
:max_bytes(150000):strip_icc()/PS5-and-Handheld-b0d564931dca40e189b3cd769af45dc0.jpg)
YouTube Audio, Made Simple for iMovie Editors
YouTube Audio, Made Simple for iMovie Editors
How to Add Music to iMovie from YouTube?

Marion Dubois
Nov 07, 2023• Proven solutions
Adding background music to videos makes the video more unique and interesting to see. iMovie is a professional video editing tool that lets you pimp your videos the way you want it with your desired music and other sound effects. With the introduction of background music, your video would become unique and stand out.
Though it is not easy to find the right music for your background music, YouTube is a good place to search for good sounds. That’s why in this article, we’ll see how to add music to iMovie from YouTube.
- Is It Possible to Add Music to iMovie from YouTube?
- Add YouTube Music to iMovie from iPhone & Mac [All-In-One Platform]
- How to Add Music to iMovie from YouTube on iPhone?
- How to Put Music from YouTube to iMovie on Mac?
Part 1. Is It Possible to Add Music to iMovie from YouTube?
iMovie is a tool developed by Apple for video editing designed to help users create unique, fun videos quickly. This outstanding video editor works only on Apple devices which includes macOS, iOS, and iPadOS. It embodies excellent tools for a media organization, color grading, soundtracks, and green-screen effects for your videos. To crown it all, it supports a few media formats.
If your media source is unavailable on your device, it could be since iMovie doesn’t support the format, or it may be under the protection of Digital Rights Management.
Now, even though you’ve downloaded the songs from YouTube to listen to them offline, you are allowed to stream them within the music player only and not apply them to other media forms.
So, if you want to add YouTube music to iMovie, you must remove the DRM restrictions first before converting the YouTube song to a format supported by iMovie. A professional YouTube music downloader can help you with all of this.
Part 2. Add YouTube Music to iMovie from iPhone & Mac
Here is an all-in-one method that to add a YouTube song to iMovie whether through iPhone or Mac. First, record the YouTube music, then add extracted audio files to iMovie.
Step 1: First download and install Filmora Video Editor from the button below and use the built-in ‘Screen Recorder‘ tool to record the YouTube video/music that you want to rip the audio from.
For Win 7 or later (64-bit)
 Secure Download
For macOS 10.14 or later Secure Download


Step 2: Import the recorded video to Filmora, right click on the video track and select ‘Detach Audio‘ to seperate the audio track and the video track. Select the audio track and click the ‘Export‘ button to save ripped audio files.
Step 3: And now, you can use the extracted YouTube audio files to iMovie for forther editing. Plus, Filmora Video Editor provides with a music library, where you can choose background music or sound effect for your project according to your needs. It is also an expert in creating videos, worth to have a try!
Tips You May Not Want to Miss
Filmora is the best iMovie alternative on the market, which provides the best methods, tools, and techniques to add music to videos, video cutting easily, joining, inversion, and editing. It allows you to easily make movies, edit audio, apply effects and share your new movies on YouTube, Vimeo, DVD, TV, iPhone, iPad, iPod, etc.
Therefore, if you are using Filmora, adding music to videos is just a piece of cake. Just select the audio clip in the timeline, click the “Video and Audio Effects” button, and go to the “Audio Effects” option. Now you can freely choose any audio effect.
For Win 7 or later (64-bit)
Secure Download
For macOS 10.14 or later Secure Download
Part 3. How to Add Music to iMovie from YouTube on iPhone?
In this part, let us read the most straightforward tutorial on how to add music from YouTube to iMovie on iPhone.
First Download Music from YouTube on iPhone
Downloading YouTube videos on your iPhone is confusing since Apple provides the apps available in the App store. If you jailbreak your phone, there are various other options, but here’s the simplest way if you don’t want to go that route.
Step 1: Download the app Documents by Readdle.
Step 2: Select the compass icon and go to https://www.videosolo.com/online-video-downloader/

Step 3: Paste a YouTube video link in the text box and select “Download”. After some seconds, the video will decode and produce a list of different output quality and format options.
Step 4: Hit the “Download” on the preferred output option.
Step 5: Enter a name and download location for the video.
Step 6: Hit the Downloads tab in the bottom navigation bar to view your downloaded videos within the Documents app.
Step 7: Go back to the Documents app home screen to save your downloaded video and open your Downloads folder.
Step 8: Look for the video you wish to edit and tap the three dots icon on it.
Step 9: Hit the Share button and then Save Video.
Step 10: You can search the downloaded YouTube videos in the Photos app.
Add Downloaded Music to iMovie
Step 1: Launch iMovie and Create a Project
Open the iMovie app and pick the “+” icon to create a project. Then, select a movie file from the media to which you want to add the music and add it to the created project.
Step2: Create Movie
Immediately the movie is added to the project, click on the “Create Movie”, enhance the quality of your video using any of iMovie’s many themes, and add the correct ambiance. Click on the icon like a gear and toggle “Theme Music”. Now you have to choose the theme you desire for your video.
Step 3: Select My Music
Now, it’s time to add audio of your choice, and if you don’t want to select from your existing collection, tap on the “+” icon below on the left side of your screen. Next, choose “Audio” and then select “My Music”.
Step 4: Select Audio from Playlist
Select from the playlist, artist, individual songs, or select from the albums you already have on your device and click on the “+” icon to add to your video. It is important to note that you cannot add multiple songs at once. Just add and adjust the sound as desired.
Finally, after the song has been added to the video successfully, export it to your gallery using the “Export” button and save it on your phone.

Filmora Video Editor
Best iMovie Alternative - Filmora Video Editor
Filmora Video Editor is an expert in creating and editing videos, it offers a ChatGPT plug-in and AI tools to enhance your creative vision. Make your idea into reality.
Try It Free Try It Free Try It Free Learn More >
Part 4. How to Add Music to iMovie from YouTube on Mac?
It is elementary to use YouTube songs in iMovie on Mac. You can easily drag the YouTube music file into your project from the Finder and the desktop. The YouTube music added into the project timeline behaves differently depending on the place you added them.
Download Music from YouTube on Mac
Various programs and tools can assist you in downloading YouTube videos on a Mac.
A straightforward way is to use the inbuilt screen capture tool of macOS. Hit the Command + Shift + 5 tabs to bring up the screen recording options.
You can either record an entire screen or choose a window and alter the options to add audio from your Mac’s internal microphone.

The ideal tool or app for downloading YouTube videos on Mac in high-tech quality is a 4K Video Downloader.
It’s free for a max of 30 downloads per day, or you can upgrade to one of its premium plans. The software can also download videos in around 8K quality and various other high-tech formats. And 4K Video Downloader can also grab whole playlists of YouTube.
Here’s how to use it:
Step 1: Launch the 4K Video Downloader and open the program.
Step 2: Find a YouTube video and copy the link.
Step 3: Hit the Paste Link button in the menu.
Step 4: Select the Download button after choosing from the list of quality and format options.
Step 5: Download the video and then click the three-dot icon, so you can play.
How to Add Music to iMovie
Step 1: Add YouTube Music to the Clip
To add a YouTube music file to a particular video clip, drag the YouTube music file under the video clip so that a bar appears. Next, release the button when you see the green “Add” symbol to set the music as a background song in your iMovie project.
To add a YouTube music file to the iMovie project: drag and drop the YouTube music file to your project, release the mouse button once you see the green color. Add a symbol to add a YouTube song to the iMovie project as background music.
Step 2: Add YouTube Music File to the iMovie Project
Just drag and drop the YouTube video file to your project. Then, release the button once you see the green “Add” sign to add background music from the YouTube file to your project.
Conclusion
So, guys, now, can you add music from YouTube to iMovie? I’m pretty sure you have a positive answer as you saw how to add music to iMovie from YouTube using a simple step method. Moreover, have fun and create magic with your discovery of Filmora Video Editor , as it allows you to explore its numerous features to make a movie.
For Win 7 or later (64-bit)
Secure Download
For macOS 10.14 or later Secure Download
Marion Dubois
Marion Dubois is a writer and a lover of all things video.
Follow @Marion Dubois
Marion Dubois
Nov 07, 2023• Proven solutions
Adding background music to videos makes the video more unique and interesting to see. iMovie is a professional video editing tool that lets you pimp your videos the way you want it with your desired music and other sound effects. With the introduction of background music, your video would become unique and stand out.
Though it is not easy to find the right music for your background music, YouTube is a good place to search for good sounds. That’s why in this article, we’ll see how to add music to iMovie from YouTube.
- Is It Possible to Add Music to iMovie from YouTube?
- Add YouTube Music to iMovie from iPhone & Mac [All-In-One Platform]
- How to Add Music to iMovie from YouTube on iPhone?
- How to Put Music from YouTube to iMovie on Mac?
Part 1. Is It Possible to Add Music to iMovie from YouTube?
iMovie is a tool developed by Apple for video editing designed to help users create unique, fun videos quickly. This outstanding video editor works only on Apple devices which includes macOS, iOS, and iPadOS. It embodies excellent tools for a media organization, color grading, soundtracks, and green-screen effects for your videos. To crown it all, it supports a few media formats.
If your media source is unavailable on your device, it could be since iMovie doesn’t support the format, or it may be under the protection of Digital Rights Management.
Now, even though you’ve downloaded the songs from YouTube to listen to them offline, you are allowed to stream them within the music player only and not apply them to other media forms.
So, if you want to add YouTube music to iMovie, you must remove the DRM restrictions first before converting the YouTube song to a format supported by iMovie. A professional YouTube music downloader can help you with all of this.
Part 2. Add YouTube Music to iMovie from iPhone & Mac
Here is an all-in-one method that to add a YouTube song to iMovie whether through iPhone or Mac. First, record the YouTube music, then add extracted audio files to iMovie.
Step 1: First download and install Filmora Video Editor from the button below and use the built-in ‘Screen Recorder‘ tool to record the YouTube video/music that you want to rip the audio from.
For Win 7 or later (64-bit)
Secure Download
For macOS 10.14 or later Secure Download
Step 2: Import the recorded video to Filmora, right click on the video track and select ‘Detach Audio‘ to seperate the audio track and the video track. Select the audio track and click the ‘Export‘ button to save ripped audio files.
Step 3: And now, you can use the extracted YouTube audio files to iMovie for forther editing. Plus, Filmora Video Editor provides with a music library, where you can choose background music or sound effect for your project according to your needs. It is also an expert in creating videos, worth to have a try!
Tips You May Not Want to Miss
Filmora is the best iMovie alternative on the market, which provides the best methods, tools, and techniques to add music to videos, video cutting easily, joining, inversion, and editing. It allows you to easily make movies, edit audio, apply effects and share your new movies on YouTube, Vimeo, DVD, TV, iPhone, iPad, iPod, etc.
Therefore, if you are using Filmora, adding music to videos is just a piece of cake. Just select the audio clip in the timeline, click the “Video and Audio Effects” button, and go to the “Audio Effects” option. Now you can freely choose any audio effect.
For Win 7 or later (64-bit)
Secure Download
For macOS 10.14 or later Secure Download
Part 3. How to Add Music to iMovie from YouTube on iPhone?
In this part, let us read the most straightforward tutorial on how to add music from YouTube to iMovie on iPhone.
First Download Music from YouTube on iPhone
Downloading YouTube videos on your iPhone is confusing since Apple provides the apps available in the App store. If you jailbreak your phone, there are various other options, but here’s the simplest way if you don’t want to go that route.
Step 1: Download the app Documents by Readdle.
Step 2: Select the compass icon and go to https://www.videosolo.com/online-video-downloader/
Step 3: Paste a YouTube video link in the text box and select “Download”. After some seconds, the video will decode and produce a list of different output quality and format options.
Step 4: Hit the “Download” on the preferred output option.
Step 5: Enter a name and download location for the video.
Step 6: Hit the Downloads tab in the bottom navigation bar to view your downloaded videos within the Documents app.
Step 7: Go back to the Documents app home screen to save your downloaded video and open your Downloads folder.
Step 8: Look for the video you wish to edit and tap the three dots icon on it.
Step 9: Hit the Share button and then Save Video.
Step 10: You can search the downloaded YouTube videos in the Photos app.
Add Downloaded Music to iMovie
Step 1: Launch iMovie and Create a Project
Open the iMovie app and pick the “+” icon to create a project. Then, select a movie file from the media to which you want to add the music and add it to the created project.
Step2: Create Movie
Immediately the movie is added to the project, click on the “Create Movie”, enhance the quality of your video using any of iMovie’s many themes, and add the correct ambiance. Click on the icon like a gear and toggle “Theme Music”. Now you have to choose the theme you desire for your video.
Step 3: Select My Music
Now, it’s time to add audio of your choice, and if you don’t want to select from your existing collection, tap on the “+” icon below on the left side of your screen. Next, choose “Audio” and then select “My Music”.
Step 4: Select Audio from Playlist
Select from the playlist, artist, individual songs, or select from the albums you already have on your device and click on the “+” icon to add to your video. It is important to note that you cannot add multiple songs at once. Just add and adjust the sound as desired.
Finally, after the song has been added to the video successfully, export it to your gallery using the “Export” button and save it on your phone.
Filmora Video Editor
Best iMovie Alternative - Filmora Video Editor
Filmora Video Editor is an expert in creating and editing videos, it offers a ChatGPT plug-in and AI tools to enhance your creative vision. Make your idea into reality.
Try It Free Try It Free Try It Free Learn More >
Part 4. How to Add Music to iMovie from YouTube on Mac?
It is elementary to use YouTube songs in iMovie on Mac. You can easily drag the YouTube music file into your project from the Finder and the desktop. The YouTube music added into the project timeline behaves differently depending on the place you added them.
Download Music from YouTube on Mac
Various programs and tools can assist you in downloading YouTube videos on a Mac.
A straightforward way is to use the inbuilt screen capture tool of macOS. Hit the Command + Shift + 5 tabs to bring up the screen recording options.
You can either record an entire screen or choose a window and alter the options to add audio from your Mac’s internal microphone.
The ideal tool or app for downloading YouTube videos on Mac in high-tech quality is a 4K Video Downloader.
It’s free for a max of 30 downloads per day, or you can upgrade to one of its premium plans. The software can also download videos in around 8K quality and various other high-tech formats. And 4K Video Downloader can also grab whole playlists of YouTube.
Here’s how to use it:
Step 1: Launch the 4K Video Downloader and open the program.
Step 2: Find a YouTube video and copy the link.
Step 3: Hit the Paste Link button in the menu.
Step 4: Select the Download button after choosing from the list of quality and format options.
Step 5: Download the video and then click the three-dot icon, so you can play.
How to Add Music to iMovie
Step 1: Add YouTube Music to the Clip
To add a YouTube music file to a particular video clip, drag the YouTube music file under the video clip so that a bar appears. Next, release the button when you see the green “Add” symbol to set the music as a background song in your iMovie project.
To add a YouTube music file to the iMovie project: drag and drop the YouTube music file to your project, release the mouse button once you see the green color. Add a symbol to add a YouTube song to the iMovie project as background music.
Step 2: Add YouTube Music File to the iMovie Project
Just drag and drop the YouTube video file to your project. Then, release the button once you see the green “Add” sign to add background music from the YouTube file to your project.
Conclusion
So, guys, now, can you add music from YouTube to iMovie? I’m pretty sure you have a positive answer as you saw how to add music to iMovie from YouTube using a simple step method. Moreover, have fun and create magic with your discovery of Filmora Video Editor , as it allows you to explore its numerous features to make a movie.
For Win 7 or later (64-bit)
Secure Download
For macOS 10.14 or later Secure Download
Marion Dubois
Marion Dubois is a writer and a lover of all things video.
Follow @Marion Dubois
The Ultimate Unboxer’s Guidebook
Versatile Video Editor - Wondershare Filmora
An easy yet powerful editor
Numerous effects to choose from
Detailed tutorials provided by the official channel
Unboxing videos are a bizarre trend. However, these videos are getting the highest traction, and more videos are getting onboard about various products.
And, if you haven’t already checked one, an unboxing video is what it sounds like. At its core, “unboxing” is the procedure of recording the moment when a particular product is removed and opened from the packaging sold in.
Again, you’re probably thinking:
‘Why would anybody gaze at other folks opening their product packaging?’
More than 90,000 people type ‘unboxing’ into YouTube each month, and that’s quite interesting as well as strange. Also, these are just a few of the insane statistics about the eCommerce trend of unboxing videos.
In this article, you’ll see the science behind such unboxing videos and learn how to create an attractive one by taking inspiration from others.
So whether you’re not sure why we admire unboxing videos or you wish to know how to use them to your benefit, you’re in the right place!
In this article
02 5 Best YouTube Unboxing Channels
03 How to Create a Killer Unboxing Video
Part 1: What is an Unboxing Video?
Within the unboxing videos, people open boxes and narrate their actions. Unboxing videos are incredibly famous with kids, grabbing up tons of millions of subscribers as well as millions of views. Such videos are also usually great for kids to watch (with a few caveats). But the matter of the subject of some unboxing videos is not age-appropriate. And, there are niche-specific videos as well on different channels.
Are unboxers paid by the companies whose services or products they consider opening on YouTube? Companies don’t generally pay the YouTuber directly for featuring their products in a video. When an unboxer becomes super popular (with subscribers and tens of millions of views), companies may send the products for free, but not always. Sometimes hosts disclose this, sometimes not. However, companies do sponsor highly famous and influential YouTubers in other areas. For instance, they may pay the YouTuber to make a personal appearance at a toy store or convention.
Part 2: 5 Best YouTube Unboxing Channels
There are considerable merits to offering your customers a branded and personalized unboxing experience.
Even if you decide to get your products featured in a YouTuber’s unboxing videos, you can help promote your brand and improve brand awareness. So which is the perfect or ideal YouTube channel for unboxing videos for you to try to get featured on? The answer is: “It depends!”
Not every YouTuber is the best for every eCommerce business—and a YouTube channel simply being huge and influential doesn’t make it relevant for your brand. So it’s essential to consider brand suitability while trying looking for a YouTuber to create unboxing videos.
This means considering whether they use harsh language or if their target audience has some overlap with your target audience.
Keeping it in mind, here are some of the top YouTube unboxing channels for inspiration:
1. Unbox Therapy 
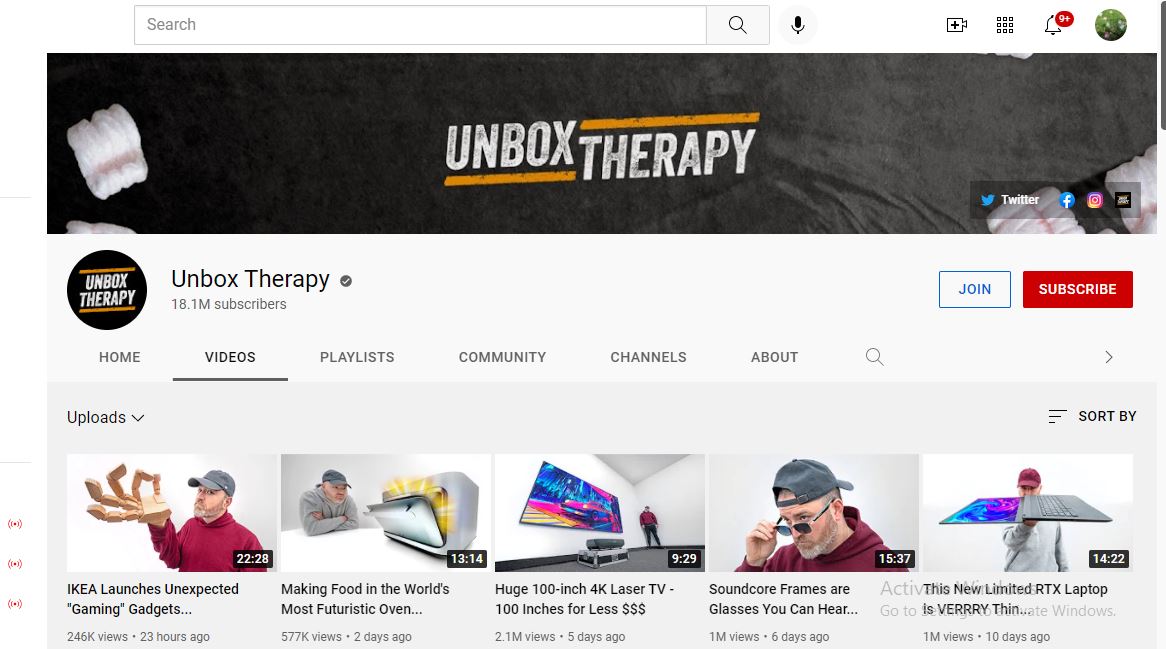
With around 17 million-plus subscribers, Unbox Therapy is a great channel with a ten-year history of sharing various videos presenting the hottest and most excellent products on the planet. According to their YouTube stats, tech gadgets are a regular feature on the channel, and they have amassed four billion-plus views.
2. Ryan’s World
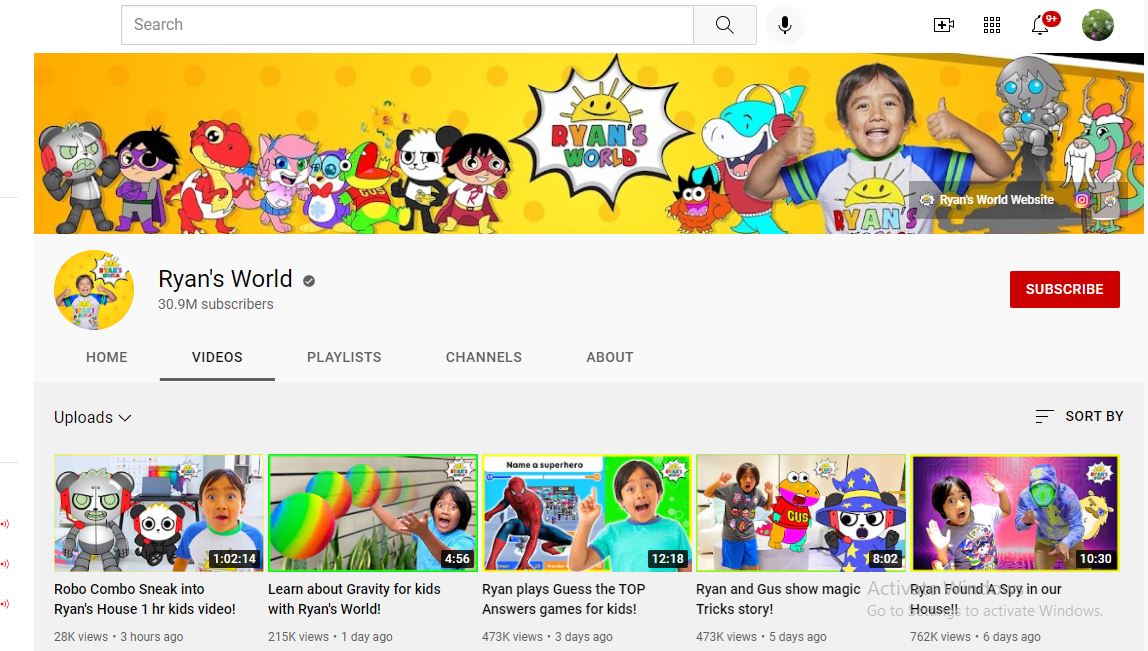
This titan of teeny the unboxing video world is one of the immensely paid YouTubers for a reason. This channel features fun animation and unboxing videos, simple science experiments for kids, and other educational content. Those interested in doing the best unboxing videos for a younger audience could learn a lot from this platform.
3. Tech Unboxing
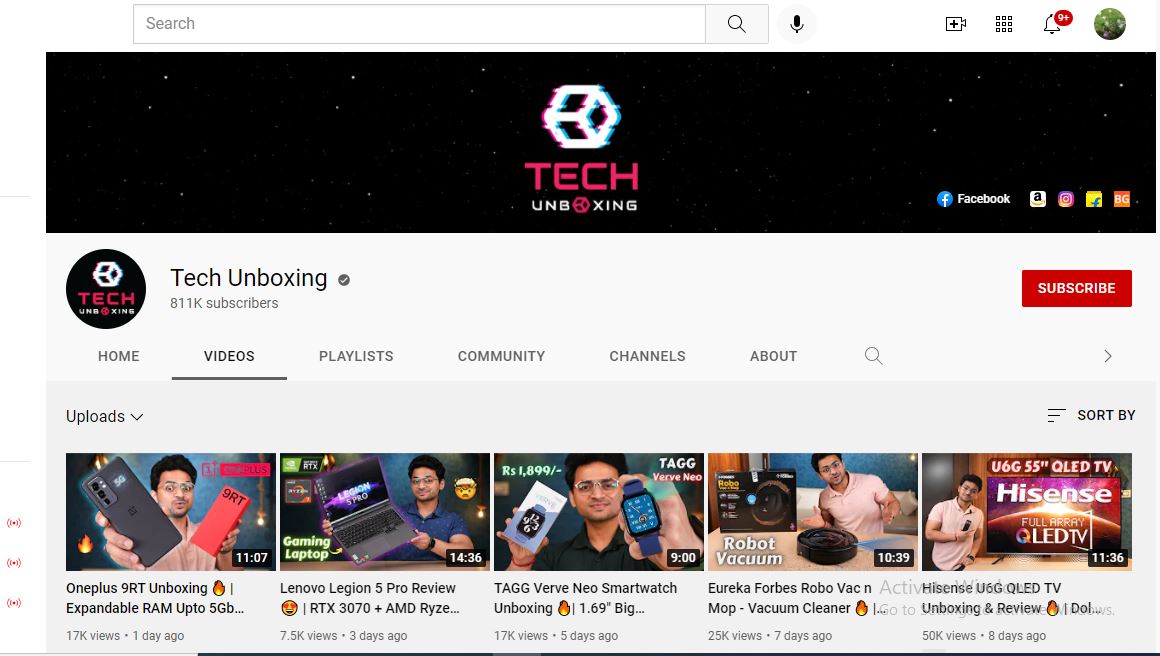
At 700k plus subscribers, Tech Unboxing may not be the most significant content creator on this list, but it’s no slouch. The channel mentions everything about the high-tech gadgets and isn’t afraid to brag about the products reviewed. The track also hosts frequent giveaways of tech products and unboxing videos that the host likes that other tech enthusiasts may look at it with fun.
4. Dr. DeBox
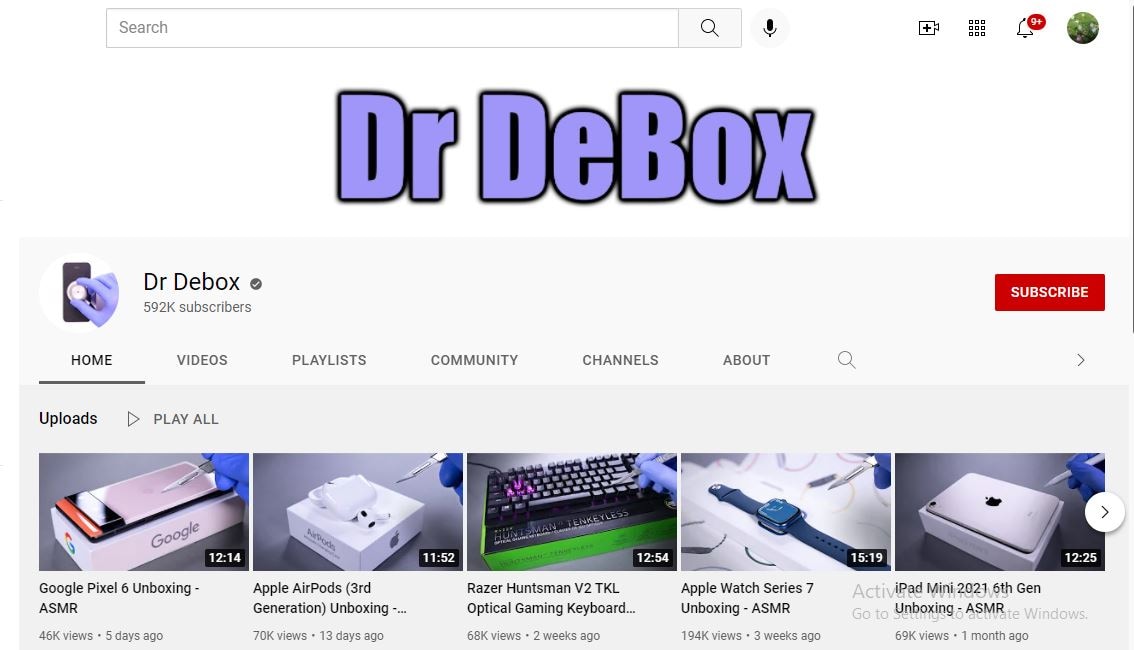
DrDebox looks at tech, gadgets, and other products ordered from online sites and offers viewers rundowns of their functions and how they operate. With 590k plus subscribers and billions of video views, DrDebox has a prominent audience and presence on YouTube that can help improve awareness for the products he reviews.
5. UNBOXING Fashion & Sports
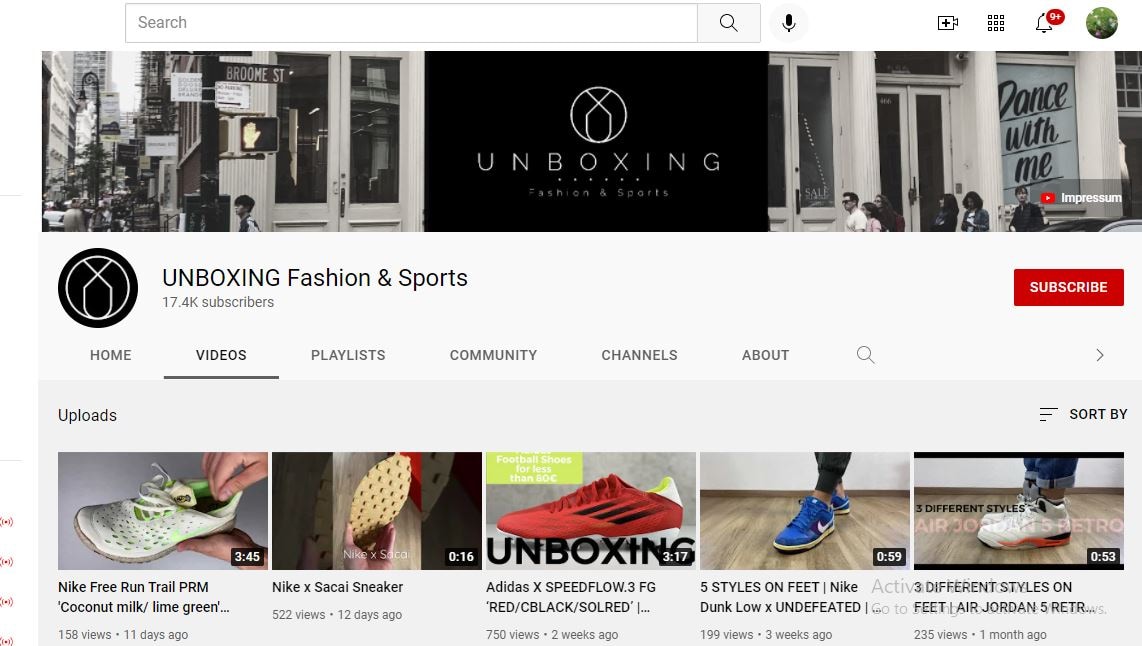
Unboxing Fashion & Sports is a channel specializing in well unboxing videos for a range of sports and fashion apparel (frequently shoe brands like Nike or Adidas). Its content generally features a close-up of the reviewer taking products out of the box and moving them around. At the same time, text highlights relevant product features—all set to catchy music without being disturbing. With 17k plus subscribers and a strong focus on sports apparel, this YouTuber knows how to attract a target market.
Part 3: How to Create a Killer Unboxing Video
Firstly, you have to take note of the following points to create the best unboxing videos.
1. Select an Unboxing Niche
2. Practice Speaking Clearly and Slowly
3. Use the Best Unboxing Set-Up
4. Make Sure to Timely Unbox the Products
5. Don’t Delay the Unboxing in Your Video
6. Show the Product in Use
One of the prominent factors about unboxing videos is that anyone can make them. You don’t need to be uniquely talented but go with the products that have broad appeal. Once you create such videos, you can share them on your social media networks or personal website.
Do you want to create your creative unboxing videos for others to find? Do you like to introduce your customers to your products in your own YouTube Channel, so you have total control over the content and messaging of each video?
Here is a step by step guide to help you revamp the creation of your unboxing video:
1. Use a Good Camera & Video Editing Software
While you probably don’t require that high-tech camera that professional Hollywood filmmakers would consider shooting or filming 8k+ ultra-HD movies, you need a good camera that can capture HD footage (preferably at least 1080p). This allows providing your unboxing videos just enough of a professional look to not deactivate or disable the interest of potential viewers.
In addition to a camera, ensure that you have a stand or a decent tripod for it. This way, you don’t have to hold onto your camera by yourself (or have an assistant hold it) while you’re filming. In addition, this minimizes camera shake, which assists in making easy-to-watch videos.
On the other hand, video editing software is a must for taking all of your video compiling and recording into a cohesive video that will be attractive for viewers to watch. There are tons of accessible video editing tools to choose from and some paid options that may have helpful features. However, our favorite pick is Wondershare Filmora due to its beginner-friendly yet professional editing elements. Let us know what you can’t do with this software! It’s a combination of professionalism and reliability you can consider for all your video editing needs.
The hottest feature of Wondershare Filmora for making attractive unboxing videos is audio ducking. With this feature, you can effectively lower the background vocals while adding your voiceovers. And, that’s extremely valuable in making these kinds of videos.
Wondershare Filmora
Get started easily with Filmora’s powerful performance, intuitive interface, and countless effects Try It Free Try It Free Learn More >

2. Prepare Your Stage/Photo Lightbox
If you look at some famous unboxing channels listed above, you’ll notice that much of their content is shot in a well-framed space where there isn’t much in the background to disturb them from the product being viewed.
Often, this is a “photo lightbox” or an empty table (a small container with a smooth white backdrop that enhances lighting while reducing shadows for making photos look greater). Lightboxes can also be helpful when you’re taking snapshots of your products to put up on your eCommerce website, so it’s a great idea to make (or buy) one that can fit your products.
3. Practice Making Videos
Before uploading videos to YouTube, take some time to practice making your unboxing videos using random items or already-opened products. This way, you can work upon setting up your stage and camera, keeping the product within an aim, narrating your unboxing video, editing footage to reduce the “dead air” where nothing is being done or said, and more!
When you’re over making your first test video, play it back and look for issues like excessive “ums, ahs,” or things that are out of focus and other sentence fillers. Don’t worry if your first video isn’t that great—that’s what practice (and your video editing software) are for!
4. Don’t Waste Your Viewers’ Time
If you want to make the best unboxing videos, ensure that you get to the “unboxing” section quite instantly! As indicated by the Expert Voice: “remember that you compete for viewers’ attention with lots of other video content. Keep your introductions brief and quickly get to the unboxing.” If you take too much time to get to the section of unboxing video, you risk losing your audience’s interest and them going away from your content before you can introduce your product.
5. Compile Things Up Once in a While
If you unbox your products, you might instantly run out of content ideas to make. You may look up your YouTube channel losing traction without the new content. So, try to compile things up once in a while—as the Ryan’s World channel discussed earlier.
Creating other kinds of content, such as how-to videos and advice videos for specific products, product updates, and simple news, or even short promotional bits, can help keep your publishing frequency top-notch.
Just remember: everything you publish or post should still be related to your brand and your channel’s core content!
6. Promote Your YouTube Video or Channel on Social Media
There are specific odds that your eCommerce business is active on other social media channels, such as LinkedIn, Facebook, Twitter, etc. Taking benefit of your audience on other social media platforms to promote your YouTube channel can assist you promptly earning some easy subscribers and allow you better promote your products for the current followers.
Part 4: FAQs about Unboxing Videos
1 - What should be included in the unboxing video?
As discussed earlier, you can include products related to your channel’s niche in your unboxing videos.
2 - How long should an unboxing video be?
Time will vary depending on the actual unboxing product, but try to keep it below 5 minutes.
3 - Can you monetize unboxing videos?
No. Text-based commentary isn’t acceptable for monetization. It must be vocal, and for you to show your face as well would be even better.
Conclusion
Unboxing videos are a bang on that; hate them or love them, they are here to stay. Whether you’re a brand owner, a consumer, or both, you’ve probably considered one or two while purposelessly browsing.
You can use the above tips or strategies to create a compelling unboxing experience for small brands to get the most out of a best unboxing video.
What are some of your favorite unboxing videos? Comment down below Try It Free
Unboxing videos are a bizarre trend. However, these videos are getting the highest traction, and more videos are getting onboard about various products.
And, if you haven’t already checked one, an unboxing video is what it sounds like. At its core, “unboxing” is the procedure of recording the moment when a particular product is removed and opened from the packaging sold in.
Again, you’re probably thinking:
‘Why would anybody gaze at other folks opening their product packaging?’
More than 90,000 people type ‘unboxing’ into YouTube each month, and that’s quite interesting as well as strange. Also, these are just a few of the insane statistics about the eCommerce trend of unboxing videos.
In this article, you’ll see the science behind such unboxing videos and learn how to create an attractive one by taking inspiration from others.
So whether you’re not sure why we admire unboxing videos or you wish to know how to use them to your benefit, you’re in the right place!
In this article
02 5 Best YouTube Unboxing Channels
03 How to Create a Killer Unboxing Video
Part 1: What is an Unboxing Video?
Within the unboxing videos, people open boxes and narrate their actions. Unboxing videos are incredibly famous with kids, grabbing up tons of millions of subscribers as well as millions of views. Such videos are also usually great for kids to watch (with a few caveats). But the matter of the subject of some unboxing videos is not age-appropriate. And, there are niche-specific videos as well on different channels.
Are unboxers paid by the companies whose services or products they consider opening on YouTube? Companies don’t generally pay the YouTuber directly for featuring their products in a video. When an unboxer becomes super popular (with subscribers and tens of millions of views), companies may send the products for free, but not always. Sometimes hosts disclose this, sometimes not. However, companies do sponsor highly famous and influential YouTubers in other areas. For instance, they may pay the YouTuber to make a personal appearance at a toy store or convention.
Part 2: 5 Best YouTube Unboxing Channels
There are considerable merits to offering your customers a branded and personalized unboxing experience.
Even if you decide to get your products featured in a YouTuber’s unboxing videos, you can help promote your brand and improve brand awareness. So which is the perfect or ideal YouTube channel for unboxing videos for you to try to get featured on? The answer is: “It depends!”
Not every YouTuber is the best for every eCommerce business—and a YouTube channel simply being huge and influential doesn’t make it relevant for your brand. So it’s essential to consider brand suitability while trying looking for a YouTuber to create unboxing videos.
This means considering whether they use harsh language or if their target audience has some overlap with your target audience.
Keeping it in mind, here are some of the top YouTube unboxing channels for inspiration:
1. Unbox Therapy
With around 17 million-plus subscribers, Unbox Therapy is a great channel with a ten-year history of sharing various videos presenting the hottest and most excellent products on the planet. According to their YouTube stats, tech gadgets are a regular feature on the channel, and they have amassed four billion-plus views.
2. Ryan’s World
This titan of teeny the unboxing video world is one of the immensely paid YouTubers for a reason. This channel features fun animation and unboxing videos, simple science experiments for kids, and other educational content. Those interested in doing the best unboxing videos for a younger audience could learn a lot from this platform.
3. Tech Unboxing
At 700k plus subscribers, Tech Unboxing may not be the most significant content creator on this list, but it’s no slouch. The channel mentions everything about the high-tech gadgets and isn’t afraid to brag about the products reviewed. The track also hosts frequent giveaways of tech products and unboxing videos that the host likes that other tech enthusiasts may look at it with fun.
4. Dr. DeBox
DrDebox looks at tech, gadgets, and other products ordered from online sites and offers viewers rundowns of their functions and how they operate. With 590k plus subscribers and billions of video views, DrDebox has a prominent audience and presence on YouTube that can help improve awareness for the products he reviews.
5. UNBOXING Fashion & Sports
Unboxing Fashion & Sports is a channel specializing in well unboxing videos for a range of sports and fashion apparel (frequently shoe brands like Nike or Adidas). Its content generally features a close-up of the reviewer taking products out of the box and moving them around. At the same time, text highlights relevant product features—all set to catchy music without being disturbing. With 17k plus subscribers and a strong focus on sports apparel, this YouTuber knows how to attract a target market.
Part 3: How to Create a Killer Unboxing Video
Firstly, you have to take note of the following points to create the best unboxing videos.
1. Select an Unboxing Niche
2. Practice Speaking Clearly and Slowly
3. Use the Best Unboxing Set-Up
4. Make Sure to Timely Unbox the Products
5. Don’t Delay the Unboxing in Your Video
6. Show the Product in Use
One of the prominent factors about unboxing videos is that anyone can make them. You don’t need to be uniquely talented but go with the products that have broad appeal. Once you create such videos, you can share them on your social media networks or personal website.
Do you want to create your creative unboxing videos for others to find? Do you like to introduce your customers to your products in your own YouTube Channel, so you have total control over the content and messaging of each video?
Here is a step by step guide to help you revamp the creation of your unboxing video:
1. Use a Good Camera & Video Editing Software
While you probably don’t require that high-tech camera that professional Hollywood filmmakers would consider shooting or filming 8k+ ultra-HD movies, you need a good camera that can capture HD footage (preferably at least 1080p). This allows providing your unboxing videos just enough of a professional look to not deactivate or disable the interest of potential viewers.
In addition to a camera, ensure that you have a stand or a decent tripod for it. This way, you don’t have to hold onto your camera by yourself (or have an assistant hold it) while you’re filming. In addition, this minimizes camera shake, which assists in making easy-to-watch videos.
On the other hand, video editing software is a must for taking all of your video compiling and recording into a cohesive video that will be attractive for viewers to watch. There are tons of accessible video editing tools to choose from and some paid options that may have helpful features. However, our favorite pick is Wondershare Filmora due to its beginner-friendly yet professional editing elements. Let us know what you can’t do with this software! It’s a combination of professionalism and reliability you can consider for all your video editing needs.
The hottest feature of Wondershare Filmora for making attractive unboxing videos is audio ducking. With this feature, you can effectively lower the background vocals while adding your voiceovers. And, that’s extremely valuable in making these kinds of videos.
Wondershare Filmora
Get started easily with Filmora’s powerful performance, intuitive interface, and countless effects Try It Free Try It Free Learn More >
2. Prepare Your Stage/Photo Lightbox
If you look at some famous unboxing channels listed above, you’ll notice that much of their content is shot in a well-framed space where there isn’t much in the background to disturb them from the product being viewed.
Often, this is a “photo lightbox” or an empty table (a small container with a smooth white backdrop that enhances lighting while reducing shadows for making photos look greater). Lightboxes can also be helpful when you’re taking snapshots of your products to put up on your eCommerce website, so it’s a great idea to make (or buy) one that can fit your products.
3. Practice Making Videos
Before uploading videos to YouTube, take some time to practice making your unboxing videos using random items or already-opened products. This way, you can work upon setting up your stage and camera, keeping the product within an aim, narrating your unboxing video, editing footage to reduce the “dead air” where nothing is being done or said, and more!
When you’re over making your first test video, play it back and look for issues like excessive “ums, ahs,” or things that are out of focus and other sentence fillers. Don’t worry if your first video isn’t that great—that’s what practice (and your video editing software) are for!
4. Don’t Waste Your Viewers’ Time
If you want to make the best unboxing videos, ensure that you get to the “unboxing” section quite instantly! As indicated by the Expert Voice: “remember that you compete for viewers’ attention with lots of other video content. Keep your introductions brief and quickly get to the unboxing.” If you take too much time to get to the section of unboxing video, you risk losing your audience’s interest and them going away from your content before you can introduce your product.
5. Compile Things Up Once in a While
If you unbox your products, you might instantly run out of content ideas to make. You may look up your YouTube channel losing traction without the new content. So, try to compile things up once in a while—as the Ryan’s World channel discussed earlier.
Creating other kinds of content, such as how-to videos and advice videos for specific products, product updates, and simple news, or even short promotional bits, can help keep your publishing frequency top-notch.
Just remember: everything you publish or post should still be related to your brand and your channel’s core content!
6. Promote Your YouTube Video or Channel on Social Media
There are specific odds that your eCommerce business is active on other social media channels, such as LinkedIn, Facebook, Twitter, etc. Taking benefit of your audience on other social media platforms to promote your YouTube channel can assist you promptly earning some easy subscribers and allow you better promote your products for the current followers.
Part 4: FAQs about Unboxing Videos
1 - What should be included in the unboxing video?
As discussed earlier, you can include products related to your channel’s niche in your unboxing videos.
2 - How long should an unboxing video be?
Time will vary depending on the actual unboxing product, but try to keep it below 5 minutes.
3 - Can you monetize unboxing videos?
No. Text-based commentary isn’t acceptable for monetization. It must be vocal, and for you to show your face as well would be even better.
Conclusion
Unboxing videos are a bang on that; hate them or love them, they are here to stay. Whether you’re a brand owner, a consumer, or both, you’ve probably considered one or two while purposelessly browsing.
You can use the above tips or strategies to create a compelling unboxing experience for small brands to get the most out of a best unboxing video.
What are some of your favorite unboxing videos? Comment down below!
Also read:
- A Comprehenensive Guide to YouTube Studio's Editing Features
- [New] Essential Gear Picking the Very Best Among Top 9 Free Logomakers
- Ideal Video Maker Apps for Novice iPhone and Android Users
- Crafting Content Step by Step Guide to YouTube Video Editing for 2024
- In 2024, Deleted History Uncovered Your Guide to Online Video Retrieval
- Audio Enhancement for Online Video Creators
- [Updated] Discover 8 Trusted Online Content Marketing Tools
- [Updated] Earnings Breakdown One Million Glances at Youtube
- A Comparative Analysis Android's Finest Video Downloaders
- Examining the Ethics and Effectiveness of Buying Video Popularity
- 2024 Approved Becoming a Skin-Deep Sage Setting Up Your Beauty Channel
- Optimal Earnings Scaling Your YouTube Channel's Revenue on Mobile Devices
- Prime Choices The Premier Portable Devices for Editors
- [New] Elevating Your Music Crafting Stunning Lyric Videos Using Lyric Video Maker
- In 2024, Enhance Your YouTube Presence with These Top 10 Editors
- Comedy Central The Best Laughter-Inducing Channels Online
- In 2024, Digital Arcade Over a Hundred Game Channels
- Unveiled YouTube's Crème De La Crème of VR Videos
- Short Form Media Exploration
- [New] A Producer's Roadmap Pioneering High-Quality ASMR Content
- Beat the Blank Screen Overcoming Top Vlogging Anxieties
- 2024 Approved Elevating YouTube Live with High-Quality Webcam Cameras
- Boosting Your Youtube Shorts Profits Key Requirements & Earning Potential
- In 2024, BeatsEdit Pro Master PC Editor with Musical Flair
- Essential Steps for Starting a YouTube Channel
- 2024 Approved Elevate Your Social Media Presence with These High-Impact YouTube Strategies
- Prime Screen Recording Devices for YouTube Pioneers
- Boosting Your Channel A Guide to Gaining Viewers for 2024
- Elevate Your Streaming Game From Twitch Viewers to YouTube Fans
- Cash Creation in Content A Deep Dive Into Vids and Videos
- [Updated] Crafting News End Credits A Step-by-Step Guide
- [New] Earning Edge Exploiting YouTube Studio for Global Viewers
- [Updated] Dish on Titles Crafting Captivating Cookery Channel Names
- Curating Historical Wisdom The Ultimate Student-Friendly Channel List (#1-10) for 2024
- 2024 Approved Champion of Cinematography Audio-Visual Artistry
- [New] Club Anthems Expertly Curated DJ Vids Downloads
- [Updated] Editing Elegance Into News Summations
- Mastering Tagging Elevate Your YouTube Content
- 9 Solutions to Fix Vivo G2 System Crash Issue | Dr.fone
- Calls on Oppo F25 Pro 5G Go Straight to Voicemail? 12 Fixes | Dr.fone
- [New] Enhancing Your TikTok Videography with Slow-Motion Techniques for 2024
- 2024 Approved Creating Impactful Learning Experiences Through Video
- How to Reset a Samsung Galaxy A23 5G Phone That Is Locked | Dr.fone
- [New] 2024 Approved Pinnacle of PC Clicker Fun Top 12 Must-Try Games
- Excellent Top Picks Economical Cam Streaming Tech for 2024
- Is your Honor Play 40C working too slow? Heres how you can hard reset it | Dr.fone
- [Updated] 2024 Approved Efficient Video Editing Learn the Ultimate Online Ways to Shorten & Slice on Vimeo
- In 2024, Why Your WhatsApp Location is Not Updating and How to Fix On Motorola Moto G24 | Dr.fone
- [Updated] 2024 Approved Reliving Real-Time Recollections
- Why is iPogo not working On OnePlus 12R? Fixed | Dr.fone
- New 2024 Approved Top Free Online Video Rotators for Easy Flipping
- [Updated] Beat the Bounds of Voice Modification The Leading Chrome Apps Unveiled
- [Updated] 28 Practical Tips for Streaming Online Courses on a Budget
- New Video Dubbing Made Easy Top Software for PC (Free Download)
- 4 Ways to Transfer Music from Lava Storm 5G to iPhone | Dr.fone
- [Updated] The Ultimate Path to Monetizing TikTok Content Creation
- In 2024, Forgotten The Voicemail Password Of ZTE Blade A73 5G? Try These Fixes
- In 2024, Inventory Types of FB Video Ratios
- 6 Solutions to Fix Error 505 in Google Play Store on Vivo S17 Pro | Dr.fone
- New Mastering Hip-Hop An Insiders Guide to the Best 8 DAW Software of the Year
- [Updated] Streamline Online Interactions The Simple Science of Clear Backgrounds in Google Meet
- TinyTake Screen Recorder Review for 2024
- How to Unlock Your Apple iPhone SE (2022) Passcode 4 Easy Methods (With or Without iTunes) | Dr.fone
- [New] In 2024, Navigating the Virtual Space Mastering Discord Screencasts
- Beats & Brilliance Creating Soundtracked Instagram Feeds for 2024
- [Updated] 2024 Approved Encase Full Browser Window
- Title: YouTube Audio, Made Simple for iMovie Editors
- Author: Kevin
- Created at : 2024-06-26 14:16:35
- Updated at : 2024-06-27 14:16:35
- Link: https://youtube-videos.techidaily.com/youtube-audio-made-simple-for-imovie-editors/
- License: This work is licensed under CC BY-NC-SA 4.0.
