

Visual Storyteller Toolkit
Visual Storyteller Toolkit
In today’s world where businesses are going digital, it is very important to think of how you are going to get your products in front of many customers as possible without having to spend a fortune. That’s where YouTube Clip Maker comes in. It is an effective way for making YouTube videos that you can use for your business advertisements.
If you are a budding YouTuber or just looking at starting to make YouTube videos, you should consider among your editing tools a YouTube Clip Maker. It is an application that has all the tools necessary for you to edit videos in a fast and convenient way and enables you to upload the completed videos to YouTube. It is a simple tool with a friendly-to-use interface for editing videos, it should be a must-have for all users.
Part 1. Best YouTube Clip Maker Filmora
Filmora is a feature-rich audio and video editor that helps beginners with the editing of their audio and video files. The designers did their job with the armature editors in mind. It gives them a simple and easy-to-use layout that makes the work less complicated. Filmora has a built-in feature that lets you record your music and voice and also trim, merge, and cut a split your mp3 files.
Besides all the wonderful features, Filmora lets you make adjustments to speed, pitch, and volume, this makes you improve the clarity of your audio file. The app can be used to customize ringtones and specialized sound effects for your presentation.

For Win 7 or later (64-bit)
For macOS 10.12 or later
Steps on How to Use Filmora
This is an app that is best suited to those starting in video editing and requires the use of an easy-to-use app that can as well deliver quality work. Filmora is an application that was made with the armature editors in mind and is one they should consider while looking for a program to work with. It features some of the essential tools one would require and it is easy to learn how to navigate through it.
Installation Steps
- Click the icon in the center of the Media Library to add files directly.
- Go File > Import Media > Import Media Files.
- Drag and drop to the ‘media library’ directly.
When importing a media file and Filmora asks you to create a proxy file to speed up the editing process. Select “Yes” to have a fast video editing experience.
You can also import video clips using your Touch Bar controls if your computer has Touch Bar.
Record a media file
Apart from the videos shot by your digital devices, you can also directly import media files by recording video from your webcam, screen recording your computer, and a voice-over recording.
Computer screen recording:
Click the “Record” option, and choose “Record PC Screen” to get the built-in Wondershare Screen Recorder. Hit the red button to get started. To finish recording click on F9
Record videos from webcam:
Also, click the “Record” option, and choose “Record from Webcam”. In the recording pop-up window, select the red button, it will start the recording process and is also the button to choose when you want to stop recording. You will then select OK to save the recorded video clip.
Record voice-over:
Choose “Record a voiceover” on the Record menu. It would be better to connect a microphone to your Mac for a better result. Hit the Record button, and it leaves you 3 seconds to get ready.
All media files recorded are automatically saved in the “Media Library”, in case of further editing, you can drag them to the timeline.
Part 2. How to Make YouTube Clip Online
The application lets you trim your YouTube videos without having to have an account. It provides you with a quick way to either cut the beginning or end of a YouTube video. YouTube Trimmer will let you trim the video in a couple of seconds with just a few clicks. To use the app, you just need to copy and paste the earl and you are on your way to editing. You don’t have to be worried about downloading or installing the application for you to use it.
Steps on How to Use YouTube Trimmer
Step 1:
Import
Copy the YouTube link that you want to work on and paste it into the field indicated on the application.
Step 2:
Trim and Edit
You can drag the video at the edges to trim it. You can also move the playhead with your mouse and manually make cuts by clicking on the cut button.
Step 3:
Export
Once you are done editing and happy with the outcome, select the Export button to start rendering the video. Here you can choose to publish it on YouTube or save it for other uses.
Part 3. YouTube Clip Maker for Android and iPhone
KineMaster
It is a simple-to-use application that lets you create professional-quality videos in very short minutes. It enables you to edit pre-made videos or lets you make fresh ones by combining your video with several visual and sound effects. After you are done with the editing, you can save your video or share it out there.
Steps on How to Use Kinemater
Step 1:Create
It lets you import videos, audio, and images from your device. After which you can cut, rearrange, and transition between your images and videos using the KineMaster’s video layering support. This is highly dependent on your computer’s hardware capabilities.
Step 2:Edit
Adjust your video’s appearance parameters by blending color modes, adding light and sound effects, overlaying graphics, and text, or rather directly drawing on the video by using the handwriting layers.
Step 3:Share
You can export your project up to 4k and 60fps. The app saves directly to your camera’s roll besides letting you share to social media.
Part 4: Related FAQs
**How to Make a Clip from a YouTube Video ?
First, sign in to YouTube and start playing a video. Under the video click on the Clip, this will create a clip box after which you will select the part of the video that you want to clip. Give the clip a title then click share after which you will be prompted to choose an option for sharing.
**How to Clip Parts of a YouTube Video ?
Start by sign-in and opening YouTube then proceed by watching a video. If clips are available, you will see a clips icon in the bar at the bottom of the video. Click on the clip icon and select that part of the video you are interested in, give the clip a title, and select Share Clip. Choose whether you want to share the clip or save it for later use.
**What YouTubers Use to Get Clips ?
YouTubers use several video editors for their work. Some of the most popular editors are iMovie, Final Cut Pro X, and Premier Pro CC. These YouTube editing apps vary in technicalities of use and features whereby you will find that some are easy to use and have varying features. Some of the editors are free while others require payments for one to use.
Key 10 Acoustic Amplifiers for Android, iOS
Best 10 YouTube Volume Boosters for Windows, macOS, Android, and iPhone

Shanoon Cox
Mar 27, 2024• Proven solutions
Have you ever listened to a YouTube video on max volume but still the sound wasn’t audible - even after turning up the YouTube volume as well as device audio? It is super annoying and inconvenient when you increase volume to max yet the video remains inaudible. YouTube volume issue could be due to various reasons such as poor audio quality of the built-in speakers or low original video sound. Well, there is a simple way to combat this problem i.e., sound booster. You can set different volume levels for the YouTube app on your PC or smartphone’s native volume controls. There are different YouTube volume boosters for Android, Windows, macOS, and iOS devices.
From listening to your favorite podcast to watching vlogs with your friends, you can use the best volume booster apps to increase the media sound volume and quality!
- Part 1: Best YouTube Volume Boosters for Windows and macOS
- Part 2: Best YouTube Volume Boosters for Android and iOS
- Part 3: Best YouTube Video Editing Software-Wondershare Filmora (Bonus Tip)
Part 1: Best YouTube Volume Boosters for Windows and macOS
Let’s introduce the best YouTube volume boosters for Windows and macOS:
1. FxSound (Windows and Mac)
FxSound is a very powerful tool that is made for Windows and macOS to enhance and boost the quality and volume of sound. This app comes with many features. For example, this audio software provides better sound quality, volume booster, and sound effects. Now you can listen to music, watch movies and play games without any distortion. Easily boost base, get customized effects and play with custom presets. You can download this app for your PC for free through the official website. People like this equalizer because it can make any audio format sound good even if it is 100 years old!

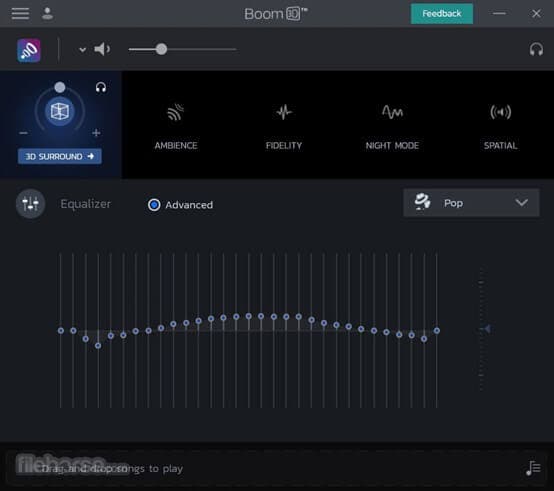
2. Boom 3D (Windows and macOS)
Boom 3D is a very popular app among many Windows and macOS users. This software is designed to help improve the audio on speakers or headphones that are connected to your computer. Boom 3D audio booster software also works with the Bluetooth devices that are connected to your PC. It can make any sound louder, clearer, and much better without buying any external devices. It provides us a 3D audio experience and works with any music player, video player, etc.!
3. Chrome Volume Booster Plugin (Windows)
This plugin has been rated 5 stars on the chrome web store as it is the best plugin for boosting up your volume on windows PC. This booster is so easy to download; you just have to go to the chrome web store and add the extension to your Google Chrome Browser. After adding it you can simply click on the icon and boost your volume up to 1000%! This plugin is free in the chrome store, just add it and choose how much louder you want your sound to be.

4. Letasoft Sound Booster (Windows)
Letasoft Sound Booster can only be used on windows. You can download it through the official website of Letasoft. It comes with a 14 days free trial period but after that, you have to buy their license to keep using it. This software is made to be used as an extra amplifier to boost up the volume of your audio or video if you think it is too low. The Letasoft Sound Booster app is very easy to use as you can control the volume from the slider. Moreover, it auto-starts and has no sound distortion.

5. Froyosoft Sound Booster (Mac)
Froyosoft Sound Booster is made for macOS users so they can boost video and audio file volumes. Individual application volumes can also be adjusted with the help of the Froyosoft Sound Booster. The good thing about this booster is that it is free for all users and it is 100% safe - you will not get any virus on your PC. You can download it from their website and increase the volume as high as you want to. So, get ready to get a clear and enhanced sound with the help of this app!

Part 2: Best YouTube Volume Boosters for Android and iOS
Following are the best YouTube sound boosters for Android and iOS devices:
1. AmpMe (Android and iOS)
With the help of AmpMe, you can start your little party through music apps. You don’t just get to listen to music but you can also chat with your friends - yup that’s right, it is a two-in-one app! The AmpMe app helps you to play the same music with your friends at the same time. It is one of the best volume booster apps that is available for both Android and iOS. It uses Bluetooth to connect with several devices, and the more the devices the higher the volume of the music. AmpMe offers a free trial and it costs $9.99 per week.

2. Super Volume Booster (Android)
To enjoy your music more than ever, you need a good volume enhancer. And, what can be better than an app that is free and boosts your audio? Android users are in luck because Super Volume Booster is a user-friendly app that allows you to increase the volume of YouTube and other apps. It gives you the best music experience. Moreover, it is clean, simple and has a one-touch operation. Not to forget that it has amazing reviews on Playstore. This app also increases the bass and also supports headphones and Bluetooth.

3. Volume Booster GOODEV (Android)
Volume Booster GOODEV is another app that boosts up the audio for you from 20 to 30% more! If you want to listen to an audiobook, watch a YouTube video or a movie on Netflix, volume Booster GOODEV can help you increase the volume of any media on any app! The volume can get so high that it might be dangerous for your ears so be careful. It offers a sound equalizer and is simple to use.

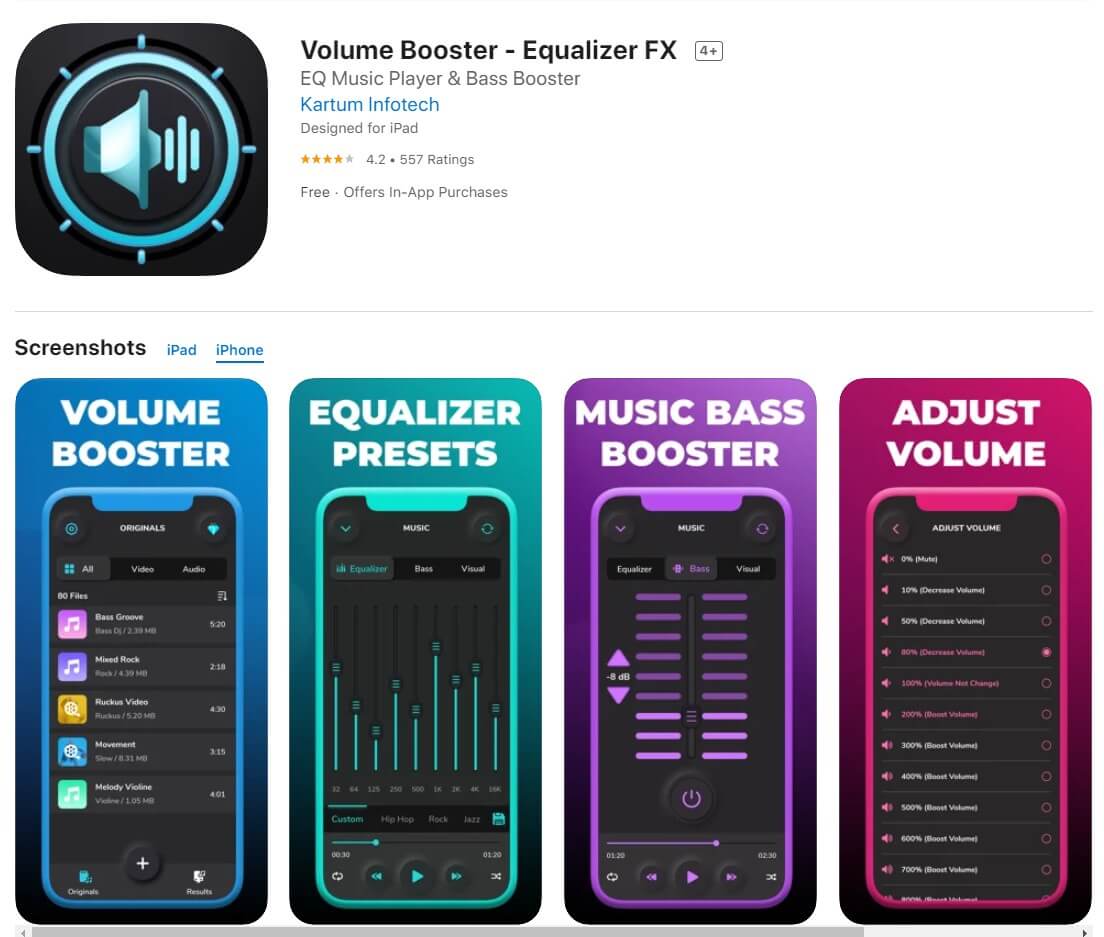
4. Volume Booster - Equalizer FX (iOS)
Volume Booster Equalizer FX can increase your volume higher than the default audio controller. With the help of this app, your device’s speaker will give the best result. You can adjust the sound effect levels according to your need. It makes the sound quality better and boosts up the volume with a single tap. You can get a weekly, monthly or yearly subscription. It is a great premium YouTube Volume booster for all iOS devices.
5. Max Volume Booster (iOS)
Max Volume Booster, as the name shows, boosts the volume to the maximum. You can find this app in the AppStore for free but it offers a premium version as well. With the help of the premium version, you can get an ad-free experience with no time limit. You can decrease or increase the volume based on your needs. Max Volume Booster gives you the experience and you will get addicted to it because it is a high-quality YouTube volume booster.

Part 3: Best YouTube Video Editing Software-Wondershare Filmora (Bonus Tip)
Wondershare Filmora is one of the most popular and user-friendly video editing software available. From beginners to pros, this app world for all. With Filmora you can create home videos, vlogs, Instagram reels, tutorials, guides, podcasts, and more! Wondershare Filmora is also the best YouTube video editor you will find! From editing to volume booster, you will find all the tools to create the perfect YouTube videos.


Here are some of the key features of Filmora that can help YouTubers make their YouTube videos:
- Offers multiple drawing video editing tools like speed control, volume booster, and color grading
- Offers special effects to enhance the appearance of your videos
- Allows you to custom create different animations
- Green Screen feature to help you change backgrounds and make the perfect videos
- Cross-platform accessibility as you can use it on both Windows and Mac
- Supports multiple file formats
- Ultra 4k HD support for the best quality of videos
- Free download and super easy to use with an intuitive interface
- Anyone can use it whether beginner or pro
- Online customer support available 24/7
Summing up
Stop worrying about low audio. Use one of the YouTube volume booster apps mentioned in this article. If you are making vlogs, tutorials, and other YouTube content, you can increase volume and create ideal videos with Wondershare video editor. So, to create the perfect videos with high-quality sound get Wondershare Filmora!
Shanoon Cox
Shanoon Cox is a writer and a lover of all things video.
Follow @Shanoon Cox
Shanoon Cox
Mar 27, 2024• Proven solutions
Have you ever listened to a YouTube video on max volume but still the sound wasn’t audible - even after turning up the YouTube volume as well as device audio? It is super annoying and inconvenient when you increase volume to max yet the video remains inaudible. YouTube volume issue could be due to various reasons such as poor audio quality of the built-in speakers or low original video sound. Well, there is a simple way to combat this problem i.e., sound booster. You can set different volume levels for the YouTube app on your PC or smartphone’s native volume controls. There are different YouTube volume boosters for Android, Windows, macOS, and iOS devices.
From listening to your favorite podcast to watching vlogs with your friends, you can use the best volume booster apps to increase the media sound volume and quality!
- Part 1: Best YouTube Volume Boosters for Windows and macOS
- Part 2: Best YouTube Volume Boosters for Android and iOS
- Part 3: Best YouTube Video Editing Software-Wondershare Filmora (Bonus Tip)
Part 1: Best YouTube Volume Boosters for Windows and macOS
Let’s introduce the best YouTube volume boosters for Windows and macOS:
1. FxSound (Windows and Mac)
FxSound is a very powerful tool that is made for Windows and macOS to enhance and boost the quality and volume of sound. This app comes with many features. For example, this audio software provides better sound quality, volume booster, and sound effects. Now you can listen to music, watch movies and play games without any distortion. Easily boost base, get customized effects and play with custom presets. You can download this app for your PC for free through the official website. People like this equalizer because it can make any audio format sound good even if it is 100 years old!
2. Boom 3D (Windows and macOS)
Boom 3D is a very popular app among many Windows and macOS users. This software is designed to help improve the audio on speakers or headphones that are connected to your computer. Boom 3D audio booster software also works with the Bluetooth devices that are connected to your PC. It can make any sound louder, clearer, and much better without buying any external devices. It provides us a 3D audio experience and works with any music player, video player, etc.!
3. Chrome Volume Booster Plugin (Windows)
This plugin has been rated 5 stars on the chrome web store as it is the best plugin for boosting up your volume on windows PC. This booster is so easy to download; you just have to go to the chrome web store and add the extension to your Google Chrome Browser. After adding it you can simply click on the icon and boost your volume up to 1000%! This plugin is free in the chrome store, just add it and choose how much louder you want your sound to be.
4. Letasoft Sound Booster (Windows)
Letasoft Sound Booster can only be used on windows. You can download it through the official website of Letasoft. It comes with a 14 days free trial period but after that, you have to buy their license to keep using it. This software is made to be used as an extra amplifier to boost up the volume of your audio or video if you think it is too low. The Letasoft Sound Booster app is very easy to use as you can control the volume from the slider. Moreover, it auto-starts and has no sound distortion.
5. Froyosoft Sound Booster (Mac)
Froyosoft Sound Booster is made for macOS users so they can boost video and audio file volumes. Individual application volumes can also be adjusted with the help of the Froyosoft Sound Booster. The good thing about this booster is that it is free for all users and it is 100% safe - you will not get any virus on your PC. You can download it from their website and increase the volume as high as you want to. So, get ready to get a clear and enhanced sound with the help of this app!
Part 2: Best YouTube Volume Boosters for Android and iOS
Following are the best YouTube sound boosters for Android and iOS devices:
1. AmpMe (Android and iOS)
With the help of AmpMe, you can start your little party through music apps. You don’t just get to listen to music but you can also chat with your friends - yup that’s right, it is a two-in-one app! The AmpMe app helps you to play the same music with your friends at the same time. It is one of the best volume booster apps that is available for both Android and iOS. It uses Bluetooth to connect with several devices, and the more the devices the higher the volume of the music. AmpMe offers a free trial and it costs $9.99 per week.
2. Super Volume Booster (Android)
To enjoy your music more than ever, you need a good volume enhancer. And, what can be better than an app that is free and boosts your audio? Android users are in luck because Super Volume Booster is a user-friendly app that allows you to increase the volume of YouTube and other apps. It gives you the best music experience. Moreover, it is clean, simple and has a one-touch operation. Not to forget that it has amazing reviews on Playstore. This app also increases the bass and also supports headphones and Bluetooth.
3. Volume Booster GOODEV (Android)
Volume Booster GOODEV is another app that boosts up the audio for you from 20 to 30% more! If you want to listen to an audiobook, watch a YouTube video or a movie on Netflix, volume Booster GOODEV can help you increase the volume of any media on any app! The volume can get so high that it might be dangerous for your ears so be careful. It offers a sound equalizer and is simple to use.
4. Volume Booster - Equalizer FX (iOS)
Volume Booster Equalizer FX can increase your volume higher than the default audio controller. With the help of this app, your device’s speaker will give the best result. You can adjust the sound effect levels according to your need. It makes the sound quality better and boosts up the volume with a single tap. You can get a weekly, monthly or yearly subscription. It is a great premium YouTube Volume booster for all iOS devices.
5. Max Volume Booster (iOS)
Max Volume Booster, as the name shows, boosts the volume to the maximum. You can find this app in the AppStore for free but it offers a premium version as well. With the help of the premium version, you can get an ad-free experience with no time limit. You can decrease or increase the volume based on your needs. Max Volume Booster gives you the experience and you will get addicted to it because it is a high-quality YouTube volume booster.
Part 3: Best YouTube Video Editing Software-Wondershare Filmora (Bonus Tip)
Wondershare Filmora is one of the most popular and user-friendly video editing software available. From beginners to pros, this app world for all. With Filmora you can create home videos, vlogs, Instagram reels, tutorials, guides, podcasts, and more! Wondershare Filmora is also the best YouTube video editor you will find! From editing to volume booster, you will find all the tools to create the perfect YouTube videos.
Here are some of the key features of Filmora that can help YouTubers make their YouTube videos:
- Offers multiple drawing video editing tools like speed control, volume booster, and color grading
- Offers special effects to enhance the appearance of your videos
- Allows you to custom create different animations
- Green Screen feature to help you change backgrounds and make the perfect videos
- Cross-platform accessibility as you can use it on both Windows and Mac
- Supports multiple file formats
- Ultra 4k HD support for the best quality of videos
- Free download and super easy to use with an intuitive interface
- Anyone can use it whether beginner or pro
- Online customer support available 24/7
Summing up
Stop worrying about low audio. Use one of the YouTube volume booster apps mentioned in this article. If you are making vlogs, tutorials, and other YouTube content, you can increase volume and create ideal videos with Wondershare video editor. So, to create the perfect videos with high-quality sound get Wondershare Filmora!
Shanoon Cox
Shanoon Cox is a writer and a lover of all things video.
Follow @Shanoon Cox
Also read:
- In 2024, A Visual Hook Creating Captivating YouTube Thumbnails to Drive Traffic
- In 2024, 16 Best Kickstart Videos on YouTube for Visibility Boost
- [New] Beginning a Blogging Journey Profit From Your Passion
- Video Color Correction for YouTube Beauty
- Protecting Privacy During YouTube-to-MP4 Conversion
- Defining Your Digital DNA A Guide to YouTubing Personal Branding
- Best Camera Apps to Shoot and Record Videos on iPhone and Andriod Phones
- 2024 Approved Audience Expansion Strategies That Honor YouTube Standards
- 2024 Approved Erasing the Spotlight Hide Visuals in Shared Media
- YouTube Movie Maker A Beginner-Friendly Video Editing Companion
- [New] Easily Enable Offline Access to YouTube on iPhone/iPad
- [Updated] Capture Attention YT Imagery and Its Dimension Magic
- Elevate Your Online Video Quality Mastery in FinalCut for YouTube for 2024
- [New] Designing Memorable Try-On Videos for Online Audiences
- [New] Ethical Approaches to Extract and Convert YouTube Videos
- In 2024, Beginner's Guide to Budget-Friendly Webinars Using YouTube
- Today's Vital Views YouTube’s Quick Hit List
- From Noob to Pro Selecting Webcams That Make a Difference in YouTube Livestreams
- [New] Complete Walkthrough to Grab YouTube Playlists
- [Updated] Charting the Course From AdSense Income to Savings
- In 2024, Auto-Play YouTube IPhone/Android, No Notification
- [New] Elevating Your Vlogs A List of the Top 12 Professional Cameras
- A Look at Earnings Understanding Your Monthly Income From YouTube's AdSense
- Curating Your Music Collection The Easy Guide to YouTube Playlist Creation (Web/App)
- In 2024, Designing a Trailer Blueprint to Amplify Channel Income
- Dial in the Ideal Aspect Ratio for Stunning YouTube Videos for 2024
- In 2024, Effortless Engagement Integrating GS & YT Strategies
- Secrets Unlocked Starting Your Own Hit Gaming Stream
- 2024 Approved Crafting Success Pushing Your Video Into Top Charts
- 2024 Approved Budget-Friendly Webinar Strategies for YouTube
- How Neuroscience Insights Enhance Effective Corporate Governance
- The Titans of Tutorials YouTube Leaders
- Stream-to-File Conversion Effortless Archive Creation
- How to Mirror Asus ROG Phone 8 to Mac? | Dr.fone
- What's the Difference Between 360° Video and VR Video?
- [New] In 2024, Comprehensive DuRecorder Manual Review
- [New] Top 10 TikTok Tests You Must Try for 2024
- [New] Quick-Start Guide to Recording Remote Meetings with Ease (Windows, Mac)
- Elite Camera Selection Our Top 15 Picks
- [New] 2024 Approved The Foremost 9 Digital Mic Recorders for High-Fidelity Capture
- Unparalleled Production Choosing the Top Webcam for Podcasts
- [Updated] Boost Your Insta Presence Safest Free Follower Finders (iOS/Android)
- [New] 2024 Approved Make Every Story Stand Out 6 Top-Rated Apps for Android & iPhone
- In 2024, Recommended Best Applications for Mirroring Your Realme 11 Pro Screen | Dr.fone
- In 2024, How to Fake Snapchat Location without Jailbreak On OnePlus Nord N30 5G | Dr.fone
- 4 Ways to Transfer Music from Infinix Smart 8 Pro to iPhone | Dr.fone
- Updated Merge AVI Videos with Ease 10 Best Free AVI Joiner Tools for 2024
- Title: Visual Storyteller Toolkit
- Author: Kevin
- Created at : 2024-06-10 00:24:54
- Updated at : 2024-06-11 00:24:54
- Link: https://youtube-videos.techidaily.com/visual-storyteller-toolkit/
- License: This work is licensed under CC BY-NC-SA 4.0.
