
!["[Updated] Essential Tools Top 8 Mirrorless Cams For Professional Filmmakers"](https://www.lifewire.com/thmb/vIrcE4SKlxDw0DhFl8M9ilBfxG4=/2000x0/filters:no_upscale():max_bytes(150000):strip_icc()/Streaming_GettyImages-1317797291_grinvalds_CROPPED-e2f9d4a91c004a85a244031575aca1a0.jpg)
"[Updated] Essential Tools Top 8 Mirrorless Cams For Professional Filmmakers"
Essential Tools: Top 8 Mirrorless Cams For Professional Filmmakers
8 Best Mirrorless Cameras Vloggers Should Know

Richard Bennett
Nov 01, 2022• Proven solutions
Mirrorless cameras are great for vloggers wanting a powerful camera without the weight and size of a DSLR camera. As mirrorless cameras are becoming better with all the advancements in camera technology, more and more DSLR camera vloggers are switching over to vlogging with a mirrorless camera. Below is our list and review of the eight best mirrorless cameras for vlogging.
WHAT TO LOOK FOR IN A VLOGGING CAMERA
1. Fully articulated screen (flip screen)
2. Good continual autofocus while recording video
3. Good focus priority through face recognition
4. Touch to focus
5. Good low-light performance
6. external mic jack, hot/cold shoe bracket
7. optical image stabilization
8. good battery life
Check out my full list of 10 Things To Look For In A Vlogging Camera to understand the importance of these camera features.
THE 8 BEST MIRRORLESS CAMERAS FOR VLOGGING (2018)
| Camera | Release Date | Sensor Size | Flip Screen | Mic Port | Price | |
|---|---|---|---|---|---|---|
| CanonEOSM50 | 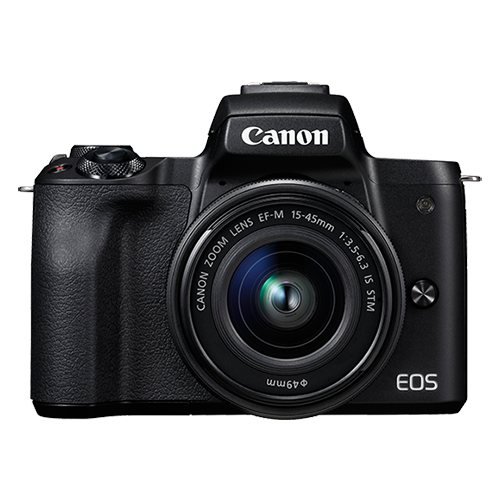 |
February2018 | APS-C(22.3 x 14.9 mm) | Fully Articulated | Yes | $- |
| PanasonicLumixDC-GH5S | 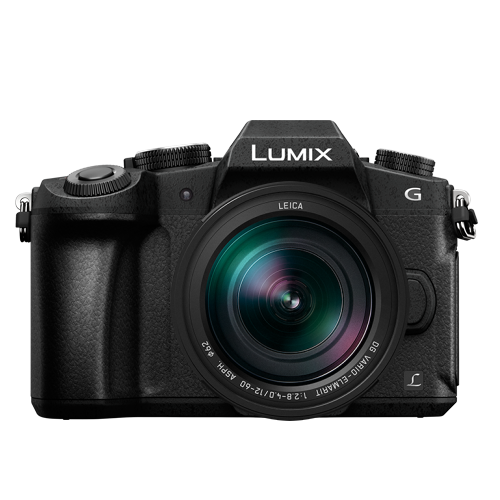 |
January2018 | Four Thirds(19.2 x 13 mm) | Fully Articulated | Yes | $$$ |
| SonyAlphaa7R III | 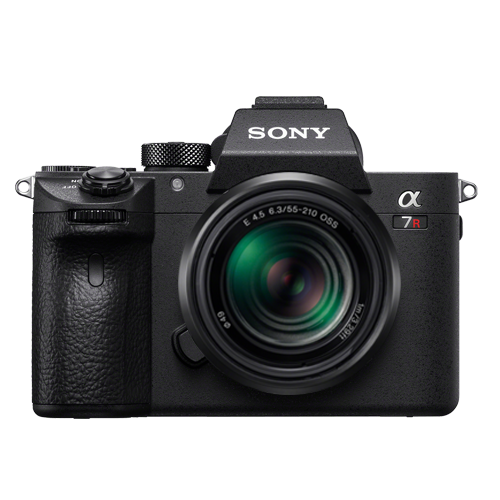 |
October2017 | Full Frame(35.9 x 24 mm) | Tilting | Yes | $$$ |
| CanonEOSM100 | 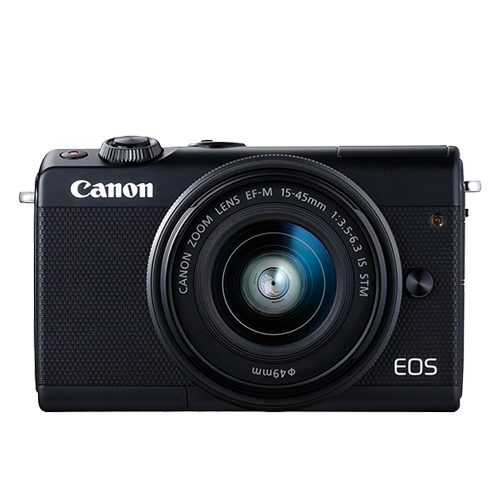 |
August2017 | APS-C(22.3 x 14.9 mm) | Flip Up | No | $ |
| CanonEOSM6 | 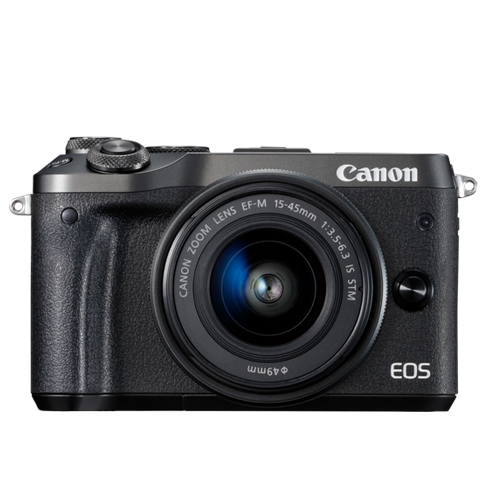 |
February2017 | APS-C(22.3 x 14.9 mm) | Flip Up | Yes | $- |
| SonyAlphaa6500 | 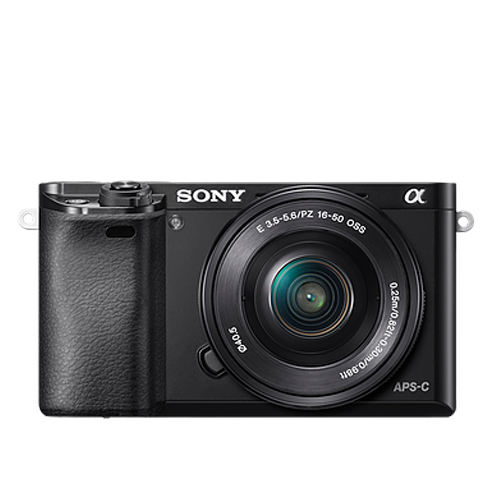 |
October2016 | APS-C(23.5 x 15.6 mm) | Tilting | Yes | $$- |
| PanasonicLumixDMC-G85 | 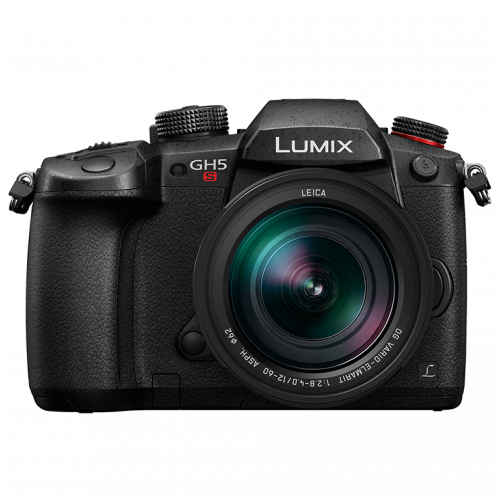 |
September2016 | Four Thirds(17.3 x 13 mm) | Fully Articulated | Yes | $- |
| PanasonicLumixDMC-G7 | 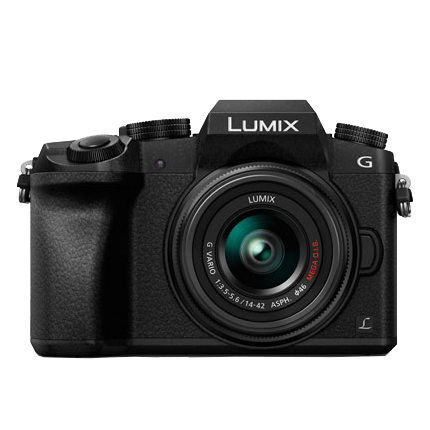 |
May2015 | Four Thirds(17.3 x 13 mm) | Fully Articulated | Yes | $ |
|
Best daily mirrorless camera for vlogging: Canon EOS M50 The Canon EOS M50 is Canon’s first mirrorless camera that comes equipped with both a fully-articulated screen and an external microphone jack. It came out only a few months ago and is already considered one of the best mirrorless cameras for vlogging. The M50 is also the only camera on our list that you can buy at a prosumer’s budget that shoots 4K video. Yes, the Sony a7R III and Panasonic GH5S also shoot 4K video, but they are much more expensive. With Canon’s new DIGIC 8 Image Processor, the camera’s dual-pixel autofocusing system will perform even better. PROS - Can shoot UHD 4K videos at 23.98 fps - Has a 2.36m-dot OLED electronic viewfinder CONS - No image stabilization - Battery life could be longer |
|---|---|
|
Best entry-level mirrorless camera for vlogging: Canon EOS M100 The Canon EOS M100 is a small, but powerful mirrorless camera for vlogging. This camera can shoot full HD 1080p videos at 60 fps. It cannot shoot 4K video, unfortunately. It uses its DIGIC 7 Image Processor and dual-pixel autofocusing system to ensure that your vlogs are always in focus. The M100 provides great ISO sensitivity options - it can reach up to ISO 25600. With its built-in Wi-Fi with NFC, you can transfer your media seamlessly to a computer. PROS - Affordable - Great connectivity options CONS - Lacks advanced video recording features - No viewfinder |
|
Best mid-range mirrorless camera for vlogging: Canon EOS M50 The Canon EOS M50 wins this category as well in our books. It is the only camera on our list that shoots 4K video that is priced much lower than the Sony a7R III and the Panasonic GH7S. In case you missed it, check out my review on the Canon EOS M50. |
|
Best professional mirrorless camera for vlogging: Panasonic Lumix DC-GH5S Originally, Panasonic had released it’s GH5 as a hybrid camera that handles both photography and videography well. In response to hearing customers’ interest in a more video-focused camera, Panasonic came up with the GH5S. In our list of the top mirrorless cameras, the Panasonic GH5S and the Sony a7R III are the two professional mirrorless cameras that can record 4K video. Between the two, though, the GH5S wins as the best professional mirrorless camera for vlogging because it sports a fully-articulated screen. Its micro four-thirds sensor is smaller than the a7R III’s full-frame sensor. Even with a smaller sensor, though, the GH5S is made to still autofocus well in low lighting conditions. Another amazing feature is its ability to record 240 fps slow-motion video at full HD 1080p. PROS - ISO sensitivity goes up to 204800 - High video bit rates CONS - Expensive - The camera body weighs about 1.5 lbs |
Want to compare even more cameras? Check out…
12 Best Vlogging Cameras (2018)
Top 11 Cheap Vlogging Cameras (2018)
7 Best DSLR Cameras For Vlogging (2018)
12 Best Vlogging Cameras With A Flip Screen (2018)
Richard Bennett
Richard Bennett is a writer and a lover of all things video.
Follow @Richard Bennett
Richard Bennett
Nov 01, 2022• Proven solutions
Mirrorless cameras are great for vloggers wanting a powerful camera without the weight and size of a DSLR camera. As mirrorless cameras are becoming better with all the advancements in camera technology, more and more DSLR camera vloggers are switching over to vlogging with a mirrorless camera. Below is our list and review of the eight best mirrorless cameras for vlogging.
WHAT TO LOOK FOR IN A VLOGGING CAMERA
1. Fully articulated screen (flip screen)
2. Good continual autofocus while recording video
3. Good focus priority through face recognition
4. Touch to focus
5. Good low-light performance
6. external mic jack, hot/cold shoe bracket
7. optical image stabilization
8. good battery life
Check out my full list of 10 Things To Look For In A Vlogging Camera to understand the importance of these camera features.
THE 8 BEST MIRRORLESS CAMERAS FOR VLOGGING (2018)
| Camera | Release Date | Sensor Size | Flip Screen | Mic Port | Price | |
|---|---|---|---|---|---|---|
| CanonEOSM50 | |
February2018 | APS-C(22.3 x 14.9 mm) | Fully Articulated | Yes | $- |
| PanasonicLumixDC-GH5S | |
January2018 | Four Thirds(19.2 x 13 mm) | Fully Articulated | Yes | $$$ |
| SonyAlphaa7R III | |
October2017 | Full Frame(35.9 x 24 mm) | Tilting | Yes | $$$ |
| CanonEOSM100 | |
August2017 | APS-C(22.3 x 14.9 mm) | Flip Up | No | $ |
| CanonEOSM6 | |
February2017 | APS-C(22.3 x 14.9 mm) | Flip Up | Yes | $- |
| SonyAlphaa6500 | |
October2016 | APS-C(23.5 x 15.6 mm) | Tilting | Yes | $$- |
| PanasonicLumixDMC-G85 | |
September2016 | Four Thirds(17.3 x 13 mm) | Fully Articulated | Yes | $- |
| PanasonicLumixDMC-G7 | |
May2015 | Four Thirds(17.3 x 13 mm) | Fully Articulated | Yes | $ |
|
Best daily mirrorless camera for vlogging: Canon EOS M50 The Canon EOS M50 is Canon’s first mirrorless camera that comes equipped with both a fully-articulated screen and an external microphone jack. It came out only a few months ago and is already considered one of the best mirrorless cameras for vlogging. The M50 is also the only camera on our list that you can buy at a prosumer’s budget that shoots 4K video. Yes, the Sony a7R III and Panasonic GH5S also shoot 4K video, but they are much more expensive. With Canon’s new DIGIC 8 Image Processor, the camera’s dual-pixel autofocusing system will perform even better. PROS - Can shoot UHD 4K videos at 23.98 fps - Has a 2.36m-dot OLED electronic viewfinder CONS - No image stabilization - Battery life could be longer |
|---|---|
|
Best entry-level mirrorless camera for vlogging: Canon EOS M100 The Canon EOS M100 is a small, but powerful mirrorless camera for vlogging. This camera can shoot full HD 1080p videos at 60 fps. It cannot shoot 4K video, unfortunately. It uses its DIGIC 7 Image Processor and dual-pixel autofocusing system to ensure that your vlogs are always in focus. The M100 provides great ISO sensitivity options - it can reach up to ISO 25600. With its built-in Wi-Fi with NFC, you can transfer your media seamlessly to a computer. PROS - Affordable - Great connectivity options CONS - Lacks advanced video recording features - No viewfinder |
|
Best mid-range mirrorless camera for vlogging: Canon EOS M50 The Canon EOS M50 wins this category as well in our books. It is the only camera on our list that shoots 4K video that is priced much lower than the Sony a7R III and the Panasonic GH7S. In case you missed it, check out my review on the Canon EOS M50. |
|
Best professional mirrorless camera for vlogging: Panasonic Lumix DC-GH5S Originally, Panasonic had released it’s GH5 as a hybrid camera that handles both photography and videography well. In response to hearing customers’ interest in a more video-focused camera, Panasonic came up with the GH5S. In our list of the top mirrorless cameras, the Panasonic GH5S and the Sony a7R III are the two professional mirrorless cameras that can record 4K video. Between the two, though, the GH5S wins as the best professional mirrorless camera for vlogging because it sports a fully-articulated screen. Its micro four-thirds sensor is smaller than the a7R III’s full-frame sensor. Even with a smaller sensor, though, the GH5S is made to still autofocus well in low lighting conditions. Another amazing feature is its ability to record 240 fps slow-motion video at full HD 1080p. PROS - ISO sensitivity goes up to 204800 - High video bit rates CONS - Expensive - The camera body weighs about 1.5 lbs |
Want to compare even more cameras? Check out…
12 Best Vlogging Cameras (2018)
Top 11 Cheap Vlogging Cameras (2018)
7 Best DSLR Cameras For Vlogging (2018)
12 Best Vlogging Cameras With A Flip Screen (2018)
Richard Bennett
Richard Bennett is a writer and a lover of all things video.
Follow @Richard Bennett
Step-by-Step Tutorial: Download YouTube Videos in Pieces
How to Download Part of YouTube Video?
Richard Bennett
Mar 27, 2024• Proven solutions
YouTube is the second-most viewed social platform, with around 2.3 Billion people active on it every day.
It’s easy to find videos of your choice with a simple search online. You’ve probably come across ways to download a YouTube video, but what if you only want to download a part of the video and not the whole? Well, that’s exactly what we’ll be covering here.
Here in this article, you will learn about the most straightforward YouTube video cutter and its uses. The next time you see something interesting, you can straightaway download it!
- Part 1: How to Download a Certain Part of a YouTube Video?
- Part 2: How to Record YouTube Videos with Filmora? [Video Tutorial]
Part 1: How to Download a Certain Part of a YouTube Video?
Below are 6 software that are available to download part of youtube video, find which one fit you much. Watch a video description first!
Note: We resolutely oppose all forms of copyright-infringing downloads. This tutorial is only for downloading YouTube videos/audio materials from your own channel.
| 1 - Clideo | 2 - YT Cutter | 3 - VEED.IO |
|---|---|---|
| 4 - Hashcut | 5 - VideoCrops | 6 - Kapwing |
Try Filmora to Download and Edit YouTube Video for Free!
Filmora YouTube Video Editor is an expert in creating and editing videos for all YouTubers. You can use the built-in screen recorder to download YouTube videos and add cool visual effects and popular emojis to re-edit your video. Then you can upload to YouTube directly and gain more views!
Download & Edit YouTube Videos Download & Edit YouTube Videos Download & Edit YouTube Videos Learn More >
1. Clideo
Clideo is not only easy to use, but it’s safe too. It helps you cut parts of the video in just a few steps, and it’s completely free! Furthermore, it will delete the user information in 24 hours. Clideo also works even if you don’t log in or register.
You just need to follow the simple steps below to download the part of the YouTube video.
Step 1: Copy the YouTube link you want and paste it on the Clideo video cutter. As shown in the figure below, you need to paste it in the space on the homepage. You can also export the file to Google Drive and Dropbox. It is also compatible with Mobile and PC.

Step 2: Once you paste the link, you need to cut the video part using the slider. You then have to set the start and end times accordingly. You can also choose the “Fade in” or “Fade out” option to give your video smooth finishing. Clideo provides several extensions to download, but if you want to post your video on social media, it’s better to use the MP4 option. After finishing, press the “Cut” button.

Step 3: You can preview your video and save it on your device as the final step.
2. YT Cutter
It’s a super-easy video cutter that can download a part of any YouTube video in no time. YT Cutter also allows downloading and trimming the video online. The maximum limit is 1 minute for free account users, but it’s 20 minutes for premium users.
Here are the steps to download part of your YouTube video using YT Cutter.
Step 1: Click on the “start” button after pasting your YouTube URL.
Step 2: You can preview the part of the video you want to download online. After that, add the start and end times in the options bar on the left. Then, you’re good to go! Your video will be ready to download once you hit the “download” button.

3. VEED.IO
Veed.io YouTube video cutter is another flexible and easy tool to use. Paste the YouTube URL on Veed and cut or trim any part of the YouTube video easily.
Check out the simple steps to use Veed below:
Step 1: You will find the option to upload your file, record a video, or paste the YouTube video URL on Veed.
Step 2: Once you have uploaded your video in Veed, you can trim or cut a section by dragging or clicking the video ends.
Step 3: Soon after finishing your work, press the “download” button, and you finish it.

Filmora Video Editor
Create AI-Generated Video with Filmora
Filmora Discord video editor offers a ChatGPT plug-in and AI tools to enhance your creative vision. Make your idea into reality.
Create Video with ChatGPT Create Video with ChatGPT Create Video with ChatGPT Learn More >
4. Hashcut
Hashcut is user-friendly as it does not save up your video. If you like a video on YouTube and want to download a part of the video, Hashcut is your go-to!
Want to know how it works? Read below:
Step 1: You can search for the YouTube video you want to cut and paste the URL on the Hashcut box. Then, click the START RECORDING button to add the start timing, and then click the END RECORDING button to add the ending timing.

Step 2: You can also add stickers and texts as per your choice before saving the part of the YouTube video.

Step 3: Finally, you can compile multiple clips into a single clip and then hit “SAVE HASHCUT” to finish your work.
5. VideoCrops
VideoCrops is another wonderful tool to download a part of the YouTube video you want. It has limited tools as it is free. Be sure to download your video immediately after your work is done.
Here are the simple steps you need to follow to use VideoCrops.
Step 1: Open VideoCrops on your device, paste the YouTube video URL, and click the “Play” button.
Step 2: Select the video interval you want to crop and hit the “Crop selection” button below the video.

Step 3: Click the “Download” button below and enjoy your clip.
6. Kapwing
Kapwing is another cool tool that works on all devices such as Android, Mac, and iOS. It makes your work easy with a few simple trims and cuts.
Know how to get your work done with Kapwing here!
Step 1: If you want a part of any YouTube video, paste the link into the given space and wait for the video to be displayed on the screen.
Step 2: When the video appears, you need to select the slider and drag it to the part of the video you want for a final cut. You can also use the arrow key if you want better trimming. You can also zoom in or out for better results and adjust the video’s speed.

Step 3: When you’re finally done with the cropping and editing, press the “Export Video” button at the top right corner. You can now share and download the shortened video.
Part 2: How to Record YouTube Videos with Filmora?
Filmora is a software editor that is available for both Windows and MacOS. It can give you many editing and recording facilities. Besides, it offers many editing facilities like effects, color match, motion tracking, direct upload to social platforms, and a lot more. You need to follow a few steps to record YouTube videos using Filmora and easily save parts of the video.
You need to follow a few steps to record YouTube videos using Filmora and easily save parts of the video.
 Secure Download
Secure Download
- Open Wondershare Filmora and then click the PC Screen button to enter the screen recording interface.

- In the Wondershare Screen Recorder tool, you can choose to record your full screen or any target window. For example, since we want to record part of the YouTube video, choose target window and then select the browser playing the YouTube video.
You need to choose the file location of where you want your video to be saved, set a record time limit and hit the red record button.

- If you want to save only a part of the YouTube video, you can drag the play header to the section of your choice and trim it or use scissors to slice the part you want in Filmora. You can edit the part by adding headings and effects. And finally, export the video to use.
You can check this part to learn more details about how to use Filmora to record screen .
Final thoughts
That’s about it! These were some of the best tools to download sections of the YouTube videos of your choice. The steps are pretty much the same for all the tools mentioned above. You no longer have to reach out to your friends to do this for you. This article will help you out as we’ve mentioned the step-by-step process for each tool. First, you need to ensure you have a stable internet connection.
Download segments of the YouTube video effortlessly with a few taps on your phone now!
![]()
A cross-platform for making videos anywhere for all creators

Why your video editing isn’t good enough? How about some creative inspo?
- 100 Million+ Users
- 150+ Countries and Regions
- 4 Million+ Social Media Followers
- 5 Million+ Stock Media for Use
* Secure Download

Richard Bennett
Richard Bennett is a writer and a lover of all things video.
Follow @Richard Bennett
Richard Bennett
Mar 27, 2024• Proven solutions
YouTube is the second-most viewed social platform, with around 2.3 Billion people active on it every day.
It’s easy to find videos of your choice with a simple search online. You’ve probably come across ways to download a YouTube video, but what if you only want to download a part of the video and not the whole? Well, that’s exactly what we’ll be covering here.
Here in this article, you will learn about the most straightforward YouTube video cutter and its uses. The next time you see something interesting, you can straightaway download it!
- Part 1: How to Download a Certain Part of a YouTube Video?
- Part 2: How to Record YouTube Videos with Filmora? [Video Tutorial]
Part 1: How to Download a Certain Part of a YouTube Video?
Below are 6 software that are available to download part of youtube video, find which one fit you much. Watch a video description first!
Note: We resolutely oppose all forms of copyright-infringing downloads. This tutorial is only for downloading YouTube videos/audio materials from your own channel.
| 1 - Clideo | 2 - YT Cutter | 3 - VEED.IO |
|---|---|---|
| 4 - Hashcut | 5 - VideoCrops | 6 - Kapwing |
Try Filmora to Download and Edit YouTube Video for Free!
Filmora YouTube Video Editor is an expert in creating and editing videos for all YouTubers. You can use the built-in screen recorder to download YouTube videos and add cool visual effects and popular emojis to re-edit your video. Then you can upload to YouTube directly and gain more views!
Download & Edit YouTube Videos Download & Edit YouTube Videos Download & Edit YouTube Videos Learn More >
1. Clideo
Clideo is not only easy to use, but it’s safe too. It helps you cut parts of the video in just a few steps, and it’s completely free! Furthermore, it will delete the user information in 24 hours. Clideo also works even if you don’t log in or register.
You just need to follow the simple steps below to download the part of the YouTube video.
Step 1: Copy the YouTube link you want and paste it on the Clideo video cutter. As shown in the figure below, you need to paste it in the space on the homepage. You can also export the file to Google Drive and Dropbox. It is also compatible with Mobile and PC.
Step 2: Once you paste the link, you need to cut the video part using the slider. You then have to set the start and end times accordingly. You can also choose the “Fade in” or “Fade out” option to give your video smooth finishing. Clideo provides several extensions to download, but if you want to post your video on social media, it’s better to use the MP4 option. After finishing, press the “Cut” button.
Step 3: You can preview your video and save it on your device as the final step.
2. YT Cutter
It’s a super-easy video cutter that can download a part of any YouTube video in no time. YT Cutter also allows downloading and trimming the video online. The maximum limit is 1 minute for free account users, but it’s 20 minutes for premium users.
Here are the steps to download part of your YouTube video using YT Cutter.
Step 1: Click on the “start” button after pasting your YouTube URL.
Step 2: You can preview the part of the video you want to download online. After that, add the start and end times in the options bar on the left. Then, you’re good to go! Your video will be ready to download once you hit the “download” button.
3. VEED.IO
Veed.io YouTube video cutter is another flexible and easy tool to use. Paste the YouTube URL on Veed and cut or trim any part of the YouTube video easily.
Check out the simple steps to use Veed below:
Step 1: You will find the option to upload your file, record a video, or paste the YouTube video URL on Veed.
Step 2: Once you have uploaded your video in Veed, you can trim or cut a section by dragging or clicking the video ends.
Step 3: Soon after finishing your work, press the “download” button, and you finish it.
Filmora Video Editor
Create AI-Generated Video with Filmora
Filmora Discord video editor offers a ChatGPT plug-in and AI tools to enhance your creative vision. Make your idea into reality.
Create Video with ChatGPT Create Video with ChatGPT Create Video with ChatGPT Learn More >
4. Hashcut
Hashcut is user-friendly as it does not save up your video. If you like a video on YouTube and want to download a part of the video, Hashcut is your go-to!
Want to know how it works? Read below:
Step 1: You can search for the YouTube video you want to cut and paste the URL on the Hashcut box. Then, click the START RECORDING button to add the start timing, and then click the END RECORDING button to add the ending timing.
Step 2: You can also add stickers and texts as per your choice before saving the part of the YouTube video.
Step 3: Finally, you can compile multiple clips into a single clip and then hit “SAVE HASHCUT” to finish your work.
5. VideoCrops
VideoCrops is another wonderful tool to download a part of the YouTube video you want. It has limited tools as it is free. Be sure to download your video immediately after your work is done.
Here are the simple steps you need to follow to use VideoCrops.
Step 1: Open VideoCrops on your device, paste the YouTube video URL, and click the “Play” button.
Step 2: Select the video interval you want to crop and hit the “Crop selection” button below the video.
Step 3: Click the “Download” button below and enjoy your clip.
6. Kapwing
Kapwing is another cool tool that works on all devices such as Android, Mac, and iOS. It makes your work easy with a few simple trims and cuts.
Know how to get your work done with Kapwing here!
Step 1: If you want a part of any YouTube video, paste the link into the given space and wait for the video to be displayed on the screen.
Step 2: When the video appears, you need to select the slider and drag it to the part of the video you want for a final cut. You can also use the arrow key if you want better trimming. You can also zoom in or out for better results and adjust the video’s speed.
Step 3: When you’re finally done with the cropping and editing, press the “Export Video” button at the top right corner. You can now share and download the shortened video.
Part 2: How to Record YouTube Videos with Filmora?
Filmora is a software editor that is available for both Windows and MacOS. It can give you many editing and recording facilities. Besides, it offers many editing facilities like effects, color match, motion tracking, direct upload to social platforms, and a lot more. You need to follow a few steps to record YouTube videos using Filmora and easily save parts of the video.
You need to follow a few steps to record YouTube videos using Filmora and easily save parts of the video.
Secure Download
Secure Download
- Open Wondershare Filmora and then click the PC Screen button to enter the screen recording interface.
- In the Wondershare Screen Recorder tool, you can choose to record your full screen or any target window. For example, since we want to record part of the YouTube video, choose target window and then select the browser playing the YouTube video.
You need to choose the file location of where you want your video to be saved, set a record time limit and hit the red record button.
- If you want to save only a part of the YouTube video, you can drag the play header to the section of your choice and trim it or use scissors to slice the part you want in Filmora. You can edit the part by adding headings and effects. And finally, export the video to use.
You can check this part to learn more details about how to use Filmora to record screen .
Final thoughts
That’s about it! These were some of the best tools to download sections of the YouTube videos of your choice. The steps are pretty much the same for all the tools mentioned above. You no longer have to reach out to your friends to do this for you. This article will help you out as we’ve mentioned the step-by-step process for each tool. First, you need to ensure you have a stable internet connection.
Download segments of the YouTube video effortlessly with a few taps on your phone now!
![]()
A cross-platform for making videos anywhere for all creators
Why your video editing isn’t good enough? How about some creative inspo?
- 100 Million+ Users
- 150+ Countries and Regions
- 4 Million+ Social Media Followers
- 5 Million+ Stock Media for Use
* Secure Download
Richard Bennett
Richard Bennett is a writer and a lover of all things video.
Follow @Richard Bennett
Also read:
- Green Screen Tech for Improved CTAs
- The Foundational Handbook to YouTube Business Success
- Streamline Your YouTube Channel URL with These Tips
- [New] Avoiding Common Pitfalls in YouTube Sponsorships, According to FameBit
- Building Confidence Against YouTube Critiques
- [New] Beginner's Guide to Pro YouTube Tech
- Examining How YouTube Curates Its Highlighted Discussion Threads
- 2024 Approved Chuckle Chronicles Top YouTube Humorists' Masterpieces
- Professional Shortcut to Content Perfection with These Tools
- Charting the Upward Momentum Top 8 Skyrocketing YouTube Sites
- In 2024, Decoding Digital Dollars An Effective Triple Step Process to Determine Your Subscriber Profits
- [Updated] Behind the Numbers Deciphering How YouTube Measures Popularity
- CarryMinati Unmasked The Monetary Milestones for 2024
- How to Create GIFs From YouTube Videos on Desktop and Mobile Devices
- An Owner's Guide to Playlist Permutations in YT
- From Search Patterns to Screenplay Crafting Videos From Google Data
- 2024 Approved Evolution of Engagement Key Post-VidCon Events
- 2024 Approved Diversify Referrals Tactics for Effective YouTube Backlinks
- [Updated] Building Buzz Strategies for Shaping Your Unique YouTubing Image
- MP3 Broadcasting Made Easy Upload Tutorial for YouTube
- Comparative Review Smartphone Usage of the Leading Video Apps
- Tutorial Turning Your Google Meet Into a YouTube Showcase
- 2024 Approved Astonishing Visuals on Thumbnails
- [New] Essential YouTube Marketing Techniques – Ranked From Best to Worst
- In 2024, Evaluating Mr. Beast's Monetary World
- Insightful Analysis The Impact and Mechanics of YouTube's Shorts Fund
- Top 15 Video Capture for Gamers Guide
- [New] Automating the Creation of YouTube Subscriber Links
- Comprehensive List of High-Quality Game Entrance Makers Online for 2024
- Unlock Your Income Potential YouTube Studio's Global Reach
- Beat Drops in Seconds A Beginner’s Guide to Music Videos
- 25 Ultimate Android & iOS Downloading Tools Reviewed for 2024
- Building an Online Empire Ramp Up Video Views
- [Updated] Create a Unique Identity Personalize Your YouTube URL Today
- The Ultimate Pre-Journey to Sub4sub Success Starts Here!
- Easy Entrance to Follow Creating a User-Friendly Subscribe Link for 2024
- 3 Things You Must Know about Fake Snapchat Location On Poco X5 | Dr.fone
- [New] 2024 Approved Decelerating Action The Ultimate Guide to IG Reels’ Slow Motion
- [Updated] 2024 Approved Avoid the Void Strategies for Non-Black Screens in OBS Recordings
- [Updated] In 2024, Skyrocketing Fame? Here Are the Top 30 Creative TikTok Usernames
- [New] Leading Offline PC Screen Recording Software
- [Updated] Professional Edge Mastering Bordered Videos on Insta
- [Updated] Techniques for Modifying Voice on Instagram Profiles
- 2024 Approved Top Full-Screen Recorders Uncovered A Compreayer's Picks
- How to Use Pokémon Emerald Master Ball Cheat On Realme 12+ 5G | Dr.fone
- In 2024, How to Share/Fake Location on WhatsApp for Nokia C12 Plus | Dr.fone
- Title: "[Updated] Essential Tools Top 8 Mirrorless Cams For Professional Filmmakers"
- Author: Kevin
- Created at : 2024-05-25 16:53:03
- Updated at : 2024-05-26 16:53:03
- Link: https://youtube-videos.techidaily.com/updated-essential-tools-top-8-mirrorless-cams-for-professional-filmmakers/
- License: This work is licensed under CC BY-NC-SA 4.0.
