
!["[Updated] Epicurean Epiphanies Filming Feast Creation"](https://www.lifewire.com/thmb/tG-F-sQp21lJs8o0YCxJ5BuJA24=/400x300/filters:no_upscale():max_bytes(150000):strip_icc()/001_authenticator-add-account-8634672-ffc510271be046f4af6138462ae02a44.jpg)
"[Updated] Epicurean Epiphanies Filming Feast Creation"
Epicurean Epiphanies: Filming Feast Creation
How to Make a Cooking Video in Steps - an Ultimate Guide

Richard Bennett
Mar 27, 2024• Proven solutions
Cooking and food-oriented videos are among the most outreaching and popular categories of content to publish online, notably, on YouTube, Facebook, or Instagram. So if you are a cooking aficionado, you have excellent potential to gain positive attention and a loyal audience. But to create engaging videos, you’d need a lot more than excellent culinary skills. This article aims to enlighten aspiring food and recipe vloggers about the essentials of video making straight out of the oven, to create enriched content that’s professional, neat, and viral-worthy.
- Part 1: What to Prepare Before Making a Recipe Video?
- Part 2: Make a Cooking Video with Filmora: a Step-by-Step Guide
- Part 3: Tips to Make Your Cooking Videos Stand Out
- Part 4: How to Promote Your Cooking Channel on YouTube?
What to Prepare Before Making a Recipe Video
While you would know best about the prep work needed for the recipes, the prep work for making a video starts with a plan. What goes into the plan?
Brainstorm this equation - Main Content + Duration + Light + Sound + Camera + Camera Angle, Shots & Transition.
The main content is how you picture the finished video. Ask yourself - Do you want an intro gig? Are you going to talk in the video or show only hands and the cooking with a piece of background music? How do you wish to present the ingredients? Would there be additional tips? At what platform are you going to publish your content? How long should be your clippings? Consider all these questions to chalk out a basic framework of your video
The camera is a pivotal element. Whether it is a smartphone or a hi-fidelity digital camera, it is worthwhile to familiarise the best positions and light orientations and the capacity of the device to produce the best quality picture.
How is your sound going to be like? If you are going to talk in the video, it is recommended that you use a microphone. Or else, you can also use background sound. But to mix sound with the video, you’d need an excellent sound editing tool.
Finally, comes the editing and finishing part. Eventually, you’ll need purposive video-editing software to help you work out the video transitions, sound, and visual effects.Choose a toolkit that is easy to learn and that you can get comfortable with so that the job of video editing doesn’t take the focus away from the main task of cooking.

Now, once you have all the essential ingredients to create your video, start practicing. Remember that it is the most natural thing for the first videos to appear amateurish or inept. And that is part of the plan. Don’t be disheartened and keep going.
Make a Cooking Video with Filmora: a Step-by-Step Guide
As one of the easiest-to-use video editing tools, the full-featured Filmora is the right choice considering it can fit most of your needs. Moreover, you’d be delighted to know that the software also has a series of features and functions and even tutorial videos dedicated to cooking videos.


Step 1: Filming the Video
Whether you are going to present a traditional cook-with-me style video or feature the contemporary “jump-cut” style focusing on speedy short videos, you need to prepare all the equipment and ingredients to suit the frame by frame shots. Consider spills, drops, overcooking, etc. as part of the process, so keep adequate substitutes to continue with your project unwaveringly. If you are using a phone, keep it fully charged up. And have a plan beforehand about what you should do when you get an urgent call while shooting. Also, consider doing a site investigation of the shooting spot for any fragile items, pointy corners, slippery areas, curious pets, etc. to avoid trips and falls in the middle of the filming, especially when working with a cameraman who’s following your movement. If you are using a tripod, and floor-standing lights, remember to secure the equipment with plenty of adhesive tapes, lest they bump into an expensive trip or fall.
Step 2: mport Your Video In Filmora
You need to sync the device that you used to film the video with the computer that has Filmora installed. It may be a phone or a camcorder. Once the devices are synced, you should launch the Filmora software and go the “Media” button at the top right toolbar. There you will find the “Import” button. You will get a pop-up message asking you to choose the type of device. Select the right one, and your video will be imported in the Filmora interface.
Step 3: Edit Video Pace: Time-Lapse, Jump Cut, Slow Motion
To create crisp, fast-paced videos, you don’t have to gobble up the content eyeing at the duration. Think smart when you have the resources of a tool like Filmora. Here are the three best features that help you create fast-paced yet well-defined recipes.
Time-Lapse: The time-lapse feature allows you to adjust the speed of the video from slow-motion to 10x faster. To use this, double click on a specific clip in your imported video and open the custom speed settings. Use the adjusting meter beside speed to make your clip as fast or slow as you want. You may use the same feature to introduce the slow-motion effects in certain areas of the video.
Now, when you are using either the fast-forward or slow-motion effects, it is best to have stable video footage with consistent lighting and a static background. There are also the options of Reverse Speed that can play the clip backward, as in flash-back. The Ripple edit feature allows you to cut short a long clip seamlessly.
Jump Cut: The Jump Cut is about snipping unwanted areas in the clip. It may sound like the Ripple edit mentioned above, but the ripple edit is more functional for cutting short a continuous video so that the viewer won’t realize the snip. For the Jump Cut, it doesn’t have to be a constant clip. You can get to the next frame or scene with an abracadabra move.
To use Jump Cut, place the cursor over the starting of the clip that you want to cut, and right-click on it and select “Split” (the “scissors” feature on the toolbar does the same thing). To make this look neat, preview the portion of the clip once again and delete the cuts between two clips with the same right-click.
Step 4: Understanding Transitions on Filmora
Transitions make your video more interactive and help you segregate the video from frame-to-frame with effects like dissolve, fade, flash, etc. there are numerous transition options available within the Filmora suit.
The best way to do this drag and drop the clips on the timeline is to trim parts of the clip to shorten it. Once you have all the clips in place, go to the “Transitions” options at the top toolbar to apply it on the end or start of each clip.
Step 5: Audio, Playback & Sound Edits
There are plenty of options that you can remove background noise, add voiceover, add music, and detach audio from video. Refer to the Audios section from your toolbar.
Step 6: Save to Drive/ Emport/ Publish
Once you are satisfied with your content, then go to Export. Choose the format of the video, MOV, MP4, MPG, etc. and whether you wish to publish directly or save to drive.
Tips to Make Your Cooking Videos Stand Out
- Lighting is your best friend. Invest in some quality spotlights or use the best of daylight.
- Mind your video duration. Short and Simple videos get the most views, but your content should not look incomplete. It is not a fact that long and elaborate videos do not get a place on the table; it is all about the relevance of your content. So don’t stop till you get enough.
- If you appear in the video, keep yourself always look good.
- Keep your video titles relevant and prominent, so that people looking for it can readily find it.
- Have a scrumptious custom thumbnail.
How to Promote Your Cooking Channel on YouTube
- Create an inventory before publishing videos. YouTube vlogging is valued for consistency. If you have a list of 10, 15, 20 videos, then you can have enough time in hand to film your next videos.
- Have a consistent style to create brand recognition. Do you think branding is not for Vlogs? Well, I suppose you might be wrong. Branding is for anyone who uses it.
- Share the link of your YouTube videos on other platforms like Twitter and Facebook.
- Encourage your viewers to comment on the video.
- Explore the different YouTube SEO strategies and use the accurate keywords in your video descriptions with hashtags.
With prior planning and practicing, you are bent on developing more confident moves and camera angles. Once you have that, follow this step by step guide to gain speed and prowess and also enjoy the whole adventure.
Richard Bennett
Richard Bennett is a writer and a lover of all things video.
Follow @Richard Bennett
Richard Bennett
Mar 27, 2024• Proven solutions
Cooking and food-oriented videos are among the most outreaching and popular categories of content to publish online, notably, on YouTube, Facebook, or Instagram. So if you are a cooking aficionado, you have excellent potential to gain positive attention and a loyal audience. But to create engaging videos, you’d need a lot more than excellent culinary skills. This article aims to enlighten aspiring food and recipe vloggers about the essentials of video making straight out of the oven, to create enriched content that’s professional, neat, and viral-worthy.
- Part 1: What to Prepare Before Making a Recipe Video?
- Part 2: Make a Cooking Video with Filmora: a Step-by-Step Guide
- Part 3: Tips to Make Your Cooking Videos Stand Out
- Part 4: How to Promote Your Cooking Channel on YouTube?
What to Prepare Before Making a Recipe Video
While you would know best about the prep work needed for the recipes, the prep work for making a video starts with a plan. What goes into the plan?
Brainstorm this equation - Main Content + Duration + Light + Sound + Camera + Camera Angle, Shots & Transition.
The main content is how you picture the finished video. Ask yourself - Do you want an intro gig? Are you going to talk in the video or show only hands and the cooking with a piece of background music? How do you wish to present the ingredients? Would there be additional tips? At what platform are you going to publish your content? How long should be your clippings? Consider all these questions to chalk out a basic framework of your video
The camera is a pivotal element. Whether it is a smartphone or a hi-fidelity digital camera, it is worthwhile to familiarise the best positions and light orientations and the capacity of the device to produce the best quality picture.
How is your sound going to be like? If you are going to talk in the video, it is recommended that you use a microphone. Or else, you can also use background sound. But to mix sound with the video, you’d need an excellent sound editing tool.
Finally, comes the editing and finishing part. Eventually, you’ll need purposive video-editing software to help you work out the video transitions, sound, and visual effects.Choose a toolkit that is easy to learn and that you can get comfortable with so that the job of video editing doesn’t take the focus away from the main task of cooking.
Now, once you have all the essential ingredients to create your video, start practicing. Remember that it is the most natural thing for the first videos to appear amateurish or inept. And that is part of the plan. Don’t be disheartened and keep going.
Make a Cooking Video with Filmora: a Step-by-Step Guide
As one of the easiest-to-use video editing tools, the full-featured Filmora is the right choice considering it can fit most of your needs. Moreover, you’d be delighted to know that the software also has a series of features and functions and even tutorial videos dedicated to cooking videos.
Step 1: Filming the Video
Whether you are going to present a traditional cook-with-me style video or feature the contemporary “jump-cut” style focusing on speedy short videos, you need to prepare all the equipment and ingredients to suit the frame by frame shots. Consider spills, drops, overcooking, etc. as part of the process, so keep adequate substitutes to continue with your project unwaveringly. If you are using a phone, keep it fully charged up. And have a plan beforehand about what you should do when you get an urgent call while shooting. Also, consider doing a site investigation of the shooting spot for any fragile items, pointy corners, slippery areas, curious pets, etc. to avoid trips and falls in the middle of the filming, especially when working with a cameraman who’s following your movement. If you are using a tripod, and floor-standing lights, remember to secure the equipment with plenty of adhesive tapes, lest they bump into an expensive trip or fall.
Step 2: mport Your Video In Filmora
You need to sync the device that you used to film the video with the computer that has Filmora installed. It may be a phone or a camcorder. Once the devices are synced, you should launch the Filmora software and go the “Media” button at the top right toolbar. There you will find the “Import” button. You will get a pop-up message asking you to choose the type of device. Select the right one, and your video will be imported in the Filmora interface.
Step 3: Edit Video Pace: Time-Lapse, Jump Cut, Slow Motion
To create crisp, fast-paced videos, you don’t have to gobble up the content eyeing at the duration. Think smart when you have the resources of a tool like Filmora. Here are the three best features that help you create fast-paced yet well-defined recipes.
Time-Lapse: The time-lapse feature allows you to adjust the speed of the video from slow-motion to 10x faster. To use this, double click on a specific clip in your imported video and open the custom speed settings. Use the adjusting meter beside speed to make your clip as fast or slow as you want. You may use the same feature to introduce the slow-motion effects in certain areas of the video.
Now, when you are using either the fast-forward or slow-motion effects, it is best to have stable video footage with consistent lighting and a static background. There are also the options of Reverse Speed that can play the clip backward, as in flash-back. The Ripple edit feature allows you to cut short a long clip seamlessly.
Jump Cut: The Jump Cut is about snipping unwanted areas in the clip. It may sound like the Ripple edit mentioned above, but the ripple edit is more functional for cutting short a continuous video so that the viewer won’t realize the snip. For the Jump Cut, it doesn’t have to be a constant clip. You can get to the next frame or scene with an abracadabra move.
To use Jump Cut, place the cursor over the starting of the clip that you want to cut, and right-click on it and select “Split” (the “scissors” feature on the toolbar does the same thing). To make this look neat, preview the portion of the clip once again and delete the cuts between two clips with the same right-click.
Step 4: Understanding Transitions on Filmora
Transitions make your video more interactive and help you segregate the video from frame-to-frame with effects like dissolve, fade, flash, etc. there are numerous transition options available within the Filmora suit.
The best way to do this drag and drop the clips on the timeline is to trim parts of the clip to shorten it. Once you have all the clips in place, go to the “Transitions” options at the top toolbar to apply it on the end or start of each clip.
Step 5: Audio, Playback & Sound Edits
There are plenty of options that you can remove background noise, add voiceover, add music, and detach audio from video. Refer to the Audios section from your toolbar.
Step 6: Save to Drive/ Emport/ Publish
Once you are satisfied with your content, then go to Export. Choose the format of the video, MOV, MP4, MPG, etc. and whether you wish to publish directly or save to drive.
Tips to Make Your Cooking Videos Stand Out
- Lighting is your best friend. Invest in some quality spotlights or use the best of daylight.
- Mind your video duration. Short and Simple videos get the most views, but your content should not look incomplete. It is not a fact that long and elaborate videos do not get a place on the table; it is all about the relevance of your content. So don’t stop till you get enough.
- If you appear in the video, keep yourself always look good.
- Keep your video titles relevant and prominent, so that people looking for it can readily find it.
- Have a scrumptious custom thumbnail.
How to Promote Your Cooking Channel on YouTube
- Create an inventory before publishing videos. YouTube vlogging is valued for consistency. If you have a list of 10, 15, 20 videos, then you can have enough time in hand to film your next videos.
- Have a consistent style to create brand recognition. Do you think branding is not for Vlogs? Well, I suppose you might be wrong. Branding is for anyone who uses it.
- Share the link of your YouTube videos on other platforms like Twitter and Facebook.
- Encourage your viewers to comment on the video.
- Explore the different YouTube SEO strategies and use the accurate keywords in your video descriptions with hashtags.
With prior planning and practicing, you are bent on developing more confident moves and camera angles. Once you have that, follow this step by step guide to gain speed and prowess and also enjoy the whole adventure.
Richard Bennett
Richard Bennett is a writer and a lover of all things video.
Follow @Richard Bennett
The Ascent of Jake Paul in Online Video Fame
Jake Paul’s YouTube Success Story - All You Need to Know
Richard Bennett
Oct 26, 2023• Proven solutions
There is a lot to learn about YouTube success from Jake Paul. With more than 300 hours of video uploaded onto YouTube every minute by more than ten million content creators, standing out from the competition and becoming a YouTube star can seem impossible. But, Jake Paul managed to achieve that in a short amount of time.
How Old Is Jake Paul?
Twenty-three-year-old Jake Joseph Paul was born in Cleveland, Ohio, the U.S. on January 17, 1997, to realtor father Greg Paul and nurse mother, Pam Stepnick.
Logan Paul and Jake Paul
He and his older brother, Logan, grew up in Westlake, Ohio, and played a lot of football together growing up. Jake’s childhood dream was to play for the NFL. Thinking they might enjoy filming themselves playing football, their father got them a camera. With this camera, Jake and his brother began filming themselves doing skits, pranks, and scripted videos.
Jake’s favorite YouTube channel at the time was “Smosh,” featuring the comedic duo Ian Hecox and Anthony Padilla. Smosh was such an inspiration to them that the two Paul brothers started their own channel, “Zoosh” (notice the similar-sounding channel name?) - their old Zoosh channel and videos are still publicly available on YouTube.
For the majority of his years in school, Jake was the class clown. As he got older, though, he focused on football and wrestling and made it into his school’s varsity wrestling team. Around this time, Jake also began to contemplate what he would do after high school. Figuring he wanted to join the U.S. Navy SEALs, Jake started training for recruitment.
But before Jake fully invested his energy into training for the U.S. Navy SEALS, his brother, Logan, convinced him to make videos with him again (by this time, Logan had already built up a large following on Vine, the short-form video hosting service).

Image resource: BBC NEWS
Together with his older brother Logan, Jake also amassed a large following and eventually began receiving paid sponsorships, at which point Jake realized that he could make a career out of video content creation.
Curious, young, and adventurous, at the age of seventeen, after discussing with his mother, Jake dropped out of high school, put aside his pursuit to join the Navy SEALs, and moved to Los Angeles without much of a plan.
Jake Paul and Disney
Not wasting a single day in L.A., Jake went straight to taking acting and improv classes, growing his social media, and networking with everyone he could meet in the entertainment industry. In 2015, Jake auditioned for Disney Channel’s comedy series “Bizaardvark” and successfully landed the role of “Dirk.” However, the Disney Channel grew more and more uncomfortable with Jake’s growing image as an outrageous teenager. After Jake made it onto the KTLA 5 news for the noise complaints around his mansion, the Disney Channel fired him from Bizaardvark.

Image resource:tubefilter.com
Team 10
In 2016, with all of his many exciting experiences, Jake put together a humorous and motivational memoir titled “You Gotta Want It.” As his own social media channels kept on growing rapidly, Jake launched “Team 10,” his own influencer management agency comprised of other teen social media influencers. In order to collaborate with one another more easily, they all moved in together to a Beverly Grove mansion that rents for $17,000 USD a month. After Jake publicized his address, the mansion attracted so many fans that neighbors filed multiple noise complaints and even contemplated filing a class-action public nuisance lawsuit against Jake.
More than a home, the mansion became a film set. The teenage tenants filmed themselves pranking one another and being as outrageous as teenagers can possibly be.
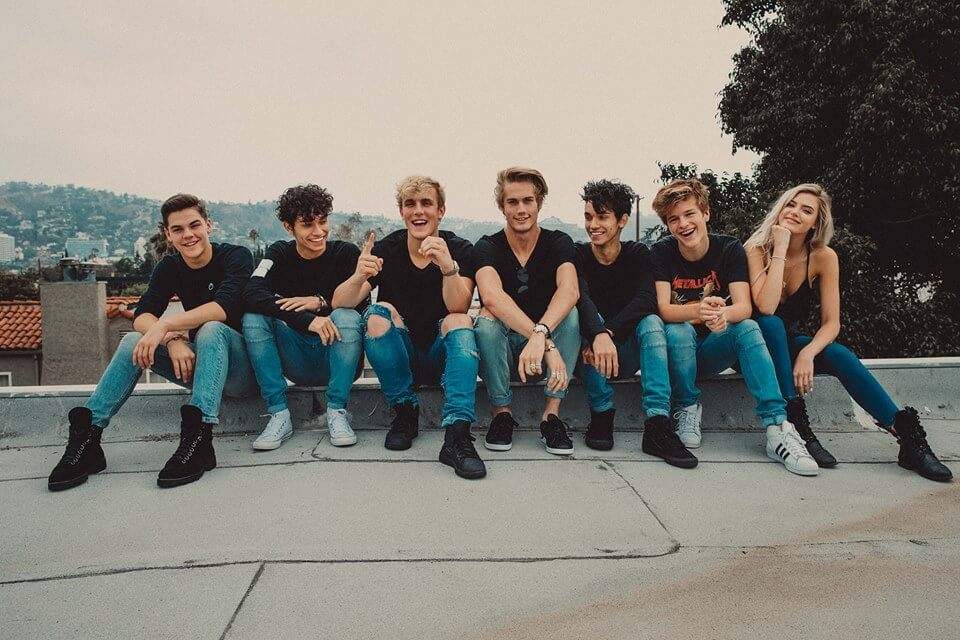
Image resource:venturebeat.com
On May 30, 2017, Jake uploaded a rap music video with Team 10 titled “It’s Everyday Bro.” While Jake is no stranger to making popular videos, the number of views this music video garnered was on another level. The stark difference between the high production quality of the video and the unimpressive lyrical content may have been the perfect combination that catapulted the video’s success.
As it always happens with all videos that go viral, many YouTubers jumped on the bandwagon and made their own reaction videos to “It’s Everyday Bro,” mostly making fun of Jake. Some big-name YouTubers, including his own brother, even went as far as producing their own “diss track” music video. This drama created even more heavy traffic around Jake, which he cleverly responded with more video content.
Despite all of these oppositions in his life, Jake continues to work hard to build his social media empire. Looking at all the many strategies he has already successfully executed from such a young age, and I have no doubts that Jake will continue to push the boundaries of social media and content creation in the years to come.
What About Social Media Success Can We Learn From Jake Paul?
Quick Follower Growth Through First-Mover Advantage
When a new social media service pops up, there’s so much opportunity to quickly rack up a huge number of followers simply by being one of the early content creators on that platform. This was the case for the Paul brothers on Vine. After the fall of Vine, the Paul brothers were able to migrate their Vine fans over to YouTube.
Jake has a very good understanding of who his audience is. He knows that his audience is young. By knowing the age group that the majority of his audience falls under, Jake is then able to tailor his content in a way that captures his audience’s attention most effectively. Through high-energy prank videos and daring stunts, Jake is able to supply his audience with the content that they want. As a YouTuber, you can get an idea of who your main audience is by accessing your channel’s analytics.
Commitment To Consistent Delivery of Audience-Centered Content
Jake made a serious commitment to delivering audience-centered content. Jake moved into a house full of other teenagers also committed to content creation, and they all filmed themselves doing pranks and stunts every day.
Get the ultimate guide to growing your YouTube subscribers
Do you want to be a YouTuber? If you desire to be a YouTuber yet not knowing how to edit a video, please try this robust and user-friendly video editing software Wondershare Filmora. It provides special effects, stock photo & video, sound library, etc., which will definitely enhance your productivity and helps to make money by making videos much accessible.
Richard Bennett
Richard Bennett is a writer and a lover of all things video.
Follow @Richard Bennett
Richard Bennett
Oct 26, 2023• Proven solutions
There is a lot to learn about YouTube success from Jake Paul. With more than 300 hours of video uploaded onto YouTube every minute by more than ten million content creators, standing out from the competition and becoming a YouTube star can seem impossible. But, Jake Paul managed to achieve that in a short amount of time.
How Old Is Jake Paul?
Twenty-three-year-old Jake Joseph Paul was born in Cleveland, Ohio, the U.S. on January 17, 1997, to realtor father Greg Paul and nurse mother, Pam Stepnick.
Logan Paul and Jake Paul
He and his older brother, Logan, grew up in Westlake, Ohio, and played a lot of football together growing up. Jake’s childhood dream was to play for the NFL. Thinking they might enjoy filming themselves playing football, their father got them a camera. With this camera, Jake and his brother began filming themselves doing skits, pranks, and scripted videos.
Jake’s favorite YouTube channel at the time was “Smosh,” featuring the comedic duo Ian Hecox and Anthony Padilla. Smosh was such an inspiration to them that the two Paul brothers started their own channel, “Zoosh” (notice the similar-sounding channel name?) - their old Zoosh channel and videos are still publicly available on YouTube.
For the majority of his years in school, Jake was the class clown. As he got older, though, he focused on football and wrestling and made it into his school’s varsity wrestling team. Around this time, Jake also began to contemplate what he would do after high school. Figuring he wanted to join the U.S. Navy SEALs, Jake started training for recruitment.
But before Jake fully invested his energy into training for the U.S. Navy SEALS, his brother, Logan, convinced him to make videos with him again (by this time, Logan had already built up a large following on Vine, the short-form video hosting service).
Image resource: BBC NEWS
Together with his older brother Logan, Jake also amassed a large following and eventually began receiving paid sponsorships, at which point Jake realized that he could make a career out of video content creation.
Curious, young, and adventurous, at the age of seventeen, after discussing with his mother, Jake dropped out of high school, put aside his pursuit to join the Navy SEALs, and moved to Los Angeles without much of a plan.
Jake Paul and Disney
Not wasting a single day in L.A., Jake went straight to taking acting and improv classes, growing his social media, and networking with everyone he could meet in the entertainment industry. In 2015, Jake auditioned for Disney Channel’s comedy series “Bizaardvark” and successfully landed the role of “Dirk.” However, the Disney Channel grew more and more uncomfortable with Jake’s growing image as an outrageous teenager. After Jake made it onto the KTLA 5 news for the noise complaints around his mansion, the Disney Channel fired him from Bizaardvark.

Image resource:tubefilter.com
Team 10
In 2016, with all of his many exciting experiences, Jake put together a humorous and motivational memoir titled “You Gotta Want It.” As his own social media channels kept on growing rapidly, Jake launched “Team 10,” his own influencer management agency comprised of other teen social media influencers. In order to collaborate with one another more easily, they all moved in together to a Beverly Grove mansion that rents for $17,000 USD a month. After Jake publicized his address, the mansion attracted so many fans that neighbors filed multiple noise complaints and even contemplated filing a class-action public nuisance lawsuit against Jake.
More than a home, the mansion became a film set. The teenage tenants filmed themselves pranking one another and being as outrageous as teenagers can possibly be.
Image resource:venturebeat.com
On May 30, 2017, Jake uploaded a rap music video with Team 10 titled “It’s Everyday Bro.” While Jake is no stranger to making popular videos, the number of views this music video garnered was on another level. The stark difference between the high production quality of the video and the unimpressive lyrical content may have been the perfect combination that catapulted the video’s success.
As it always happens with all videos that go viral, many YouTubers jumped on the bandwagon and made their own reaction videos to “It’s Everyday Bro,” mostly making fun of Jake. Some big-name YouTubers, including his own brother, even went as far as producing their own “diss track” music video. This drama created even more heavy traffic around Jake, which he cleverly responded with more video content.
Despite all of these oppositions in his life, Jake continues to work hard to build his social media empire. Looking at all the many strategies he has already successfully executed from such a young age, and I have no doubts that Jake will continue to push the boundaries of social media and content creation in the years to come.
What About Social Media Success Can We Learn From Jake Paul?
Quick Follower Growth Through First-Mover Advantage
When a new social media service pops up, there’s so much opportunity to quickly rack up a huge number of followers simply by being one of the early content creators on that platform. This was the case for the Paul brothers on Vine. After the fall of Vine, the Paul brothers were able to migrate their Vine fans over to YouTube.
Jake has a very good understanding of who his audience is. He knows that his audience is young. By knowing the age group that the majority of his audience falls under, Jake is then able to tailor his content in a way that captures his audience’s attention most effectively. Through high-energy prank videos and daring stunts, Jake is able to supply his audience with the content that they want. As a YouTuber, you can get an idea of who your main audience is by accessing your channel’s analytics.
Commitment To Consistent Delivery of Audience-Centered Content
Jake made a serious commitment to delivering audience-centered content. Jake moved into a house full of other teenagers also committed to content creation, and they all filmed themselves doing pranks and stunts every day.
Get the ultimate guide to growing your YouTube subscribers
Do you want to be a YouTuber? If you desire to be a YouTuber yet not knowing how to edit a video, please try this robust and user-friendly video editing software Wondershare Filmora. It provides special effects, stock photo & video, sound library, etc., which will definitely enhance your productivity and helps to make money by making videos much accessible.
Richard Bennett
Richard Bennett is a writer and a lover of all things video.
Follow @Richard Bennett
Also read:
- [New] Amass Higher Views with #Powerful YouTube Tags
- 2024 Approved Amplify Your Content Techniques for Successful Youtube & Twitch Multi-Streams
- Crafting Captivating Animations Creating GIFs From Your Favorite YouTube Videos
- In 2024, Cut The Cost, Not Your Content Quality - Try These Top 8 Free Tools
- Channel Charisma Techniques for Amplifying YouTube Visibility
- [New] Behind the Scenes of Gamers' Elite Setup
- Shorts Display Enhanced – Update Complete
- [Updated] Audio-to-Text Converter for Videos
- 2024 Approved Charting Your Course in the World of YouTube Tracking Success & Monetary Value
- Calculating Your Digital Footprint Understanding Views & Income From YouTube for 2024
- Captivating Your Audience YouTube Intro Excellence with iMovie for 2024
- Affordable Mic Picks for Aspiring YT Bands
- Cutting Edge Creativity Choosing High-Quality Camera Lenses for 2024
- In 2024, A Comprehenensive Guide to YouTube Studio's Editing Features
- Boosting Your YT Subs A Complete Strategy Guide for 2024
- Mastering Tagging Elevate Your YouTube Content
- Simplify Your Path to YouTube Short Mastery
- YouTube's Income Leap at 500 Subs Count
- Dive Into iOS Screenshots A Comprehensive YouTube Guide for 2024
- Designing Short Trailers That Tell a Story for 2024
- Crafting Content for Success How to Start Your Own YouTube Chanel for 2024
- Crafting a Unique Online Presence YouTube Edition for 2024
- Free Yourself with Top 4 Applications for YouTube-to-WAV Conversion
- 2024 Approved Creating Custom Subscribe URLs for Online Content
- [New] Avoiding YouTube's Controversial Scrutiny
- Crafting Powerful Thumbnails with Top 20 Font Options
- [New] Crafting Captivating YouTube Thumbnails A Sizing Guide
- Optimal Livestream Capture Options for Video Artists
- In 2024, Conquer Copious Drafts with Clever Edits on TikTok
- In 2024, 3 Facts You Need to Know about Screen Mirroring Oppo Find N3 | Dr.fone
- In 2024, Step-By-Step Techniques for Embedding Audio Into Videos
- What To Do if Your Infinix Note 30 VIP Auto Does Not Work | Dr.fone
- [New] Authenticity Matters Selecting Reliable TikTok Followers
- [New] In 2024, The Ultimate Tutorial Creating Instagram-Ready Videos with Final Cut Pro X
- In 2024, Premium, Planet-Friendly Recording Software
- New Mastering the Art of Selecting Purpose-Driven Instrumental Music in Videos for 2024
- [Updated] X-Professional Studio for Windows for 2024
- 5 Most Effective Methods to Unlock iPhone 15 Pro in Lost Mode
- Updated Essential Audio Recorders The Top MP3 Software Compatible with PC & Mac OS
- [New] 2024 Approved Crafting Compelling Storylines with Top 20 Anime Influences on TikTok
- [New] Tutorial Uploading YouTube to Instagram Stories Effortlessly
- Reliable User Guide to Fix Motorola Moto G73 5G Running Slow and Freezing | Dr.fone
- Video File Repair - How to Fix Corrupted video files of Sony Xperia 10 V?
- In 2024, A Quick Guide Secure Your Instagram Stories with Screen Record
- New 3 Quick Ways to Convert Audio to Text for FreeStep-by-Step Guide
- 2024 Approved Eternal Clip Saver Software
- Updated 2024 Approved Mastering Mobile Audio Recordings The 10 Leading iPhone Apps
- [New] 2024 Approved ImpeccableCapture Studio Suite (Windows 10 Edition)
- In 2024, 15 Snapshot Strategies for Social Success on Snapchat
- [New] SocialVideo Saver – Messenger Edition
- How to Restore iPhone from Backup when iTunes Backup is Corrupt or not compatible | Stellar
- Title: "[Updated] Epicurean Epiphanies Filming Feast Creation"
- Author: Kevin
- Created at : 2024-05-25 16:52:13
- Updated at : 2024-05-26 16:52:13
- Link: https://youtube-videos.techidaily.com/updated-epicurean-epiphanies-filming-feast-creation/
- License: This work is licensed under CC BY-NC-SA 4.0.
