
!["[Updated] Enhance Creativity in Video Editing - These 7 Sources"](https://www.lifewire.com/thmb/pqu2By75ru8MJlTZ4i-iemNOlJg=/400x300/filters:no_upscale():max_bytes(150000):strip_icc()/ledephoto-820c7f6e8d3747c396c4fae1032ac4b4.jpg)
"[Updated] Enhance Creativity in Video Editing - These 7 Sources"
Enhance Creativity in Video Editing - These 7 Sources
7 Places to Find Royalty Free Sound Effects for YouTube Videos

Richard Bennett
Mar 27, 2024• Proven solutions
Sound effects can add a lot of excitement to your videos. Sometimes they are even used for comedic effect. For example, you might use a fake slap sound in a slapstick comedy sketch. Other times sound effects can be more subtle. You might want to add city noises to the background of your video to help set your scene, or a droning sound to build suspense. A lot of the most popular free sound effects are related to the genres of science fiction or action.
- Part 1: Three Types of Sound Effects
- Part 2: Royalty-Free Sound Effects for Your YouTube Videos
- Part 3: Free Sound Effects and Music in Filmora
Part 1: Three Types of Sound Effects
1. Without License
When you want to download sound effects for YouTube, the licensed ones cannot be used, but there are a few that do not hold a license and can be easily downloaded from the website. The quality might be poor to some extent, but you may use the sound effects without a license in any product or video.
2. Creative Commons License
The sound effects under the CC license need to be checked for their type. There are some vlog sound effects that can be used for personal projects free but not for commercial ones. There are a few sound effects that might just require attribution or credit to the creator and cannot be modified in any way.
3. Royalty-free license
You may download sound effects for YouTube by purchasing the licensed sound effects that a professional offers. When you purchase it, you will get high-quality sound, and you may use it on one or more projects, irrespective of personal or commercial types.
Where can you get free sound effects and edit audios at the same time? Just try Filmora for free!


Part 2: Royalty-Free Sound Effects for Your YouTube Videos
This article will introduce you to the six best sites to find royalty-free sound effects and explain their terms of use.
1.YouTube Audio Library – Free!
Besides royalty-free music, the YouTube Audio Library also has sound effects that you can download for free. The sound effects in YouTube’s library are organized into categories. You can select a category, i.e ‘sci-fi’, from the drop-down menu next to the search bar and browse through just the types of sounds you are interested in. You can also favorite sounds you like so you can find them again easily.
The sound effects you download from YouTube’s library can be used as many times as you like and in as many different projects. Monetizing your videos will not impact your ability to use these sound effects either. Some other sources of sound effects have different rules about monetizing or using sound effects in multiple projects.
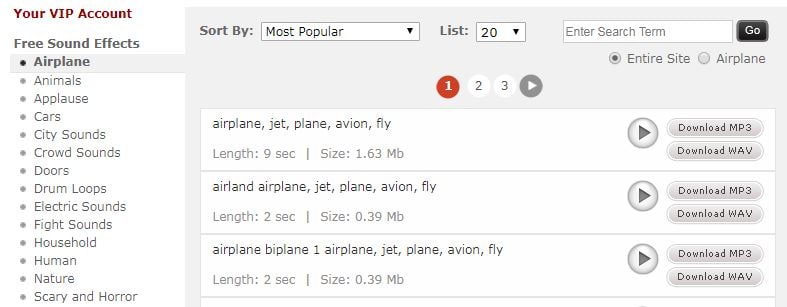
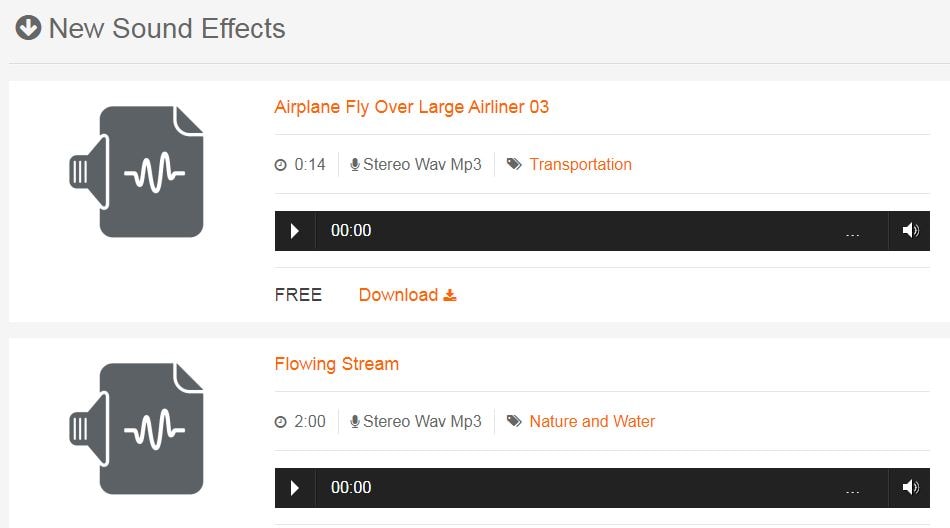
2.Freesound – Free!
![]()
Freesound.org is a huge database of royalty-free sound effects and other audio files. All downloads are free, but there are conditions for using some of the sounds on Freesound. There are three different Creative Commons licenses uses on Freesound and which one applies to the sound effect you want depends on the user who posted it.
The three licenses used on Freesound are Zero, Attribution, and Attribution-Noncommercial.
Zero (cc0): you can do anything you want with these sound effects except claim that you created them. You can make money off of them and you do not have to credit the original creator.
Attribution (by): you should credit the creator of the sound. Usually, this means adding a ‘Sound effect by Username on Freesound’ line in the description of your video. So long as you credit the artists you can do anything with these sounds, even monetize the videos you use them in.
Attribution-Noncommercial (by –nc): you must credit the creators of these sound effects and you cannot make money off of them. This means that you cannot monetize a video in which you used these sound effects.
Freesound is a social site where you can talk to the creators of the sounds you want to download. If you are planning to monetize a video that uses an Attribution-Noncommercial sound effect you can always ask the artist for permission.
I’ve also found a YouTube video that explains the Creative Commons in detail. You can watch it below.
3.AudioJungle - $1 and Up

AudioJungle.net has a wide selection of royalty-free sound effects available for prices as low as $1. Sound effects costing more than $10 tend to either be longer or include whole sets of sounds. You can filter the sounds on AudioJungle by category, tags, and price while you browse.
There are two different licenses you can purchase on AudioJungle, SFX Single Use, and SFX Multi-Use. The prices displayed are all for the Single Use license. The Multi-Use license costs more.
The main difference between the two licenses on AudioJungle is how many projects you can use your sound effect in. If you purchase a sound under a Single-Use license you can only use it in one project. You can use it as many times as you want within that project, and you can even make money off of that project, but you cannot use it again in a second project unless you repurchase it. While it is more expensive, the Multi-Use license gives you unlimited use of your download.
If you decide to use sound effects from any of these sites then please make sure to read their more detailed legal information.
4.Free Sound Effects
The Free Sound Effects lets you access free as well as licensed sound effects. If you want to download sound effects for YouTube videos, the legally licensed soundtracks with high-quality effects can be selected from the Pro Sound Effects sections. These are royalty-free sound effects.
It requires a one-time fee and you get access to use the sound effects as many times you want for your projects. But, if you are not really serious and just creating videos out of fun, you may also try the free sound effects like animals, applause, cars, etc. to ensure good vlog sound effects that can give life to your vlog.
5.Soundsnap

Whether you wish to spice up your games videos or make the notification alerts hilarious, the Soundsnap app lets you download some of the most amazing sound effects. It is the best platform to search and also share the free vlog sound effects or loops legally. Soundsnap offers original sound effects created by the users and not the edited or mixed sounds that you find in usual commercial libraries. It features above 200,000 loops and sound effects created by expert and knowledgeable music producers and sound engineers.
6.PacDV Free Sound Effects
Now, you may create vlog sound effects from this royalty-free library of sounds produced by film students, multimedia developers, sound designers, music producers, etc. On the PacDV Free Sound Effects site, you can find free sound clips that have been used in a number of films, television programs, and videos.
You may definitely enjoy downloading sound effects for YouTube from this site completely free but cannot sell it or re-license it to anyone for your benefit. It must be used by you for your video only. The sound clips must not be put on site for download or link to other sound files.
Part 3: Get Free Sound Effects for YouTube Video in Filmora
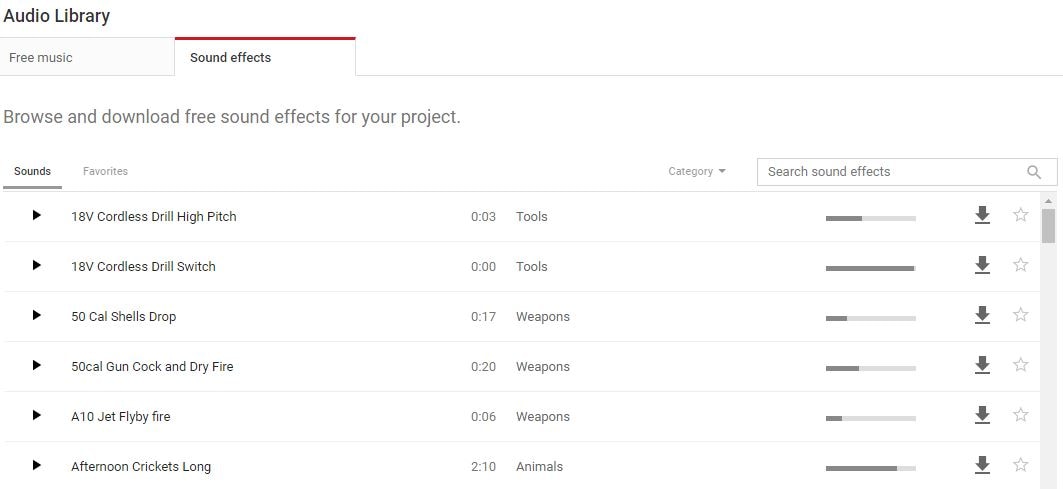
If you’re using the Filmora video editor to produce YouTube videos, then you have a free sound effect library already. You can find them in the Audio library (shown below).

There are currently 25 different sound effects available, varying from animal, machine, people, sci-fi, and ambiance. After adding the sound effect to the timeline, you can change the speed to make the sound sounds fun.
Richard Bennett
Richard Bennett is a writer and a lover of all things video.
Follow @Richard Bennett
Richard Bennett
Mar 27, 2024• Proven solutions
Sound effects can add a lot of excitement to your videos. Sometimes they are even used for comedic effect. For example, you might use a fake slap sound in a slapstick comedy sketch. Other times sound effects can be more subtle. You might want to add city noises to the background of your video to help set your scene, or a droning sound to build suspense. A lot of the most popular free sound effects are related to the genres of science fiction or action.
- Part 1: Three Types of Sound Effects
- Part 2: Royalty-Free Sound Effects for Your YouTube Videos
- Part 3: Free Sound Effects and Music in Filmora
Part 1: Three Types of Sound Effects
1. Without License
When you want to download sound effects for YouTube, the licensed ones cannot be used, but there are a few that do not hold a license and can be easily downloaded from the website. The quality might be poor to some extent, but you may use the sound effects without a license in any product or video.
2. Creative Commons License
The sound effects under the CC license need to be checked for their type. There are some vlog sound effects that can be used for personal projects free but not for commercial ones. There are a few sound effects that might just require attribution or credit to the creator and cannot be modified in any way.
3. Royalty-free license
You may download sound effects for YouTube by purchasing the licensed sound effects that a professional offers. When you purchase it, you will get high-quality sound, and you may use it on one or more projects, irrespective of personal or commercial types.
Where can you get free sound effects and edit audios at the same time? Just try Filmora for free!
Part 2: Royalty-Free Sound Effects for Your YouTube Videos
This article will introduce you to the six best sites to find royalty-free sound effects and explain their terms of use.
1.YouTube Audio Library – Free!
Besides royalty-free music, the YouTube Audio Library also has sound effects that you can download for free. The sound effects in YouTube’s library are organized into categories. You can select a category, i.e ‘sci-fi’, from the drop-down menu next to the search bar and browse through just the types of sounds you are interested in. You can also favorite sounds you like so you can find them again easily.
The sound effects you download from YouTube’s library can be used as many times as you like and in as many different projects. Monetizing your videos will not impact your ability to use these sound effects either. Some other sources of sound effects have different rules about monetizing or using sound effects in multiple projects.
2.Freesound – Free!
![]()
Freesound.org is a huge database of royalty-free sound effects and other audio files. All downloads are free, but there are conditions for using some of the sounds on Freesound. There are three different Creative Commons licenses uses on Freesound and which one applies to the sound effect you want depends on the user who posted it.
The three licenses used on Freesound are Zero, Attribution, and Attribution-Noncommercial.
Zero (cc0): you can do anything you want with these sound effects except claim that you created them. You can make money off of them and you do not have to credit the original creator.
Attribution (by): you should credit the creator of the sound. Usually, this means adding a ‘Sound effect by Username on Freesound’ line in the description of your video. So long as you credit the artists you can do anything with these sounds, even monetize the videos you use them in.
Attribution-Noncommercial (by –nc): you must credit the creators of these sound effects and you cannot make money off of them. This means that you cannot monetize a video in which you used these sound effects.
Freesound is a social site where you can talk to the creators of the sounds you want to download. If you are planning to monetize a video that uses an Attribution-Noncommercial sound effect you can always ask the artist for permission.
I’ve also found a YouTube video that explains the Creative Commons in detail. You can watch it below.
3.AudioJungle - $1 and Up
AudioJungle.net has a wide selection of royalty-free sound effects available for prices as low as $1. Sound effects costing more than $10 tend to either be longer or include whole sets of sounds. You can filter the sounds on AudioJungle by category, tags, and price while you browse.
There are two different licenses you can purchase on AudioJungle, SFX Single Use, and SFX Multi-Use. The prices displayed are all for the Single Use license. The Multi-Use license costs more.
The main difference between the two licenses on AudioJungle is how many projects you can use your sound effect in. If you purchase a sound under a Single-Use license you can only use it in one project. You can use it as many times as you want within that project, and you can even make money off of that project, but you cannot use it again in a second project unless you repurchase it. While it is more expensive, the Multi-Use license gives you unlimited use of your download.
If you decide to use sound effects from any of these sites then please make sure to read their more detailed legal information.
4.Free Sound Effects
The Free Sound Effects lets you access free as well as licensed sound effects. If you want to download sound effects for YouTube videos, the legally licensed soundtracks with high-quality effects can be selected from the Pro Sound Effects sections. These are royalty-free sound effects.
It requires a one-time fee and you get access to use the sound effects as many times you want for your projects. But, if you are not really serious and just creating videos out of fun, you may also try the free sound effects like animals, applause, cars, etc. to ensure good vlog sound effects that can give life to your vlog.
5.Soundsnap
Whether you wish to spice up your games videos or make the notification alerts hilarious, the Soundsnap app lets you download some of the most amazing sound effects. It is the best platform to search and also share the free vlog sound effects or loops legally. Soundsnap offers original sound effects created by the users and not the edited or mixed sounds that you find in usual commercial libraries. It features above 200,000 loops and sound effects created by expert and knowledgeable music producers and sound engineers.
6.PacDV Free Sound Effects
Now, you may create vlog sound effects from this royalty-free library of sounds produced by film students, multimedia developers, sound designers, music producers, etc. On the PacDV Free Sound Effects site, you can find free sound clips that have been used in a number of films, television programs, and videos.
You may definitely enjoy downloading sound effects for YouTube from this site completely free but cannot sell it or re-license it to anyone for your benefit. It must be used by you for your video only. The sound clips must not be put on site for download or link to other sound files.
Part 3: Get Free Sound Effects for YouTube Video in Filmora
If you’re using the Filmora video editor to produce YouTube videos, then you have a free sound effect library already. You can find them in the Audio library (shown below).
There are currently 25 different sound effects available, varying from animal, machine, people, sci-fi, and ambiance. After adding the sound effect to the timeline, you can change the speed to make the sound sounds fun.
Richard Bennett
Richard Bennett is a writer and a lover of all things video.
Follow @Richard Bennett
Keylight: Secrets to Stellar Lighting on Your YouTube Videos
How To Light Your YouTube Video
Richard Bennett
Oct 26, 2023• Proven solutions
When it comes to sensitivity to light, no consumer-level camera sensor comes close in performance to the human eye. Many newbies to videography, though, don’t think about this when they use their camera indoors and discover that their recorded footage appears too dark.
If you want to use your camera indoors as many YouTubers do, you’ll need to have extra light. But the solution is not as simple as surrounding yourself with lamps that are all randomly placed.
Below, I’ll go into detail on how you can set up your lighting equipment to make your YouTube videos look good.
| Table of Contents Using Light You Already Have Window LightingHome Lighting Home Studio Lighting Light Control3-Point Lighting4-Point Lighting |
|---|
Part 1: Using Light You Already Have
Most beginner YouTubers light their videos with what they already have. That’s what I did to start as well. In the past, my video recording space consisted of natural sunlight coming from my window and ceiling light for times when the sunlight wasn’t strong enough.
1. Window Lighting
The best thing about window lighting is that it’s free. The worst thing about it is that it’s uncontrollable. The amount of light you get in your video can vary with all the changes in the weather.
Window lighting for me was especially difficult to work with because I live in a very rainy and cloudy city, Vancouver, Canada, where we pretty much just get three months of good sun.

Above are two freeze frames from one of Daniel’s past window-lit vlogs. Although these two frames are both from the same vlog, you can see that the image on the right looks brighter due to clearer skies at that moment. These varying amounts of light is what you will have to deal with if you choose to light your YouTube video with window lighting.
2. Home Lighting
Home lighting is another source of light that many new YouTubers use. In the past, when my window light wasn’t strong enough to light my video recording space, I would turn on the ceiling light.

Notice how the color of Daniel’s skin looks much more orange here (above) than the color of the skin in the two side-by-side window lighting examples? The side of the face also appears to look bluer. This all happened because he mixed up different color temperatures shining out of the two lights (cooler window light and warmer ceiling light).
Most home lighting is warmer in its color temperature. If you want to use your home lights without everything being orange-tinted, you’ll need to switch out your light bulbs for daytime LED light bulbs.
Ceiling lights are also typically situated in the center of a room in order to light an entire room evenly. This is not likely to be the best location for your filming video. Since the ceiling light was directly above the face in the above example, you can see harder shadows beneath his cheeks.
Part 2: Home Studio Lighting
If you rather not deal with all the window and home lighting challenges, you can set up studio lighting in your home.
1. Light Control
The first thing you’ll want to do to set up studio lighting in your home is to pick a room to film in and eliminate as much external lighting as you can. Use blinds, curtains, towels, or any thick fabric to block sunlight from shining into your room.
2. 3-Point Lighting
The most common setup for studio lighting is 3-point lighting. For this kind of lighting you’ll need three lights: a key light, a fill light, and a back light (also called a hair light).

Out of the three lights, the key light should be the brightest. When it is positioned to the left of you (as shown in the diagram above) your right side will have shadows.
To minimize the shadows on your right side, use a weaker light as a fill light. You don’t want your fill light to completely eliminate all your shadows or else your shot will look flat.
Lastly, a backlight positioned behind you can give an appealing highlight to the ends of your head and even help to separate your hair from blending into your background if both happen to be dark.
3. 4-Point Lighting
As a YouTuber, you may not only want yourself to be seen optimally with proper lighting, but you may also want your background to be seen optimally, especially if you’ve taken the time to decorate it for your audience.
What you’ll need to ensure that your background is sufficiently lit is 4-point lighting setup. The 4-point lighting setup is the same as a 3-point lighting setup, but with an additional light shining at your background.
For more information on lighting equipment, check out my Top 17 Video Lighting Equipment For YouTubers .
Touch Up YouTube Videos with Filmora
Filmora is one of the best video editing software for YouTube beginners to start the YouTube channel. So, if you find the lighting isn’t perfect after recording, you can use the Auto Color Enhancement feature in Filmora to adjust the color with one-click. Or, you can change the white balance, Light, color, and HSL manually. Filmora also features some presets and LUTs templates , which allows you to apply pre-programmed effects to video for color correction faster.
Richard Bennett
Richard Bennett is a writer and a lover of all things video.
Follow @Richard Bennett
Richard Bennett
Oct 26, 2023• Proven solutions
When it comes to sensitivity to light, no consumer-level camera sensor comes close in performance to the human eye. Many newbies to videography, though, don’t think about this when they use their camera indoors and discover that their recorded footage appears too dark.
If you want to use your camera indoors as many YouTubers do, you’ll need to have extra light. But the solution is not as simple as surrounding yourself with lamps that are all randomly placed.
Below, I’ll go into detail on how you can set up your lighting equipment to make your YouTube videos look good.
| Table of Contents Using Light You Already Have Window LightingHome Lighting Home Studio Lighting Light Control3-Point Lighting4-Point Lighting |
|---|
Part 1: Using Light You Already Have
Most beginner YouTubers light their videos with what they already have. That’s what I did to start as well. In the past, my video recording space consisted of natural sunlight coming from my window and ceiling light for times when the sunlight wasn’t strong enough.
1. Window Lighting
The best thing about window lighting is that it’s free. The worst thing about it is that it’s uncontrollable. The amount of light you get in your video can vary with all the changes in the weather.
Window lighting for me was especially difficult to work with because I live in a very rainy and cloudy city, Vancouver, Canada, where we pretty much just get three months of good sun.
Above are two freeze frames from one of Daniel’s past window-lit vlogs. Although these two frames are both from the same vlog, you can see that the image on the right looks brighter due to clearer skies at that moment. These varying amounts of light is what you will have to deal with if you choose to light your YouTube video with window lighting.
2. Home Lighting
Home lighting is another source of light that many new YouTubers use. In the past, when my window light wasn’t strong enough to light my video recording space, I would turn on the ceiling light.
Notice how the color of Daniel’s skin looks much more orange here (above) than the color of the skin in the two side-by-side window lighting examples? The side of the face also appears to look bluer. This all happened because he mixed up different color temperatures shining out of the two lights (cooler window light and warmer ceiling light).
Most home lighting is warmer in its color temperature. If you want to use your home lights without everything being orange-tinted, you’ll need to switch out your light bulbs for daytime LED light bulbs.
Ceiling lights are also typically situated in the center of a room in order to light an entire room evenly. This is not likely to be the best location for your filming video. Since the ceiling light was directly above the face in the above example, you can see harder shadows beneath his cheeks.
Part 2: Home Studio Lighting
If you rather not deal with all the window and home lighting challenges, you can set up studio lighting in your home.
1. Light Control
The first thing you’ll want to do to set up studio lighting in your home is to pick a room to film in and eliminate as much external lighting as you can. Use blinds, curtains, towels, or any thick fabric to block sunlight from shining into your room.
2. 3-Point Lighting
The most common setup for studio lighting is 3-point lighting. For this kind of lighting you’ll need three lights: a key light, a fill light, and a back light (also called a hair light).
Out of the three lights, the key light should be the brightest. When it is positioned to the left of you (as shown in the diagram above) your right side will have shadows.
To minimize the shadows on your right side, use a weaker light as a fill light. You don’t want your fill light to completely eliminate all your shadows or else your shot will look flat.
Lastly, a backlight positioned behind you can give an appealing highlight to the ends of your head and even help to separate your hair from blending into your background if both happen to be dark.
3. 4-Point Lighting
As a YouTuber, you may not only want yourself to be seen optimally with proper lighting, but you may also want your background to be seen optimally, especially if you’ve taken the time to decorate it for your audience.
What you’ll need to ensure that your background is sufficiently lit is 4-point lighting setup. The 4-point lighting setup is the same as a 3-point lighting setup, but with an additional light shining at your background.
For more information on lighting equipment, check out my Top 17 Video Lighting Equipment For YouTubers .
Touch Up YouTube Videos with Filmora
Filmora is one of the best video editing software for YouTube beginners to start the YouTube channel. So, if you find the lighting isn’t perfect after recording, you can use the Auto Color Enhancement feature in Filmora to adjust the color with one-click. Or, you can change the white balance, Light, color, and HSL manually. Filmora also features some presets and LUTs templates , which allows you to apply pre-programmed effects to video for color correction faster.
Richard Bennett
Richard Bennett is a writer and a lover of all things video.
Follow @Richard Bennett
Also read:
- Game Development Behind-the-Scenes
- Checking Credentials on YouTube
- In 2024, Discover Your Top 10 Choice of Editors for YouTube Short Videos
- Embedding YT Playlists Seamlessly on Webpages
- Elevate Your YouTube Presence Strategic Tagging and Titling Techniques for 2024
- Mastering YouTube's Feature Switch Between Commenting States
- Innovative Youtube Monikers for Vloggers & Filmmakers (Up to 156 Characters)
- Marvelous Magicians Top YouTube Editor Magic Moments
- In 2024, Amplify Earnings Monetize YouTube on the Go with Effective Techniques
- A Comprehensive Guide to Creating Viral YouTube Shorts Videos for 2024
- [New] Downloading the Latest Tracks A Guide to Free Extractors for PC Users
- [New] Breakthrough in Video Production Advanced Techniques for Uploading 360° Content on YouTube
- [Updated] Enhance Viewer Engagement The Top 6 Methods for Higher YouTube Audience Retention
- 2024 Approved Crafting Snug Winter Atmospheres for Engaging Online Content
- Crafting Splitscreen YouTube Videos A Guide to Creativity for 2024
- Personalized Timelength Upload on YouTube
- [Updated] Audio Adaptation Innovations for YouTubers' Videos
- In 2024, 5 Innovative YT Tales Share Your Life Journey
- 2024 Approved Earning Stream Start Small, See Big on YouTube
- Curbing Common Mishaps YouTube Short Edition
- Essential List of Free Rippers For Video Conversion for 2024
- Captivating Audiences Adopting YouTube Vlogger Charisma for 2024
- [Updated] A Comprehensive Guide to Creating Viral YouTube Shorts Videos
- Unleashing Creativity How to Make a Hit Music Reaction Video on YoTube
- Decode the Digital Dollar with YouTube An Effective Triple Step Method for Income Analysis
- 2024 Approved Conquer YouTube's Realms A Step-by-Step Video Uploading Guidebook
- Efficiently Balancing Professional Commitments & Creativity
- 2024 Approved Elite Visionaries Video Realm
- A Deep Dive Into YouTube Content Ownership Laws for 2024
- Download YouTube Tunes with These 10+ No-Cost Audio Crackers for 2024
- 2024 Approved Comprehensive iTunes Update Upload YouTube Videos Guide
- [Updated] Creators Uniting for Marvel's Digital Future
- Masterful Mythos YouTube's Finest Magic Tricks
- A Step-by-Step Approach to Ad Revenue in YouTube Videos for 2024
- [New] Deciphering YouTube's Monetary Mechanisms
- In 2024, Effortless Video Submission From iPhone/iPad for YouTubers
- In 2024, Earn Online via YouTube How Reaching 500 Subscribers Pays Off
- Complete Guide to Crafting Killer YouTube Outros for 2024
- [Updated] Channeling Success The Personal Brand Strategy for YouTubers
- Making Everyday Moments Memorable on YouTube
- In 2024, Discovering & Perfecting Your Individual Style
- Techniques for Perfect Chroma Key Compositing
- [Updated] Dive Into the World of YouTube Shorts Mastering Video Creation
- [Updated] Curate Content The 10 Best YouTube Video Length Tools
- Beauty's Buzz YouTube Gurus Predicted
- Your Essential Gift A Compact Bundle of 50 Banners
- Next-Gen 8 Streamers Capturing Attention Worldwide
- Cool Climates, Cozy Cinematics Selecting Winter Backgrounds
- 2024 Approved Secure & Quality The Best 5 Conference Recorders Online
- Updated 2024 Approved A Brief Review of CapCut Translate With Alternative
- [New] Detecting Phony Instagram Connections Efficiently
- [Updated] Apeaksoft's Screen Tech Revolution 2023 Review for 2024
- Best Streamers Unveiled An All-Round Comparison Guide
- An Overview of Googles Audio Content Distribution Service for 2024
- In 2024, How to Transfer Music from Nokia C110 to iPod | Dr.fone
- [Updated] 2024 Approved Hidden Viewers Guide Reading Instagram Stories Privately From PC/Android/iOS
- How to Stop My Spouse from Spying on My Realme C55 | Dr.fone
- [Updated] Step-by-Step Guide to Record Online Video Calls for 2024
- [New] 2024 Approved Non-Vimeo Showstoppers for Online Content Creators
- Updated 2024 Approved Pro Video Editor Secrets Adding Awesome Effects to Your Videos
- Biometrics Battle Comparing Faces of iPhone X & Galaxy Phones
- In 2024, The Ultimate Guide to Bypassing iCloud Activation Lock on iPhone 15
- Use Device Manager to reinstall your drivers on Windows 11 & 10
- [Updated] 2024 Approved From Basic Recording to Masterpiece Your WebCam Guide
- Best Practices in Converting Images to Videos for 2024
- In 2024, How Can Samsung Galaxy S24+Mirror Share to PC? | Dr.fone
- Decoding DiscoNitro How It Works and How You Can Join
- [New] A Step-by-Step Guide to Rewind a Livestream with These Ten Approaches
- In 2024, How to Share/Fake Location on WhatsApp for Vivo Y77t | Dr.fone
- [New] In the Ring with Video Recording Who Will Triumph, OBS or Bandicam?
- Updated Instantaneous Techniques for Cutting Down Residual Hum in Recordings for 2024
- 2024 Approved Instagram Filming Blending Into New Backgrounds Easily
- Updated The Best Free Online Video Editors A Comprehensive Guide
- [New] Premier Call Customization and Editing Software for 2024
- [Updated] 2024 Approved Cutting Through the Noise Strategies for Standout Instagram Success
- Updated Top 3 Best MP3 Volume Booster Online
- Title: "[Updated] Enhance Creativity in Video Editing - These 7 Sources"
- Author: Kevin
- Created at : 2024-05-25 16:51:28
- Updated at : 2024-05-26 16:51:28
- Link: https://youtube-videos.techidaily.com/updated-enhance-creativity-in-video-editing-these-7-sources/
- License: This work is licensed under CC BY-NC-SA 4.0.
