
!["[Updated] Elevate Your Streaming Game From Twitch Viewers to YouTube Fans"](https://www.lifewire.com/thmb/EfCQ28OGHf4dR3Od1N0-6XNoXfQ=/400x300/filters:no_upscale():max_bytes(150000):strip_icc()/iPad-Pro-2024-Normal-04a9c15834e44801b665c308088cdf91.jpg)
"[Updated] Elevate Your Streaming Game From Twitch Viewers to YouTube Fans"
Elevate Your Streaming Game: From Twitch Viewers to YouTube Fans
Create High-Quality Video - Wondershare Filmora
An easy and powerful YouTube video editor
Numerous video and audio effects to choose from
Detailed tutorials provided by the official channel
Amidst many online applications is Twitch. This live streaming platform takes your experience to another level. You can use it to make crafts, play games, attract broadcasters, and many more. Twitch was launched in 2011, and since then, it has attracted millions of users, managing a database of about 4 million broadcasters by early 2020. With it, users can stream their activities as others watch in real-time. Just browse a category to find a stream.
You can also follow streamers that you like on the platform and get updates and notifications immediately after they are posted. But how do you start a career on a platform like Twitch? You need to broadcast and gather a large following. You can use built-in audiences from other platforms like Facebook. Let’s dive into the core of the matter and look at how to upload Twitch streams to YouTube and build your platform.

In this article
02 What is the benefit of uploading your Twitch Streams to YouTube
03 How to upload your Twitch Streams to YouTube
What is Twitch VOD?
Twitch Video on Demand (VOD) is a recording of previously streamed content. It provides briefings if you missed catching the Twitch live stream. Just watch the VOD from your favorite streamer and be engaged the best way possible. However, VODs don’t last forever. They are removed after two weeks of broadcast. But streamers with Partner Status can have their VODs last up to 60 days.
- How to enable Twitch VOD?
VODs are the best form to archive streams that your fans missed. Even though they are not enabled by default, you can manually enable them and not let your fans miss any important event from your channel. They’ll find it under the “Videos” tab on any Twitch channel. Follow these steps to enable VOD on your channel.
Step 1. Go to your profile icon in the top right corner of Twitch
Check in the “Channel & Video” section and locate the “Stream Key & Preferences” menu.

Step 2. Click on “Creator Dashboard”
Remember, you can enable VODs from your creator dashboard. Just go under the “Settings” tab and click on the “Stream section” of the creator dashboard. Check under the subtitle “VOD Settings” and get the option to store past broadcasts. You can also toggle the slider to store your past broadcasts.

Step 3 Click on the “Settings” tab on the left-hand side and go to Stream
You’ll get various drop-down menu options. Click on the “Settings” tab and choose the “Stream” option. The system will navigate to a new page, thus setting your preferences for VODs and clips.
Step 4. Go to “VOD Settings” and toggle on the “Store Past Broadcast.”
Ensure you have the toggle option turned ON under the “VOD Settings.” If it’s “ON,” you’ll realize the toggle will be purple, with a checkmark in it. Twitch will be confirmed to be enabled if it’s purple.

- Frequently Asked Question about Twitch VOD
These are some questions frequently asked by Twitch users.
1. How long will Twitch store my VOD
Your Twitch can either be stored for 14 or 60 days, depending on your level. For Twitch Prime, Twitch Partner or a Twitch Turbo user has their past broadcasts automatically saved for 60 days before deletion. But if you are not connected to these three options, your past broadcasts will be saved for only 14 days before deletion.
Since your past broadcasts cannot be live for more than 60 days, you have the option to download the video to your computer before the validity days expire and Twitch deletes it. You can use an External Hard drive to save the past broadcast content. Likewise, it is possible to turn your past broadcast content into Highlight and, in turn, permanently store them on Twitch.
2. What is the difference between Twitch VOD, Highlights, and Clips
Twitch VOD is a previously saved video of your live stream content. You choose to save either part or the entire content of your previously streamed content. More so, you don’t need any additional requirements to use VOD.
Highlights are short videos that have been edited from your past broadcast content. You can save them on Twitch permanently. Streamers majorly use highlights to save video game achievements. Unlike VOD Twitch that can be saved up to 60 days, Highlights usually lasts no more than 3 minutes.
- To make Highlights on Twitch, first, navigate to your Dashboard.
- Then scroll down and click on “Content” > “Video Producer.
- Next, press on “All Videos” to change them to “Past Broadcasts.”
- Now press the “Highlight” button, and Twitch will immediately open a new tab for “Twitch Highlighter Tool.”
- Then select the video part to include as “Highlight” and press the “Create Highlights” button.
- Wait a while for the process to be completed, and Voila! You have your Highlights created.
When it comes to Twitch Clip, you can capture special moments in a stream you are currently watching. On the same note, you can share clips with friends and other users on social media platforms. Such shared clips contain a link where others view the source or video from.
The clips you create will automatically be saved on the streamer’s channel on the “Clips” page, where other viewers can see them too. Nonetheless, you can download “clips” to your computer and, in turn, upload them whenever you want to. And note that you can help your stream grow via “Clips” by letting your viewers clip and share your stream moments.
- To create “Clips” on Twitch, identify which Streamers channel you wish to create a clip from.
- Then click on the “Clapper board” icon. Next, edit your clip between 5 and 60 seconds long.
- Finally, create a title and publish your Clip. You’ll also enjoy the privilege to share your clip’s link to other social media networks.
What is the benefit of uploading your Twitch Streams to YouTube
You stand to gain a lot when you upload your Twitch Streams to YouTube.
1) To enlighten your followers
Your followers will see your streams and make the best decisions. Viewers can check out your recordings and other highlights from past streams. It will help them decide whether they like what they see and probably join your live streams.
2) Twitch provides content for you to share and monetize on YouTube
Since Twitch streaming is more popular nowadays, many people throng it for content. It is not wise to rely entirely on Twitch to discover as a Twitch Streamer. Posting to YouTube will make it known within a short time. You would have announced your streams most nobly and kept your followers up to date, attracting new ones as well.
3) To keep your followers engaged even when you are offline
Even though live streaming is important, some viewers may not attend the live sessions due to different time zones or other commitments. In this regard, when uploaded to YouTube, Twitch will give them a chance to watch your content just whenever they log in. They, therefore, have the option to watch a Twitch VOD of the live stream they missed.
How to upload your Twitch Streams to YouTube
Check how to upload Twitch streams to YouTube from the Twitch website.
Step 1. Identify the little arrow next to your name on the Twitch website and click on it. Then click on the “Video Producer” to take you to a list of your Twitch videos.

Step 2. Check out and click on the “three-dots” on the video you wish to upload to YouTube. Click on the “Export” tab.
Step 3. A menu will then pop up. Here, you can fill in the description, title, and tags that you would like to appear on the YouTube video. There is an option for Twitch to split your video automatically. If you wish so, then tick the “Checkbox” to enable it. Then click on the “Start Export” option to export your Twitch streams to YouTube.

Bouns! Edit Your Twitch Video with Filmora
The quality of your video matters when it comes to uploading Twitch Streams to YouTube. Using a third-party tool to edit your video is the first step in ensuring your videos communicate meaningful content. Filmora comes in handy to bring your imaginations to life. Use it for simple creation without limits, even for beginners.
- Use it to track moving objects in video clips
- Easily match any image of the selected clip
- Its powerful tools let you edit your video by cropping, splitting, adjusting speed, etc
- The video keyframe easily indicates the beginning and end of the parameters
For Win 7 or later (64-bit)
For macOS 10.12 or later
Conclusion
● Don’t just focus on how to upload Twitch streams to YouTube but also consider the quality of video you are posting to YouTube. Remember, your video quality will speak much more of you than any other description. So, strive to produce quality videos using the best tool, Filmora. The app is easy to use and will elevate your views and imaginations through your video in the most impactful way.
Amidst many online applications is Twitch. This live streaming platform takes your experience to another level. You can use it to make crafts, play games, attract broadcasters, and many more. Twitch was launched in 2011, and since then, it has attracted millions of users, managing a database of about 4 million broadcasters by early 2020. With it, users can stream their activities as others watch in real-time. Just browse a category to find a stream.
You can also follow streamers that you like on the platform and get updates and notifications immediately after they are posted. But how do you start a career on a platform like Twitch? You need to broadcast and gather a large following. You can use built-in audiences from other platforms like Facebook. Let’s dive into the core of the matter and look at how to upload Twitch streams to YouTube and build your platform.
In this article
02 What is the benefit of uploading your Twitch Streams to YouTube
03 How to upload your Twitch Streams to YouTube
What is Twitch VOD?
Twitch Video on Demand (VOD) is a recording of previously streamed content. It provides briefings if you missed catching the Twitch live stream. Just watch the VOD from your favorite streamer and be engaged the best way possible. However, VODs don’t last forever. They are removed after two weeks of broadcast. But streamers with Partner Status can have their VODs last up to 60 days.
- How to enable Twitch VOD?
VODs are the best form to archive streams that your fans missed. Even though they are not enabled by default, you can manually enable them and not let your fans miss any important event from your channel. They’ll find it under the “Videos” tab on any Twitch channel. Follow these steps to enable VOD on your channel.
Step 1. Go to your profile icon in the top right corner of Twitch
Check in the “Channel & Video” section and locate the “Stream Key & Preferences” menu.
Step 2. Click on “Creator Dashboard”
Remember, you can enable VODs from your creator dashboard. Just go under the “Settings” tab and click on the “Stream section” of the creator dashboard. Check under the subtitle “VOD Settings” and get the option to store past broadcasts. You can also toggle the slider to store your past broadcasts.
Step 3 Click on the “Settings” tab on the left-hand side and go to Stream
You’ll get various drop-down menu options. Click on the “Settings” tab and choose the “Stream” option. The system will navigate to a new page, thus setting your preferences for VODs and clips.
Step 4. Go to “VOD Settings” and toggle on the “Store Past Broadcast.”
Ensure you have the toggle option turned ON under the “VOD Settings.” If it’s “ON,” you’ll realize the toggle will be purple, with a checkmark in it. Twitch will be confirmed to be enabled if it’s purple.
- Frequently Asked Question about Twitch VOD
These are some questions frequently asked by Twitch users.
1. How long will Twitch store my VOD
Your Twitch can either be stored for 14 or 60 days, depending on your level. For Twitch Prime, Twitch Partner or a Twitch Turbo user has their past broadcasts automatically saved for 60 days before deletion. But if you are not connected to these three options, your past broadcasts will be saved for only 14 days before deletion.
Since your past broadcasts cannot be live for more than 60 days, you have the option to download the video to your computer before the validity days expire and Twitch deletes it. You can use an External Hard drive to save the past broadcast content. Likewise, it is possible to turn your past broadcast content into Highlight and, in turn, permanently store them on Twitch.
2. What is the difference between Twitch VOD, Highlights, and Clips
Twitch VOD is a previously saved video of your live stream content. You choose to save either part or the entire content of your previously streamed content. More so, you don’t need any additional requirements to use VOD.
Highlights are short videos that have been edited from your past broadcast content. You can save them on Twitch permanently. Streamers majorly use highlights to save video game achievements. Unlike VOD Twitch that can be saved up to 60 days, Highlights usually lasts no more than 3 minutes.
- To make Highlights on Twitch, first, navigate to your Dashboard.
- Then scroll down and click on “Content” > “Video Producer.
- Next, press on “All Videos” to change them to “Past Broadcasts.”
- Now press the “Highlight” button, and Twitch will immediately open a new tab for “Twitch Highlighter Tool.”
- Then select the video part to include as “Highlight” and press the “Create Highlights” button.
- Wait a while for the process to be completed, and Voila! You have your Highlights created.
When it comes to Twitch Clip, you can capture special moments in a stream you are currently watching. On the same note, you can share clips with friends and other users on social media platforms. Such shared clips contain a link where others view the source or video from.
The clips you create will automatically be saved on the streamer’s channel on the “Clips” page, where other viewers can see them too. Nonetheless, you can download “clips” to your computer and, in turn, upload them whenever you want to. And note that you can help your stream grow via “Clips” by letting your viewers clip and share your stream moments.
- To create “Clips” on Twitch, identify which Streamers channel you wish to create a clip from.
- Then click on the “Clapper board” icon. Next, edit your clip between 5 and 60 seconds long.
- Finally, create a title and publish your Clip. You’ll also enjoy the privilege to share your clip’s link to other social media networks.
What is the benefit of uploading your Twitch Streams to YouTube
You stand to gain a lot when you upload your Twitch Streams to YouTube.
1) To enlighten your followers
Your followers will see your streams and make the best decisions. Viewers can check out your recordings and other highlights from past streams. It will help them decide whether they like what they see and probably join your live streams.
2) Twitch provides content for you to share and monetize on YouTube
Since Twitch streaming is more popular nowadays, many people throng it for content. It is not wise to rely entirely on Twitch to discover as a Twitch Streamer. Posting to YouTube will make it known within a short time. You would have announced your streams most nobly and kept your followers up to date, attracting new ones as well.
3) To keep your followers engaged even when you are offline
Even though live streaming is important, some viewers may not attend the live sessions due to different time zones or other commitments. In this regard, when uploaded to YouTube, Twitch will give them a chance to watch your content just whenever they log in. They, therefore, have the option to watch a Twitch VOD of the live stream they missed.
How to upload your Twitch Streams to YouTube
Check how to upload Twitch streams to YouTube from the Twitch website.
Step 1. Identify the little arrow next to your name on the Twitch website and click on it. Then click on the “Video Producer” to take you to a list of your Twitch videos.
Step 2. Check out and click on the “three-dots” on the video you wish to upload to YouTube. Click on the “Export” tab.
Step 3. A menu will then pop up. Here, you can fill in the description, title, and tags that you would like to appear on the YouTube video. There is an option for Twitch to split your video automatically. If you wish so, then tick the “Checkbox” to enable it. Then click on the “Start Export” option to export your Twitch streams to YouTube.
Bouns! Edit Your Twitch Video with Filmora
The quality of your video matters when it comes to uploading Twitch Streams to YouTube. Using a third-party tool to edit your video is the first step in ensuring your videos communicate meaningful content. Filmora comes in handy to bring your imaginations to life. Use it for simple creation without limits, even for beginners.
- Use it to track moving objects in video clips
- Easily match any image of the selected clip
- Its powerful tools let you edit your video by cropping, splitting, adjusting speed, etc
- The video keyframe easily indicates the beginning and end of the parameters
For Win 7 or later (64-bit)
For macOS 10.12 or later
Conclusion
● Don’t just focus on how to upload Twitch streams to YouTube but also consider the quality of video you are posting to YouTube. Remember, your video quality will speak much more of you than any other description. So, strive to produce quality videos using the best tool, Filmora. The app is easy to use and will elevate your views and imaginations through your video in the most impactful way.
Virtual Battles, Real Money: Gamer Prospects 2024
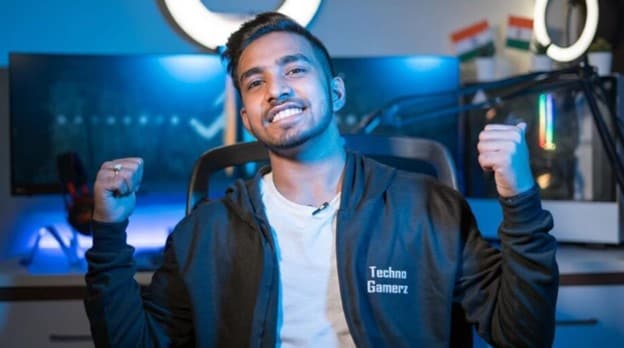
Gone is when playing video games was strictly for entertainment. These days, you can record and share your gaming skills on YouTube and earn a fortune. A good example is Techno Gamerz. This YouTube channel has over 29 million subscribers, and it’s believed to be among the fastest-growing channels in India. In fact, the channel recently crossed the 1 billion views mark.

Now, this begs the query; what is the Techno Gamerz income on YouTube? This article discusses everything you need to know about the young YouTube gamer, from his monthly and yearly payments to his net worth.
Meta Description: This article discusses the brains behind the popular Techno Gamerz YouTube channel. You’ll learn about the Techno Gamerz income, age, gender, nationality, and more.
Part 1: Summary Box on Techno Gamerz
| Name | Ujjwal Chaurasia |
|---|---|
| Net worth in USD (2022) | $2 million |
| Monthly income and salary | RS.15 Lakh+ |
| Yearly income and salary | 1.5 Crore |
| Age | 20 years (born January 12, 2002) |
| Gender | Male |
| Nationality | Indian |
| Height | 5.5 inches |
| Profession | YouTuber |
| YouTube channel | Techno Gamerz |
| Awards and recognition | Diamond, Gold, and Silver play buttons |
Up to this point, you should have a brief overview of who Techno Gamerz is and what he does to earn such staggering figures on YouTube. So, the next section discusses his income in detail and what makes this YouTuber so famous. Keep reading!
Part 2: Techno Gamerz YouTube Earning and Stats
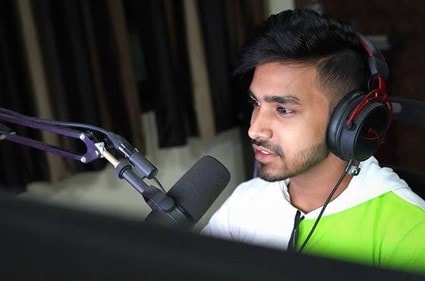
Ujjwal Chaurasia, alias Techno Gamerz, was born and grew up in New Delhi, India. The charismatic vlogger first joined YouTube on August 13, 2017, and uploaded his first gaming video on January 2018. Initially, Ujjwal used his elder brother’s phone to post gaming tutorial videos. This obviously limited his input on YouTube as he also had to set aside time for studying.
But after seeing potential in what Techno Gamerz was doing, his brother encouraged him to post more often. His first viral video was for Dragon Ball Z, a downloading tutorial. This video garnered a massive 250K views, boosting his channel’s profile. The young YouTube star has never looked back since then.
Meantime, you must be asking yourself how YouTube generates income in India. It’s simple; via AdSense! YouTube’s RPM (Revenue Per Mile) metric per 1,000 views varies between countries. In India, the video-sharing platform pays $0.50 per 1,000 views. This means that Indian YouTube teachers and influencers can earn $500 after garnering 1 million views.
But nothing is cast in stone on YouTube. Most Indian channels can earn between $800 and $2,500 after reaching 1 million views. However, this depends on where you get the most views from. For example, if at least half of your views are from the US, you’ll earn at least $1,500. Techno Gamerz YouTube income per 1,000 views is approximately $1.21.
Remember that there are some conditions to meet before you start earning money on YouTube. First, the channel must be active for at least a year and have a minimum of 1,000 subscribers. That’s not all; you’ll need nothing less than 4,000 watch hours to be on YouTube’s payroll.
With that said, below are some YouTube stats about the Techno Gamerz monthly income, number of views, and more:
| Estimated Monthly earnings in USD/Indian rupees | $167K |
|---|---|
| Estimated Yearly earnings in USD/Indian rupees | $8.6 million |
| Total video uploads | 858 |
| Type of videos | Gaming tutorials |
| Subscribers | 29 million |
| Video views | 7.5 billion |
| Last 30 days’ views | 7 million |
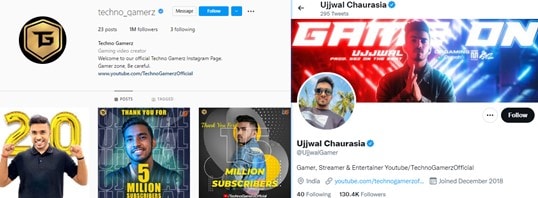
As expected, Ujjwal Chaurasia has a massive following on other social media platforms, especially on Instagram. Here, the 20-year-old has more than 2 million followers and over 250K likes on “ujjwalgamer.” He usually posts selfies, pictures, and a few gaming contents on Instagram. Ujjwal’s engagement rate on Instagram is around 12.5%.
He also has another Instagram account called “Techno_Gamerz ,” which has over 1M followers and over 120K likes. Ujjwal uses this account to keep his followers abreast of what’s happening on his YouTube channel and give hints of future releases. He also posts subscriber milestones. His Twitter account is “Ujjwal Chaurasia ,” with over 116K followers and around 290 posts.
Ujjwal is also venturing into music lately, specifically Hip Hop. He partnered with one of India’s most prominent producers, Sez on the Beat, to release Game On. This music tells a tale of how Chaurasia started from zero subscribers to more than 10 million. Currently, this single boasts over 62 million views.
Part 3: Why Is Techno Gamerz Trending on YouTube?
The Techno Gamerz earnings are certainly no fluke. Many YouTube careers come crashing down before they even start. You’ll even need to congratulate yourself for earning just $100 on YouTube. So, what makes Techno Gamers a darling to many YouTubers?
1. Engaging and interactive videos
YouTube is a very competitive video-sharing platform, and Techno Gamerz knows this fact quite well. Techno Gamerz adds funny and interactive commentary to his YouTube gaming videos to make them more interactive. Many YouTubers also love his confidence and composure in front of the camera.
2. Captivating story and continuity
One major thing you’ll see about all of Techno Gamerz’s videos is continuity. The YouTuber churns out new content every couple of days, keeping his fans entertained at all times. Also, Techno Gamerz always does a recap on his previous episodes to ensure that viewers can keep up with the pace. He even admitted in an interview that it’s critical for his audience to follow the storyline, making watching series like GTA V more interesting.
3. Single and multiplayer tutorials
Techno Gamerz’s tutorials consist of single and multiplayer games. He says that single-player games bring out his character’s awesomely powerful and superior side. He also admitted that he loves multiplayer games’ unpredictable and challenging nature.
Something about Techno Gamerz’s most loved videos
As said before, Dragon Ball Z was the YouTuber’s first upload on the platform. Then in January 2018, he went ahead to upload PUBG videos, but his breakthrough came when he switched to GTA. Up to now, he has posted 140+ GTA 5 episodes, which are famous for their unique storylines. Interestingly, each of his GTA videos has 5+ million views.
But to be one of the most popular YouTubers, you’ll need diversity. Techno Gamerz has this in abundance. His “Grandpa and Granny Two Hunters” video has 10+ million views. It’s a horror game where Techno Gamerz plays the scary granny with insane tricks.
His other videos, “BeamNG” and “Just Draw,” have more than 12 million and 13 million views, respectively. GTA V is the most loved by his audience, with over 30 million views.
Bonus Tip: How To Be a YouTuber and Make Videos Like Techno Gamerz
Evidently, you need to create compelling videos to increase your chances of getting over 1 million views and matching the Techno Gamerz salary. So, what makes a great YouTube video? The perfect YouTube videos should have a catchy intro, voice overlays, picture-in-picture effects, background audio, and more. You can also include elements like timers, subtitles, and effect overlays.
Thankfully, Wondershare Filmora comes with all these features and many more. It’s a macOS/iPadOS/Windows program that allows you to record Techno Gamerz-like videos with a live microphone commentary. After recording the video, add it to the editing timeline to customize it with stunning plugin effects, texts, transitions, subtitles, background music, and more. You also can explore features like motion tracking, key framing, speed ramping, and split screen if it’s a fast-paced video like GTA.
Let’s learn how to create and edit a YouTube video on Filmora 11:
Free Download For Win 7 or later(64-bit)
Free Download For macOS 10.14 or later
Step1 Start a new video project
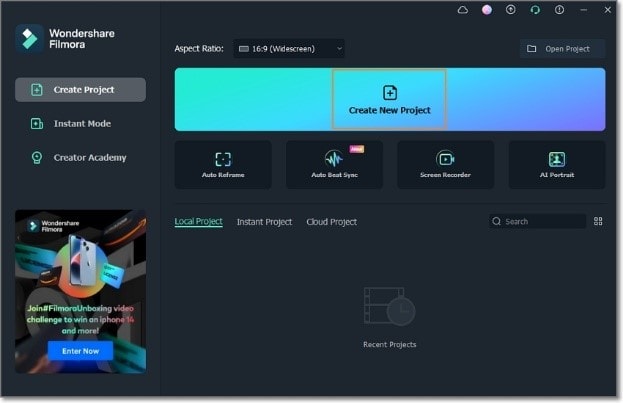
Install and run Filmora 11 on your computer and choose the 16:9 aspect ratio for YouTube videos. Then, start a New Project.
Step2 Import the YouTube video tutorial
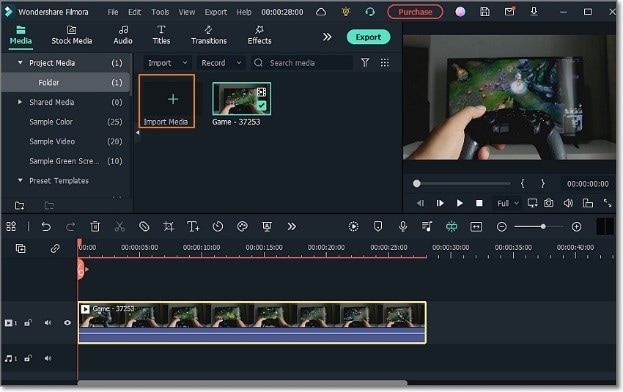
Now click the Import Media button to open a video file from your local storage. You can add multiple media files before moving them to the storyboard.
Step3 Edit your gaming video
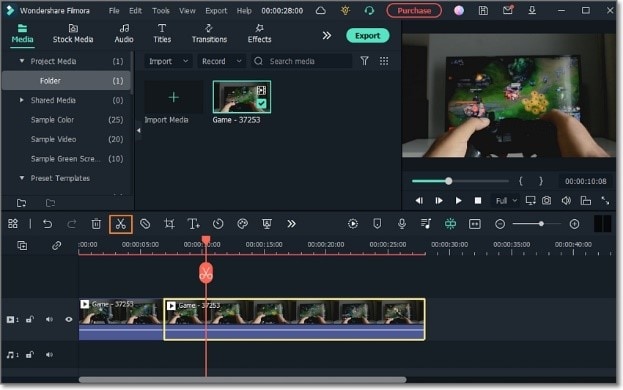
Start by trimming your video to remove the noisy or unwanted parts. To trim and split a video, place the playhead where you want to cut and press the Split button. Repeat the same procedure to cut out a clip and delete it.
Your YouTube gaming tutorial also needs subtitles to stand out from the crowd. Select the YouTube video clip and click the Speech-to-Text button. Once the Speech-to-Text feature is active, select the translation language to start creating subtitles. Remember, you can edit and download the subtitle tracks as a .txt or .srt file.
Step4 Convert the video and upload it on YouTube
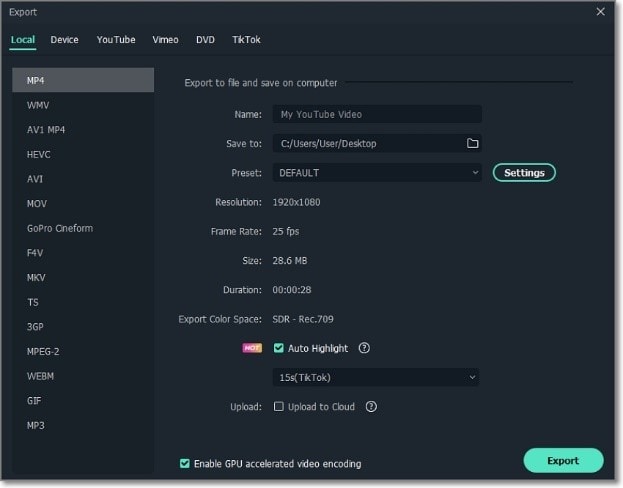
If you’re satisfied with the edited video, click the Export button, then select MP4, WebM, or MP4 AV1 as the target format. Now name your video, choose a folder path, and export it. Remember that you can also directly upload videos on YouTube by clicking the YouTube tab.
Hot FAQs on Techno Gamerz
1. Who earns more between Techno Gamerz and Carry Minati?
Techno Gamerz is not alone in Indian YouTube vlogging. CarryMinati is another top YouTuber in India, with 36.90 million followers. This YouTuber earns more than 25 Lakhs per month with annual revenue of at least 3 Crore Rupees. According to reports, Carry Minati (Ajey Nagar) has over $5 million in net worth.
2. How much does Techno Gamerz earn from one video?
It depends on the number of views. According to reports, this popular Indian YouTuber earns over $1.21 per 1,000 views. He has over 7.5 billion views currently.
3. What does Techno Gamerz do for a living?
Techno Gamerz’s primary source of income is YouTubing. This is where the 20-year-old earns most of his dollars.
Final Words
YouTubing can pay top money as long as you do it professionally. But it may need a lot of hard work and patience to start earning on YouTube. Also, invest in a powerful, all-in-one video editor for vloggers like Filmora 11. So, are you ready to start making the Techno Gamerz monthly income from YouTube? Give it a try!
Free Download For Win 7 or later(64-bit)
Free Download For macOS 10.14 or later
Up to this point, you should have a brief overview of who Techno Gamerz is and what he does to earn such staggering figures on YouTube. So, the next section discusses his income in detail and what makes this YouTuber so famous. Keep reading!
Part 2: Techno Gamerz YouTube Earning and Stats
Ujjwal Chaurasia, alias Techno Gamerz, was born and grew up in New Delhi, India. The charismatic vlogger first joined YouTube on August 13, 2017, and uploaded his first gaming video on January 2018. Initially, Ujjwal used his elder brother’s phone to post gaming tutorial videos. This obviously limited his input on YouTube as he also had to set aside time for studying.
But after seeing potential in what Techno Gamerz was doing, his brother encouraged him to post more often. His first viral video was for Dragon Ball Z, a downloading tutorial. This video garnered a massive 250K views, boosting his channel’s profile. The young YouTube star has never looked back since then.
Meantime, you must be asking yourself how YouTube generates income in India. It’s simple; via AdSense! YouTube’s RPM (Revenue Per Mile) metric per 1,000 views varies between countries. In India, the video-sharing platform pays $0.50 per 1,000 views. This means that Indian YouTube teachers and influencers can earn $500 after garnering 1 million views.
But nothing is cast in stone on YouTube. Most Indian channels can earn between $800 and $2,500 after reaching 1 million views. However, this depends on where you get the most views from. For example, if at least half of your views are from the US, you’ll earn at least $1,500. Techno Gamerz YouTube income per 1,000 views is approximately $1.21.
Remember that there are some conditions to meet before you start earning money on YouTube. First, the channel must be active for at least a year and have a minimum of 1,000 subscribers. That’s not all; you’ll need nothing less than 4,000 watch hours to be on YouTube’s payroll.
With that said, below are some YouTube stats about the Techno Gamerz monthly income, number of views, and more:
| Estimated Monthly earnings in USD/Indian rupees | $167K |
|---|---|
| Estimated Yearly earnings in USD/Indian rupees | $8.6 million |
| Total video uploads | 858 |
| Type of videos | Gaming tutorials |
| Subscribers | 29 million |
| Video views | 7.5 billion |
| Last 30 days’ views | 7 million |
As expected, Ujjwal Chaurasia has a massive following on other social media platforms, especially on Instagram. Here, the 20-year-old has more than 2 million followers and over 250K likes on “ujjwalgamer.” He usually posts selfies, pictures, and a few gaming contents on Instagram. Ujjwal’s engagement rate on Instagram is around 12.5%.
He also has another Instagram account called “Techno_Gamerz ,” which has over 1M followers and over 120K likes. Ujjwal uses this account to keep his followers abreast of what’s happening on his YouTube channel and give hints of future releases. He also posts subscriber milestones. His Twitter account is “Ujjwal Chaurasia ,” with over 116K followers and around 290 posts.
Ujjwal is also venturing into music lately, specifically Hip Hop. He partnered with one of India’s most prominent producers, Sez on the Beat, to release Game On. This music tells a tale of how Chaurasia started from zero subscribers to more than 10 million. Currently, this single boasts over 62 million views.
Part 3: Why Is Techno Gamerz Trending on YouTube?
The Techno Gamerz earnings are certainly no fluke. Many YouTube careers come crashing down before they even start. You’ll even need to congratulate yourself for earning just $100 on YouTube. So, what makes Techno Gamers a darling to many YouTubers?
1. Engaging and interactive videos
YouTube is a very competitive video-sharing platform, and Techno Gamerz knows this fact quite well. Techno Gamerz adds funny and interactive commentary to his YouTube gaming videos to make them more interactive. Many YouTubers also love his confidence and composure in front of the camera.
2. Captivating story and continuity
One major thing you’ll see about all of Techno Gamerz’s videos is continuity. The YouTuber churns out new content every couple of days, keeping his fans entertained at all times. Also, Techno Gamerz always does a recap on his previous episodes to ensure that viewers can keep up with the pace. He even admitted in an interview that it’s critical for his audience to follow the storyline, making watching series like GTA V more interesting.
3. Single and multiplayer tutorials
Techno Gamerz’s tutorials consist of single and multiplayer games. He says that single-player games bring out his character’s awesomely powerful and superior side. He also admitted that he loves multiplayer games’ unpredictable and challenging nature.
Something about Techno Gamerz’s most loved videos
As said before, Dragon Ball Z was the YouTuber’s first upload on the platform. Then in January 2018, he went ahead to upload PUBG videos, but his breakthrough came when he switched to GTA. Up to now, he has posted 140+ GTA 5 episodes, which are famous for their unique storylines. Interestingly, each of his GTA videos has 5+ million views.
But to be one of the most popular YouTubers, you’ll need diversity. Techno Gamerz has this in abundance. His “Grandpa and Granny Two Hunters” video has 10+ million views. It’s a horror game where Techno Gamerz plays the scary granny with insane tricks.
His other videos, “BeamNG” and “Just Draw,” have more than 12 million and 13 million views, respectively. GTA V is the most loved by his audience, with over 30 million views.
Bonus Tip: How To Be a YouTuber and Make Videos Like Techno Gamerz
Evidently, you need to create compelling videos to increase your chances of getting over 1 million views and matching the Techno Gamerz salary. So, what makes a great YouTube video? The perfect YouTube videos should have a catchy intro, voice overlays, picture-in-picture effects, background audio, and more. You can also include elements like timers, subtitles, and effect overlays.
Thankfully, Wondershare Filmora comes with all these features and many more. It’s a macOS/iPadOS/Windows program that allows you to record Techno Gamerz-like videos with a live microphone commentary. After recording the video, add it to the editing timeline to customize it with stunning plugin effects, texts, transitions, subtitles, background music, and more. You also can explore features like motion tracking, key framing, speed ramping, and split screen if it’s a fast-paced video like GTA.
Let’s learn how to create and edit a YouTube video on Filmora 11:
Free Download For Win 7 or later(64-bit)
Free Download For macOS 10.14 or later
Step1 Start a new video project
Install and run Filmora 11 on your computer and choose the 16:9 aspect ratio for YouTube videos. Then, start a New Project.
Step2 Import the YouTube video tutorial
Now click the Import Media button to open a video file from your local storage. You can add multiple media files before moving them to the storyboard.
Step3 Edit your gaming video
Start by trimming your video to remove the noisy or unwanted parts. To trim and split a video, place the playhead where you want to cut and press the Split button. Repeat the same procedure to cut out a clip and delete it.
Your YouTube gaming tutorial also needs subtitles to stand out from the crowd. Select the YouTube video clip and click the Speech-to-Text button. Once the Speech-to-Text feature is active, select the translation language to start creating subtitles. Remember, you can edit and download the subtitle tracks as a .txt or .srt file.
Step4 Convert the video and upload it on YouTube
If you’re satisfied with the edited video, click the Export button, then select MP4, WebM, or MP4 AV1 as the target format. Now name your video, choose a folder path, and export it. Remember that you can also directly upload videos on YouTube by clicking the YouTube tab.
Hot FAQs on Techno Gamerz
1. Who earns more between Techno Gamerz and Carry Minati?
Techno Gamerz is not alone in Indian YouTube vlogging. CarryMinati is another top YouTuber in India, with 36.90 million followers. This YouTuber earns more than 25 Lakhs per month with annual revenue of at least 3 Crore Rupees. According to reports, Carry Minati (Ajey Nagar) has over $5 million in net worth.
2. How much does Techno Gamerz earn from one video?
It depends on the number of views. According to reports, this popular Indian YouTuber earns over $1.21 per 1,000 views. He has over 7.5 billion views currently.
3. What does Techno Gamerz do for a living?
Techno Gamerz’s primary source of income is YouTubing. This is where the 20-year-old earns most of his dollars.
Final Words
YouTubing can pay top money as long as you do it professionally. But it may need a lot of hard work and patience to start earning on YouTube. Also, invest in a powerful, all-in-one video editor for vloggers like Filmora 11. So, are you ready to start making the Techno Gamerz monthly income from YouTube? Give it a try!
Free Download For Win 7 or later(64-bit)
Free Download For macOS 10.14 or later
Also read:
- Mastering Revenue Division on YouTube Shorts
- [New] Culinary Callings Innovative Naming for Foodie Channels
- [Updated] Blueprint for Broadcasting Breaks
- 2024 Approved Craft the Ultimate Outro with Pro Maker Advice
- [Updated] Discovering 6 Interactive Workout Ideas for Social Media Success
- Year's Biggest Beauty Influencers on YouTube
- Unlock 7 Superb Apps for Seamless YouTube LIVE From iPhone & Android
- 2024 Approved Creative Vanguard Audio-Visual Convergence
- [Updated] Breaking Down Barriers Adding Chapters to Create Cohesive YouTube Lessons
- [New] Elevate Content Discovery The TubeBuddy Way
- Your Device, Uninterrupted Revealing the Top 7 Android AdBlockers
- [New] Best YouTube Beginnings 15 Editing Samples
- Video Platform Economics A Tale of Two Titles' Income Potentials
- Harnessing iMovie's Capabilities for YouTube Video Perfection
- [Updated] Comparing Social Platforms Facebook LIVE Vs. YouTube Live & Twitter Periscope
- 2024 Approved Channel Cashflow Effective Tactics for Monetizing on Mobile Devices
- In 2024, Advanced Strategies for YouTube Audio Editing Mastery
- Channel Visualization Selecting the Ideal Size and Placement for YT for 2024
- [Updated] Building a Strong Online Presence with Attractive Video Thumbnails
- 2024 Approved Are There Natural Methods for Boosting Channels?
- [Updated] Craft an Inclusive Viewership Strategy for Youtube & Twitch Streaming
- 2024 Approved Bridging Soundscapes & Visuals – Essentials for Innovative ASMR Videos
- [New] Breaking Through Barriers Innovative Strategies for Multi-Streaming Success
- Convert & Edit Wonders 10 Best YouTube Tools Feat. Audio for 2024
- [Updated] How Do Beginners Make a Cool Video for YouTube on Mac
- [Updated] Blueprints for Breaking Ground in Edu-Video Production on YouTube Channels
- Personalize Your Pixelated World The Ultimate Guide to Discovering Creator Types via 6 Tests
- [Updated] Dominate the Digital Arena Audience Expansion on Youtube
- Scripting Your Story's Visual Heartbeat at Home
- In 2024, High-Quality Win Capturing Tools
- [New] Cadence in Clips The Guide to Musical Integration on IG for 2024
- Resizing Your Footage How to Change Aspect Ratio in Final Cut Pro for 2024
- Updated 2024 Approved Add Dynamism to Your Videos Motion Blur in Final Cut Pro Explained
- In 2024, Unlock iPhone 14 Pro With Forgotten Passcode Different Methods You Can Try | Dr.fone
- Facebook's A+ Covers Ranking the Best Photo Making Websites for 2024
- Audiovisual Integration Incorporating Audio Waveform and Creative Animation Into DaVinci Resolve
- [Updated] Top 15 Facebook Strategies for Maximizing Online Selling Power for 2024
- In 2024, Essential Tips for Adding Lame Library to Your Audacity Setup
- 7 Solutions to Fix Chrome Crashes or Wont Open on Honor Magic 6 Pro | Dr.fone
- Unraveling Time Reverse Video on Instagram Secrets
- Process of Screen Sharing Vivo Y78t to PC- Detailed Steps | Dr.fone
- The Full Guide to Instagram's Per-Video Limit
- [Updated] TwitCast Audible & MP4 Edition for 2024
- [Updated] In 2024, Tailoring Audio Quality Audacity's Path to Noiselessness
- [New] 2024 Approved Discover, Review & Compare with AZ Screenshotter
- In 2024, Du Recorder Features and Review
- Bypassing Google Account With vnROM Bypass For Oppo A78
- Title: "[Updated] Elevate Your Streaming Game From Twitch Viewers to YouTube Fans"
- Author: Kevin
- Created at : 2024-05-25 16:50:13
- Updated at : 2024-05-26 16:50:13
- Link: https://youtube-videos.techidaily.com/updated-elevate-your-streaming-game-from-twitch-viewers-to-youtube-fans/
- License: This work is licensed under CC BY-NC-SA 4.0.
