
!["[Updated] Effortlessly Convert YouTube Audio - Top 4 Low-Cost Apps"](https://www.lifewire.com/thmb/LMVFwXh09U0pTH87SpUAPwMzqjE=/400x300/filters:no_upscale():max_bytes(150000):strip_icc():format(webp)/Instagram_Login-5c004ff2c9e77c000104174d.png)
"[Updated] Effortlessly Convert YouTube Audio - Top 4 Low-Cost Apps"
Effortlessly Convert YouTube Audio - Top 4 Low-Cost Apps
YouTube to WAV File: 4 Best Free Convert Solutions

Richard Bennett
Mar 27, 2024• Proven solutions
YouTube to WAV converter is a very common phenomenon. This is done by the users as they want to play the video on selected devices.
In this article, we will help you manage to convert YouTube to WAV file with ease.
You will Learn :
- What is WAV?
- How to Convert YouTube to WAV Format? (4 Options)
- Tips to Convert YouTube to WAV
- Beside WAV Other Popular Formats for YouTube Videos
What is WAV?
WAV, known as Wave Form Audio File Format and is fully supported by Windows, is a common format that was launched back in 1991, which supports most of the older devices as well.
For the users that want uncompressed and lossless quality prefer to use WAV format. It is extended from the RIFF format to the RF64 format.
How to Convert YouTube to WAV Format?
Some many ways and programs can be used as YouTube to WAV converter. All these programs are easy to use and definitive guides are also available online. Some of the best ways are mentioned below.
Option 1: Convert YouTube to WAV by Wondershare Filmora
Filmora is by far the best program that can be used to convert YouTube to WAV format. YouTube to WAV file conversion has never been as easy as it is with this program. The program is easy to use and allows the users to overcome the issues which other programs present.
Features of the Program
- It is one of the very few programs that come with split-screen functionality. It means that the video and audio can be played simultaneously on a single interface.
- The audio equalizer ensures that the tuning is done as per the requirements.
- There is an advanced functionality of text editing which allows the users to mention the text onto the converted video as well.
- The UI of the program is graphical and hence it is easy to use. The independent reviews have granted a score of 9.5 based on this functionality of the program.
- The part selection is available in the program. It means that multiple conversions can be done at the same time without losing quality.
How to Convert YouTube to WAV Using Filmora?
This YouTube WAV converter is easy to use. The best part is that it is compatible with major platforms i.e. Windows and Mac. The processes for both will be explained in detail so that you can understand the program better.
The Process to Convert YouTube to WAV:
Step 1: Download Filmora for Windows or Mac (depends on your operating system).
If you want to download the program for Windows then click below download icon:

For Mac version download click below icon:

Step 2: There are three ways to import media into the program.
Methond 1: Click File > Import Media. Choose the YouTube file that you want to convert to WAV format. If the file is on another device then you can get it from there as well.

Method 2: Click Import Media on the main interface and select the file from the window that pops up.
Method 3: You can also drag and drop the files onto the interface to make sure that they are imported.
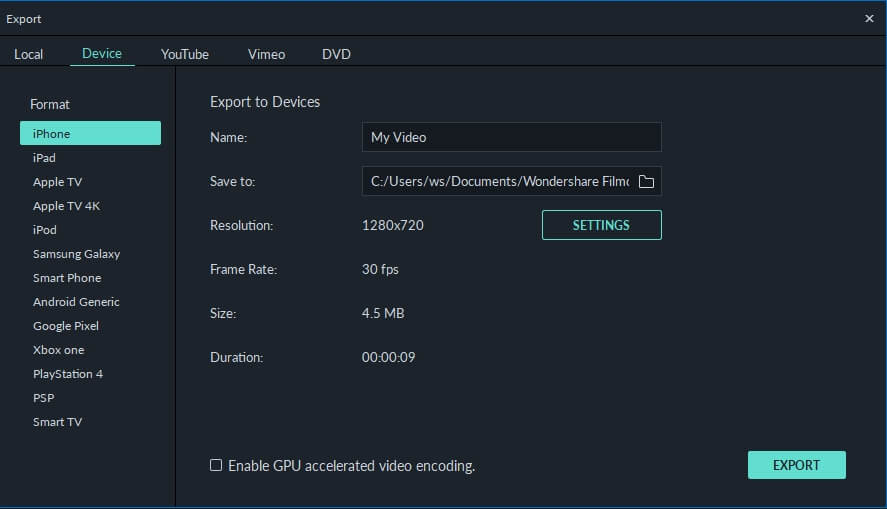
Step 3: You now just need to export the video in the WAV format. Click the Export button and then go for the Local tab. The export formats that are currently supported by the program are WMV, MP4, AVI, MOV, F4V, MKV, TS, 3GP, MPEG-2, WEBM, GIF and MP3.

Step 4: You can then alter the settings within the settings tab. The bit rate is the main thing that defines the quality of the video. Once the settings are done press OK
Step 5: You can also export the video as per the device that you want to play it on.
Step 6: You can also upload the video to social media platforms such as YouTube and Vimeo.
Step 7: You can also burn the converted format onto a DVD. Select the appropriate settings and press Export.
The process is explained as under. For video guides please visit Filmora 101 as it will get you the complete knowledge thoroughly.
You may also like: How to Convert YouTube to MP4 Safely? [Step by Step Guide] >>
Option 2: Other Way to Convert YouTube to WAV on Windows
5K Player is one of the best and the most used players that also work as YouTube to WAV conversion platform as well. The process is very easy to follow and is mentioned as under.
Step 1: Copy and paste the URL of the video on the desired location within the player. Click download and the process starts.

Step 2: Click “To Music” and select the WAV format from the drop-down that appears. You can also choose the bit rate, frame rate, and resolution. Once the conversion is completed you can save the file and the process ends here.
You may also like: >> How to to Convert WMV to MP4 Easily?
Option 3: Other Way to Convert YouTube to WAV on Mac
The Allavsoft is one of the best converters that can be used to convert YouTube to WAV on Mac. The process is simple and has been explained as under.
Step 1: Paste the URL of the YouTube video that you want to convert. You can also select the download quality and can access the file once the download has been completed.

Step 2: You can then select the format and once the conversion has been completed click the download button. The same has been depicted by numbers 2 and 3 in the picture below. WAV lossless quality should be selected from the dropdown to make sure that the work is done without any issue and problem.
Right format selection is important as the conversion is done instantly.
Option 4: YouTube to WAV Conversion Online
The process that you need to follow is explained as under.
Step 1: Visit https.//www.savethevideo.com/convert to access the converter.
Step 2: Paste the URL of the YouTube video that you want to convert and click the “Convert” button:

Step 3: Wait till the converter fetches the information.
Step 4: From the drop-down make sure that you select the WAV format.
Step 5: Click “Convert” once again and the process of conversion starts.
Step 6: The video then starts to download in the desired format.
Step 7: Click “Download” and save the file to the desired location. This concludes the process in full.
Tips to Convert YouTube to WAV
Below are some tips that would be useful for the users that want to convert YouTube to WAV format.
1. Always use the multipurpose software. It will allow you to download and convert the video at the same time-saving time.
2. Lossless quality is always to be selected while you are converting the format. It will make sure that the video is never compressed at all.
3. One of the best ways to convert the video is to disable the background noise. This will lead to awesome results.
4. Converting from YouTube to WAV also requires you to choose the software that is fast and reliable or else you will get the outcome which is not as per your requirements.
5. Free software programs can also get the malware to your system and therefore these are not recommended at all.
6. WAV is a format that is of high quality as the converters have loads of options so it is advised to use these carefully.
7. Make sure that the converters that are used are the ones that are highly rated and have a graphical user interface.
8. The YouTube to WAV downloader should be there on with the converter as it will make the process easy and you don’t need tons of software programs for a single purpose.
9. Always go for the program that supports the containers instead of just the format. If a program supports the containers then it is easy to convert a number of formats.
10. The conversion should be done with converters that do not cause any type of loss to enhance the quality as well.
Beside WAV Other Popular Formats for YouTube Videos
Many other video formats should be used to make sure that the best and the most advanced outcome is generated. Some of the most popular formats are as under.
- Audio Video Interleave Format, AVI
It is one of the oldest formats that are on the market. It was developed by Microsoft as a part of their video processing format for Windows. It was made publically available in 1992.
This one of the oldest formats is used universally. Many people consider it the standard to save videos. The AVI files are simple to use and are supported by almost every video player currently on the market.
It is easy to store as it takes less space than many other formats that are on the market. It will also let you transfer the files relatively faster due to the small size.
- Flash Video Format, FLV
The flash player by Adobe is one of the most common software programs on the system. This has made this video format one of the common ones on the market. The format can be played with ease as the supported plugins are there for other apps as well.
The flash content is supported by all browsers and therefore it is common to play these videos without any additional plugins. The best part of this format is the lossless quality that it provides to its users. Even if you compress these videos they remain HD as the quality remains the same.
- Apple QuickTime Movie, MOV
Among the Mac users, it is one of the most used formats. Developed by Apple it is a format that allows the users to overcome issues such as playback errors. The new version has also been launched which is known as QuickTime X.
The best part of this format is that it is available for Windows users as well. The files of the MOV format are usually of high quality. It is for the same that the size of such files is large as compared to other formats.
- Moving Pictures Expert Group 4, MP4
Introduced in 1998 it is a format that is used by the motion pictures association responsible for setting the standards. The format is widely used and is supported by various platforms as well as devices.
Even after the MP4 file is compressed it remains lossless and the quality remains the same. The HTML5 that has been launched currently also supports this format. It is compatible with almost all of the browsers that are on the market.
- 264
As the name suggests it is one of the best and the most used formats for HD videos. The compression remains lossless and even if the resolution is low the quality is maintained. The MP4 container is the one that is used to contain this format.
Most of the streaming devices, as well as the services, use this format while referring to HD video. The best part is that the format is widely accepted as industry standards for HD videos. Most of the users all over the world use this format to save their HD videos with ease.
- OGG
It is one of the most used video formats. It has been developed by the Xiph.org foundation to maintain the video as well as the audio quality on different platforms. The format is free and the documentation, as well as the configuration, can be downloaded by anyone.
- Advanced Systems Format, .ASF
If you want to stream videos then this is the format that is considered to be the best. It is still being used by the major popular streaming platforms of the world. The .ASF format is one of the best and it allows the users to overcome issues such as quality loss as well as streaming related issues.
You may also like: How to Post/Share a Video From YouTube on Instagram >>
Conclusion
If you require lossless compression then YouTube to WAV conversion is something that is required. Some many ways and means can be used to make sure that the idea is approached. The best way is to use Filmora as it is an easy and efficient operation.
The best way to get around the issue is to always use the service that is embedded with quality.
If you like this article then it is requested to comment and share it on social media. It will not only help others but will also let them have knowledgeable ideas.
Richard Bennett
Richard Bennett is a writer and a lover of all things video.
Follow @Richard Bennett
Richard Bennett
Mar 27, 2024• Proven solutions
YouTube to WAV converter is a very common phenomenon. This is done by the users as they want to play the video on selected devices.
In this article, we will help you manage to convert YouTube to WAV file with ease.
You will Learn :
- What is WAV?
- How to Convert YouTube to WAV Format? (4 Options)
- Tips to Convert YouTube to WAV
- Beside WAV Other Popular Formats for YouTube Videos
What is WAV?
WAV, known as Wave Form Audio File Format and is fully supported by Windows, is a common format that was launched back in 1991, which supports most of the older devices as well.
For the users that want uncompressed and lossless quality prefer to use WAV format. It is extended from the RIFF format to the RF64 format.
How to Convert YouTube to WAV Format?
Some many ways and programs can be used as YouTube to WAV converter. All these programs are easy to use and definitive guides are also available online. Some of the best ways are mentioned below.
Option 1: Convert YouTube to WAV by Wondershare Filmora
Filmora is by far the best program that can be used to convert YouTube to WAV format. YouTube to WAV file conversion has never been as easy as it is with this program. The program is easy to use and allows the users to overcome the issues which other programs present.
Features of the Program
- It is one of the very few programs that come with split-screen functionality. It means that the video and audio can be played simultaneously on a single interface.
- The audio equalizer ensures that the tuning is done as per the requirements.
- There is an advanced functionality of text editing which allows the users to mention the text onto the converted video as well.
- The UI of the program is graphical and hence it is easy to use. The independent reviews have granted a score of 9.5 based on this functionality of the program.
- The part selection is available in the program. It means that multiple conversions can be done at the same time without losing quality.
How to Convert YouTube to WAV Using Filmora?
This YouTube WAV converter is easy to use. The best part is that it is compatible with major platforms i.e. Windows and Mac. The processes for both will be explained in detail so that you can understand the program better.
The Process to Convert YouTube to WAV:
Step 1: Download Filmora for Windows or Mac (depends on your operating system).
If you want to download the program for Windows then click below download icon:
For Mac version download click below icon:
Step 2: There are three ways to import media into the program.
Methond 1: Click File > Import Media. Choose the YouTube file that you want to convert to WAV format. If the file is on another device then you can get it from there as well.
Method 2: Click Import Media on the main interface and select the file from the window that pops up.
Method 3: You can also drag and drop the files onto the interface to make sure that they are imported.
Step 3: You now just need to export the video in the WAV format. Click the Export button and then go for the Local tab. The export formats that are currently supported by the program are WMV, MP4, AVI, MOV, F4V, MKV, TS, 3GP, MPEG-2, WEBM, GIF and MP3.
Step 4: You can then alter the settings within the settings tab. The bit rate is the main thing that defines the quality of the video. Once the settings are done press OK
Step 5: You can also export the video as per the device that you want to play it on.
Step 6: You can also upload the video to social media platforms such as YouTube and Vimeo.
Step 7: You can also burn the converted format onto a DVD. Select the appropriate settings and press Export.
The process is explained as under. For video guides please visit Filmora 101 as it will get you the complete knowledge thoroughly.
You may also like: How to Convert YouTube to MP4 Safely? [Step by Step Guide] >>
Option 2: Other Way to Convert YouTube to WAV on Windows
5K Player is one of the best and the most used players that also work as YouTube to WAV conversion platform as well. The process is very easy to follow and is mentioned as under.
Step 1: Copy and paste the URL of the video on the desired location within the player. Click download and the process starts.
Step 2: Click “To Music” and select the WAV format from the drop-down that appears. You can also choose the bit rate, frame rate, and resolution. Once the conversion is completed you can save the file and the process ends here.
You may also like: >> How to to Convert WMV to MP4 Easily?
Option 3: Other Way to Convert YouTube to WAV on Mac
The Allavsoft is one of the best converters that can be used to convert YouTube to WAV on Mac. The process is simple and has been explained as under.
Step 1: Paste the URL of the YouTube video that you want to convert. You can also select the download quality and can access the file once the download has been completed.
Step 2: You can then select the format and once the conversion has been completed click the download button. The same has been depicted by numbers 2 and 3 in the picture below. WAV lossless quality should be selected from the dropdown to make sure that the work is done without any issue and problem.
Right format selection is important as the conversion is done instantly.
Option 4: YouTube to WAV Conversion Online
The process that you need to follow is explained as under.
Step 1: Visit https.//www.savethevideo.com/convert to access the converter.
Step 2: Paste the URL of the YouTube video that you want to convert and click the “Convert” button:
Step 3: Wait till the converter fetches the information.
Step 4: From the drop-down make sure that you select the WAV format.
Step 5: Click “Convert” once again and the process of conversion starts.
Step 6: The video then starts to download in the desired format.
Step 7: Click “Download” and save the file to the desired location. This concludes the process in full.
Tips to Convert YouTube to WAV
Below are some tips that would be useful for the users that want to convert YouTube to WAV format.
1. Always use the multipurpose software. It will allow you to download and convert the video at the same time-saving time.
2. Lossless quality is always to be selected while you are converting the format. It will make sure that the video is never compressed at all.
3. One of the best ways to convert the video is to disable the background noise. This will lead to awesome results.
4. Converting from YouTube to WAV also requires you to choose the software that is fast and reliable or else you will get the outcome which is not as per your requirements.
5. Free software programs can also get the malware to your system and therefore these are not recommended at all.
6. WAV is a format that is of high quality as the converters have loads of options so it is advised to use these carefully.
7. Make sure that the converters that are used are the ones that are highly rated and have a graphical user interface.
8. The YouTube to WAV downloader should be there on with the converter as it will make the process easy and you don’t need tons of software programs for a single purpose.
9. Always go for the program that supports the containers instead of just the format. If a program supports the containers then it is easy to convert a number of formats.
10. The conversion should be done with converters that do not cause any type of loss to enhance the quality as well.
Beside WAV Other Popular Formats for YouTube Videos
Many other video formats should be used to make sure that the best and the most advanced outcome is generated. Some of the most popular formats are as under.
- Audio Video Interleave Format, AVI
It is one of the oldest formats that are on the market. It was developed by Microsoft as a part of their video processing format for Windows. It was made publically available in 1992.
This one of the oldest formats is used universally. Many people consider it the standard to save videos. The AVI files are simple to use and are supported by almost every video player currently on the market.
It is easy to store as it takes less space than many other formats that are on the market. It will also let you transfer the files relatively faster due to the small size.
- Flash Video Format, FLV
The flash player by Adobe is one of the most common software programs on the system. This has made this video format one of the common ones on the market. The format can be played with ease as the supported plugins are there for other apps as well.
The flash content is supported by all browsers and therefore it is common to play these videos without any additional plugins. The best part of this format is the lossless quality that it provides to its users. Even if you compress these videos they remain HD as the quality remains the same.
- Apple QuickTime Movie, MOV
Among the Mac users, it is one of the most used formats. Developed by Apple it is a format that allows the users to overcome issues such as playback errors. The new version has also been launched which is known as QuickTime X.
The best part of this format is that it is available for Windows users as well. The files of the MOV format are usually of high quality. It is for the same that the size of such files is large as compared to other formats.
- Moving Pictures Expert Group 4, MP4
Introduced in 1998 it is a format that is used by the motion pictures association responsible for setting the standards. The format is widely used and is supported by various platforms as well as devices.
Even after the MP4 file is compressed it remains lossless and the quality remains the same. The HTML5 that has been launched currently also supports this format. It is compatible with almost all of the browsers that are on the market.
- 264
As the name suggests it is one of the best and the most used formats for HD videos. The compression remains lossless and even if the resolution is low the quality is maintained. The MP4 container is the one that is used to contain this format.
Most of the streaming devices, as well as the services, use this format while referring to HD video. The best part is that the format is widely accepted as industry standards for HD videos. Most of the users all over the world use this format to save their HD videos with ease.
- OGG
It is one of the most used video formats. It has been developed by the Xiph.org foundation to maintain the video as well as the audio quality on different platforms. The format is free and the documentation, as well as the configuration, can be downloaded by anyone.
- Advanced Systems Format, .ASF
If you want to stream videos then this is the format that is considered to be the best. It is still being used by the major popular streaming platforms of the world. The .ASF format is one of the best and it allows the users to overcome issues such as quality loss as well as streaming related issues.
You may also like: How to Post/Share a Video From YouTube on Instagram >>
Conclusion
If you require lossless compression then YouTube to WAV conversion is something that is required. Some many ways and means can be used to make sure that the idea is approached. The best way is to use Filmora as it is an easy and efficient operation.
The best way to get around the issue is to always use the service that is embedded with quality.
If you like this article then it is requested to comment and share it on social media. It will not only help others but will also let them have knowledgeable ideas.
Richard Bennett
Richard Bennett is a writer and a lover of all things video.
Follow @Richard Bennett
Optimize Video Sharing Preferences on YouTube
How to Change the Privacy Setting on Your YouTube Videos
Richard Bennett
Mar 27, 2024• Proven solutions
Privacy settings on YouTube allow you to control who can see your videos. There are three settings — Public, unlisted, and private. This article will give you a brief introduction of what those three settings mean, and how to use them.
- Part1: Public VS Unlisted VS Private
- Part2: How to Change Privacy Settings
- Part2: Sharing Private Videos
Want to make your YouTube videos more beautiful within minutes? Here we recommend an easy-to-use video editing software for beginner for your reference - Wondershare Filmora .
Download Mac Version ](https://tools.techidaily.com/wondershare/filmora/download/ )
Part 1: Public VS Unlisted VS Private
Let’s figure out some terms before runing into the how-to part.
Public Videos
These are videos that everyone can view. This is the majority of YouTube videos, and just about every one you’ve ever watched will have been public. You’ll want this if you want lots of people to watch your video.
Unlisted
Unlisted videos are ones that anybody can view so long as they have the link. The video won’t show up on search results or in “related” or “suggested” videos.
This is a great setting for sharing a video amongst small groups. You might have a rough edit you want to show a few people, or you might have a show reel that you only want certain people to see.
Private
Completely private videos cannot be watched by anyone who doesn’t have permission. You grant people permission by allowing their Google accounts to access the video. Nobody else can see the video, regardless of whether they have the link.
It won’t show up on searches, as related or suggested videos, or even when imbedded in other sites. This is the best setting for a video you need to share with only very specific people, if anyone. Below is a comparison table to know more about privacy settings .

Part 2: How to Change Privacy Settings
There are two ways to change the privacy settings: firstly, when you upload the video, and secondly through Creator Studio.
Method 1:
When you upload a video to YouTube you’ll see on the right hand side an option that says “privacy”. This is defaulted to “public”, but you can use the drop-down menu on the button to change the setting. This will apply your privacy setting the second the video finishes uploading and processing.

Method 2:
To change the privacy setting later, go to Creator Studio, then Video Manager. On the right-hand side you’ll see one of three icons: a world, a chain, and a lock. The world means “public”, the chain means “unlisted”, and the lock is for “private”.

To change the privacy, click the icon. You’ll be taken to the video’s info and settings page. Down below where you see the thumbnails you’ll see the selected privacy setting. Click this to open a drop down menu, and select your desired privacy level.
Part 3: Sharing Private Videos
If a video is set to “private’, you’ll have the option to share it with specific people. Below where it says “private” on the info and settings page you’ll see a button labeled “share”. Click this and type in the email addresses of the people you want to be able to watch the video. You’ll also have the option of notifying the people via email that you’ve shared the video with them.

Conclusion
And that’s all there is to it! Changing the privacy setting on YouTube videos is a simple, helpful tool to allow you to control the audience of you work. Enjoy!
Richard Bennett
Richard Bennett is a writer and a lover of all things video.
Follow @Richard Bennett
Richard Bennett
Mar 27, 2024• Proven solutions
Privacy settings on YouTube allow you to control who can see your videos. There are three settings — Public, unlisted, and private. This article will give you a brief introduction of what those three settings mean, and how to use them.
- Part1: Public VS Unlisted VS Private
- Part2: How to Change Privacy Settings
- Part2: Sharing Private Videos
Want to make your YouTube videos more beautiful within minutes? Here we recommend an easy-to-use video editing software for beginner for your reference - Wondershare Filmora .
Download Mac Version ](https://tools.techidaily.com/wondershare/filmora/download/ )
Part 1: Public VS Unlisted VS Private
Let’s figure out some terms before runing into the how-to part.
Public Videos
These are videos that everyone can view. This is the majority of YouTube videos, and just about every one you’ve ever watched will have been public. You’ll want this if you want lots of people to watch your video.
Unlisted
Unlisted videos are ones that anybody can view so long as they have the link. The video won’t show up on search results or in “related” or “suggested” videos.
This is a great setting for sharing a video amongst small groups. You might have a rough edit you want to show a few people, or you might have a show reel that you only want certain people to see.
Private
Completely private videos cannot be watched by anyone who doesn’t have permission. You grant people permission by allowing their Google accounts to access the video. Nobody else can see the video, regardless of whether they have the link.
It won’t show up on searches, as related or suggested videos, or even when imbedded in other sites. This is the best setting for a video you need to share with only very specific people, if anyone. Below is a comparison table to know more about privacy settings .
Part 2: How to Change Privacy Settings
There are two ways to change the privacy settings: firstly, when you upload the video, and secondly through Creator Studio.
Method 1:
When you upload a video to YouTube you’ll see on the right hand side an option that says “privacy”. This is defaulted to “public”, but you can use the drop-down menu on the button to change the setting. This will apply your privacy setting the second the video finishes uploading and processing.
Method 2:
To change the privacy setting later, go to Creator Studio, then Video Manager. On the right-hand side you’ll see one of three icons: a world, a chain, and a lock. The world means “public”, the chain means “unlisted”, and the lock is for “private”.
To change the privacy, click the icon. You’ll be taken to the video’s info and settings page. Down below where you see the thumbnails you’ll see the selected privacy setting. Click this to open a drop down menu, and select your desired privacy level.
Part 3: Sharing Private Videos
If a video is set to “private’, you’ll have the option to share it with specific people. Below where it says “private” on the info and settings page you’ll see a button labeled “share”. Click this and type in the email addresses of the people you want to be able to watch the video. You’ll also have the option of notifying the people via email that you’ve shared the video with them.
Conclusion
And that’s all there is to it! Changing the privacy setting on YouTube videos is a simple, helpful tool to allow you to control the audience of you work. Enjoy!
Richard Bennett
Richard Bennett is a writer and a lover of all things video.
Follow @Richard Bennett
Also read:
- 2024 Approved Elevate Your YouTube Channel Perfecting Video Scriptwriting Skills
- Top Earning YouTube Star Globally
- Elevate Your Content The Secrets to Increased Subscribers for 2024
- Optimize Your Music Experience The Best Apps for Turning Spotify Into YouTube
- [New] A Dive Into the Premium List of Top 10 Budget-Friendly YouTube Designers
- Convenient Cornerstone Building Your Online Channel, Anywhere & Everytime
- Top 20 Fonts for Captivating YouTube Thumbnails
- 2024 Approved Becoming a YouTube Guru Essential Production Know-How
- [New] Bridal Bliss Filmed Alike High-Quality 8 Marriage Videos Online
- Perfecting Your YouTube Presence A Video Upload Manual
- Designing Memorable Try-On Videos for Online Audiences for 2024
- Unveiling YouTube's Complex View Count System
- [Updated] Engaging Viewers First Impressions The Art of Backdrop Selection in Thumbnails
- The Comprehensible Guide to Selecting Popular YouTube Openings
- Mobile Filmmaking Mastery Creating Impactful YouTube Thumbnails
- 2024 Approved Convenient Viewing Setting Up YouTube on Large TV Panels
- Decoding Steps to Access Your Channel's Eyeballs
- Discovering the Top 5 Smarter URL Lengtheners for YouTube for 2024
- 2024 Approved Beginner's Steps to Broadcast on Youtube via OBS
- Quick Start to YouTube Success Creating Business & Personal Channels on Phone
- Crafting the Quintessential Thumbnails for Live Video Success for 2024
- In 2024, BeatCut Studio Pro Audio-Film Fusion on PC
- Transfer Tactics for Seamless Online Video Sharing
- [New] Elevated Viewership Status Symbolized by Buttons
- Targeted Success Identifying YouTube Niche Demand
- [New] Beyond Simplicity Exploring the Intricacies of YouTube’s View Count Algorithm
- YouTube for Educators Maximizing Its Classroom Potential
- In 2024, How To Add Custom Thumbnails to Your YouTube Videos
- Revenue Realization Strategies for Successful Monetization on YouTube Mobile
- Synergistic Videos to Skyrocket Your Follower Count
- Navigating Content Distribution A Close Look at IGTV and YouTube
- Comprehensively Understanding YouTube's Aspect Ratio Ecosystem
- Wander in Wealthy Web Words Worlds
- Channel Triumphs with Trending Hashtags
- [Updated] Elevate Views The Power of Synergistic YouTube Content Partnerships
- 2024 Approved Deciphering Revenue Sharing in YouTube Shorts
- Are There Benefits to Purchasing YouTube Engagement for 2024
- Updated How to Make an Explainer Video Step by Step Guide for 2024
- 10 Easy-to-Use FRP Bypass Tools for Unlocking Google Accounts On Vivo Y27 5G
- [Updated] Top 15 Best Business Simulation Games of 2024
- In 2024, How to Unlock SIM Card on Meizu online without jailbreak
- New The Ultimate MP4 Video Editing Tutorial Mac and Windows Edition for 2024
- Single-Tasking with Background Elimination
- [Updated] In 2024, Take Fullscreen Digital Canvas
- Updated 2024 Approved What Apps Can You Use to Blur the Face or the Background on the Video? In This Article, I Will Share some of the Best Video Blur Apps that You Can Use to Blur Any Part of the Video on iPhone or Android Phones
- 15 Best Strongest Pokémon To Use in Pokémon GO PvP Leagues For Tecno Spark Go (2024) | Dr.fone
- New 2024 Approved Optimizing Vertical Video Tips for Smartphone Creators
- Learn How to Make a Gaming Montage - Guide & Tips
- Unveiling Color Secrets - Master the Craft with Our Tutorial Series
- [New] 2024 Approved Time-Saving Titans The 8 Cutting-Edge Schedulers Reviewed
- 2024 Approved The Ultimate List 15 Best Adobe Premiere Pro Plugins to Download
- Updated In 2024, Conquering Complex Audioscapes A No-Nonsense Guide to Effective Track Combination in Premiere Pro
- Want to Uninstall Google Play Service from Motorola Moto G24? Here is How | Dr.fone
- Updated Subtitle Edit for Mac Not Working? Try These Alternatives for 2024
- In 2024, Easy Guide to Samsung FRP Bypass With Best Methods
- [Updated] Cutting Through Steps Posting TikTok Videos on Twitter
- In 2024, How to Mirror Your Tecno Phantom V Fold Screen to PC with Chromecast | Dr.fone
- Revolutionize Your Animation Workflow 7 Must-Try Drawing Software for 2024
- How to Spy on Text Messages from Computer & Infinix Hot 30i | Dr.fone
- [Updated] Extreme Playlist Best TikTok Crazy Games to Try for 2024
- [New] In 2024, Personalizing Teams Windows for Effective Calls
- [New] Followers & Posts 10 Instagram Essentials to Watch for 2024
- How to Fake Snapchat Location on Vivo Y56 5G | Dr.fone
- How to Fake Snapchat Location on Oppo A79 5G | Dr.fone
- [Updated] 2024 Approved Expert Guide to Optimizing Solo Play in Apex Legends
- Perfected Acoustic Parameters for Electronics Optimization for 2024
- [New] 2024 Approved The Best for Broadcasting? OBS vs Twitch Studio
- In 2024, How to Use Pokémon Emerald Master Ball Cheat On Oppo Find N3 Flip | Dr.fone
- 4 Solutions to Fix Unfortunately Your App Has Stopped Error on Realme Narzo 60x 5G | Dr.fone
- Title: "[Updated] Effortlessly Convert YouTube Audio - Top 4 Low-Cost Apps"
- Author: Kevin
- Created at : 2024-05-25 16:49:30
- Updated at : 2024-05-26 16:49:30
- Link: https://youtube-videos.techidaily.com/updated-effortlessly-convert-youtube-audio-top-4-low-cost-apps/
- License: This work is licensed under CC BY-NC-SA 4.0.
