
!["[Updated] Digital Influencer's Riches Exceed Ages Kaji Ryan Story"](https://www.lifewire.com/thmb/E-bplQlBHLm0L2wSA_D5laHXhBM=/400x300/filters:no_upscale():max_bytes(150000):strip_icc()/google-meet-camera-not-working-how-to-fix-the-problem-5201889-1-266a66056f7f4b3e945b24c0de3a729b.jpg)
"[Updated] Digital Influencer's Riches Exceed Ages Kaji Ryan Story"
Digital Influencer’s Riches Exceed Ages: Kaji Ryan Story
If you are curious about Ryan Kaji’s net worth and what led to it, you are at the right place. YouTube as a platform is accessible to a vast global audience, and anyone, regardless of age or lifestyle, can earn high amounts with the right type of content. Ryan Kaji is one such individual who has achieved a lot in his short life with his YouTube channel, Ryan’s World.
Read ahead to get deep knowledge of how much does ryan’s world make, career graph, and how you can emulate a similar path on YouTube.

Part 1: The Biography Box on Ryan Kaji
Before going into this in detail, here is an overall summary of Ryan Kaji and his income structure for a quick look.
| Name | Ryan Kaji |
|---|---|
| Real Name | Ryan Naruto Nguyen |
| Net Worth (as of 2022) | USD 35 million |
| Monthly Income/Salary (approx.) | USD 1.11 million |
| Yearly Income (approx.) | USD 16.66 million |
| Age | 11 years |
| Gender | Male |
| Height | 1.28 m or 128 cm or 4 ft 2 inches |
| Nationality | Asian-American |
| Profession | YouTuber, Influencer |
| YouTube Channel | Ryan’s World |
| Awards and Recognition | · Ranked No. 23 on Top Creators List, Forbes 2022.· Ryan’s World ranks as one of the top 100 YouTube channels. |

Now that we know the primary data about Ryan, read on to learn about how he became famous on YouTube and his overall income, in more detail.
Part 2: Ryan Kaji YouTube Earning and Stats
After seeing the notes about Ryan’s World’s yearly income and other points, you must wonder how it has increased over the years. To simplify, most of his income comes from YouTube in terms of views and ad revenue, like most YouTubers.
Other than that, his subscriber count also accounts for a portion of what the YouTube algorithm calculates for the income evaluation. Currently, the subscriber counts for the Ryan’s World channel sits at 33.3 million, spread across different age demographics.
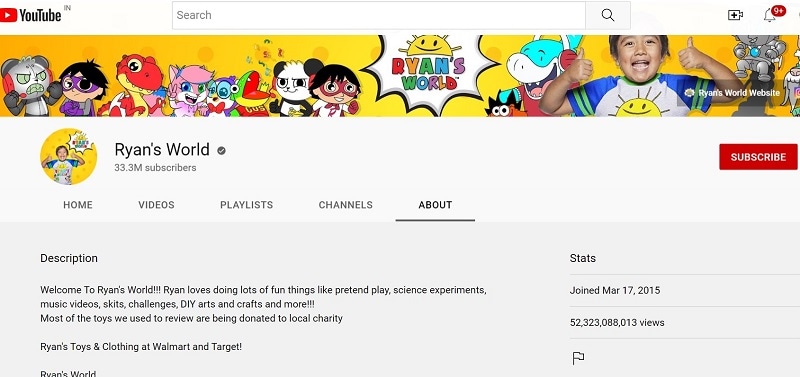
To calculate Ryan World net worth in 2020, the jump from 2022, and how it grew since 2015 overall, the ads play a major role. Typically, YouTubers earn around USD 3-7 for every 1000 views. His videos get around 277.59 million views per month. So, the overall count can extend to USD 1.11 million per month.
If he earns higher, like USD 7 for every 1000 views, his annual average can increase reach around USD 29.98 million instead of the estimated USD 16.66 million.
Moreover, YouTubers earn from other sources besides the ads on their videos, so the overall Ryan YouTube income is likely even higher monthly and yearly. These additional sources include affiliate commissions, sponsorships, interviews at other platforms, and product sales/merchandise.

Here is a quantified average of the earning statistics for Ryan’s World income in tabular format.
| Ryan Kaji Ryan’s World Income | |
|---|---|
| Estimated Earnings per Month | USD 1.11 million |
| Estimated Earnings per Year | USD 16.66 million |
| Total Video Uploads (Approx) | 52.323 billion |
| Subscribers | 33.3 million |
| Video Views (on average) | 800,000+ |
| Views for the last 30 days (on average) | 277.59 million |
Ryan Kaji’s Annual Income between 2016-2022
For a better understanding of how much does Ryan ToysReview make, which is the most popular segment in his channel, let’s look at his earning graph over the years.
Here is a bar chart showing the growth in Raji Kaji’s net worth from 2016 to the present.
Since Ryan Kaji started his channel in 2015, he has focused mainly on posting reviews and critiques on toys in videos. His personable characteristics and demeanor, plus the type of content he presented, helped him increase his earnings, raking in USD 11 million in 2016 and 2017.
As he grew in age, his content shifted to fit his interests at 6 years of age, which revolved around DIY science, adding animated co-stars, and doodles. He also started his custom merchandise for the subscribers, had his AdSense revenue, and a proprietary toy line. Therefore, regarding how much money did Ryan ToysReview make in 2018, the channel saw growth to USD 22 million, which further increased to USD 26 million in 2019.
In 2020, he earned around USD 29.5 million and USD 27 million in 2021. The Ryan ToysReview income further grew to USD 35 million in 2022, and it is expected to increase in the upcoming time, especially with his videos raking in millions of views in recent times.
Popularity across social media
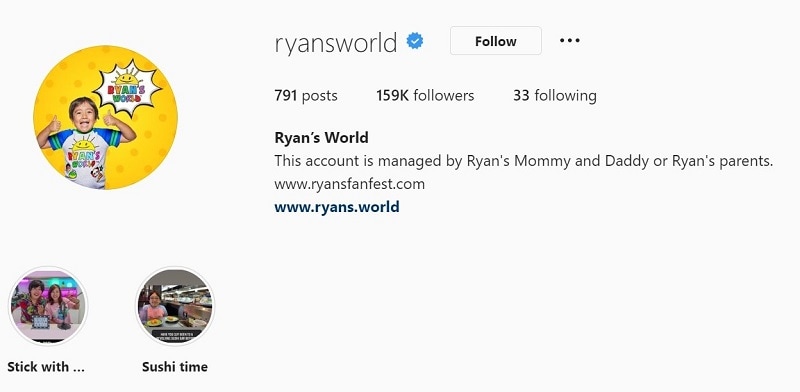
The leading social media platform where Ryan Kaji grew his strength is YouTube, and he currently enjoys a massive fan following. His channel, Ryan’s World, has an overall subscriber base of around 33.3 million YouTube users. These include primarily children as well as other adults, either who enjoy his content or those who watch along with their kids. He also has an Instagram account for his channel with around 159k followers.
Besides that, the total Ryan’s World earnings also come from his other YouTube channels, managed under the company his parents established afterward. These include Ryan ToysReview, The Studio Space, Ryan’s Family Review, EK Doodles, and three more.
All of these channels combined get a substantial overall following base, though there are overlaps between all or some of them. Ryan Kaji also has a television series and video game under the brand, increasing his overall popularity. The series name is “Ryan’s Mystery Playdate” on Nick Jr.
Part 3: Why is Ryan Kaji Trending on YouTube?
The overall view of how much money does Ryan have throughout the years and his social media popularity will surely give you an idea of how he amassed his impressive net worth. However, why exactly is he so popular on the platform when he focuses mainly on kid’s toys instead of other things that appeal to the primarily adult userbase on YouTube?
Charming personality
Ryan has a fun and enthusiastic approach to his videos, showing a bright and adorable personality. This shines through all of his videos, and his excitement translates across the screen to the viewers to captivate their attention well.
Interactive and engaging videos
The way the content is presented is engaging, with Ryan speaking to the viewers like friends. That creates a light-hearted environment for his subscribers, who are mostly kids. His videos also include information they learn, like the “ABC Song Learn English Alphabet for Children with Ryan!” video.
High-quality visuals and effects
The videos on the channel are well edited, with bright color scape and high-resolution imagery. The editor also adds fun effects in video, image, and audio format to engage all senses of viewers.
Consistent delivery/updates
The team behind Ryan’s World has the timing of their releases well-planned and relatively consistent with the posting schedule. Subscribers stay engaged since they get the videos they want regularly.
Engaging and eye-catching titles-
The titles of the videos on this channel are framed with the main keywords of what content one can expect. The title card design with effects and other areas where text pop up is properly set.
Top videos on Ryan’s World
To understand these points, you should take a look at his top videos on YouTube. The best videos on Ryan’s World channel include “HUGE EGGS Surprise Toys Challenge with Inflatable Water Slide” with 2 billion views, “Giant Lightning McQueen Egg Surprise with 100+ Disney Cars Toys” with 1.1 billion views, and “ABC Song Learn English Alphabet for Children with Ryan!” with 384 million views.
Video Link: https://www.youtube.com/watch?v=GcmDiyk3NJs
Each video has an engaging title that speaks on the central theme while keeping consistent with his content type, i.e., toys review. Plus, he has visually appealing thumbnails with edited imagery, and his vibrant personality is appealing as well. All in all, he covers all the main points necessary to create engaging content, and that naturally adds to Ryan World salary.

Bonus Tip: How to be a YouTuber and Make Videos like Ryan Kaji
Yes, the quality and presentation of the videos on the channel are one of critical pieces that caused the high Ryan Kaji net worth. If you plan to start your YouTube channel, you should focus on video editing to optimize its quality. In this context, the Filmora software is an excellent tool to use.
Filmora- Why should you use it?
Wondershare Filmora is a high-grade video editing software that allows users to create dynamic, eye-grabbing, and intuitive videos efficiently. You can use the features available in this Mac and Windows-based software to merge, cut, split, and more your video clips into one cohesive project. It is simple to add filters with pre-set FX plugins like Boris FX, among other available options, for a unique video look.
Additionally, you can adjust the coloring of your videos with Color Matching and Color Correction features and add titles/transitions, among others. You can add voiceover and audio effects and adjust the video’s volume, tone, and soundtrack. AI-based features are also available here for quick automated edits (Instant Mode), removing background by focusing on only the subject (AI Portrait), and more.
How to use Filmora to create engaging videos for YouTube?
Free Download For Win 7 or later(64-bit)
Free Download For macOS 10.14 or later
Step1 Download and launch the Filmora software on Mac or Windows PC.
Step2 Tap on New Project > Click here to import media.
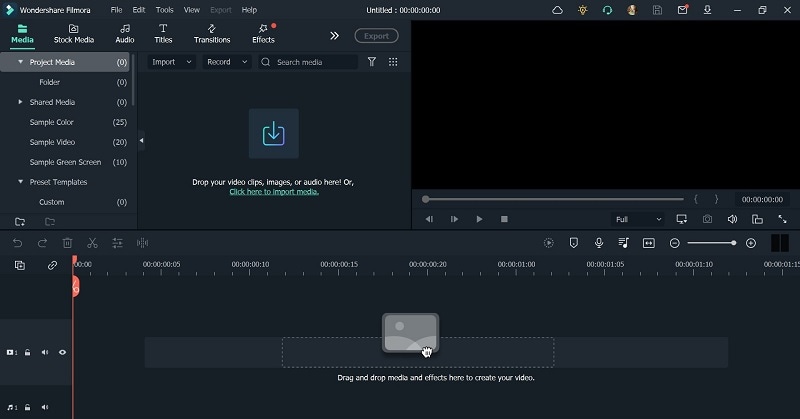
Step3 After choosing the video file or files from your device, drag them to the editor timeline below.
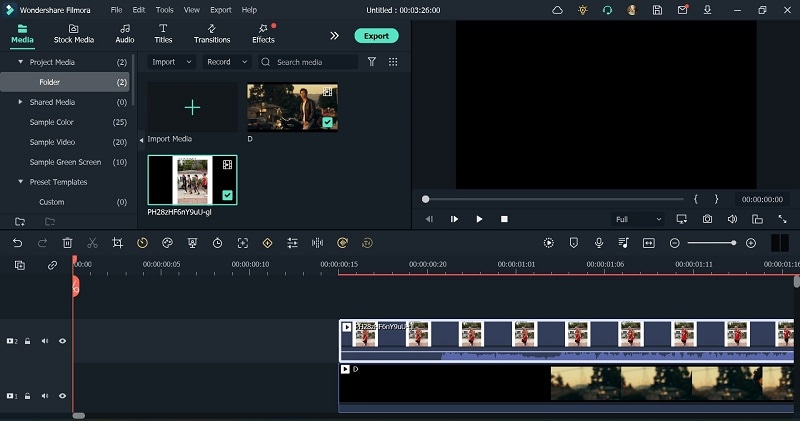
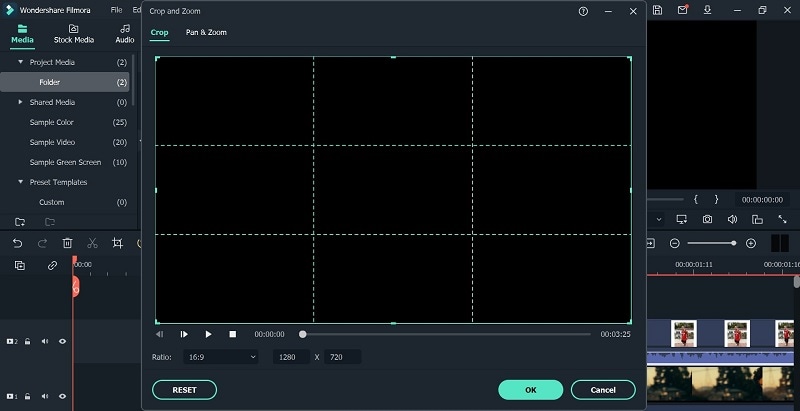
Step4 From the toolbar just above the timeline, click on the standard functions you want to use for editing the video. For example, click on the file and press the Crop icon.
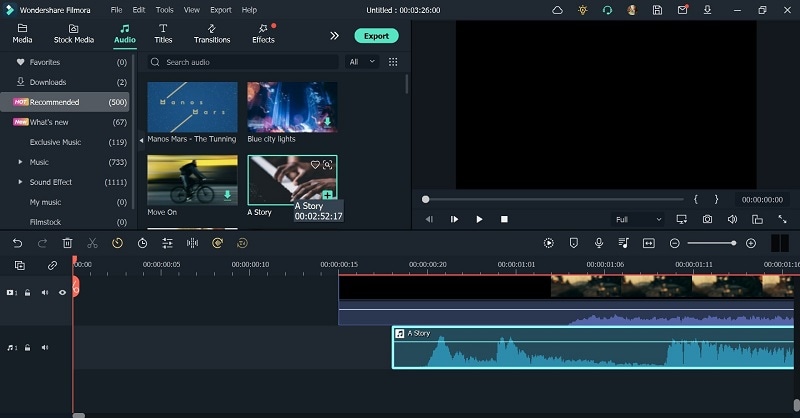
Step5 At the top-most toolbar, you can see many tabs for editing, like Effects, Audio, Titles, etc. Click on them to get the drop-down menu of available effects, audio clips, and more. Add the ones you choose by dragging them to the video on the timeline.
Continue with further editing work using other tools available, like speed adjustment, background removal (chroma key), and more.
Step6 After completing the edits, click the Export button. Choose to download it offline by selecting Local and choosing your preferred format. Make further changes in the settings.
Or, you can directly post the video to your linked YouTube account.
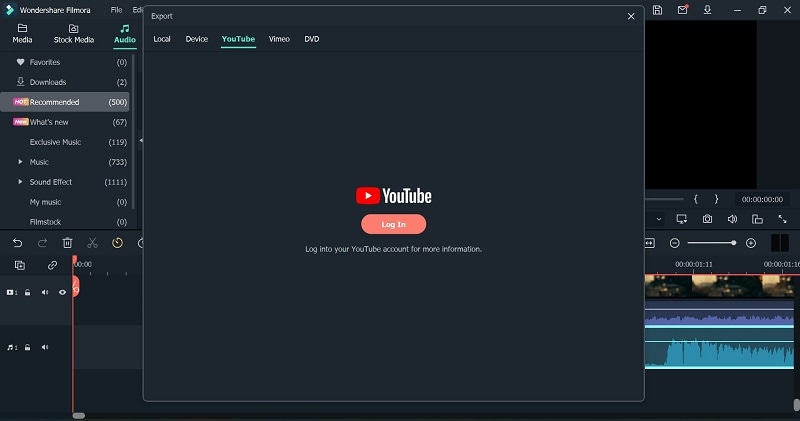
Step7 Tap the Export button.
Final Words
Overall, Ryan Kaji saw great success with his stunning and engaging videos on his YouTube channel over the years. Also, he focused on other ventures, with the support of the team behind his channel, for income and editing work.
But, while starting, your funding will be less. It would help if you handled the video editing work on your own first, with reliable software like Filmora . Also, use other analytics tools and strategies to improve your channel further.
Free Download For Win 7 or later(64-bit)
Free Download For macOS 10.14 or later
Part 1: The Biography Box on Ryan Kaji
Before going into this in detail, here is an overall summary of Ryan Kaji and his income structure for a quick look.
| Name | Ryan Kaji |
|---|---|
| Real Name | Ryan Naruto Nguyen |
| Net Worth (as of 2022) | USD 35 million |
| Monthly Income/Salary (approx.) | USD 1.11 million |
| Yearly Income (approx.) | USD 16.66 million |
| Age | 11 years |
| Gender | Male |
| Height | 1.28 m or 128 cm or 4 ft 2 inches |
| Nationality | Asian-American |
| Profession | YouTuber, Influencer |
| YouTube Channel | Ryan’s World |
| Awards and Recognition | · Ranked No. 23 on Top Creators List, Forbes 2022.· Ryan’s World ranks as one of the top 100 YouTube channels. |
Now that we know the primary data about Ryan, read on to learn about how he became famous on YouTube and his overall income, in more detail.
Part 2: Ryan Kaji YouTube Earning and Stats
After seeing the notes about Ryan’s World’s yearly income and other points, you must wonder how it has increased over the years. To simplify, most of his income comes from YouTube in terms of views and ad revenue, like most YouTubers.
Other than that, his subscriber count also accounts for a portion of what the YouTube algorithm calculates for the income evaluation. Currently, the subscriber counts for the Ryan’s World channel sits at 33.3 million, spread across different age demographics.
To calculate Ryan World net worth in 2020, the jump from 2022, and how it grew since 2015 overall, the ads play a major role. Typically, YouTubers earn around USD 3-7 for every 1000 views. His videos get around 277.59 million views per month. So, the overall count can extend to USD 1.11 million per month.
If he earns higher, like USD 7 for every 1000 views, his annual average can increase reach around USD 29.98 million instead of the estimated USD 16.66 million.
Moreover, YouTubers earn from other sources besides the ads on their videos, so the overall Ryan YouTube income is likely even higher monthly and yearly. These additional sources include affiliate commissions, sponsorships, interviews at other platforms, and product sales/merchandise.
Here is a quantified average of the earning statistics for Ryan’s World income in tabular format.
| Ryan Kaji Ryan’s World Income | |
|---|---|
| Estimated Earnings per Month | USD 1.11 million |
| Estimated Earnings per Year | USD 16.66 million |
| Total Video Uploads (Approx) | 52.323 billion |
| Subscribers | 33.3 million |
| Video Views (on average) | 800,000+ |
| Views for the last 30 days (on average) | 277.59 million |
Ryan Kaji’s Annual Income between 2016-2022
For a better understanding of how much does Ryan ToysReview make, which is the most popular segment in his channel, let’s look at his earning graph over the years.
Here is a bar chart showing the growth in Raji Kaji’s net worth from 2016 to the present.
Since Ryan Kaji started his channel in 2015, he has focused mainly on posting reviews and critiques on toys in videos. His personable characteristics and demeanor, plus the type of content he presented, helped him increase his earnings, raking in USD 11 million in 2016 and 2017.
As he grew in age, his content shifted to fit his interests at 6 years of age, which revolved around DIY science, adding animated co-stars, and doodles. He also started his custom merchandise for the subscribers, had his AdSense revenue, and a proprietary toy line. Therefore, regarding how much money did Ryan ToysReview make in 2018, the channel saw growth to USD 22 million, which further increased to USD 26 million in 2019.
In 2020, he earned around USD 29.5 million and USD 27 million in 2021. The Ryan ToysReview income further grew to USD 35 million in 2022, and it is expected to increase in the upcoming time, especially with his videos raking in millions of views in recent times.
Popularity across social media
The leading social media platform where Ryan Kaji grew his strength is YouTube, and he currently enjoys a massive fan following. His channel, Ryan’s World, has an overall subscriber base of around 33.3 million YouTube users. These include primarily children as well as other adults, either who enjoy his content or those who watch along with their kids. He also has an Instagram account for his channel with around 159k followers.
Besides that, the total Ryan’s World earnings also come from his other YouTube channels, managed under the company his parents established afterward. These include Ryan ToysReview, The Studio Space, Ryan’s Family Review, EK Doodles, and three more.
All of these channels combined get a substantial overall following base, though there are overlaps between all or some of them. Ryan Kaji also has a television series and video game under the brand, increasing his overall popularity. The series name is “Ryan’s Mystery Playdate” on Nick Jr.
Part 3: Why is Ryan Kaji Trending on YouTube?
The overall view of how much money does Ryan have throughout the years and his social media popularity will surely give you an idea of how he amassed his impressive net worth. However, why exactly is he so popular on the platform when he focuses mainly on kid’s toys instead of other things that appeal to the primarily adult userbase on YouTube?
Charming personality
Ryan has a fun and enthusiastic approach to his videos, showing a bright and adorable personality. This shines through all of his videos, and his excitement translates across the screen to the viewers to captivate their attention well.
Interactive and engaging videos
The way the content is presented is engaging, with Ryan speaking to the viewers like friends. That creates a light-hearted environment for his subscribers, who are mostly kids. His videos also include information they learn, like the “ABC Song Learn English Alphabet for Children with Ryan!” video.
High-quality visuals and effects
The videos on the channel are well edited, with bright color scape and high-resolution imagery. The editor also adds fun effects in video, image, and audio format to engage all senses of viewers.
Consistent delivery/updates
The team behind Ryan’s World has the timing of their releases well-planned and relatively consistent with the posting schedule. Subscribers stay engaged since they get the videos they want regularly.
Engaging and eye-catching titles-
The titles of the videos on this channel are framed with the main keywords of what content one can expect. The title card design with effects and other areas where text pop up is properly set.
Top videos on Ryan’s World
To understand these points, you should take a look at his top videos on YouTube. The best videos on Ryan’s World channel include “HUGE EGGS Surprise Toys Challenge with Inflatable Water Slide” with 2 billion views, “Giant Lightning McQueen Egg Surprise with 100+ Disney Cars Toys” with 1.1 billion views, and “ABC Song Learn English Alphabet for Children with Ryan!” with 384 million views.
Video Link: https://www.youtube.com/watch?v=GcmDiyk3NJs
Each video has an engaging title that speaks on the central theme while keeping consistent with his content type, i.e., toys review. Plus, he has visually appealing thumbnails with edited imagery, and his vibrant personality is appealing as well. All in all, he covers all the main points necessary to create engaging content, and that naturally adds to Ryan World salary.
Bonus Tip: How to be a YouTuber and Make Videos like Ryan Kaji
Yes, the quality and presentation of the videos on the channel are one of critical pieces that caused the high Ryan Kaji net worth. If you plan to start your YouTube channel, you should focus on video editing to optimize its quality. In this context, the Filmora software is an excellent tool to use.
Filmora- Why should you use it?
Wondershare Filmora is a high-grade video editing software that allows users to create dynamic, eye-grabbing, and intuitive videos efficiently. You can use the features available in this Mac and Windows-based software to merge, cut, split, and more your video clips into one cohesive project. It is simple to add filters with pre-set FX plugins like Boris FX, among other available options, for a unique video look.
Additionally, you can adjust the coloring of your videos with Color Matching and Color Correction features and add titles/transitions, among others. You can add voiceover and audio effects and adjust the video’s volume, tone, and soundtrack. AI-based features are also available here for quick automated edits (Instant Mode), removing background by focusing on only the subject (AI Portrait), and more.
How to use Filmora to create engaging videos for YouTube?
Free Download For Win 7 or later(64-bit)
Free Download For macOS 10.14 or later
Step1 Download and launch the Filmora software on Mac or Windows PC.
Step2 Tap on New Project > Click here to import media.
Step3 After choosing the video file or files from your device, drag them to the editor timeline below.
Step4 From the toolbar just above the timeline, click on the standard functions you want to use for editing the video. For example, click on the file and press the Crop icon.
Step5 At the top-most toolbar, you can see many tabs for editing, like Effects, Audio, Titles, etc. Click on them to get the drop-down menu of available effects, audio clips, and more. Add the ones you choose by dragging them to the video on the timeline.
Continue with further editing work using other tools available, like speed adjustment, background removal (chroma key), and more.
Step6 After completing the edits, click the Export button. Choose to download it offline by selecting Local and choosing your preferred format. Make further changes in the settings.
Or, you can directly post the video to your linked YouTube account.
Step7 Tap the Export button.
Final Words
Overall, Ryan Kaji saw great success with his stunning and engaging videos on his YouTube channel over the years. Also, he focused on other ventures, with the support of the team behind his channel, for income and editing work.
But, while starting, your funding will be less. It would help if you handled the video editing work on your own first, with reliable software like Filmora . Also, use other analytics tools and strategies to improve your channel further.
Free Download For Win 7 or later(64-bit)
Free Download For macOS 10.14 or later
Quick Tips: Incorporating Video From YouTube Into Google Presentations
Create High-Quality Video - Wondershare Filmora
An easy and powerful YouTube video editor
Numerous video and audio effects to choose from
Detailed tutorials provided by the official channel
Google Slide presentation is a powerful tool for creators to keep their audience engaged. This online platform lets you create and demonstrate your ideas. It will capture your viewers’ attention from the very beginning. It also doesn’t matter whatever learning style you engage. Adding YouTube videos to Google Slide will appeal to all levels of individuals.
More so, it is the best way to provide a break for both the audience and the creator. You can break Google Slide presentations with videos to offer some break. Viewers and the presenter get a breather in the process. The presenter can take a short break from speaking while the video plays. Let’s now dive into how to embed a YouTube video in Google Slides.

In this article
01 Why should we add a video to Google Slides?
02 How to add a YouTube video to Google Slide
03 How to choose the right video for your Slides?
Why should we add a video to Google Slides?
There is a great impact of adding video to Google Slides.
For attention
Videos will automatically awaken you, especially if your thoughts have started to sway during a presentation. A video has a direct way of showing creativity. The audience automatically connects the dots between the video and the presentation lines alike.
To stimulate discussion
A picture is worth a thousand words. There is a way that an added video will help the audience connect to the day’s topic. It will bring up several ideas and stir up discussion with the presenter.
Easy following
With videos embedded in Google Slide, viewers will find it easy to understand and digest. Videos automatically eliminate boredom and make any topic interesting.
How to add a YouTube video to Google Slide
Use these two methods to add a YouTube video to Google Slides. Via the Search and Direct link.
Method 1. Embed YouTube video to Google Slide by search and selection
Google has owned YouTube since the year 2006. You can, therefore, integrate Google’s products with YouTube easily.
Step 1. First, go to the slide where you want to embed your video.
Step 2. Then choose the “Insert” option from the menu bar and hit the “Video” option.

Step 3. It would be best if you now viewed the “YouTube” search bar to type in the video you want to embed. You can use keywords to search for the video in question and view instant search results.
Step 4. Then select the video you want to embed, and you’ll see it appear on the “Slide.”

Step 5. Format your video. Remember that the entire video will be embedded. You don’t necessarily need the whole video. It is time to select just a brief but relevant clip from the video to use. Then position your video to the right point using the axes from the exact starting point to the finished part you want the video to appear in.
Method 2. Embed YouTube video to Google Slide by direct link
You can engage this method if you want to include the entire video.
Step 1. Get the URL of the specific YouTube video that you want to use.

Step 2. Then go to your browser’s “Address bar” to copy the YouTube link.
Step 3. Next, open the “Presentation” slide to put your video to.
Step 4. Choose the “Insert” tab from the menu bar.
Step 5. Then hit on the “Video” option from the drop-down menu that appears.
Step 6. A new window will open automatically. Choose the “By URL” tab.
Step 7. Then paste the YouTube video URL in the “Paste YouTube URL Here” bar section.

Step 8. Wait for the video file to load and press the “Select” option. The video will immediately appear in the presentation slide. Just drag and drop the video in your preferred position.
Note: You can do a few edits inside the application. Set the timer when your video should start and when to stop. You can also adjust the video player size.
How to choose the right video for your Slides?
Not all videos will make an impact on your Google Slide. You need to use the best shot that adds value to your presentation. These guidelines will help you to settle on the best video.
Be Professional – choose the best video for your presentation. Remember that the video is part of the presentation and carries more weight. Settling for quality video will bring out the professionalism in you.
Relevant – how do you know that what you are showing your audience corresponds to the presentation piece? Ensure that the video you add has something to do with the Google Slide presentation topic. The two should naturally flow to make it easy to understand the whole concept.
Precise – your presentation is not about the video. The ideal length should not exceed 60 seconds. The longer the video, the greater the chance for your audience to lose track along the way.
Know every footage you are working with – this will help you pick the best shots for your presentation. So, learn every aspect of the video before settling down to use it.
Add new content – even though one content may suit several presentations, don’t rely on the same piece each time. Your audience will want to feel something fresh each time you are presenting. So, compose different videos for different scenarios to make that big impact.
Create an eye-catching video for your Slides with Filmora
The video quality matters when it comes to creating your Slides. The best video creator – Filmora – works in simple steps to give you an eye-catching video. It will create videos for all scenarios like marketing, tutorial, gaming, etc.
Key features of Filmora
- It offers you advanced video effects like filters, motion elements, etc
- You can multiply your fun with multiple screens with the Split Screen feature
- Easily change backgrounds using the Green Screen feature
- The speed control lets you fast forward or slow down a special moment
- Import your video clips to social media platforms
- You can also adjust the audio of your tracks using the Audio Mixer feature
Follow this guide to create a video for your slide with Filmora
Step 1. Launch Filmora
First, begin by downloading and installing Filmora on your computer device. Once installed, launch it and allow it to run. You can either create a new project or open an existing project to work on.
Step 2. Create a new project
Here, click on the “New Project” tab on the app’s welcome screen. The editor should load immediately. Then proceed to register the product. Just hit on the “Register” tab.
Step 3. Import video
Check the upper left corner of your screen to see the “Import” tab. Click on it and choose the “Import Media Files” option. Next, navigate to the location of your computer’s local list to select the clip or video you want to edit. Then, hit the “Import” button to add the video to the timeline for editing.
Step 4. Edit video
Drag and drop the raw footage to Filmora’s timeline to begin editing. Here, you can trim, add other video clips, merge, and add effects as you wish. Likewise, you can add opening titles, subtitles, and end credits to your video. More so, this tool offers different templates to use. Just drag and drop the templates you wish to use to a specific location on the timeline.
Step 5. Preview your file
Last but not least, you can preview your files. Click on the “Play” tab to start previewing your video clips. The main essence of this part is to allow you to make the necessary changes to your clips if there is a need.
Step 6. Export and Share
With Filmora, you can export your file to various social media platforms. But first, go to the “Output window” and select the video file format to use. This software supports several output formats to apply to any platform and device. Just click on the “Format” tab and choose the file format to use. Then also change the resolution and other parameters like frame rate and channel of your video in the “Settings” section. Finally, share your video to your YouTube channel and get ready to add the video to the Google Slide presentation.
For Win 7 or later (64-bit)
For macOS 10.12 or later
Conclusion
● You now know how to put a YouTube video in Google Slides the simple way. You can search for your YouTube videos or directly use the URL link. Whatever the case, remember that it’s the quality of your video that carries more weight. Thanks to the availability of third-party apps that you can use to create and improve the quality of your videos.
● Filmora is at your service to create high-resolution videos that you can export in any format to your YouTube channel. The tool is intuitive, and it won’t matter whether you haven’t tried it before. It is a perfect choice for both professionals and first-time users.
Google Slide presentation is a powerful tool for creators to keep their audience engaged. This online platform lets you create and demonstrate your ideas. It will capture your viewers’ attention from the very beginning. It also doesn’t matter whatever learning style you engage. Adding YouTube videos to Google Slide will appeal to all levels of individuals.
More so, it is the best way to provide a break for both the audience and the creator. You can break Google Slide presentations with videos to offer some break. Viewers and the presenter get a breather in the process. The presenter can take a short break from speaking while the video plays. Let’s now dive into how to embed a YouTube video in Google Slides.
In this article
01 Why should we add a video to Google Slides?
02 How to add a YouTube video to Google Slide
03 How to choose the right video for your Slides?
Why should we add a video to Google Slides?
There is a great impact of adding video to Google Slides.
For attention
Videos will automatically awaken you, especially if your thoughts have started to sway during a presentation. A video has a direct way of showing creativity. The audience automatically connects the dots between the video and the presentation lines alike.
To stimulate discussion
A picture is worth a thousand words. There is a way that an added video will help the audience connect to the day’s topic. It will bring up several ideas and stir up discussion with the presenter.
Easy following
With videos embedded in Google Slide, viewers will find it easy to understand and digest. Videos automatically eliminate boredom and make any topic interesting.
How to add a YouTube video to Google Slide
Use these two methods to add a YouTube video to Google Slides. Via the Search and Direct link.
Method 1. Embed YouTube video to Google Slide by search and selection
Google has owned YouTube since the year 2006. You can, therefore, integrate Google’s products with YouTube easily.
Step 1. First, go to the slide where you want to embed your video.
Step 2. Then choose the “Insert” option from the menu bar and hit the “Video” option.
Step 3. It would be best if you now viewed the “YouTube” search bar to type in the video you want to embed. You can use keywords to search for the video in question and view instant search results.
Step 4. Then select the video you want to embed, and you’ll see it appear on the “Slide.”
Step 5. Format your video. Remember that the entire video will be embedded. You don’t necessarily need the whole video. It is time to select just a brief but relevant clip from the video to use. Then position your video to the right point using the axes from the exact starting point to the finished part you want the video to appear in.
Method 2. Embed YouTube video to Google Slide by direct link
You can engage this method if you want to include the entire video.
Step 1. Get the URL of the specific YouTube video that you want to use.
Step 2. Then go to your browser’s “Address bar” to copy the YouTube link.
Step 3. Next, open the “Presentation” slide to put your video to.
Step 4. Choose the “Insert” tab from the menu bar.
Step 5. Then hit on the “Video” option from the drop-down menu that appears.
Step 6. A new window will open automatically. Choose the “By URL” tab.
Step 7. Then paste the YouTube video URL in the “Paste YouTube URL Here” bar section.
Step 8. Wait for the video file to load and press the “Select” option. The video will immediately appear in the presentation slide. Just drag and drop the video in your preferred position.
Note: You can do a few edits inside the application. Set the timer when your video should start and when to stop. You can also adjust the video player size.
How to choose the right video for your Slides?
Not all videos will make an impact on your Google Slide. You need to use the best shot that adds value to your presentation. These guidelines will help you to settle on the best video.
Be Professional – choose the best video for your presentation. Remember that the video is part of the presentation and carries more weight. Settling for quality video will bring out the professionalism in you.
Relevant – how do you know that what you are showing your audience corresponds to the presentation piece? Ensure that the video you add has something to do with the Google Slide presentation topic. The two should naturally flow to make it easy to understand the whole concept.
Precise – your presentation is not about the video. The ideal length should not exceed 60 seconds. The longer the video, the greater the chance for your audience to lose track along the way.
Know every footage you are working with – this will help you pick the best shots for your presentation. So, learn every aspect of the video before settling down to use it.
Add new content – even though one content may suit several presentations, don’t rely on the same piece each time. Your audience will want to feel something fresh each time you are presenting. So, compose different videos for different scenarios to make that big impact.
Create an eye-catching video for your Slides with Filmora
The video quality matters when it comes to creating your Slides. The best video creator – Filmora – works in simple steps to give you an eye-catching video. It will create videos for all scenarios like marketing, tutorial, gaming, etc.
Key features of Filmora
- It offers you advanced video effects like filters, motion elements, etc
- You can multiply your fun with multiple screens with the Split Screen feature
- Easily change backgrounds using the Green Screen feature
- The speed control lets you fast forward or slow down a special moment
- Import your video clips to social media platforms
- You can also adjust the audio of your tracks using the Audio Mixer feature
Follow this guide to create a video for your slide with Filmora
Step 1. Launch Filmora
First, begin by downloading and installing Filmora on your computer device. Once installed, launch it and allow it to run. You can either create a new project or open an existing project to work on.
Step 2. Create a new project
Here, click on the “New Project” tab on the app’s welcome screen. The editor should load immediately. Then proceed to register the product. Just hit on the “Register” tab.
Step 3. Import video
Check the upper left corner of your screen to see the “Import” tab. Click on it and choose the “Import Media Files” option. Next, navigate to the location of your computer’s local list to select the clip or video you want to edit. Then, hit the “Import” button to add the video to the timeline for editing.
Step 4. Edit video
Drag and drop the raw footage to Filmora’s timeline to begin editing. Here, you can trim, add other video clips, merge, and add effects as you wish. Likewise, you can add opening titles, subtitles, and end credits to your video. More so, this tool offers different templates to use. Just drag and drop the templates you wish to use to a specific location on the timeline.
Step 5. Preview your file
Last but not least, you can preview your files. Click on the “Play” tab to start previewing your video clips. The main essence of this part is to allow you to make the necessary changes to your clips if there is a need.
Step 6. Export and Share
With Filmora, you can export your file to various social media platforms. But first, go to the “Output window” and select the video file format to use. This software supports several output formats to apply to any platform and device. Just click on the “Format” tab and choose the file format to use. Then also change the resolution and other parameters like frame rate and channel of your video in the “Settings” section. Finally, share your video to your YouTube channel and get ready to add the video to the Google Slide presentation.
For Win 7 or later (64-bit)
For macOS 10.12 or later
Conclusion
● You now know how to put a YouTube video in Google Slides the simple way. You can search for your YouTube videos or directly use the URL link. Whatever the case, remember that it’s the quality of your video that carries more weight. Thanks to the availability of third-party apps that you can use to create and improve the quality of your videos.
● Filmora is at your service to create high-resolution videos that you can export in any format to your YouTube channel. The tool is intuitive, and it won’t matter whether you haven’t tried it before. It is a perfect choice for both professionals and first-time users.
Also read:
- Step-by-Step Guide to YouTube Video Enhancement with WMM
- Converting YT to IGTV 3 Effective Methods for 2024
- [Updated] Accelerate Your YouTube Journey - Achieve the Essential 10K Vistas
- 2024 Approved Enhance Video Visibility Using Creator Studio Wisdom
- 2024 Approved Best Practices for Designing an Engaging YouTube Teaser
- [Updated] Dive Deep Into the Past with These Top 10 Student-Friendly YT Channels
- Discover the Best Yoga Vlogs - Perfect Balance Guide for 2024
- 2024 Approved Do Paid Followers Impact Channel Popularity?
- In 2024, Engaging Subjects for Consistent Vlogging
- [New] Crafting Channel Graphics Icons, Banners & Thumbnails
- In 2024, Channel Elevation Strategy – Quickly Reach Your 10K View Quota
- [Updated] A Comprehensive Overview of YouTube Standards for Content Creators
- [Updated] Dive Into Alternative Watching on iOS & Android Devices
- Optimize and Upload More Content to YouTube
- Efficient Mac Video Resizing to Fixed Ratio for 2024
- [New] Choosing Streaming Giants Vimeo, YouTube, or DailyMotion?
- Culinary Callings 30 Unique Show Title Suggestions for 2024
- In 2024, 2017 Data Overload Infographics & Surprising YT Stats
- In 2024, Cross-Platform Content Dimensions YouTube, Facebook, Insta & More
- In 2024, Best of the Best Top 10 YouTube Trimmers Reviewed
- [New] Discover the Top 10 Fitness Channels for Yogis
- 2024 Approved Elevating Your Video's Reach - Top 8 YouTube Ranks Unveiled
- Learning Leaders Most Influential Edu Tutorials YT
- Instructions Removing Videos From YouTube's Watchlater
- In 2024, 12 Best Vlogging Cameras with a Flip Screen
- [New] Elevate Visuals Thumbnails with Flair
- Creating Engaging YouTube Content A Step-by-Step Approach for 2024
- [New] Dive Deep Into the Past with These Top 10 Student-Friendly YT Channels
- [Updated] Enhancing Engagement Through YouTube Advertising
- 9 Ultimate Free Online Editors for Content Creators for 2024
- Best 7 DSLR Vlogging Cameras
- [Updated] 15 Inspiring YouTube Guides for Aspiring Singers and Instrumentalists
- Miniature Mastery in the Social Sphere Who Wins with YouTube Shorts or TikToks?
- Streamlining Sonic Selection A Guide to Curating YouTube Content
- 2024 Approved Elevate Your Content's Appeal Professional BG Techniques for YouTube Thumbnails
- The Beginner's Blueprint for YouTube Trailers via Filmora
- 2024 Approved Epic Editing Illusions YouTube Edition
- Elevating Brand Awareness with Tailored, Engaging YouTube Banners
- In 2024, Boosting Engagement A Guide to More YouTube Shorts Success
- In 2024, Club Craft How to Download Best DJ Vids
- Maximize Youtube Income Insights and Techniques
- Elevate Your Channels Selecting Prime Microphones for Every Content Category
- In 2024, Enliven YouTube Images A Burst of Neon Flair
- In 2024, Enhance Your Music Library Top 6 Free iOS Apps for Audio Conversion
- YouTube Alternatives 3 Best Video Sharing Sites for 2024
- [Updated] FB Video Placement - Upright or Flat Angle for 2024
- What to Do if Google Play Services Keeps Stopping on Motorola Razr 40 Ultra | Dr.fone
- [New] In 2024, Tips for Documenting Virtual Meetings
- [Updated] 2024 Approved The Ultimate Exploration of Apeaksoft's Screen Recorder
- [New] 2024 Approved Craft Your Signature Snaps with Easeful Lens Design
- [New] 2024 Approved Modify Where Mac Photos Stash Location
- [Updated] Crafting a Vocal Identity Steps for Impactful Video Overdubs
- [New] Transform Your Feed A Comprehensive Guide to Videos for 2024
- 2024 Approved The Ultimate FCP Voice Over Guide Quick Start Tips
- [New] TikTok Trends Unveiled How to Perfectly Reproduce Yourself Online
- In 2024, Unlocking Sims 4 Memories Key Methods to Document Gameplay Success
- Unlock Apple ID without Phone Number From iPhone 7
- Battle for Best Action Camera Sony FDR-X1000V Meets Hero 4 Black for 2024
- [Updated] 2024 Approved How to Turn Off IGTV?
- [New] Inside Look at Instagram's Subtle Yet Powerful Features for 2024
- How to Fix Life360 Shows Wrong Location On Apple iPhone 11 Pro Max? | Dr.fone
- [Updated] In 2024, Capturing Chats Complete FBM Conversation History
- In 2024, How to Reset Gmail Password on Infinix Smart 8 Pro Devices
- Updated Aspect Ratio Calculations Simplified A Beginners Guide for 2024
- Aurora in the Market Is It a Premium Need?
- Here Are Some Reliable Ways to Get Pokemon Go Friend Codes For Lava Yuva 2 | Dr.fone
- Ratio Rebellion How to Break Free From Conventional YouTube Aspect Ratios for 2024
- Brainless Beats Celebrating Best Zombie Gaming
- In 2024, SaveTech Reviews Insights
- New Top 6 Mickey Mouse Voice Generators for 2024
- 2024 Approved All-Inclusive Giroptic Panoramic Study
- [Updated] 2024 Approved Broadcasting Made Simple 3 Secrets to Great LOL Streams
- In 2024, Bebop's Visionary Feathered Future Examined
- [New] Precision in Screen Recording A Comprehensively Reviewed List
- [Updated] Unlocking TikTok's #1 Gamer List for 2024
- Mastering the Exchange A Comprehensive Guide to FB Media Download for 2024
- New In 2024, Top List 20 Best LUTs for Music Videos
- In 2024, Top 15 Augmented Reality Games Like Pokémon GO To Play On Realme GT 3 | Dr.fone
- [New] In 2024, Unleashing Video Potential Steps to Become a Staff Pick Favorite
- A Step-by-Step Guide to Finding Your Apple ID On Your iPhone 15
- [New] 2024 Approved Dominating Instagram's Social Scene 5 Proven Tips & Success Stories
- Title: "[Updated] Digital Influencer's Riches Exceed Ages Kaji Ryan Story"
- Author: Kevin
- Created at : 2024-05-25 16:46:23
- Updated at : 2024-05-26 16:46:23
- Link: https://youtube-videos.techidaily.com/updated-digital-influencers-riches-exceed-ages-kaji-ryan-story/
- License: This work is licensed under CC BY-NC-SA 4.0.
