
!["[Updated] Digital Dollars Kings & Queens YouTube Edition"](https://www.lifewire.com/thmb/1U94UuPNjs9sWrmhW2oYZdtQOGo=/400x300/filters:no_upscale():max_bytes(150000):strip_icc()/delioption2-9bda55697741460689d37ff358db63f8.png)
"[Updated] Digital Dollars Kings & Queens YouTube Edition"
Digital Dollars Kings & Queens: YouTube Edition
The amount of money that the highest-paid YouTubers make in a year is mind-blowing. They are the prime example of what Millionaires are.
If you tally up the estimated net worth of the top 10 richest YouTubers, then you get a whooping 300+ Million dollars.
I repeat!!!
That’s more than 300 million dollars. So Who are these richest YouTubers? What is the thing that people like so much about them?
That’s what this guide is all about. Let’s look at these richest YouTubers.
- MrBeast $58 Million
- Jake Paul $60 Million
- Markiplier $35 Million
- Rhett and Link
- Unspeakable
- Nastya
- Ryan Kaji - $25 Million
- Dude Perfect
- Logan Paul
- Preston Arsement - $14 million
Part 1: Who are the Richest YouTubers in the World Today?
Here, we have compiled a list of the top 10 YouTube money makers with their 2022 estimated earnings and the number of subscribers of their main YouTube channel.
| Sr. Number | YouTuber | 2022 Estimated Worth | Subscribers |
|---|---|---|---|
| 1 | MrBeast | $58 Million | 104M+ |
| 2 | Jake Paul | $60 Million | 20M+ |
| 3 | Markiplier | $35 Million | 33M+ |
| 4 | Rhett and link | 17.8M+ | |
| 5 | Unspeakable | 14M+ | |
| 6 | Nastya | 100M+ | |
| 7 | Ryan Kaji | $25 Million | 33M+ |
| 8 | Dude Perfect | 58M+ | |
| 9 | Logan Paul | 23.6M+ | |
| 10 | Preston Arsement | $20 Million | 21M+ |
Now that you have an overview of the top 10 richest YouTubers let’s jump into the detail of what type of videos these millionaires make, one by one.
Part2. Highest-Paid YouTubers in the World 2022
1. MrBeast $58 Million
The richest YouTuber that makes the most out of YouTube is no other than MrBeast. Jimmy Donaldson, the MrBeast, is a YouTube star that has made record-breaking world earnings in the recent year from his YouTube channel with over 100 Million subscribers.
The extravagant stunts and philanthropist endeavors of MrBeast attract so many people like bees to honey.
But that’s not all; the MrBeast Burger app has also contributed to skyrocketing the earnings of Mr. Beast. With this mobile application, MrBeast handles marketing among his 100M+ subscribers while keeping a share of the sales.
Here’s one of his recent popular videos where MrBeast hunted for 100 people.
I Hunted 100 People For $1,000,000 .
Earning in 2021
$54 Million.
2. Jake Paul $60 Million
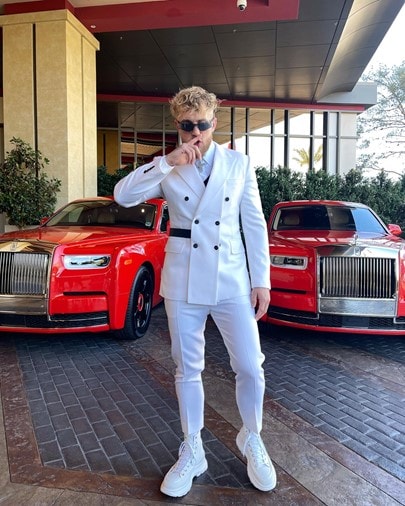
The next richest YouTuber, second only to MrBeast, is the famous boxer Jake Paul.
The personality of Jake paul is so bright that it continuously keeps him in the headlines.
Jake was a substantial part of the top 10 highest-paid YouTubers until 2017, but it was all busted by his brother Logan when he posted a video widely known as “Suicide Forest.” The backlash was so harsh that many sponsors cut off from Jake, and even YouTube stopped monetizing the channel.
But that’s all in the past because Jake is here again and on the second spot, of course.
Let’s look at a video from Jake Paul.
I turned down $40 million for this.
Earning in 2021
$45 Million.
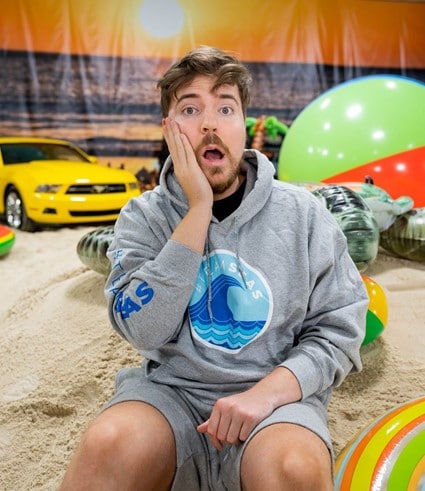
3. Markiplier $35 Million
Now comes Mark Fischbach, aka Markiplier, a YouTube star that started his journey in 2012 as an avid gamer.
But later on, his Unus Annus series increased his popularity dramatically in 2019. This series was created with Co-Youtuber Ethan Nestor Darling. But the sad news is that Markiplier deliberately removed this series from his channel a year ago.
But the other thing that has greatly helped Markiplier in raking all this income is his ability to move Merchandise like T-shirts, hoodies, and other items. So it is of no surprise that he remains one of the richest YouTubers in the world.
Let’s have a look at one of his trending videos.
In Space with Markiplier: Part 1
Earning in 2021
$38 Million.
4. Rhett and Link
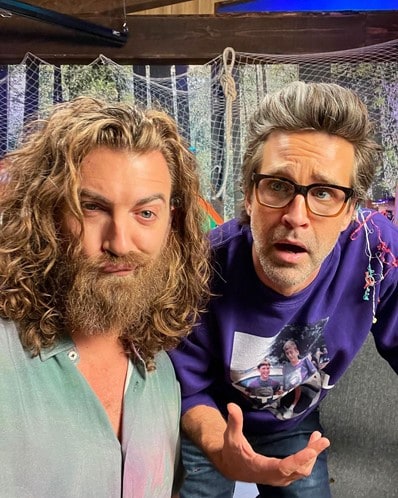
Starting with a friendly and nerdy talk show with the channel “Good Mythical Morning,” Rhett and Link quickly evolved their branding, and their popularity achieved a level of 17 Million subscribers.
Their recent collaborative cooking show, Mythical Kitchen, earned them 30 Million US$ last year.
The different guests they invite sometimes come off as a surprise for their loyal subscribers.
Lastly, the Mythical Accelerator Fund is another initiative currently increasing its popularity.
Here is a trending video from Rhett and Link.
International Carnival Food Taste Test.
Earning in 2021
$30 Million.
5. Unspeakable
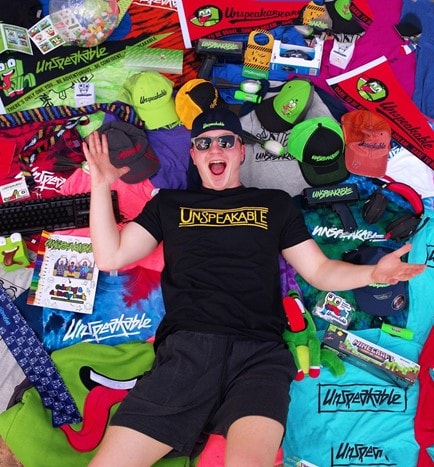
A new YouTube star that popped up in the list of top 10 highest-paid YouTubers last year is Unspeakable.
Going by the name Natham Graham, unspeakable continuously makes videos of his little “Minecraft” games and has been posting them on his channel for the last 10 years.
But last year, he made a smart move and sold the whole catalog of his YouTube videos to “Spotter” in one go.
So what did he get in return? A huge lump sum, of course.
Here’s a video of Unspeakable.
Surviving Overnight in $60 Million Doomsday Bunker.
Earning in 2021
$28.5 Million.
6. Nastya
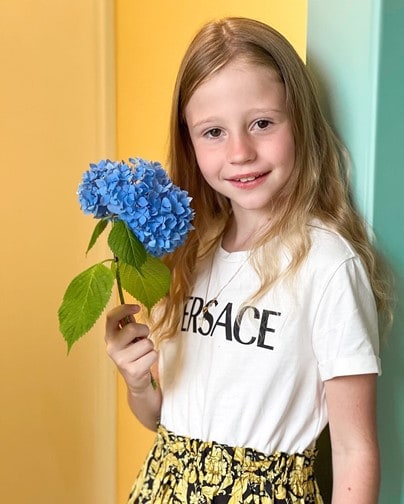
If we are talking about the highest-paid YouTubers, how can we skip this cute little princess?
This seven-year Russian-born Youtube star, Anastasia Radzinskaya, puts her daily life into the video and entertains kids and adults worldwide with her well-produced videos. Meanwhile, multiple brand extensions and a merchandise line added to their videos also considerably increased their earnings.
But wait a minute!!!
The Spotter is here to spoil the fun again. Recently, just like Unspeakable, Natsya has also sold all the monetization rights of her previous videos by making a lucrative deal with Spotter.
Now let’s check one of Nastya’s recent popular videos.
Nastya reads books and uses the Internet to get new information.
Earning in 2021
$28 Million.
7. Ryan Kaji - $25 Million
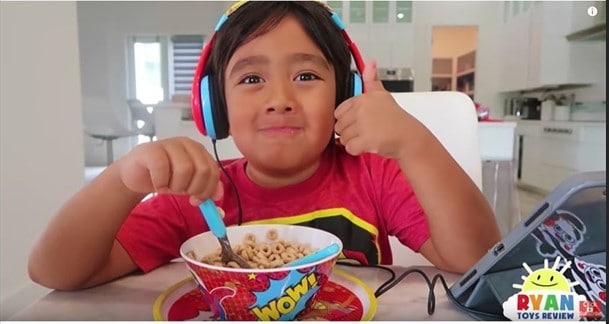
Look who’s back: Ryan Kaji returns to this list. This little fellow was above all other YouTubers in 2020, with an income of 29.5 Million US$ that year. But don’t think that his earnings decreased just like his ranking.
Ryan Kaji started his journey at the mere age of 4, and it’s been 6 years since his debut. With his child-amusing playtime, he has made over 33 Million subscribers on his channel Ryan’s World.
Utilizing his 33 Million subscribers on his main channel, Ryan Kaji is still earning a fortune with branded merchandise and toys sold at Target and Walmart.
Here’s an example video of Ryan Kaji for you.
Ryan’s Superhero Family Titan Universe!
Earning in 2021
$27 Million.
8. Dude Perfect
These five stunt masters have shocked the world with their classical and dangerous stunts.
This sports-comedy troupe is made of twins Coby and Cory Cotton, Garett Hilbert, Cody Jones, and Tyler Toney.
They make the classical “Don’t try at home” stunts which are dangerous and amusing.
But wait a minute!!
Recently these stuntmen released a “how-to” book on 101 amazing stunts with a complete step-by-step guide explaining everything with pictures.
So now, by following these instructions, you can try it at home if you want.
Here’s a video from Dude Perfect that we recommend watching.
Loser Gets Full Body Casted | OT 35.
Earning in 2021
$20 million.
9. Logan Paul
After Jake Paul, who acquired the second position in our list, we have another Paul here. Logan Paul, the older brother of Jake.
These brothers experienced a downfall after the “Suicide Forest” scandal in 2017, but here they are again on the list of 10 highest-paid YouTubers.
Last year, the mind-blowing podcast from Logan, which was named “IMPAULSIVE,” created over 100 Million YouTube views, and to be honest, that’s a lot.
Other than that, the “Pokemon Card Discussion” of Logan Paul is also pretty popular among his subscribers.
Let’s have a look at one of his trending videos.
I Made A Masterpiece | Logan Paul’s 99 Originals (Official Trailer.)
Earning in 2021
$18 Million.
10. Preston Arsement - $14 million

The last YouTube star in our list of the 10 highest-paid YouTubers is Preston Arsement.
This young lad has increased his popularity with first-class gaming and pranking skills.
Out of his several YouTube channels, PrestonPlayz is the one that describes this fellow quickly. The Minecraft version of the “Squid Games” he showed in one of his recent videos has hit the jackpot.
So how much does this young fellow earn? A lot!!!
Here’s a famous video of Preston Arsement.
50 Ways To DESTROY The Warden In Minecraft.
Earning in 2021
$16 Million.
After seeing all these highest-paid YouTubers, you must be wondering what makes them earn so much money with just a YouTube channel.
Here are some reasons that decide the highest-earning Youtubers.
Part3. What Decides the Highest-Earning YouTubers?
Multiple factors influence YouTubers’ earnings.
First of all, it’s the subscribers’ growth. As subscribers to the YouTube channel increase, the creator can apply for YouTube’s Partner Program and start monetizing the channel with channel membership or subscriptions.
That’s not all; the creator can also use different ads, and the revenue generated can even be in millions if you have a lot of subscribers.
Then comes the channel type. If the channel is a niche, it will not make as much money as channels that meet the public’s appetite.
Lastly, we can’t ignore the quality of videos, can we?
A high-quality video with multiple transitions, effects, and interactive scenes is a must if you want to gain popularity on your YouTube channel.
So how can we make our videos top-notch?
Read on and find the answer in the bonus tip below.
Bonus Tip to Increase YouTube Money
One of the best video editor platforms for pushing the storytelling boundaries of your YouTube videos is Wondershare Filmora.
This powerful and intuitive video editor is suited for all kinds of content creators, especially YouTubers. Multiple video effect plug-ins, excellent templates, and intuitive annotations are available for polishing and shaping your videos just like you want.
Meanwhile, you can readily temper the video settings of your content to slow the vital point of the video or make the video sounds more clear and fascinating. So why are you waiting?Just download the Wondershare Filmora now and level up your YouTube videos before you upload them on your channel.
Now, YouTube is not the only social media platform for making money. TikTokers are also earning a fortune nowadays. But which one of them is better? Let’s have a look at it.
Are YouTubers Earning More Money than TikTokers?
With analysis, it’s crystal clear that YouTubers are making more money than TickTokers, and it’s not without reason.
In the year 2021, YouTube has paid more than 15 Billion US$ to its creators altogether, according to JUMPSTART . And it’s to be expected because Youtubers have been making content for way longer than TickTokers.
For example, MrBeast posted his first video on YouTube in 2012, and it has been about 10 years since he created his content.
Are Highest-Paid YouTube Stars Always Trending?
Since the highest-paid YouTubers make so much money, you may think they are always “Trending” on YouTube.
Sorry to pop your bubble, but they are not.
The highest-paid YouTubers may have a ton of subscribers, but being in “Trending” is different.
The most important reason is that the “Trending” part of YouTube shows popular videos in the specific area of the users, so it varies depending upon the user’s location.
Final Words
The world’s biggest video-sharing platform, YouTube, offers an opportunity to all content creators.
And those who get on the top strike a fortune without a doubt.
The top 10 highest-paid YouTubers are listed in this article who are making millions of dollars with their YouTube channel.
And if you also want to create first-class YouTube videos just like them, try using Wondershare Filmora for editing your videos before uploading them on YouTube.
Thanks for reading, folks.
Free Download For Win 7 or later(64-bit)
Free Download For macOS 10.14 or later
Part 1: Who are the Richest YouTubers in the World Today?
Here, we have compiled a list of the top 10 YouTube money makers with their 2022 estimated earnings and the number of subscribers of their main YouTube channel.
| Sr. Number | YouTuber | 2022 Estimated Worth | Subscribers |
|---|---|---|---|
| 1 | MrBeast | $58 Million | 104M+ |
| 2 | Jake Paul | $60 Million | 20M+ |
| 3 | Markiplier | $35 Million | 33M+ |
| 4 | Rhett and link | 17.8M+ | |
| 5 | Unspeakable | 14M+ | |
| 6 | Nastya | 100M+ | |
| 7 | Ryan Kaji | $25 Million | 33M+ |
| 8 | Dude Perfect | 58M+ | |
| 9 | Logan Paul | 23.6M+ | |
| 10 | Preston Arsement | $20 Million | 21M+ |
Now that you have an overview of the top 10 richest YouTubers let’s jump into the detail of what type of videos these millionaires make, one by one.
Part2. Highest-Paid YouTubers in the World 2022
1. MrBeast $58 Million
The richest YouTuber that makes the most out of YouTube is no other than MrBeast. Jimmy Donaldson, the MrBeast, is a YouTube star that has made record-breaking world earnings in the recent year from his YouTube channel with over 100 Million subscribers.
The extravagant stunts and philanthropist endeavors of MrBeast attract so many people like bees to honey.
But that’s not all; the MrBeast Burger app has also contributed to skyrocketing the earnings of Mr. Beast. With this mobile application, MrBeast handles marketing among his 100M+ subscribers while keeping a share of the sales.
Here’s one of his recent popular videos where MrBeast hunted for 100 people.
I Hunted 100 People For $1,000,000 .
Earning in 2021
$54 Million.
2. Jake Paul $60 Million
The next richest YouTuber, second only to MrBeast, is the famous boxer Jake Paul.
The personality of Jake paul is so bright that it continuously keeps him in the headlines.
Jake was a substantial part of the top 10 highest-paid YouTubers until 2017, but it was all busted by his brother Logan when he posted a video widely known as “Suicide Forest.” The backlash was so harsh that many sponsors cut off from Jake, and even YouTube stopped monetizing the channel.
But that’s all in the past because Jake is here again and on the second spot, of course.
Let’s look at a video from Jake Paul.
I turned down $40 million for this.
Earning in 2021
$45 Million.
3. Markiplier $35 Million
Now comes Mark Fischbach, aka Markiplier, a YouTube star that started his journey in 2012 as an avid gamer.
But later on, his Unus Annus series increased his popularity dramatically in 2019. This series was created with Co-Youtuber Ethan Nestor Darling. But the sad news is that Markiplier deliberately removed this series from his channel a year ago.
But the other thing that has greatly helped Markiplier in raking all this income is his ability to move Merchandise like T-shirts, hoodies, and other items. So it is of no surprise that he remains one of the richest YouTubers in the world.
Let’s have a look at one of his trending videos.
In Space with Markiplier: Part 1
Earning in 2021
$38 Million.
4. Rhett and Link
Starting with a friendly and nerdy talk show with the channel “Good Mythical Morning,” Rhett and Link quickly evolved their branding, and their popularity achieved a level of 17 Million subscribers.
Their recent collaborative cooking show, Mythical Kitchen, earned them 30 Million US$ last year.
The different guests they invite sometimes come off as a surprise for their loyal subscribers.
Lastly, the Mythical Accelerator Fund is another initiative currently increasing its popularity.
Here is a trending video from Rhett and Link.
International Carnival Food Taste Test.
Earning in 2021
$30 Million.
5. Unspeakable
A new YouTube star that popped up in the list of top 10 highest-paid YouTubers last year is Unspeakable.
Going by the name Natham Graham, unspeakable continuously makes videos of his little “Minecraft” games and has been posting them on his channel for the last 10 years.
But last year, he made a smart move and sold the whole catalog of his YouTube videos to “Spotter” in one go.
So what did he get in return? A huge lump sum, of course.
Here’s a video of Unspeakable.
Surviving Overnight in $60 Million Doomsday Bunker.
Earning in 2021
$28.5 Million.
6. Nastya
If we are talking about the highest-paid YouTubers, how can we skip this cute little princess?
This seven-year Russian-born Youtube star, Anastasia Radzinskaya, puts her daily life into the video and entertains kids and adults worldwide with her well-produced videos. Meanwhile, multiple brand extensions and a merchandise line added to their videos also considerably increased their earnings.
But wait a minute!!!
The Spotter is here to spoil the fun again. Recently, just like Unspeakable, Natsya has also sold all the monetization rights of her previous videos by making a lucrative deal with Spotter.
Now let’s check one of Nastya’s recent popular videos.
Nastya reads books and uses the Internet to get new information.
Earning in 2021
$28 Million.
7. Ryan Kaji - $25 Million
Look who’s back: Ryan Kaji returns to this list. This little fellow was above all other YouTubers in 2020, with an income of 29.5 Million US$ that year. But don’t think that his earnings decreased just like his ranking.
Ryan Kaji started his journey at the mere age of 4, and it’s been 6 years since his debut. With his child-amusing playtime, he has made over 33 Million subscribers on his channel Ryan’s World.
Utilizing his 33 Million subscribers on his main channel, Ryan Kaji is still earning a fortune with branded merchandise and toys sold at Target and Walmart.
Here’s an example video of Ryan Kaji for you.
Ryan’s Superhero Family Titan Universe!
Earning in 2021
$27 Million.
8. Dude Perfect
These five stunt masters have shocked the world with their classical and dangerous stunts.
This sports-comedy troupe is made of twins Coby and Cory Cotton, Garett Hilbert, Cody Jones, and Tyler Toney.
They make the classical “Don’t try at home” stunts which are dangerous and amusing.
But wait a minute!!
Recently these stuntmen released a “how-to” book on 101 amazing stunts with a complete step-by-step guide explaining everything with pictures.
So now, by following these instructions, you can try it at home if you want.
Here’s a video from Dude Perfect that we recommend watching.
Loser Gets Full Body Casted | OT 35.
Earning in 2021
$20 million.
9. Logan Paul
After Jake Paul, who acquired the second position in our list, we have another Paul here. Logan Paul, the older brother of Jake.
These brothers experienced a downfall after the “Suicide Forest” scandal in 2017, but here they are again on the list of 10 highest-paid YouTubers.
Last year, the mind-blowing podcast from Logan, which was named “IMPAULSIVE,” created over 100 Million YouTube views, and to be honest, that’s a lot.
Other than that, the “Pokemon Card Discussion” of Logan Paul is also pretty popular among his subscribers.
Let’s have a look at one of his trending videos.
I Made A Masterpiece | Logan Paul’s 99 Originals (Official Trailer.)
Earning in 2021
$18 Million.
10. Preston Arsement - $14 million
The last YouTube star in our list of the 10 highest-paid YouTubers is Preston Arsement.
This young lad has increased his popularity with first-class gaming and pranking skills.
Out of his several YouTube channels, PrestonPlayz is the one that describes this fellow quickly. The Minecraft version of the “Squid Games” he showed in one of his recent videos has hit the jackpot.
So how much does this young fellow earn? A lot!!!
Here’s a famous video of Preston Arsement.
50 Ways To DESTROY The Warden In Minecraft.
Earning in 2021
$16 Million.
After seeing all these highest-paid YouTubers, you must be wondering what makes them earn so much money with just a YouTube channel.
Here are some reasons that decide the highest-earning Youtubers.
Part3. What Decides the Highest-Earning YouTubers?
Multiple factors influence YouTubers’ earnings.
First of all, it’s the subscribers’ growth. As subscribers to the YouTube channel increase, the creator can apply for YouTube’s Partner Program and start monetizing the channel with channel membership or subscriptions.
That’s not all; the creator can also use different ads, and the revenue generated can even be in millions if you have a lot of subscribers.
Then comes the channel type. If the channel is a niche, it will not make as much money as channels that meet the public’s appetite.
Lastly, we can’t ignore the quality of videos, can we?
A high-quality video with multiple transitions, effects, and interactive scenes is a must if you want to gain popularity on your YouTube channel.
So how can we make our videos top-notch?
Read on and find the answer in the bonus tip below.
Bonus Tip to Increase YouTube Money
One of the best video editor platforms for pushing the storytelling boundaries of your YouTube videos is Wondershare Filmora.
This powerful and intuitive video editor is suited for all kinds of content creators, especially YouTubers. Multiple video effect plug-ins, excellent templates, and intuitive annotations are available for polishing and shaping your videos just like you want.
Meanwhile, you can readily temper the video settings of your content to slow the vital point of the video or make the video sounds more clear and fascinating. So why are you waiting?Just download the Wondershare Filmora now and level up your YouTube videos before you upload them on your channel.
Now, YouTube is not the only social media platform for making money. TikTokers are also earning a fortune nowadays. But which one of them is better? Let’s have a look at it.
Are YouTubers Earning More Money than TikTokers?
With analysis, it’s crystal clear that YouTubers are making more money than TickTokers, and it’s not without reason.
In the year 2021, YouTube has paid more than 15 Billion US$ to its creators altogether, according to JUMPSTART . And it’s to be expected because Youtubers have been making content for way longer than TickTokers.
For example, MrBeast posted his first video on YouTube in 2012, and it has been about 10 years since he created his content.
Are Highest-Paid YouTube Stars Always Trending?
Since the highest-paid YouTubers make so much money, you may think they are always “Trending” on YouTube.
Sorry to pop your bubble, but they are not.
The highest-paid YouTubers may have a ton of subscribers, but being in “Trending” is different.
The most important reason is that the “Trending” part of YouTube shows popular videos in the specific area of the users, so it varies depending upon the user’s location.
Final Words
The world’s biggest video-sharing platform, YouTube, offers an opportunity to all content creators.
And those who get on the top strike a fortune without a doubt.
The top 10 highest-paid YouTubers are listed in this article who are making millions of dollars with their YouTube channel.
And if you also want to create first-class YouTube videos just like them, try using Wondershare Filmora for editing your videos before uploading them on YouTube.
Thanks for reading, folks.
Free Download For Win 7 or later(64-bit)
Free Download For macOS 10.14 or later
Dazzle Viewers with Brightly Outlined YT Snapshots
Your YouTube video, or any other clip published on any forum, gets a larger number of hits if it has an attractive thumbnail. And, the fact is, a thumbnail becomes 10x more attractive when the main character that the image has have a neon border around it.
With that said, in the following sections, you will learn a couple of methods on how to add a YouTube thumbnail border around the main characters and/or objects that are significant to the clip.
In this article
01 Add Glowing Neon Border to YouTube Thumbnail with Filmora
02 Add a Glowing Neon Border in YouTube Thumbnail with Canva
03 Outline a Person in a YouTube Thumbnail with Photoshop
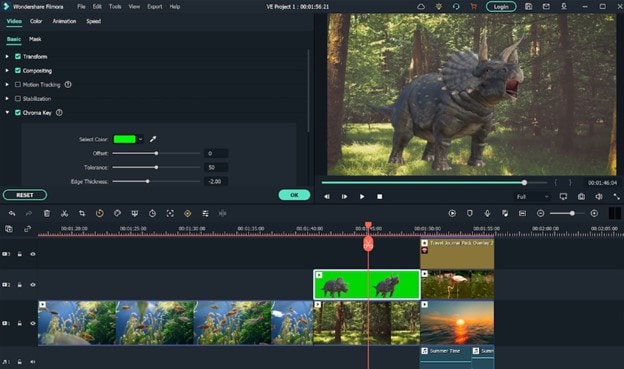
Part 1: How to Add Neon Border to YouTube Thumbnail for Free with Filmora
Being one of the most versatile and intuitive post-production tools available in the market today, Wondershare Filmora X allows you to add a neon border to a YouTube thumbnail quite conveniently. You can learn how to get this done on Windows or Mac by following the steps given below.
For Win 7 or later (64-bit)
For macOS 10.12 or later
Step 1: Define Project Settings and Add Image to the Timeline
Launch Wondershare Filmora X on your PC (a MacBook Pro M1 is used here), ensure that the project aspect ratio is set to 16:9 (Widescreen) on the splash screen, and click New Project. On the main interface, click the Preview quality and display settings icon from the upper-right area of the Timeline, click Change Project Aspect Ratio, click to select 1280 x 720 (HD) from the Resolution menu of the Project Settings box, and click OK to save the custom project settings.

Then select My Media from the menu bar if not already selected, click Project Media from the navigation pane, and click Import from the Media box to select and import the image of the main character or object that you want to use in the thumbnail.

Now, drag the image from the Media box to the Timeline at the bottom.

Step 2: Clear Image Background, Add Border, and Add Custom Background
Go to Effects from the menu bar, click to select the Default tab and then AI Portrait from the navigation pane, and click and drag the Human Segmentation preset from the right box, and place it over the image track in the Timeline.

Double-click the image layer, scroll down the upper-left box to the Video Effects section, and use the Edge Thickness and Edge Feather sliders to adjust the character’s edges to make them as realistic as possible. Click OK when done.

Next, click and drag the Human Border preset over the image track in the Timeline, and follow the same procedure to customize the border. This will give the character a neon border effect.

Now, use the method explained earlier to import a custom image for the background, and drag and place it under the previous track in the Timeline.

If you are running the latest version of Filmora, you will find there are some neon light effects available under AI Portrait as well.

Step 3: Add Titles to Thumbnail
Go to Titles from the menu bar, click to select the Default tab and then Lower 3rds from the navigation pane, and click and drag your preferred lower-third preset from the right window to a separate layer in the Timeline. Double-click the lower-third layer, and use the available options in the upper-left window to change the text, its color, etc., and drag the textbox to place it to your preferred position on the image as well. Click OK to save the changes.
Next, click to select Titles from the navigation pane, and drag your preferred title from the right window to the upper-most track in the Timeline. Now use the method explained earlier to edit the text, its color, position, etc. to make it look professional.

For more tips and tricks for creating YouTube thumbnail, you can check this You Tube thumbnail creating guide.
Step 4: Get the Neon Border Thumbnail
Click the Snapshot (Camera) icon from the upper-right area of the Timeline, go to My Media from the menu bar, right-click the thumbnail of the screenshot you captured, and click Reveal in Finder (on Mac) or Reveal in Explorer (on Windows) to get to the folder the YouTube thumbnail border is saved in.

Part 2: How to Add a Glowing Neon Border in Your YouTube Thumbnail with Canva
Canva is another intuitive editing program that works on the web interface rather than having you download and install an app on your PC. You can add a neon border for YouTube thumbnails using Canva by following the instructions given below:
Step 1: Define Project Settings and Add a Background
After signing in to your Canva account, click Create a design from the top-right corner of the page, click Custom size from the bottom, define 1280 and 720 in the Width and Height fields on the box that appears respectively, and click Create new design.

Now, click to select Background from the navigation bar on the left (if the Background tool is not visible, click More and then choose Background from the expanded list), and click to select a background from the images available in the center pane.

Step 2: Upload an Image and Add Effects
Click Uploads from the navigation bar, click the More icon from the right of the Upload media button present at the top of the center pane, choose your preferred method to upload the image (with the transparent background) that you want to use, upload the image, and drag it from the center pane to the Canvas.
Note: You can use any of the tools available online to remove the background from your image for free.

To add a YouTube thumbnail border, make sure that the image that you added to the Canvas is selected, click the Duplicate icon from the upper-right area, and use the scaling handles of the copy of the image to increase its size a bit. Reposition the image back to its original location as well.
Then, click Edit image from the upper-left corner of the Canvas, click Duotone from the Edit image pane at the center, if need be, click See all, choose your preferred duotone effect to apply on the image, choose your preferred highlight and shadow colors from the box that appears next, and click Back from the top of the pane.

Next, click See all next to the Adjust section from the center pane, and drag the Blur slider to the right to increase the blur effect on the image.

Step 3: Position the Layers
While keeping the duplicate image selected, click the Position button from the upper-right area of the Canvas, and click Background to send the second image behind the first one to get the neon border effect for the photo.

Part 3: How to Outline a Person in a YouTube Thumbnail with Photoshop
Because YouTube thumbnails are nothing but static images, creating YouTube thumbnail border with Adobe Photoshop is comparatively easier. The process of doing this is given below:
Step 1: Define Document Preferences and Import an Image
Launch Adobe Photoshop on your PC, click Create new, and on the New Document customization box, define the width and height values to 1280 and 720 pixels respectively. Select Transparent from the Background Contents menu as well if not already selected. Click Create from the bottom to create a new Photoshop document with the specified document settings. Next, open the folder that contains the source image, drag the photo to Photoshop, and press Enter to place the photo.

Step 2: Remove Background from the Image
Make sure that the image layer is selected in the Layers panel on the right, go to Select from the menu bar at the top, and click Subject. From the bottom of the Layers panel, click the Add a mask icon to get rid of the background, leaving only the human on the Canvas.

Step 3: Add a Custom Background and an Outline Around the Subject
Use the method explained earlier to import a background image of your choice to Photoshop. Drag the background image layer to the bottom in the Layers panel. Double-click the masked layer, click to select Stroke from the left pane of the Layer Style box, and use the options available on the right to manage the size, color, position, etc. of the stroke that has been added around the human subject. Click OK when done, and then export the image normally to use it as a YouTube thumbnail border.

Summary
It is important to know that the default resolution of a YouTube thumbnail is 1280 x 720 pixels that is usually written and referred to as 720p. While adding a YouTube thumbnail border, it is also imperative to have a good sense of color combination and fonts. Furthermore, a decent tool like Wondershare Filmora X must be used to add an appealing neon border around the main subject in the thumbnail image easily and quickly.
02 Add a Glowing Neon Border in YouTube Thumbnail with Canva
03 Outline a Person in a YouTube Thumbnail with Photoshop
Part 1: How to Add Neon Border to YouTube Thumbnail for Free with Filmora
Being one of the most versatile and intuitive post-production tools available in the market today, Wondershare Filmora X allows you to add a neon border to a YouTube thumbnail quite conveniently. You can learn how to get this done on Windows or Mac by following the steps given below.
For Win 7 or later (64-bit)
For macOS 10.12 or later
Step 1: Define Project Settings and Add Image to the Timeline
Launch Wondershare Filmora X on your PC (a MacBook Pro M1 is used here), ensure that the project aspect ratio is set to 16:9 (Widescreen) on the splash screen, and click New Project. On the main interface, click the Preview quality and display settings icon from the upper-right area of the Timeline, click Change Project Aspect Ratio, click to select 1280 x 720 (HD) from the Resolution menu of the Project Settings box, and click OK to save the custom project settings.
Then select My Media from the menu bar if not already selected, click Project Media from the navigation pane, and click Import from the Media box to select and import the image of the main character or object that you want to use in the thumbnail.
Now, drag the image from the Media box to the Timeline at the bottom.
Step 2: Clear Image Background, Add Border, and Add Custom Background
Go to Effects from the menu bar, click to select the Default tab and then AI Portrait from the navigation pane, and click and drag the Human Segmentation preset from the right box, and place it over the image track in the Timeline.
Double-click the image layer, scroll down the upper-left box to the Video Effects section, and use the Edge Thickness and Edge Feather sliders to adjust the character’s edges to make them as realistic as possible. Click OK when done.
Next, click and drag the Human Border preset over the image track in the Timeline, and follow the same procedure to customize the border. This will give the character a neon border effect.
Now, use the method explained earlier to import a custom image for the background, and drag and place it under the previous track in the Timeline.
If you are running the latest version of Filmora, you will find there are some neon light effects available under AI Portrait as well.
Step 3: Add Titles to Thumbnail
Go to Titles from the menu bar, click to select the Default tab and then Lower 3rds from the navigation pane, and click and drag your preferred lower-third preset from the right window to a separate layer in the Timeline. Double-click the lower-third layer, and use the available options in the upper-left window to change the text, its color, etc., and drag the textbox to place it to your preferred position on the image as well. Click OK to save the changes.
Next, click to select Titles from the navigation pane, and drag your preferred title from the right window to the upper-most track in the Timeline. Now use the method explained earlier to edit the text, its color, position, etc. to make it look professional.
For more tips and tricks for creating YouTube thumbnail, you can check this You Tube thumbnail creating guide.
Step 4: Get the Neon Border Thumbnail
Click the Snapshot (Camera) icon from the upper-right area of the Timeline, go to My Media from the menu bar, right-click the thumbnail of the screenshot you captured, and click Reveal in Finder (on Mac) or Reveal in Explorer (on Windows) to get to the folder the YouTube thumbnail border is saved in.
Part 2: How to Add a Glowing Neon Border in Your YouTube Thumbnail with Canva
Canva is another intuitive editing program that works on the web interface rather than having you download and install an app on your PC. You can add a neon border for YouTube thumbnails using Canva by following the instructions given below:
Step 1: Define Project Settings and Add a Background
After signing in to your Canva account, click Create a design from the top-right corner of the page, click Custom size from the bottom, define 1280 and 720 in the Width and Height fields on the box that appears respectively, and click Create new design.
Now, click to select Background from the navigation bar on the left (if the Background tool is not visible, click More and then choose Background from the expanded list), and click to select a background from the images available in the center pane.
Step 2: Upload an Image and Add Effects
Click Uploads from the navigation bar, click the More icon from the right of the Upload media button present at the top of the center pane, choose your preferred method to upload the image (with the transparent background) that you want to use, upload the image, and drag it from the center pane to the Canvas.
Note: You can use any of the tools available online to remove the background from your image for free.
To add a YouTube thumbnail border, make sure that the image that you added to the Canvas is selected, click the Duplicate icon from the upper-right area, and use the scaling handles of the copy of the image to increase its size a bit. Reposition the image back to its original location as well.
Then, click Edit image from the upper-left corner of the Canvas, click Duotone from the Edit image pane at the center, if need be, click See all, choose your preferred duotone effect to apply on the image, choose your preferred highlight and shadow colors from the box that appears next, and click Back from the top of the pane.
Next, click See all next to the Adjust section from the center pane, and drag the Blur slider to the right to increase the blur effect on the image.
Step 3: Position the Layers
While keeping the duplicate image selected, click the Position button from the upper-right area of the Canvas, and click Background to send the second image behind the first one to get the neon border effect for the photo.
Part 3: How to Outline a Person in a YouTube Thumbnail with Photoshop
Because YouTube thumbnails are nothing but static images, creating YouTube thumbnail border with Adobe Photoshop is comparatively easier. The process of doing this is given below:
Step 1: Define Document Preferences and Import an Image
Launch Adobe Photoshop on your PC, click Create new, and on the New Document customization box, define the width and height values to 1280 and 720 pixels respectively. Select Transparent from the Background Contents menu as well if not already selected. Click Create from the bottom to create a new Photoshop document with the specified document settings. Next, open the folder that contains the source image, drag the photo to Photoshop, and press Enter to place the photo.
Step 2: Remove Background from the Image
Make sure that the image layer is selected in the Layers panel on the right, go to Select from the menu bar at the top, and click Subject. From the bottom of the Layers panel, click the Add a mask icon to get rid of the background, leaving only the human on the Canvas.
Step 3: Add a Custom Background and an Outline Around the Subject
Use the method explained earlier to import a background image of your choice to Photoshop. Drag the background image layer to the bottom in the Layers panel. Double-click the masked layer, click to select Stroke from the left pane of the Layer Style box, and use the options available on the right to manage the size, color, position, etc. of the stroke that has been added around the human subject. Click OK when done, and then export the image normally to use it as a YouTube thumbnail border.
Summary
It is important to know that the default resolution of a YouTube thumbnail is 1280 x 720 pixels that is usually written and referred to as 720p. While adding a YouTube thumbnail border, it is also imperative to have a good sense of color combination and fonts. Furthermore, a decent tool like Wondershare Filmora X must be used to add an appealing neon border around the main subject in the thumbnail image easily and quickly.
Also read:
- [New] Channel Growth Strategy Going with Studio or Beta Progression
- Creative Teaching Incorporating YouTube Into Your Curriculum
- [New] 2023'S Premier Movie Options Beyond The Top Selections
- In 2024, Best 3D Software for Dynamic YouTube Intros
- In 2024, Building Engaging Learning Experiences YouTube as Your Classroom Screen
- Budget-Friendly Designs for YouTube Content Creators for 2024
- Optimizing YouTube Audio Speed - Desktop & Mobile Way
- The Ultimate How-To for YouTube Ad Creators
- [Updated] Avoiding Common Pitfalls in Uploading HD Videos to YouTube
- Beginning with YouTube Essential Steps to Create Your Space for 2024
- 2024 Approved Collaborative Listening Made Simple on YouTube
- [New] Best Streaming Setup Leading Livestream Hardware & Software Guide
- 2024 Approved Culinary Comrades YouTube's Best Food Blogs
- In 2024, Digging Through YouTube Conversations
- [Updated] Can You Lawfully Archive YouTube Content?
- Engage and Inspire Viewers - Animated Subscribers in Filmora Explained
- 2024 Approved Elite Equipment Showcasing Gameplay Innovations
- Cutting-Edge Royalty-Free Music Platforms for Content Makers
- Explore Our Collection 50+ Unique, Free YouTube Banner Ads
- 2024 Approved Diving Into Video Quality DSLR vs Mirrorless Cameras
- In 2024, Behind the Scenes Expert Video Editing Techniques for YouTubers
- Enter Immersive Realms Top 10 YouTube's Most Captivating VR Videos for 2024
- [New] Boosting Your Youtube Shorts Profits Key Requirements & Earning Potential
- [Updated] Effortless Single-Frame Analysis in YouTube Videos [5 Ways]
- [New] Discovering the Power Behind YouTube Statistics Interpretation
- 2024 Approved Essential Tips for Successful YouTube Broadcasts
- Top 10 Hashtags to Boost Your Youtube Views Beyond Six Figures
- Expressive Commentary Utilizing Emojis on YouTube
- In 2024, Crafting a Pro Sports YouTube Feed on MacOS
- Mastering Sharing Your Privacy-Guarded YT Clip via Gmail Pro
- 2024 Approved Essentials to Skyrocketing Video Views on YouTube
- [Updated] Deciphering the Divergent Aspects of YouTubes & DailyMentions
- 2024 Approved Culinary Callings 30 Unique Show Title Suggestions
- 2024 Approved Create Like a Pro 16 Free Video Editors for Amateur Filmmakers
- How Can Infinix Hot 40iMirror Share to PC? | Dr.fone
- [Updated] In 2024, Fashioning Small Homes with Eastern Aesthetics
- New Comprehensive Overview Discover the Best macOS-Based Music Editors Ranked Top 4 for 2024
- Updated In 2024, Top 10 Free Online Subtitle Generators for Videos
- In 2024, Fake the Location to Get Around the MLB Blackouts on Itel S23+ | Dr.fone
- 15 Best Strongest Pokémon To Use in Pokémon GO PvP Leagues For Honor Magic 5 | Dr.fone
- [New] The Ultimate 5 PC Snipers for Efficient Image Capture for 2024
- [Updated] Master Snapchat Essential Strategies for Snappy Snaps for 2024
- New A Detailed Guide To Stream to Instagram With an RTMP for 2024
- Quick Methods Saving Your Google Voice Dialogues for 2024
- [New] In 2024, Navigating the Maze of Communication Features on Snapchat
- Complete guide for recovering contacts files on Find X7 Ultra.
- [Updated] Mastering the Art of Video Capturing ZDSoft's Method
- Deluxe Low-Cost ASMR Recording Options for Enthusiasts
- 2024 Approved Advanced Techniques for Using the Instagram Sticker Question Mark
- How to share/fake gps on Uber for Tecno Pova 6 Pro 5G | Dr.fone
- How to Claim Facebook's Accredited, Elite Verification for 2024
- [New] Pro-Rated Screen Capture Software Top 11 Selections for 2024
- Cutting-Edge Strategies for Saving Telecasts on Workstations
- Do You Want to Add Subtitles to Your MKV Files Easily? This Article Will Introduce 7 Simple Ways Through Which You Can Add Subtitles to MKV on Different Devices for 2024
- [Updated] How to Capture and Share Your Favorite Pics on Social Platforms with OBS
- [Updated] 2024 Approved Tactics for Elevating Your Video's Popularity at Vimeo
- In 2024, Life360 Learn How Everything Works On Oppo Reno 10 5G | Dr.fone
- [Updated] Transforming Teams' Visuals for Flawless Video Meetings
- In 2024, How to Screen Mirroring Motorola G24 Power? | Dr.fone
- List of Pokémon Go Joysticks On Honor 100 Pro | Dr.fone
- [Updated] 2024 Approved Secrets to Updating Your Facebook Banner
- [New] A World of Textual Wonder Traverse These Top 10 Sites Featuring Modern Font Designs
- [Updated] Recording Wonders The Best Screenshot Tools
- In 2024, Two Ways to Keep Your Insta Reels Accessible Anytime
- Title: "[Updated] Digital Dollars Kings & Queens YouTube Edition"
- Author: Kevin
- Created at : 2024-05-25 16:46:19
- Updated at : 2024-05-26 16:46:19
- Link: https://youtube-videos.techidaily.com/updated-digital-dollars-kings-and-queens-youtube-edition/
- License: This work is licensed under CC BY-NC-SA 4.0.
