![[Updated] Curating YouTube Music Experiences](https://thmb.techidaily.com/b7ac3fecaf39cbf4ad53ade68b5607328fb5fc5fabf85fb01691cb6e94c786a0.jpg)
[Updated] Curating YouTube Music Experiences
Curating YouTube Music Experiences
YouTube Music has become a popular go-to platform for music lovers to find new songs and artists to enjoy. The content is uploaded regularly, so there’s always something new to discover.
But with so much music content on YouTube Music, finding the right mix for you can take time and effort. That’s why we’ve put together this guide on how to find my playlists on YouTube.
We’ll also answer some frequently asked questions to help you find solutions regarding the YouTube Mix queries. So, without wasting time, let’s get on with the guide!
Basic Information of YouTube Mix
Before starting, let’s learn some basic information about the YouTube Music Mix playlists:
Three Ways Of YouTube Music Mix
YouTube has popularized three personalized mixes to keep you up-to-date on newly released music and introduce more artists to you:
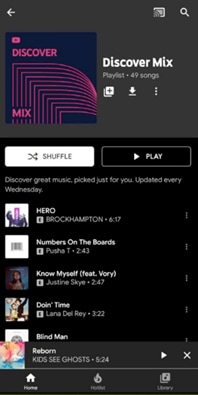
Discover Mix: Discover Mix introduces you to 50 new tracks every week, expanding your musical horizons and introducing you to contemporary artists. This playlist mix provides new updates every Wednesday, making it a go-to playlist for discovering new music to your taste.
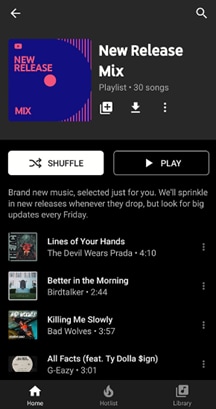
New Release Mix: In the New Release Mix playlist, you can find all the newest tracks from your favorite artists, and some music is recommended. New updates are provided every Friday (when most new releases come out), and mid-week releases the entire week to ensure you’re always up-to-date on the latest music.
Your Mix: Your Mix is a playlist full of songs by popular and well-known artists, as well as some new tunes and performers you’ve never discovered before, which are recommended based on your preferences, making it ideal for unwinding and listening to something you’re guaranteed to love. The playlist is updated regularly, so the music never gets dull, and there’s always something new to listen to.
What Is YouTube Music Replay Mix?
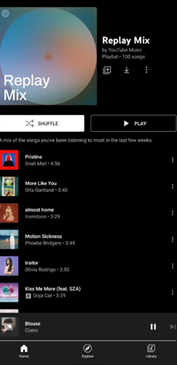
YouTube Music Replay Mix is a feature of YouTube Music that is automatically generated via the YouTube algorithm and contains a personalized mix of tracks based on your listening history. The mix is updated daily and includes up to 100 songs.
You can access it by tapping the “Replay Mix” option on the YouTube app’s main screen or the YouTube Music website. This feature is perfect for those who want a continuously updated mix of their favorite songs.
So, if you’re always on the go and need more time to create your playlist, YouTube Music Replay Mix is a great option. Since it’s based on your listening history, you can be sure that you’ll always hear songs that you love.
The Things You Want To Know About YouTube Mix
Now that you’ve what YouTube Mix is, you might have some queries in mind. To help you resolve them, we’ve provided solutions to the most frequently asked questions:
1. How Do I Save My Mix Playlist On YouTube?
To save My Mix playlist on YouTube, launch the YouTube app, tap “More” on the app’s main interface, and tap “Add to Library.” You can also save the playlist by going to the Mix page and tapping “Save” below the description.
2. How Do I Find My Playlist On YouTube?
The YouTube Music Replay Mix playlist is located on the home screen of the YouTube Music app and website under the “Mixed for you” header. Here you can also find other playlists, including “Your likes,” “New Release Mix,” “My Supermix,” and “Discover Mix.”
3. How Do I Add Songs To The Replay Mix Playlist?
You can’t manually add songs to the Replay Mix because YouTube Music automatically adds tracks that you listen to more than once.
The more often you hear a soundtrack, the higher it will appear on the YouTube list. Conversely, songs you’ve only played once or twice will appear lower on the list.
4. How Do I Delete A Mix Playlist On YouTube?
To delete a saved YouTube playlist from the Music library:
- Launch YouTube Music app on your mobile device or head to its website on your computer.
- Tap “Library” on the home screen or homepage and tap the “Mix” you want to delete.
- Tap the**”More”** option on the playlist panel and tap “Remove Playlist From Library.”
5. How Do I Turn Off YouTube Mixes?
To turn off YouTube Mixes, you can use Google extensions or create one yourself if you are an expert in coding.
6. Are YouTube Mixes Endless?
YouTube Music offers an endless personalized music playlist called “My Mixes.” Every time you click or tap the playlist, a new queue of your most listened or favorite tracks is generated for you.
The playlist contains about 100 songs with an endless auto-play feature once you reach the end of the list.
A Bonus Tip: How To Make a Music Video?
Hopefully, you have got the information you need about YouTube Mixes. Supposing you are YouTube music lover, we wonder, do you want to create YouTube videos for your channel or add music to your clips? In that case, we prepared a video tutorial for you - How To Make a Music Video. If you have any interests, you can watch it and learn about how to use the user-friendly video editor to make it:
Here’s why Wondershare Filmora is an excellent option for making YouTube videos or adding music to them:
- Huge royalty-free music library
- Easy to use, even for novice users
- Record videos from your webcam and screen simultaneously
- Multiple advanced video editing features, such as green screen, background blur, keyframe, split screen, motion tracking, and preset templates
- Adds effects, filters, transitions, and animations to your video footage to make it more eye-catching
- Quick “export to YouTube” feature to help you instantly share your final project on your channel
Free Download For Win 7 or later(64-bit)
Free Download For macOS 10.14 or later
If you want additional guidance on adding YouTube Music to your videos using Filmora,click here to learn everything you need to know!
Conclusion
This comprehensive guide explored some basic information about YouTube Music Mix and discussed how to find My Playlist on YouTube Music quickly. We’ve also provided solutions to help you save, find, delete, or turn off YouTube Mix playlists.
In addition, we’ve provided a bonus tip to use Filmora to add music to your YouTube videos and discussed its key features.
Hopefully, you’ve found this article helpful and can now locate your YouTube Music Mix playlist without issues.
Quick-Fix Closed Captioning & Subtitling for YouTube Amateurs
How to Easily Add Subtitles and Closed Captions to YouTube Video

Richard Bennett
Mar 27, 2024• Proven solutions
In this article, we are going to show you how important it is to add subtitle and closed captions in your YouTube video, and how to add them.
The best video editor for YouTubers - Wondershare Filmora , not only allows you to cut, crop, rotate, reverse videos, but also offers your advanced features like PIP, Green Screen, or audio mixing. What’s more, you can find lots of effects for Fashion, gaming, education, tutorial, sports, etc. Check this article to know more.


Why subtitle and closed captions are important for YouTube videos?
- Forced closed captions and subtitles actually help the viewers to understand the content in your video if the audio quality of your video is bad, muffled or barely audible. Reading makes it easier for them to understand.
- This also helps people with hearing impairments. People with troubled ears can still watch and understand your content.
- It’s a great aid to such videos which have been recorded in other foreign languages that you don’t understand. Hence it will increase the number of viewers all around the world.
- They both are generally added for easy accessibility to the viewers who wish to watch in sound sensitive environments.
So, here we are going to show you two ways to add subtittles to video: directly or uploading caption or transcript files
Adding subtitles and closed captions manually
To add subtitles and closed captions to your YouTube video, fisrt, you should sign in to your YouTube account. On left right below ‘Home’ you will find ‘My Channel’. It will direct you to your personal YouTube page. On the top, right next to your subscribers lays the ‘Video manager’, giving you the list of your uploaded videos.
Select the video and click on edit to get a drop down menu. Click on subtitles and CC. This will take you to the subtitling interface. To the right of video select ‘add new subtitles’ and then ‘create new subtitles’. Select the subtitle language. Play the video to listen to the content and type down in the box. Click on ‘+’ button once you are done.
This will create a subtitle timeline right beneath the video. You can manage by dragging and expanding the subtitle duration according to the audio of the video. The subtitle will appear at the bottom of the video screen. Click ‘publish’ once done.
An interruption might occur with appearing of subtitles in accordance with video. Hence a lot precision is required while doing so.
Uploading Caption or Transcript Files automatically
To upload Caption or Transcript Files to YouTube Videos you first need to create a format on a text editor. For windows use Notepad and for Mac you may use TextEdit. Create a format of putting the number of subtitle first, time stamp and then text of the subtitle. For example
1\
00:02:34:12 using a format of (hour : minute : second : millisecond)
2. *text*
This is the sample text for first subtitle at zero hours, two minutes, thirty four seconds and twelve milliseconds. Once done with this. Go to file, select ‘save as’. Write the file name with an extension of .srt and select ‘All files’ for type of file. Click encoding menu and select UTF-8. Once saved, sign in to your YouTube account.
On left right below ‘Home’ you will find ‘My Channel’. It will direct you to your personal YouTube page. On the top, right next to your subscribers lays the ‘Video manager’, giving you the list of your uploaded videos.
Select the video and click on edit to get a drop down menu. Click on subtitles and CC. Go to ‘add subtitles’ and then ‘upload a file’. A pop-up menu will appear select ‘subtitles file’. Click upload. The file will send subtitles to your video.
This will create a subtitle timeline right beneath the video. You can manage by dragging and expanding the subtitle duration according to the audio of the video. The subtitle will appear at the bottom of the video screen. Click ‘publish’ once done.
3 Best Tools for add/managing video Subtitles/CC
1. Amara
Amara is a smart video editor which helps insert captions and subtitles to videos. It also helps in transcribing the videos. It takes help of crowd sourcing to subtitle any YouTube video. They take help from viewers to subtitle the videos. By making crowd subtitling available for any YouTube creator, they are allowing them to reach more viewers in more languages
2. DIY Captions
DIY captions help you to transcribe the YouTube videos, if not in most accurate manner, then in a little easier way. All you have to do is just paste the URL of the YouTube video and it will provide you all the subtitles. These may not be accurate but will provide you major base material which can be tweaked a bit here and there and is far better than making all the subtitles starting from scratch.
3 Subtitles for YouTube
Subtitles for YouTube is a Google Chrome extension which provides subtitles for YouTube videos. For this you will have to provide a subtitle file with .srt extension. The attractive feature of this is that you won’t have to download the video and still run the subtitles on it. This is very much helpful for people who work on YouTube or watch movies without subtitles.
Richard Bennett
Richard Bennett is a writer and a lover of all things video.
Follow @Richard Bennett
Richard Bennett
Mar 27, 2024• Proven solutions
In this article, we are going to show you how important it is to add subtitle and closed captions in your YouTube video, and how to add them.
The best video editor for YouTubers - Wondershare Filmora , not only allows you to cut, crop, rotate, reverse videos, but also offers your advanced features like PIP, Green Screen, or audio mixing. What’s more, you can find lots of effects for Fashion, gaming, education, tutorial, sports, etc. Check this article to know more.
Why subtitle and closed captions are important for YouTube videos?
- Forced closed captions and subtitles actually help the viewers to understand the content in your video if the audio quality of your video is bad, muffled or barely audible. Reading makes it easier for them to understand.
- This also helps people with hearing impairments. People with troubled ears can still watch and understand your content.
- It’s a great aid to such videos which have been recorded in other foreign languages that you don’t understand. Hence it will increase the number of viewers all around the world.
- They both are generally added for easy accessibility to the viewers who wish to watch in sound sensitive environments.
So, here we are going to show you two ways to add subtittles to video: directly or uploading caption or transcript files
Adding subtitles and closed captions manually
To add subtitles and closed captions to your YouTube video, fisrt, you should sign in to your YouTube account. On left right below ‘Home’ you will find ‘My Channel’. It will direct you to your personal YouTube page. On the top, right next to your subscribers lays the ‘Video manager’, giving you the list of your uploaded videos.
Select the video and click on edit to get a drop down menu. Click on subtitles and CC. This will take you to the subtitling interface. To the right of video select ‘add new subtitles’ and then ‘create new subtitles’. Select the subtitle language. Play the video to listen to the content and type down in the box. Click on ‘+’ button once you are done.
This will create a subtitle timeline right beneath the video. You can manage by dragging and expanding the subtitle duration according to the audio of the video. The subtitle will appear at the bottom of the video screen. Click ‘publish’ once done.
An interruption might occur with appearing of subtitles in accordance with video. Hence a lot precision is required while doing so.
Uploading Caption or Transcript Files automatically
To upload Caption or Transcript Files to YouTube Videos you first need to create a format on a text editor. For windows use Notepad and for Mac you may use TextEdit. Create a format of putting the number of subtitle first, time stamp and then text of the subtitle. For example
1\
00:02:34:12 using a format of (hour : minute : second : millisecond)
2. *text*
This is the sample text for first subtitle at zero hours, two minutes, thirty four seconds and twelve milliseconds. Once done with this. Go to file, select ‘save as’. Write the file name with an extension of .srt and select ‘All files’ for type of file. Click encoding menu and select UTF-8. Once saved, sign in to your YouTube account.
On left right below ‘Home’ you will find ‘My Channel’. It will direct you to your personal YouTube page. On the top, right next to your subscribers lays the ‘Video manager’, giving you the list of your uploaded videos.
Select the video and click on edit to get a drop down menu. Click on subtitles and CC. Go to ‘add subtitles’ and then ‘upload a file’. A pop-up menu will appear select ‘subtitles file’. Click upload. The file will send subtitles to your video.
This will create a subtitle timeline right beneath the video. You can manage by dragging and expanding the subtitle duration according to the audio of the video. The subtitle will appear at the bottom of the video screen. Click ‘publish’ once done.
3 Best Tools for add/managing video Subtitles/CC
1. Amara
Amara is a smart video editor which helps insert captions and subtitles to videos. It also helps in transcribing the videos. It takes help of crowd sourcing to subtitle any YouTube video. They take help from viewers to subtitle the videos. By making crowd subtitling available for any YouTube creator, they are allowing them to reach more viewers in more languages
2. DIY Captions
DIY captions help you to transcribe the YouTube videos, if not in most accurate manner, then in a little easier way. All you have to do is just paste the URL of the YouTube video and it will provide you all the subtitles. These may not be accurate but will provide you major base material which can be tweaked a bit here and there and is far better than making all the subtitles starting from scratch.
3 Subtitles for YouTube
Subtitles for YouTube is a Google Chrome extension which provides subtitles for YouTube videos. For this you will have to provide a subtitle file with .srt extension. The attractive feature of this is that you won’t have to download the video and still run the subtitles on it. This is very much helpful for people who work on YouTube or watch movies without subtitles.
Richard Bennett
Richard Bennett is a writer and a lover of all things video.
Follow @Richard Bennett
Also read:
- [New] Adding Chronological Markers to YouTube Media
- [New] Budget-Friendly Methods for YouTube Card Creation
- [New] Conduct Cost-Effective Seminars Using YouTube
- [New] Cultivate Calmness & Flexibility with Top 10 Yoga Streams
- [Updated] Mastering YouTube Dimensions A Comprehensive Guide for 2024
- [Updated] Maximize YouTube Visibility with 11 Proven SEO Techniques
- 2024 Approved Enhancing YouTube Content with Text Overlays
- A Comparative Analysis: The Crème De La Crème of Mesh Wi-Fi Networks
- Aim for Affluence Enroll Now in YouTube's Partner Programme
- Complete Guide For iPhone 14 Plus Lock Screen | Dr.fone
- Create Professional Movies on YouTube Quickly for 2024
- Defending Your Videos Against YouTube Copyright Strikes
- EditPrime Vision for 2024
- Fix Itel P40 Android System Webview Crash 2024 Issue | Dr.fone
- In 2024, 2023 | How To Watch Twitter Videos in Full HD?
- In 2024, Elevate Your Content Perfecting Videos on Instagram
- In 2024, How to Unlock ZTE PIN Code/Pattern Lock/Password
- Step-by-Step Tutorial Broadcasting 360 Video on YouTube Live
- Tips for Accurate Age Input in TikTok Profiles for 2024
- Title: [Updated] Curating YouTube Music Experiences
- Author: Kevin
- Created at : 2024-11-22 19:44:32
- Updated at : 2024-11-24 20:50:13
- Link: https://youtube-videos.techidaily.com/updated-curating-youtube-music-experiences/
- License: This work is licensed under CC BY-NC-SA 4.0.