
![[Updated] Converting Your Twitch Showcase Into a YouTube Hit](https://thmb.techidaily.com/aa2122a37a5989c0b8e6135c848a9b094e794d7aa1b69be64b39a2ed2ad95c93.jpg)
[Updated] Converting Your Twitch Showcase Into a YouTube Hit
Converting Your Twitch Showcase Into a YouTube Hit
Create High-Quality Video - Wondershare Filmora
An easy and powerful YouTube video editor
Numerous video and audio effects to choose from
Detailed tutorials provided by the official channel
Amidst many online applications is Twitch. This live streaming platform takes your experience to another level. You can use it to make crafts, play games, attract broadcasters, and many more. Twitch was launched in 2011, and since then, it has attracted millions of users, managing a database of about 4 million broadcasters by early 2020. With it, users can stream their activities as others watch in real-time. Just browse a category to find a stream.
You can also follow streamers that you like on the platform and get updates and notifications immediately after they are posted. But how do you start a career on a platform like Twitch? You need to broadcast and gather a large following. You can use built-in audiences from other platforms like Facebook. Let’s dive into the core of the matter and look at how to upload Twitch streams to YouTube and build your platform.

In this article
02 What is the benefit of uploading your Twitch Streams to YouTube
03 How to upload your Twitch Streams to YouTube
What is Twitch VOD?
Twitch Video on Demand (VOD) is a recording of previously streamed content. It provides briefings if you missed catching the Twitch live stream. Just watch the VOD from your favorite streamer and be engaged the best way possible. However, VODs don’t last forever. They are removed after two weeks of broadcast. But streamers with Partner Status can have their VODs last up to 60 days.
- How to enable Twitch VOD?
VODs are the best form to archive streams that your fans missed. Even though they are not enabled by default, you can manually enable them and not let your fans miss any important event from your channel. They’ll find it under the “Videos” tab on any Twitch channel. Follow these steps to enable VOD on your channel.
Step 1. Go to your profile icon in the top right corner of Twitch
Check in the “Channel & Video” section and locate the “Stream Key & Preferences” menu.

Step 2. Click on “Creator Dashboard”
Remember, you can enable VODs from your creator dashboard. Just go under the “Settings” tab and click on the “Stream section” of the creator dashboard. Check under the subtitle “VOD Settings” and get the option to store past broadcasts. You can also toggle the slider to store your past broadcasts.

Step 3 Click on the “Settings” tab on the left-hand side and go to Stream
You’ll get various drop-down menu options. Click on the “Settings” tab and choose the “Stream” option. The system will navigate to a new page, thus setting your preferences for VODs and clips.
Step 4. Go to “VOD Settings” and toggle on the “Store Past Broadcast.”
Ensure you have the toggle option turned ON under the “VOD Settings.” If it’s “ON,” you’ll realize the toggle will be purple, with a checkmark in it. Twitch will be confirmed to be enabled if it’s purple.

- Frequently Asked Question about Twitch VOD
These are some questions frequently asked by Twitch users.
1. How long will Twitch store my VOD
Your Twitch can either be stored for 14 or 60 days, depending on your level. For Twitch Prime, Twitch Partner or a Twitch Turbo user has their past broadcasts automatically saved for 60 days before deletion. But if you are not connected to these three options, your past broadcasts will be saved for only 14 days before deletion.
Since your past broadcasts cannot be live for more than 60 days, you have the option to download the video to your computer before the validity days expire and Twitch deletes it. You can use an External Hard drive to save the past broadcast content. Likewise, it is possible to turn your past broadcast content into Highlight and, in turn, permanently store them on Twitch.
2. What is the difference between Twitch VOD, Highlights, and Clips
Twitch VOD is a previously saved video of your live stream content. You choose to save either part or the entire content of your previously streamed content. More so, you don’t need any additional requirements to use VOD.
Highlights are short videos that have been edited from your past broadcast content. You can save them on Twitch permanently. Streamers majorly use highlights to save video game achievements. Unlike VOD Twitch that can be saved up to 60 days, Highlights usually lasts no more than 3 minutes.
- To make Highlights on Twitch, first, navigate to your Dashboard.
- Then scroll down and click on “Content” > “Video Producer.
- Next, press on “All Videos” to change them to “Past Broadcasts.”
- Now press the “Highlight” button, and Twitch will immediately open a new tab for “Twitch Highlighter Tool.”
- Then select the video part to include as “Highlight” and press the “Create Highlights” button.
- Wait a while for the process to be completed, and Voila! You have your Highlights created.
When it comes to Twitch Clip, you can capture special moments in a stream you are currently watching. On the same note, you can share clips with friends and other users on social media platforms. Such shared clips contain a link where others view the source or video from.
The clips you create will automatically be saved on the streamer’s channel on the “Clips” page, where other viewers can see them too. Nonetheless, you can download “clips” to your computer and, in turn, upload them whenever you want to. And note that you can help your stream grow via “Clips” by letting your viewers clip and share your stream moments.
- To create “Clips” on Twitch, identify which Streamers channel you wish to create a clip from.
- Then click on the “Clapper board” icon. Next, edit your clip between 5 and 60 seconds long.
- Finally, create a title and publish your Clip. You’ll also enjoy the privilege to share your clip’s link to other social media networks.
What is the benefit of uploading your Twitch Streams to YouTube
You stand to gain a lot when you upload your Twitch Streams to YouTube.
1) To enlighten your followers
Your followers will see your streams and make the best decisions. Viewers can check out your recordings and other highlights from past streams. It will help them decide whether they like what they see and probably join your live streams.
2) Twitch provides content for you to share and monetize on YouTube
Since Twitch streaming is more popular nowadays, many people throng it for content. It is not wise to rely entirely on Twitch to discover as a Twitch Streamer. Posting to YouTube will make it known within a short time. You would have announced your streams most nobly and kept your followers up to date, attracting new ones as well.
3) To keep your followers engaged even when you are offline
Even though live streaming is important, some viewers may not attend the live sessions due to different time zones or other commitments. In this regard, when uploaded to YouTube, Twitch will give them a chance to watch your content just whenever they log in. They, therefore, have the option to watch a Twitch VOD of the live stream they missed.
How to upload your Twitch Streams to YouTube
Check how to upload Twitch streams to YouTube from the Twitch website.
Step 1. Identify the little arrow next to your name on the Twitch website and click on it. Then click on the “Video Producer” to take you to a list of your Twitch videos.

Step 2. Check out and click on the “three-dots” on the video you wish to upload to YouTube. Click on the “Export” tab.
Step 3. A menu will then pop up. Here, you can fill in the description, title, and tags that you would like to appear on the YouTube video. There is an option for Twitch to split your video automatically. If you wish so, then tick the “Checkbox” to enable it. Then click on the “Start Export” option to export your Twitch streams to YouTube.

Bouns! Edit Your Twitch Video with Filmora
The quality of your video matters when it comes to uploading Twitch Streams to YouTube. Using a third-party tool to edit your video is the first step in ensuring your videos communicate meaningful content. Filmora comes in handy to bring your imaginations to life. Use it for simple creation without limits, even for beginners.
- Use it to track moving objects in video clips
- Easily match any image of the selected clip
- Its powerful tools let you edit your video by cropping, splitting, adjusting speed, etc
- The video keyframe easily indicates the beginning and end of the parameters
For Win 7 or later (64-bit)
For macOS 10.12 or later
Conclusion
● Don’t just focus on how to upload Twitch streams to YouTube but also consider the quality of video you are posting to YouTube. Remember, your video quality will speak much more of you than any other description. So, strive to produce quality videos using the best tool, Filmora. The app is easy to use and will elevate your views and imaginations through your video in the most impactful way.
Amidst many online applications is Twitch. This live streaming platform takes your experience to another level. You can use it to make crafts, play games, attract broadcasters, and many more. Twitch was launched in 2011, and since then, it has attracted millions of users, managing a database of about 4 million broadcasters by early 2020. With it, users can stream their activities as others watch in real-time. Just browse a category to find a stream.
You can also follow streamers that you like on the platform and get updates and notifications immediately after they are posted. But how do you start a career on a platform like Twitch? You need to broadcast and gather a large following. You can use built-in audiences from other platforms like Facebook. Let’s dive into the core of the matter and look at how to upload Twitch streams to YouTube and build your platform.
In this article
02 What is the benefit of uploading your Twitch Streams to YouTube
03 How to upload your Twitch Streams to YouTube
What is Twitch VOD?
Twitch Video on Demand (VOD) is a recording of previously streamed content. It provides briefings if you missed catching the Twitch live stream. Just watch the VOD from your favorite streamer and be engaged the best way possible. However, VODs don’t last forever. They are removed after two weeks of broadcast. But streamers with Partner Status can have their VODs last up to 60 days.
- How to enable Twitch VOD?
VODs are the best form to archive streams that your fans missed. Even though they are not enabled by default, you can manually enable them and not let your fans miss any important event from your channel. They’ll find it under the “Videos” tab on any Twitch channel. Follow these steps to enable VOD on your channel.
Step 1. Go to your profile icon in the top right corner of Twitch
Check in the “Channel & Video” section and locate the “Stream Key & Preferences” menu.
Step 2. Click on “Creator Dashboard”
Remember, you can enable VODs from your creator dashboard. Just go under the “Settings” tab and click on the “Stream section” of the creator dashboard. Check under the subtitle “VOD Settings” and get the option to store past broadcasts. You can also toggle the slider to store your past broadcasts.
Step 3 Click on the “Settings” tab on the left-hand side and go to Stream
You’ll get various drop-down menu options. Click on the “Settings” tab and choose the “Stream” option. The system will navigate to a new page, thus setting your preferences for VODs and clips.
Step 4. Go to “VOD Settings” and toggle on the “Store Past Broadcast.”
Ensure you have the toggle option turned ON under the “VOD Settings.” If it’s “ON,” you’ll realize the toggle will be purple, with a checkmark in it. Twitch will be confirmed to be enabled if it’s purple.
- Frequently Asked Question about Twitch VOD
These are some questions frequently asked by Twitch users.
1. How long will Twitch store my VOD
Your Twitch can either be stored for 14 or 60 days, depending on your level. For Twitch Prime, Twitch Partner or a Twitch Turbo user has their past broadcasts automatically saved for 60 days before deletion. But if you are not connected to these three options, your past broadcasts will be saved for only 14 days before deletion.
Since your past broadcasts cannot be live for more than 60 days, you have the option to download the video to your computer before the validity days expire and Twitch deletes it. You can use an External Hard drive to save the past broadcast content. Likewise, it is possible to turn your past broadcast content into Highlight and, in turn, permanently store them on Twitch.
2. What is the difference between Twitch VOD, Highlights, and Clips
Twitch VOD is a previously saved video of your live stream content. You choose to save either part or the entire content of your previously streamed content. More so, you don’t need any additional requirements to use VOD.
Highlights are short videos that have been edited from your past broadcast content. You can save them on Twitch permanently. Streamers majorly use highlights to save video game achievements. Unlike VOD Twitch that can be saved up to 60 days, Highlights usually lasts no more than 3 minutes.
- To make Highlights on Twitch, first, navigate to your Dashboard.
- Then scroll down and click on “Content” > “Video Producer.
- Next, press on “All Videos” to change them to “Past Broadcasts.”
- Now press the “Highlight” button, and Twitch will immediately open a new tab for “Twitch Highlighter Tool.”
- Then select the video part to include as “Highlight” and press the “Create Highlights” button.
- Wait a while for the process to be completed, and Voila! You have your Highlights created.
When it comes to Twitch Clip, you can capture special moments in a stream you are currently watching. On the same note, you can share clips with friends and other users on social media platforms. Such shared clips contain a link where others view the source or video from.
The clips you create will automatically be saved on the streamer’s channel on the “Clips” page, where other viewers can see them too. Nonetheless, you can download “clips” to your computer and, in turn, upload them whenever you want to. And note that you can help your stream grow via “Clips” by letting your viewers clip and share your stream moments.
- To create “Clips” on Twitch, identify which Streamers channel you wish to create a clip from.
- Then click on the “Clapper board” icon. Next, edit your clip between 5 and 60 seconds long.
- Finally, create a title and publish your Clip. You’ll also enjoy the privilege to share your clip’s link to other social media networks.
What is the benefit of uploading your Twitch Streams to YouTube
You stand to gain a lot when you upload your Twitch Streams to YouTube.
1) To enlighten your followers
Your followers will see your streams and make the best decisions. Viewers can check out your recordings and other highlights from past streams. It will help them decide whether they like what they see and probably join your live streams.
2) Twitch provides content for you to share and monetize on YouTube
Since Twitch streaming is more popular nowadays, many people throng it for content. It is not wise to rely entirely on Twitch to discover as a Twitch Streamer. Posting to YouTube will make it known within a short time. You would have announced your streams most nobly and kept your followers up to date, attracting new ones as well.
3) To keep your followers engaged even when you are offline
Even though live streaming is important, some viewers may not attend the live sessions due to different time zones or other commitments. In this regard, when uploaded to YouTube, Twitch will give them a chance to watch your content just whenever they log in. They, therefore, have the option to watch a Twitch VOD of the live stream they missed.
How to upload your Twitch Streams to YouTube
Check how to upload Twitch streams to YouTube from the Twitch website.
Step 1. Identify the little arrow next to your name on the Twitch website and click on it. Then click on the “Video Producer” to take you to a list of your Twitch videos.
Step 2. Check out and click on the “three-dots” on the video you wish to upload to YouTube. Click on the “Export” tab.
Step 3. A menu will then pop up. Here, you can fill in the description, title, and tags that you would like to appear on the YouTube video. There is an option for Twitch to split your video automatically. If you wish so, then tick the “Checkbox” to enable it. Then click on the “Start Export” option to export your Twitch streams to YouTube.
Bouns! Edit Your Twitch Video with Filmora
The quality of your video matters when it comes to uploading Twitch Streams to YouTube. Using a third-party tool to edit your video is the first step in ensuring your videos communicate meaningful content. Filmora comes in handy to bring your imaginations to life. Use it for simple creation without limits, even for beginners.
- Use it to track moving objects in video clips
- Easily match any image of the selected clip
- Its powerful tools let you edit your video by cropping, splitting, adjusting speed, etc
- The video keyframe easily indicates the beginning and end of the parameters
For Win 7 or later (64-bit)
For macOS 10.12 or later
Conclusion
● Don’t just focus on how to upload Twitch streams to YouTube but also consider the quality of video you are posting to YouTube. Remember, your video quality will speak much more of you than any other description. So, strive to produce quality videos using the best tool, Filmora. The app is easy to use and will elevate your views and imaginations through your video in the most impactful way.
Unleash Potential: Access Premium Sound Effects
Download Free Sound Effects for YouTubers

Richard Bennett
Oct 26, 2023• Proven solutions
Whether you’re making a short film and need sounds to go with your action sequences, or just want some fun noises for your vlog or challenge video, it’s easy to find great sound effects you can use for free online.
Here are 7 places to download free sound effects! Or, if you’re interested in making your own, click here to jump to ‘Make Your Own Sound Effects’.


Part 1: YouTube Free Sound Effects Download
1. Filmora Sound Effects
Filmora Video Editor provides you with a huge library of free sound effects without download from anywhere else. There are 25 pieces of sound effect available in Filmora, such as transition swoosh, cinematic horn, beep sound and phone ring.

If you do not see the sound effect you want in Filmora, you can also go to the online effect store to find out more sound effects. The sounds are in.wav or mp3 files, so you do not have to use them inside Filmora only. They’re free to use for everyone after downloading, no matter what video editor you use.
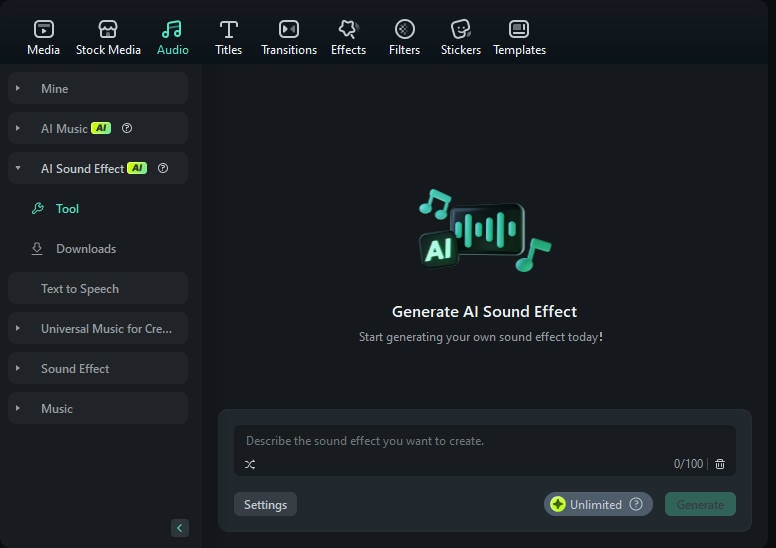
The Filmstock audio effect library covers sound effects in different categories: nature sounds, animal sounds, movie sounds, gun sounds, fireworks, bird sounds, cricket sounds, wet sounds, dog barking, water sounds, guitar sounds, city sounds, monster sounds, laughing sounds, dinosaur sounds, fart sounds, pet sounds, dog sounds, car sounds, video game, and thunderstorm.
2. Freesound
Sounds on Freesound are uploaded by users under various Creative Commons licenses (some may require attribution, some may not allow commercial use).
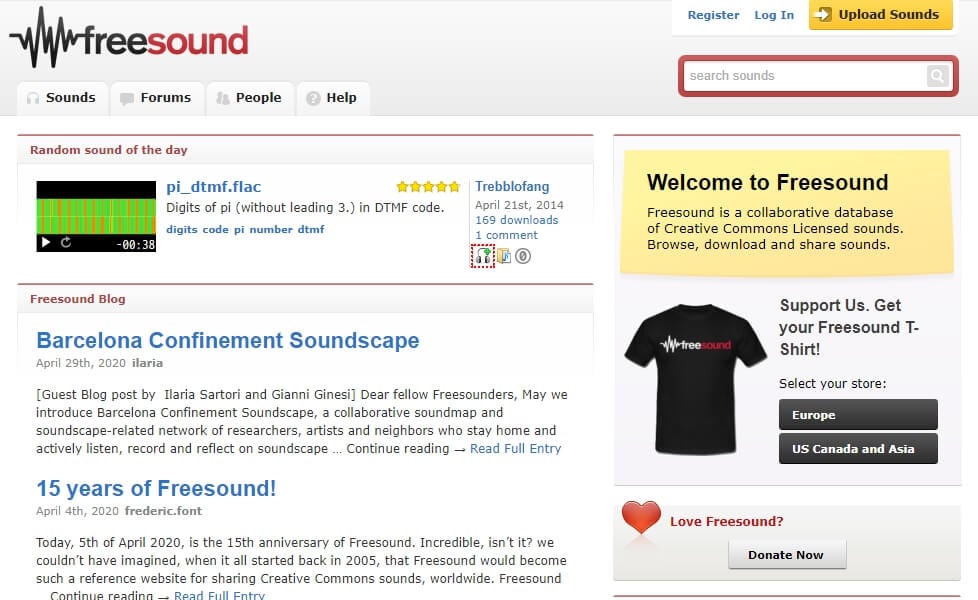
The easiest way to browse the sounds on Freesound is probably to click into Sounds in the top menu, and then ‘Browse tags’ in the menu on the right of your screen. All of the tags on the site will be displayed, and the most commonly used ones will be biggest. The tags include what the sounds are meant to be (i.e. percussion or thunder) and what type of sounds they are (i.e. field-recording or synth).
3. PacDV
PacDV has been producing sound effects since 2001. You can browse and download sounds individually from their site, or download all at once in a huge bundle. You can use all the sounds for free (you just can’t sell them or provide direct download links to other people).
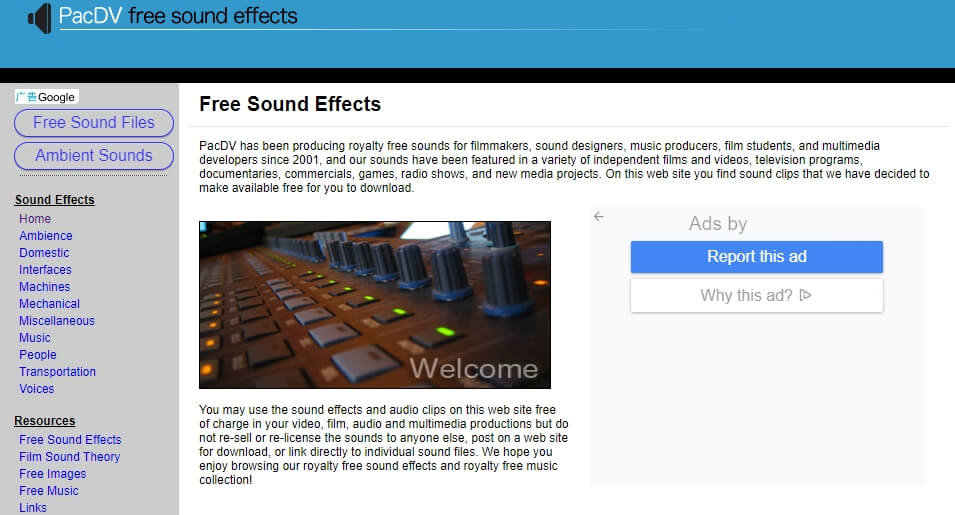
On the left of the website there’s a menu where you can choose what kinds of sound effects you’re interested in. The categories are:
Ambience: this is where you’ll find general background sounds, like ‘car interior’ or ‘grocery store’. Even when nothing in particular is happening, locations have sounds. This is also where you’ll find things like crowd noises.
Domestic: these are sounds you hear around the home, like sounds related to doors and appliances.
Interfaces: a lot of tech sounds live here, like beeps and clicks. Beeps are all titled ‘Beep’, but nothing else is really labeled beyond being called ‘Interface Sound’. You just have to listen and find out.
Machines: a variety of different machine sounds can be found here, from power tools like chainsaws and drills to things like typewriters or paper shredders.
Mechanical: this is where you’ll find sounds associated with cameras, coin slots, zippers, and more.
People: laughing, clapping, footsteps and even farts – this is where you’ll find human sounds.
Transportation: these sounds are all related to vehicles, be they cars or airplanes.
Voices: here you’ll find voices saying common things like ‘hi’, ‘aaah’, or ‘come on’.
Music: PacDV also has a selection of royalty free music. If you use it in your video, you need to give them credit by including Music by <www.pacdv.com/sounds/> in your video description.
Miscellaneous: sounds that don’t quite fit into other categories.
4. Sound Bible
The sounds on Sound Bible are either in the public domain, which means anyone can use them for anything without restriction, or licensed under the Creative Commons Attribution 3.0 License, which means you just need to provide a credit for the person who created the effect you use. When you click on sound effects on Sound Bible you’ll be able to see whether the effect is Public Domain or Attribution 3.0, and it will tell you who the sound was recorded by. Both public domain and Attribution 3.0 sounds are available for commercial use.
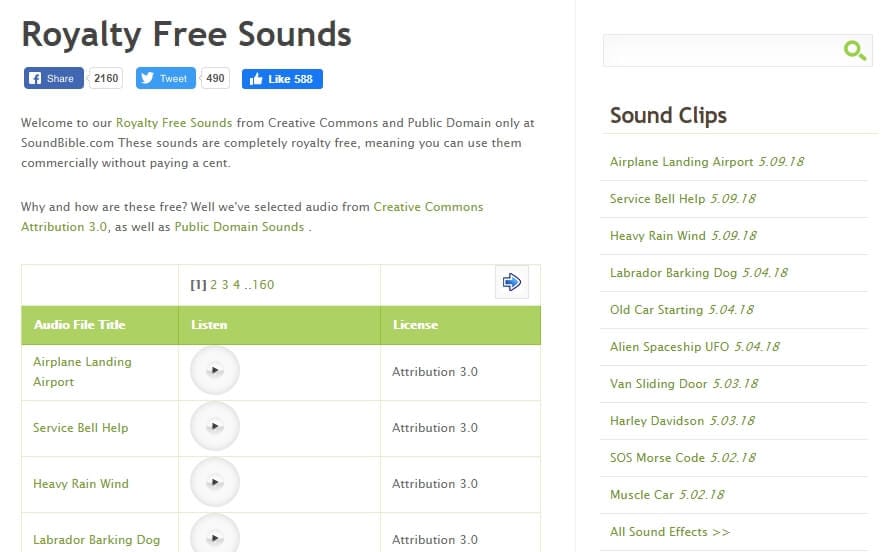
This site has a search function, so if you want dog sounds you can search for ‘dog’. This might be easier than trying to pick the category closest to what you’re looking for and just scrolling through, like you do on some sites.
Sound Bible is updated about 3 times a week, so you can always check back for fresh sounds.
5. Sound Gator
Sound Gator has a huge number of sound effects divided into too many categories to list (24). The categories tend to be very specific, like ‘drink sound effects’ or ‘phone sound effects. If you don’t see a category that sounds like what you’re looking for, make sure to check under Misc Sound Effects because there are 68 Mp3#s in there for everything from tools to static.
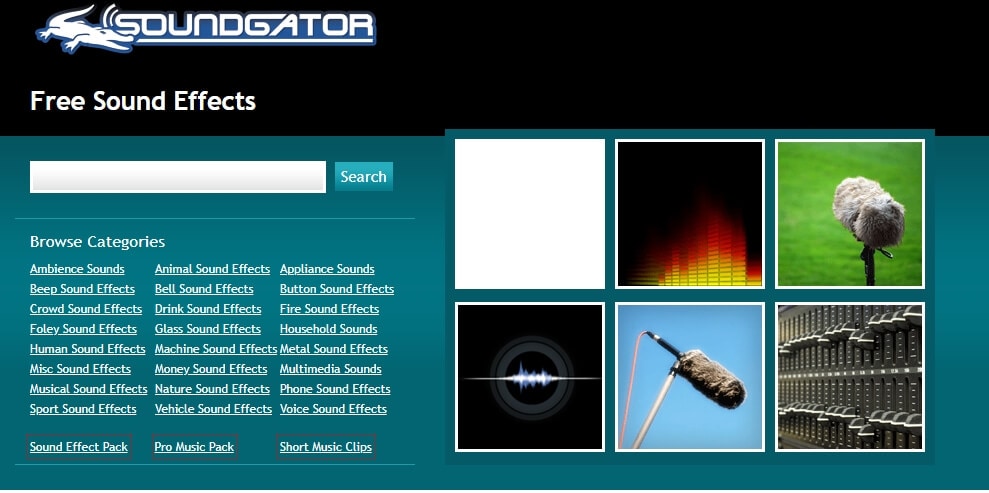
You can sort the sound effects on Sound Gator by date added, popularity, top rated, runtime, top favorites, or most discussed.
6. Sounds Crate
Sounds Crate is part of the larger Production Crate which provides all kinds of resources to creators for free (you can upgrade to a paid account to access exclusive content, but there’s a lot of great content available for free). The categories available on Sounds Crate are:

Ambient: room tones and general background noises from nature or cities.
Animal: includes things like puppy barks and angry cats.
Blades and Metal: you’ll find sounds from swords, chains, and other metal implements here.
Crashes and Debris: perfect for action, this is where you’ll find sounds associated with destruction.
Electricity: things like electrical blasts and charges can be found here.
Electronics: any sound made by anything electrical, like beeps and appliance sounds.
Explosions and Bangs: if you have a visual explosion effect, you’ll probably need to combine it with something from here.
Fight: find sounds associated with action sequences, like whooshes and punches.
Gun Related: everything from reloads to gunshots.
Impact: any kind of thud or shattering sound.
Lock n’ Load: although there are some ‘gun checking’ sounds in here, it’s mostly clothing related sounds like zippers and Velcro.
Movement: wind sounds and whooshes.
People: sounds humans make, from voices to footsteps.
Sci-Fi SFX: zaps, beeps, and sci-fi ambience.
Vehicle: includes both common vehicles like cars and less-common vehicles like tanks.
Weapons: both modern weapons like missiles and old-timey things like arrows.
7. Zapsplat
Zapsplat claims to be the fastest growing free sound effects library on the internet. With more than 23,999 professional sounds, and more being added every week, they might just be right. The owner of the site, Alan McKinney, adds 500 sound effects every week by himself and the site also accepts sounds from contributors. All of their sounds were recorded using professional equipment and then edited to make them perfect.
You can even send Alan a message and request specific sound effects if you can’t already find what you want on the site.
On Zapsplat you can browse 26 categories including fantasy, warfare, and animals for individual sounds. Or, you can visit the Free SFX Packs section and download a set of related sounds together. Packs include ‘Magic Wand’, ‘Science Fiction Alarms’, and ‘Cartoon Boings’.
Part 2: Make Your Own Sound Effects for YouTube Videos
Here are some easy ways you can make your own sound effects at home.
1. Making Natural Sounds
Fire using cellophane. Just crinkle the cellophane wrap to create a sound like a crackling fire. Chip bags work too.
Rain using rice. Sprinkle rice (or birdseed) onto a thin metal sheet.
Alternatively for rain, you could record the sound of bacon frying.
Wind using a Ziploc. Fill a large ziplock with air and then open the bag a bit and force the air out.
Thunder with aluminum. Just shake a sheet of aluminum to make a thunder sound.
2. Making Action or Sci-Fi Sounds
Ticking Bomb with a clock. Any clock that ticks will do.
Hits/Blows with a pillow. Hit a pillow to make a sound like a body blow. For really hard hits, you might want to whack a sofa cushion with a broomstick.
Bones breaking with celery. Just snap the celery stalks in half.
Richard Bennett
Richard Bennett is a writer and a lover of all things video.
Follow @Richard Bennett
Richard Bennett
Oct 26, 2023• Proven solutions
Whether you’re making a short film and need sounds to go with your action sequences, or just want some fun noises for your vlog or challenge video, it’s easy to find great sound effects you can use for free online.
Here are 7 places to download free sound effects! Or, if you’re interested in making your own, click here to jump to ‘Make Your Own Sound Effects’.
Part 1: YouTube Free Sound Effects Download
1. Filmora Sound Effects
Filmora Video Editor provides you with a huge library of free sound effects without download from anywhere else. There are 25 pieces of sound effect available in Filmora, such as transition swoosh, cinematic horn, beep sound and phone ring.
If you do not see the sound effect you want in Filmora, you can also go to the online effect store to find out more sound effects. The sounds are in.wav or mp3 files, so you do not have to use them inside Filmora only. They’re free to use for everyone after downloading, no matter what video editor you use.
The Filmstock audio effect library covers sound effects in different categories: nature sounds, animal sounds, movie sounds, gun sounds, fireworks, bird sounds, cricket sounds, wet sounds, dog barking, water sounds, guitar sounds, city sounds, monster sounds, laughing sounds, dinosaur sounds, fart sounds, pet sounds, dog sounds, car sounds, video game, and thunderstorm.
2. Freesound
Sounds on Freesound are uploaded by users under various Creative Commons licenses (some may require attribution, some may not allow commercial use).
The easiest way to browse the sounds on Freesound is probably to click into Sounds in the top menu, and then ‘Browse tags’ in the menu on the right of your screen. All of the tags on the site will be displayed, and the most commonly used ones will be biggest. The tags include what the sounds are meant to be (i.e. percussion or thunder) and what type of sounds they are (i.e. field-recording or synth).
3. PacDV
PacDV has been producing sound effects since 2001. You can browse and download sounds individually from their site, or download all at once in a huge bundle. You can use all the sounds for free (you just can’t sell them or provide direct download links to other people).
On the left of the website there’s a menu where you can choose what kinds of sound effects you’re interested in. The categories are:
Ambience: this is where you’ll find general background sounds, like ‘car interior’ or ‘grocery store’. Even when nothing in particular is happening, locations have sounds. This is also where you’ll find things like crowd noises.
Domestic: these are sounds you hear around the home, like sounds related to doors and appliances.
Interfaces: a lot of tech sounds live here, like beeps and clicks. Beeps are all titled ‘Beep’, but nothing else is really labeled beyond being called ‘Interface Sound’. You just have to listen and find out.
Machines: a variety of different machine sounds can be found here, from power tools like chainsaws and drills to things like typewriters or paper shredders.
Mechanical: this is where you’ll find sounds associated with cameras, coin slots, zippers, and more.
People: laughing, clapping, footsteps and even farts – this is where you’ll find human sounds.
Transportation: these sounds are all related to vehicles, be they cars or airplanes.
Voices: here you’ll find voices saying common things like ‘hi’, ‘aaah’, or ‘come on’.
Music: PacDV also has a selection of royalty free music. If you use it in your video, you need to give them credit by including Music by <www.pacdv.com/sounds/> in your video description.
Miscellaneous: sounds that don’t quite fit into other categories.
4. Sound Bible
The sounds on Sound Bible are either in the public domain, which means anyone can use them for anything without restriction, or licensed under the Creative Commons Attribution 3.0 License, which means you just need to provide a credit for the person who created the effect you use. When you click on sound effects on Sound Bible you’ll be able to see whether the effect is Public Domain or Attribution 3.0, and it will tell you who the sound was recorded by. Both public domain and Attribution 3.0 sounds are available for commercial use.
This site has a search function, so if you want dog sounds you can search for ‘dog’. This might be easier than trying to pick the category closest to what you’re looking for and just scrolling through, like you do on some sites.
Sound Bible is updated about 3 times a week, so you can always check back for fresh sounds.
5. Sound Gator
Sound Gator has a huge number of sound effects divided into too many categories to list (24). The categories tend to be very specific, like ‘drink sound effects’ or ‘phone sound effects. If you don’t see a category that sounds like what you’re looking for, make sure to check under Misc Sound Effects because there are 68 Mp3#s in there for everything from tools to static.
You can sort the sound effects on Sound Gator by date added, popularity, top rated, runtime, top favorites, or most discussed.
6. Sounds Crate
Sounds Crate is part of the larger Production Crate which provides all kinds of resources to creators for free (you can upgrade to a paid account to access exclusive content, but there’s a lot of great content available for free). The categories available on Sounds Crate are:
Ambient: room tones and general background noises from nature or cities.
Animal: includes things like puppy barks and angry cats.
Blades and Metal: you’ll find sounds from swords, chains, and other metal implements here.
Crashes and Debris: perfect for action, this is where you’ll find sounds associated with destruction.
Electricity: things like electrical blasts and charges can be found here.
Electronics: any sound made by anything electrical, like beeps and appliance sounds.
Explosions and Bangs: if you have a visual explosion effect, you’ll probably need to combine it with something from here.
Fight: find sounds associated with action sequences, like whooshes and punches.
Gun Related: everything from reloads to gunshots.
Impact: any kind of thud or shattering sound.
Lock n’ Load: although there are some ‘gun checking’ sounds in here, it’s mostly clothing related sounds like zippers and Velcro.
Movement: wind sounds and whooshes.
People: sounds humans make, from voices to footsteps.
Sci-Fi SFX: zaps, beeps, and sci-fi ambience.
Vehicle: includes both common vehicles like cars and less-common vehicles like tanks.
Weapons: both modern weapons like missiles and old-timey things like arrows.
7. Zapsplat
Zapsplat claims to be the fastest growing free sound effects library on the internet. With more than 23,999 professional sounds, and more being added every week, they might just be right. The owner of the site, Alan McKinney, adds 500 sound effects every week by himself and the site also accepts sounds from contributors. All of their sounds were recorded using professional equipment and then edited to make them perfect.
You can even send Alan a message and request specific sound effects if you can’t already find what you want on the site.
On Zapsplat you can browse 26 categories including fantasy, warfare, and animals for individual sounds. Or, you can visit the Free SFX Packs section and download a set of related sounds together. Packs include ‘Magic Wand’, ‘Science Fiction Alarms’, and ‘Cartoon Boings’.
Part 2: Make Your Own Sound Effects for YouTube Videos
Here are some easy ways you can make your own sound effects at home.
1. Making Natural Sounds
Fire using cellophane. Just crinkle the cellophane wrap to create a sound like a crackling fire. Chip bags work too.
Rain using rice. Sprinkle rice (or birdseed) onto a thin metal sheet.
Alternatively for rain, you could record the sound of bacon frying.
Wind using a Ziploc. Fill a large ziplock with air and then open the bag a bit and force the air out.
Thunder with aluminum. Just shake a sheet of aluminum to make a thunder sound.
2. Making Action or Sci-Fi Sounds
Ticking Bomb with a clock. Any clock that ticks will do.
Hits/Blows with a pillow. Hit a pillow to make a sound like a body blow. For really hard hits, you might want to whack a sofa cushion with a broomstick.
Bones breaking with celery. Just snap the celery stalks in half.
Richard Bennett
Richard Bennett is a writer and a lover of all things video.
Follow @Richard Bennett
Also read:
- 2024 Approved Craft a Memorable YouTube Channel Brand for More Viewers
- [New] Direct Your Media Essential Flv-to-YouTube Applications Ranked
- [New] Chuckling Chords & Clever Cuts 10 Parody Classics
- [Updated] Dive Into Filmora’s Certified Creative Program
- [New] Essential YouTube Movie Binge Guides
- Securely Verifying Your YouTube Access Details
- From Virality to Value Ajay’s Playbook for Profitable Content Creation
- An Owner's Guide to Playlist Permutations in YT
- 2024 Approved Budget-Friendly Designs for YouTube Content Creators
- [New] Post Youtube Video on the Best Days to Get More View
- The Swift Video Voyage Navigating Through the YouTubes and TikTok Landscapes
- [New] Deep Dive The Economy and Impact of Online Stars
- 2024 Approved Enhance Productions No-Cost Sounds Available
- 2024 Approved Cutting-Edge Strategies for YouTube Split-Screen Videos
- [Updated] Building a Channel Team-Up Videography Guide
- Achieving Content Balance A Thorough Exploration of YT Aspect Ratios
- Charting the Financial Pathway of TSeries Within YouTube Market Space for 2024
- 2024 Approved Discover the Ideal Release Windows on YouTube
- Essential Guide Top 10 Free YouTube-to-MP3 Tools for 2024
- 2024 Approved Comprehensive Review Top 10 YouTube Trimming Tools
- Earnings Engineering Crafting a High Yield Strategy for Your YouTube Channel for 2024
- Non-Tripod Techniques for Still Cameras
- [Updated] An Easy-to-Follow Guide to Applying CC License Types
- Quickfire Engagement Top 30+ YouTube Hashes
- In 2024, Bridging the Gap YouTube Editing Mastered in iMovie Workflows
- 2024 Approved Essential Steps for Crafting Video-Based GIFs on Mobile/Desktop
- How to Record Good Audio Without a Microphone
- Icon & Logo Inspiration The Top 6 Website Roundup
- In 2024, How to jailbreak iCloud locked Apple iPhone XS
- Innovative Platforms Simplifying Group Chats
- [Updated] 2024 Approved Masterclass in Visualization Perfectly Cropped Instagram Videos
- Updated The Ultimate List Best Free and Open-Source Video Editors for 2024
- New Unbrand Your Videos Removing Filmora Watermark with Free and Paid Options
- In 2024, How To Unlock A Found iPhone XS Max? | Dr.fone
- 3 Ways to Track Infinix Zero 30 5G without Them Knowing | Dr.fone
- How to Recover lost Calendar on iPhone 13 Pro | Stellar
- 2024 Approved Updated Rankings Alternative Social Apps to TikTok
- In 2024, Unova Stone Pokémon Go Evolution List and How Catch Them For Oppo Find X6 Pro | Dr.fone
- How to Unlock Poco X5 Phone Pattern Lock without Factory Reset
- In 2024, Maximizing TikTok Impact Trending Hashtags & Strategies
- Updated In 2024, Bring Your Vision to Life Best Animation Software for Mac and Windows
- Network Locked SIM Card Inserted On Your Motorola Edge 40 Neo Phone? Unlock It Now
- Title: [Updated] Converting Your Twitch Showcase Into a YouTube Hit
- Author: Kevin
- Created at : 2024-06-10 00:24:53
- Updated at : 2024-06-11 00:24:53
- Link: https://youtube-videos.techidaily.com/updated-converting-your-twitch-showcase-into-a-youtube-hit/
- License: This work is licensed under CC BY-NC-SA 4.0.
