
!["[Updated] Capture It Right Essential Camera Lenses for Video Blogging"](https://www.lifewire.com/thmb/0XOSR_cSdI-UPr8TRlThT4Fytnk=/400x300/filters:no_upscale():max_bytes(150000):strip_icc()/GorillaArmor-6d65059c5c99453d85e9a960592adb9a.jpeg)
"[Updated] Capture It Right Essential Camera Lenses for Video Blogging"
Capture It Right: Essential Camera Lenses for Video Blogging
A Vlogger’s Guide To Camera Lenses

Richard Bennett
Nov 01, 2022• Proven solutions
The staple of any vlog is the talking headshot, a shot of the speaker talking directly to the audience. You can compose this shot with different kinds of lenses for your interchangeable lens camera.
But which kind of lens is the right lens for you as a vlogger?
In this article, I’m going to help you figure that out.
- Part 1: Three Focal Length Groups: Wide, Standard, Telephoto
- Part 2: Vlogging With Each Focal Length Group
- Part 3: Crop Factor
- Part 4: Focal Length Equivalency Table
- Part 5: Aperture
- Part 6: Vlogging With a Fast Lens
- Part 7: Optical Image Stabilization
Three Focal Length Groups: Wide, Standard, Telephoto
There are three main ranges in focal lengths that camera lenses can be categorized into wide, standard, and telephoto.
Wide-Angle Lens
Wide-angle lenses can “see more.” They allow more of your scene to fit inside your frame. Objects that are closer to the lens appear much bigger while objects that are further away appear even smaller. Perspectives are also enhanced, making close objects and people that just make it into the sides of the frame appear more stretched out. Out of all the other ranges in focal lengths, wide-angle lenses will appear the least zoomed in.
Standard Lens
With standard lenses or normal lenses, you won’t get the stretched out objects or enhanced perspectives that you get from wide-angle lenses. Instead, standard lenses are meant to see scenes as the natural human eye is meant to see them. If you shoot a scene with both a wide-angle lens and a standard lens from the same position, you’ll notice that less of the scene fits into your frame. Standard lenses will appear more zoomed-in than wide-angle lenses, but less zoomed-in than telephoto lenses.
Telephoto Lens
Out of all the other ranges in focal lengths, telephoto lenses will appear the most zoomed in. This can be beneficial for the shooter who wants to get a closer shot of a scene without having to physically be in close proximity to the scene. Objects that are further away in the background also appear larger and closer than they would appear on wide-angle or standard lenses.
Vlogging With Each Focal Length Group
You can get your talking head footage using lenses from any of the three focal length groups. Depending on how you plan to vlog most of the time, though, one of the three focal lengths might be more suitable for you.
When to vlog with a wide-angle lens
Wide-angle lenses are the most commonly used lenses for vlogging. Wide-angle lenses are great when you need to be close to your camera. This might be the case for you if your recording space is small or if you want to film yourself as you hold your camera up with your own hand.
Being close to your camera not only gives you the option to use your camera’s built-in microphone, but it also gives you the option to make use of camera-mounted shotgun microphones.
When to vlog with a standard lens
Standard lenses are great when you have more space to be further away from your camera. The perspectives in your shot will look more natural through a standard lens, making your talking head footage feel more corporate or professional. You’ll also be able to get blurrier backgrounds using a standard lens versus a wide-angle lens.
Being further away from your camera, however, means that you’ll have to use a separate microphone positioned closer to you.
When to vlog with a telephoto lens
As telephoto lenses are even more zoomed in, you’ll need to be even further away from your camera to fit yourself inside your camera frame. Why would any vlogger ever need to be that far away from their camera? One word… teleprompter. If you want or need to stick to a script, you’ll have to be far away enough from your camera that it doesn’t appear like your eyes are scanning left to right. You then close in the distance with a telephoto lens.
In the above video, Marcos Rocha compares different focal lengths for talking head videos. Which focal length range do you like the look of?
Crop Factor
Focal lengths in camera lenses are measured in millimeters. You can vlog yourself handheld with a 24mm lens on a camera with a full-frame sensor (the sensor is the piece of hardware inside your camera that turns the light it receives into a digital image). But if you use a 24mm lens on a camera with a smaller sensor, like an APS-C sensor or even smaller Micro 4/3 sensor, more of you will get cropped out (see below).

In order to make up for the cropping that occurs, you will need to use a wider lens on cameras with smaller sensors to get the same shot you’d get with a full-frame camera.
Focal Length Equivalency Table
This table shows you the focal lengths needed to achieve the same shot between cameras with different sensor sizes. In order to take a shot as wide as the shot I took of myself with the 24mm lens on my full-frame camera, I would need a 15mm lens on an APS-C sensor camera or a 12mm lens on a micro 4/3 camera.
| Focal Length / Sensor | Full Frame | APS-C | Micro 4/3 |
|---|---|---|---|
| Wide (Handheld Selfie-Safe) | 16mm | 10mm | 8mm |
| Wide (Handheld Selfie-Safe) | 18mm | 11mm | 9mm |
| Wide (Handheld Selfie-Safe) | 24mm | 15mm | 12mm |
| Wide | 35mm | 22mm | 18mm |
| Standard | 50mm | 31mm | 25mm |
| Telephoto | 70mm | 44mm | 35mm |
| Telephoto | 100mm | 63mm | 50mm |
| Telephoto | 200mm | 125mm | 100mm |
Aperture

The next thing to consider when you’re looking for a lens is the aperture, the hole (often adjustable) within the lens that lets light in. Aperture for camera lenses is measured in f-stops (f/1.4, f/1.8, f/2.0) - the smaller the f-stop number, the larger the aperture (bigger hole letting even more light in).

Because larger aperture lenses let more light in, they need a shorter time for cameras to compose an image. This is why larger aperture lenses are also called “fast” lenses.
Fast lenses are more expensive because they cost more to produce. There’s a lot more that goes into them, including larger and higher quality glass elements.
But do you even need a fast lens?
Vlogging With a Fast Lens
Pros of Vlogging With a Fast Lens
- Better low-light performance
- Better autofocus performance
- Better “bokeh” (out-of-focus areas, like your background, having that nice blurry look that you see in a lot of movies)
Cons of Vlogging With a Fast Lens
- More expensive
- Moving subjects more likely to get out of focus when shooting with a large aperture
- Better continuous autofocus performance needed when shooting moving subjects with a large aperture
Optical Image Stabilization
Finally, you’ll have to decide whether or not you want your lens to have built-in optical image stabilization (OIS).
OIS is very beneficial to have on a lens if you’re a vlogger who films mostly handheld footage. Although this technology adds to the price of your lens as well, it can greatly help you to capture smoother footage that may otherwise be shaky. Nikon calls this technology “Vibration Reduction” (VR) for their lenses.
In the above video, you can see how much OIS can help to stabilize your footage. MicBergsma simultaneously compares the footage between two GoPro Hero5 Blacks, one with OIS on and one with OIS off.
If, however, you are shooting most of your vlogs on a tripod, you won’t need a lens with OIS.
Looking for ways to set up your talking-head shot for YouTube with any of these lenses? Check out our post on 4 Ways To Set Up Your Talking-Head Shots For YouTube .
Richard Bennett
Richard Bennett is a writer and a lover of all things video.
Follow @Richard Bennett
Richard Bennett
Nov 01, 2022• Proven solutions
The staple of any vlog is the talking headshot, a shot of the speaker talking directly to the audience. You can compose this shot with different kinds of lenses for your interchangeable lens camera.
But which kind of lens is the right lens for you as a vlogger?
In this article, I’m going to help you figure that out.
- Part 1: Three Focal Length Groups: Wide, Standard, Telephoto
- Part 2: Vlogging With Each Focal Length Group
- Part 3: Crop Factor
- Part 4: Focal Length Equivalency Table
- Part 5: Aperture
- Part 6: Vlogging With a Fast Lens
- Part 7: Optical Image Stabilization
Three Focal Length Groups: Wide, Standard, Telephoto
There are three main ranges in focal lengths that camera lenses can be categorized into wide, standard, and telephoto.
Wide-Angle Lens
Wide-angle lenses can “see more.” They allow more of your scene to fit inside your frame. Objects that are closer to the lens appear much bigger while objects that are further away appear even smaller. Perspectives are also enhanced, making close objects and people that just make it into the sides of the frame appear more stretched out. Out of all the other ranges in focal lengths, wide-angle lenses will appear the least zoomed in.
Standard Lens
With standard lenses or normal lenses, you won’t get the stretched out objects or enhanced perspectives that you get from wide-angle lenses. Instead, standard lenses are meant to see scenes as the natural human eye is meant to see them. If you shoot a scene with both a wide-angle lens and a standard lens from the same position, you’ll notice that less of the scene fits into your frame. Standard lenses will appear more zoomed-in than wide-angle lenses, but less zoomed-in than telephoto lenses.
Telephoto Lens
Out of all the other ranges in focal lengths, telephoto lenses will appear the most zoomed in. This can be beneficial for the shooter who wants to get a closer shot of a scene without having to physically be in close proximity to the scene. Objects that are further away in the background also appear larger and closer than they would appear on wide-angle or standard lenses.
Vlogging With Each Focal Length Group
You can get your talking head footage using lenses from any of the three focal length groups. Depending on how you plan to vlog most of the time, though, one of the three focal lengths might be more suitable for you.
When to vlog with a wide-angle lens
Wide-angle lenses are the most commonly used lenses for vlogging. Wide-angle lenses are great when you need to be close to your camera. This might be the case for you if your recording space is small or if you want to film yourself as you hold your camera up with your own hand.
Being close to your camera not only gives you the option to use your camera’s built-in microphone, but it also gives you the option to make use of camera-mounted shotgun microphones.
When to vlog with a standard lens
Standard lenses are great when you have more space to be further away from your camera. The perspectives in your shot will look more natural through a standard lens, making your talking head footage feel more corporate or professional. You’ll also be able to get blurrier backgrounds using a standard lens versus a wide-angle lens.
Being further away from your camera, however, means that you’ll have to use a separate microphone positioned closer to you.
When to vlog with a telephoto lens
As telephoto lenses are even more zoomed in, you’ll need to be even further away from your camera to fit yourself inside your camera frame. Why would any vlogger ever need to be that far away from their camera? One word… teleprompter. If you want or need to stick to a script, you’ll have to be far away enough from your camera that it doesn’t appear like your eyes are scanning left to right. You then close in the distance with a telephoto lens.
In the above video, Marcos Rocha compares different focal lengths for talking head videos. Which focal length range do you like the look of?
Crop Factor
Focal lengths in camera lenses are measured in millimeters. You can vlog yourself handheld with a 24mm lens on a camera with a full-frame sensor (the sensor is the piece of hardware inside your camera that turns the light it receives into a digital image). But if you use a 24mm lens on a camera with a smaller sensor, like an APS-C sensor or even smaller Micro 4/3 sensor, more of you will get cropped out (see below).
In order to make up for the cropping that occurs, you will need to use a wider lens on cameras with smaller sensors to get the same shot you’d get with a full-frame camera.
Focal Length Equivalency Table
This table shows you the focal lengths needed to achieve the same shot between cameras with different sensor sizes. In order to take a shot as wide as the shot I took of myself with the 24mm lens on my full-frame camera, I would need a 15mm lens on an APS-C sensor camera or a 12mm lens on a micro 4/3 camera.
| Focal Length / Sensor | Full Frame | APS-C | Micro 4/3 |
|---|---|---|---|
| Wide (Handheld Selfie-Safe) | 16mm | 10mm | 8mm |
| Wide (Handheld Selfie-Safe) | 18mm | 11mm | 9mm |
| Wide (Handheld Selfie-Safe) | 24mm | 15mm | 12mm |
| Wide | 35mm | 22mm | 18mm |
| Standard | 50mm | 31mm | 25mm |
| Telephoto | 70mm | 44mm | 35mm |
| Telephoto | 100mm | 63mm | 50mm |
| Telephoto | 200mm | 125mm | 100mm |
Aperture
The next thing to consider when you’re looking for a lens is the aperture, the hole (often adjustable) within the lens that lets light in. Aperture for camera lenses is measured in f-stops (f/1.4, f/1.8, f/2.0) - the smaller the f-stop number, the larger the aperture (bigger hole letting even more light in).
Because larger aperture lenses let more light in, they need a shorter time for cameras to compose an image. This is why larger aperture lenses are also called “fast” lenses.
Fast lenses are more expensive because they cost more to produce. There’s a lot more that goes into them, including larger and higher quality glass elements.
But do you even need a fast lens?
Vlogging With a Fast Lens
Pros of Vlogging With a Fast Lens
- Better low-light performance
- Better autofocus performance
- Better “bokeh” (out-of-focus areas, like your background, having that nice blurry look that you see in a lot of movies)
Cons of Vlogging With a Fast Lens
- More expensive
- Moving subjects more likely to get out of focus when shooting with a large aperture
- Better continuous autofocus performance needed when shooting moving subjects with a large aperture
Optical Image Stabilization
Finally, you’ll have to decide whether or not you want your lens to have built-in optical image stabilization (OIS).
OIS is very beneficial to have on a lens if you’re a vlogger who films mostly handheld footage. Although this technology adds to the price of your lens as well, it can greatly help you to capture smoother footage that may otherwise be shaky. Nikon calls this technology “Vibration Reduction” (VR) for their lenses.
In the above video, you can see how much OIS can help to stabilize your footage. MicBergsma simultaneously compares the footage between two GoPro Hero5 Blacks, one with OIS on and one with OIS off.
If, however, you are shooting most of your vlogs on a tripod, you won’t need a lens with OIS.
Looking for ways to set up your talking-head shot for YouTube with any of these lenses? Check out our post on 4 Ways To Set Up Your Talking-Head Shots For YouTube .
Richard Bennett
Richard Bennett is a writer and a lover of all things video.
Follow @Richard Bennett
The Art of Creating Captivating YouTube Ads
While there are a lot of ways you could advertise your business online, YouTube video ads are quickly becoming the most popular advertising solution. This is because more and more people choose to watch videos than any other form of video.
But to make sure that you are putting your best foot forward when it comes to video ads, you need to invest in a YouTube ad creator that is easy to use and effective. Here, we will be looking at the best YouTube video creators that you can use.
Why Use YouTube Video Ads
Before we look at some of the tools you can use to create YouTube video ads, it is important to mention some of the reasons why you may want to choose YouTube ads over other solutions. YouTube ads when compared to PPC are relatively cheaper and you also choose how much you are willing to pay when a user clicks on the ads. This makes it unlikely that you could spend more than you intended to.
YouTube ads are also more targeted than any other form of advertising. You have a lot of options when choosing who you want to target including metrics such as demographics, topics, similar audiences, customer matches, life events, and more.
Since the ad is a video, it generates far more engagement than a text ad on any other platform. Even though it is an ad, the video is still a great way for your brand to connect with potential audiences.
Types of Video Ads for YouTube
The following are the different types of YouTube ads that you can create;
**Video Discovery
Video discover ads appear on the search page results and are usually composed of a thumbnail image and a few lines of text. They also have a very recognizable “Ad” in the box to let all users know that this is sponsored content.
**In-Stream Ads
In-stream video ads can be skippable or non-skippable. Skippable in-stream video ads will often play for a minimum of 5 seconds before allowing the user to skip to the video content. Non-skippable in-stream video ads do not have the “skip” button and the user has to watch the video to the end.
**Pre-roll Ads
A pre-roll ad is just an in-stream ad that is not skippable. It doesn’t give the user the option of skipping the app and they have to watch the entire ad before they can watch the video. The pre-roll video ad is usually 15 to 60 seconds long.
**Bumper Ads
Bumper ads are tiny non-skippable 6-second ads that will play right before the video content loads. They can be an ideal way to promote an event or a new brand. Since they are only 6 seconds long, they can be very easy to make.
Best YouTube Ad Creators
The following are the best YouTube ad creators that you can use to make your YouTube video ad;
Filmora
Best For: All Types of YouTube Video ads
Price: Free Trial Available with plans starting from $54.99 a year.
Rating: 4.8/5
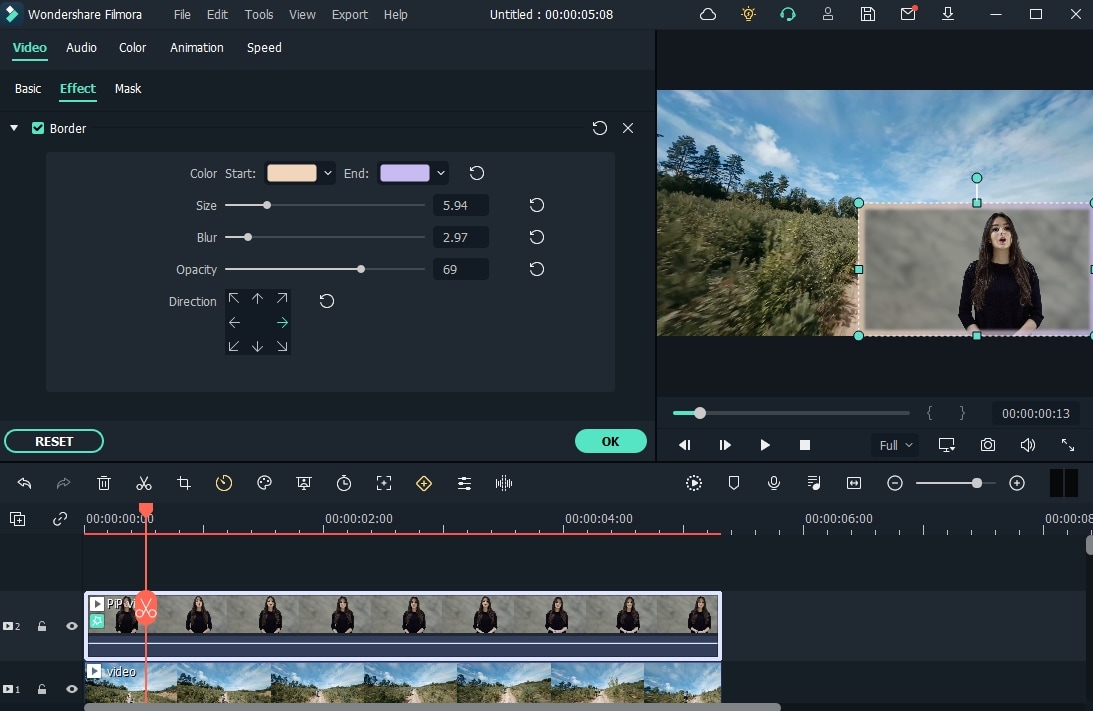
Wondershare Filmora is one of the best video creation software in the market and therefore can be very useful when creating YouTube video ads of any kind. It has powerful features that can benefit both beginner and professional users, allowing users to create stunning videos of any length.
For Win 7 or later (64-bit)
For macOS 10.12 or later
It comes with a library of more than 300 templates, filters, overlays, and numerous other effects that you can use to create your video. You can even add audio and music to the video to make your ad stand out more.
Animoto
Best For: All Types of YouTube Video Ads
Price: A free plan is available with paid plans starting from $15 a month
User Rating: 4.3/5

Animoto is another great solution that you can use to create YouTube ads of all kinds and publish them directly on the video-sharing platform. It has a very simple drag-and-drop operation that can allow you to create your YouTube video ad in just a few minutes.
It offers you a lot of resources that you can use to create the video including a huge library of up to one million photos and video clips as well as licensed audio tracks that you can use freely. This is on top of the numerous effects that you can use to make your video ad stand out more.
Promo.com
Best For: All Types of YouTube Video Ads
Price: Free plan is available with paid plans starting at $39 a month
User Rating: 4.4/5

Promo.com is another great solution that you can use to create YouTube video ads to give your brand the upper hand. It simplifies the video creation process by providing you with pre-made templates that you can add elements to create the video. You also get a library of music, photos, and video clips that you can choose to add to the video.
It also allows you to publish the video directly on social media apps. Since it doesn’t limit the size of the video that you can create, it is also an ideal solution for creating other types of videos.
Biteable
Best For: All Types of YouTube Ads
Price: Free Plan is available with paid plans starting at $19 a month
User Rating: 4.3/5

Biteable is also a great choice when you want to create YouTube ad videos. It is a professional solution that gives you a lot of options when it comes to video creation with a rich resource of over 1.8 million photos, clips, and pre-made animations to choose from.
The videos that you create with Biteable are of very high resolution and you have unlimited exports so you can use the same video over and over again. It also doesn’t limit the size or length of the video that you can create making it an ideal solution to create all types of videos.
InVideo
Best For: All Types of YouTube Ads
Price: Free plan is available with paid plans from $10 a month
User Rating: 4.7/5

This is an online solution that is very easy to use and that creates stunning videos. The interface allows you to upload your images, video clips, and audio and then use one of the many templates to create the video. The templates are also customizable, giving you additional options to customize your video in many ways.
InVideo allows you to upload the video that you create directly to social media platforms. It also has a very large library of resources that you can use to create the video including more than 3000 professionally made templates and more than a million premium photos and videos to choose from.
Adobe Spark
Best For: All Types of YouTube Ad Videos
Price: Free Plan available with paid plans starting at $9.99 a month
User Rating: 4.5/5

If you are looking for a solution that will allow you to make unique and very high-quality video ads, then Adobe Spark is a great choice. It has a ton of resources that you can use to make your video ad stand out including multiple themes, layouts, storyboards, and unique fonts.
You also have access to thousands of free images to spice up your creation and exclusive templates that you will not find anywhere else. But like most Adobe software, it can be hard to get started with Adobe Spark, especially for beginner users.
Animaker
Best For: All Types of YouTube Ad videos
Price: It doesn’t offer a free plan. Paid plans start at $10 per month.
User Rating: 4.6/5

Animaker is a professional video editing tool that can create very high-quality and unique videos. It is also one of the only tools that you can use to add subtitles to a video. You get to choose from a lot of professionally made templates and choose from a large library of images and videos to add to your project.
It also allows you to add audio to the video in the form of voiceover or music. You can also use the live editing feature to make changes to a video that is already uploaded to YouTube.
Powtoon
Best For: Animated YouTube Ads
Price: It doesn’t offer a free plan. Paid plans start at $20 a month
User Rating: 4/5

Powtoon is a great solution when the YouTube ad video that you want to create is an animated video. It has numerous features designed to help you create the most interactive animated videos. You have a lot of resources to choose from including various animation styles, whiteboards, and infographics.
It also has a very large library of templates, videos, images, and audio to choose from. But Powtoon doesn’t offer a free plan and hence there is no way for you to test its function before purchasing it.
Magisto
Best For: All Types of YouTube Ads
Price: It doesn’t offer a free plan. Paid plans start at $34.99 a month
User Rating: 4.4/5

Magisto is an online video editing tool that you can use to create video ads very quickly. It is completely deployed on the cloud which means that you don’t have to download any software on your computer. The user interface is very easy to use, allowing users to create professional-quality videos in a matter of minutes.
If you are using it to create longer videos, you can edit the scenes of the video individually and add as many effects as are relevant to your project. It can also be used to create and edit videos on Android and iOS devices.
Creatopy
Best For: All Types of YouTube Ads
Price: A free plan is available. Paid plans start at $17 a month
User Rating: 4.3/5

Creatopy is a simple to use and highly effective video editor that can come in handy when creating YouTube video ads. It offers you the chance to create videos of any size, making it an ideal choice not just for video ads but all types of video ads.
You can upload your images and audio files to add to the video project, or you can choose from the built-in library. Then you can use one or more of the many effects to add the finishing touch.
Tips for Creating YouTube Ads
The following are just some tips to help you create effective and profitable YouTube Video ads;
- Choose the type of ad you would like to create wisely. Learn the different types of YouTube ads and select one based on your brand, advertising budget, and projected reach.
- Use the YouTube targeting options to give your ads the best chance at success. Ensure that you are choosing the right targets to avoid spending money on targets that will not engage with your ad.
- You may also want to use your videos in a remarketing campaign. Remarketing targets the same audience that you targeted before, increasing your chances of getting more engagement.
- When creating the ad, ensure that the content in the ad is compelling and feels natural. Even though the audience will be watching sponsored content it should feel just like any other video.
- You can also drive more engagement by adding interactive elements to the video. These can be calls-to-action, auto-end screens, and cards to showcase your products.
Related FAQs About YouTube Ads
**How do you create a YouTube Ad?
You can easily create a YouTube ad using one of the video editing tools that we have outlined above. Choose the type of YouTube video ad you want to create as it will inform the length of the video you will create.
**Is it Free to Make YouTube Ads?
It can be free. If you choose to use a free video editor, you can create a YouTube ad for free. But you should know that you will still have to pay for YouTube to serve the ad.
**What is a YouTube Ad Specialist?
A YouTube Ads Specialist is a professional who is responsible for creating a YouTube ads strategy and implementing the strategy by creating the YouTube video ads.
**Can I Put My Ads on YouTube?
Yes. YouTube allows you to run your ads and even choose the placement of the ads and target the audiences you want YouTube to serve the ads to.
YouTube video ads can be a great way to reach as many people as you can with your products and services. Now you have several options that you can use to create the ads.
For macOS 10.12 or later
It comes with a library of more than 300 templates, filters, overlays, and numerous other effects that you can use to create your video. You can even add audio and music to the video to make your ad stand out more.
Animoto
Best For: All Types of YouTube Video Ads
Price: A free plan is available with paid plans starting from $15 a month
User Rating: 4.3/5
Animoto is another great solution that you can use to create YouTube ads of all kinds and publish them directly on the video-sharing platform. It has a very simple drag-and-drop operation that can allow you to create your YouTube video ad in just a few minutes.
It offers you a lot of resources that you can use to create the video including a huge library of up to one million photos and video clips as well as licensed audio tracks that you can use freely. This is on top of the numerous effects that you can use to make your video ad stand out more.
Promo.com
Best For: All Types of YouTube Video Ads
Price: Free plan is available with paid plans starting at $39 a month
User Rating: 4.4/5
Promo.com is another great solution that you can use to create YouTube video ads to give your brand the upper hand. It simplifies the video creation process by providing you with pre-made templates that you can add elements to create the video. You also get a library of music, photos, and video clips that you can choose to add to the video.
It also allows you to publish the video directly on social media apps. Since it doesn’t limit the size of the video that you can create, it is also an ideal solution for creating other types of videos.
Biteable
Best For: All Types of YouTube Ads
Price: Free Plan is available with paid plans starting at $19 a month
User Rating: 4.3/5
Biteable is also a great choice when you want to create YouTube ad videos. It is a professional solution that gives you a lot of options when it comes to video creation with a rich resource of over 1.8 million photos, clips, and pre-made animations to choose from.
The videos that you create with Biteable are of very high resolution and you have unlimited exports so you can use the same video over and over again. It also doesn’t limit the size or length of the video that you can create making it an ideal solution to create all types of videos.
InVideo
Best For: All Types of YouTube Ads
Price: Free plan is available with paid plans from $10 a month
User Rating: 4.7/5
This is an online solution that is very easy to use and that creates stunning videos. The interface allows you to upload your images, video clips, and audio and then use one of the many templates to create the video. The templates are also customizable, giving you additional options to customize your video in many ways.
InVideo allows you to upload the video that you create directly to social media platforms. It also has a very large library of resources that you can use to create the video including more than 3000 professionally made templates and more than a million premium photos and videos to choose from.
Adobe Spark
Best For: All Types of YouTube Ad Videos
Price: Free Plan available with paid plans starting at $9.99 a month
User Rating: 4.5/5
If you are looking for a solution that will allow you to make unique and very high-quality video ads, then Adobe Spark is a great choice. It has a ton of resources that you can use to make your video ad stand out including multiple themes, layouts, storyboards, and unique fonts.
You also have access to thousands of free images to spice up your creation and exclusive templates that you will not find anywhere else. But like most Adobe software, it can be hard to get started with Adobe Spark, especially for beginner users.
Animaker
Best For: All Types of YouTube Ad videos
Price: It doesn’t offer a free plan. Paid plans start at $10 per month.
User Rating: 4.6/5
Animaker is a professional video editing tool that can create very high-quality and unique videos. It is also one of the only tools that you can use to add subtitles to a video. You get to choose from a lot of professionally made templates and choose from a large library of images and videos to add to your project.
It also allows you to add audio to the video in the form of voiceover or music. You can also use the live editing feature to make changes to a video that is already uploaded to YouTube.
Powtoon
Best For: Animated YouTube Ads
Price: It doesn’t offer a free plan. Paid plans start at $20 a month
User Rating: 4/5
Powtoon is a great solution when the YouTube ad video that you want to create is an animated video. It has numerous features designed to help you create the most interactive animated videos. You have a lot of resources to choose from including various animation styles, whiteboards, and infographics.
It also has a very large library of templates, videos, images, and audio to choose from. But Powtoon doesn’t offer a free plan and hence there is no way for you to test its function before purchasing it.
Magisto
Best For: All Types of YouTube Ads
Price: It doesn’t offer a free plan. Paid plans start at $34.99 a month
User Rating: 4.4/5
Magisto is an online video editing tool that you can use to create video ads very quickly. It is completely deployed on the cloud which means that you don’t have to download any software on your computer. The user interface is very easy to use, allowing users to create professional-quality videos in a matter of minutes.
If you are using it to create longer videos, you can edit the scenes of the video individually and add as many effects as are relevant to your project. It can also be used to create and edit videos on Android and iOS devices.
Creatopy
Best For: All Types of YouTube Ads
Price: A free plan is available. Paid plans start at $17 a month
User Rating: 4.3/5
Creatopy is a simple to use and highly effective video editor that can come in handy when creating YouTube video ads. It offers you the chance to create videos of any size, making it an ideal choice not just for video ads but all types of video ads.
You can upload your images and audio files to add to the video project, or you can choose from the built-in library. Then you can use one or more of the many effects to add the finishing touch.
Tips for Creating YouTube Ads
The following are just some tips to help you create effective and profitable YouTube Video ads;
- Choose the type of ad you would like to create wisely. Learn the different types of YouTube ads and select one based on your brand, advertising budget, and projected reach.
- Use the YouTube targeting options to give your ads the best chance at success. Ensure that you are choosing the right targets to avoid spending money on targets that will not engage with your ad.
- You may also want to use your videos in a remarketing campaign. Remarketing targets the same audience that you targeted before, increasing your chances of getting more engagement.
- When creating the ad, ensure that the content in the ad is compelling and feels natural. Even though the audience will be watching sponsored content it should feel just like any other video.
- You can also drive more engagement by adding interactive elements to the video. These can be calls-to-action, auto-end screens, and cards to showcase your products.
Related FAQs About YouTube Ads
**How do you create a YouTube Ad?
You can easily create a YouTube ad using one of the video editing tools that we have outlined above. Choose the type of YouTube video ad you want to create as it will inform the length of the video you will create.
**Is it Free to Make YouTube Ads?
It can be free. If you choose to use a free video editor, you can create a YouTube ad for free. But you should know that you will still have to pay for YouTube to serve the ad.
**What is a YouTube Ad Specialist?
A YouTube Ads Specialist is a professional who is responsible for creating a YouTube ads strategy and implementing the strategy by creating the YouTube video ads.
**Can I Put My Ads on YouTube?
Yes. YouTube allows you to run your ads and even choose the placement of the ads and target the audiences you want YouTube to serve the ads to.
YouTube video ads can be a great way to reach as many people as you can with your products and services. Now you have several options that you can use to create the ads.
Also read:
- 2024 Approved Crafting Timeless Videos with Historical Flair
- Charting Success Understanding YouTube Insights for 2024
- 2024 Approved Best Android Apps YouTube Video Downloads Compared
- [Updated] Champion's Tech The Ultimate Gaming Toolkit
- [New] Decipher High-Impact Content Selecting Premier Rank Trackers for YouTubers
- Discover the Best 10 Online Yoga Hubs for Fitness
- [Updated] Elevate Your YouTube Presence with Simple SEO Techniques
- Elevate Your Channels Selecting Prime Microphones for Every Content Category for 2024
- Designing a Memorable YouTube Sign-Off
- [New] Crafting Powerful Partnerships A Guide to Choosing YouTube Allies
- [New] Creating Stunning YouTube Openings - Best Tools List
- Premium Video Gear Guide Selecting the Right Lens for YouTube
- Comparative Analysis of TikTok & YouTube Shorts for Individual Content
- Top 11 Economical Cameras for Professional Vloggers
- Elevate Your Brand with These Biz Channel Standouts for 2024
- Inhibit Surprise YouTube Recommendations
- 2024 Approved Bring Your Vision to Life YouTube Trailers Using Filmora's Magic
- Breaking Barriers World’s Best & Largest Shorts Downloaders for 2024
- Stand Out in a Crowd with These 10 YouTube Theme Innovators
- In 2024, Breaking Down Barriers to Inaccessible YouTube Content
- 2024 Approved Capturing Life in Motion Top 9 Smartphone Props for Dynamic Cinematography
- Boosting Views with Captivating Intros Filmed in iMovie for 2024
- Outro Optimization Making Lasting Impacts
- Elevate Viewership 3 Key Storytelling Approaches
- Optimal Video Posting Frequency for Increased YouTube Popularity
- [Updated] Entry Level Landing Low-Cost, Profitable YouTube Platforms
- Cheap Yet Good Quality Cameras Reviewed Here
- [Updated] Creating Engaging YouTube Openings & Closers for Free
- Captivating Audiences with Cross-Platform Multistreaming on Youtube and Twitch
- Subscribe Green Screen - Make It Easy to Add YouTube Video CTA
- 11 Useful YouTube SEO Tips to Rank Your Video for 2024
- [Updated] Distinguishing Between YouTube Content Control and Creative Commons Flexibility
- 2024 Approved Yummy Yields The 10 Most Popular Food Trends on Social Media
- How to recover deleted contacts from Honor X50.
- How To Bypass Activation Lock On Apple Watch Or iPhone 8?
- [Updated] In 2024, The Critical 7 TikTok Apps to Amplify Your Influence
- 2024 Approved Step Into the Archive Old Stories on Facebook
- Updated 2024 Approved How to Create Captions in Final Cut Pro X A Comprehensive Guide
- Updated In 2024, Stabilize Your Videos for Free 8 Best Online Tools and a Step-by-Step Guide
- Hard to Remove Black Background in After Effects? Heres the Best Way to Deal With It for 2024
- Updated 2024 Approved Perfect Pacing Strategies for Cutting Extra Audio in Your iMovie Projects Across Apple Ecosystems
- In 2024, How to use Snapchat Location Spoofer to Protect Your Privacy On ZTE Nubia Z60 Ultra? | Dr.fone
- In 2024, A Guide to the 10 Leading PC Applications for Effortless Voice Recording
- How to add a digital signature block to PDF
- New New Essential Details of Making Perfect Talking Face
- Guide How To Unbrick a Bricked Samsung Galaxy S23+ Phone | Dr.fone
- In 2024, A Working Guide For Pachirisu Pokemon Go Map On Samsung Galaxy F15 5G | Dr.fone
- [New] Mastering Quick Play TikTok Speed Skipping Guide
- [Updated] 2024 Approved Cutting-Edge Mobile & Desktop Discord Capture Software
- New Cutting-Edge Free FLV Video Editing Software for 2024
- [New] Superior HD Video Capturing Choosing Premium Recorder Models
- Updated 2024 Approved Looking Forward to Try Hands at Using the Icecream Slideshow Maker Program to Create High End Slideshow Presentations? Stay Here for a Complete Insight Into the Process
- New Discover the Power of 3D Video Editing on Windows A Beginners Guide for 2024
- Unlock Your Vivo V27 Pros Potential The Top 20 Lock Screen Apps You Need to Try
- Updated Next-Level Siri Sounding Board for Mac & Microsoft Systems for 2024
- Title: "[Updated] Capture It Right Essential Camera Lenses for Video Blogging"
- Author: Kevin
- Created at : 2024-05-25 16:41:00
- Updated at : 2024-05-26 16:41:00
- Link: https://youtube-videos.techidaily.com/updated-capture-it-right-essential-camera-lenses-for-video-blogging/
- License: This work is licensed under CC BY-NC-SA 4.0.
