![[Updated] Adjust Privacy Settings for Secure Online Viewing](https://thmb.techidaily.com/43dc38eef47f27063f0ee863ee1d82afec185562726cc3d8ded22c5ffb968132.jpg)
[Updated] Adjust Privacy Settings for Secure Online Viewing
Adjust Privacy Settings for Secure Online Viewing
How to Change the Privacy Setting on Your YouTube Videos

Richard Bennett
Mar 27, 2024• Proven solutions
Privacy settings on YouTube allow you to control who can see your videos. There are three settings — Public, unlisted, and private. This article will give you a brief introduction of what those three settings mean, and how to use them.
- Part1: Public VS Unlisted VS Private
- Part2: How to Change Privacy Settings
- Part2: Sharing Private Videos
Want to make your YouTube videos more beautiful within minutes? Here we recommend an easy-to-use video editing software for beginner for your reference - Wondershare Filmora .
 Download Mac Version ](https://tools.techidaily.com/wondershare/filmora/download/ )
Part 1: Public VS Unlisted VS Private
Let’s figure out some terms before runing into the how-to part.
Public Videos
These are videos that everyone can view. This is the majority of YouTube videos, and just about every one you’ve ever watched will have been public. You’ll want this if you want lots of people to watch your video.
Unlisted
Unlisted videos are ones that anybody can view so long as they have the link. The video won’t show up on search results or in “related” or “suggested” videos.
This is a great setting for sharing a video amongst small groups. You might have a rough edit you want to show a few people, or you might have a show reel that you only want certain people to see.
Private
Completely private videos cannot be watched by anyone who doesn’t have permission. You grant people permission by allowing their Google accounts to access the video. Nobody else can see the video, regardless of whether they have the link.
It won’t show up on searches, as related or suggested videos, or even when imbedded in other sites. This is the best setting for a video you need to share with only very specific people, if anyone. Below is a comparison table to know more about privacy settings .

Part 2: How to Change Privacy Settings
There are two ways to change the privacy settings: firstly, when you upload the video, and secondly through Creator Studio.
Method 1:
When you upload a video to YouTube you’ll see on the right hand side an option that says “privacy”. This is defaulted to “public”, but you can use the drop-down menu on the button to change the setting. This will apply your privacy setting the second the video finishes uploading and processing.

Method 2:
To change the privacy setting later, go to Creator Studio, then Video Manager. On the right-hand side you’ll see one of three icons: a world, a chain, and a lock. The world means “public”, the chain means “unlisted”, and the lock is for “private”.

To change the privacy, click the icon. You’ll be taken to the video’s info and settings page. Down below where you see the thumbnails you’ll see the selected privacy setting. Click this to open a drop down menu, and select your desired privacy level.
Part 3: Sharing Private Videos
If a video is set to “private’, you’ll have the option to share it with specific people. Below where it says “private” on the info and settings page you’ll see a button labeled “share”. Click this and type in the email addresses of the people you want to be able to watch the video. You’ll also have the option of notifying the people via email that you’ve shared the video with them.

Conclusion
And that’s all there is to it! Changing the privacy setting on YouTube videos is a simple, helpful tool to allow you to control the audience of you work. Enjoy!

Richard Bennett
Richard Bennett is a writer and a lover of all things video.
Follow @Richard Bennett
Richard Bennett
Mar 27, 2024• Proven solutions
Privacy settings on YouTube allow you to control who can see your videos. There are three settings — Public, unlisted, and private. This article will give you a brief introduction of what those three settings mean, and how to use them.
- Part1: Public VS Unlisted VS Private
- Part2: How to Change Privacy Settings
- Part2: Sharing Private Videos
Want to make your YouTube videos more beautiful within minutes? Here we recommend an easy-to-use video editing software for beginner for your reference - Wondershare Filmora .
Download Mac Version ](https://tools.techidaily.com/wondershare/filmora/download/ )
Part 1: Public VS Unlisted VS Private
Let’s figure out some terms before runing into the how-to part.
Public Videos
These are videos that everyone can view. This is the majority of YouTube videos, and just about every one you’ve ever watched will have been public. You’ll want this if you want lots of people to watch your video.
Unlisted
Unlisted videos are ones that anybody can view so long as they have the link. The video won’t show up on search results or in “related” or “suggested” videos.
This is a great setting for sharing a video amongst small groups. You might have a rough edit you want to show a few people, or you might have a show reel that you only want certain people to see.
Private
Completely private videos cannot be watched by anyone who doesn’t have permission. You grant people permission by allowing their Google accounts to access the video. Nobody else can see the video, regardless of whether they have the link.
It won’t show up on searches, as related or suggested videos, or even when imbedded in other sites. This is the best setting for a video you need to share with only very specific people, if anyone. Below is a comparison table to know more about privacy settings .
Part 2: How to Change Privacy Settings
There are two ways to change the privacy settings: firstly, when you upload the video, and secondly through Creator Studio.
Method 1:
When you upload a video to YouTube you’ll see on the right hand side an option that says “privacy”. This is defaulted to “public”, but you can use the drop-down menu on the button to change the setting. This will apply your privacy setting the second the video finishes uploading and processing.
Method 2:
To change the privacy setting later, go to Creator Studio, then Video Manager. On the right-hand side you’ll see one of three icons: a world, a chain, and a lock. The world means “public”, the chain means “unlisted”, and the lock is for “private”.
To change the privacy, click the icon. You’ll be taken to the video’s info and settings page. Down below where you see the thumbnails you’ll see the selected privacy setting. Click this to open a drop down menu, and select your desired privacy level.
Part 3: Sharing Private Videos
If a video is set to “private’, you’ll have the option to share it with specific people. Below where it says “private” on the info and settings page you’ll see a button labeled “share”. Click this and type in the email addresses of the people you want to be able to watch the video. You’ll also have the option of notifying the people via email that you’ve shared the video with them.
Conclusion
And that’s all there is to it! Changing the privacy setting on YouTube videos is a simple, helpful tool to allow you to control the audience of you work. Enjoy!
Richard Bennett
Richard Bennett is a writer and a lover of all things video.
Follow @Richard Bennett
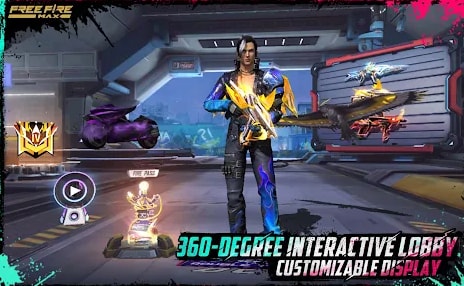
Boost Popularity Quickly: Top 30 Hashtags Every Gamer Needs
Are you a YouTube gaming streamer looking for the right hashtags for FreeFiree - a popular mobile game with millions of players worldwide? The right hashtag can help you reach a larger audience and make more people see your videos.
If yes, please read this article furtherly. We’ll provide you with a list of the 30 best FreeFire hashtags for YouTube and valuable tips to make your content more engaging.
Without any delay, let’s hit the road directly!
Best 30 FreeFire Hashtags In 2024
To make things easier and help you get started, we’ve compiled a list of the 30 best FreeFire hashtags for YouTube gaming videos. These tags are the most popular ones in 2024. It can aid you in reaching a wider audience and getting your clips seen by more people interested in this game.
- #freefire - ranked 100 on the Kparser tool
- #freefirelinggo - ranked 67 on the Kparser tool
- #freefirebrasil - rated 91% on the best-hashtags platform
- #freefirememe
- #garena
- #freefirenews
- #freefireyoutubegaming
- #freefireyoutubegamer
- #freefiregame
- #freefiregarena
- #garenaff
- #lasgrandes
- #freefiremobile
- #garenafreefireindonesia
- #freefirebooyah
- #freefiresquad
- #freefirestudio
- #freefireshare
- #garenafreefireofficial
- #garenafreefirelive
- #alphafreefire
- #freefirebattleground
- #freefiretournament
- #freefirebgid
- #freefiresquad
- #gaming
- #mobilelegends
- #freefirebr
- #garena
- #freefirehack
How To Optimize your YouTube Tags To Win More Views
Tags are one of the most important aspects of YouTube videos, yet creators often need to pay more attention to them. This is because YouTube uses them to categorize and organize videos and play a significant role in determining which videos are shown to which viewers.
So, if you want to reach the right audiences and get viral quickly, keep these things in mind when optimizing your YouTube tags, such as using relevant keywords, using all 500 characters, and avoiding duplicate tags.
Your gameplay footage will likely do most of the heavy lifting in terms of getting you in front of your target viewers, but there’s a reason why FreeFire tags are gaining so much popularity. These tags allow you to get in front of specific types of viewers and make it easier for people who are only interested in the gaming content you offer.
Give them a shot and see if they can help you take your gaming channel on YouTube to the next level. To learn more about YouTube tags and the tips and tricks for adding them to your videos, click here!
Bonus: Improve Your Gaming Recording Video With Filmora
If you’re a gamer who likes to record your gameplay and share with friends or build up a following on YouTube, then you know that getting high-quality videos is essential.
Fortunately, Filmora is there to assist you in creating engaging and eye-capturing gaming videos.
Here are some advanced features of Wonderdahre Filmora that can help you improve your gaming recording video:
Screen Recorder: With its screen recorder, you can simultaneously record your gaming screen and webcam. Additionally, you can show the mouse while recording and set the Frame Rate, Quality, and Record Timer.

Audio Ducking: Audio ducking lets you automatically lower the volume of background noise in your gaming videos when someone is speaking and is a great way to ensure that your audio is always clear and easy to understand.
Speed Ramping: Speed ramping features allow you to change the speed of your gaming videos at different points and add excitement or drama for your viewers.
Export: When exporting, you can share your finished project directly to YouTube with just a few clicks. Besides that, you can save it on your device or phone.
With these features and tools in Filmora , you can create a video that instantly grabs the viewers’ attention and keeps them engaged till the end.
So, what are you waiting for? Get started using Filmora for your YouTube gaming video editing needs!
Free Download For Win 7 or later(64-bit)
Free Download For macOS 10.14 or later
Conclusion
In this comprehensive guide, we’ve compiled a complete list of the 30 best gaming tags for YouTube FreeFire to help you reach a bigger audience. We’ve also provided some tips to improve your gaming recording and optimize your YouTube tags.
The hashtags and tips discussed should help you formulate your strategy when gunning for the top in the YouTube gaming world. Of course, in the end, your skill as a gamer will determine how fast you can gain subscribers, but these suggestions will aid you in getting there much quicker.
Hopefully, this article helped resolve your query, and you can now use the right hashtags for YouTube gaming videos.
Also read:
- [New] 2024 Approved Best Streamers Unveiled An All-Round Comparison Guide
- [Updated] Enhance Your Profile Best Tools to Create Professional Facebook Cover Photos for 2024
- Essential Guide The 8 Best Zero Price Video Cutting Software for 2024
- Full Guide to Unlock Your Samsung Galaxy F04
- How to fix runtime error 424 object required error in Excel 2003
- In 2024, Crafting YouTube Channel Trailers The Ultimate Guide to Profitability
- In 2024, Empowered by Numbers Decoding YouTube Analytics
- In 2024, Entering Income Territory with a Thousand Followers
- Top Recommended Kingston SSDClone Applications: A Comprehensive Guide
- Title: [Updated] Adjust Privacy Settings for Secure Online Viewing
- Author: Kevin
- Created at : 2024-11-21 20:54:11
- Updated at : 2024-11-24 17:43:10
- Link: https://youtube-videos.techidaily.com/updated-adjust-privacy-settings-for-secure-online-viewing/
- License: This work is licensed under CC BY-NC-SA 4.0.