
:max_bytes(150000):strip_icc()/how-to-watch-mission-impossible-movies-in-order-61da86fffee741fc89a1dbc52dddd4e4.jpg)
"Transform Your Videos on Demand Freedom Through Editing, Android Edition"
Transform Your Videos on Demand: Freedom Through Editing, Android Edition
FREE Best YouTube Video Editor Apps for Android

Richard Bennett
Mar 27, 2024• Proven solutions
In this article, we are going to show you how to edit videos on an Android smartphone with your YouTube app, and some useful tips while editing.
The best video editor for successful YouTubers - Wondershare Filmora , not only allows you to cut, crop, rotate, reverse videos, but also offers your advanced features like PIP, Green Screen, or audio mixing. What’s more, you can find lots of effects on Fashion, gaming, education, tutorial, sports, etc.
Check the below video to know more.
For Win 7 or later (64-bit)
 Secure Download
For macOS 10.14 or later
Secure Download
Click here to get Filmora for PC by email
or Try Filmora App for mobile >>>
download filmora app for ios ](https://app.adjust.com/b0k9hf2%5F4bsu85t ) download filmora app for android ](https://app.adjust.com/b0k9hf2%5F4bsu85t )
If you are an iPhone owner, please check this article to see: how to edit youtube videos on iPhone>>
How to Edit YouTube Videos on Your Android Smartphone?
With the YouTube app, android users have an easy way to grab and upload videos to YouTube directly from their mobile devices.
Simply hit on the video camera button, record the clip and the app will upload your recording to your YouTube channel on the background. It also makes it possible to select existing videos from your SD card and upload them directly to your channel.
In some instances, you may want to edit your videos on android devices. With the YouTube android app, editing videos is a simple task which involves the following process-:
Step 1: Click on YouTube and choose the small little icon indicating your profile. This will reveal to you all your videos on YouTube.
Step 2: Locate the video you want to edit then click on the three vertical little dots on the far right of the video to reveal for you more options. Choose on the “Edit” button drop-down menu.
Step 3: Once done with the editing, click on the small little icon (looks like a forward arrow) at the top of the screen to save your edits.
The video will load again and you will receive an on-screen message telling you that the video has been updated.
Please check this video to see all details:
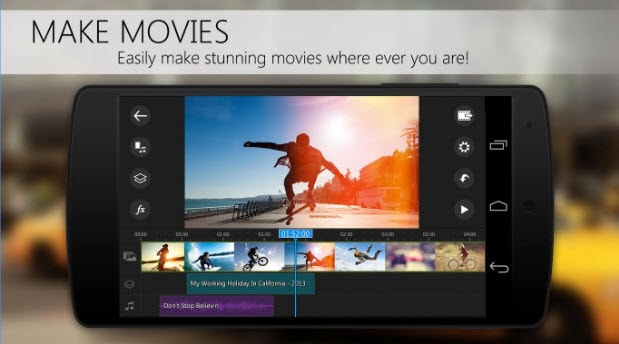
Other 6 Video Editing Apps for Android
As you can see, the YouTube app is very limited in editing, fortunately, there are other apps that could be used to edit videos on android devices. Some of them are as highlighted below-:
1.Vlogit
This is a pro tool for editing videos and other media files and it highly preferred to by individuals who love to edit YouTube videos on android. It comes with an easy to use interface and it has features like video rotating, trimming, and nice video effects such as animated texts, overlays, and filters as well as the ability to stream the completed video or share it on the social media platforms.
Vlogit is free to download and use.
2.Power Director Video Editor for Android Apps
This is an android video editing free app. It allows for powerful video editing and it has cool video effects as well as all the features present in most of the movie makers. The app also includes a voice over which you can also share directly to YouTube once you are done with the editing.
Other features include a drag and drop feature, record and customize soundtracks, edit video quickly and much more.
3.KineMaster Pro Video Editor

Considered as the only full-featured app to edit YouTube videos on android, KineMaster Pro Video Editor is packed with superior features needed to make quick and professional videos. With the app, you are able to add layers to your work including picture in picture effects.
Other features include ability to add multiple layers of a video, trim video properly, get preview anytime you need it, adjust brightness, color, speeds and volumes amongst other settings, and share your videos on YouTube and Facebook upon finishing.
The app is free hence you should not worry about any extra charges.
4.Adobe Premiere Clip
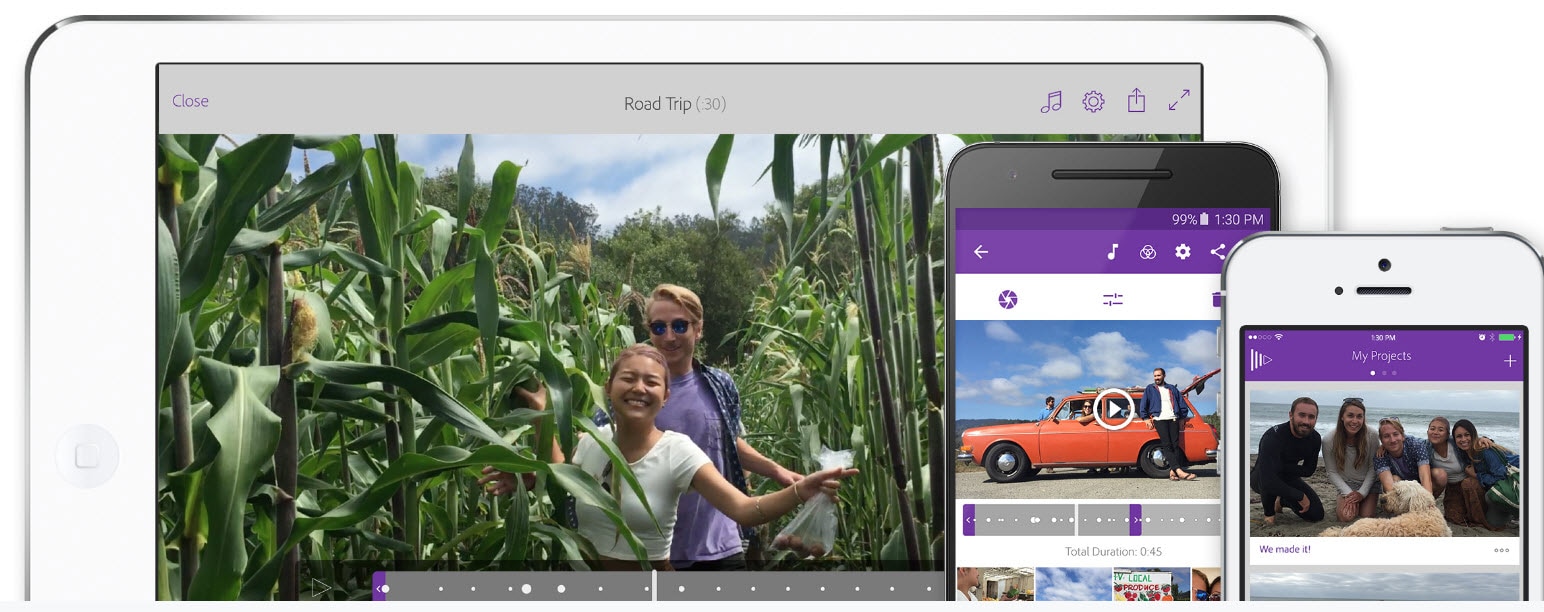
This is a premiere app by Adobe and lets you edit YouTube videos on android quite easily. Some of its adored features include the ability to create automatic video clips complete with images and soundtracks, drag and drop clips and photos when you edit the unwanted parts, ability to choose any soundtrack without losing the audio levels between clips.
This app is also free and enjoys a higher user rating of 4/5.
5.Magisto Video Editor and Maker

Magisto help you convert your home videos into movies in an instant. All you have to do is to select two or more clips, choose a soundtrack and press the “processing” button for the app to do its magic. After a few minutes, you will have a professional looking home video made from your android device.
6.VideoShow
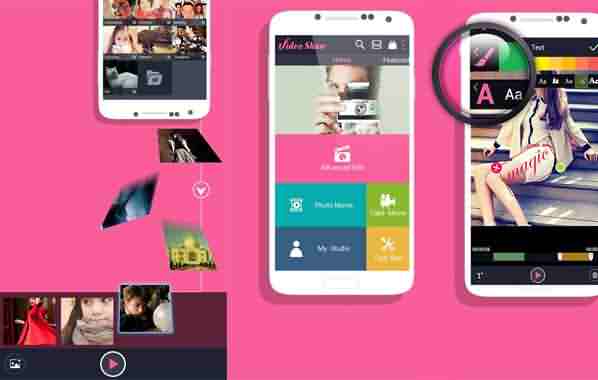
VideoShow is also a top free video editor and video maker app and it is very ideal if you want to edit YouTube videos on android devices. It has an easy to use interface where you can add texts, emoji, filters, themes and music amongst other features.
It also has a large selection of free music to use in making or editing the videos.
It’s free and allows you to share your videos on YouTube and other social media platforms like Facebook and Instagram.
For Win 7 or later (64-bit)
Secure Download
For macOS 10.14 or later
Secure Download
Click here to get Filmora for PC by email
or Try Filmora App for mobile >>>
download filmora app for ios ](https://app.adjust.com/b0k9hf2%5F4bsu85t ) download filmora app for android ](https://app.adjust.com/b0k9hf2%5F4bsu85t )
Richard Bennett
Richard Bennett is a writer and a lover of all things video.
Follow @Richard Bennett
Richard Bennett
Mar 27, 2024• Proven solutions
In this article, we are going to show you how to edit videos on an Android smartphone with your YouTube app, and some useful tips while editing.
The best video editor for successful YouTubers - Wondershare Filmora , not only allows you to cut, crop, rotate, reverse videos, but also offers your advanced features like PIP, Green Screen, or audio mixing. What’s more, you can find lots of effects on Fashion, gaming, education, tutorial, sports, etc.
Check the below video to know more.
For Win 7 or later (64-bit)
Secure Download
For macOS 10.14 or later
Secure Download
Click here to get Filmora for PC by email
or Try Filmora App for mobile >>>
download filmora app for ios ](https://app.adjust.com/b0k9hf2%5F4bsu85t ) download filmora app for android ](https://app.adjust.com/b0k9hf2%5F4bsu85t )
If you are an iPhone owner, please check this article to see: how to edit youtube videos on iPhone>>
How to Edit YouTube Videos on Your Android Smartphone?
With the YouTube app, android users have an easy way to grab and upload videos to YouTube directly from their mobile devices.
Simply hit on the video camera button, record the clip and the app will upload your recording to your YouTube channel on the background. It also makes it possible to select existing videos from your SD card and upload them directly to your channel.
In some instances, you may want to edit your videos on android devices. With the YouTube android app, editing videos is a simple task which involves the following process-:
Step 1: Click on YouTube and choose the small little icon indicating your profile. This will reveal to you all your videos on YouTube.
Step 2: Locate the video you want to edit then click on the three vertical little dots on the far right of the video to reveal for you more options. Choose on the “Edit” button drop-down menu.
Step 3: Once done with the editing, click on the small little icon (looks like a forward arrow) at the top of the screen to save your edits.
The video will load again and you will receive an on-screen message telling you that the video has been updated.
Please check this video to see all details:
Other 6 Video Editing Apps for Android
As you can see, the YouTube app is very limited in editing, fortunately, there are other apps that could be used to edit videos on android devices. Some of them are as highlighted below-:
1.Vlogit
This is a pro tool for editing videos and other media files and it highly preferred to by individuals who love to edit YouTube videos on android. It comes with an easy to use interface and it has features like video rotating, trimming, and nice video effects such as animated texts, overlays, and filters as well as the ability to stream the completed video or share it on the social media platforms.
Vlogit is free to download and use.
2.Power Director Video Editor for Android Apps
This is an android video editing free app. It allows for powerful video editing and it has cool video effects as well as all the features present in most of the movie makers. The app also includes a voice over which you can also share directly to YouTube once you are done with the editing.
Other features include a drag and drop feature, record and customize soundtracks, edit video quickly and much more.
3.KineMaster Pro Video Editor
Considered as the only full-featured app to edit YouTube videos on android, KineMaster Pro Video Editor is packed with superior features needed to make quick and professional videos. With the app, you are able to add layers to your work including picture in picture effects.
Other features include ability to add multiple layers of a video, trim video properly, get preview anytime you need it, adjust brightness, color, speeds and volumes amongst other settings, and share your videos on YouTube and Facebook upon finishing.
The app is free hence you should not worry about any extra charges.
4.Adobe Premiere Clip
This is a premiere app by Adobe and lets you edit YouTube videos on android quite easily. Some of its adored features include the ability to create automatic video clips complete with images and soundtracks, drag and drop clips and photos when you edit the unwanted parts, ability to choose any soundtrack without losing the audio levels between clips.
This app is also free and enjoys a higher user rating of 4/5.
5.Magisto Video Editor and Maker
Magisto help you convert your home videos into movies in an instant. All you have to do is to select two or more clips, choose a soundtrack and press the “processing” button for the app to do its magic. After a few minutes, you will have a professional looking home video made from your android device.
6.VideoShow
VideoShow is also a top free video editor and video maker app and it is very ideal if you want to edit YouTube videos on android devices. It has an easy to use interface where you can add texts, emoji, filters, themes and music amongst other features.
It also has a large selection of free music to use in making or editing the videos.
It’s free and allows you to share your videos on YouTube and other social media platforms like Facebook and Instagram.
For Win 7 or later (64-bit)
Secure Download
For macOS 10.14 or later
Secure Download
Click here to get Filmora for PC by email
or Try Filmora App for mobile >>>
download filmora app for ios ](https://app.adjust.com/b0k9hf2%5F4bsu85t ) download filmora app for android ](https://app.adjust.com/b0k9hf2%5F4bsu85t )
Richard Bennett
Richard Bennett is a writer and a lover of all things video.
Follow @Richard Bennett
A Visual Guide to Subtitling: Techniques for Effective Dialogue Placement
How to Add Text to YouTube Video Before or After Uploading
Richard Bennett
Mar 27, 2024• Proven solutions
A great way to emphasize something you say in your vlog is to have your words appear next to you as you say them . Adding text to YouTube videos can look really professional. You might put a title at the beginning of your video, use bullet points to help people keep track of your monologue, or to highlight an important point by writing it on your screen. When you use text in your videos there are a few things you need to keep in mind. In this article, I will share with you 2 ways to add text/subtitles/captions to YouTube videos, whether you need to add text to the video during editing and upload it to YouTube later, or you have uploaded the video to YouTube already and want to add some captions and subtitles to complement it.
- Part 1: Add text to video before uploading YouTube
- Part 2: Add Text to YouTube video after uploading
- Part 3: Top 3 YouTube Video Text Tips
How to Add Text to YouTube Video Before Uploading
Before uploading the video to YouTube, it is recommended to add text to the video first. You can add simple texts and captions to videos with the free video editing software. To add more text effects to the video, you can use Filmora, Sony Vegas Movie Studio and Adobe Premiere CC based on your video editing skills and needs. These software programs are great video editors, which can help you input text easily.
1. Use Filmora to Add text to Videos
There are plenty of Text effects built in Filmora, you can apply motions and animation to texts, titles, subtitles, end credits and openers as well. Each title preset will present different effects. You can add multiple text boxes and place the text to any position in need. Besides writing texts to video, you can select the target font, size and color and customize the text effect in detail as well. To add text to a video in Filmora is easy, just follow the steps below:

- Open up Filmora and drag a clip into your timeline. Then, go to Text/Credit.
- Find a style that you like and drag it into your timeline where you want your text to appear. Make sure your text is selected in your timeline and click the Advanced Text Editing icon, which looks like a pen and paper.
- Insert your own words and drag your text to where you want it on the screen. Adjust the size by dragging the blue squares which surround your text.
- To change the color of your text, go into the Customize menu. You will find it near the top left of your screen. While you are in Customize there will be a section called Fill. This is where you select the color of your text. You can even change the fill type to ‘gradient fill’ and have your text transition between two colors.
- All of Filmora’s text options are animated – they fade, move around the screen, or perform some other type of action as they appear and disappear. To change the animation of your text select Animation next to Customize. A selection of different animations will appear. Double click on the one you want to apply to your text.
 Download Mac Version ](https://tools.techidaily.com/wondershare/filmora/download/ )
Check the detailed steps of how to add text to video in Filmora.
2. Use Windows Movie Maker
As a simple video editing software, Windows Movie Maker also allows you to add text to videos. It provides 3 different options for you to add Title, Caption and Credits to the YouTube videos. You can follow the steps below to add text to the video in WMM.

- To start, launch the Windows Movie Maker.
- After, select import video to insert the video that you want to add text with.
- Select edit movie then click make credits or titles.
- Then add the text that you want to include.
For the step by step tutorial of adding text to YouTube video, check How to Add Text to Video with Windows Movie Maker . Besides adding text to video, you can use Windows Movie Maker to edit YouTube video further. Learn How to trim, cut, combine, split video and add transitions and upload video to YouTube in Windows Movie Maker?
3. Use Sony Vegas Movie Studio
Adding text to YouTube videos in Sony Vegas is not so complicated if you are new to this software. You can adjust the color, size, font and duration of the text effect and add fade in and fade out effects. Follow the steps below to add texts to video in Vegas:

- Launch Sony Vegas Movie Studio.
- Click the View Menu then select Media Generators.
- Choose the generator that you want to use.
- After, drag the generator you have chosen on the timeline.
- Then, the video event FX dialogue box will appear.
- Enter the text that you want and modify it by changing the font, size and style.
4. Use Adobe Premiere CC
For professionals who are looking for a professional way to adding text to video and also have a sufficient budget, Adobe Premiere CC is always recommended. You can check the video and the steps below to add text to video in Premiere:
- Click open or create a project.
- Click the file menu then choose new and title.
- After, the text window will appear then utilize the text tool to add text.
- You can also edit your text using the commands that are provided in the Title Menu.
- Save the text that you have made by clicking the file menu then choose Save As.
How to Add Text to video in YouTube after uploading
Sometimes, we have uploaded a video to YouTube and then want to add subtitles/cc to the video later. The good news is that YouTube is not only a site for videos but is also the place where you can edit your videos in an instant. As you have read, adding text and captions to the uploaded YouTube videos is just a breeze.
Of course, you can only add and edit texts and captions to the video under your YouTube account. Here are the steps on how you can add text to your videos with YouTube Video Editor after the video is uploaded.
- Go to youtube.com then sign in to your account. After sign in your YouTube account, click your avatar and select Creator Studio to enter the creator studio interface.
- Click the Video Manager tab and in Videos section you will see all your videos uploaded to YouTube. Select the video that you want to add captions to and then select Subtitles/CC after clicking Edit button.
- Add Captions/Subtitles

While YouTube may have already created the subtitles automatically for your video with its speech recognition technology. If it does, you will see something like Published: English (Automatic) to the right of your video. If the automatically generated subtitles is not correct, you can edit it to improve the accuracy. Select the line that needs modification to make the edits.
If there is no auto-subtitles, you can choose from 3 ways to add subtitles and closed captions to the video: Upload a file, Transcribe and auto-sync and create new subtitles or CC.

Upload a file: upload a text transcript or timed subtitles file.
Transcribe and auto-sync: Type or paste in a full transcript of the video and subtitle timings will be set automatically.
Create new subtitles or CC: Create subtitles and closed captions by typing them in as you watch the video.
If you already have a caption file which contains both text and time codes, just click Upload a file and upload the text to the video.
- Once everything is okay, you can change the name of the video and you can do it in the box beside Project.
Cons of Using YouTube Video Editor
When you make use of this editor, you cannot shorten the clips for music. Moreover, since it is an online editor, you need to refresh the page in order to do the changes. Aside from YouTube Video Editor, you can use Adobe Premier Pro, MAGIX Vegas Pro, OpenShot and Avidemux.
From 20th September 2017 users will no longer be able to use the complementary editing suite. Check the best YouTube video editor alternatives from this complete guide to find out more YouTube video editor alternatives if you want to add text to video with more features and customization.
Top 3 Tips for Adding Text to YouTube Videos
1. Leave Room
If you know you are going to add text to your video then make sure you leave room for it in your frame. Consider standing off to one side instead of directly in front of your camera. You do not want to have to choose between not using text, making your text really small, or placing it over your face.
While planning out your frame and leaving room for your text, consider what color you are going to make the words and whether it will stand out and look good against your background.
2. Bigger is Better
People should be able to read your text without putting in any extra effort, such as straining their eyes to make out small words. If it takes effort to read your text then a lot of people will just ignore it. Your text should be big enough that somebody watching your video on their smartphone screen – where everything is shrunk down – can read it easily.
It is easier to make your text larger when you stick to titles, keywords, and short sentences.
3. Do Not Overuse
Text is a great tool for making something stand out. However, if you try to use text to emphasize too much of what you say it will lose its effect. Text does not stand out anymore once viewers get too used to seeing it. Too much text can even get annoying and cause people to click away from your videos.
Try to use text to emphasize only the most important things you say.

Richard Bennett
Richard Bennett is a writer and a lover of all things video.
Follow @Richard Bennett
Richard Bennett
Mar 27, 2024• Proven solutions
A great way to emphasize something you say in your vlog is to have your words appear next to you as you say them . Adding text to YouTube videos can look really professional. You might put a title at the beginning of your video, use bullet points to help people keep track of your monologue, or to highlight an important point by writing it on your screen. When you use text in your videos there are a few things you need to keep in mind. In this article, I will share with you 2 ways to add text/subtitles/captions to YouTube videos, whether you need to add text to the video during editing and upload it to YouTube later, or you have uploaded the video to YouTube already and want to add some captions and subtitles to complement it.
- Part 1: Add text to video before uploading YouTube
- Part 2: Add Text to YouTube video after uploading
- Part 3: Top 3 YouTube Video Text Tips
How to Add Text to YouTube Video Before Uploading
Before uploading the video to YouTube, it is recommended to add text to the video first. You can add simple texts and captions to videos with the free video editing software. To add more text effects to the video, you can use Filmora, Sony Vegas Movie Studio and Adobe Premiere CC based on your video editing skills and needs. These software programs are great video editors, which can help you input text easily.
1. Use Filmora to Add text to Videos
There are plenty of Text effects built in Filmora, you can apply motions and animation to texts, titles, subtitles, end credits and openers as well. Each title preset will present different effects. You can add multiple text boxes and place the text to any position in need. Besides writing texts to video, you can select the target font, size and color and customize the text effect in detail as well. To add text to a video in Filmora is easy, just follow the steps below:
- Open up Filmora and drag a clip into your timeline. Then, go to Text/Credit.
- Find a style that you like and drag it into your timeline where you want your text to appear. Make sure your text is selected in your timeline and click the Advanced Text Editing icon, which looks like a pen and paper.
- Insert your own words and drag your text to where you want it on the screen. Adjust the size by dragging the blue squares which surround your text.
- To change the color of your text, go into the Customize menu. You will find it near the top left of your screen. While you are in Customize there will be a section called Fill. This is where you select the color of your text. You can even change the fill type to ‘gradient fill’ and have your text transition between two colors.
- All of Filmora’s text options are animated – they fade, move around the screen, or perform some other type of action as they appear and disappear. To change the animation of your text select Animation next to Customize. A selection of different animations will appear. Double click on the one you want to apply to your text.
Download Mac Version ](https://tools.techidaily.com/wondershare/filmora/download/ )
Check the detailed steps of how to add text to video in Filmora.
2. Use Windows Movie Maker
As a simple video editing software, Windows Movie Maker also allows you to add text to videos. It provides 3 different options for you to add Title, Caption and Credits to the YouTube videos. You can follow the steps below to add text to the video in WMM.
- To start, launch the Windows Movie Maker.
- After, select import video to insert the video that you want to add text with.
- Select edit movie then click make credits or titles.
- Then add the text that you want to include.
For the step by step tutorial of adding text to YouTube video, check How to Add Text to Video with Windows Movie Maker . Besides adding text to video, you can use Windows Movie Maker to edit YouTube video further. Learn How to trim, cut, combine, split video and add transitions and upload video to YouTube in Windows Movie Maker?
3. Use Sony Vegas Movie Studio
Adding text to YouTube videos in Sony Vegas is not so complicated if you are new to this software. You can adjust the color, size, font and duration of the text effect and add fade in and fade out effects. Follow the steps below to add texts to video in Vegas:
- Launch Sony Vegas Movie Studio.
- Click the View Menu then select Media Generators.
- Choose the generator that you want to use.
- After, drag the generator you have chosen on the timeline.
- Then, the video event FX dialogue box will appear.
- Enter the text that you want and modify it by changing the font, size and style.
4. Use Adobe Premiere CC
For professionals who are looking for a professional way to adding text to video and also have a sufficient budget, Adobe Premiere CC is always recommended. You can check the video and the steps below to add text to video in Premiere:
- Click open or create a project.
- Click the file menu then choose new and title.
- After, the text window will appear then utilize the text tool to add text.
- You can also edit your text using the commands that are provided in the Title Menu.
- Save the text that you have made by clicking the file menu then choose Save As.
How to Add Text to video in YouTube after uploading
Sometimes, we have uploaded a video to YouTube and then want to add subtitles/cc to the video later. The good news is that YouTube is not only a site for videos but is also the place where you can edit your videos in an instant. As you have read, adding text and captions to the uploaded YouTube videos is just a breeze.
Of course, you can only add and edit texts and captions to the video under your YouTube account. Here are the steps on how you can add text to your videos with YouTube Video Editor after the video is uploaded.
- Go to youtube.com then sign in to your account. After sign in your YouTube account, click your avatar and select Creator Studio to enter the creator studio interface.
- Click the Video Manager tab and in Videos section you will see all your videos uploaded to YouTube. Select the video that you want to add captions to and then select Subtitles/CC after clicking Edit button.
- Add Captions/Subtitles
While YouTube may have already created the subtitles automatically for your video with its speech recognition technology. If it does, you will see something like Published: English (Automatic) to the right of your video. If the automatically generated subtitles is not correct, you can edit it to improve the accuracy. Select the line that needs modification to make the edits.
If there is no auto-subtitles, you can choose from 3 ways to add subtitles and closed captions to the video: Upload a file, Transcribe and auto-sync and create new subtitles or CC.
Upload a file: upload a text transcript or timed subtitles file.
Transcribe and auto-sync: Type or paste in a full transcript of the video and subtitle timings will be set automatically.
Create new subtitles or CC: Create subtitles and closed captions by typing them in as you watch the video.
If you already have a caption file which contains both text and time codes, just click Upload a file and upload the text to the video.
- Once everything is okay, you can change the name of the video and you can do it in the box beside Project.
Cons of Using YouTube Video Editor
When you make use of this editor, you cannot shorten the clips for music. Moreover, since it is an online editor, you need to refresh the page in order to do the changes. Aside from YouTube Video Editor, you can use Adobe Premier Pro, MAGIX Vegas Pro, OpenShot and Avidemux.
From 20th September 2017 users will no longer be able to use the complementary editing suite. Check the best YouTube video editor alternatives from this complete guide to find out more YouTube video editor alternatives if you want to add text to video with more features and customization.
Top 3 Tips for Adding Text to YouTube Videos
1. Leave Room
If you know you are going to add text to your video then make sure you leave room for it in your frame. Consider standing off to one side instead of directly in front of your camera. You do not want to have to choose between not using text, making your text really small, or placing it over your face.
While planning out your frame and leaving room for your text, consider what color you are going to make the words and whether it will stand out and look good against your background.
2. Bigger is Better
People should be able to read your text without putting in any extra effort, such as straining their eyes to make out small words. If it takes effort to read your text then a lot of people will just ignore it. Your text should be big enough that somebody watching your video on their smartphone screen – where everything is shrunk down – can read it easily.
It is easier to make your text larger when you stick to titles, keywords, and short sentences.
3. Do Not Overuse
Text is a great tool for making something stand out. However, if you try to use text to emphasize too much of what you say it will lose its effect. Text does not stand out anymore once viewers get too used to seeing it. Too much text can even get annoying and cause people to click away from your videos.
Try to use text to emphasize only the most important things you say.
Richard Bennett
Richard Bennett is a writer and a lover of all things video.
Follow @Richard Bennett
Also read:
- Unlock Creative Potentials YouTube Trailers with Filmora
- [Updated] 10 Comprehensible & Cost-Free Subtitle Downloader Sites
- Unsubscribing From Youtube Computer & Mobile Techniques
- Cultivate Calmness & Flexibility with Top 10 Yoga Streams
- Tunes on Demand Picks of 6 Top-Ranked Free Android Apps for YouTube
- Earning the Big Bucks as a YouTube Star for 2024
- The 10 Most Popular YouTube Channels for Real-Time News
- Efficacy of Monetized YouTube Engagement for Content Creators?
- Free FX Library to Enhance YouTube Productions
- Skyrocket Viewer Numbers with the Top 12 Effective Tactics
- [New] Cutting-Edge PC Editing Techniques Enhancing Your YouTube Presence
- Upload YouTube Shorts Detailed Instructions From Desktop/Mobile
- Amplify Audience on Both Platforms Youtube + Twitch Strategy
- Achieving a Noiseless Presence on Social Video Platforms for 2024
- Revolutionize Earning with Youtube Short Tactics
- [New] Boosting Your YouTube with Partner Videos
- Vloggers' Solution Excellent Camera Stabilization
- [Updated] Beauty Vlogs From Basics to Brilliance Launching a YouTube Channel
- [Updated] A Stepwise Approach to Unlinking and Removing YouTube Content
- The Video Creator’s Guide to IGTV & YouTube Finding the Right Fit
- Elevate Your YouTube Presence The Art of SEO Optimization
- In 2024, Effortlessly Transform YouTube Tunes to MP3 with Mac
- [Updated] Average Income for YouTubers per Ad Displayed?
- [New] Achieving Visual Excellence ASPECT RATIO Mastery on YOUTUBE
- [New] Crafting Effective Ads A Cost-Free Guide to YouTube Videos
- 2024 Approved Engaging Audiences with Thrilling Haul Content Creation
- [Updated] Alternative Film Choices Ranked #7-1
- [New] Craft the Perfect Stream A Comprehensive Guide to YouTube’s Full-Rotation Videos
- In 2024, Cutting Edge Tools YouTube's Finest Editors
- In 2024, Achieving Top Quality on YouTube Video Enhancement Fundamentals
- [New] Beginner's Guide to Pro YouTube Tech
- Cut-to-the-Chase Strategies Top 20 YouTube Tips for Growth
- In 2024, Elevated Engagement Awards on Video Realms
- [Updated] Easy iOS Steps for YouTube Video Submissions
- Crafting Dynamic YouTube Content as Animated GIFs Without Downloads
- [Updated] Cost-Effective Recording Devices The Ultimate List
- 2024 Approved Analyzing Per-View Gain for Content Making on Video Platforms
- Songbird Scribes Writing the Script for YouTube
- In 2024, Creative Command Center Studio for YouTubers
- 2024 Approved Decoding YouTube's Earning Rules Update
- [New] 9 Zero Price Programs to Take Your Videos From Average to Amazing
- Crafting YouTube Success by Uploading From Twitch Streams
- Elevate Every Story Prime Video Editor Apps for Android for 2024
- Premier Tech to Record Your On-Air Video on YouTube
- Elevate Your Watchlist Experience with YouTube's AV1 Settings
- [New] Break Through Boundaries 15+ Best Free Video Starters
- 2024 Approved Elevate Your Channel Game - TubeBuddy Insights
- Deciphering the Language of YouTube Thumbnails Effectiveness for 2024
- 2024 Approved 7 Creative Thumbnails Free Tools for YouTube
- Updated 2024 Approved The Ultimate List of Video Editors with Music Capabilities
- 2024 Approved Optimizing Google's Automatic Speech Recognition Features
- In 2024, Best 3 Software to Transfer Files to/from Your Vivo Y100i Power 5G via a USB Cable | Dr.fone
- How to Fix Pokemon Go Route Not Working On Apple iPhone 13 Pro? | Dr.fone
- 2024 Approved Amp Up Your IG Videos Crafting Winning Marketing Tactics
- Step by Step to Rotate Videos Using Kdenlive
- 2024 Approved Discover the Top Free Android Video Editing Apps Plus Paid Options
- Solved How To Transfer From Apple iPhone 14 to iPhone 15 | Dr.fone
- [Updated] 2024 Approved Modulate Your Message A Top-Tier List of Voice Change Mobile Apps
- [Updated] In 2024, Discover the World of Screen Capture with Apowersoft's Free Version
- [Updated] Ultimate Guide to Premium Screen Capturing Tools on Win11 (Top 15)
- [Updated] 2024 Approved Tailored Transfer Process for Mobile Camera Roll on Snapchat
- Updated Detaching Sound Effects From Videos Using Adobe Premiere Pro – Step by Step for 2024
- In 2024, How to Change/Add Location Filters on Snapchat For your Meizu 21 Pro | Dr.fone
- [New] 2024 Approved Premium Enhancements Guide to Superior Terria
- [New] Ensuring Smooth Streaming How to Avoid Fb Live Glitches for 2024
- CartoonKingdom Comprehensive '24 Guide for 2024
- [New] 5 Best GBA Emulators for PC That Hook You Up for 2024
- In 2024, How to Hide/Fake Snapchat Location on Your Vivo X90S | Dr.fone
- [New] 2024 Approved Poll Power Play Best Election Strategy Games
- In 2024, God of Thunder Returns Epic Dawn
- 2024 Approved Apex Legends Solo Strategies Mastering One Platform at a Time
- Title: "Transform Your Videos on Demand Freedom Through Editing, Android Edition"
- Author: Kevin
- Created at : 2024-05-25 16:29:22
- Updated at : 2024-05-26 16:29:22
- Link: https://youtube-videos.techidaily.com/transform-your-videos-on-demand-freedom-through-editing-android-edition/
- License: This work is licensed under CC BY-NC-SA 4.0.
