
:max_bytes(150000):strip_icc():format(webp)/patch-tuesday-2625783-d6bcf232b3c64fc5958037ad31299bd9.png)
"Transform Your Content 3 Effective Techniques for YouTube Reaction Magic"
Transform Your Content: 3 Effective Techniques for YouTube Reaction Magic
How to Make a YouTube Reaction Video?

Richard Bennett
Mar 27, 2024• Proven solutions
Sharing ideas and opinions on virtually any topic you can think of with millions of people around the world is arguably one of the greatest benefits YouTube gives to content creators. Even so, building your channel exclusively around reaction videos may prove to be difficult, but this doesn’t mean that you can’t use this type of video to comment on what other YouTubers are saying.
The process of making a YouTube reaction video is not overly technical, although you will have to decide which video editing technique you are going to use to make a reaction video. That is why in this article we are going to take a look at different ways to make a YouTube reaction video.
- Method 1: Making Reaction Videos with PIP feature in Filmora
- Method 2: Create YouTube Reaction Video with Split Screen Templates
- Method 3: Make A Reaction Video for YouTube with AI Portrait
How to Make a Reaction Video for Your YouTube Channel? [3 Ways]
Using the footage without the consent of the copyright owner is punishable by the law, which means that you can only include the footage in a reaction video if you have the owner’s consent. Consequently, the selection of videos you can comment on is going to be limited, since it is entirely up to the creator of the video if they are going to give you permission to use their footage in your reaction video.
You can use the following video editing techniques, once you have access to the video you would like to comment on.
Method 1: Making a reaction video with the Picture-in-Picture feature in Filmora
Video editing software, like Filmora , can also be used to create YouTube reaction videos, but you must have all the footage you would like to include in that video before you can start putting it together.
The first step is to create a new project in Filmora and then import the media assets into the editor. Besides video clips, you can also add music, pictures, or create opening titles and end credits for your reaction video.


Place the video you’re reacting to on a video track on the timeline and then add the video of your reaction to the timeline that is directly above the one to which you added the first video clip. Click on the top video in the preview window and use the handles that are positioned around the edges of the video to adjust its size.
If you would like to change the on-screen position of the overlay clip, you should simply click on it and drag it to the new location within the preview window.

Filmora offers more than sixty motion effects, hundreds of transitions, and visual effects that can make your reaction video more visually appealing to the audience.

Moreover, Filmora video editing software offers a variety of blending modes, and it lets you control the opacity of the overlay video so that you can make it more transparent. Whether or not you are going to use these options depends on the footage you’re working with and the demands of a particular project.
Pros of using the Picture in Picture feature to make reaction videos in Filmora: You can place and adjust the videos with more customizable options. Get more tips about Making a PIP video in Filmora .
Method 2: Create several reaction windows with the Split Screen feature
Besides the Picture-in-Picture option, Filmora also enables you to play two or more videos simultaneously with Split Screen templates. Drag and drop the template you want to use in your reaction video to the timeline and click on the Enable Split Screen Animation tick box if you want to use the template without animations.

Afterward, you should drag the video clips from the Media tab and drop them onto the section of the preview window where you want them to be located. Keep in mind that you cannot add more than six videos to a split-screen template.

All videos you add to a split-screen template can be edited, and you just have to click on them if you want to adjust their sizes, enhance colors, mute their audio tracks or add a new audio file to the template.
Check the details about How to make a split-screen video step by step.
Pros of using Split-screen template to make reaction video in Filmora: various templates for creating stylish video side by side easily.
Method 3: Create A YouTube Reaction Video with AI Portrait
With the human segmentation effect in AI Portrait, you can now blend the reaction video in a more natural way. The human segmentation effect will isolate people from the background, you can use any background in the video.
Note: You can use this feature after version after V 10.5 for Windows, and V 10.4 for Mac. Click the button below to get the latest version of Filmora on your desktop.
Step 1: Import the videos to the media library, and then drag the background video to the first video track, and the reaction video to the track above.

Step 2: Go to the Effects tab at the top, and click the AI Portrait category, and then you will see many effects such as Human Segmentation, Human Pixelate, Human Noise, and lighting flash. Here, drag and drop the Human segmentation effect to the reaction video.

Step 3: Select the reaction video in the timeline, and then adjust its size and position by dragging it on the preview window. See, the reaction video is fine blended with the background video.

Step 4: That’s the basic editing of making a reaction video. You can also add the neon or flashing effect to the video. If everything goes well, click Export and save the video.

You can find out more details about using the AI Portrait effect to make a reaction video .
How to Avoid Copyright Infringements While Making a YouTube Reaction Video
All videos you can find on YouTube are protected by intellectual property regulations, and you can’t use them without the copyright owner’s permission. The only way to avoid being absolutely sure that your reaction video isn’t violating the law is to contact the video creator and ask for permission to use their intellectual property. However, most YouTubers are reluctant to let others download and edit their videos unless they already have a large fan base.
In case you’re granted permission to comment on a video, you have nothing to worry about. However, if you don’t get the permission you’re all the money the reaction video generates will go to the copyright owner or you will be forced to delete the video from your channel. There are still a few things you can do, even if you don’t get permission to use the video you would like to comment on.
Muting the video’s audio or altering its pitch will make it more difficult for YouTube’s bots to detect copyright infringement, although this method may not always work. In addition, you can play a video for up to thirty seconds, then comment on that segment, and then play another segment of that video.
There is no way of saying whether any of these editing tricks are going to help you avoid a copyright claim, and you should only use them if you have no other option.
Conclusion
Anyone can master the technical aspects of making a reaction video, but the topics you react to need to be related to the general topic your channel covers. What’s more, the idea of your reaction video has to be relevant for your audience if you want to attract their attention. Which video editing techniques are you using to make a YouTube reaction video?
Download Mac Version ](https://tools.techidaily.com/wondershare/filmora/download/ )
Richard Bennett
Richard Bennett is a writer and a lover of all things video.
Follow @Richard Bennett
Richard Bennett
Mar 27, 2024• Proven solutions
Sharing ideas and opinions on virtually any topic you can think of with millions of people around the world is arguably one of the greatest benefits YouTube gives to content creators. Even so, building your channel exclusively around reaction videos may prove to be difficult, but this doesn’t mean that you can’t use this type of video to comment on what other YouTubers are saying.
The process of making a YouTube reaction video is not overly technical, although you will have to decide which video editing technique you are going to use to make a reaction video. That is why in this article we are going to take a look at different ways to make a YouTube reaction video.
- Method 1: Making Reaction Videos with PIP feature in Filmora
- Method 2: Create YouTube Reaction Video with Split Screen Templates
- Method 3: Make A Reaction Video for YouTube with AI Portrait
How to Make a Reaction Video for Your YouTube Channel? [3 Ways]
Using the footage without the consent of the copyright owner is punishable by the law, which means that you can only include the footage in a reaction video if you have the owner’s consent. Consequently, the selection of videos you can comment on is going to be limited, since it is entirely up to the creator of the video if they are going to give you permission to use their footage in your reaction video.
You can use the following video editing techniques, once you have access to the video you would like to comment on.
Method 1: Making a reaction video with the Picture-in-Picture feature in Filmora
Video editing software, like Filmora , can also be used to create YouTube reaction videos, but you must have all the footage you would like to include in that video before you can start putting it together.
The first step is to create a new project in Filmora and then import the media assets into the editor. Besides video clips, you can also add music, pictures, or create opening titles and end credits for your reaction video.
Place the video you’re reacting to on a video track on the timeline and then add the video of your reaction to the timeline that is directly above the one to which you added the first video clip. Click on the top video in the preview window and use the handles that are positioned around the edges of the video to adjust its size.
If you would like to change the on-screen position of the overlay clip, you should simply click on it and drag it to the new location within the preview window.
Filmora offers more than sixty motion effects, hundreds of transitions, and visual effects that can make your reaction video more visually appealing to the audience.
Moreover, Filmora video editing software offers a variety of blending modes, and it lets you control the opacity of the overlay video so that you can make it more transparent. Whether or not you are going to use these options depends on the footage you’re working with and the demands of a particular project.
Pros of using the Picture in Picture feature to make reaction videos in Filmora: You can place and adjust the videos with more customizable options. Get more tips about Making a PIP video in Filmora .
Method 2: Create several reaction windows with the Split Screen feature
Besides the Picture-in-Picture option, Filmora also enables you to play two or more videos simultaneously with Split Screen templates. Drag and drop the template you want to use in your reaction video to the timeline and click on the Enable Split Screen Animation tick box if you want to use the template without animations.
Afterward, you should drag the video clips from the Media tab and drop them onto the section of the preview window where you want them to be located. Keep in mind that you cannot add more than six videos to a split-screen template.
All videos you add to a split-screen template can be edited, and you just have to click on them if you want to adjust their sizes, enhance colors, mute their audio tracks or add a new audio file to the template.
Check the details about How to make a split-screen video step by step.
Pros of using Split-screen template to make reaction video in Filmora: various templates for creating stylish video side by side easily.
Method 3: Create A YouTube Reaction Video with AI Portrait
With the human segmentation effect in AI Portrait, you can now blend the reaction video in a more natural way. The human segmentation effect will isolate people from the background, you can use any background in the video.
Note: You can use this feature after version after V 10.5 for Windows, and V 10.4 for Mac. Click the button below to get the latest version of Filmora on your desktop.
Step 1: Import the videos to the media library, and then drag the background video to the first video track, and the reaction video to the track above.
Step 2: Go to the Effects tab at the top, and click the AI Portrait category, and then you will see many effects such as Human Segmentation, Human Pixelate, Human Noise, and lighting flash. Here, drag and drop the Human segmentation effect to the reaction video.
Step 3: Select the reaction video in the timeline, and then adjust its size and position by dragging it on the preview window. See, the reaction video is fine blended with the background video.
Step 4: That’s the basic editing of making a reaction video. You can also add the neon or flashing effect to the video. If everything goes well, click Export and save the video.
You can find out more details about using the AI Portrait effect to make a reaction video .
How to Avoid Copyright Infringements While Making a YouTube Reaction Video
All videos you can find on YouTube are protected by intellectual property regulations, and you can’t use them without the copyright owner’s permission. The only way to avoid being absolutely sure that your reaction video isn’t violating the law is to contact the video creator and ask for permission to use their intellectual property. However, most YouTubers are reluctant to let others download and edit their videos unless they already have a large fan base.
In case you’re granted permission to comment on a video, you have nothing to worry about. However, if you don’t get the permission you’re all the money the reaction video generates will go to the copyright owner or you will be forced to delete the video from your channel. There are still a few things you can do, even if you don’t get permission to use the video you would like to comment on.
Muting the video’s audio or altering its pitch will make it more difficult for YouTube’s bots to detect copyright infringement, although this method may not always work. In addition, you can play a video for up to thirty seconds, then comment on that segment, and then play another segment of that video.
There is no way of saying whether any of these editing tricks are going to help you avoid a copyright claim, and you should only use them if you have no other option.
Conclusion
Anyone can master the technical aspects of making a reaction video, but the topics you react to need to be related to the general topic your channel covers. What’s more, the idea of your reaction video has to be relevant for your audience if you want to attract their attention. Which video editing techniques are you using to make a YouTube reaction video?
Download Mac Version ](https://tools.techidaily.com/wondershare/filmora/download/ )
Richard Bennett
Richard Bennett is a writer and a lover of all things video.
Follow @Richard Bennett
Tailor-Made YouTube Closings: How to Get Them Right
Free YouTube End Screen Templates
Richard Bennett
Oct 26, 2023• Proven solutions
YouTube end screens are a great way to get your viewers who have watched your YouTube video until the end to subscribe to your channel, visit your website, or watch more of your videos. End screens work on all devices, including mobile phones and tablets. This was not the case for annotations (YouTube’s former way of doing these things). As more YouTubers have jumped onto using end screens, the need for well-designed end screen templates have rapidly grown. In this post, I will
- List some places you can download free end screen templates
- Give you a step-by-step tutorial on how to build your own outro for free
Part 1: Free End Screen Templates Download
Wondershare Filmstock Gaming Video Editing Skils ](https://filmstock.wondershare.com/creative-theme-game?source%5Fchannel=seo%5Farticle?spm=rs.filmora%5Fweb )
(The images displayed below are for preview purposes only. For the highest quality and ideal dimensions to add into your own video, click the image and follow the links that we provide)
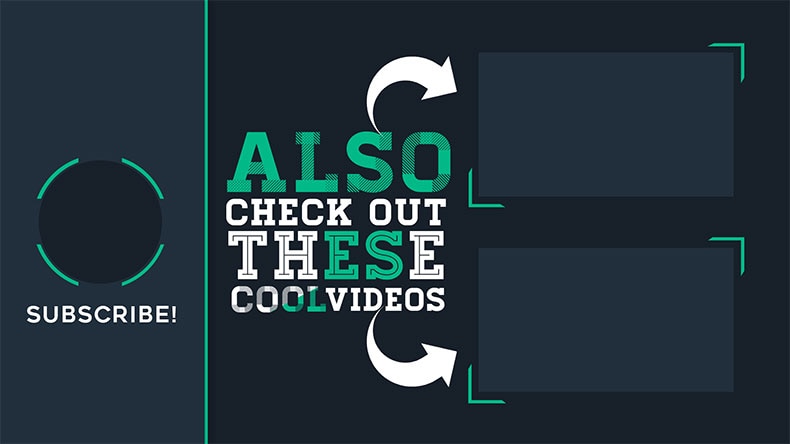
1. The Sales Lion
In exchange for your name and e-mail address, the Sales Lion will let you download their YouTube templates pack, which includes a PhotoShop PSD file of their designed YouTube end screen.
sales-lion-outro-end-screen ](https://www.thesaleslion.com/download-youtube-templates-pack/ “The Sales Lion YouTube Templates Pack”)
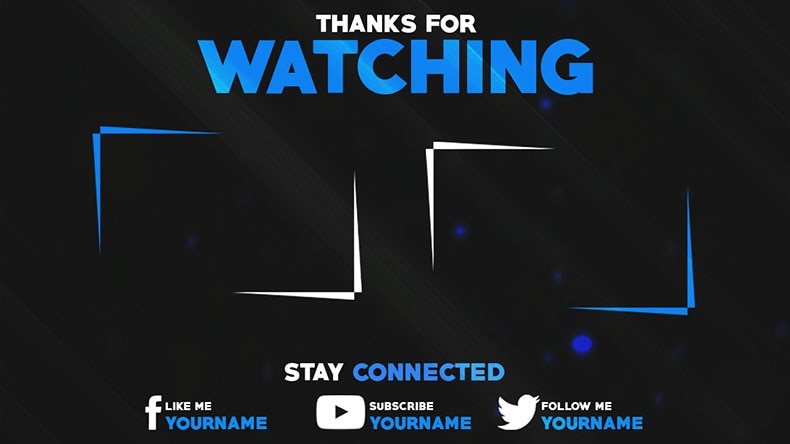
2. Grabster
Grabster offers five free YouTube end screen templates. With each download, you’ll get a PhotoShop PSD file and a font file so that you can change the text.
grabster-outro ](https://mega.nz/#!l5VVwR7J!w9hv%5FBgVIN2SsEdlf5IZViISJvXgmkDbErhG4A3gGYQ “Grabster Channel Art Template”)
grabster-your-channel-name-outro ](https://mega.nz/#!RoMXlTbR!ALzroPD6CNRVuDABR7Uv3WAPajr0WJ1BT9ZVDwF4m0Y “Grabster Channel Art Template”)
grabster-youtube-end-screen ](https://mega.nz/#!B8sAhL6Q!iIaTl4uGojXONee6k%5FdTLWdSVrGOiRWPQu4BjU2zJ5o “Grabster Channel Art Template”)
grabster-youtube-end-screen-2 ](https://mega.nz/#!RokxlYTK!vuKGcwG-ymNdR9tBfSp8xjhynNIkn%5F4PC9ob%5Fq2TvWc “Grabster Channel Art Template”)
grabster-youtube-end-screen-3 ](https://mega.nz/#!otc2wRaK!pk%5F7smhaRSuymYkKpf6DVPh2yt40Vlhz8xd8wRuu9Oo “Grabster Channel Art Template”)
3. Taha Chimar
Those who do not have PhotoShop can use Taha Chimar’s end screen designs that come in png file format.
To download, you will have to follow a URL link in the description box of the YouTube videos. Be careful, though, as a lot of the links lead to free hosting websites with pop-ups that can harm your computer if you are easily fooled by them.
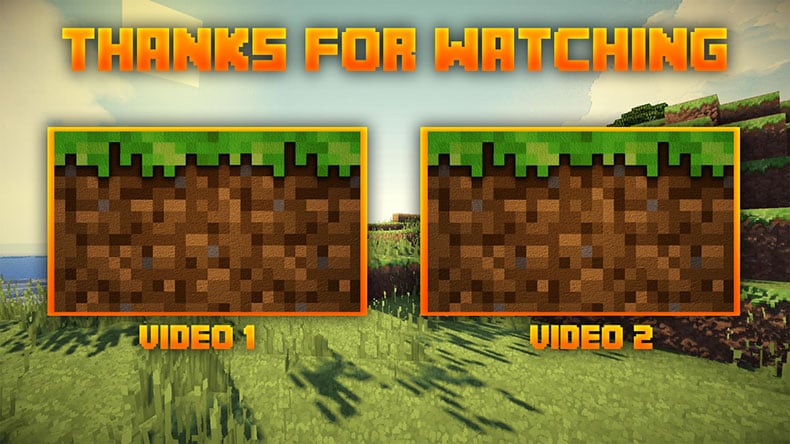
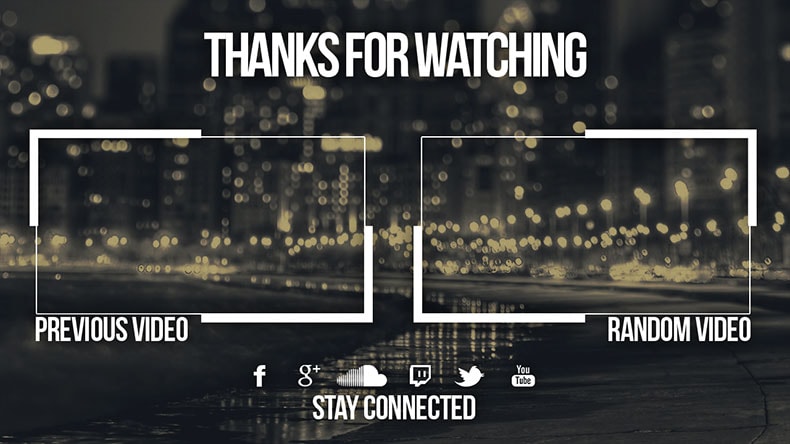
4. SoapyEdits
SoapyEdits is a YouTuber with a channel offering a whole playlist of PhotoShop PSD file end screen designs.
Here are some of our favorite ones.
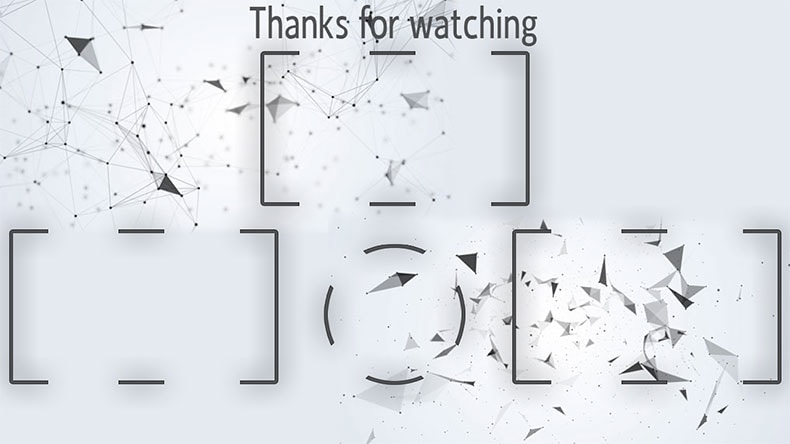
Here’s one for the Minecraft fans:
Another way to get your YouTube end screens for free, of course, is to make them yourself. Canva is a great free online design tool for this.
Part 2: How To Build Your Outro For Free (Step-by-step Canva Tutorial)
1. First, you have to sign up with an e-mail address

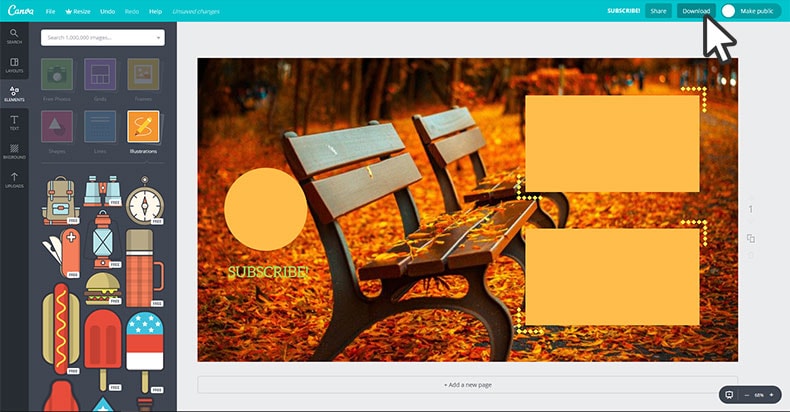
2. Once logged in, select “use custom dimensions” and plug in “1920” pixels as your width and “1080” pixels as your height (this, of course, may vary depending on the resolution of your video project).
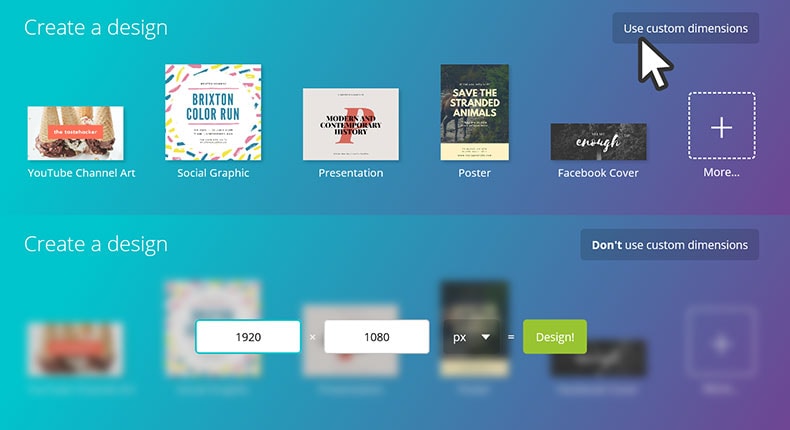
3. After clicking “Design!,” a new browser will open with a blank canvas.
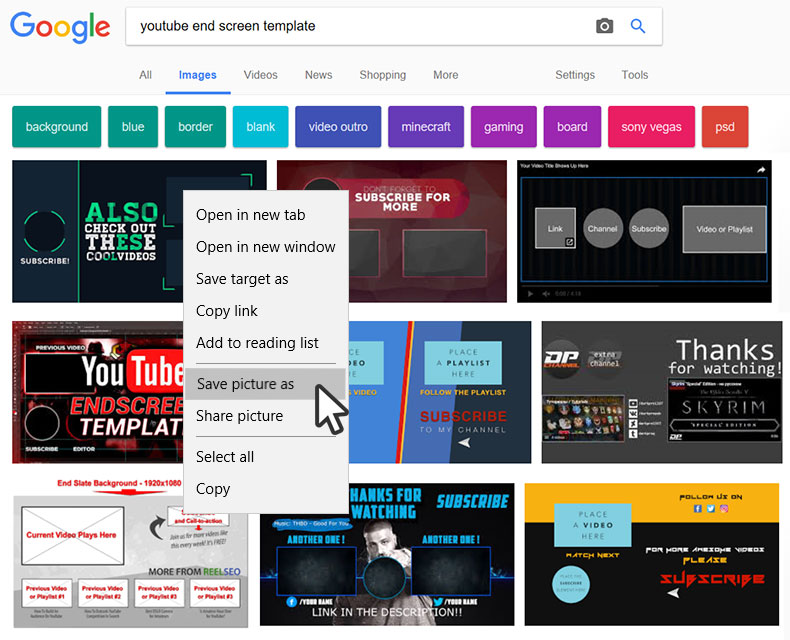
4. Next, do an image search for “YouTube End Screen,” choose an end screen with a layout that you would like to build off of, and save the image onto your computer.
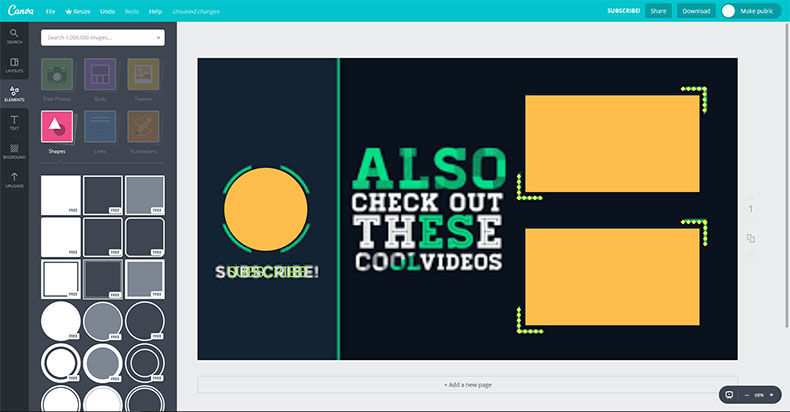
5. Upload the image onto your Canva project.

6. Stretch your image to the ends of your canvas.

7. Insert your own shapes, lines, colours, images, and text over the image.
8. When you’re done, delete the original image so that you’re left with just your own design. Go ahead and click “download.”
If you’re looking for other options to design your end screen, make sure to also check out our article on The YouTube Outro Guide . To edit the YouTube video with more effects and templates, you can try Wondershare Filmora video editor.
Richard Bennett
Richard Bennett is a writer and a lover of all things video.
Follow @Richard Bennett
Richard Bennett
Oct 26, 2023• Proven solutions
YouTube end screens are a great way to get your viewers who have watched your YouTube video until the end to subscribe to your channel, visit your website, or watch more of your videos. End screens work on all devices, including mobile phones and tablets. This was not the case for annotations (YouTube’s former way of doing these things). As more YouTubers have jumped onto using end screens, the need for well-designed end screen templates have rapidly grown. In this post, I will
- List some places you can download free end screen templates
- Give you a step-by-step tutorial on how to build your own outro for free
Part 1: Free End Screen Templates Download
Wondershare Filmstock Gaming Video Editing Skils ](https://filmstock.wondershare.com/creative-theme-game?source%5Fchannel=seo%5Farticle?spm=rs.filmora%5Fweb )
(The images displayed below are for preview purposes only. For the highest quality and ideal dimensions to add into your own video, click the image and follow the links that we provide)
1. The Sales Lion
In exchange for your name and e-mail address, the Sales Lion will let you download their YouTube templates pack, which includes a PhotoShop PSD file of their designed YouTube end screen.
sales-lion-outro-end-screen ](https://www.thesaleslion.com/download-youtube-templates-pack/ “The Sales Lion YouTube Templates Pack”)
2. Grabster
Grabster offers five free YouTube end screen templates. With each download, you’ll get a PhotoShop PSD file and a font file so that you can change the text.
grabster-outro ](https://mega.nz/#!l5VVwR7J!w9hv%5FBgVIN2SsEdlf5IZViISJvXgmkDbErhG4A3gGYQ “Grabster Channel Art Template”)
grabster-your-channel-name-outro ](https://mega.nz/#!RoMXlTbR!ALzroPD6CNRVuDABR7Uv3WAPajr0WJ1BT9ZVDwF4m0Y “Grabster Channel Art Template”)
grabster-youtube-end-screen ](https://mega.nz/#!B8sAhL6Q!iIaTl4uGojXONee6k%5FdTLWdSVrGOiRWPQu4BjU2zJ5o “Grabster Channel Art Template”)
grabster-youtube-end-screen-2 ](https://mega.nz/#!RokxlYTK!vuKGcwG-ymNdR9tBfSp8xjhynNIkn%5F4PC9ob%5Fq2TvWc “Grabster Channel Art Template”)
grabster-youtube-end-screen-3 ](https://mega.nz/#!otc2wRaK!pk%5F7smhaRSuymYkKpf6DVPh2yt40Vlhz8xd8wRuu9Oo “Grabster Channel Art Template”)
3. Taha Chimar
Those who do not have PhotoShop can use Taha Chimar’s end screen designs that come in png file format.
To download, you will have to follow a URL link in the description box of the YouTube videos. Be careful, though, as a lot of the links lead to free hosting websites with pop-ups that can harm your computer if you are easily fooled by them.
4. SoapyEdits
SoapyEdits is a YouTuber with a channel offering a whole playlist of PhotoShop PSD file end screen designs.
Here are some of our favorite ones.
Here’s one for the Minecraft fans:
Another way to get your YouTube end screens for free, of course, is to make them yourself. Canva is a great free online design tool for this.
Part 2: How To Build Your Outro For Free (Step-by-step Canva Tutorial)
1. First, you have to sign up with an e-mail address
2. Once logged in, select “use custom dimensions” and plug in “1920” pixels as your width and “1080” pixels as your height (this, of course, may vary depending on the resolution of your video project).
3. After clicking “Design!,” a new browser will open with a blank canvas.
4. Next, do an image search for “YouTube End Screen,” choose an end screen with a layout that you would like to build off of, and save the image onto your computer.
5. Upload the image onto your Canva project.
6. Stretch your image to the ends of your canvas.
7. Insert your own shapes, lines, colours, images, and text over the image.
8. When you’re done, delete the original image so that you’re left with just your own design. Go ahead and click “download.”
If you’re looking for other options to design your end screen, make sure to also check out our article on The YouTube Outro Guide . To edit the YouTube video with more effects and templates, you can try Wondershare Filmora video editor.
Richard Bennett
Richard Bennett is a writer and a lover of all things video.
Follow @Richard Bennett
Also read:
- [Updated] Boosting Video Appeal Implementing Neon Borders in Thumbnails
- 2024 Approved Breakthrough Tools An Analysis of the Top 10 Cost-Effective Video Design Schools on YouTube
- In 2024, Digital Video Conquerors' Ultimate Toolkit List
- Boosting YouTube Income Using Studio Anywhere, Anyhow for 2024
- [Updated] Elevate Your Channels Visibility Through Proven Methods
- Quantifying the Fortune of Mr. Beast
- Profit Prospects Analyzing YouTube's Monetization Mechanisms
- FreeFire Gaming Guide Maximizing Video Impact
- Navigating the World of Time Stamps in YouTube Links (Desktop/Mobile)
- 2024 Approved Enhance Video Pace - YouTube via Desktops & Phones
- Turning Time on Its Ear Unique Approaches to Reversed YouTube Content
- In 2024, Become a Shorts Connoisseur Must-Know Facts
- Enhancing Creativity - Discover Top 10 Video Cutter Software for 2024
- 2024 Approved Elevate Your Social Media Presence with These High-Impact YouTube Strategies
- Perfect Cuts on Demand Top 10 Apps for Youtube Short Edits
- [Updated] Avoid YouTube? Here Are Top 10 Indie Video Apps for Phones
- In 2024, Analyzing Per-View Gain for Content Making on Video Platforms
- Innovative Ideas to Make Your YouTube Shorts Exceptional
- ImageSlice Editor
- Innovative Editing Techniques for Visually Striking Hauls
- 10 Best Travel Youtube Channels to Follow for 2024
- The Blueprint for YouTube Educational Video Success Stories
- Capturing Contentment A Practical Guide to Daily Vlogging
- Diversifying Audience Across 30+ Online Venues for 2024
- [New] Cultivating the Culture of Creativity Within YouTube Shorts
- Unleashing Creative Potential with These 6 YouTube Graphic Sources
- Beauty's Buzz YouTube Gurus Predicted
- 10 Tips to Make Your YouTube Shorts Channels Stand Out
- [Updated] Bright Beginnings on YouTube Launching and Revenue Strategies
- Breakthrough in Video Production Advanced Techniques for Uploading 360° Content on YouTube
- 5 Essential TikTok-to-GIF Conversion Apps
- [New] Mastering the Art of Easy TikTok Dance Hits
- [New] In 2024, Tips to Share Pre-Recorded Videos Live on Facebook
- New Download Facebook Audio as MP3 with These Top Online Tools for 2024
- Maximizing Performance Optimal Settings for Logitech Webcam
- [New] How to Add End Screen to Video on Vimeo for 2024
- [Updated] SyncSound Pro Downloads & Analysis
- In 2024, 4 Feasible Ways to Fake Location on Facebook For your Samsung Galaxy S23 | Dr.fone
- [New] 2024 Approved Best Practices for Embedding Facebook Video Streams
- [Updated] Sending Non-Retwitted Videos From Your Mobile Browser to Twitter
- How to Gionee F3 Pro Get Deleted Phone Number Back with Ease and Safety
- [Updated] TwitTickle Your Personalized Toolkit for Cutest Tweets
- How to rescue lost call logs from Xiaomi Redmi K70 Pro
- In 2024, ClarityCaptureX7 Zoom In, Size Up Smartly
- In 2024, How to Screen Mirror on Apple iPhone 6? | Dr.fone
- [Updated] Twitch Out Streaming Twitter's HD Visuals Seamlessly
- Title: "Transform Your Content 3 Effective Techniques for YouTube Reaction Magic"
- Author: Kevin
- Created at : 2024-05-25 16:29:15
- Updated at : 2024-05-26 16:29:15
- Link: https://youtube-videos.techidaily.com/transform-your-content-3-effective-techniques-for-youtube-reaction-magic/
- License: This work is licensed under CC BY-NC-SA 4.0.
