
:max_bytes(150000):strip_icc()/GettyImages-578188655-5859a6685f9b586e028a9c96.jpg)
"Syncopate Sound and Picture YouTube's Audio Editing Techniques"
Syncopate Sound and Picture: YouTube’s Audio Editing Techniques
How to Add Music to YouTubeVideo with YouTube Video Editor

Richard Bennett
Mar 27, 2024• Proven solutions
Adding the right music to your YouTube can significantly increase its entertainment value. Professional video maker will not play a music background while shooting the video; they do it during the editing process. You can remove the background noisy during editing and add your own music sound during editing, but you can also upload the video to YouTube first and then choose the right music for your video in YouTube. In this article, we are going to show you how to add or change music to your YouTube videos in YouTube platform after uploading and how to add music to YouTube Video with royalty free music in Audio Library.
You may also like: How to edit YouTube videos >>
Before we get started, there is a better way on how to add music to YouTube Video. You may use Wondershare Filmora to better manage your video. It allows you to import any track you want in different format including but not limited to MP3, WAV, FLAC and others. They also have a huge and better collection of royalty-free music. Compared to YouTube Video Editor where you have a pretty limited audio mix manager, the Filmora comes with an audio equalizer. You may also detach the music easily or add multiple tracks on a single video. You can also import the video that you created in different format or upload it directly to YouTube.
 Download Mac Version ](https://tools.techidaily.com/wondershare/filmora/download/ )
Part 1: How to Add Music to YouTube Video
We’re going to offer you two ways to add music to YouTube video with YouTube built-in video editing features.
Section 1: Using Video Manager
There are thousands of royalty free songs that you can use in the YouTube video. You can choose from different genres and moods songs with different duration as well. Here is how to add music to YouTube videos in Video Manager tab.
Step 1 Sign in
The first thing you need to do when you want to know how to add music to YouTube Video is to sign into your account on YouTube. Go to the official site of YouTube and click the sign-in option found at the upper right corner of your screen. You will then be asked to enter your Gmail account and your password. After you managed to sign in, you should be able to see your profile picture on the upper right corner of the page. Click your picture, and you will be able to see the Creator Studio Option. Click that button.

Step 2 Choosing the Video
Start Browsing Your Video Channel. You may do this by clicking on the Video Tab on your Profile Page or Clicking the Video Manager option located at the left bar. You will then be redirected to the videos that you uploaded. Choose your video that you want to have background music.

Step 3 Choosing the Music
Click the Edit option that is located next to the video that you want to edit. This will open the online video editing tool of YouTube. Located on top of the page are the different commands that you can execute to edit the video; you may enhance, add audio, put annotation, create cards, add subtitle and add copyright. Click the Audio Option. It will lead you to a library of music that you may add to your video.

Step 4 Finding the Right Music
The next thing to do on how to add music to YouTube Video is to find an appropriate music for your video. You also need to make sure that the length of the track will perfectly match the length of your video. To do this, Click on the drop down menu that says ‘Top Tracks’ and you will see the different genre of music. In case you already have music in your mind, simply type the title of the song on the search bar and hit enter.

Additional Tip: Not satisfied with the track? Try the sound effects by going at YouTube Audio Library . You can create an advance search by customizing the result based on popularity, duration, instrument, mood and genre.
Step 5 Adding the Selected Music
Before you decided to add the music to your video, make sure that it fits the duration of your video. In case you want to know how to add music to YouTube Video, you should do nothing more than to click the ADD TO VIDEO button and it will be automatically integrated into your video.
Step 6 Editing the Music
- After you successfully integrate the music to the video, you will see the title of the music under your video. You also have additional tools that you can use. Let us take a look at the Position audio and the slide bar option a little closer.

- Once You Click the Position Audio Button, you will be able to customize and position your integrated music as well as compress the length of the music. To trim the music, simply put your pointer either at the end or the beginning of the music. When you want to move the audio, you may just drag the music.
- The ‘Only Music’ option located at the left side of the Position Audio can be used to adjust the volume of the music. In case you want to remove the original sound from the video, drag the pointer at the right most.
Step 7 Saving the Changes
When you save the edited video, you can save it as a separate video, or you can overwrite the existing video.
Additional Reminder: You can’t add multiple audio tracks in one video with youtube video editor, if you want to get an advanced audio editing, check this article How to mix audio tracks into one file for video
Section 2: Using Audio Library
Since YouTube has shut down the Video Editor module in 2017, you can now add music in YouTube Video Editor Module. Though there are plentiful video editing software for YouTube videos , you can also download Free Music and Sound Effects in YouTube Audio Library first and then add it to your video clips. Here is how to add music to YouTube video with YouTube Audio Library.
Step 1 Click on Audio Library
This time instead of clicking the Video Manager option, you will have to click on the Create option and choose Audio Library.

Step 2 Download target free music or sound effect
In YouTube Audio Library, you will find some free music sounds and sound effects available. You can search music in the library and filter genre, duration, mood, attribution and instrument properties. Click the download icon to download this royalty free music and sound effect to your computer. And then you can combine the audio and video and make it as a video with music sound. You can download multiple audio files and then add multiple songs to the YouTube video.

Step 3 Add Music to Video and Edit the music track
There are numerous video editors that you can add the downloaded music from YouTube Audio Library to the video. You can check our guide abouthow to edit YouTube videos in Windows Movie Maker orhow to add music to video in iMovie . While, as we described before, Filmora video editor is one of the best video editor for YouTubers. And here is how to add music to YouTube videos with Filmora . You can edit the treble, bass, pan and volume. However, it is impossible for you to position the music in a desired spot. If you want to get more control on your audio tracks, please read this article to know how to add audio effects to your video
Importing the video and audio
Importing media files to Filmora is easy. After launching Filmora, import all the files to the media library first and then drag and drop the target video and audio to the timeline. One of the best things of using Filmora to edit YouTube video is there is a built-in Music Library which including some royalty free music sound and sound effects as well.

Detach the original audio from video [Optional]
If you want to remove the recorded original audio file from video , just right click the video and then select Audio Detach option and the audio will be separated from the video automatically and then delete the audio.
What’s more, you can also use Filmora to remove the background noise and then keep the original audio as well.
Edit the Music

In Filmora, you can change the video and audio speed, add fade in and fade out to the music and change the music sound.
Read More to Get: 10 Best Music Video Makers >>
Watch the video below to check how to empower your imagination with Filmora

Richard Bennett
Richard Bennett is a writer and a lover of all things video.
Follow @Richard Bennett
Richard Bennett
Mar 27, 2024• Proven solutions
Adding the right music to your YouTube can significantly increase its entertainment value. Professional video maker will not play a music background while shooting the video; they do it during the editing process. You can remove the background noisy during editing and add your own music sound during editing, but you can also upload the video to YouTube first and then choose the right music for your video in YouTube. In this article, we are going to show you how to add or change music to your YouTube videos in YouTube platform after uploading and how to add music to YouTube Video with royalty free music in Audio Library.
You may also like: How to edit YouTube videos >>
Before we get started, there is a better way on how to add music to YouTube Video. You may use Wondershare Filmora to better manage your video. It allows you to import any track you want in different format including but not limited to MP3, WAV, FLAC and others. They also have a huge and better collection of royalty-free music. Compared to YouTube Video Editor where you have a pretty limited audio mix manager, the Filmora comes with an audio equalizer. You may also detach the music easily or add multiple tracks on a single video. You can also import the video that you created in different format or upload it directly to YouTube.
Download Mac Version ](https://tools.techidaily.com/wondershare/filmora/download/ )
Part 1: How to Add Music to YouTube Video
We’re going to offer you two ways to add music to YouTube video with YouTube built-in video editing features.
Section 1: Using Video Manager
There are thousands of royalty free songs that you can use in the YouTube video. You can choose from different genres and moods songs with different duration as well. Here is how to add music to YouTube videos in Video Manager tab.
Step 1 Sign in
The first thing you need to do when you want to know how to add music to YouTube Video is to sign into your account on YouTube. Go to the official site of YouTube and click the sign-in option found at the upper right corner of your screen. You will then be asked to enter your Gmail account and your password. After you managed to sign in, you should be able to see your profile picture on the upper right corner of the page. Click your picture, and you will be able to see the Creator Studio Option. Click that button.
Step 2 Choosing the Video
Start Browsing Your Video Channel. You may do this by clicking on the Video Tab on your Profile Page or Clicking the Video Manager option located at the left bar. You will then be redirected to the videos that you uploaded. Choose your video that you want to have background music.
Step 3 Choosing the Music
Click the Edit option that is located next to the video that you want to edit. This will open the online video editing tool of YouTube. Located on top of the page are the different commands that you can execute to edit the video; you may enhance, add audio, put annotation, create cards, add subtitle and add copyright. Click the Audio Option. It will lead you to a library of music that you may add to your video.
Step 4 Finding the Right Music
The next thing to do on how to add music to YouTube Video is to find an appropriate music for your video. You also need to make sure that the length of the track will perfectly match the length of your video. To do this, Click on the drop down menu that says ‘Top Tracks’ and you will see the different genre of music. In case you already have music in your mind, simply type the title of the song on the search bar and hit enter.
Additional Tip: Not satisfied with the track? Try the sound effects by going at YouTube Audio Library . You can create an advance search by customizing the result based on popularity, duration, instrument, mood and genre.
Step 5 Adding the Selected Music
Before you decided to add the music to your video, make sure that it fits the duration of your video. In case you want to know how to add music to YouTube Video, you should do nothing more than to click the ADD TO VIDEO button and it will be automatically integrated into your video.
Step 6 Editing the Music
- After you successfully integrate the music to the video, you will see the title of the music under your video. You also have additional tools that you can use. Let us take a look at the Position audio and the slide bar option a little closer.
- Once You Click the Position Audio Button, you will be able to customize and position your integrated music as well as compress the length of the music. To trim the music, simply put your pointer either at the end or the beginning of the music. When you want to move the audio, you may just drag the music.
- The ‘Only Music’ option located at the left side of the Position Audio can be used to adjust the volume of the music. In case you want to remove the original sound from the video, drag the pointer at the right most.
Step 7 Saving the Changes
When you save the edited video, you can save it as a separate video, or you can overwrite the existing video.
Additional Reminder: You can’t add multiple audio tracks in one video with youtube video editor, if you want to get an advanced audio editing, check this article How to mix audio tracks into one file for video
Section 2: Using Audio Library
Since YouTube has shut down the Video Editor module in 2017, you can now add music in YouTube Video Editor Module. Though there are plentiful video editing software for YouTube videos , you can also download Free Music and Sound Effects in YouTube Audio Library first and then add it to your video clips. Here is how to add music to YouTube video with YouTube Audio Library.
Step 1 Click on Audio Library
This time instead of clicking the Video Manager option, you will have to click on the Create option and choose Audio Library.
Step 2 Download target free music or sound effect
In YouTube Audio Library, you will find some free music sounds and sound effects available. You can search music in the library and filter genre, duration, mood, attribution and instrument properties. Click the download icon to download this royalty free music and sound effect to your computer. And then you can combine the audio and video and make it as a video with music sound. You can download multiple audio files and then add multiple songs to the YouTube video.
Step 3 Add Music to Video and Edit the music track
There are numerous video editors that you can add the downloaded music from YouTube Audio Library to the video. You can check our guide abouthow to edit YouTube videos in Windows Movie Maker orhow to add music to video in iMovie . While, as we described before, Filmora video editor is one of the best video editor for YouTubers. And here is how to add music to YouTube videos with Filmora . You can edit the treble, bass, pan and volume. However, it is impossible for you to position the music in a desired spot. If you want to get more control on your audio tracks, please read this article to know how to add audio effects to your video
Importing the video and audio
Importing media files to Filmora is easy. After launching Filmora, import all the files to the media library first and then drag and drop the target video and audio to the timeline. One of the best things of using Filmora to edit YouTube video is there is a built-in Music Library which including some royalty free music sound and sound effects as well.
Detach the original audio from video [Optional]
If you want to remove the recorded original audio file from video , just right click the video and then select Audio Detach option and the audio will be separated from the video automatically and then delete the audio.
What’s more, you can also use Filmora to remove the background noise and then keep the original audio as well.
Edit the Music
In Filmora, you can change the video and audio speed, add fade in and fade out to the music and change the music sound.
Read More to Get: 10 Best Music Video Makers >>
Watch the video below to check how to empower your imagination with Filmora
Richard Bennett
Richard Bennett is a writer and a lover of all things video.
Follow @Richard Bennett
Essential Mobile Media Apps for High-Quality Photography/Videography
Best Camera Apps to Shoot and Record Videos on iPhone and Andriod Phones
Richard Bennett
Oct 26, 2023• Proven solutions
Smartphone cameras, especially the newest models, are capable of recording great videos. Depending on what kind of videos you make, you might not actually need a separate camera.
The majority of phone cameras record in full HD now, and some can even manage 4K. Where things get tricky is shooting in less than ideal conditions, i.e low light. You cannot make the same adjustments and customizations to your settings with a smartphone camera as you can with a DSLR.
You don’t have the same level of control.
But don’t worry – there are 5 camera apps that will allow you to record videos and get even more creative with how you use your phone’s camera.
- Part 1: Bonus Tip-Make Your Own Video with Wondershare Filmora
- Part 2: Best 5 Camera Apps to Record Videos on iPhone and Android
Part 1: Bonus Tip-Make Your Own Video with Wondershare Filmora
Wondershare Filmora is an amazing video editor for both professional staff and beginners. Its intuitive interface, fast timeline rendering, advanced color tuning, and surprising video effects, etc will make your video stand out! Just download it and edit your smartphone videos with Wondershare Filmora!
Part 2: Best 5 Camera Apps to Record Videos on iPhone and Android
Let’s dive!
1. Open Camera – Free, Android Only

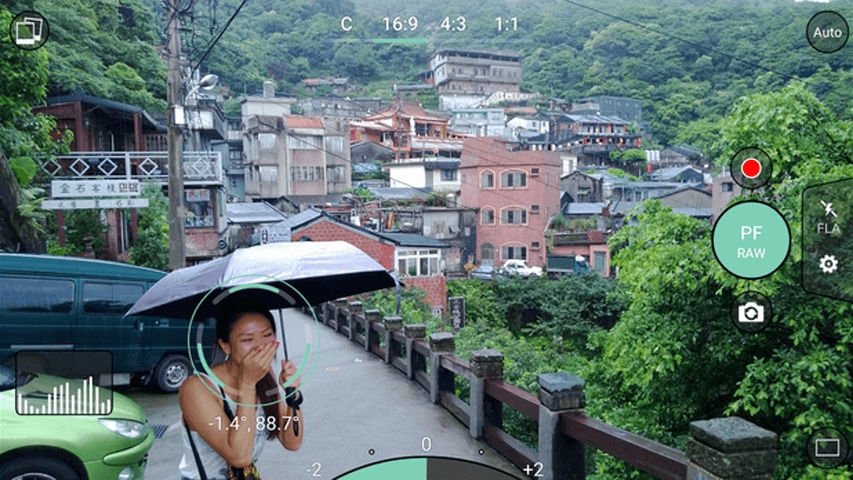
This camera app gives you control over your exposure, flash, focus, ISO, shutter speed, torch, and white balance. How much control you have is up to you. If managing all these things manually is a hassle for you, you can use its automatic or semi-manual modes instead of manual mode.
This is a great camera app to record time-lapses. It is simplistic compared to some of the other apps on this list, but it is also extremely easy to use.
2. ProShot - $4, iOS or Android
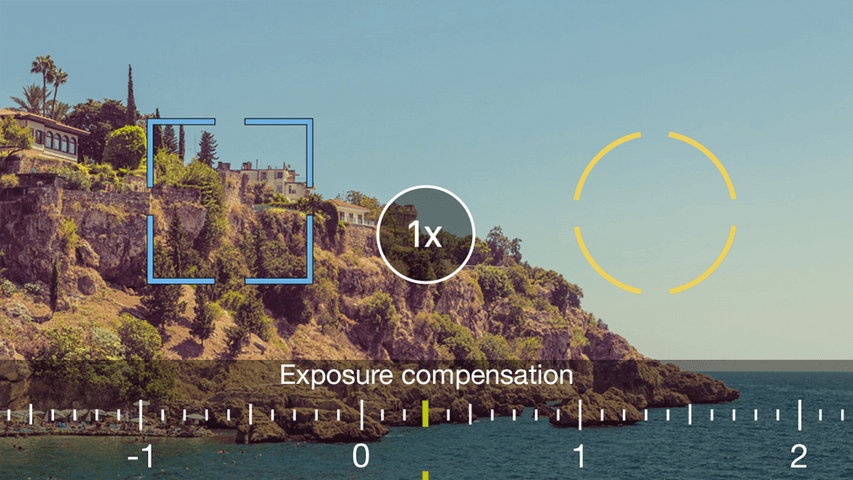
ProShot lets you adjust your frame rate, which is important if you want to shoot slow motion or time-lapse videos. You can also adjust your brightness while filming. One of the most useful features of this camera app is that it provides a real-time audio level meter, so you won’t be surprised by a poor sound recording when you watch your videos back.
3. ProCamera - $5, iOS Only
This is one of the most frequently recommended camera apps for iPhones. It makes it easy for you to adjust your focus, iOS, and exposure. You can also play with different filters and effects right in the app. One of the only downsides of this app is that some of its most useful features, like Lowlight Plus, are in-app purchases.
4. Sun Seeker - $10, iOS or Android

A lot of the time when you’re shooting with your phone, you’re shooting outside. When you’re shooting outside, the most important thing you need to keep track of is the sun. Sun Seeker is the perfect app for figuring out where the sun will be in the sky at any given time, which will tell you the best time to go out and make your video.
For more information on making videos with natural light, check out Indoor Natural Lighting Tips .
Besides just keeping track of the sun, Sun Seeker provides an augmented reality view of its path and how it will affect specific locations.
5. FiLMiC Pro - $10, iOS or Android
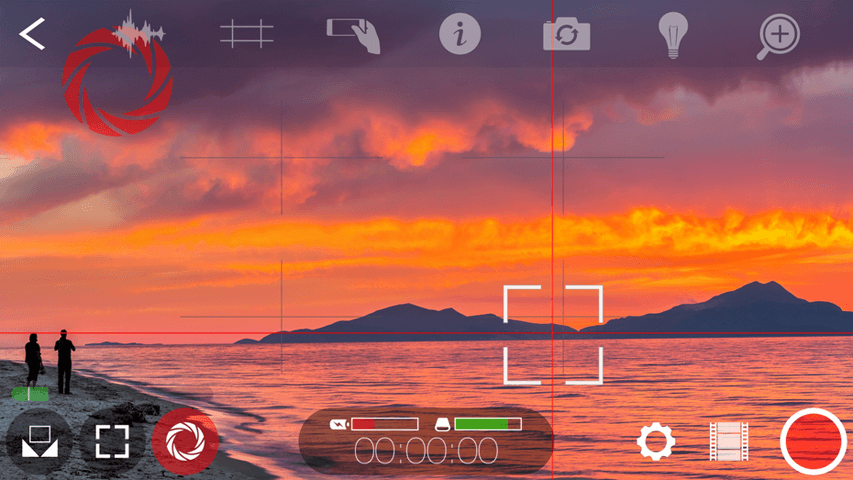
This is probably the best all-purpose camera app available. It gives you exactly the same kind of control over your smartphone camera as you would have over a DSLR. You can manually adjust your focus, exposure, ISO, shutter speed, tint, and color temperature. There are even voice processing audio filters, so you can capture better audio while you’re shooting and have less to fix in post.
Final Words
Because mobile cameras already perform so well, it can be easy to think to have more to adjust would only make things more complicated. However, there are occasions where you need to be able to make these adjustments. Are the videos you take inside at night at a lower quality than the ones you record during the day, for example? If you could set a higher ISO, you would be able to fix that.
Another example: just the other day, there was a question here about shooting green screen videos on a mobile device. One of our community members, Vivekpanwar, was having an issue with motion blur. Motion blur isn’t always distracting in normal videos, but it becomes a huge issue when you apply a Chroma key effect. The best way to avoid motion blur is to set a high shutter speed, which you can do if you download a quality camera app.
Richard Bennett
Richard Bennett is a writer and a lover of all things video.
Follow @Richard Bennett
Richard Bennett
Oct 26, 2023• Proven solutions
Smartphone cameras, especially the newest models, are capable of recording great videos. Depending on what kind of videos you make, you might not actually need a separate camera.
The majority of phone cameras record in full HD now, and some can even manage 4K. Where things get tricky is shooting in less than ideal conditions, i.e low light. You cannot make the same adjustments and customizations to your settings with a smartphone camera as you can with a DSLR.
You don’t have the same level of control.
But don’t worry – there are 5 camera apps that will allow you to record videos and get even more creative with how you use your phone’s camera.
- Part 1: Bonus Tip-Make Your Own Video with Wondershare Filmora
- Part 2: Best 5 Camera Apps to Record Videos on iPhone and Android
Part 1: Bonus Tip-Make Your Own Video with Wondershare Filmora
Wondershare Filmora is an amazing video editor for both professional staff and beginners. Its intuitive interface, fast timeline rendering, advanced color tuning, and surprising video effects, etc will make your video stand out! Just download it and edit your smartphone videos with Wondershare Filmora!
Part 2: Best 5 Camera Apps to Record Videos on iPhone and Android
Let’s dive!
1. Open Camera – Free, Android Only
This camera app gives you control over your exposure, flash, focus, ISO, shutter speed, torch, and white balance. How much control you have is up to you. If managing all these things manually is a hassle for you, you can use its automatic or semi-manual modes instead of manual mode.
This is a great camera app to record time-lapses. It is simplistic compared to some of the other apps on this list, but it is also extremely easy to use.
2. ProShot - $4, iOS or Android
ProShot lets you adjust your frame rate, which is important if you want to shoot slow motion or time-lapse videos. You can also adjust your brightness while filming. One of the most useful features of this camera app is that it provides a real-time audio level meter, so you won’t be surprised by a poor sound recording when you watch your videos back.
3. ProCamera - $5, iOS Only
This is one of the most frequently recommended camera apps for iPhones. It makes it easy for you to adjust your focus, iOS, and exposure. You can also play with different filters and effects right in the app. One of the only downsides of this app is that some of its most useful features, like Lowlight Plus, are in-app purchases.
4. Sun Seeker - $10, iOS or Android
A lot of the time when you’re shooting with your phone, you’re shooting outside. When you’re shooting outside, the most important thing you need to keep track of is the sun. Sun Seeker is the perfect app for figuring out where the sun will be in the sky at any given time, which will tell you the best time to go out and make your video.
For more information on making videos with natural light, check out Indoor Natural Lighting Tips .
Besides just keeping track of the sun, Sun Seeker provides an augmented reality view of its path and how it will affect specific locations.
5. FiLMiC Pro - $10, iOS or Android
This is probably the best all-purpose camera app available. It gives you exactly the same kind of control over your smartphone camera as you would have over a DSLR. You can manually adjust your focus, exposure, ISO, shutter speed, tint, and color temperature. There are even voice processing audio filters, so you can capture better audio while you’re shooting and have less to fix in post.
Final Words
Because mobile cameras already perform so well, it can be easy to think to have more to adjust would only make things more complicated. However, there are occasions where you need to be able to make these adjustments. Are the videos you take inside at night at a lower quality than the ones you record during the day, for example? If you could set a higher ISO, you would be able to fix that.
Another example: just the other day, there was a question here about shooting green screen videos on a mobile device. One of our community members, Vivekpanwar, was having an issue with motion blur. Motion blur isn’t always distracting in normal videos, but it becomes a huge issue when you apply a Chroma key effect. The best way to avoid motion blur is to set a high shutter speed, which you can do if you download a quality camera app.
Richard Bennett
Richard Bennett is a writer and a lover of all things video.
Follow @Richard Bennett
Also read:
- 2024 Approved Curbing Common Mishaps YouTube Short Edition
- Free Guide Recording YouTube Videos on Screencasts
- Best Practices for YouTube Outro Design
- Channeling Creativity Get Green Screen Tips From YouTube
- In 2024, Discover the Best 3 Platforms for Video Consumption (Post-YouTube)
- [New] Engage, Enchant Elevate Your Unboxing Content
- A Step-by-Step Guide How To Record, Save & Share YouTube Video for No Cost
- Boost YouTube Video Performance with Rapid Rendering Methods
- Flawless Offline Viewing Your Guide to Mobile Video Downloads for iDevices
- [New] Beauty Breakdown Mastering Makeup and Hauls Online
- In 2024, Efficiency at Fingertips Swiftly Upload Videos From iPhone/iPad to YouTube
- Free, High-Quality Edits Explore These 9 Cloud Apps
- [Updated] Choosing the Best Cameras & Lenses for Vloggers
- In 2024, Elevate Your Game 14 Must-See Vids for YouTube Gaming Success
- Mastering Video Dimensions The Key to YouTube Presence
- In 2024, Accelerated Learning for Chromakey Artistry
- AuditoryVisionStudio Ultimate Editing Software Blend
- [New] Choosing the Best Camera for Filming Mirrorless or DSLR
- Avoid Every Interruption The Ultimate Guide to 7 AdBlocking Tools
- 2024 Approved A Review of YouTube's Integration with iPhone & Android Devices
- [New] In 2024, Dive Into High Definition FB Streaming in 1080P
- The Most Useful Tips for Pokemon Go Ultra League On Poco F5 5G | Dr.fone
- [Updated] In 2024, The Speedy Way Effortlessly Add a Vimeo Video to Your Slides
- Insights Into Premier Video Communication Tools on Devices for 2024
- New In 2024, Strategizing Gamers Speech Modification Unveiling the Superior Choices
- In 2024, Unlock Apple ID without Phone Number On Apple iPhone 7 Plus
- How to use Snapchat Location Spoofer to Protect Your Privacy On Realme GT Neo 5? | Dr.fone
- 2024 Approved Leveraging TikTok to Mirror Your Best Features
- GoPro Hero5 Session Review
- [New] 2024 Approved Featured Top-Ranked Emulators for 3DS on PC
- New In 2024, The Best Video Editing Apps for Vloggers Top Picks for iOS & Android
- Relapse Prevention
- Ranchers' Revelry Best Friendly Farming Titles for Gathering Pals for 2024
- In 2024, Direct to Your Library Simple Windows & Mac Techniques for Downloading IGTV
- [New] In 2024, Remedy Non-Playing YouTube Tweet Clips
- Mastering IGTV Sharing via Insta Stories for 2024
- In 2024, How To Activate and Use Life360 Ghost Mode On Xiaomi Redmi 12 5G | Dr.fone
- In 2024, How to Reset Apple ID and Apple Password On iPhone 11 Pro Max
- Title: "Syncopate Sound and Picture YouTube's Audio Editing Techniques"
- Author: Kevin
- Created at : 2024-05-25 16:21:06
- Updated at : 2024-05-26 16:21:06
- Link: https://youtube-videos.techidaily.com/syncopate-sound-and-picture-youtubes-audio-editing-techniques/
- License: This work is licensed under CC BY-NC-SA 4.0.
