
:max_bytes(150000):strip_icc()/GettyImages-172697480-58d0c4bb3df78c3c4f2df865.jpg)
Strategies for Maximizing Video Impact While Staying in CC Zone
Strategies for Maximizing Video Impact While Staying in CC Zone
How to Force YouTube CC to Stay On and Get More Views

Richard Bennett
Oct 26, 2023• Proven solutions
Table of Content:
How YouTube CC Helps You Get More Views?
Benefits of Having YouTube CC Always On
How to Force YouTube CC to Always Turn On?
How to Embed Your Videos with Closed Captions on Your Website
Bonus Tip-Add Subtitles to YouTube Video with Wondershare Filmora
Wondershare Filmora serves as an inevitable video editing software for video lovers. It has a variety of subtitle templates for you to make great creations. Let’s see how to add subtitles to a YouTube video with Wondershare Filmora!


How YouTube CC Helps You to Get More Views?
YouTube CC (Closed Captions) is much capable of bringing more views to your videos.
Why? Because YouTube algorithms prefer to highlight YouTube videos that contain closed captions because such content appears universally acceptable and it helps to boost the experience for viewers. So when your YouTube video has some kind of relevant audio or speech information then it is essential to add closed captions (YouTube CC) to it.
Benefits of Having YouTube CC Always On
YouTube CC can easily bring more viewers to your terminal. But not all users know how to turn it on or bother to turn it on when it can actually help improve the watching experience. So there are few benefits that you can enjoy by having CCs ALWAYS on your videos.
- Closed captions play an important role when you have poor audio quality in your videos. For instance, if your videos did not follow the best audio recording practices , and are affected by background noise or bad audio equipment. In such cases, YouTube subtitles help viewers to understand what is going on videos even if they cannot hear it.
- For those who make videos with a unique accent, discuss something complex, or speaks too fast, turning on the closed captions help your viewers understand explanations and maintain their attention.
- This feature makes videos more accessible and can also appear useful for viewers that are hearing impaired.
How to Force YouTube CC to Always Turn On?
So, as you have gone through several benefits associated with YouTube video closed captions, now it is time to learn the technique to keep them always On.
Go through the steps below to force CCs always on your YouTube videos:
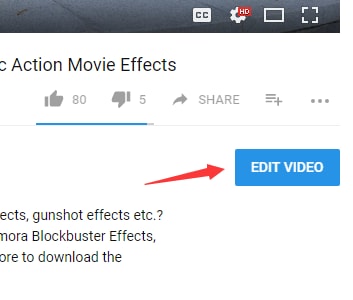
Step 1: Login and click the video in which you wish to add your captions.
Step 2: Click Edit underneath the video
Step 3: Add a specific tag to your content: “yt:cc=on”

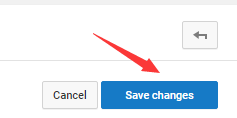
Step 4: Click Save Edit
There you go!

How to Embed your Videos with Closed Captions on your website
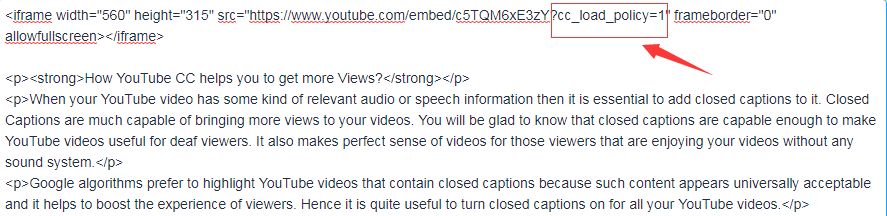
Some of you might also want to embed YouTube videos on your website. In this case, also you will need to use closed captions during display.
To do this, write “?cc_load_policy=1” at the end of your video source URL; it will be inside the iframe.
These simple steps will help you to create videos with the most impactful content and this collection will be enjoyed by all viewers on your channel. The Closed Captioned videos are valued higher by Google because they are capable enough to please the viewers throughout the world.
Even though CCs can be a powerful addition to your videos, it’s always important to prioritize audio, and it all starts with a good microphone. Find out what the best microphones are in this blog post: The Best Microphone for All Types of Creators
Richard Bennett
Richard Bennett is a writer and a lover of all things video.
Follow @Richard Bennett
Richard Bennett
Oct 26, 2023• Proven solutions
Table of Content:
How YouTube CC Helps You Get More Views?
Benefits of Having YouTube CC Always On
How to Force YouTube CC to Always Turn On?
How to Embed Your Videos with Closed Captions on Your Website
Bonus Tip-Add Subtitles to YouTube Video with Wondershare Filmora
Wondershare Filmora serves as an inevitable video editing software for video lovers. It has a variety of subtitle templates for you to make great creations. Let’s see how to add subtitles to a YouTube video with Wondershare Filmora!
How YouTube CC Helps You to Get More Views?
YouTube CC (Closed Captions) is much capable of bringing more views to your videos.
Why? Because YouTube algorithms prefer to highlight YouTube videos that contain closed captions because such content appears universally acceptable and it helps to boost the experience for viewers. So when your YouTube video has some kind of relevant audio or speech information then it is essential to add closed captions (YouTube CC) to it.
Benefits of Having YouTube CC Always On
YouTube CC can easily bring more viewers to your terminal. But not all users know how to turn it on or bother to turn it on when it can actually help improve the watching experience. So there are few benefits that you can enjoy by having CCs ALWAYS on your videos.
- Closed captions play an important role when you have poor audio quality in your videos. For instance, if your videos did not follow the best audio recording practices , and are affected by background noise or bad audio equipment. In such cases, YouTube subtitles help viewers to understand what is going on videos even if they cannot hear it.
- For those who make videos with a unique accent, discuss something complex, or speaks too fast, turning on the closed captions help your viewers understand explanations and maintain their attention.
- This feature makes videos more accessible and can also appear useful for viewers that are hearing impaired.
How to Force YouTube CC to Always Turn On?
So, as you have gone through several benefits associated with YouTube video closed captions, now it is time to learn the technique to keep them always On.
Go through the steps below to force CCs always on your YouTube videos:
Step 1: Login and click the video in which you wish to add your captions.
Step 2: Click Edit underneath the video
Step 3: Add a specific tag to your content: “yt:cc=on”
Step 4: Click Save Edit
There you go!
How to Embed your Videos with Closed Captions on your website
Some of you might also want to embed YouTube videos on your website. In this case, also you will need to use closed captions during display.
To do this, write “?cc_load_policy=1” at the end of your video source URL; it will be inside the iframe.
These simple steps will help you to create videos with the most impactful content and this collection will be enjoyed by all viewers on your channel. The Closed Captioned videos are valued higher by Google because they are capable enough to please the viewers throughout the world.
Even though CCs can be a powerful addition to your videos, it’s always important to prioritize audio, and it all starts with a good microphone. Find out what the best microphones are in this blog post: The Best Microphone for All Types of Creators
Richard Bennett
Richard Bennett is a writer and a lover of all things video.
Follow @Richard Bennett
Efficiently Isolate Key Moments in YouTube Footage
How to Download Part of YouTube Video?
Richard Bennett
Mar 27, 2024• Proven solutions
YouTube is the second-most viewed social platform, with around 2.3 Billion people active on it every day.
It’s easy to find videos of your choice with a simple search online. You’ve probably come across ways to download a YouTube video, but what if you only want to download a part of the video and not the whole? Well, that’s exactly what we’ll be covering here.
Here in this article, you will learn about the most straightforward YouTube video cutter and its uses. The next time you see something interesting, you can straightaway download it!
- Part 1: How to Download a Certain Part of a YouTube Video?
- Part 2: How to Record YouTube Videos with Filmora? [Video Tutorial]
Part 1: How to Download a Certain Part of a YouTube Video?
Below are 6 software that are available to download part of youtube video, find which one fit you much. Watch a video description first!
Note: We resolutely oppose all forms of copyright-infringing downloads. This tutorial is only for downloading YouTube videos/audio materials from your own channel.
| 1 - Clideo | 2 - YT Cutter | 3 - VEED.IO |
|---|---|---|
| 4 - Hashcut | 5 - VideoCrops | 6 - Kapwing |
Try Filmora to Download and Edit YouTube Video for Free!
Filmora YouTube Video Editor is an expert in creating and editing videos for all YouTubers. You can use the built-in screen recorder to download YouTube videos and add cool visual effects and popular emojis to re-edit your video. Then you can upload to YouTube directly and gain more views!
Download & Edit YouTube Videos Download & Edit YouTube Videos Download & Edit YouTube Videos Learn More >
1. Clideo
Clideo is not only easy to use, but it’s safe too. It helps you cut parts of the video in just a few steps, and it’s completely free! Furthermore, it will delete the user information in 24 hours. Clideo also works even if you don’t log in or register.
You just need to follow the simple steps below to download the part of the YouTube video.
Step 1: Copy the YouTube link you want and paste it on the Clideo video cutter. As shown in the figure below, you need to paste it in the space on the homepage. You can also export the file to Google Drive and Dropbox. It is also compatible with Mobile and PC.

Step 2: Once you paste the link, you need to cut the video part using the slider. You then have to set the start and end times accordingly. You can also choose the “Fade in” or “Fade out” option to give your video smooth finishing. Clideo provides several extensions to download, but if you want to post your video on social media, it’s better to use the MP4 option. After finishing, press the “Cut” button.

Step 3: You can preview your video and save it on your device as the final step.
2. YT Cutter
It’s a super-easy video cutter that can download a part of any YouTube video in no time. YT Cutter also allows downloading and trimming the video online. The maximum limit is 1 minute for free account users, but it’s 20 minutes for premium users.
Here are the steps to download part of your YouTube video using YT Cutter.
Step 1: Click on the “start” button after pasting your YouTube URL.
Step 2: You can preview the part of the video you want to download online. After that, add the start and end times in the options bar on the left. Then, you’re good to go! Your video will be ready to download once you hit the “download” button.

3. VEED.IO
Veed.io YouTube video cutter is another flexible and easy tool to use. Paste the YouTube URL on Veed and cut or trim any part of the YouTube video easily.
Check out the simple steps to use Veed below:
Step 1: You will find the option to upload your file, record a video, or paste the YouTube video URL on Veed.
Step 2: Once you have uploaded your video in Veed, you can trim or cut a section by dragging or clicking the video ends.
Step 3: Soon after finishing your work, press the “download” button, and you finish it.

Filmora Video Editor
Create AI-Generated Video with Filmora
Filmora Discord video editor offers a ChatGPT plug-in and AI tools to enhance your creative vision. Make your idea into reality.
Create Video with ChatGPT Create Video with ChatGPT Create Video with ChatGPT Learn More >
4. Hashcut
Hashcut is user-friendly as it does not save up your video. If you like a video on YouTube and want to download a part of the video, Hashcut is your go-to!
Want to know how it works? Read below:
Step 1: You can search for the YouTube video you want to cut and paste the URL on the Hashcut box. Then, click the START RECORDING button to add the start timing, and then click the END RECORDING button to add the ending timing.

Step 2: You can also add stickers and texts as per your choice before saving the part of the YouTube video.

Step 3: Finally, you can compile multiple clips into a single clip and then hit “SAVE HASHCUT” to finish your work.
5. VideoCrops
VideoCrops is another wonderful tool to download a part of the YouTube video you want. It has limited tools as it is free. Be sure to download your video immediately after your work is done.
Here are the simple steps you need to follow to use VideoCrops.
Step 1: Open VideoCrops on your device, paste the YouTube video URL, and click the “Play” button.
Step 2: Select the video interval you want to crop and hit the “Crop selection” button below the video.

Step 3: Click the “Download” button below and enjoy your clip.
6. Kapwing
Kapwing is another cool tool that works on all devices such as Android, Mac, and iOS. It makes your work easy with a few simple trims and cuts.
Know how to get your work done with Kapwing here!
Step 1: If you want a part of any YouTube video, paste the link into the given space and wait for the video to be displayed on the screen.
Step 2: When the video appears, you need to select the slider and drag it to the part of the video you want for a final cut. You can also use the arrow key if you want better trimming. You can also zoom in or out for better results and adjust the video’s speed.

Step 3: When you’re finally done with the cropping and editing, press the “Export Video” button at the top right corner. You can now share and download the shortened video.
Part 2: How to Record YouTube Videos with Filmora?
Filmora is a software editor that is available for both Windows and MacOS. It can give you many editing and recording facilities. Besides, it offers many editing facilities like effects, color match, motion tracking, direct upload to social platforms, and a lot more. You need to follow a few steps to record YouTube videos using Filmora and easily save parts of the video.
You need to follow a few steps to record YouTube videos using Filmora and easily save parts of the video.
 Secure Download
Secure Download
- Open Wondershare Filmora and then click the PC Screen button to enter the screen recording interface.

- In the Wondershare Screen Recorder tool, you can choose to record your full screen or any target window. For example, since we want to record part of the YouTube video, choose target window and then select the browser playing the YouTube video.
You need to choose the file location of where you want your video to be saved, set a record time limit and hit the red record button.

- If you want to save only a part of the YouTube video, you can drag the play header to the section of your choice and trim it or use scissors to slice the part you want in Filmora. You can edit the part by adding headings and effects. And finally, export the video to use.
You can check this part to learn more details about how to use Filmora to record screen .
Final thoughts
That’s about it! These were some of the best tools to download sections of the YouTube videos of your choice. The steps are pretty much the same for all the tools mentioned above. You no longer have to reach out to your friends to do this for you. This article will help you out as we’ve mentioned the step-by-step process for each tool. First, you need to ensure you have a stable internet connection.
Download segments of the YouTube video effortlessly with a few taps on your phone now!
![]()
A cross-platform for making videos anywhere for all creators

Why your video editing isn’t good enough? How about some creative inspo?
- 100 Million+ Users
- 150+ Countries and Regions
- 4 Million+ Social Media Followers
- 5 Million+ Stock Media for Use
* Secure Download

Richard Bennett
Richard Bennett is a writer and a lover of all things video.
Follow @Richard Bennett
Richard Bennett
Mar 27, 2024• Proven solutions
YouTube is the second-most viewed social platform, with around 2.3 Billion people active on it every day.
It’s easy to find videos of your choice with a simple search online. You’ve probably come across ways to download a YouTube video, but what if you only want to download a part of the video and not the whole? Well, that’s exactly what we’ll be covering here.
Here in this article, you will learn about the most straightforward YouTube video cutter and its uses. The next time you see something interesting, you can straightaway download it!
- Part 1: How to Download a Certain Part of a YouTube Video?
- Part 2: How to Record YouTube Videos with Filmora? [Video Tutorial]
Part 1: How to Download a Certain Part of a YouTube Video?
Below are 6 software that are available to download part of youtube video, find which one fit you much. Watch a video description first!
Note: We resolutely oppose all forms of copyright-infringing downloads. This tutorial is only for downloading YouTube videos/audio materials from your own channel.
| 1 - Clideo | 2 - YT Cutter | 3 - VEED.IO |
|---|---|---|
| 4 - Hashcut | 5 - VideoCrops | 6 - Kapwing |
Try Filmora to Download and Edit YouTube Video for Free!
Filmora YouTube Video Editor is an expert in creating and editing videos for all YouTubers. You can use the built-in screen recorder to download YouTube videos and add cool visual effects and popular emojis to re-edit your video. Then you can upload to YouTube directly and gain more views!
Download & Edit YouTube Videos Download & Edit YouTube Videos Download & Edit YouTube Videos Learn More >
1. Clideo
Clideo is not only easy to use, but it’s safe too. It helps you cut parts of the video in just a few steps, and it’s completely free! Furthermore, it will delete the user information in 24 hours. Clideo also works even if you don’t log in or register.
You just need to follow the simple steps below to download the part of the YouTube video.
Step 1: Copy the YouTube link you want and paste it on the Clideo video cutter. As shown in the figure below, you need to paste it in the space on the homepage. You can also export the file to Google Drive and Dropbox. It is also compatible with Mobile and PC.
Step 2: Once you paste the link, you need to cut the video part using the slider. You then have to set the start and end times accordingly. You can also choose the “Fade in” or “Fade out” option to give your video smooth finishing. Clideo provides several extensions to download, but if you want to post your video on social media, it’s better to use the MP4 option. After finishing, press the “Cut” button.
Step 3: You can preview your video and save it on your device as the final step.
2. YT Cutter
It’s a super-easy video cutter that can download a part of any YouTube video in no time. YT Cutter also allows downloading and trimming the video online. The maximum limit is 1 minute for free account users, but it’s 20 minutes for premium users.
Here are the steps to download part of your YouTube video using YT Cutter.
Step 1: Click on the “start” button after pasting your YouTube URL.
Step 2: You can preview the part of the video you want to download online. After that, add the start and end times in the options bar on the left. Then, you’re good to go! Your video will be ready to download once you hit the “download” button.
3. VEED.IO
Veed.io YouTube video cutter is another flexible and easy tool to use. Paste the YouTube URL on Veed and cut or trim any part of the YouTube video easily.
Check out the simple steps to use Veed below:
Step 1: You will find the option to upload your file, record a video, or paste the YouTube video URL on Veed.
Step 2: Once you have uploaded your video in Veed, you can trim or cut a section by dragging or clicking the video ends.
Step 3: Soon after finishing your work, press the “download” button, and you finish it.
Filmora Video Editor
Create AI-Generated Video with Filmora
Filmora Discord video editor offers a ChatGPT plug-in and AI tools to enhance your creative vision. Make your idea into reality.
Create Video with ChatGPT Create Video with ChatGPT Create Video with ChatGPT Learn More >
4. Hashcut
Hashcut is user-friendly as it does not save up your video. If you like a video on YouTube and want to download a part of the video, Hashcut is your go-to!
Want to know how it works? Read below:
Step 1: You can search for the YouTube video you want to cut and paste the URL on the Hashcut box. Then, click the START RECORDING button to add the start timing, and then click the END RECORDING button to add the ending timing.
Step 2: You can also add stickers and texts as per your choice before saving the part of the YouTube video.
Step 3: Finally, you can compile multiple clips into a single clip and then hit “SAVE HASHCUT” to finish your work.
5. VideoCrops
VideoCrops is another wonderful tool to download a part of the YouTube video you want. It has limited tools as it is free. Be sure to download your video immediately after your work is done.
Here are the simple steps you need to follow to use VideoCrops.
Step 1: Open VideoCrops on your device, paste the YouTube video URL, and click the “Play” button.
Step 2: Select the video interval you want to crop and hit the “Crop selection” button below the video.
Step 3: Click the “Download” button below and enjoy your clip.
6. Kapwing
Kapwing is another cool tool that works on all devices such as Android, Mac, and iOS. It makes your work easy with a few simple trims and cuts.
Know how to get your work done with Kapwing here!
Step 1: If you want a part of any YouTube video, paste the link into the given space and wait for the video to be displayed on the screen.
Step 2: When the video appears, you need to select the slider and drag it to the part of the video you want for a final cut. You can also use the arrow key if you want better trimming. You can also zoom in or out for better results and adjust the video’s speed.
Step 3: When you’re finally done with the cropping and editing, press the “Export Video” button at the top right corner. You can now share and download the shortened video.
Part 2: How to Record YouTube Videos with Filmora?
Filmora is a software editor that is available for both Windows and MacOS. It can give you many editing and recording facilities. Besides, it offers many editing facilities like effects, color match, motion tracking, direct upload to social platforms, and a lot more. You need to follow a few steps to record YouTube videos using Filmora and easily save parts of the video.
You need to follow a few steps to record YouTube videos using Filmora and easily save parts of the video.
Secure Download
Secure Download
- Open Wondershare Filmora and then click the PC Screen button to enter the screen recording interface.
- In the Wondershare Screen Recorder tool, you can choose to record your full screen or any target window. For example, since we want to record part of the YouTube video, choose target window and then select the browser playing the YouTube video.
You need to choose the file location of where you want your video to be saved, set a record time limit and hit the red record button.
- If you want to save only a part of the YouTube video, you can drag the play header to the section of your choice and trim it or use scissors to slice the part you want in Filmora. You can edit the part by adding headings and effects. And finally, export the video to use.
You can check this part to learn more details about how to use Filmora to record screen .
Final thoughts
That’s about it! These were some of the best tools to download sections of the YouTube videos of your choice. The steps are pretty much the same for all the tools mentioned above. You no longer have to reach out to your friends to do this for you. This article will help you out as we’ve mentioned the step-by-step process for each tool. First, you need to ensure you have a stable internet connection.
Download segments of the YouTube video effortlessly with a few taps on your phone now!
![]()
A cross-platform for making videos anywhere for all creators
Why your video editing isn’t good enough? How about some creative inspo?
- 100 Million+ Users
- 150+ Countries and Regions
- 4 Million+ Social Media Followers
- 5 Million+ Stock Media for Use
* Secure Download
Richard Bennett
Richard Bennett is a writer and a lover of all things video.
Follow @Richard Bennett
Also read:
- 2024 Approved Effective Team Videos Boosting Channelnode Growth Rate
- In 2024, Ad Profits Unveiled How Much Do Creators Make on Youtube?
- 2024 Approved Break Through Bot Barriers Rising From the Crowd
- [Updated] Charting Success Navigating YouTube Statistics with Social Blade
- 2024 Approved Elevate Your Earning Game with YouTube's Member Status
- Spotlight The Fastest 8 Growth-Driven YouTube Vids
- Best Approach for Managing CC Rights & Usage
- In 2024, Cutting and Compositing for YouTube Videos Using Premiere Pro
- Techniques to Improve Video Visibility on YouTube Platform
- [Updated] Crafting a Viral Video Journey 6 Key Strategies on YouTube
- [New] A Closer Look at Earnings Comparing Dailymotion and YouTube Revenues
- Crafting Powerful Thumbnails with Top 20 Font Options
- In 2024, Digital Dominance Top YouTube Watch Count Chronicles
- Step-by-Step to Stellar Custom Shorts Thumbnails
- [Updated] Decoding YouTube Community Terms and Policies
- In 2024, Creative Backgrounds for Engaging Thumbnails
- [New] Breaking Barriers YouTube Marketing Mastery
- Essential FreeFire Hashtags to Skyrocket Video Views on YouTube for 2024
- 2024 Approved Choosing Your Go-To YouTube Video Downloaders on Android Platform
- 2024 Approved Convenient Cornerstone Building Your Online Channel, Anywhere & Everytime
- Convert & Share Simplified MP3 to YouTube Process [3 Phases] for 2024
- In 2024, Breakthrough Tools An Analysis of the Top 10 Cost-Effective Video Design Schools on YouTube
- How to Convert YouTube Videos to MP3 Songs on Mac-2023 Update
- 2024 Approved Directors Academy YouTube Channels for Cinematic Innovation
- Crafting an Efficient YouTube Subscription Path
- Confirm Monetization Accuracy Essential Steps for Your YT Channels for 2024
- Inside Look Comprehensive Analysis of V-Tubers
- 2024 Approved Apex Chart Analyst Master Video Popularity
- Step-by-Step for Sports Video Compilation
- 2024 Approved Cutting Techniques for Sports Entertainment Films
- How Much Can You Earn on YouTube via Ad Revenue?
- Embracing Constructive Feedback, Ignoring the Rest for 2024
- [New] Elevate Your Edits The Beginner's Insider Look at Editing Techniques
- Decoding the Secrets of Highly Successful YouTube Shorts Templates
- In 2024, Does Artificial Engagement Damage YouTube Reputation?
- How Sony Vegas Transforms Ordinary Footage Into YouTube Stardom
- Essential YouTube Tagging Strategies for Optimal Visibility
- Harnessing YouTube's Power for Maximum Earnings via AdSense
- 2024 Approved Boosting YouTube Videos Activating AV1 Support
- [Updated] Accessible Visual Aids for YouTube Videos
- [New] Affordable YouTube Intro Designs and Templates
- Channeling Success The Personal Brand Strategy for YouTubers
- [New] Average Profit per Stream Watcher on YouTube
- Secret Watchers How to Hide YouTube Playback
- Best Cameras for Quality YouTube Content for 2024
- Direct Download of YouTube Videos for 2024
- Starting Off Determining Your Creative Passion
- Crafting Content Gold YouTube Studio's Path to Perfection for 2024
- [Updated] Soil Spinners Finding the Next Stardew Title for 2024
- [Updated] VirtualVicar Video Vetting
- In 2024, How to Bypass Google FRP Lock from Xiaomi Civi 3 Devices
- How To Transfer Data From iPhone 12 To Other iPhone 13 devices? | Dr.fone
- 2024 Approved Mastering Multi-Image Instagram Stories A Step-by-Step Tutorial
- [Updated] 2024 Approved Ultimate Screen Recorder Companion for Windows 10
- 2024 Approved Mastering Insta Exiting A Step-by-Step Guide
- New 2024 Approved The Ultimate Guide Top 8 Mac DAWs with In-Depth Analysis
- [New] Adventure Videography Supplies for Travelers
- In 2024, Eclectic Compilation of Irresistible YouTube Sounds
- New Elevate Your Online Collaboration Discover the Best Voice Transformation Technologies for Google Meet Users for 2024
- Title: Strategies for Maximizing Video Impact While Staying in CC Zone
- Author: Kevin
- Created at : 2024-05-25 16:19:21
- Updated at : 2024-05-26 16:19:21
- Link: https://youtube-videos.techidaily.com/strategies-for-maximizing-video-impact-while-staying-in-cc-zone/
- License: This work is licensed under CC BY-NC-SA 4.0.
