
:max_bytes(150000):strip_icc()/ethernet-cable-socket-182148077-57a2244a3df78c3276eec2c6.jpg)
"Step-by-Step Using Premiere for Video Upload"
Step-by-Step: Using Premiere for Video Upload
How Do I Use Adobe Premiere To Upload YouTube Videos?

Benjamin Arango
Mar 27, 2024• Proven solutions
Whilst getting the editing and post work just right on any project is what we all aim for, the ultimate aim is for other people to see our creations, and the most popular way to achieve that is YouTube . Chances are, if you are producing video, you will be putting some of it on YouTube at some point, so let’s have a look at the most efficient way to get your work from Premiere to YouTube.
Check if your computer meet the Premiere System Requirements >>
This is a basic tutorial about Adobe Premiere, professional video editing software. However, if video editing is new to you, consider Wondershare Filmora , which is a powerful but easy-to-use tool for users just starting out. Download the free trial version below.
 Download Mac Version ](https://tools.techidaily.com/wondershare/filmora/download/ )
How Do I Use Adobe Premiere To Upload YouTube Videos
1. Master Copy
Before exporting your work, it is important to first create a master copy of your project that is ‘as is’, in that it reflects the settings and codecs used in the original footage.
To do this you simply select the sequence within the Timeline or in the Project Panel, and go through the menu tree via File > Export > Media to bring up the export dialogue.

To create your Master Copy, simply select the first option of ‘Match Sequence Settings’, this exports a file that is of the same quality as your original footage, essentially producing a digital copy of the work for archiving before anything else is done.
With you work safe and secure it is now time to look at ensuring the project is suitable for YouTube. With our sequence selected in the Timeline or Project Panel again, we go through the same File > Export > Media path to bring up the media export dialogue as before.
2. Container
The first option we have to consider is the file format that our finished video needs to be in. Here you should refer to YouTube for its guidelines, whilst they do accept a number of file formats, digging through the YouTube help system to find the settings for highest quality we find that they recommend MPEG4 as the container, using the codec.

We can also see further recommended settings in this screenshot that will be covered later.
The good news is that Premiere automatically selects the appropriate container for us when we select our codec, however it is worth knowing the file type YouTube is expecting just to check yourself.
3. Video Codec
So having established that YouTube recommends the MPEG4 container using the codec, the first option we need to look for in the media export dialogue is to select the appropriate Format.
This is the first drop down in the dialogue box, and in this case we simply select from the list.

Once you select you can check the ‘output name’ field and see that premiere is automatically set the output file to .mp4 which is exactly what we need.
4. Preset
The next field we come to is the ‘Preset’ dropdown menu. This is a major help to most people, as Adobe have very kindly included large numbers of presets to quickly adapt video settings to suit specific uses. They vary depending on the exact version of Premiere you are using, and each format type does have its own list of presets, as we can see has a large number for YouTube, but also has many presets for specific devices (presets for iPad, Kindle, Nook, various other tablets and phones, Vimeo and a host of others) to make getting the right settings that bit easier for us.

It is important here to select the correct preset from the various YouTube options. You want to select the resolution and frame rate that match your source file, for the best results. So, if your source file is 1080p with a frame rate of 29.97 fps then that is the YouTube setting you would select.
Once a preset is selected a summary of the settings is displayed below, normally these will be well suited to your project, however you can fine tune anything you wish by selecting the video or audio tabs at the bottom which give you the chance to adjust each parameter individually. If you do this, you can save these changes as a custom preset by clicking the button at the side of the Preset dropdown menu and simply use it on later projects by selecting it from the list the same as any other, a great time saving tool.

5. Rendering
Once you are satisfied with the settings, either from the Preset alone or if you have adjusted anything yourself, you are nearly ready to render the file and export it.
For YouTube it is recommended you select the ‘Use Maximum Render Quality’ option to maintain the best output you can, it does add time to the render process but if you value the quality of your work it is worthwhile.
Finally you can choose a suitable filename and the destination of the file by clicking on the ‘Output Name’ field.
I normally use a filename that includes the destination medium so I can differentiate between different versions of a project and know which one to upload where, in this case I include ‘youtube’, but if I were planning on uploading clips of the project to vimeo as well for instance there may be a cut of the project with ‘vimeo’ in the name too. The destination is personal preference, because I do use filenames to differentiate versions I can put the various iterations into a single project file, others have folder structures for each type of file , so all YouTube output goes into a single folder and so on, how you organize is entirely dependent on how you work.

Once those are selected clicking ‘Export’ starts the rendering process, and eventually (how long depends on the speed of your computer and the size and type of file involved), you will end up with your YouTube optimized video in the location you chose.
Here I created 4 key frames that let the ‘Animation’ object move around the ‘Demo Text’ Object and finally come to rest below it. Whilst this type of effect does look very effective on screen, such is the ease of use of After Effects it really is just a few minutes work to achieve.
Learn more details about How to add text in Premiere >>
6. Uploading
Now you have your file, the next step is to go to your YouTube account and log in if you need to.
On the top of your homepage on the right is the upload button, selecting that brings up the select file menu as below.

You can either drag your file into the window or click on it to open a standard file browser to locate the desired file, click and the upload will begin. The dropdown underneath allows you to set the video as Public, Unlisted or Private. You can change this at any time once the video is uploaded as well.
This opens the upload progress window, where you can add in a name, description and tags as well as add the video to a playlist or adjust the privacy settings as the video is uploading.

Once the upload as finished, you can do final adjustments to settings and choose a thumbnail for the video. The final step is to click the ‘Publish’ button and your video will be processed and go live.

Benjamin Arango
Benjamin Arango is a writer and a lover of all things video.
Follow @Benjamin Arango
Benjamin Arango
Mar 27, 2024• Proven solutions
Whilst getting the editing and post work just right on any project is what we all aim for, the ultimate aim is for other people to see our creations, and the most popular way to achieve that is YouTube . Chances are, if you are producing video, you will be putting some of it on YouTube at some point, so let’s have a look at the most efficient way to get your work from Premiere to YouTube.
Check if your computer meet the Premiere System Requirements >>
This is a basic tutorial about Adobe Premiere, professional video editing software. However, if video editing is new to you, consider Wondershare Filmora , which is a powerful but easy-to-use tool for users just starting out. Download the free trial version below.
Download Mac Version ](https://tools.techidaily.com/wondershare/filmora/download/ )
How Do I Use Adobe Premiere To Upload YouTube Videos
1. Master Copy
Before exporting your work, it is important to first create a master copy of your project that is ‘as is’, in that it reflects the settings and codecs used in the original footage.
To do this you simply select the sequence within the Timeline or in the Project Panel, and go through the menu tree via File > Export > Media to bring up the export dialogue.
To create your Master Copy, simply select the first option of ‘Match Sequence Settings’, this exports a file that is of the same quality as your original footage, essentially producing a digital copy of the work for archiving before anything else is done.
With you work safe and secure it is now time to look at ensuring the project is suitable for YouTube. With our sequence selected in the Timeline or Project Panel again, we go through the same File > Export > Media path to bring up the media export dialogue as before.
2. Container
The first option we have to consider is the file format that our finished video needs to be in. Here you should refer to YouTube for its guidelines, whilst they do accept a number of file formats, digging through the YouTube help system to find the settings for highest quality we find that they recommend MPEG4 as the container, using the codec.
We can also see further recommended settings in this screenshot that will be covered later.
The good news is that Premiere automatically selects the appropriate container for us when we select our codec, however it is worth knowing the file type YouTube is expecting just to check yourself.
3. Video Codec
So having established that YouTube recommends the MPEG4 container using the codec, the first option we need to look for in the media export dialogue is to select the appropriate Format.
This is the first drop down in the dialogue box, and in this case we simply select from the list.
Once you select you can check the ‘output name’ field and see that premiere is automatically set the output file to .mp4 which is exactly what we need.
4. Preset
The next field we come to is the ‘Preset’ dropdown menu. This is a major help to most people, as Adobe have very kindly included large numbers of presets to quickly adapt video settings to suit specific uses. They vary depending on the exact version of Premiere you are using, and each format type does have its own list of presets, as we can see has a large number for YouTube, but also has many presets for specific devices (presets for iPad, Kindle, Nook, various other tablets and phones, Vimeo and a host of others) to make getting the right settings that bit easier for us.
It is important here to select the correct preset from the various YouTube options. You want to select the resolution and frame rate that match your source file, for the best results. So, if your source file is 1080p with a frame rate of 29.97 fps then that is the YouTube setting you would select.
Once a preset is selected a summary of the settings is displayed below, normally these will be well suited to your project, however you can fine tune anything you wish by selecting the video or audio tabs at the bottom which give you the chance to adjust each parameter individually. If you do this, you can save these changes as a custom preset by clicking the button at the side of the Preset dropdown menu and simply use it on later projects by selecting it from the list the same as any other, a great time saving tool.
5. Rendering
Once you are satisfied with the settings, either from the Preset alone or if you have adjusted anything yourself, you are nearly ready to render the file and export it.
For YouTube it is recommended you select the ‘Use Maximum Render Quality’ option to maintain the best output you can, it does add time to the render process but if you value the quality of your work it is worthwhile.
Finally you can choose a suitable filename and the destination of the file by clicking on the ‘Output Name’ field.
I normally use a filename that includes the destination medium so I can differentiate between different versions of a project and know which one to upload where, in this case I include ‘youtube’, but if I were planning on uploading clips of the project to vimeo as well for instance there may be a cut of the project with ‘vimeo’ in the name too. The destination is personal preference, because I do use filenames to differentiate versions I can put the various iterations into a single project file, others have folder structures for each type of file , so all YouTube output goes into a single folder and so on, how you organize is entirely dependent on how you work.
Once those are selected clicking ‘Export’ starts the rendering process, and eventually (how long depends on the speed of your computer and the size and type of file involved), you will end up with your YouTube optimized video in the location you chose.
Here I created 4 key frames that let the ‘Animation’ object move around the ‘Demo Text’ Object and finally come to rest below it. Whilst this type of effect does look very effective on screen, such is the ease of use of After Effects it really is just a few minutes work to achieve.
Learn more details about How to add text in Premiere >>
6. Uploading
Now you have your file, the next step is to go to your YouTube account and log in if you need to.
On the top of your homepage on the right is the upload button, selecting that brings up the select file menu as below.
You can either drag your file into the window or click on it to open a standard file browser to locate the desired file, click and the upload will begin. The dropdown underneath allows you to set the video as Public, Unlisted or Private. You can change this at any time once the video is uploaded as well.
This opens the upload progress window, where you can add in a name, description and tags as well as add the video to a playlist or adjust the privacy settings as the video is uploading.
Once the upload as finished, you can do final adjustments to settings and choose a thumbnail for the video. The final step is to click the ‘Publish’ button and your video will be processed and go live.
Benjamin Arango
Benjamin Arango is a writer and a lover of all things video.
Follow @Benjamin Arango
Mastering Name Selection for Distinctive YouTube Channels
How To Pick a YouTube Channel Name

Richard Bennett
Mar 27, 2024• Proven solutions
Choosing the name of your YouTube channel is one of the most important decisions you will make as a vlogger. If your channel name sticks in the minds of people who watch your videos it will help to ensure viewers return and watch more of your work. An especially catchy channel name can even draw in new viewers who just have to find out what kind of videos somebody with that particular name makes. Most successful noted YouTubers carefully planned their names.
How to come up with the best YouTube name? Below we will introduce some useful tips that you should think about before choosing a YouTube channel name and some best online YouTube name generators that you can use to pick up a good YouTube name.
- Part 1: How To Pick a Name for Your YouTube Channel
- Part 2: Best Free Online Name Generator Tools for YouTube Channel
- Part 3: YouTube Channel Name vs. YouTube Usernames
- Part 4: How to Change YouTube Channel Name
Best YouTube Video Editor - Filmora
It is not easy to come up with a good YouTube channel and user name, but it is easy to edit an excellent YouTube video with Filmora. It is designed for beginner users who want to edit videos easily for YouTube channel! You can add royalty-free music and various filters/effects to touch up your videos with dragging and dropping. After editing, you can directly upload the video to the YouTube platform. Download it now to have a try!
Part 1: How To Pick a YouTube Channel Name: 5 Tips for Choosing a Better YouTube Name
Of course, it is best to choose an amazing channel name in the first place so you never have to worry about changing it. Here are five tips for naming your YouTube channel.
1. Keep it Short and Impressive
In order to be memorable, your channel name should be short and catchy. Generally, it is a bad idea to have a name that is more than five syllables long. Longer channel names are both harder to remember, and harder to tell your friends about since they do not tend to roll off the tongue.
The worst way you can end up with an overly long username is by adding numbers or extra letters to the end of it. People often decide to do this because their desired channel name was taken. It is always a terrible idea. Your username might still look short, but that is deceptive. A username like ‘Lucas423’ is really ‘Lucasfourtwentythree’. Nobody will remember the exact numbers. If anyone remembers that username at all they will only remember ‘Lucas’, which will make it extremely difficult for them to find your channel again.
For the sake of keeping their channel names short and memorable, some successful YouTubers have actually made up words, i.e ‘Smosh’. This only works if a silly made-up word suits the tone of your channel, and even a lot of made-up words are taken by this point.
2. It’s All About You
Regardless of the topic of your vlog, your vlog will also be about you as a personality, so your channel name should have something to do with who you are as a person. It can even include your real name or some variation of it. Real-life nicknames work great.
If you do not want to use your actual name, or do not think your actual name would stick in people’s minds very well, then think about what your hobbies are and what kind of words could be used to describe you. Come up with a list of nouns and describing words and try out different combinations. You might even decide to try out some of your describing words with your real name.
3. It’s Also About Your Audience
Your name should reflect who you are, but it should also be relevant to the people who will be watching your vlog. For example, people who are tuning in to a daily life vlog might appreciate it if you use your real name or some variation on your name. People who are tuning into a vlog to learn something – beauty or cooking tips, for example – will be confused if your channel name is something like ‘LucasIsCool’. If you have a channel that is about anything besides your daily life, experiences, or opinions then your channel name needs to reference your topic. If Lucas’s channel is about baking then rather than ‘LucasIsCool’ he should try something like ‘LucasBakes’ or ‘CookiesByLucas’.
4. Test Drive It
It is a bad idea to rush over to YouTube and sign up for the first channel name you decide you like. First, say it out loud and see if it sounds as catchy as it seemed in your head. If it does, then there are still a couple of other “test drives” you need to do.
Plunk the channel name you are considering into a search engine to make sure it is not already strongly associated with something besides you. If there is actually a website with your channel name as its URL then you should almost definitely discard that name and choose a new one. If you have some success with your vlog then you will probably want to acquire the associated URL later on. Even if you do not think you want a website it is a bad idea to choose a channel name that already has a strong association with something else. For example, if you play music on your channel and your channel has the same name as a music festival people might automatically think you and that festival are affiliated.
You will also want to check and make sure nobody is using your channel name as their username on Instagram, Vimeo, or any other social media site. If your name is already being used elsewhere then it will be difficult for you to expand.
5. Don’t Give up
YouTube is a huge site and a lot of the really good names are already being used or – more frustratingly – have been taken by people who are not actually using them. The first few names you come up with will probably be unavailable. This is where a lot of YouTubers get discouraged and start weakening their channel name by typing numbers after it. It is easy to get pulled into settling for any name that sort of sounds like the one you want, but which is actually available. Do not do this! You will be able to create a catchy, unique, name that is all you own.
Coming up with the perfect name for your channel can take time, sometimes a lot of time. If you can get it done in one evening then you are lucky because this is something that can take days. The name of your YouTube channel is extremely important and you should take as long as you need to pick a good one.
Part 2: 5 Best Free Online YouTube Name Generators in 2021
1. YouTube Name Generator:
In case if you need a YouTube name with a specific keyword, this YouTube Name Generator tool can help you better. The unique algorithm of this online tool is capable enough to generate unique channel names that can match certain keywords of your need. All that you need to do is provide it with the total number of names it should generate for you along with your target keyword. It will soon open a long list of actual names and made-up names that you can choose for your channel.
2. Kparser:
Those who are more focused on the SEO ranking of their YouTube channel instead of the uniqueness of the YouTube channel name can avail great benefits from Kparser. It is well known as a keyword suggestion tool that is also used as a YouTube Name Generator due to its awesome algorithm that brings out top SEO-ranked channel names from the web. By upgrading to the Pro version of this tool, you can also get information about the volume and CPC of the listed keyword.
3. SpinXo:
Here is the most comprehensive tool for YouTube channel name generation and it provides satisfactory results to most users who don’t have specific requirements. You can add few specific details to this platform in terms of topic, keywords, niche, interests, and important word; SpinXo will soon generate the best channel names by utilizing that information. Observations say that most of the names generated by this tool are of three words. As soon as you like a certain keyword on this platform, you can see its availability on other social media platforms like Instagram, Twitter, and Blogger, etc.
4. Best Username Generator:
It is almost the same as that of the YouTube Username Generator tool as it also brings out made-up YouTube names with its search results. But the great news is that it is also loaded with unique customization options. After listing the essential keyword, this tool also allows users to provide details about the number of characters they want in the name. When you like any one of the generated names, you can also check their availability on YouTube as well as 9 other popular social media websites.
5. Name Generator 2:
When you are interested in getting a funny YouTube channel name to grab the attention of more viewers online, Name Generator 2 is probably the best platform for you. Although it cannot provide you with a long list of keywords, whatever it provides is always full of humor. Note that, this tool does not allow customization options for YouTube Channel Name generations, users can simply add prefix or suffix details and it will combine them to provide you with something unique out of its database.
Part 3: YouTube Channel Name vs. YouTube Usernames
Are you aware of the difference between YouTube Channel name and YouTube Usernames? Most people are confused about this fact, but there is something that you really need to know about. Go through the details below to clear your doubt:
1. YouTube Channel Names
It is the name by which your channel is known on the network online. When viewers watch your videos online, your channel name appears on their screen, and they can click on this name to reach your channel to watch more collections. In a few cases, the channel name can be a username as well, but it is not always so.
2. YouTube Usernames

The YouTube Username is the one that appears on your URL when you visit your channel page. The time when you started your YouTube channel for the very first time, it appeared automatically containing a random string of characters. In the past, you can not change the URL but now YouTube allows you to customize it when you have more than 100 subscribers and your channel is at least 30 days old. For more details about claiming a custom URL for YouTube, check it here.

Since we have already known the differences between YouTube Channel Name and YouTube User name, you may wonder why the YouTube channel name is so important. While the flip side of that is that not choosing a good channel name can really hurt your chances of getting views and subscribers. Your videos might be great, but if viewers who like them cannot remember your name then it will be hard for them to find you again. Other videos of yours might even show up in their searches and be ignored because the viewer does not recognize your name. Also, while the very best channel names make people curious about what you do, the very worst channel names will be a deterrent for people when they are deciding whether to watch your videos. For example, including a sequence of numbers after your name will give people on YouTube the impression that you do not know what you are doing.
You May Also Like:
YouTube SEO Guide: How to Improve Search Rankings For Your YouTube Videos >>
How to Get More Subscribers on YouTube >>
Part 4: How to Change YouTube Channel Name
YouTube does allow you to change the name that is displayed for your channel now (in the past you could not). However, while your display name can be changed, the URL of your channel is permanent. If you change your display name then the two things will no longer match. Also if you manage to build up a following using one name you will probably lose some of those people if you change it. If you feel like your channel name is holding you back then you should definitely update it to something better, but you should also consider whether it is holding you back enough that it is worth losing some of the regular viewers you already have. It probably will be, if you feel like your channel will start growing faster after the change.
Even after selecting the best name for your YouTube channel, if one day you realize that it must be modified to have much better results; you can definitely change it without deleting the existing account. Note that your Google account name is the same as your YouTube Channel name. So, whenever you want to change the name of the channel; you can follow these simple steps to execute this task:
Step 1: First of all, simply sign in to YouTube.com and then hit on the Settings icon option available on the top right corner of your screen.
Step 2: Now go to the settings button and then choose the “Edit on Google” link.
Step 3: It is time to enter the updated Channel name and then finally hit the Ok button on the screen.
You are done with it, and now you can visit your YouTube channel once again to see the new name appearing on it.
Note: changing the channel name in this way will change all your names across Google services, such as Gmail and Google Drive. If you want to use a YouTube channel name different from that in your Google account, you can connect your channel to a Brand Account. For more details about that, please check: Use a different name on YouTube than your Google Account.
Conclusion
Above are some tips about how to pick up a YouTube channel name and some useful online YouTube name generator tools that you can use to choose a YouTube name quickly. Hope these tips and tools can help you when you building your YouTube channel. If can’t think of a good YouTube name, you can take a look at your similar channels’ names, which will give you a hint. InflueNex , the helpful influencer marketing platform, will help you to find similar channels in one click.
Download Mac Version ](https://tools.techidaily.com/wondershare/filmora/download/ )
Richard Bennett
Richard Bennett is a writer and a lover of all things video.
Follow @Richard Bennett
Richard Bennett
Mar 27, 2024• Proven solutions
Choosing the name of your YouTube channel is one of the most important decisions you will make as a vlogger. If your channel name sticks in the minds of people who watch your videos it will help to ensure viewers return and watch more of your work. An especially catchy channel name can even draw in new viewers who just have to find out what kind of videos somebody with that particular name makes. Most successful noted YouTubers carefully planned their names.
How to come up with the best YouTube name? Below we will introduce some useful tips that you should think about before choosing a YouTube channel name and some best online YouTube name generators that you can use to pick up a good YouTube name.
- Part 1: How To Pick a Name for Your YouTube Channel
- Part 2: Best Free Online Name Generator Tools for YouTube Channel
- Part 3: YouTube Channel Name vs. YouTube Usernames
- Part 4: How to Change YouTube Channel Name
Best YouTube Video Editor - Filmora
It is not easy to come up with a good YouTube channel and user name, but it is easy to edit an excellent YouTube video with Filmora. It is designed for beginner users who want to edit videos easily for YouTube channel! You can add royalty-free music and various filters/effects to touch up your videos with dragging and dropping. After editing, you can directly upload the video to the YouTube platform. Download it now to have a try!
Part 1: How To Pick a YouTube Channel Name: 5 Tips for Choosing a Better YouTube Name
Of course, it is best to choose an amazing channel name in the first place so you never have to worry about changing it. Here are five tips for naming your YouTube channel.
1. Keep it Short and Impressive
In order to be memorable, your channel name should be short and catchy. Generally, it is a bad idea to have a name that is more than five syllables long. Longer channel names are both harder to remember, and harder to tell your friends about since they do not tend to roll off the tongue.
The worst way you can end up with an overly long username is by adding numbers or extra letters to the end of it. People often decide to do this because their desired channel name was taken. It is always a terrible idea. Your username might still look short, but that is deceptive. A username like ‘Lucas423’ is really ‘Lucasfourtwentythree’. Nobody will remember the exact numbers. If anyone remembers that username at all they will only remember ‘Lucas’, which will make it extremely difficult for them to find your channel again.
For the sake of keeping their channel names short and memorable, some successful YouTubers have actually made up words, i.e ‘Smosh’. This only works if a silly made-up word suits the tone of your channel, and even a lot of made-up words are taken by this point.
2. It’s All About You
Regardless of the topic of your vlog, your vlog will also be about you as a personality, so your channel name should have something to do with who you are as a person. It can even include your real name or some variation of it. Real-life nicknames work great.
If you do not want to use your actual name, or do not think your actual name would stick in people’s minds very well, then think about what your hobbies are and what kind of words could be used to describe you. Come up with a list of nouns and describing words and try out different combinations. You might even decide to try out some of your describing words with your real name.
3. It’s Also About Your Audience
Your name should reflect who you are, but it should also be relevant to the people who will be watching your vlog. For example, people who are tuning in to a daily life vlog might appreciate it if you use your real name or some variation on your name. People who are tuning into a vlog to learn something – beauty or cooking tips, for example – will be confused if your channel name is something like ‘LucasIsCool’. If you have a channel that is about anything besides your daily life, experiences, or opinions then your channel name needs to reference your topic. If Lucas’s channel is about baking then rather than ‘LucasIsCool’ he should try something like ‘LucasBakes’ or ‘CookiesByLucas’.
4. Test Drive It
It is a bad idea to rush over to YouTube and sign up for the first channel name you decide you like. First, say it out loud and see if it sounds as catchy as it seemed in your head. If it does, then there are still a couple of other “test drives” you need to do.
Plunk the channel name you are considering into a search engine to make sure it is not already strongly associated with something besides you. If there is actually a website with your channel name as its URL then you should almost definitely discard that name and choose a new one. If you have some success with your vlog then you will probably want to acquire the associated URL later on. Even if you do not think you want a website it is a bad idea to choose a channel name that already has a strong association with something else. For example, if you play music on your channel and your channel has the same name as a music festival people might automatically think you and that festival are affiliated.
You will also want to check and make sure nobody is using your channel name as their username on Instagram, Vimeo, or any other social media site. If your name is already being used elsewhere then it will be difficult for you to expand.
5. Don’t Give up
YouTube is a huge site and a lot of the really good names are already being used or – more frustratingly – have been taken by people who are not actually using them. The first few names you come up with will probably be unavailable. This is where a lot of YouTubers get discouraged and start weakening their channel name by typing numbers after it. It is easy to get pulled into settling for any name that sort of sounds like the one you want, but which is actually available. Do not do this! You will be able to create a catchy, unique, name that is all you own.
Coming up with the perfect name for your channel can take time, sometimes a lot of time. If you can get it done in one evening then you are lucky because this is something that can take days. The name of your YouTube channel is extremely important and you should take as long as you need to pick a good one.
Part 2: 5 Best Free Online YouTube Name Generators in 2021
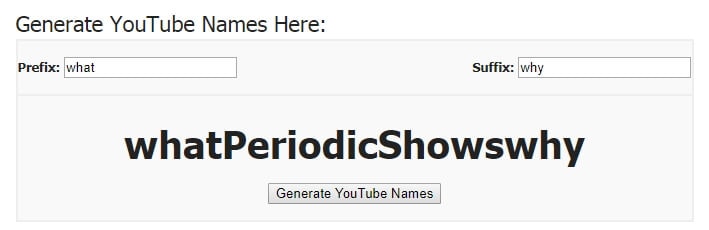
1. YouTube Name Generator:
In case if you need a YouTube name with a specific keyword, this YouTube Name Generator tool can help you better. The unique algorithm of this online tool is capable enough to generate unique channel names that can match certain keywords of your need. All that you need to do is provide it with the total number of names it should generate for you along with your target keyword. It will soon open a long list of actual names and made-up names that you can choose for your channel.
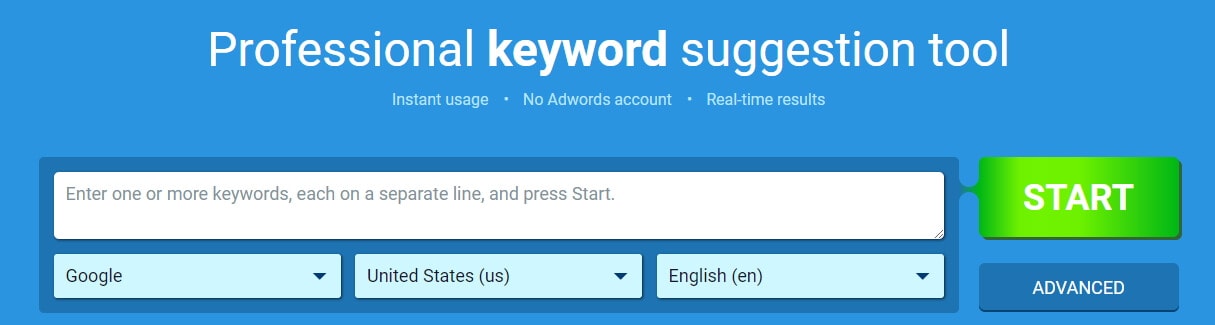
2. Kparser:
Those who are more focused on the SEO ranking of their YouTube channel instead of the uniqueness of the YouTube channel name can avail great benefits from Kparser. It is well known as a keyword suggestion tool that is also used as a YouTube Name Generator due to its awesome algorithm that brings out top SEO-ranked channel names from the web. By upgrading to the Pro version of this tool, you can also get information about the volume and CPC of the listed keyword.
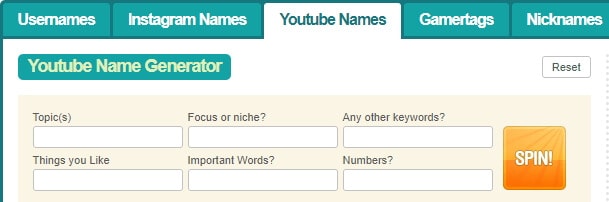
3. SpinXo:
Here is the most comprehensive tool for YouTube channel name generation and it provides satisfactory results to most users who don’t have specific requirements. You can add few specific details to this platform in terms of topic, keywords, niche, interests, and important word; SpinXo will soon generate the best channel names by utilizing that information. Observations say that most of the names generated by this tool are of three words. As soon as you like a certain keyword on this platform, you can see its availability on other social media platforms like Instagram, Twitter, and Blogger, etc.
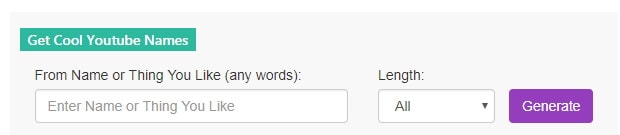
4. Best Username Generator:
It is almost the same as that of the YouTube Username Generator tool as it also brings out made-up YouTube names with its search results. But the great news is that it is also loaded with unique customization options. After listing the essential keyword, this tool also allows users to provide details about the number of characters they want in the name. When you like any one of the generated names, you can also check their availability on YouTube as well as 9 other popular social media websites.
5. Name Generator 2:
When you are interested in getting a funny YouTube channel name to grab the attention of more viewers online, Name Generator 2 is probably the best platform for you. Although it cannot provide you with a long list of keywords, whatever it provides is always full of humor. Note that, this tool does not allow customization options for YouTube Channel Name generations, users can simply add prefix or suffix details and it will combine them to provide you with something unique out of its database.
Part 3: YouTube Channel Name vs. YouTube Usernames
Are you aware of the difference between YouTube Channel name and YouTube Usernames? Most people are confused about this fact, but there is something that you really need to know about. Go through the details below to clear your doubt:
1. YouTube Channel Names
It is the name by which your channel is known on the network online. When viewers watch your videos online, your channel name appears on their screen, and they can click on this name to reach your channel to watch more collections. In a few cases, the channel name can be a username as well, but it is not always so.
2. YouTube Usernames
The YouTube Username is the one that appears on your URL when you visit your channel page. The time when you started your YouTube channel for the very first time, it appeared automatically containing a random string of characters. In the past, you can not change the URL but now YouTube allows you to customize it when you have more than 100 subscribers and your channel is at least 30 days old. For more details about claiming a custom URL for YouTube, check it here.
Since we have already known the differences between YouTube Channel Name and YouTube User name, you may wonder why the YouTube channel name is so important. While the flip side of that is that not choosing a good channel name can really hurt your chances of getting views and subscribers. Your videos might be great, but if viewers who like them cannot remember your name then it will be hard for them to find you again. Other videos of yours might even show up in their searches and be ignored because the viewer does not recognize your name. Also, while the very best channel names make people curious about what you do, the very worst channel names will be a deterrent for people when they are deciding whether to watch your videos. For example, including a sequence of numbers after your name will give people on YouTube the impression that you do not know what you are doing.
You May Also Like:
YouTube SEO Guide: How to Improve Search Rankings For Your YouTube Videos >>
How to Get More Subscribers on YouTube >>
Part 4: How to Change YouTube Channel Name
YouTube does allow you to change the name that is displayed for your channel now (in the past you could not). However, while your display name can be changed, the URL of your channel is permanent. If you change your display name then the two things will no longer match. Also if you manage to build up a following using one name you will probably lose some of those people if you change it. If you feel like your channel name is holding you back then you should definitely update it to something better, but you should also consider whether it is holding you back enough that it is worth losing some of the regular viewers you already have. It probably will be, if you feel like your channel will start growing faster after the change.
Even after selecting the best name for your YouTube channel, if one day you realize that it must be modified to have much better results; you can definitely change it without deleting the existing account. Note that your Google account name is the same as your YouTube Channel name. So, whenever you want to change the name of the channel; you can follow these simple steps to execute this task:
Step 1: First of all, simply sign in to YouTube.com and then hit on the Settings icon option available on the top right corner of your screen.
Step 2: Now go to the settings button and then choose the “Edit on Google” link.
Step 3: It is time to enter the updated Channel name and then finally hit the Ok button on the screen.
You are done with it, and now you can visit your YouTube channel once again to see the new name appearing on it.
Note: changing the channel name in this way will change all your names across Google services, such as Gmail and Google Drive. If you want to use a YouTube channel name different from that in your Google account, you can connect your channel to a Brand Account. For more details about that, please check: Use a different name on YouTube than your Google Account.
Conclusion
Above are some tips about how to pick up a YouTube channel name and some useful online YouTube name generator tools that you can use to choose a YouTube name quickly. Hope these tips and tools can help you when you building your YouTube channel. If can’t think of a good YouTube name, you can take a look at your similar channels’ names, which will give you a hint. InflueNex , the helpful influencer marketing platform, will help you to find similar channels in one click.
Download Mac Version ](https://tools.techidaily.com/wondershare/filmora/download/ )
Richard Bennett
Richard Bennett is a writer and a lover of all things video.
Follow @Richard Bennett
Richard Bennett
Mar 27, 2024• Proven solutions
Choosing the name of your YouTube channel is one of the most important decisions you will make as a vlogger. If your channel name sticks in the minds of people who watch your videos it will help to ensure viewers return and watch more of your work. An especially catchy channel name can even draw in new viewers who just have to find out what kind of videos somebody with that particular name makes. Most successful noted YouTubers carefully planned their names.
How to come up with the best YouTube name? Below we will introduce some useful tips that you should think about before choosing a YouTube channel name and some best online YouTube name generators that you can use to pick up a good YouTube name.
- Part 1: How To Pick a Name for Your YouTube Channel
- Part 2: Best Free Online Name Generator Tools for YouTube Channel
- Part 3: YouTube Channel Name vs. YouTube Usernames
- Part 4: How to Change YouTube Channel Name
Best YouTube Video Editor - Filmora
It is not easy to come up with a good YouTube channel and user name, but it is easy to edit an excellent YouTube video with Filmora. It is designed for beginner users who want to edit videos easily for YouTube channel! You can add royalty-free music and various filters/effects to touch up your videos with dragging and dropping. After editing, you can directly upload the video to the YouTube platform. Download it now to have a try!
Part 1: How To Pick a YouTube Channel Name: 5 Tips for Choosing a Better YouTube Name
Of course, it is best to choose an amazing channel name in the first place so you never have to worry about changing it. Here are five tips for naming your YouTube channel.
1. Keep it Short and Impressive
In order to be memorable, your channel name should be short and catchy. Generally, it is a bad idea to have a name that is more than five syllables long. Longer channel names are both harder to remember, and harder to tell your friends about since they do not tend to roll off the tongue.
The worst way you can end up with an overly long username is by adding numbers or extra letters to the end of it. People often decide to do this because their desired channel name was taken. It is always a terrible idea. Your username might still look short, but that is deceptive. A username like ‘Lucas423’ is really ‘Lucasfourtwentythree’. Nobody will remember the exact numbers. If anyone remembers that username at all they will only remember ‘Lucas’, which will make it extremely difficult for them to find your channel again.
For the sake of keeping their channel names short and memorable, some successful YouTubers have actually made up words, i.e ‘Smosh’. This only works if a silly made-up word suits the tone of your channel, and even a lot of made-up words are taken by this point.
2. It’s All About You
Regardless of the topic of your vlog, your vlog will also be about you as a personality, so your channel name should have something to do with who you are as a person. It can even include your real name or some variation of it. Real-life nicknames work great.
If you do not want to use your actual name, or do not think your actual name would stick in people’s minds very well, then think about what your hobbies are and what kind of words could be used to describe you. Come up with a list of nouns and describing words and try out different combinations. You might even decide to try out some of your describing words with your real name.
3. It’s Also About Your Audience
Your name should reflect who you are, but it should also be relevant to the people who will be watching your vlog. For example, people who are tuning in to a daily life vlog might appreciate it if you use your real name or some variation on your name. People who are tuning into a vlog to learn something – beauty or cooking tips, for example – will be confused if your channel name is something like ‘LucasIsCool’. If you have a channel that is about anything besides your daily life, experiences, or opinions then your channel name needs to reference your topic. If Lucas’s channel is about baking then rather than ‘LucasIsCool’ he should try something like ‘LucasBakes’ or ‘CookiesByLucas’.
4. Test Drive It
It is a bad idea to rush over to YouTube and sign up for the first channel name you decide you like. First, say it out loud and see if it sounds as catchy as it seemed in your head. If it does, then there are still a couple of other “test drives” you need to do.
Plunk the channel name you are considering into a search engine to make sure it is not already strongly associated with something besides you. If there is actually a website with your channel name as its URL then you should almost definitely discard that name and choose a new one. If you have some success with your vlog then you will probably want to acquire the associated URL later on. Even if you do not think you want a website it is a bad idea to choose a channel name that already has a strong association with something else. For example, if you play music on your channel and your channel has the same name as a music festival people might automatically think you and that festival are affiliated.
You will also want to check and make sure nobody is using your channel name as their username on Instagram, Vimeo, or any other social media site. If your name is already being used elsewhere then it will be difficult for you to expand.
5. Don’t Give up
YouTube is a huge site and a lot of the really good names are already being used or – more frustratingly – have been taken by people who are not actually using them. The first few names you come up with will probably be unavailable. This is where a lot of YouTubers get discouraged and start weakening their channel name by typing numbers after it. It is easy to get pulled into settling for any name that sort of sounds like the one you want, but which is actually available. Do not do this! You will be able to create a catchy, unique, name that is all you own.
Coming up with the perfect name for your channel can take time, sometimes a lot of time. If you can get it done in one evening then you are lucky because this is something that can take days. The name of your YouTube channel is extremely important and you should take as long as you need to pick a good one.
Part 2: 5 Best Free Online YouTube Name Generators in 2021
1. YouTube Name Generator:
In case if you need a YouTube name with a specific keyword, this YouTube Name Generator tool can help you better. The unique algorithm of this online tool is capable enough to generate unique channel names that can match certain keywords of your need. All that you need to do is provide it with the total number of names it should generate for you along with your target keyword. It will soon open a long list of actual names and made-up names that you can choose for your channel.
2. Kparser:
Those who are more focused on the SEO ranking of their YouTube channel instead of the uniqueness of the YouTube channel name can avail great benefits from Kparser. It is well known as a keyword suggestion tool that is also used as a YouTube Name Generator due to its awesome algorithm that brings out top SEO-ranked channel names from the web. By upgrading to the Pro version of this tool, you can also get information about the volume and CPC of the listed keyword.
3. SpinXo:
Here is the most comprehensive tool for YouTube channel name generation and it provides satisfactory results to most users who don’t have specific requirements. You can add few specific details to this platform in terms of topic, keywords, niche, interests, and important word; SpinXo will soon generate the best channel names by utilizing that information. Observations say that most of the names generated by this tool are of three words. As soon as you like a certain keyword on this platform, you can see its availability on other social media platforms like Instagram, Twitter, and Blogger, etc.
4. Best Username Generator:
It is almost the same as that of the YouTube Username Generator tool as it also brings out made-up YouTube names with its search results. But the great news is that it is also loaded with unique customization options. After listing the essential keyword, this tool also allows users to provide details about the number of characters they want in the name. When you like any one of the generated names, you can also check their availability on YouTube as well as 9 other popular social media websites.
5. Name Generator 2:
When you are interested in getting a funny YouTube channel name to grab the attention of more viewers online, Name Generator 2 is probably the best platform for you. Although it cannot provide you with a long list of keywords, whatever it provides is always full of humor. Note that, this tool does not allow customization options for YouTube Channel Name generations, users can simply add prefix or suffix details and it will combine them to provide you with something unique out of its database.
Part 3: YouTube Channel Name vs. YouTube Usernames
Are you aware of the difference between YouTube Channel name and YouTube Usernames? Most people are confused about this fact, but there is something that you really need to know about. Go through the details below to clear your doubt:
1. YouTube Channel Names
It is the name by which your channel is known on the network online. When viewers watch your videos online, your channel name appears on their screen, and they can click on this name to reach your channel to watch more collections. In a few cases, the channel name can be a username as well, but it is not always so.
2. YouTube Usernames
The YouTube Username is the one that appears on your URL when you visit your channel page. The time when you started your YouTube channel for the very first time, it appeared automatically containing a random string of characters. In the past, you can not change the URL but now YouTube allows you to customize it when you have more than 100 subscribers and your channel is at least 30 days old. For more details about claiming a custom URL for YouTube, check it here.
Since we have already known the differences between YouTube Channel Name and YouTube User name, you may wonder why the YouTube channel name is so important. While the flip side of that is that not choosing a good channel name can really hurt your chances of getting views and subscribers. Your videos might be great, but if viewers who like them cannot remember your name then it will be hard for them to find you again. Other videos of yours might even show up in their searches and be ignored because the viewer does not recognize your name. Also, while the very best channel names make people curious about what you do, the very worst channel names will be a deterrent for people when they are deciding whether to watch your videos. For example, including a sequence of numbers after your name will give people on YouTube the impression that you do not know what you are doing.
You May Also Like:
YouTube SEO Guide: How to Improve Search Rankings For Your YouTube Videos >>
How to Get More Subscribers on YouTube >>
Part 4: How to Change YouTube Channel Name
YouTube does allow you to change the name that is displayed for your channel now (in the past you could not). However, while your display name can be changed, the URL of your channel is permanent. If you change your display name then the two things will no longer match. Also if you manage to build up a following using one name you will probably lose some of those people if you change it. If you feel like your channel name is holding you back then you should definitely update it to something better, but you should also consider whether it is holding you back enough that it is worth losing some of the regular viewers you already have. It probably will be, if you feel like your channel will start growing faster after the change.
Even after selecting the best name for your YouTube channel, if one day you realize that it must be modified to have much better results; you can definitely change it without deleting the existing account. Note that your Google account name is the same as your YouTube Channel name. So, whenever you want to change the name of the channel; you can follow these simple steps to execute this task:
Step 1: First of all, simply sign in to YouTube.com and then hit on the Settings icon option available on the top right corner of your screen.
Step 2: Now go to the settings button and then choose the “Edit on Google” link.
Step 3: It is time to enter the updated Channel name and then finally hit the Ok button on the screen.
You are done with it, and now you can visit your YouTube channel once again to see the new name appearing on it.
Note: changing the channel name in this way will change all your names across Google services, such as Gmail and Google Drive. If you want to use a YouTube channel name different from that in your Google account, you can connect your channel to a Brand Account. For more details about that, please check: Use a different name on YouTube than your Google Account.
Conclusion
Above are some tips about how to pick up a YouTube channel name and some useful online YouTube name generator tools that you can use to choose a YouTube name quickly. Hope these tips and tools can help you when you building your YouTube channel. If can’t think of a good YouTube name, you can take a look at your similar channels’ names, which will give you a hint. InflueNex , the helpful influencer marketing platform, will help you to find similar channels in one click.
Download Mac Version ](https://tools.techidaily.com/wondershare/filmora/download/ )
Richard Bennett
Richard Bennett is a writer and a lover of all things video.
Follow @Richard Bennett
Also read:
- Understanding the Core of ASMR Media
- [Updated] Boost Your Game Presence A Comprehensible Guide to FreeGame Hashtags
- In 2024, Cool Climates, Cozy Cinematics Selecting Winter Backgrounds
- [New] A Decade of YouTube Dominance Breakthrough Videos Hitting a Billion Views
- Rising Stars in Streaming Global YouTube's Subs Pantheon
- Leading 8 Software for Linux Video Editors
- In 2024, Essential Microphones Tailored to Channel Genres
- [Updated] Enhancing Video Signals with YouTube Cards
- Stop Algorithmic YouTube Video Selections
- Democratize Music Distribution via Social Media for 2024
- In 2024, A Guide to Understanding and Joining a YouTube Media Company
- Evaluating Earnings From One Million YouTube Watches for 2024
- [New] Design Principles for Eye-Catching YT Previews
- Banter Bonanza The Best Comedians on the Web for 2024
- 2024 Approved 80+ Catchy Cooking Channel Names to Attract More Audience
- Exclusive Insight Choosing Among the Top 3 Leading Web Platforms for Enhanced Media Sounds for 2024
- [Updated] In 2024, Unlock a Vast Collection of Animated Emojis Top 8 FREE Sources
- Updated In 2024, Beyond Audacity A Comprehensive List of Cross-Platform Audio Editors Excelling in Performance and Features
- New 2024 Approved Top 200 Free Video Soundtrack Collections
- In 2024, All You Need To Know About Mega Greninja For Vivo X100 | Dr.fone
- [Updated] In 2024, Android's Best MOBA Games Roundup - #10 Edition
- New Techniques on Making After Effects 2D Animation
- [New] 2024 Approved Masterclass Choosing the Top FPS Games
- [New] How to Record IPTV Screen
- Leading Sound Transformation Tools, Magic Edition Included
- Updated In 2024, The Ins and Outs of Converting MP3 Files to MP4 A Beginners Guide
- In 2024, Logging Live Video Conversations
- In 2024, You Can Turn a TikTok Into a GIF Now
- Title: "Step-by-Step Using Premiere for Video Upload"
- Author: Kevin
- Created at : 2024-05-25 16:18:48
- Updated at : 2024-05-26 16:18:48
- Link: https://youtube-videos.techidaily.com/step-by-step-using-premiere-for-video-upload/
- License: This work is licensed under CC BY-NC-SA 4.0.
