
"Step-by-Step Guide to Brighter YouTube Video Editing"
Step-by-Step Guide to Brighter YouTube Video Editing
How To Light Your YouTube Video

Richard Bennett
Oct 26, 2023• Proven solutions
When it comes to sensitivity to light, no consumer-level camera sensor comes close in performance to the human eye. Many newbies to videography, though, don’t think about this when they use their camera indoors and discover that their recorded footage appears too dark.
If you want to use your camera indoors as many YouTubers do, you’ll need to have extra light. But the solution is not as simple as surrounding yourself with lamps that are all randomly placed.
Below, I’ll go into detail on how you can set up your lighting equipment to make your YouTube videos look good.
| Table of Contents Using Light You Already Have Window LightingHome Lighting Home Studio Lighting Light Control3-Point Lighting4-Point Lighting |
|---|
Part 1: Using Light You Already Have
Most beginner YouTubers light their videos with what they already have. That’s what I did to start as well. In the past, my video recording space consisted of natural sunlight coming from my window and ceiling light for times when the sunlight wasn’t strong enough.
1. Window Lighting
The best thing about window lighting is that it’s free. The worst thing about it is that it’s uncontrollable. The amount of light you get in your video can vary with all the changes in the weather.
Window lighting for me was especially difficult to work with because I live in a very rainy and cloudy city, Vancouver, Canada, where we pretty much just get three months of good sun.

Above are two freeze frames from one of Daniel’s past window-lit vlogs. Although these two frames are both from the same vlog, you can see that the image on the right looks brighter due to clearer skies at that moment. These varying amounts of light is what you will have to deal with if you choose to light your YouTube video with window lighting.
2. Home Lighting
Home lighting is another source of light that many new YouTubers use. In the past, when my window light wasn’t strong enough to light my video recording space, I would turn on the ceiling light.

Notice how the color of Daniel’s skin looks much more orange here (above) than the color of the skin in the two side-by-side window lighting examples? The side of the face also appears to look bluer. This all happened because he mixed up different color temperatures shining out of the two lights (cooler window light and warmer ceiling light).
Most home lighting is warmer in its color temperature. If you want to use your home lights without everything being orange-tinted, you’ll need to switch out your light bulbs for daytime LED light bulbs.
Ceiling lights are also typically situated in the center of a room in order to light an entire room evenly. This is not likely to be the best location for your filming video. Since the ceiling light was directly above the face in the above example, you can see harder shadows beneath his cheeks.
Part 2: Home Studio Lighting
If you rather not deal with all the window and home lighting challenges, you can set up studio lighting in your home.
1. Light Control
The first thing you’ll want to do to set up studio lighting in your home is to pick a room to film in and eliminate as much external lighting as you can. Use blinds, curtains, towels, or any thick fabric to block sunlight from shining into your room.
2. 3-Point Lighting
The most common setup for studio lighting is 3-point lighting. For this kind of lighting you’ll need three lights: a key light, a fill light, and a back light (also called a hair light).

Out of the three lights, the key light should be the brightest. When it is positioned to the left of you (as shown in the diagram above) your right side will have shadows.
To minimize the shadows on your right side, use a weaker light as a fill light. You don’t want your fill light to completely eliminate all your shadows or else your shot will look flat.
Lastly, a backlight positioned behind you can give an appealing highlight to the ends of your head and even help to separate your hair from blending into your background if both happen to be dark.
3. 4-Point Lighting
As a YouTuber, you may not only want yourself to be seen optimally with proper lighting, but you may also want your background to be seen optimally, especially if you’ve taken the time to decorate it for your audience.
What you’ll need to ensure that your background is sufficiently lit is 4-point lighting setup. The 4-point lighting setup is the same as a 3-point lighting setup, but with an additional light shining at your background.
For more information on lighting equipment, check out my Top 17 Video Lighting Equipment For YouTubers .
Touch Up YouTube Videos with Filmora
Filmora is one of the best video editing software for YouTube beginners to start the YouTube channel. So, if you find the lighting isn’t perfect after recording, you can use the Auto Color Enhancement feature in Filmora to adjust the color with one-click. Or, you can change the white balance, Light, color, and HSL manually. Filmora also features some presets and LUTs templates , which allows you to apply pre-programmed effects to video for color correction faster.


Richard Bennett
Richard Bennett is a writer and a lover of all things video.
Follow @Richard Bennett
Richard Bennett
Oct 26, 2023• Proven solutions
When it comes to sensitivity to light, no consumer-level camera sensor comes close in performance to the human eye. Many newbies to videography, though, don’t think about this when they use their camera indoors and discover that their recorded footage appears too dark.
If you want to use your camera indoors as many YouTubers do, you’ll need to have extra light. But the solution is not as simple as surrounding yourself with lamps that are all randomly placed.
Below, I’ll go into detail on how you can set up your lighting equipment to make your YouTube videos look good.
| Table of Contents Using Light You Already Have Window LightingHome Lighting Home Studio Lighting Light Control3-Point Lighting4-Point Lighting |
|---|
Part 1: Using Light You Already Have
Most beginner YouTubers light their videos with what they already have. That’s what I did to start as well. In the past, my video recording space consisted of natural sunlight coming from my window and ceiling light for times when the sunlight wasn’t strong enough.
1. Window Lighting
The best thing about window lighting is that it’s free. The worst thing about it is that it’s uncontrollable. The amount of light you get in your video can vary with all the changes in the weather.
Window lighting for me was especially difficult to work with because I live in a very rainy and cloudy city, Vancouver, Canada, where we pretty much just get three months of good sun.
Above are two freeze frames from one of Daniel’s past window-lit vlogs. Although these two frames are both from the same vlog, you can see that the image on the right looks brighter due to clearer skies at that moment. These varying amounts of light is what you will have to deal with if you choose to light your YouTube video with window lighting.
2. Home Lighting
Home lighting is another source of light that many new YouTubers use. In the past, when my window light wasn’t strong enough to light my video recording space, I would turn on the ceiling light.
Notice how the color of Daniel’s skin looks much more orange here (above) than the color of the skin in the two side-by-side window lighting examples? The side of the face also appears to look bluer. This all happened because he mixed up different color temperatures shining out of the two lights (cooler window light and warmer ceiling light).
Most home lighting is warmer in its color temperature. If you want to use your home lights without everything being orange-tinted, you’ll need to switch out your light bulbs for daytime LED light bulbs.
Ceiling lights are also typically situated in the center of a room in order to light an entire room evenly. This is not likely to be the best location for your filming video. Since the ceiling light was directly above the face in the above example, you can see harder shadows beneath his cheeks.
Part 2: Home Studio Lighting
If you rather not deal with all the window and home lighting challenges, you can set up studio lighting in your home.
1. Light Control
The first thing you’ll want to do to set up studio lighting in your home is to pick a room to film in and eliminate as much external lighting as you can. Use blinds, curtains, towels, or any thick fabric to block sunlight from shining into your room.
2. 3-Point Lighting
The most common setup for studio lighting is 3-point lighting. For this kind of lighting you’ll need three lights: a key light, a fill light, and a back light (also called a hair light).
Out of the three lights, the key light should be the brightest. When it is positioned to the left of you (as shown in the diagram above) your right side will have shadows.
To minimize the shadows on your right side, use a weaker light as a fill light. You don’t want your fill light to completely eliminate all your shadows or else your shot will look flat.
Lastly, a backlight positioned behind you can give an appealing highlight to the ends of your head and even help to separate your hair from blending into your background if both happen to be dark.
3. 4-Point Lighting
As a YouTuber, you may not only want yourself to be seen optimally with proper lighting, but you may also want your background to be seen optimally, especially if you’ve taken the time to decorate it for your audience.
What you’ll need to ensure that your background is sufficiently lit is 4-point lighting setup. The 4-point lighting setup is the same as a 3-point lighting setup, but with an additional light shining at your background.
For more information on lighting equipment, check out my Top 17 Video Lighting Equipment For YouTubers .
Touch Up YouTube Videos with Filmora
Filmora is one of the best video editing software for YouTube beginners to start the YouTube channel. So, if you find the lighting isn’t perfect after recording, you can use the Auto Color Enhancement feature in Filmora to adjust the color with one-click. Or, you can change the white balance, Light, color, and HSL manually. Filmora also features some presets and LUTs templates , which allows you to apply pre-programmed effects to video for color correction faster.
Richard Bennett
Richard Bennett is a writer and a lover of all things video.
Follow @Richard Bennett
Leading Links to Google’s Advertising Networks on Videos
FameBit Alternatives for Finding YouTube Sponsorships
Richard Bennett
Oct 26, 2023• Proven solutions
Famebit is the most popular influencer marketing platform, but there are lots of sites like Famebit where YouTube creators can find sponsorships. The key is to find one where you won’t be reduced to a database entry listing your channel’s genre and your subscriber count.
If you want to be valued for your talent then FameBit is a great choice, but it’s not your only choice. If you are serious about finding sponsorships and creating branded content then there is no reason you shouldn’t be on multiple platforms.
4 Alternatives to FameBit
Here are four influencer marketing platforms besides FameBit that cater to creators, not just brands.
Revfluence
Revfluence promises creators they will be able to ‘create content on their terms’. They work with both YouTubers and Instagrammers.
A lot of big fashion brands like Calvin Klein, Madewell, and Gap can be found on Revfluence. This platform is a must if you have a lifestyle, beauty, or fashion channel.
On Revfluence you can browse through brands instead of waiting for them to contact you. You choose which companies you want to endorse, so you never have to worry about losing your integrity in the eyes of your subscribers. Once you find a sponsor, you maintain control over how you choose to collaborate with them.

TapInfluence
TapInfluence might initially seem more brand-focused than equal, like FameBit, because it makes you wait for brands to select you. You are not simply on-call for any brand willing to pay, though.
After a brand approaches you, you get to examine their offer and decide whether you would feel proud to be associated with them.
The main thing that sets TapInfluence apart from other platforms where brands approach you is their attitude towards influencers and the way they define influence.
Some creators get turned off by the word ‘influencer’, and it is easy to understand why. Your subscriber count is important when you want to participate in an ad campaign, but your subscribers are not just numbers and you are not some kind of puppetmaster ‘influencing’ them for monetary gain.
TapInfluence values authenticity and works with brands that hold that same value. Your ability to be genuine with your audience is never compromised because it is that honest relationship that makes you valuable to brands.
Izea
Izea’s motto states that they champion the creators. They value you for whatever it is you already do, be it ranting vlogs or educational content.
When you create your profile on Izea you connect your YouTube account, and any other social media account you open to use for branded content. You also describe your audience and state your asking price.
Brands distribute their sponsorship opportunities to select groups of creators based on what they are looking for. Sponsors may approach you, or you can take matters into your own hands and approach brands with creative pitches.
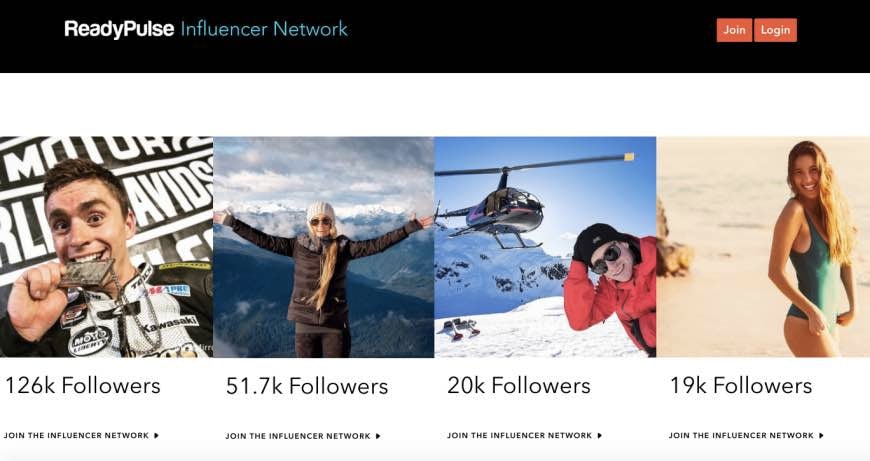
ReadyPulse
ReadyPulse is different from both FameBit and the other platforms on this list because you do not join brands for specific campaigns, you become a brand ambassador.
The idea is that you continue being you – creating the same style of content you already do – but you also have a relationship with a brand that you openly support and advocate for. The trust your subscribers have in you is supposed to be extended to your associated brands.
This is excellent if you have the opportunity to become a brand ambassador for a company you respect and are excited to work with. You can get all kinds of perks – like discounts and early releases – from your partner brand, and there is no reason you should not want your subscribers to trust the brand that you trust.
It becomes problematic if you find yourself matched with brands you do not have total confidence in, although ReadyPulse does try to match brands with influencers who are already fans of them.
Only you can decide if becoming a brand ambassador is right for you and your audience.
Do you know about any other sites like Famebit?
If you want to find a video editing solution that empowers your imagination and creativity yet takes less effort, please try this robust and user-friendly video editing software Wondershare Filmora, which will definitely enhance your productivity and helps you to make money by making videos much easier.
Richard Bennett
Richard Bennett is a writer and a lover of all things video.
Follow @Richard Bennett
Richard Bennett
Oct 26, 2023• Proven solutions
Famebit is the most popular influencer marketing platform, but there are lots of sites like Famebit where YouTube creators can find sponsorships. The key is to find one where you won’t be reduced to a database entry listing your channel’s genre and your subscriber count.
If you want to be valued for your talent then FameBit is a great choice, but it’s not your only choice. If you are serious about finding sponsorships and creating branded content then there is no reason you shouldn’t be on multiple platforms.
4 Alternatives to FameBit
Here are four influencer marketing platforms besides FameBit that cater to creators, not just brands.
Revfluence
Revfluence promises creators they will be able to ‘create content on their terms’. They work with both YouTubers and Instagrammers.
A lot of big fashion brands like Calvin Klein, Madewell, and Gap can be found on Revfluence. This platform is a must if you have a lifestyle, beauty, or fashion channel.
On Revfluence you can browse through brands instead of waiting for them to contact you. You choose which companies you want to endorse, so you never have to worry about losing your integrity in the eyes of your subscribers. Once you find a sponsor, you maintain control over how you choose to collaborate with them.
TapInfluence
TapInfluence might initially seem more brand-focused than equal, like FameBit, because it makes you wait for brands to select you. You are not simply on-call for any brand willing to pay, though.
After a brand approaches you, you get to examine their offer and decide whether you would feel proud to be associated with them.
The main thing that sets TapInfluence apart from other platforms where brands approach you is their attitude towards influencers and the way they define influence.
Some creators get turned off by the word ‘influencer’, and it is easy to understand why. Your subscriber count is important when you want to participate in an ad campaign, but your subscribers are not just numbers and you are not some kind of puppetmaster ‘influencing’ them for monetary gain.
TapInfluence values authenticity and works with brands that hold that same value. Your ability to be genuine with your audience is never compromised because it is that honest relationship that makes you valuable to brands.
Izea
Izea’s motto states that they champion the creators. They value you for whatever it is you already do, be it ranting vlogs or educational content.
When you create your profile on Izea you connect your YouTube account, and any other social media account you open to use for branded content. You also describe your audience and state your asking price.
Brands distribute their sponsorship opportunities to select groups of creators based on what they are looking for. Sponsors may approach you, or you can take matters into your own hands and approach brands with creative pitches.
ReadyPulse
ReadyPulse is different from both FameBit and the other platforms on this list because you do not join brands for specific campaigns, you become a brand ambassador.
The idea is that you continue being you – creating the same style of content you already do – but you also have a relationship with a brand that you openly support and advocate for. The trust your subscribers have in you is supposed to be extended to your associated brands.
This is excellent if you have the opportunity to become a brand ambassador for a company you respect and are excited to work with. You can get all kinds of perks – like discounts and early releases – from your partner brand, and there is no reason you should not want your subscribers to trust the brand that you trust.
It becomes problematic if you find yourself matched with brands you do not have total confidence in, although ReadyPulse does try to match brands with influencers who are already fans of them.
Only you can decide if becoming a brand ambassador is right for you and your audience.
Do you know about any other sites like Famebit?
If you want to find a video editing solution that empowers your imagination and creativity yet takes less effort, please try this robust and user-friendly video editing software Wondershare Filmora, which will definitely enhance your productivity and helps you to make money by making videos much easier.
Richard Bennett
Richard Bennett is a writer and a lover of all things video.
Follow @Richard Bennett
Also read:
- [New] 10 Premier Yoga Educators on YouTube for 2024
- [New] Channel Artistry in a Click 10 Prime Apps for Banner Crafting
- [New] Crafting Compelling Narratives with Strategic YouTube Banners
- [New] In 2024, Selling Success on Facebook Ideas and Strategies to Try
- [Updated] 2024 Approved Step-by-Step Strategies Downloading Audio on iPhones
- [Updated] Dissecting Your Profit Share in YouTube Short Creation
- [Updated] Evaluating Best YouTube Extractors Available on Android
- 2024 Approved Effortless Audio Integration for InShot Devices
- Escaping Frustration: A Comprehensive Fix for Fortnite Error 84 - Party Connection Problems.
- How To Fix Unresponsive Touch Screen on Poco C51 | Dr.fone
- Streamline Your Video's Acoustic Appeal on YouTube
- The Player's Handbook for Speed-Traveling in Minecraft Using Teleport Magic
- Unearthing the Hidden An Orderly Guide to Covert YouTube Videos
- Title: Step-by-Step Guide to Brighter YouTube Video Editing
- Author: Kevin
- Created at : 2024-12-03 17:17:19
- Updated at : 2024-12-10 17:04:43
- Link: https://youtube-videos.techidaily.com/step-by-step-guide-to-brighter-youtube-video-editing/
- License: This work is licensed under CC BY-NC-SA 4.0.