
:max_bytes(150000):strip_icc():format(webp)/samsungvoiceassistant-1c59910bc4614b2a8531fc5b7a754e7d.jpg)
"Stars of Tomorrow Perfecting Reaction Videos for Audiences Through Dual Perspectives"
Stars of Tomorrow: Perfecting Reaction Videos for Audiences Through Dual Perspectives
How to Make a YouTube Reaction Video?

Richard Bennett
Mar 27, 2024• Proven solutions
Sharing ideas and opinions on virtually any topic you can think of with millions of people around the world is arguably one of the greatest benefits YouTube gives to content creators. Even so, building your channel exclusively around reaction videos may prove to be difficult, but this doesn’t mean that you can’t use this type of video to comment on what other YouTubers are saying.
The process of making a YouTube reaction video is not overly technical, although you will have to decide which video editing technique you are going to use to make a reaction video. That is why in this article we are going to take a look at different ways to make a YouTube reaction video.
- Method 1: Making Reaction Videos with PIP feature in Filmora
- Method 2: Create YouTube Reaction Video with Split Screen Templates
- Method 3: Make A Reaction Video for YouTube with AI Portrait
How to Make a Reaction Video for Your YouTube Channel? [3 Ways]
Using the footage without the consent of the copyright owner is punishable by the law, which means that you can only include the footage in a reaction video if you have the owner’s consent. Consequently, the selection of videos you can comment on is going to be limited, since it is entirely up to the creator of the video if they are going to give you permission to use their footage in your reaction video.
You can use the following video editing techniques, once you have access to the video you would like to comment on.
Method 1: Making a reaction video with the Picture-in-Picture feature in Filmora
Video editing software, like Filmora , can also be used to create YouTube reaction videos, but you must have all the footage you would like to include in that video before you can start putting it together.
The first step is to create a new project in Filmora and then import the media assets into the editor. Besides video clips, you can also add music, pictures, or create opening titles and end credits for your reaction video.


Place the video you’re reacting to on a video track on the timeline and then add the video of your reaction to the timeline that is directly above the one to which you added the first video clip. Click on the top video in the preview window and use the handles that are positioned around the edges of the video to adjust its size.
If you would like to change the on-screen position of the overlay clip, you should simply click on it and drag it to the new location within the preview window.

Filmora offers more than sixty motion effects, hundreds of transitions, and visual effects that can make your reaction video more visually appealing to the audience.

Moreover, Filmora video editing software offers a variety of blending modes, and it lets you control the opacity of the overlay video so that you can make it more transparent. Whether or not you are going to use these options depends on the footage you’re working with and the demands of a particular project.
Pros of using the Picture in Picture feature to make reaction videos in Filmora: You can place and adjust the videos with more customizable options. Get more tips about Making a PIP video in Filmora .
Method 2: Create several reaction windows with the Split Screen feature
Besides the Picture-in-Picture option, Filmora also enables you to play two or more videos simultaneously with Split Screen templates. Drag and drop the template you want to use in your reaction video to the timeline and click on the Enable Split Screen Animation tick box if you want to use the template without animations.

Afterward, you should drag the video clips from the Media tab and drop them onto the section of the preview window where you want them to be located. Keep in mind that you cannot add more than six videos to a split-screen template.

All videos you add to a split-screen template can be edited, and you just have to click on them if you want to adjust their sizes, enhance colors, mute their audio tracks or add a new audio file to the template.
Check the details about How to make a split-screen video step by step.
Pros of using Split-screen template to make reaction video in Filmora: various templates for creating stylish video side by side easily.
Method 3: Create A YouTube Reaction Video with AI Portrait
With the human segmentation effect in AI Portrait, you can now blend the reaction video in a more natural way. The human segmentation effect will isolate people from the background, you can use any background in the video.
Note: You can use this feature after version after V 10.5 for Windows, and V 10.4 for Mac. Click the button below to get the latest version of Filmora on your desktop.
Step 1: Import the videos to the media library, and then drag the background video to the first video track, and the reaction video to the track above.

Step 2: Go to the Effects tab at the top, and click the AI Portrait category, and then you will see many effects such as Human Segmentation, Human Pixelate, Human Noise, and lighting flash. Here, drag and drop the Human segmentation effect to the reaction video.

Step 3: Select the reaction video in the timeline, and then adjust its size and position by dragging it on the preview window. See, the reaction video is fine blended with the background video.

Step 4: That’s the basic editing of making a reaction video. You can also add the neon or flashing effect to the video. If everything goes well, click Export and save the video.

You can find out more details about using the AI Portrait effect to make a reaction video .
How to Avoid Copyright Infringements While Making a YouTube Reaction Video
All videos you can find on YouTube are protected by intellectual property regulations, and you can’t use them without the copyright owner’s permission. The only way to avoid being absolutely sure that your reaction video isn’t violating the law is to contact the video creator and ask for permission to use their intellectual property. However, most YouTubers are reluctant to let others download and edit their videos unless they already have a large fan base.
In case you’re granted permission to comment on a video, you have nothing to worry about. However, if you don’t get the permission you’re all the money the reaction video generates will go to the copyright owner or you will be forced to delete the video from your channel. There are still a few things you can do, even if you don’t get permission to use the video you would like to comment on.
Muting the video’s audio or altering its pitch will make it more difficult for YouTube’s bots to detect copyright infringement, although this method may not always work. In addition, you can play a video for up to thirty seconds, then comment on that segment, and then play another segment of that video.
There is no way of saying whether any of these editing tricks are going to help you avoid a copyright claim, and you should only use them if you have no other option.
Conclusion
Anyone can master the technical aspects of making a reaction video, but the topics you react to need to be related to the general topic your channel covers. What’s more, the idea of your reaction video has to be relevant for your audience if you want to attract their attention. Which video editing techniques are you using to make a YouTube reaction video?
Download Mac Version ](https://tools.techidaily.com/wondershare/filmora/download/ )
Richard Bennett
Richard Bennett is a writer and a lover of all things video.
Follow @Richard Bennett
Richard Bennett
Mar 27, 2024• Proven solutions
Sharing ideas and opinions on virtually any topic you can think of with millions of people around the world is arguably one of the greatest benefits YouTube gives to content creators. Even so, building your channel exclusively around reaction videos may prove to be difficult, but this doesn’t mean that you can’t use this type of video to comment on what other YouTubers are saying.
The process of making a YouTube reaction video is not overly technical, although you will have to decide which video editing technique you are going to use to make a reaction video. That is why in this article we are going to take a look at different ways to make a YouTube reaction video.
- Method 1: Making Reaction Videos with PIP feature in Filmora
- Method 2: Create YouTube Reaction Video with Split Screen Templates
- Method 3: Make A Reaction Video for YouTube with AI Portrait
How to Make a Reaction Video for Your YouTube Channel? [3 Ways]
Using the footage without the consent of the copyright owner is punishable by the law, which means that you can only include the footage in a reaction video if you have the owner’s consent. Consequently, the selection of videos you can comment on is going to be limited, since it is entirely up to the creator of the video if they are going to give you permission to use their footage in your reaction video.
You can use the following video editing techniques, once you have access to the video you would like to comment on.
Method 1: Making a reaction video with the Picture-in-Picture feature in Filmora
Video editing software, like Filmora , can also be used to create YouTube reaction videos, but you must have all the footage you would like to include in that video before you can start putting it together.
The first step is to create a new project in Filmora and then import the media assets into the editor. Besides video clips, you can also add music, pictures, or create opening titles and end credits for your reaction video.
Place the video you’re reacting to on a video track on the timeline and then add the video of your reaction to the timeline that is directly above the one to which you added the first video clip. Click on the top video in the preview window and use the handles that are positioned around the edges of the video to adjust its size.
If you would like to change the on-screen position of the overlay clip, you should simply click on it and drag it to the new location within the preview window.
Filmora offers more than sixty motion effects, hundreds of transitions, and visual effects that can make your reaction video more visually appealing to the audience.
Moreover, Filmora video editing software offers a variety of blending modes, and it lets you control the opacity of the overlay video so that you can make it more transparent. Whether or not you are going to use these options depends on the footage you’re working with and the demands of a particular project.
Pros of using the Picture in Picture feature to make reaction videos in Filmora: You can place and adjust the videos with more customizable options. Get more tips about Making a PIP video in Filmora .
Method 2: Create several reaction windows with the Split Screen feature
Besides the Picture-in-Picture option, Filmora also enables you to play two or more videos simultaneously with Split Screen templates. Drag and drop the template you want to use in your reaction video to the timeline and click on the Enable Split Screen Animation tick box if you want to use the template without animations.
Afterward, you should drag the video clips from the Media tab and drop them onto the section of the preview window where you want them to be located. Keep in mind that you cannot add more than six videos to a split-screen template.
All videos you add to a split-screen template can be edited, and you just have to click on them if you want to adjust their sizes, enhance colors, mute their audio tracks or add a new audio file to the template.
Check the details about How to make a split-screen video step by step.
Pros of using Split-screen template to make reaction video in Filmora: various templates for creating stylish video side by side easily.
Method 3: Create A YouTube Reaction Video with AI Portrait
With the human segmentation effect in AI Portrait, you can now blend the reaction video in a more natural way. The human segmentation effect will isolate people from the background, you can use any background in the video.
Note: You can use this feature after version after V 10.5 for Windows, and V 10.4 for Mac. Click the button below to get the latest version of Filmora on your desktop.
Step 1: Import the videos to the media library, and then drag the background video to the first video track, and the reaction video to the track above.
Step 2: Go to the Effects tab at the top, and click the AI Portrait category, and then you will see many effects such as Human Segmentation, Human Pixelate, Human Noise, and lighting flash. Here, drag and drop the Human segmentation effect to the reaction video.
Step 3: Select the reaction video in the timeline, and then adjust its size and position by dragging it on the preview window. See, the reaction video is fine blended with the background video.
Step 4: That’s the basic editing of making a reaction video. You can also add the neon or flashing effect to the video. If everything goes well, click Export and save the video.
You can find out more details about using the AI Portrait effect to make a reaction video .
How to Avoid Copyright Infringements While Making a YouTube Reaction Video
All videos you can find on YouTube are protected by intellectual property regulations, and you can’t use them without the copyright owner’s permission. The only way to avoid being absolutely sure that your reaction video isn’t violating the law is to contact the video creator and ask for permission to use their intellectual property. However, most YouTubers are reluctant to let others download and edit their videos unless they already have a large fan base.
In case you’re granted permission to comment on a video, you have nothing to worry about. However, if you don’t get the permission you’re all the money the reaction video generates will go to the copyright owner or you will be forced to delete the video from your channel. There are still a few things you can do, even if you don’t get permission to use the video you would like to comment on.
Muting the video’s audio or altering its pitch will make it more difficult for YouTube’s bots to detect copyright infringement, although this method may not always work. In addition, you can play a video for up to thirty seconds, then comment on that segment, and then play another segment of that video.
There is no way of saying whether any of these editing tricks are going to help you avoid a copyright claim, and you should only use them if you have no other option.
Conclusion
Anyone can master the technical aspects of making a reaction video, but the topics you react to need to be related to the general topic your channel covers. What’s more, the idea of your reaction video has to be relevant for your audience if you want to attract their attention. Which video editing techniques are you using to make a YouTube reaction video?
Download Mac Version ](https://tools.techidaily.com/wondershare/filmora/download/ )
Richard Bennett
Richard Bennett is a writer and a lover of all things video.
Follow @Richard Bennett
Free and Uncomplicated YouTube Image Extractor Tools Reviewed
Best Free Downloaders: Download YouTube Thumbnail for Free[Online/Win/Mac]
Richard Bennett
Mar 27, 2024• Proven solutions
What is a YouTube thumbnail?
A YouTube thumbnail is nothing but the cover image shown on a video file on YouTube. It shows what you are going to talk about in the youtube video. A cool thumbnail will make the viewers want to click your video which in turn will help you to improve the traffic and number of clicks per video. Sometimes you may want to download youtube thumbnail from others. But it is very difficult to download a thumbnail directly from YouTube and many of you might not know that a thumbnail can be downloaded from elsewhere and then added to your content.
Here in this article, we will introduce the best 6 online tools available in the market to download YouTube thumbnail.
- 6 Online Tools to Download YouTube Thumbnail for Free
- Bonus Tips to Create a Clickable YouTube Thumbnail
6 Online Tools to Download YouTube Thumbnail for Free
Knowing the importance of YouTube thumbnails, you might now be wondering where to download the thumbnails for free. Let us have a look at some of the tools that can help you download YouTube thumbnail for free.
1. YouTube Thumbnail Image Tool
The YouTube Thumbnail Image Tool is a simple and free tool that helps you to download a thumbnail in four dimensions for your video, i.e. MQ 320*180, HQ 480*360, SD 640*480, and HD 1920*1080. Whether you are using a Windows or Mac OS, the thumbnail can be easily be downloaded via any browser.
Steps to Download:
- Open any browser and open this youtube thumbnail image tool from Here
- Copy the link from your youtube video
- Paste the URL link of the video in the box and hit on Search
- You will be then displayed different qualities of the thumbnail. Choose one (HD is recommended) and hit the Download button
The selected quality of thumbnail will be downloaded to your storage which can later be used while uploading a video to YouTube.
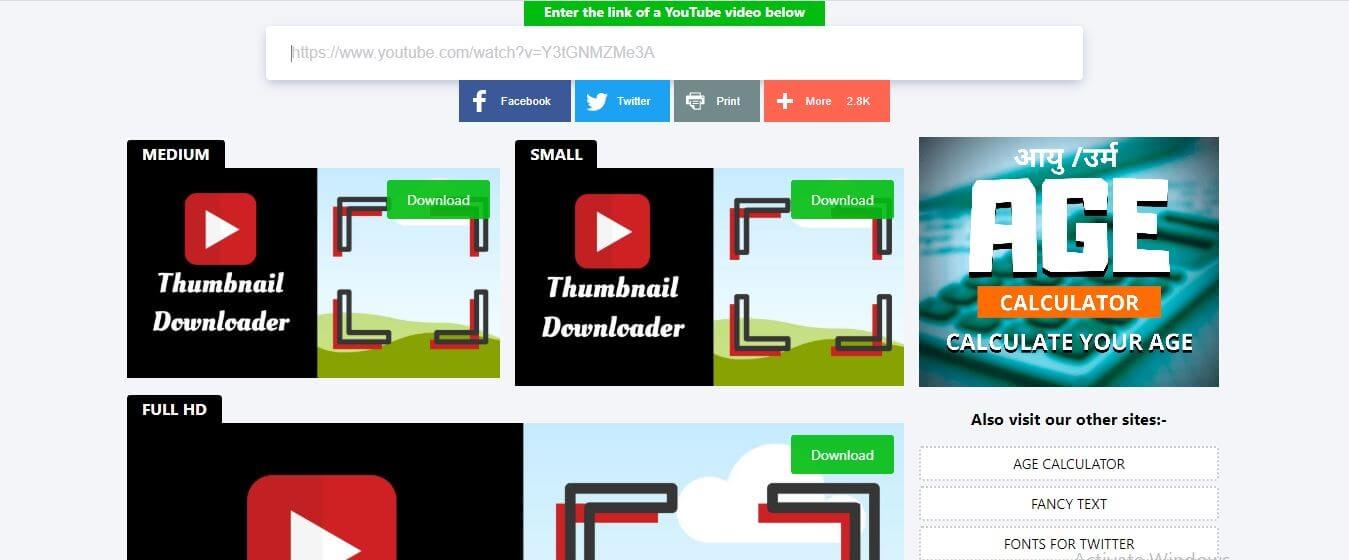
2. Online YouTube Thumbnail Downloader
This online YouTube Thumbnail Downloader tool has a lot of features among which creating thumbnail for a YouTube video is one. This free online tool can easily be accessed both on Windows and Mac OS via any browser. This downloader can generate thumbnails for videos in HD, HQ 1080p, and 4K formats and the thumbnails will be available in SD, HD(720), and Full HD(1080).
Steps to Download:
- Copy the link of the youtube video you wish to generate the thumbnail
- Click Here to open this free tool with your browser and paste the link in the box displayed at the top
- As soon as you paste the link, the available qualities of the thumbnail will be displayed just below the box
- Choose your desired quality of the image and hit on the Download button on the image you wish to download
The image will be downloaded and saved to your device instantly. You can now use it as a thumbnail for your YouTube video.
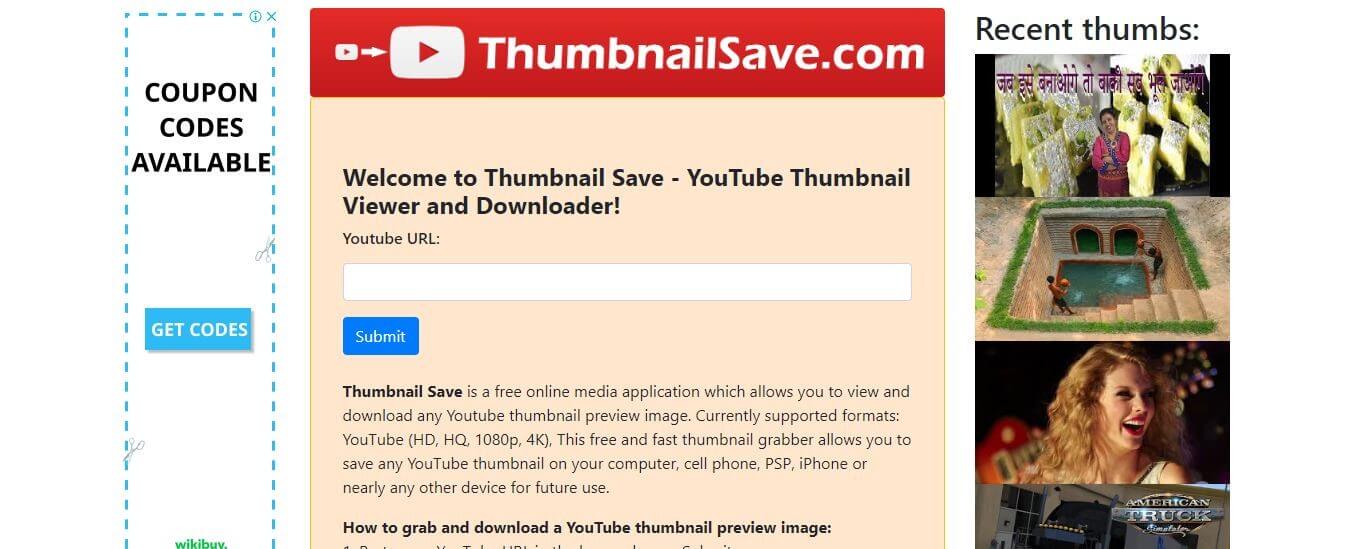
3. Thumbnail Save Tool
The Thumbnail Save Tool is also a free online tool which you can access from the browser of your Windows or Mac. It is a very simple tool that can generate thumbnails for HQ, HD, 1080P, and 4K videos instantly. Let us see how the thumbnail can be generated
Steps to Download:
- Copy the URL of the video you want to create thumbnail
- Open this Thumbnail Save Tool from Here via your browser
- Paste the copied link in the box above Submit and hit Submit. Then the thumbnail will be generated instantly
- Now, to save the generated image to your device, right-click on the thumbnail and select the Save image as… option
The image will be saved to your device for later use as a thumbnail for your YouTube video.
4. YouTube Thumbnail Grabber
The YouTube thumbnail grabber is an online tool that can help you to download a thumbnail from a YouTube video for free. This tool can simply be accessed both by windows and Mac users through any browser. This tool helps you to download a thumbnail in any quality in some simple steps. Let us see how.
Steps to Download:
- Open this youtube thumbnail grabber from Here with any browser. Then Copy the link of the youtube video.
- Paste the link in the box displayed on the page and hit the Get Thumbnails Image tab
- Five different qualities of thumbnails will be generated among which you can choose your desired quality
- Hit the Download button below the image you chose
The thumbnail will be downloaded to your device for later use.
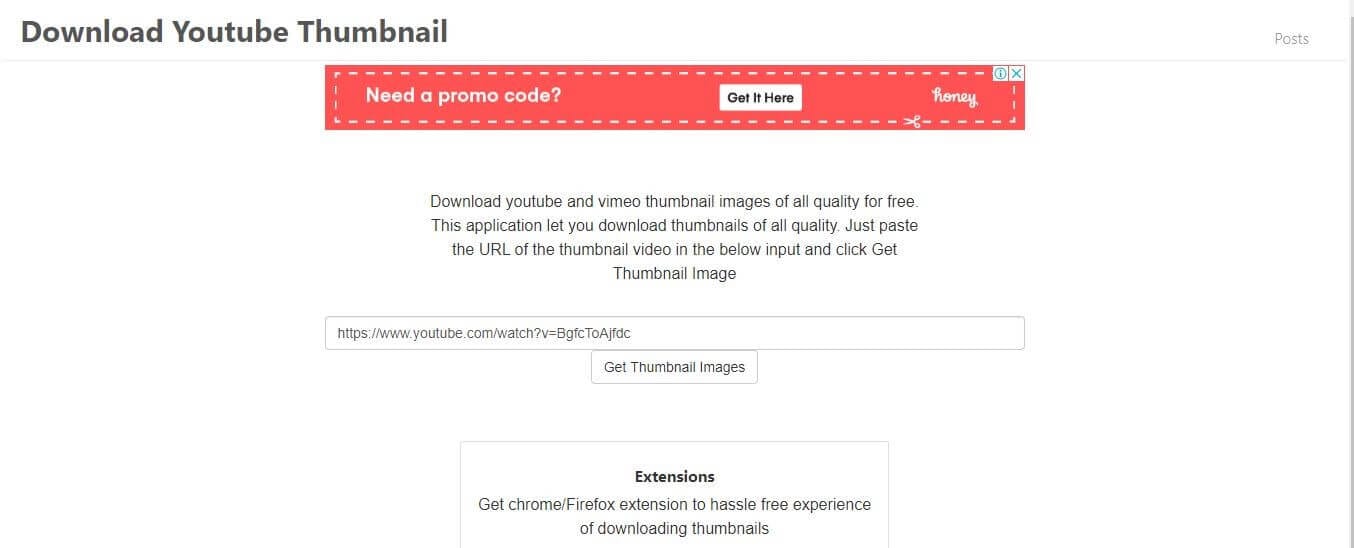
5. Thumbnail Download Tool
This thumbnail download tool allows generating thumbnails from video platforms like Dailymotion, Vimeo, Facebook, and YouTube. It is a free online tool that enables you to download the thumbnail of your video in the best quality. The tool can be accessed both on Windows and Mac OS without any issues. Let us see how the thumbnail can be downloaded for YouTube.
Steps to Download:
- Copy the URL link of the video you wish to generate a thumbnail
- Click Here to open this Thumbnail Download Tool with your browseron any browser of your Windows or iOS.
- Paste the copied link in the box and press the Download button
- Choose the picture size among the results displayed
- Save the picture to your PC
Your thumbnail image is now ready to be used.
6. YouTube Thumbnail Downloader
The YouTube Thumbnail Downloader is an online tool that can help you to create thumbnails for your YouTube videos and blogs. This tool will help you to download full HD 1080*720 images from YouTube for free, irrespective of the operative system you are using. Let us see how the thumbnail can be downloaded
Steps to Download:
- Copy the link of any YouTube video you wish to generate a thumbnail
- Click Here in your browser and Paste the link in the box
- Hit the Find button. Then different qualities of the image will be displayed
- Select your desired quality and tap on the download icon on the respective image
The image will now be saved to your device
Bonus Tips to Create a Clickable YouTube Thumbnail
Don’t know how to create a clickable youtube thumbnail? Here we will recommend 5 tips for you!
1. Great thumbnail image quality and size
The thumbnail image quality should be good (HD/UHD). It should be bright. No matter what the device (a large TV) the viewers are using, care must be taken to avoid getting blurry thumbnails. The quality and the correct size of the thumbnail will create a positive image of the video in the user’s mind even before viewing the video. The video must be viewed from a variety of devices to test if the quality differs in different devices. Here are some specs for a perfect thumbnail
- The image formats should be in GIF, JPG PNG OR BMP
- The maximum size of the image must be 1280*720 px
- The minimum size 640*360 px
- The aspect ratio 16:9
- The maximum file size 2MB
2. Show a person in the Thumbnail image
A human face will get you closer to your audience. Our brain is wired in a way that a human face will draw its attention more than anything. So the users will naturally would an image with a human delivering the content rather than a robot or just a video of nonliving things. People tend to find a connection with the characters displayed on the thumbnail and hence prompting them to click on the video.
3. Use descriptive text in your thumbnail with branding elements
It is not completely possible to deliver a message through a picture and hence try to use descriptive texts. The texts should be clear enough and must be phrased in a manner that increases the curiosity or appeals to the emotions of the viewers. People tend to click a video just because of curiosity, wanting to know what the content is about. The type of font, color, and size also plays an important role in catching the attention of the audience.
4. Make Color Contrast between the text and background
Complementary colors will make your thumbnail stand out to some extent. Combining a yellow background with a purple foreground or green with red will make it easier to draw the attention of the browsers. Also, the use of analogous colors in the thumbnail makes it more attractive and pleasing to the eye.
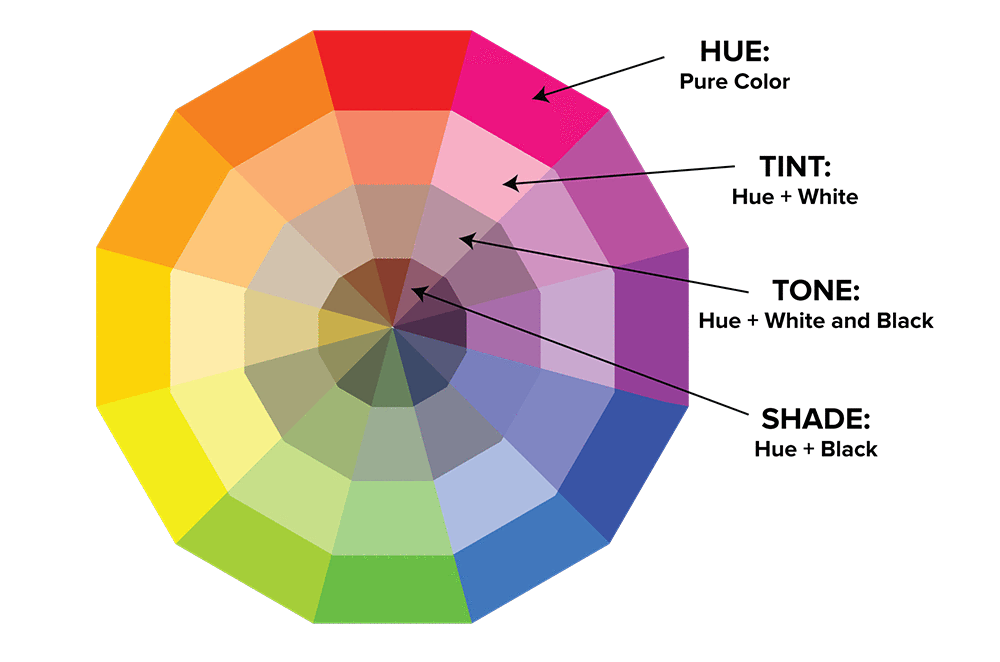
Image resource: Pinterest
Analogous colors are the colors that appear next to each other on a color wheel
5. Consistency
Consistency is something most of the people prefer and makes a thing more attractive. A thumbnail video with consistent text font, color tuning, visual effect, etc. will catch the eye of the users as it will stand apart in the whole webpage. Consistency adds to the standards of a video and will make people feel that this video is productive or from an authentic source
Create Your Own YouTube Thumbnail with Filmora for Free
Now that we have learned about how to download YouTube thumbnail for free and the rules you should follows, you may want to create a thumbnail. There are many Youtube thumbnail makers on the market that can help you create a YouTube thumbnail like Canva, PixStudio and more. However, we would like to be different today and recommend Filmora to you.
The benefits of using Filmora to create your YouTube thumbnail is that you don’t need to look for other softwares. You can make a thumbnail while you are editing your video with Filmora easily.
Wondering how can you do it? Here is a video guide for you.
Conclusion
Getting the proper size and quality of a YouTube thumbnail is very important for activities like blogging, designing, etc. Here in this article, we have described how to download YouTube thumbnail from the best free downloaders available online in simple steps. These Thumbnail downloading tools can be accessed from any device with an internet connection and will help you to download the perfect thumbnail image of your choice within minutes. Please leave your feedback about our suggestions in the comment box below.
Richard Bennett
Richard Bennett is a writer and a lover of all things video.
Follow @Richard Bennett
Richard Bennett
Mar 27, 2024• Proven solutions
What is a YouTube thumbnail?
A YouTube thumbnail is nothing but the cover image shown on a video file on YouTube. It shows what you are going to talk about in the youtube video. A cool thumbnail will make the viewers want to click your video which in turn will help you to improve the traffic and number of clicks per video. Sometimes you may want to download youtube thumbnail from others. But it is very difficult to download a thumbnail directly from YouTube and many of you might not know that a thumbnail can be downloaded from elsewhere and then added to your content.
Here in this article, we will introduce the best 6 online tools available in the market to download YouTube thumbnail.
- 6 Online Tools to Download YouTube Thumbnail for Free
- Bonus Tips to Create a Clickable YouTube Thumbnail
6 Online Tools to Download YouTube Thumbnail for Free
Knowing the importance of YouTube thumbnails, you might now be wondering where to download the thumbnails for free. Let us have a look at some of the tools that can help you download YouTube thumbnail for free.
1. YouTube Thumbnail Image Tool
The YouTube Thumbnail Image Tool is a simple and free tool that helps you to download a thumbnail in four dimensions for your video, i.e. MQ 320*180, HQ 480*360, SD 640*480, and HD 1920*1080. Whether you are using a Windows or Mac OS, the thumbnail can be easily be downloaded via any browser.
Steps to Download:
- Open any browser and open this youtube thumbnail image tool from Here
- Copy the link from your youtube video
- Paste the URL link of the video in the box and hit on Search
- You will be then displayed different qualities of the thumbnail. Choose one (HD is recommended) and hit the Download button
The selected quality of thumbnail will be downloaded to your storage which can later be used while uploading a video to YouTube.
2. Online YouTube Thumbnail Downloader
This online YouTube Thumbnail Downloader tool has a lot of features among which creating thumbnail for a YouTube video is one. This free online tool can easily be accessed both on Windows and Mac OS via any browser. This downloader can generate thumbnails for videos in HD, HQ 1080p, and 4K formats and the thumbnails will be available in SD, HD(720), and Full HD(1080).
Steps to Download:
- Copy the link of the youtube video you wish to generate the thumbnail
- Click Here to open this free tool with your browser and paste the link in the box displayed at the top
- As soon as you paste the link, the available qualities of the thumbnail will be displayed just below the box
- Choose your desired quality of the image and hit on the Download button on the image you wish to download
The image will be downloaded and saved to your device instantly. You can now use it as a thumbnail for your YouTube video.
3. Thumbnail Save Tool
The Thumbnail Save Tool is also a free online tool which you can access from the browser of your Windows or Mac. It is a very simple tool that can generate thumbnails for HQ, HD, 1080P, and 4K videos instantly. Let us see how the thumbnail can be generated
Steps to Download:
- Copy the URL of the video you want to create thumbnail
- Open this Thumbnail Save Tool from Here via your browser
- Paste the copied link in the box above Submit and hit Submit. Then the thumbnail will be generated instantly
- Now, to save the generated image to your device, right-click on the thumbnail and select the Save image as… option
The image will be saved to your device for later use as a thumbnail for your YouTube video.
4. YouTube Thumbnail Grabber
The YouTube thumbnail grabber is an online tool that can help you to download a thumbnail from a YouTube video for free. This tool can simply be accessed both by windows and Mac users through any browser. This tool helps you to download a thumbnail in any quality in some simple steps. Let us see how.
Steps to Download:
- Open this youtube thumbnail grabber from Here with any browser. Then Copy the link of the youtube video.
- Paste the link in the box displayed on the page and hit the Get Thumbnails Image tab
- Five different qualities of thumbnails will be generated among which you can choose your desired quality
- Hit the Download button below the image you chose
The thumbnail will be downloaded to your device for later use.
5. Thumbnail Download Tool
This thumbnail download tool allows generating thumbnails from video platforms like Dailymotion, Vimeo, Facebook, and YouTube. It is a free online tool that enables you to download the thumbnail of your video in the best quality. The tool can be accessed both on Windows and Mac OS without any issues. Let us see how the thumbnail can be downloaded for YouTube.
Steps to Download:
- Copy the URL link of the video you wish to generate a thumbnail
- Click Here to open this Thumbnail Download Tool with your browseron any browser of your Windows or iOS.
- Paste the copied link in the box and press the Download button
- Choose the picture size among the results displayed
- Save the picture to your PC
Your thumbnail image is now ready to be used.
6. YouTube Thumbnail Downloader
The YouTube Thumbnail Downloader is an online tool that can help you to create thumbnails for your YouTube videos and blogs. This tool will help you to download full HD 1080*720 images from YouTube for free, irrespective of the operative system you are using. Let us see how the thumbnail can be downloaded
Steps to Download:
- Copy the link of any YouTube video you wish to generate a thumbnail
- Click Here in your browser and Paste the link in the box
- Hit the Find button. Then different qualities of the image will be displayed
- Select your desired quality and tap on the download icon on the respective image
The image will now be saved to your device
Bonus Tips to Create a Clickable YouTube Thumbnail
Don’t know how to create a clickable youtube thumbnail? Here we will recommend 5 tips for you!
1. Great thumbnail image quality and size
The thumbnail image quality should be good (HD/UHD). It should be bright. No matter what the device (a large TV) the viewers are using, care must be taken to avoid getting blurry thumbnails. The quality and the correct size of the thumbnail will create a positive image of the video in the user’s mind even before viewing the video. The video must be viewed from a variety of devices to test if the quality differs in different devices. Here are some specs for a perfect thumbnail
- The image formats should be in GIF, JPG PNG OR BMP
- The maximum size of the image must be 1280*720 px
- The minimum size 640*360 px
- The aspect ratio 16:9
- The maximum file size 2MB
2. Show a person in the Thumbnail image
A human face will get you closer to your audience. Our brain is wired in a way that a human face will draw its attention more than anything. So the users will naturally would an image with a human delivering the content rather than a robot or just a video of nonliving things. People tend to find a connection with the characters displayed on the thumbnail and hence prompting them to click on the video.
3. Use descriptive text in your thumbnail with branding elements
It is not completely possible to deliver a message through a picture and hence try to use descriptive texts. The texts should be clear enough and must be phrased in a manner that increases the curiosity or appeals to the emotions of the viewers. People tend to click a video just because of curiosity, wanting to know what the content is about. The type of font, color, and size also plays an important role in catching the attention of the audience.
4. Make Color Contrast between the text and background
Complementary colors will make your thumbnail stand out to some extent. Combining a yellow background with a purple foreground or green with red will make it easier to draw the attention of the browsers. Also, the use of analogous colors in the thumbnail makes it more attractive and pleasing to the eye.
Image resource: Pinterest
Analogous colors are the colors that appear next to each other on a color wheel
5. Consistency
Consistency is something most of the people prefer and makes a thing more attractive. A thumbnail video with consistent text font, color tuning, visual effect, etc. will catch the eye of the users as it will stand apart in the whole webpage. Consistency adds to the standards of a video and will make people feel that this video is productive or from an authentic source
Create Your Own YouTube Thumbnail with Filmora for Free
Now that we have learned about how to download YouTube thumbnail for free and the rules you should follows, you may want to create a thumbnail. There are many Youtube thumbnail makers on the market that can help you create a YouTube thumbnail like Canva, PixStudio and more. However, we would like to be different today and recommend Filmora to you.
The benefits of using Filmora to create your YouTube thumbnail is that you don’t need to look for other softwares. You can make a thumbnail while you are editing your video with Filmora easily.
Wondering how can you do it? Here is a video guide for you.
Conclusion
Getting the proper size and quality of a YouTube thumbnail is very important for activities like blogging, designing, etc. Here in this article, we have described how to download YouTube thumbnail from the best free downloaders available online in simple steps. These Thumbnail downloading tools can be accessed from any device with an internet connection and will help you to download the perfect thumbnail image of your choice within minutes. Please leave your feedback about our suggestions in the comment box below.
Richard Bennett
Richard Bennett is a writer and a lover of all things video.
Follow @Richard Bennett
Also read:
- Unlock a Broader Audience Strategies for Multistreaming on Youtube and Twitch
- Screen Solidarities Picking the Right Media Company
- [New] Enhance YouTube Livestreams Webcam Selection Mastery
- [Updated] Efficient Strategies for Saving Youtube Thumbnails on Any OS
- Unlocking Video Potential YouTube to IGTV
- Game Masters YouTube Money Hacks
- Boosting Engagement Customizing Your Shorts' First Impressions
- 2024 Approved Enhancing On-Screen Appeal Essential Tips for Talking-Head Shots
- In 2024, Audio Outliers Best Sound Distortion Apps for Your Device
- Fixed YouTube's Missing Minute Media
- The Complete Guide to Crafting YouTube Masterpieces
- In 2024, Blueprint Strategies for Authentic Life Enrichment Videos
- [Updated] Beginner's Steps to Broadcast on Youtube via OBS
- [Updated] Effortless Entertainment Galore Top Free Film Series on YouTube
- Rapidly Increase Views Effective Growth Hacks for Channels
- [New] Discover 8 Trusted Platforms for Online Video Advancement
- [Updated] Chart a Course for Success Top 5 Effective Video Marketing Strategies on YouTube
- [Updated] Best iPhone & Android Photo & Video Capture Applications Reviewed
- 2024 Approved Android & iOS The Best Sound Distortion Tools
- Counteracting Bot Influence for Higher Traffic
- [Updated] Enhance Visibility & Engagement Vlog's SEO Arsenal
- How to Transform Smartphone Capabilities Into a Professional YT Channel
- In 2024, Brightening Filmmaking Ranking the 17 Best Lights
- 2024 Approved Elevate Your Online Presence with Expert Streaming Guide
- Uncovering YouTube's Top Viewed Comments
- [New] Conquer Zero Viewers 10 Essential Tips for Video Popularity
- Crafting a Narrative Template for Online Educational Videos
- In 2024, All About iPhone 14 Plus Unlock Chip You Need to Know
- Updated In 2024, 10 Exceptional Explainer Video Creation Platforms
- Updated Follow a Few Simple Steps and Learn How to Create a Professional Glowing Edge Effect to Your Videos in Filmora
- 2024 Approved Best 15 Greatest Claymation Movies of All Time
- Essential Knowledge on Discord Stickers for 2024
- Why Does My Vivo V29 Pro Keep Turning Off By Itself? 6 Fixes Are Here | Dr.fone
- Crafting Compelling GoPro Livestreams on Facebook & Periscope
- In 2024, How to Change OnePlus 12R Location on Skout | Dr.fone
- In 2024, 8 Best Apps for Screen Mirroring Samsung Galaxy M54 5G PC | Dr.fone
- 2024 Approved Navigating IGTV A Video Uploading Handbook
- [New] In 2024, 10 Best Online Learning Sites Like Udemy
- [New] 2024 Approved OBS Vs Twitch Studio Which Is Better?
- Updated In 2024, Is Auto-Gain Control Effective in Optimizing Speech Intelligibility?
- Unlock Your Apple iPhone 13 in Minutes with ICCID Code Everything You Need to Know
- In 2024, Quick Methods for Saving Videos on YouTube
- [Updated] Greenhouse Gatherings The Best Farm Titles for Group Joy for 2024
- Fixed Microsoft Excel 2007 Cannot Access the File Error | Stellar
- [Updated] In 2024, Shoot Past TikTok The Top 5 Social Network Alternatives
- [New] PC Guide Extract Twitter's Funny Images for 2024
- [Updated] Unveiling User Experiences TikTok and Snap's Comparison for 2024
- In 2024, How To Remove Flashlight From iPhone 11 Lock Screen
- How to Send and Fake Live Location on Facebook Messenger Of your Motorola G54 5G | Dr.fone
- Title: "Stars of Tomorrow Perfecting Reaction Videos for Audiences Through Dual Perspectives"
- Author: Kevin
- Created at : 2024-05-25 16:17:57
- Updated at : 2024-05-26 16:17:57
- Link: https://youtube-videos.techidaily.com/stars-of-tomorrow-perfecting-reaction-videos-for-audiences-through-dual-perspectives/
- License: This work is licensed under CC BY-NC-SA 4.0.
