
:max_bytes(150000):strip_icc()/hitachi-roku-tv-example-a-57f7be5c5f9b586c355d1bd4.jpg)
Stand Out in a Crowd with These 10 YouTube Theme Innovators
Stand Out in a Crowd with These 10 YouTube Theme Innovators
Youtube Banners Makers: 10+ Online Tools to Create Channel Art

Richard Bennett
Mar 27, 2024• Proven solutions
If you want to have more fans on your YouTube channel, it becomes really important to make your channel more attractive and fresh. YouTube banner is one of the important factors which represents the style, quality, and taste of your channel. Fortunately, there are many tools on the market that can help you make attractive banners. Therefore, we have brought you 10+ best-known YouTube banner makers that can enhance the beauty of your channel with their exceptionally amazing features. We will also let you know how to make a YouTube banner. Let’s explore.
You may also like: How to add custom thumbnails to YouTube videos >>
- Part 1: YouTube Banner Dimensions You Should Know
- Part 2: How to Make a YouTube Banner with Canva for Free
- Part 3: 10+ Best YouTube Banner Makers
Part 1: YouTube Banner Dimensions You Should Know
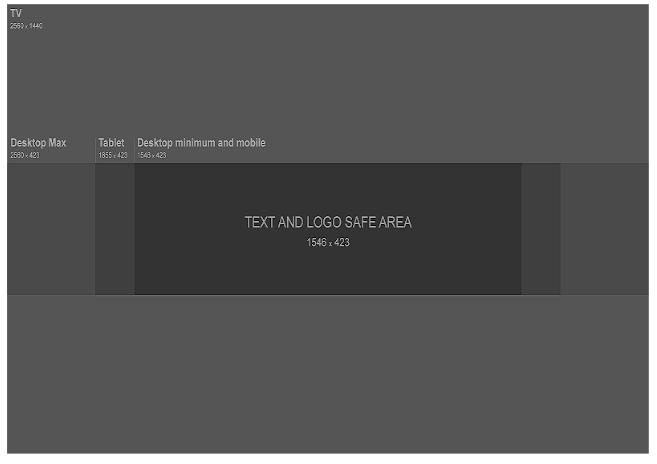
YouTube banner dimensions varied on different platforms, so you need to make the YouTube banner look great on desktop, tablet, and phone. According to Google , the recommended dimension is 2560 x 1440 px as the YouTube banner will be cropped if its size is too large. Minimum dimension is 2048 x 1152 px for uploading. The maximum width is 2560 x 423 px. The largest file size is 6MB. You can also add links to your own social media on YouTube banner, so it is a great place to recommend your other social media.
Part 2: How to Make a YouTube Banner with Canva for Free
There are so many tools that you can make a YouTube banner in the market, but it is not easy to find the right tool to make a banner if you can’t find the right tools. We have listed one way to make a YouTube banner below. You can use Wondershare Filmora to edit YouTube videos as it is designed to be a YouTube editor. Besides the basic editing including cropping/trimming and adding transitions, you can use it to add various text, more than 300 effects/filters, free audio, and more. It is also easy to make a YouTube intro. Download it to have a try!
 Download Mac Version ](https://tools.techidaily.com/wondershare/filmora/download/ )
Step 1: Choose your template and layout
Canva is an online tool to make YouTube banner, so first you need to open it up . You are asked to log in.
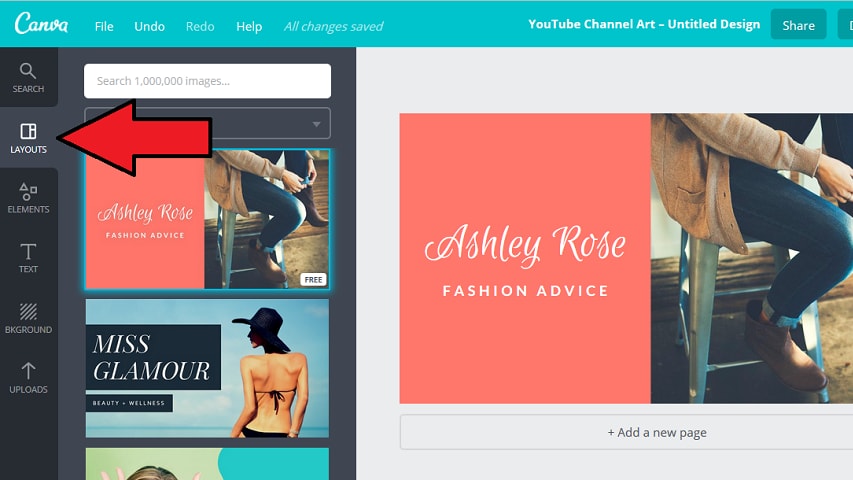
After you’ve signed up for Canva you will see a variety of different templates. Scroll through them until you find YouTube Channel Art under Social Media & Email Headers.
This template will be the right size for a YouTube banner, but it will not show you the ‘safe zones’. Your banner will show up differently depending on the screen a viewer is watching on. Click here to download YouTube’s official template, which displays safe zones. You will be able to use it as a reference.
And Canva also provides you with sample layouts that you can build off of. They will include stock photos and text. Most are free, but some might cost a dollar.
If the one you happen to like isn’t free, don’t worry. It’s actually just the specific stock images being used in the example that cost money, and you’re probably planning on replacing those anyways.
Step 2: Import your image
Canva provides a selection of stock images you can use for free. You can find them by clicking on Elements in the menu on the far left, and then clicking on Free Photos.
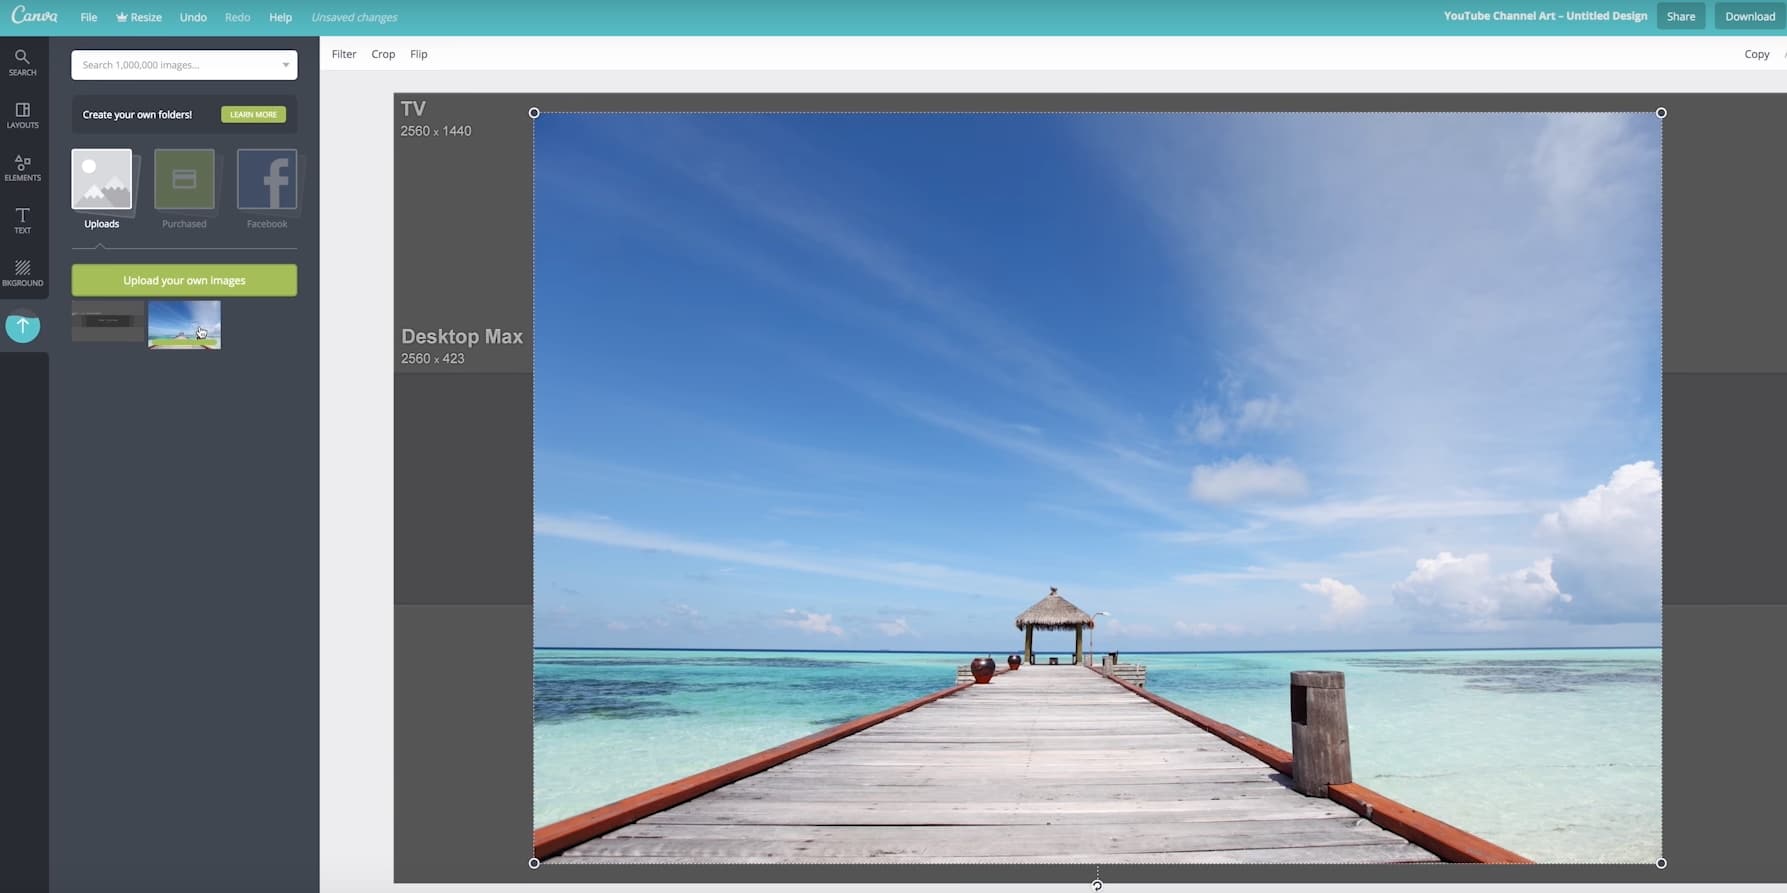
If you’d rather use your own images, click on Upload at the bottom of that same menu on the left. You’ll have the option of uploading images from your computer or importing them from Facebook.
After you have found the image you want to use or loaded it into Canva, click on it and it will appear in your layout.
Step 3: Add text to YouTube banner
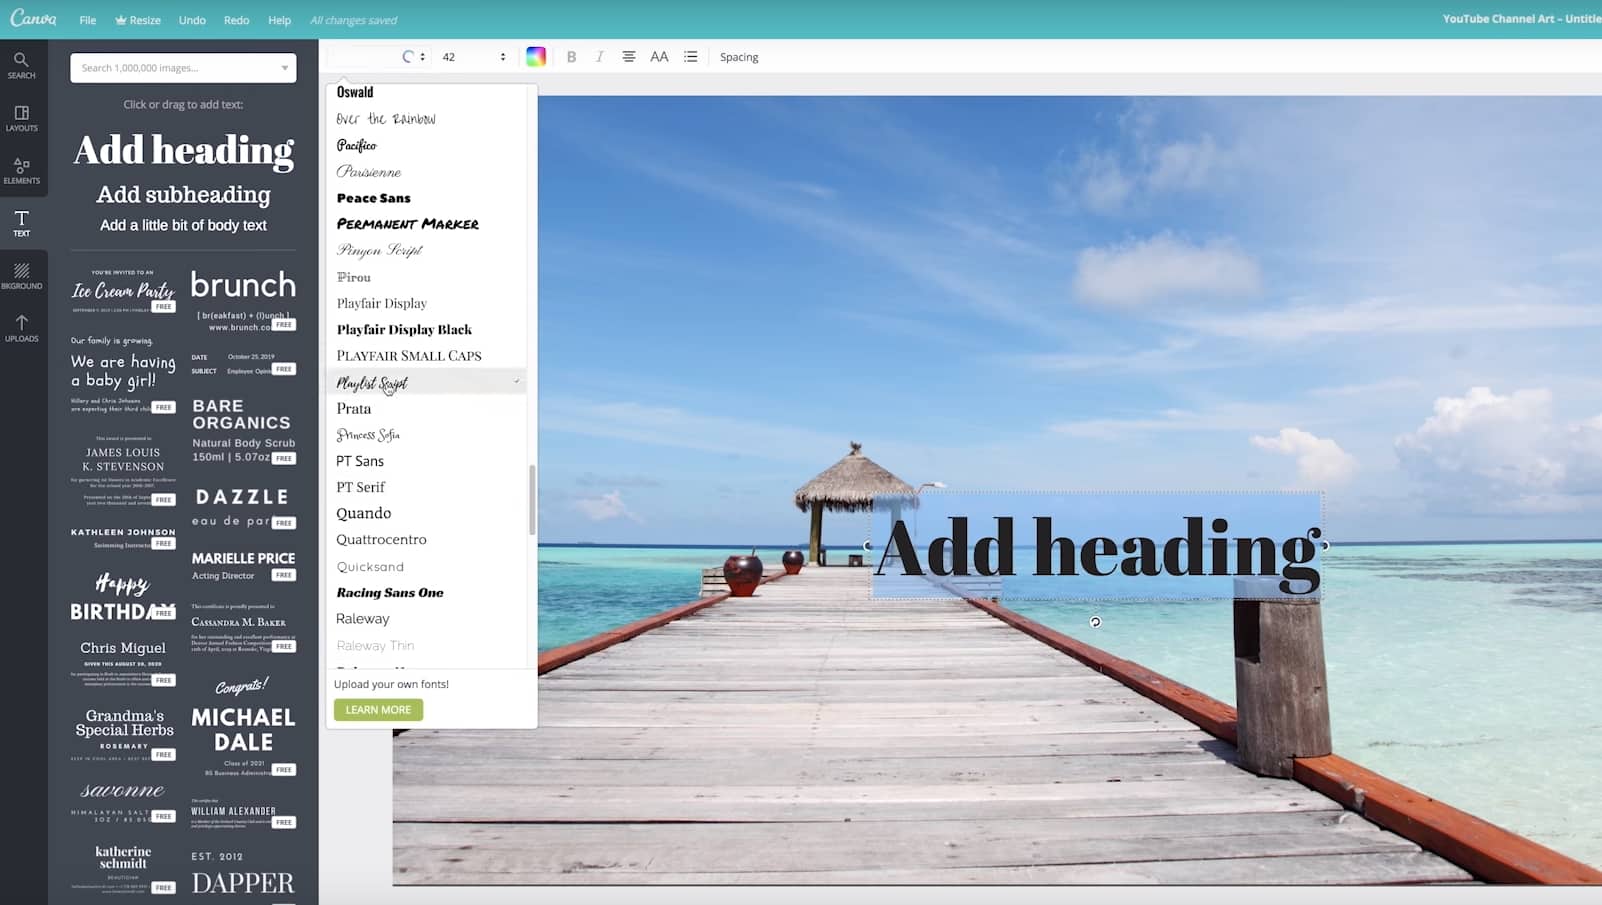
You can add various text after it is imported. There are lots of text templates in Canva, so just pick the one you like. You can also change text color and transparency to make it look great. Now to place it in the right position.
Step 4: Edit other elements
The layout you chose might include things like borders or backgrounds behind the text. You can change the colors of any of these just by clicking on them, then clicking on the color swatch in the top left corner of your design area.

Step 5: Download YouTube banner
Once you finish the editing, there is a download button in the top right corner of your screen. Click on it when you are finished to save your new channel art to your computer. It supports JPEG, PNG, and PDF. Now upload it to YouTube. So simple. Isn’t it?

Part 3: 10+ Best YouTube Banner Makers
1. Canva:
Canva is probably the most popular site for making channel art, for good reason. It has over 8000 templates for different kinds of graphics, including YouTube channel art, and there’s a huge variety of stock photos available either for free or $1. On Canva, creating your perfect banner is as easy as dragging and dropping images into a pre-built layout. Resizing is automatic, and you can flip/rotate or apply filters in just a few clicks
Pros: It contains millions of stock images, about 100 professional layouts, and lots of stunning filters.
Cons: Some high-quality images can be accessed only after payment of $1.
Price: The best thing to know is that this tool is available for free.
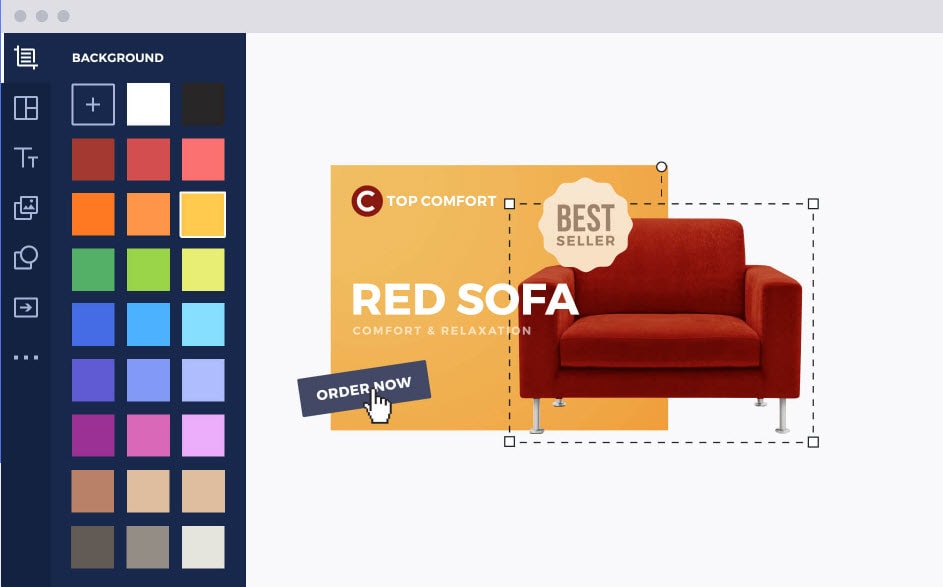
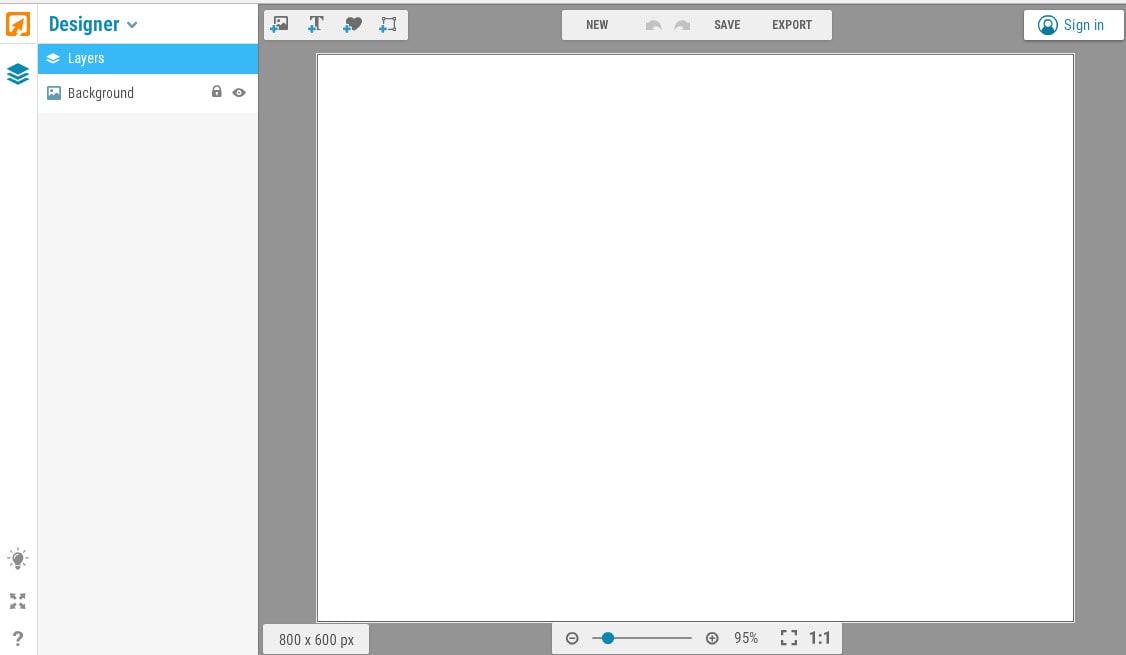
2. Wondershare PixStudio

Wondershare PixStudio is an all-in-one and powerful online graphic design maker for everyone. It has various types of templates for YouTube Thumbnails, Logos, Posters, etc. You can create a beautiful design by simply dragging and dropping the elements and photos. The online platform is free to use all templates, just One-Click to download your creations, and share to your Facebook, Instagram Story, and YouTube Thumbnails, etc. immediately.
Pros:
- Various types of templates
- Simple and Fast Design
- Background remover
Cons: The features of removing background be used after payment of $7.99 per month.
Price: The best thing to know is that this tool is available for free.
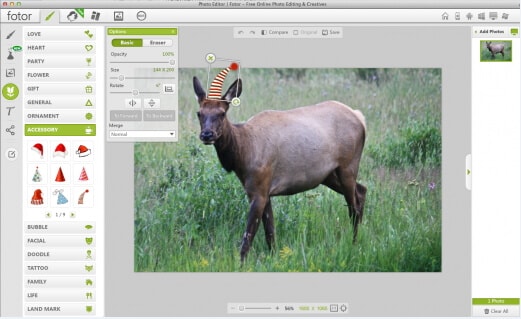
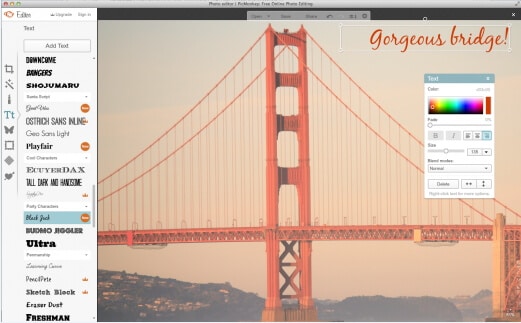
3. Fotor:
The makers of Fotor describe it as a ‘revolutionary photo editor and graphic designer’, and it is certainly a powerful tool. Fotor allows you to do a lot of fine editing on your photos – brightness, saturation, and color temperature are just a few of the things you can adjust – and its design feature is perfect for YouTube channel art.
Fotor has templates for YouTube channel art and a lot of fun sticker-like graphics. The Design interface is very similar to Canva, if slightly more complicated.
Pros: Complete art can be created within a few minutes and contains dozens of templates.
Cons: Little difficult to use for beginners.
Price: Free
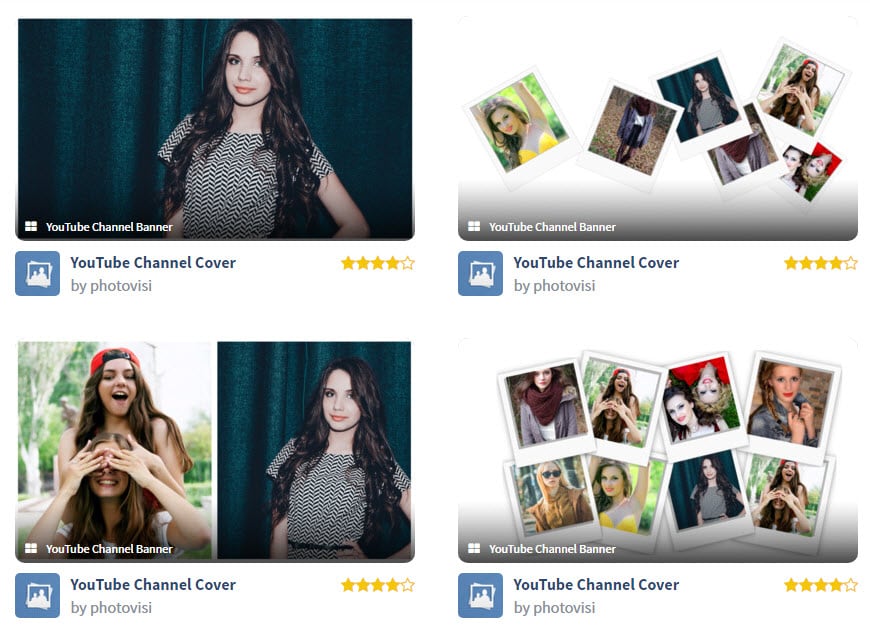
4. Photovisi:
It is a great source of inspiration for your YouTube channel where you can easily design, save and share your customized banner.
Pros: It automatically adjusts the size of the banner to the required format and is loaded with unlimited themes. Works on Android, Windows, Mac, and iOS.
Cons: Demand some special skills for usage.
Price: It is available for free at the official website
5. iKomee:
It is possible to have customized results for your YouTube banner designing using the iKomee platform where few minutes are enough to create wonders. It is one of the most loved tools of all professionals.
Pros: Contains lots of cool templates for channel art.
Cons: Limited themes and layouts.
Price: Available for free.

6. Banners Nack:
Here is one of the most wonderful YouTube banner maker for you that can be accessed online with easy to use interface where one can design animated, static HTML5 with interactive banner ads.
Pros: Professional, easy to use platform with rich quality fonts, stock images, and animated effects.
Cons: Little costly.
Price: Users can go ahead with premium plans where the basic plan is worth $12/month and a professional plan is $18/month with a business plan offer of $24 per month.
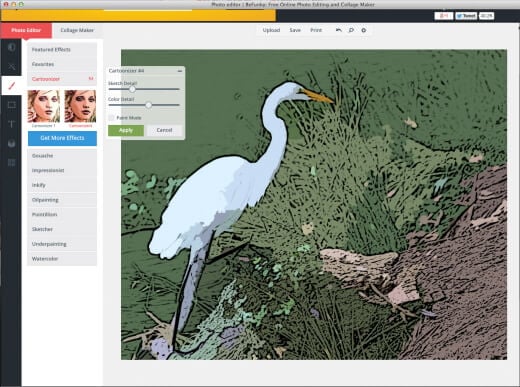
7. BeFunky:
BeFunky allows users to create meaningful banners for YouTube business building. The platform consists of numerous effortless options for banner designs and the drag and drops features make everything much easier. It is possible to boost traffic on your YouTube channel with this highly ranked banner maker.
Pros: Four-step banner-making process that can be followed by beginners too.
Cons: The uploading and downloading process takes more time due to heavy projects.
Price: Get started for free.
8. Picmonkey:
With PicMonkey.com you will be able to get customized, readymade banners with a perfect look. It is much easier to make selections for fonts, colors, and graphics with advanced templates here.
Pros: The best platform to enhance your creativity; users will be able to get perfect sharpness of quality.
Cons: File size is more for output banner and special features can be accessed only after payment.
Price: Free trial.
9. iPiccy:
The number of steps to be followed for designing a YouTube banner here completely depends upon your demand of end banner design type. Generally, four-step method is capable enough to provide you professional output with proper cropping dimensions and small file size for download
Pros: Various additional features are available like adding text etc so that highly customized designs can be created for YouTube Banners.
Cons: Demands more time of the user for making quality banner.
Price: Get started for free within a few seconds.
10. Adobe Spark:
Adobe Spark is one of the amazing online YouTube banner makers that helps you create the desired banner for your YouTube channel with ease. All that you need to do is browse to the site and pick the ‘YouTube channel art’ option to get the YouTube banner of the right size, though there are other options as well. Due to its easily customizable features, you can alter or change the background completely and try different color combinations to match your brand’s logo.
Pros:
- The drag-n-drop feature of Adobe Spark enables you to craft eye-catching and engaging banners effortlessly.
- Adobe Spark offers you the freedom to experiment with unlimited alterations in alignments, text, layouts, and themes like a trusted YouTube banner creator.
Cons: Though Adobe Spark is free, it annoys the users when it automatically adds Adobe Spark’s watermark logo to your creation. To get it removed, you must be an active subscriber of Adobe products.

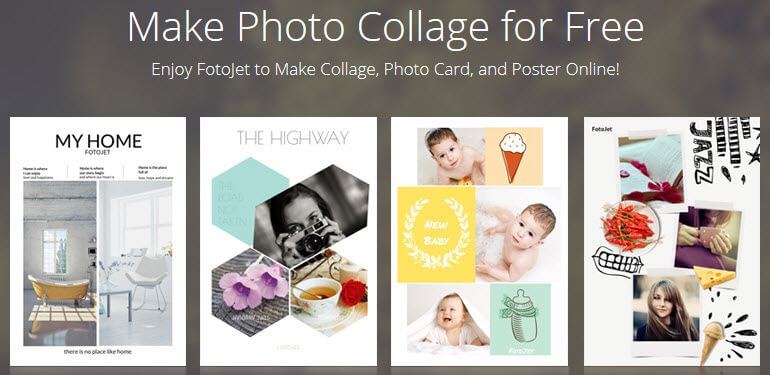
11. Fotojet:
FotoJet being a reliable YouTube banner maker assists you in creating personalized banners using numerous free templates. You get hold of interesting YouTube banner without toiling with the intricacies of graphic designing. Impressing your visitors with your unique and brand new banner from FotoJet YouTube banner creator is class apart.
Pros: It offers you the flexibility to add anything and everything on your channel art and upload it on YouTube right away.
Cons: Similar to Adobe Spark, FotoJet too adds a watermark logo of its name to your creation which is again a bit of nuisance.
Conclusion
Want to make your YouTube video more attractive and beautiful? Wondershare Filmora is such video editing software designed for YouTube creators. It not only allows you to cut, trim, crop, zoom, reverse, rotate the video clips, but also makes the advanced features like green screen, PIP, tilt-shift, and mosaic easy like a piece of cake. With Wondershare Filmora, you can ignite your YouTube videos with over 300 effects like Fashion, Beauty, BlockBuster, Travel, etc.

Richard Bennett
Richard Bennett is a writer and a lover of all things video.
Follow @Richard Bennett
Richard Bennett
Mar 27, 2024• Proven solutions
If you want to have more fans on your YouTube channel, it becomes really important to make your channel more attractive and fresh. YouTube banner is one of the important factors which represents the style, quality, and taste of your channel. Fortunately, there are many tools on the market that can help you make attractive banners. Therefore, we have brought you 10+ best-known YouTube banner makers that can enhance the beauty of your channel with their exceptionally amazing features. We will also let you know how to make a YouTube banner. Let’s explore.
You may also like: How to add custom thumbnails to YouTube videos >>
- Part 1: YouTube Banner Dimensions You Should Know
- Part 2: How to Make a YouTube Banner with Canva for Free
- Part 3: 10+ Best YouTube Banner Makers
Part 1: YouTube Banner Dimensions You Should Know
YouTube banner dimensions varied on different platforms, so you need to make the YouTube banner look great on desktop, tablet, and phone. According to Google , the recommended dimension is 2560 x 1440 px as the YouTube banner will be cropped if its size is too large. Minimum dimension is 2048 x 1152 px for uploading. The maximum width is 2560 x 423 px. The largest file size is 6MB. You can also add links to your own social media on YouTube banner, so it is a great place to recommend your other social media.
Part 2: How to Make a YouTube Banner with Canva for Free
There are so many tools that you can make a YouTube banner in the market, but it is not easy to find the right tool to make a banner if you can’t find the right tools. We have listed one way to make a YouTube banner below. You can use Wondershare Filmora to edit YouTube videos as it is designed to be a YouTube editor. Besides the basic editing including cropping/trimming and adding transitions, you can use it to add various text, more than 300 effects/filters, free audio, and more. It is also easy to make a YouTube intro. Download it to have a try!
Download Mac Version ](https://tools.techidaily.com/wondershare/filmora/download/ )
Step 1: Choose your template and layout
Canva is an online tool to make YouTube banner, so first you need to open it up . You are asked to log in.
After you’ve signed up for Canva you will see a variety of different templates. Scroll through them until you find YouTube Channel Art under Social Media & Email Headers.
This template will be the right size for a YouTube banner, but it will not show you the ‘safe zones’. Your banner will show up differently depending on the screen a viewer is watching on. Click here to download YouTube’s official template, which displays safe zones. You will be able to use it as a reference.
And Canva also provides you with sample layouts that you can build off of. They will include stock photos and text. Most are free, but some might cost a dollar.
If the one you happen to like isn’t free, don’t worry. It’s actually just the specific stock images being used in the example that cost money, and you’re probably planning on replacing those anyways.
Step 2: Import your image
Canva provides a selection of stock images you can use for free. You can find them by clicking on Elements in the menu on the far left, and then clicking on Free Photos.
If you’d rather use your own images, click on Upload at the bottom of that same menu on the left. You’ll have the option of uploading images from your computer or importing them from Facebook.
After you have found the image you want to use or loaded it into Canva, click on it and it will appear in your layout.
Step 3: Add text to YouTube banner
You can add various text after it is imported. There are lots of text templates in Canva, so just pick the one you like. You can also change text color and transparency to make it look great. Now to place it in the right position.
Step 4: Edit other elements
The layout you chose might include things like borders or backgrounds behind the text. You can change the colors of any of these just by clicking on them, then clicking on the color swatch in the top left corner of your design area.
Step 5: Download YouTube banner
Once you finish the editing, there is a download button in the top right corner of your screen. Click on it when you are finished to save your new channel art to your computer. It supports JPEG, PNG, and PDF. Now upload it to YouTube. So simple. Isn’t it?
Part 3: 10+ Best YouTube Banner Makers
1. Canva:
Canva is probably the most popular site for making channel art, for good reason. It has over 8000 templates for different kinds of graphics, including YouTube channel art, and there’s a huge variety of stock photos available either for free or $1. On Canva, creating your perfect banner is as easy as dragging and dropping images into a pre-built layout. Resizing is automatic, and you can flip/rotate or apply filters in just a few clicks
Pros: It contains millions of stock images, about 100 professional layouts, and lots of stunning filters.
Cons: Some high-quality images can be accessed only after payment of $1.
Price: The best thing to know is that this tool is available for free.
2. Wondershare PixStudio
Wondershare PixStudio is an all-in-one and powerful online graphic design maker for everyone. It has various types of templates for YouTube Thumbnails, Logos, Posters, etc. You can create a beautiful design by simply dragging and dropping the elements and photos. The online platform is free to use all templates, just One-Click to download your creations, and share to your Facebook, Instagram Story, and YouTube Thumbnails, etc. immediately.
Pros:
- Various types of templates
- Simple and Fast Design
- Background remover
Cons: The features of removing background be used after payment of $7.99 per month.
Price: The best thing to know is that this tool is available for free.
3. Fotor:
The makers of Fotor describe it as a ‘revolutionary photo editor and graphic designer’, and it is certainly a powerful tool. Fotor allows you to do a lot of fine editing on your photos – brightness, saturation, and color temperature are just a few of the things you can adjust – and its design feature is perfect for YouTube channel art.
Fotor has templates for YouTube channel art and a lot of fun sticker-like graphics. The Design interface is very similar to Canva, if slightly more complicated.
Pros: Complete art can be created within a few minutes and contains dozens of templates.
Cons: Little difficult to use for beginners.
Price: Free
4. Photovisi:
It is a great source of inspiration for your YouTube channel where you can easily design, save and share your customized banner.
Pros: It automatically adjusts the size of the banner to the required format and is loaded with unlimited themes. Works on Android, Windows, Mac, and iOS.
Cons: Demand some special skills for usage.
Price: It is available for free at the official website
5. iKomee:
It is possible to have customized results for your YouTube banner designing using the iKomee platform where few minutes are enough to create wonders. It is one of the most loved tools of all professionals.
Pros: Contains lots of cool templates for channel art.
Cons: Limited themes and layouts.
Price: Available for free.
6. Banners Nack:
Here is one of the most wonderful YouTube banner maker for you that can be accessed online with easy to use interface where one can design animated, static HTML5 with interactive banner ads.
Pros: Professional, easy to use platform with rich quality fonts, stock images, and animated effects.
Cons: Little costly.
Price: Users can go ahead with premium plans where the basic plan is worth $12/month and a professional plan is $18/month with a business plan offer of $24 per month.
7. BeFunky:
BeFunky allows users to create meaningful banners for YouTube business building. The platform consists of numerous effortless options for banner designs and the drag and drops features make everything much easier. It is possible to boost traffic on your YouTube channel with this highly ranked banner maker.
Pros: Four-step banner-making process that can be followed by beginners too.
Cons: The uploading and downloading process takes more time due to heavy projects.
Price: Get started for free.
8. Picmonkey:
With PicMonkey.com you will be able to get customized, readymade banners with a perfect look. It is much easier to make selections for fonts, colors, and graphics with advanced templates here.
Pros: The best platform to enhance your creativity; users will be able to get perfect sharpness of quality.
Cons: File size is more for output banner and special features can be accessed only after payment.
Price: Free trial.
9. iPiccy:
The number of steps to be followed for designing a YouTube banner here completely depends upon your demand of end banner design type. Generally, four-step method is capable enough to provide you professional output with proper cropping dimensions and small file size for download
Pros: Various additional features are available like adding text etc so that highly customized designs can be created for YouTube Banners.
Cons: Demands more time of the user for making quality banner.
Price: Get started for free within a few seconds.
10. Adobe Spark:
Adobe Spark is one of the amazing online YouTube banner makers that helps you create the desired banner for your YouTube channel with ease. All that you need to do is browse to the site and pick the ‘YouTube channel art’ option to get the YouTube banner of the right size, though there are other options as well. Due to its easily customizable features, you can alter or change the background completely and try different color combinations to match your brand’s logo.
Pros:
- The drag-n-drop feature of Adobe Spark enables you to craft eye-catching and engaging banners effortlessly.
- Adobe Spark offers you the freedom to experiment with unlimited alterations in alignments, text, layouts, and themes like a trusted YouTube banner creator.
Cons: Though Adobe Spark is free, it annoys the users when it automatically adds Adobe Spark’s watermark logo to your creation. To get it removed, you must be an active subscriber of Adobe products.
11. Fotojet:
FotoJet being a reliable YouTube banner maker assists you in creating personalized banners using numerous free templates. You get hold of interesting YouTube banner without toiling with the intricacies of graphic designing. Impressing your visitors with your unique and brand new banner from FotoJet YouTube banner creator is class apart.
Pros: It offers you the flexibility to add anything and everything on your channel art and upload it on YouTube right away.
Cons: Similar to Adobe Spark, FotoJet too adds a watermark logo of its name to your creation which is again a bit of nuisance.
Conclusion
Want to make your YouTube video more attractive and beautiful? Wondershare Filmora is such video editing software designed for YouTube creators. It not only allows you to cut, trim, crop, zoom, reverse, rotate the video clips, but also makes the advanced features like green screen, PIP, tilt-shift, and mosaic easy like a piece of cake. With Wondershare Filmora, you can ignite your YouTube videos with over 300 effects like Fashion, Beauty, BlockBuster, Travel, etc.
Richard Bennett
Richard Bennett is a writer and a lover of all things video.
Follow @Richard Bennett
Streaming Giants’ Rivalry: Facebook Vs. YouTube & Spaces
Facebook Live Vs YouTube Live Vs Twitter Periscope

Shanoon Cox
Mar 27, 2024• Proven solutions
Live videos are gaining huge popularity these days. People find them best method to share adventurous moments with friends over social media. You can have wide range of choices for selection of platform like Periscope, YouTube Live and Facebook Live etc. But most of you might be thinking hard about which one of these is best to get more audience support. Many of you will just respond with the quick answer that I will switch to a platform where my most of friends are connected. Actually, there are so many features to discuss about a live streaming platform as performance depends upon so many parameters.
Facebook Live
Who is not familiar with this name? Even aliens must be aware about awesomeness of Facebook and now its live streaming capability added more wonders to the life. On top portion of this application, you will find three icons telling you to make easy choices for Check in, Photo and Live. When you are ready to live stream then simply hit this Live button and you will be ready to step inside world of entertainment. Same as YouTube, it sends messages to all followers about your broadcast via notification Bar so that they can soon join the fun online.
Facebook Live has gained wide popularity within very less time and now users are enjoying long hour streaming engagement over here. It has been designed with so many interesting features, how can we forget to list 360 option in this talk. That is truly awesome and is receiving great response from viewers. Users on Facebook Live can easily update their privacy settings for each uploads and It also allows editing with filters and masks, same as that of Snapchat.
Pros
There is no doubt to say that Facebook Live is quite simple to operate. Even when you enter inside this world for the very first time, it will make everything user friendly to you.
Cons
- It generate too much notifications, they make subscribers annoyed.
- News feeds gets affected with Live feature.
YouTube Live
Go to YouTube Live, hit the camera option from top menu and it will show you two options immediately on screen: Record for camera roll and Go Live for added online adventure. You can make easy selection about whether you want to share content with public or want to make it an unlisted video. You will definitely love its ability to auto generate a thumbnail of captured videos that becomes available to all subscribers over channel and provided better description about your next post. You can set broadcasting to horizontal as well as vertical mode and as soon as you start browsing over internet, YouTube will provide you effective editing controls with its Instagram like unique filters such as Sepia, Dawn, Dream and many more.
This platform is currently entertaining millions of users from different corner of world on desktop based platform whereas if you have 10000 plus subscribers on your channel then you can also enjoy mobile live streaming feature.
Pros
- It offers quite simple operations.
- Users can easily find their favourite content in well organized YouTube Live library.
- YouTube Live also provides earning options to streamers.
Cons
- You can easily miss important comments as they fly too fast.
Periscope
Twitter’s recently updated Periscope is one of the best live mobile streaming applications. It can process all videos at faster rate with high quality results. When you are ready to broadcast then simply Go Live and all your followers will immediately receive a message about your streaming. It helps world to know immediately about where broadcasts are going to update. Periscope can easily make your streams more attractive with its appealing live stream engagements.
As, millions of users are already connected to Twitter and enjoying interactive talks with world over there so most of these prefer to chose Periscope as one of the most trustworthy platform for Live streaming.
Pros
- It offers wide range of settings and functions.
- Twitter has recently added 360 video ability to Periscope.
- Well designed with user friendly interface.
- More number of subscribers can be easily connected.
Cons
- Infrequent updates are issue for professional streamers.
Facebook Live Vs. YouTube Live Vs. Periscope: What’s the Difference?
1. Audience:
We all know that Facebook is currently having highest user base so naturally Facebook Live is assumed to have more viewers and streamers. Google considers most of the YouTube content valuable but note that it is YouTube not the recently updated YouTube Live platform. On the other side, if we talk about Periscope then it can be best described as a standalone network. In case if it gets linked to main app YouTube then it may avail some popularity in the market, same as that of Facebook. If you are a beginner then probably, Facebook is the best choice for you as it can provide more audience over the nights. Periscope users can also enjoy healthy content over Mobile phones with great stream quality. One more interesting thing to know about Periscope is that it can be used to develop healthy relationships with so many viewers and followers.
2. User Interface:
Here is one more interesting factor to discuss about all these amazing Live streaming platforms. This feature makes a system or software standout among other competitors. If we compare user interface of Facebook Live, Periscope and YouTube Live then you will find them all almost similar. But most of the beginners rate Facebook as most simple and user friendly tool for live broadcasts. Second rating is received by Periscope whereas YouTube Live stands on third level. User interface of Periscope and Facebook live possesses so many similar features such as ability to subscribe, comment or updating likes etc.
3. Saving Broadcasts and Embedding Replays:
Let us discuss about saving broadcasts as well as get some idea about their ability to arrange embedding replays. The video archiving ability of YouTube and Facebook is having almost similar kind of features. Users are able to update their live streams and they can also be saved for longer run, even permanently as per need. If you want to delete them then simple controls allow easy removal of updated broadcasts from channel. On the other side, Periscope allows live streamers to stay on channel only for 24 hours. After that, all the updated videos get automatically deleted. On Facebook, users cannot come to know about who is watching their live streams until and unless they receive comments from viewers. Although, Facebook keep on updating notifications about all live streams but more often they create a bug. In case of Periscope, whenever a person starts viewing your uploaded content, his name will directly appear at your end. It can help you to know the real strength of your updates so that you can improve quality of content as per interest of viewers. It is also possible to make private or public settings for broadcasts on Periscope whereas Facebook is gaining more popularity for its Split Screen and 360 videos.
4. Interaction:
Communicate with Broadcasters:
If you want to interact with broadcaster on Facebook then you can simply update your comment or show them your reaction with emojies. They can be updated at the time of live broadcasts as well as at the time of replay. Most of the Facebook users are unhappy with its lag time as broadcasters comment gets published after a delay of 30 seconds. In case of Periscope, viewers are able to just comment on live broadcasts and they can also update a heart for their favourite content. If we compare the lag time of Facebook and Periscope then it is lower for Periscope and people often enjoy instantaneous conversations over this network. The best part is that Viewers can update numbers of hearts even for single broadcast and all of them will get recorded. This feature is not available with Facebook emojies. You will be glad to know that once you have prepared account over YouTube then same details can be used to access Periscope platform.
Interaction with Viewers:
Facebook allows broadcasters and viewers to enjoy healthy communication as here talks can be initiated by updating name of the person before writing comment. If you want to communicate with all viewers in more professional manner then Facebook’s name based comment updates are best choices. Note that, facebook allows users to enjoy communicate even when stream has already ended. In case of Periscope, again viewers and broadcasters can enjoy direct name to name comment based conversations. Periscope broadcasts can also be enjoyed on Twitter platform directly but here you cannot update hearts directly. Also, comments remains dedicated to Twitter and Periscope environment. YouTube Live allows users to share their viewing experiences with comments and it helps broadcasters to get feedbacks for improvement. Content from YouTube Live can also be shared on other platforms.
Shanoon Cox
Shanoon Cox is a writer and a lover of all things video.
Follow @Shanoon Cox
Shanoon Cox
Mar 27, 2024• Proven solutions
Live videos are gaining huge popularity these days. People find them best method to share adventurous moments with friends over social media. You can have wide range of choices for selection of platform like Periscope, YouTube Live and Facebook Live etc. But most of you might be thinking hard about which one of these is best to get more audience support. Many of you will just respond with the quick answer that I will switch to a platform where my most of friends are connected. Actually, there are so many features to discuss about a live streaming platform as performance depends upon so many parameters.
Facebook Live
Who is not familiar with this name? Even aliens must be aware about awesomeness of Facebook and now its live streaming capability added more wonders to the life. On top portion of this application, you will find three icons telling you to make easy choices for Check in, Photo and Live. When you are ready to live stream then simply hit this Live button and you will be ready to step inside world of entertainment. Same as YouTube, it sends messages to all followers about your broadcast via notification Bar so that they can soon join the fun online.
Facebook Live has gained wide popularity within very less time and now users are enjoying long hour streaming engagement over here. It has been designed with so many interesting features, how can we forget to list 360 option in this talk. That is truly awesome and is receiving great response from viewers. Users on Facebook Live can easily update their privacy settings for each uploads and It also allows editing with filters and masks, same as that of Snapchat.
Pros
There is no doubt to say that Facebook Live is quite simple to operate. Even when you enter inside this world for the very first time, it will make everything user friendly to you.
Cons
- It generate too much notifications, they make subscribers annoyed.
- News feeds gets affected with Live feature.
YouTube Live
Go to YouTube Live, hit the camera option from top menu and it will show you two options immediately on screen: Record for camera roll and Go Live for added online adventure. You can make easy selection about whether you want to share content with public or want to make it an unlisted video. You will definitely love its ability to auto generate a thumbnail of captured videos that becomes available to all subscribers over channel and provided better description about your next post. You can set broadcasting to horizontal as well as vertical mode and as soon as you start browsing over internet, YouTube will provide you effective editing controls with its Instagram like unique filters such as Sepia, Dawn, Dream and many more.
This platform is currently entertaining millions of users from different corner of world on desktop based platform whereas if you have 10000 plus subscribers on your channel then you can also enjoy mobile live streaming feature.
Pros
- It offers quite simple operations.
- Users can easily find their favourite content in well organized YouTube Live library.
- YouTube Live also provides earning options to streamers.
Cons
- You can easily miss important comments as they fly too fast.
Periscope
Twitter’s recently updated Periscope is one of the best live mobile streaming applications. It can process all videos at faster rate with high quality results. When you are ready to broadcast then simply Go Live and all your followers will immediately receive a message about your streaming. It helps world to know immediately about where broadcasts are going to update. Periscope can easily make your streams more attractive with its appealing live stream engagements.
As, millions of users are already connected to Twitter and enjoying interactive talks with world over there so most of these prefer to chose Periscope as one of the most trustworthy platform for Live streaming.
Pros
- It offers wide range of settings and functions.
- Twitter has recently added 360 video ability to Periscope.
- Well designed with user friendly interface.
- More number of subscribers can be easily connected.
Cons
- Infrequent updates are issue for professional streamers.
Facebook Live Vs. YouTube Live Vs. Periscope: What’s the Difference?
1. Audience:
We all know that Facebook is currently having highest user base so naturally Facebook Live is assumed to have more viewers and streamers. Google considers most of the YouTube content valuable but note that it is YouTube not the recently updated YouTube Live platform. On the other side, if we talk about Periscope then it can be best described as a standalone network. In case if it gets linked to main app YouTube then it may avail some popularity in the market, same as that of Facebook. If you are a beginner then probably, Facebook is the best choice for you as it can provide more audience over the nights. Periscope users can also enjoy healthy content over Mobile phones with great stream quality. One more interesting thing to know about Periscope is that it can be used to develop healthy relationships with so many viewers and followers.
2. User Interface:
Here is one more interesting factor to discuss about all these amazing Live streaming platforms. This feature makes a system or software standout among other competitors. If we compare user interface of Facebook Live, Periscope and YouTube Live then you will find them all almost similar. But most of the beginners rate Facebook as most simple and user friendly tool for live broadcasts. Second rating is received by Periscope whereas YouTube Live stands on third level. User interface of Periscope and Facebook live possesses so many similar features such as ability to subscribe, comment or updating likes etc.
3. Saving Broadcasts and Embedding Replays:
Let us discuss about saving broadcasts as well as get some idea about their ability to arrange embedding replays. The video archiving ability of YouTube and Facebook is having almost similar kind of features. Users are able to update their live streams and they can also be saved for longer run, even permanently as per need. If you want to delete them then simple controls allow easy removal of updated broadcasts from channel. On the other side, Periscope allows live streamers to stay on channel only for 24 hours. After that, all the updated videos get automatically deleted. On Facebook, users cannot come to know about who is watching their live streams until and unless they receive comments from viewers. Although, Facebook keep on updating notifications about all live streams but more often they create a bug. In case of Periscope, whenever a person starts viewing your uploaded content, his name will directly appear at your end. It can help you to know the real strength of your updates so that you can improve quality of content as per interest of viewers. It is also possible to make private or public settings for broadcasts on Periscope whereas Facebook is gaining more popularity for its Split Screen and 360 videos.
4. Interaction:
Communicate with Broadcasters:
If you want to interact with broadcaster on Facebook then you can simply update your comment or show them your reaction with emojies. They can be updated at the time of live broadcasts as well as at the time of replay. Most of the Facebook users are unhappy with its lag time as broadcasters comment gets published after a delay of 30 seconds. In case of Periscope, viewers are able to just comment on live broadcasts and they can also update a heart for their favourite content. If we compare the lag time of Facebook and Periscope then it is lower for Periscope and people often enjoy instantaneous conversations over this network. The best part is that Viewers can update numbers of hearts even for single broadcast and all of them will get recorded. This feature is not available with Facebook emojies. You will be glad to know that once you have prepared account over YouTube then same details can be used to access Periscope platform.
Interaction with Viewers:
Facebook allows broadcasters and viewers to enjoy healthy communication as here talks can be initiated by updating name of the person before writing comment. If you want to communicate with all viewers in more professional manner then Facebook’s name based comment updates are best choices. Note that, facebook allows users to enjoy communicate even when stream has already ended. In case of Periscope, again viewers and broadcasters can enjoy direct name to name comment based conversations. Periscope broadcasts can also be enjoyed on Twitter platform directly but here you cannot update hearts directly. Also, comments remains dedicated to Twitter and Periscope environment. YouTube Live allows users to share their viewing experiences with comments and it helps broadcasters to get feedbacks for improvement. Content from YouTube Live can also be shared on other platforms.
Shanoon Cox
Shanoon Cox is a writer and a lover of all things video.
Follow @Shanoon Cox
Also read:
- 2024 Approved Enhancing Video Success Top 8 YT Thumbnail Strategies
- Excellent Tools to Save Live Feeds From YouTube Vids
- 2024 Approved Adding Visual Time Indicators to Your YouTube Links
- In 2024, Crafting GIFs Like a Pro Industry Leaders' Tools
- Channel Name Wizardry Brainstorm & Create for 2024
- 2024 Approved Designing Efficient Auto-Subscribe Web Addresses
- 2024 Approved Channel Confidence Tips for Trending on YouTube
- Earnings Explosion Boosting Your YouTube Channel's Income via Mobile for 2024
- In 2024, Beat Drops in Seconds A Beginner’s Guide to Music Videos
- 2024 Approved Countering Harshness Maintaining Poise Online
- In 2024, 10 Top Zero-Charge Web Tools to Craft Videos
- Pioneering the Next Level of Streaming Setups
- A World Beyond Men Top 10 Inspirational YouTube Stars for 2024
- In 2024, Essential Free Online Music Libraries 15 Picks
- 2024 Approved Diving Deep The Intricacies of the Mukbang Phenomenon
- In 2024, Earth’s Premier Online Income Tycoon
- Rise to Editing Greatness with Our Top 10 YouTube Tips
- Cutting-Edge Royalty-Free Music Platforms for Content Makers
- Complete Guide to Crafting Killer YouTube Outros for 2024
- 2024 Approved Crafting Timeless Videos with Historical Flair
- [Updated] Elite Influencer Economy Leaders
- Download Mastery 11 Key YouTube Extractors
- Streaming Success Starts Here - 8 Tips for Beginners
- [New] A Deep-Dive Into Digital Platform Wealth Dailymotion & YouTube Comparison
- What's the Best YouTube Thumbnail Size?
- YouTube CPM Rates How Much Do YouTubers Make
- The Crème De La Crème Top 10 YouTube Stars in Subscriptions
- In 2024, Behind the Scenes IPhone Video Loops Unveiled
- 2024 Approved Harnessing Spotifys Melodies Practical Steps for Digitally Capturing Playlists and Songs
- Fake the Location to Get Around the MLB Blackouts on Nokia C12 Pro | Dr.fone
- In 2024, How to Spy on Text Messages from Computer & Apple iPhone 13 | Dr.fone
- In 2024, Hear No Evil Top 10 Silence-Enhancing Programs for Voices
- [Updated] The Top Gaming Talents on TikTok
- 2024 Approved Leveraging TikTok Videos for Twitter Audiences
- Screen Recording Through Built-In Features of Huawei's Mate and P Devices (P20, P10) for 2024
- [New] Retro GPU Fixes for 2024
- Fine-Tuning the Small Scenes of Minecraft
- 5 Easy Ways to Transfer Contacts from Apple iPhone 14 Pro to Android | Dr.fone
- How to Fix Apple iPhone 15 Plus Passcode not Working? | Dr.fone
- How to Change Google Play Location On Nubia Z50 Ultra | Dr.fone
- Everything You Need to Know about Lock Screen Settings on your Samsung Galaxy F14 5G
- 2024 Approved The Ultimate List 10 Best Intro Maker Tools Online (Free & Paid)
- DaVinci Resolve Scopes Have Undergone Significant Improvements. Find Out How to Use These Scopes and Improve Your Video Editing Skills
- [Updated] Innovative PFP Suggestions to Differentiate Your TikTok Presence
- [New] 2024 Approved Alter Twitter Video Headline Image
- In 2024, Planning to Use a Pokemon Go Joystick on Nokia G22? | Dr.fone
- 2024 Approved Top 10 TikTok Dance Video Responses
- In 2024, How to Fake Snapchat Location on Gionee F3 Pro | Dr.fone
- Enhancing Your Digital Persona Personalize Your Discord Status with Custom Emojis for 2024
- [New] In 2024, The Snap Spectrum A Compilation of Favorite Augments
- High-Quality Fullscreen Recorders for Desktops
- In 2024, Three Ways to Sim Unlock Nokia C210
- [New] Top 3 Cloud-Based Speech Tools
- 2024 Approved Ultimate MP3 Blender for Mac Enthusiasts
- In 2024, How Many Attempts To Unlock iPhone 13 Pro Max | Dr.fone
- Title: Stand Out in a Crowd with These 10 YouTube Theme Innovators
- Author: Kevin
- Created at : 2024-05-25 16:17:53
- Updated at : 2024-05-26 16:17:53
- Link: https://youtube-videos.techidaily.com/stand-out-in-a-crowd-with-these-10-youtube-theme-innovators/
- License: This work is licensed under CC BY-NC-SA 4.0.
