
:max_bytes(150000):strip_icc():format(webp)/GettyImages-1369568023-c596ac8d6b5a4f3682bda2fa0feb12bd.jpg)
"Setting up a Sports Channel From Scratch, Mac-Style"
Setting up a Sports Channel From Scratch, Mac-Style
How to Create a Sports YouTube Channel on Mac?

Richard Bennett
Dec 14, 2023• Proven solutions
It is no secret that there is a huge audience of sports, including e-sports and gaming, on YouTube who appreciates high-quality content. These viewers are searching for sports YouTubers who create insightful and entertaining content that isn’t only rich in terms of content but production as well. It means that sports channels on YouTube have to rely on special video editing effects to ensure they are delivering what their viewers expect.
That being said, it is usually not easy for aspiring sports YouTubers to start since they have little to no experience when it comes to creating premium sports videos for YouTube. This article will help you out in terms of starting a new YouTube sports channel, especially if you are a mac user.
- Section1. Necessary Elements of a YouTube Sports Channel
- Section2. Must Use Feature for Making a Sports YouTube Channel
- Section3. Which Video Editing Software Has these Features?

Section 1. Necessary Elements of a YouTube Sports Channel
If you want to start a YouTube sports channel, you need to keep in mind that sports videos are fundamentally different from other types of videos. This requires you to have a strong grasp not only on content but video editing as well. Here are some of the top elements that every YouTube sports channel needs.
1.Insightful Producer Perspective
First of all, you should try to have a clear and comprehensive understanding of the sport you are going to talk about on your channel. If you are just an amateur or a casual fan, you will need to do more preparation as a sports YouTuber.

2.Brief and Clear Delivery
The second most important thing is to communicate your perspective in an entertaining, brief, and interactive manner so your viewers remain engaged and keep coming back to your channel. If you fail to communicate properly, your viewers will go somewhere else to watch what they are looking for.
3.Advanced Video Editing
Apart from the content, you need to make yourself familiar with using advanced video editing features such as picture-in-picture, screen recording, and audio recording. These allow you to provide a high-quality viewing experience to your YouTube channel audience.
4.Branded Intro & Outro
You need to set yourself apart with the impactful branding of your sports YouTube channel. It means that the software you are using on your Mac needs to have smart editing features including the ability to add cool intros and outros that become the trademark of your sports channel.
You May Also Like:
- YouTuber Skillshare: Essential Video Cutting Skills For YouTubers>>>
- What is the Best MP4 Cutter for YouTubers On Mac?>>>
Section 2. Must Use Feature for Making a Sports YouTube Channel
There are many features that you may need in your sports content creation. High video quality will bring more views and attract more fans to your YouTube channel. Here are some features you may use in making sports videos.
1. Making a Sports YouTube Channel - Screen Recording
One of the top features that you must use in your sports content creation is screen recording. It is a vital feature for all sports YouTubers and it is used extensively for multiple reasons:
- It gives content creators the ability to give demonstrations in a clear and convenient manner that is easily understandable.
- Screen recording also allows them to create how-to and tutorial videos for games and other sports.
- They can also use this feature to record a video clip that may not be easy to include in the final video.
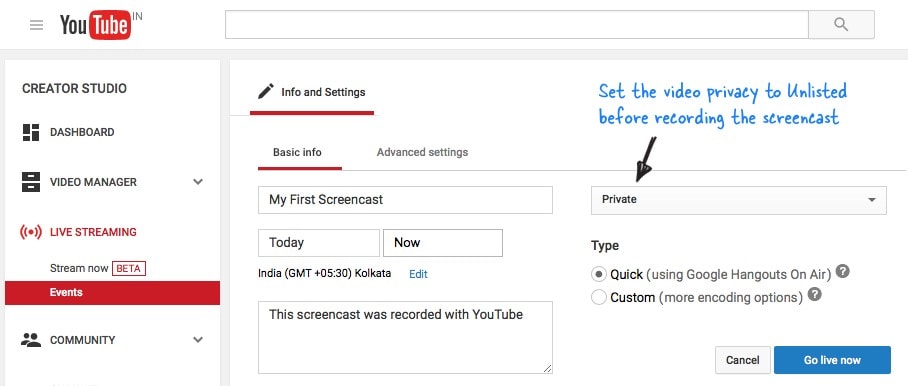
This feature will give your audience the opportunity to understand your point clearly without having to visualize everything in their heads. Everything you say would be right in front of them in the form of screen recording and they can easily get your perspective.
2. Making a Sports YouTube Channel- Picture in Picture
Another key feature that is widely used by YouTube sports channels is picture-in-picture, especially those who engage in live commentary while the game or match is still being played. As a Mac YouTube channel producer, you must use this feature to gain the following advantages:
- Picture in Picture allows you to stay visible to your audience while commentating or giving your opinion on a game.
- It also provides you with the ability to divert more focus on the game so the bigger part of the screen is dedicated to sports.
- You can also switch between the smaller and bigger video sections when necessary, for example during a break or interval.
- It gives you the opportunity to make your YouTube channel more personalized with your own take on picture-in-picture.
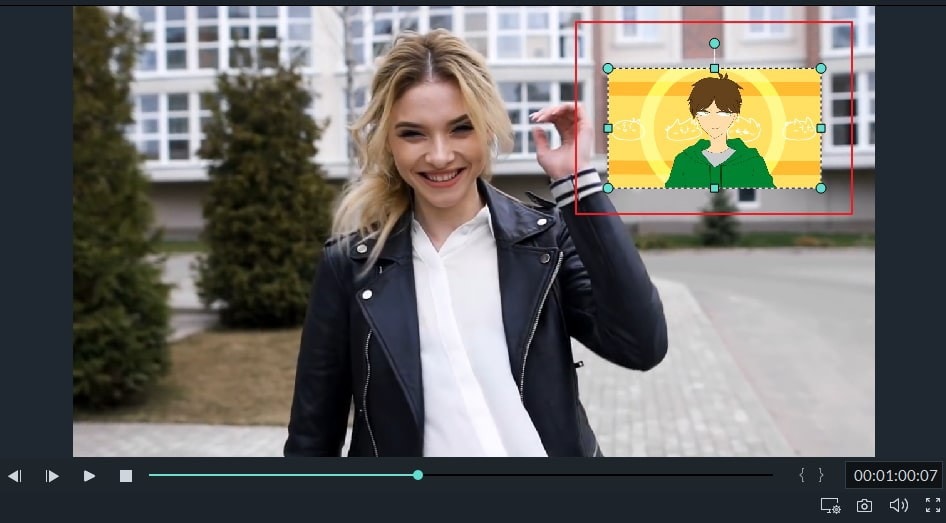
Picture in picture is a great feature for sports YouTubers on Mac as it keeps the video entertaining and personalized. Without using a picture-in-picture feature, you will find it difficult to compete with other sports YouTube channels.
3. Making a Sports YouTube Channel - Audio Recording
There are times when you cannot use the native audio of the sports video and need to add your own. It means that you need to record your own audio file and add it to the video before uploading it to your YouTube channel. This feature allows you to:
- Edit the audio of your sports video to make it more customizable according to your target audience.
- Remove the audio that might cause copyright issues and add your own to ensure your content remains original.
- Add your own remarks, commentary, and opinions in the video in full or in parts to make it more engaging and interactive.
- Make videos where you just need background music and don’t need the original audio such as montages, tributes, etc.


Clear and crisp audio recording is necessary to ensure that the video you upload on your sports YouTube channel is of high quality. Low-quality audio will damage the whole experience and leave a bad taste in the mouth of your viewers.
You May Also Like: Edit Audios in Wondershare Filmora For Mac
Filmstock Stock Media Library ](https://filmstock.wondershare.com/creative-theme-sports?spm=rs.filmora%5Fweb&source%5Fchannel=seo%5Farticle )
Section 3. What Video Editing Software Has these Features?
There are many video editing software applications that enable you to use the above-mentioned features. However, if you are just starting out and want to become a producer of your own YouTube sports channel using Mac, here are some of your options:
1. WonderShare Filmora X - Make sports channel editing easier
If you are just getting ready to do a YouTube sports channel and do not have any experience, Filmora is a good choice. There is no video editing software that provides better value.
This software contains most of the features and functions needed to create sports videos, such as audio and screen recording along with pip capability, and picture-in-picture. You can also use Filmora X to add cool branded intros and outros to customize your sports videos.
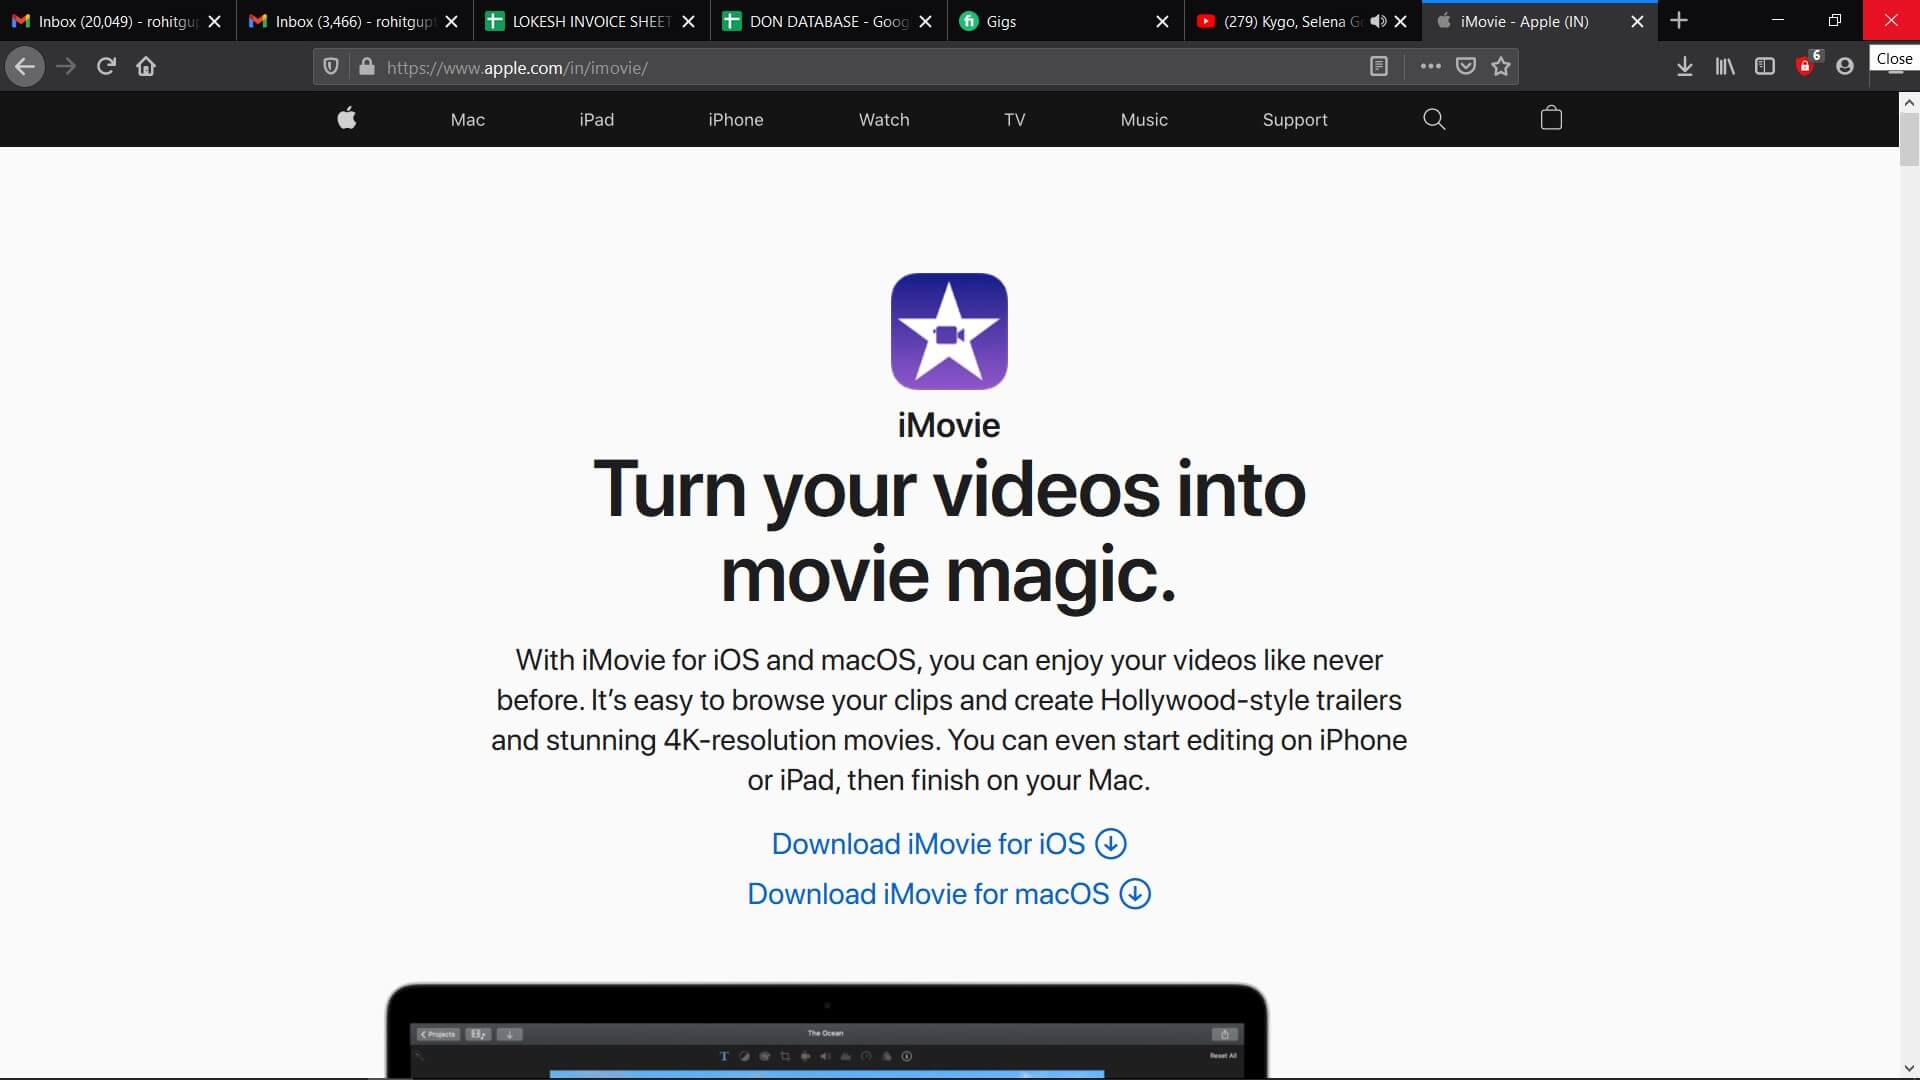
2.iMovie - Build-in software for Mac users
If you don’t want to rely on third-party software, the default built-in video editing software on Mac provides you with the basic editing features you may need.
3.Adobe Premiere Elements - Professional software to edit sport videos
If you want professional-grade software and don’t really care about the price, you can get Adobe Premiere Elements. Keep in mind that it is a highly advanced software for professionals and you may not need a wide variety of features offered here.
Richard Bennett
Richard Bennett is a writer and a lover of all things video.
Follow @Richard Bennett
Richard Bennett
Dec 14, 2023• Proven solutions
It is no secret that there is a huge audience of sports, including e-sports and gaming, on YouTube who appreciates high-quality content. These viewers are searching for sports YouTubers who create insightful and entertaining content that isn’t only rich in terms of content but production as well. It means that sports channels on YouTube have to rely on special video editing effects to ensure they are delivering what their viewers expect.
That being said, it is usually not easy for aspiring sports YouTubers to start since they have little to no experience when it comes to creating premium sports videos for YouTube. This article will help you out in terms of starting a new YouTube sports channel, especially if you are a mac user.
- Section1. Necessary Elements of a YouTube Sports Channel
- Section2. Must Use Feature for Making a Sports YouTube Channel
- Section3. Which Video Editing Software Has these Features?
Section 1. Necessary Elements of a YouTube Sports Channel
If you want to start a YouTube sports channel, you need to keep in mind that sports videos are fundamentally different from other types of videos. This requires you to have a strong grasp not only on content but video editing as well. Here are some of the top elements that every YouTube sports channel needs.
1.Insightful Producer Perspective
First of all, you should try to have a clear and comprehensive understanding of the sport you are going to talk about on your channel. If you are just an amateur or a casual fan, you will need to do more preparation as a sports YouTuber.
2.Brief and Clear Delivery
The second most important thing is to communicate your perspective in an entertaining, brief, and interactive manner so your viewers remain engaged and keep coming back to your channel. If you fail to communicate properly, your viewers will go somewhere else to watch what they are looking for.
3.Advanced Video Editing
Apart from the content, you need to make yourself familiar with using advanced video editing features such as picture-in-picture, screen recording, and audio recording. These allow you to provide a high-quality viewing experience to your YouTube channel audience.
4.Branded Intro & Outro
You need to set yourself apart with the impactful branding of your sports YouTube channel. It means that the software you are using on your Mac needs to have smart editing features including the ability to add cool intros and outros that become the trademark of your sports channel.
You May Also Like:
- YouTuber Skillshare: Essential Video Cutting Skills For YouTubers>>>
- What is the Best MP4 Cutter for YouTubers On Mac?>>>
Section 2. Must Use Feature for Making a Sports YouTube Channel
There are many features that you may need in your sports content creation. High video quality will bring more views and attract more fans to your YouTube channel. Here are some features you may use in making sports videos.
1. Making a Sports YouTube Channel - Screen Recording
One of the top features that you must use in your sports content creation is screen recording. It is a vital feature for all sports YouTubers and it is used extensively for multiple reasons:
- It gives content creators the ability to give demonstrations in a clear and convenient manner that is easily understandable.
- Screen recording also allows them to create how-to and tutorial videos for games and other sports.
- They can also use this feature to record a video clip that may not be easy to include in the final video.
This feature will give your audience the opportunity to understand your point clearly without having to visualize everything in their heads. Everything you say would be right in front of them in the form of screen recording and they can easily get your perspective.
2. Making a Sports YouTube Channel- Picture in Picture
Another key feature that is widely used by YouTube sports channels is picture-in-picture, especially those who engage in live commentary while the game or match is still being played. As a Mac YouTube channel producer, you must use this feature to gain the following advantages:
- Picture in Picture allows you to stay visible to your audience while commentating or giving your opinion on a game.
- It also provides you with the ability to divert more focus on the game so the bigger part of the screen is dedicated to sports.
- You can also switch between the smaller and bigger video sections when necessary, for example during a break or interval.
- It gives you the opportunity to make your YouTube channel more personalized with your own take on picture-in-picture.
Picture in picture is a great feature for sports YouTubers on Mac as it keeps the video entertaining and personalized. Without using a picture-in-picture feature, you will find it difficult to compete with other sports YouTube channels.
3. Making a Sports YouTube Channel - Audio Recording
There are times when you cannot use the native audio of the sports video and need to add your own. It means that you need to record your own audio file and add it to the video before uploading it to your YouTube channel. This feature allows you to:
- Edit the audio of your sports video to make it more customizable according to your target audience.
- Remove the audio that might cause copyright issues and add your own to ensure your content remains original.
- Add your own remarks, commentary, and opinions in the video in full or in parts to make it more engaging and interactive.
- Make videos where you just need background music and don’t need the original audio such as montages, tributes, etc.
Clear and crisp audio recording is necessary to ensure that the video you upload on your sports YouTube channel is of high quality. Low-quality audio will damage the whole experience and leave a bad taste in the mouth of your viewers.
You May Also Like: Edit Audios in Wondershare Filmora For Mac
Filmstock Stock Media Library ](https://filmstock.wondershare.com/creative-theme-sports?spm=rs.filmora%5Fweb&source%5Fchannel=seo%5Farticle )
Section 3. What Video Editing Software Has these Features?
There are many video editing software applications that enable you to use the above-mentioned features. However, if you are just starting out and want to become a producer of your own YouTube sports channel using Mac, here are some of your options:
1. WonderShare Filmora X - Make sports channel editing easier
If you are just getting ready to do a YouTube sports channel and do not have any experience, Filmora is a good choice. There is no video editing software that provides better value.
This software contains most of the features and functions needed to create sports videos, such as audio and screen recording along with pip capability, and picture-in-picture. You can also use Filmora X to add cool branded intros and outros to customize your sports videos.
2.iMovie - Build-in software for Mac users
If you don’t want to rely on third-party software, the default built-in video editing software on Mac provides you with the basic editing features you may need.
3.Adobe Premiere Elements - Professional software to edit sport videos
If you want professional-grade software and don’t really care about the price, you can get Adobe Premiere Elements. Keep in mind that it is a highly advanced software for professionals and you may not need a wide variety of features offered here.
Richard Bennett
Richard Bennett is a writer and a lover of all things video.
Follow @Richard Bennett
Seamless Time Logging on YouTube (Desktop/Mobile)
How to Add Timestamps on YouTube Video Link?
Richard Bennett
Mar 27, 2024• Proven solutions
It is a well-known fact that internet users have a short interest span, about just eight seconds. This attention span applies to all internet platforms including YouTube. YouTube is the second largest and most visited search engine after Google. It provides users with information through engaging and eye-catchy videos. However, certain videos are longer where only a particular section of the video holds the important information. Viewers tend to skip the long videos and if you do not want this to happen to you, you can link to that specific part on your video adding value for your channel viewers with a link known as the YouTube Timestamp link.
When you have a Timestamp link on your video, you can help your viewers directly reach the specific time in the video. This helps avoid the viewers from losing interest or to search for the key part in your video themselves.
Here in this article, we will explain Timestamp links, how to add Timestamp to YouTube video links, and what are the benefits of Timestamp.
- Part 1: YouTube Timestamp Links Introduction
- Part 2: Adding a Timestamp to YouTube Video Link on Desktop
- Part 3: How to Share Specific Parts of YouTube Video
- part 4: Getting YouTube Timestamp Link on Mobile
- Part 5: FAQ About YouTube Timestamps
Part 1: What is YouTube Timestamp Links
In this fast-paced world where viewers have limited time at hand, YouTube Timestamp links are extremely helpful. These links are anchor text or video hyperlinks found either in the description beneath the video or at the video link end.

The Timestamps links allow you to put a link to a key moment in your YouTube video allowing the viewers and subscribers to view the video at the precise time specified. Your YouTube video maybe half an hour long or maybe your users do not have the time now or forget to later watch your video, but when you add Timestamp to the YouTube link, you provide them ways to get to the content quickly enhancing the user experience.
In addition to this, you can even provide a reference in minutes and hours where necessary. The YouTube Timestamp link acts as a guide that directs viewers to the part of the video, which is most relevant to them without having to watch the entire video.
Part 2: How to Add a Timestamp to YouTube Video Link on Desktop?
In the following section, I will show you how to add timestamp to YouTube video link in several ways.
Use YouTube’s Share Feature
Using YouTube’s share feature is the simplest way to add Timestamp to YouTube videos. Here are easy steps to follow to do this.
- Open the YouTube video on your desktop that you want to share.
- Play the video or navigate the timeline and stop at the key moment you wish to apply the timestamp to.
- Now click on the Share button, a pop-up will appear. Under the URL, you will see a small box indicating Start at. The Timestamp is generated automatically, but you can adjust it.

- Copy the updated URL with Timestamp to share the video or click on the social sharing icons to do so.
- When your viewers click on this URL, the video will begin at the specified Timestamp.
Use the Browser URL to add Timestamp manually
You can add Timestamp manually as well. Follow the step-by-step guide below to add a Timestamp manually.
- Open your YouTube video in a browser on your desktop and then find the URL in the browser’s address bar.
- Enter the specific time you want the viewers to watch the video from at the end of the video URL.
You can add time manually in two ways depending on the URL.
?t=As or
&t=As
“youtu.be/” Format
If your YouTube video link is a youtu.be format, then just add ?t=As at the end of the video link. The A denotes the seconds at which you want the viewer to watch your video. The time can also be specified in minutes and seconds and when you want to do that just add ?t=AmBs. For instance, ?t=2m40s.
“youtube.com/” Format
When your YouTube video link has a youtube.com format, the adjustment starts with an ampersand. &t=As or &t=AmBs is what you can use. If you are looking to add the Timestamp at 2m40s, just add “&t=2m40s at the end of the video URL.
Whenever anybody uses the URL with Timestamp, the video will start from the specified time.
However, when adding a Timestamp manually, always leave include whole numbers. For example, if the time starts at 4m, use 4 and not 04.
Copy video URL at current time
You can use YouTube’s built-in feature to share the key parts of your YouTube video. Follow the steps here.
- Visit YouTube and open the video you want to add Timestamp link to.
- Play the video or navigate the timeline to reach the specific part you like to use in Timestamp.
- Now either press Ctrl + click or right-click anywhere on the video. A pop-up opens where you can see various texts, click on the Copy video URL at current time and share the link.

- Anyone who clicks on this link will be instantly transported to the exact segment of your YouTube video.
Part 3: How to Share Specific Parts of Videos with Vibby and Get YouTube Link with Timestamp
The above-mentioned methods to add and send YouTube link with timestamp are quick and easy, but they have a few limitations. If you need more control and share highlighted parts of YouTube video without cutting the video, you need to use a third-party tool known as Vibby.
Vibby allows you to not only share specific parts of videos from YouTube but other platforms as well like Vimeo and Twitch. With the tool, you can clip multiple sections of the video and share them with others.
- To get started, signup either with mail, Google, Twitter, Facebook, or Twitch account.
- Once signed in, go to Create vib at the top left corner and then paste the URL of the YouTube video you would like to share and then click on the Start button.

- Your video will load in the Vibby editor, now click on Highlight the parts to share.
- Here you will see the Start highlight button, jump 5-sec option, option to switch between HD and SD video quality, and volume control button. Navigate to the part you want to share and click on Start highlight.

- When you reach the end of the part, click on Finish highlight. Repeat the process to highlight multiple parts of the video. All the highlighted parts will appear in a list on the right side of the screen.
- Add a description to each part and format it, you have the option to preview before hitting the Save vib button.
- Name the vib and assign a category and then publish it to Vibby or make it a private vib.
- You get a dedicated link to your vib with the ability to embed it on your website or blog.
In this way, you can share the highlights of the YouTube video or Vimeo video easily.
Part 4: How to Get YouTube Timestamp Link on iPhone and Android?
Linking to specific YouTube Timestamp Link is straightforward on both iPhone and Android.
- Go to YouTube and select the video you want to share.
- Move through the progress bar of the video to reach the key part and click on the Share button.
- A pop-up menu appears, highlight the URL and click on the Copy button.
- Paste the URL and manually add the Timestamp using the steps mentioned in add a Timestamp manually.
Part 5: Is Timestamp Beneficial for your Video?
Timestamping your YouTube videos may decrease the watch time, but it enhances the user experience, and they want to see more of your videos. Apart from this, adding Timestamps to your videos make your videos discoverable through Google search. YouTube and Google will reward you for the videos in form of a high search engine ranking.
Bonus: How to Add YouTube Timestamp Link in YouTube Video Description
Adding a YouTube Timestamp link in your video description is easy. Here are the steps to do so.
- Go to your YouTube channel and select the video you want to add Timestamp to and then navigate to the description below it.
- Edit the description by clicking on the Edit Video button.
- You are redirected to the Video Details page. Here write 0:00 at the first part of the timecode, and then continue with the time of the key part of the video you want to add the Timestamp to in 2:40 format. You can add more Timestamp as well and then click on the Save button.

- Reload the video page and you will see auto-generated Timestamp Links at the specific time you provided in the description.
Note: You need to add at least three timestamps which are 10 seconds or longer in order to add timestamps successfully.
Conclusion
As much as possible YouTubers want to make videos short and to the point. However, if a video needs to be longer, you can still help users navigate through to find what is important to them by adding Timestamp to YouTube link or Timestamp the YouTube descriptions. This can help your viewers jump straight to the interesting part in the video, rather than viewing the entire video saving their time and boost user experience.
Richard Bennett
Richard Bennett is a writer and a lover of all things video.
Follow @Richard Bennett
Richard Bennett
Mar 27, 2024• Proven solutions
It is a well-known fact that internet users have a short interest span, about just eight seconds. This attention span applies to all internet platforms including YouTube. YouTube is the second largest and most visited search engine after Google. It provides users with information through engaging and eye-catchy videos. However, certain videos are longer where only a particular section of the video holds the important information. Viewers tend to skip the long videos and if you do not want this to happen to you, you can link to that specific part on your video adding value for your channel viewers with a link known as the YouTube Timestamp link.
When you have a Timestamp link on your video, you can help your viewers directly reach the specific time in the video. This helps avoid the viewers from losing interest or to search for the key part in your video themselves.
Here in this article, we will explain Timestamp links, how to add Timestamp to YouTube video links, and what are the benefits of Timestamp.
- Part 1: YouTube Timestamp Links Introduction
- Part 2: Adding a Timestamp to YouTube Video Link on Desktop
- Part 3: How to Share Specific Parts of YouTube Video
- part 4: Getting YouTube Timestamp Link on Mobile
- Part 5: FAQ About YouTube Timestamps
Part 1: What is YouTube Timestamp Links
In this fast-paced world where viewers have limited time at hand, YouTube Timestamp links are extremely helpful. These links are anchor text or video hyperlinks found either in the description beneath the video or at the video link end.
The Timestamps links allow you to put a link to a key moment in your YouTube video allowing the viewers and subscribers to view the video at the precise time specified. Your YouTube video maybe half an hour long or maybe your users do not have the time now or forget to later watch your video, but when you add Timestamp to the YouTube link, you provide them ways to get to the content quickly enhancing the user experience.
In addition to this, you can even provide a reference in minutes and hours where necessary. The YouTube Timestamp link acts as a guide that directs viewers to the part of the video, which is most relevant to them without having to watch the entire video.
Part 2: How to Add a Timestamp to YouTube Video Link on Desktop?
In the following section, I will show you how to add timestamp to YouTube video link in several ways.
Use YouTube’s Share Feature
Using YouTube’s share feature is the simplest way to add Timestamp to YouTube videos. Here are easy steps to follow to do this.
- Open the YouTube video on your desktop that you want to share.
- Play the video or navigate the timeline and stop at the key moment you wish to apply the timestamp to.
- Now click on the Share button, a pop-up will appear. Under the URL, you will see a small box indicating Start at. The Timestamp is generated automatically, but you can adjust it.
- Copy the updated URL with Timestamp to share the video or click on the social sharing icons to do so.
- When your viewers click on this URL, the video will begin at the specified Timestamp.
Use the Browser URL to add Timestamp manually
You can add Timestamp manually as well. Follow the step-by-step guide below to add a Timestamp manually.
- Open your YouTube video in a browser on your desktop and then find the URL in the browser’s address bar.
- Enter the specific time you want the viewers to watch the video from at the end of the video URL.
You can add time manually in two ways depending on the URL.
?t=As or
&t=As
“youtu.be/” Format
If your YouTube video link is a youtu.be format, then just add ?t=As at the end of the video link. The A denotes the seconds at which you want the viewer to watch your video. The time can also be specified in minutes and seconds and when you want to do that just add ?t=AmBs. For instance, ?t=2m40s.
“youtube.com/” Format
When your YouTube video link has a youtube.com format, the adjustment starts with an ampersand. &t=As or &t=AmBs is what you can use. If you are looking to add the Timestamp at 2m40s, just add “&t=2m40s at the end of the video URL.
Whenever anybody uses the URL with Timestamp, the video will start from the specified time.
However, when adding a Timestamp manually, always leave include whole numbers. For example, if the time starts at 4m, use 4 and not 04.
Copy video URL at current time
You can use YouTube’s built-in feature to share the key parts of your YouTube video. Follow the steps here.
- Visit YouTube and open the video you want to add Timestamp link to.
- Play the video or navigate the timeline to reach the specific part you like to use in Timestamp.
- Now either press Ctrl + click or right-click anywhere on the video. A pop-up opens where you can see various texts, click on the Copy video URL at current time and share the link.
- Anyone who clicks on this link will be instantly transported to the exact segment of your YouTube video.
Part 3: How to Share Specific Parts of Videos with Vibby and Get YouTube Link with Timestamp
The above-mentioned methods to add and send YouTube link with timestamp are quick and easy, but they have a few limitations. If you need more control and share highlighted parts of YouTube video without cutting the video, you need to use a third-party tool known as Vibby.
Vibby allows you to not only share specific parts of videos from YouTube but other platforms as well like Vimeo and Twitch. With the tool, you can clip multiple sections of the video and share them with others.
- To get started, signup either with mail, Google, Twitter, Facebook, or Twitch account.
- Once signed in, go to Create vib at the top left corner and then paste the URL of the YouTube video you would like to share and then click on the Start button.
- Your video will load in the Vibby editor, now click on Highlight the parts to share.
- Here you will see the Start highlight button, jump 5-sec option, option to switch between HD and SD video quality, and volume control button. Navigate to the part you want to share and click on Start highlight.
- When you reach the end of the part, click on Finish highlight. Repeat the process to highlight multiple parts of the video. All the highlighted parts will appear in a list on the right side of the screen.
- Add a description to each part and format it, you have the option to preview before hitting the Save vib button.
- Name the vib and assign a category and then publish it to Vibby or make it a private vib.
- You get a dedicated link to your vib with the ability to embed it on your website or blog.
In this way, you can share the highlights of the YouTube video or Vimeo video easily.
Part 4: How to Get YouTube Timestamp Link on iPhone and Android?
Linking to specific YouTube Timestamp Link is straightforward on both iPhone and Android.
- Go to YouTube and select the video you want to share.
- Move through the progress bar of the video to reach the key part and click on the Share button.
- A pop-up menu appears, highlight the URL and click on the Copy button.
- Paste the URL and manually add the Timestamp using the steps mentioned in add a Timestamp manually.
Part 5: Is Timestamp Beneficial for your Video?
Timestamping your YouTube videos may decrease the watch time, but it enhances the user experience, and they want to see more of your videos. Apart from this, adding Timestamps to your videos make your videos discoverable through Google search. YouTube and Google will reward you for the videos in form of a high search engine ranking.
Bonus: How to Add YouTube Timestamp Link in YouTube Video Description
Adding a YouTube Timestamp link in your video description is easy. Here are the steps to do so.
- Go to your YouTube channel and select the video you want to add Timestamp to and then navigate to the description below it.
- Edit the description by clicking on the Edit Video button.
- You are redirected to the Video Details page. Here write 0:00 at the first part of the timecode, and then continue with the time of the key part of the video you want to add the Timestamp to in 2:40 format. You can add more Timestamp as well and then click on the Save button.
- Reload the video page and you will see auto-generated Timestamp Links at the specific time you provided in the description.
Note: You need to add at least three timestamps which are 10 seconds or longer in order to add timestamps successfully.
Conclusion
As much as possible YouTubers want to make videos short and to the point. However, if a video needs to be longer, you can still help users navigate through to find what is important to them by adding Timestamp to YouTube link or Timestamp the YouTube descriptions. This can help your viewers jump straight to the interesting part in the video, rather than viewing the entire video saving their time and boost user experience.
Richard Bennett
Richard Bennett is a writer and a lover of all things video.
Follow @Richard Bennett
Also read:
- [New] Best Free Tools for Converting YouTube Videos
- Instantaneous Fortnite Tile Design Guide
- [New] Blitzing Sharing Easy YouTube Playlist Methods
- In 2024, ASMR Production 101 Essential Strategies for Cutting-Edge Video Making
- [Updated] Boost Engagement and Traffic with These Top Video Marketing Moves
- [Updated] Best Camera Lenses for YouTube
- [New] Channel Dynamo Craft Your Content Empire
- In 2024, Efficient Tools Simplifying the Task of Feedback Erasure
- From Mac Studio to YouTube Stream IMovie Video Upload Guide
- Elevate Your Digital Presence Mastering the Art of Video Reacts for 2024
- In 2024, Earning Insights Average AdSense Earning for Every 1,000 YouTube Views
- In 2024, Elevate Learning Top 15 YouTube Experts in Science
- How to Buy 1 Million YouTube Views Safely From Trusted Providers
- In 2024, Capturing Quality Lens Recommendations for Content Makers
- Streamline Your Vlog's Sound with Effective Tips
- Crafting Prime Valorant Video Thumbnails on YouTube
- [New] Channeling Wealth Through Beauty Online Platforms
- [New] Elevate Presence by Broadcasting on YouTube + Twitch
- In 2024, Creating a Custom URL for YouTube Autosub
- [Updated] Ever-Fading Memories Revived YouTube's Lost Content Hunt
- Evaluating TSeries' Business Model with YouTube Viewership Metrics for 2024
- Culinary Cinematography Step-by-Step Recipe Tutorials
- In 2024, Elevate Your Content with These Top Keyword Discovery Tools
- [New] Creating Compelling Sports Content From the Ground Up
- Top Camera/Phone Trackers Precision, Power, Performance
- In 2024, 8 Must-Have Methods for Crafting Memorable GIFs
- Updated In 2024, Your Selling Strategy With LazLive Live Selling
- [Updated] All-Encompassing Evaluation Gecata's Live Recording
- Best Practices in Photo Captioning Tools for 2024
- Ultimate Guide from iPhone XS Max iCloud Activation Lock Bypass
- 2024 Approved SonicSoothsayer Listening Inspection Report
- Updated Mac Video Metadata Mastery 8 Essential Editor Tools for 2024
- [New] Effortless Strategies for Facebook Stories' Seamless Uploads
- In 2024, Decreasing OBS Stream Quality
- iPhone 6s Plus Asking for Passcode after iOS 17/14 Update, What to Do? | Dr.fone
- In 2024, Complete Review & Guide to Techeligible FRP Bypass and More For Infinix Hot 40 Pro
- How to Speed up a Video on Splice for 2024
- [New] In 2024, Boosting Brand Visibility Essential Insta Highlight Upgrades
- [New] Firefox Recording Tools & Extensions for 2024
- [New] Step-By-Step Approach to Conquering IGTV for 2024
- [Updated] Follower Erosion How to Spot It on Insta
- [Updated] Transformation Tips Applying Japan's Favorite On-Screen Effects for 2024
- How to Come up With the Best Pokemon Team On Apple iPhone 11 Pro Max? | Dr.fone
- Title: "Setting up a Sports Channel From Scratch, Mac-Style"
- Author: Kevin
- Created at : 2024-05-25 16:16:03
- Updated at : 2024-05-26 16:16:03
- Link: https://youtube-videos.techidaily.com/setting-up-a-sports-channel-from-scratch-mac-style/
- License: This work is licensed under CC BY-NC-SA 4.0.
