
![Record Screen and Upload to YouTube [PC, Mac, Online]](https://www.lifewire.com/thmb/8HIWKNUhvbLFKMz_GmdXMI_Q8Z0=/400x300/filters:no_upscale():max_bytes(150000):strip_icc()/Stocksy_txp05cf88357sE100_Medium_993092-58263bfb5f9b58d5b15ceedb.jpg)
Record Screen and Upload to YouTube [PC, Mac, Online]
Record Screen and Upload to YouTube [PC, Mac, Online]
10 Record Screen and Upload to YouTube Tools [PC, Mac, Online]

Richard Bennett
Mar 27, 2024• Proven solutions
Recording the screen, including the audio, can help you introduce your gaming flow, show how to perform a task on the computer, or create a presentation. You can also upload the screen record to YouTube for free. There are several solutions if you want to record your screen and upload it to YouTube. You can record the screen with some screen recording software on your Mac or your Windows PC or with some online screen recording software or the screen recording feature built-in YouTube itself. In this article, we will show you how to to record screens and upload to YouTube on Windows and Mac with some screen recorders , some of which are free to use, or freemium, which are built in your computer. Check it out now.
- Part 1: Record Screen and Upload to YouTube Directly on PC
- Part 2: Record Screen and Upload to YouTube Online
- Part 3: Record Screen and Upload it to YouTube on Mac
Recommended YouTube Screen Recorders to Record Screen and Upload to YouTube Directly [Windows & Mac]
The following YouTube screen recording software can be used on both Windows and Mac computers. You can record the entire screen or a particular portion of the screen, record your own voiceover or add music to the recorded video and then upload it to YouTube directly.
Using Wondershare Filmora
Filmora is an easy-to-use yet powerful enough video editing software which features the Recording tools. Using Filmora, you can record the desktop screen , audio and webcam simultaneously. But compared with Filmora, the highest frame rates that Filmora can capture at 1 second is 60FPS.

Launch Wondershare Filmora and choose Full Feature mode to begin a project. Go to the Record tab and choose Record PC Screen. There are three types of screen recording to choose from – Target Window, Full Screen and Custom. You can also choose to record computer system audio or record from microphone. Click the icons to turn them off or on accordingly. Click Settings to see if there’s anything you need to adjust before recording.
 Download Mac Version ](https://tools.techidaily.com/wondershare/filmora/download/ )
The recorded footage will be loaded to the Media panel directly, you can then cut out imperfect frames, add some texts and titles, or apply transitions and filters to it. To upload the recorded screen video, click the Export in the main interface, and then switch to YouTube tab in the Export window.

Sign in your YouTube account and complete the video info accordingly and then click the Export button to upload the recorded video to YouTube directly.
If you are looking for more screen recorders which can run on Windows, Mac, Linux, Android, iOS or online for different purposes, you can check our picks of the best screen recorders for all platforms based on different purposes.
Part 1: How to Record Screen on Windows PC and Upload to YouTube Directly
1. Bandicam
To record screen using Bandicam, select “Screen Recording” and a green-edged rectangle window will appear. Adjust the rectangle window on the video then play the video.
Clicking the REC button will change the green-edged line of the rectangle window to red. Click the stop button to stop recording. To watch the recorded video, go to the “General” tab and click “Open.”
You can also upload your desired videos to YouTube from Bandicam by clicking the “Upload” button found under Bandicam’s “Output” tab.

2. Using Microsoft Expression Encoder 4
You can download Microsoft Expression Encoder 4 to record the screen of your device and upload it to YouTube. The software has a screen capture tool and encoder. Install the software as you would usually do. There’ll be 2 shortcuts in the start menu – Microsoft Expression Encoder 4 Screen Capture (used to capture the screen) and Microsoft Expression Encoder 4 (converts the screen into a video that can be uploaded to YouTube).
3. Using Ezvid
Ezvid can record screen and audio simultaneously. It can also capture the whole area of the screen, making it perfect for tutorial videos. Ezvid also has speech synthesis that translates text captions into artificial human language, so it can easily produce human sound with only a click of a button.
4. Using Smartpixel
Smartpixel is a screen recorder for Android and Windows. It has a user-friendly interface and different editing as well as recording functions. Smartpixel can export various video formats such as 3gp, MP4, wmv, avi and flv. It also allows you to upload videos to different online platforms like GoPlay and YouTube.
Part 2: How to Record Screen Online
1. Using YouTube
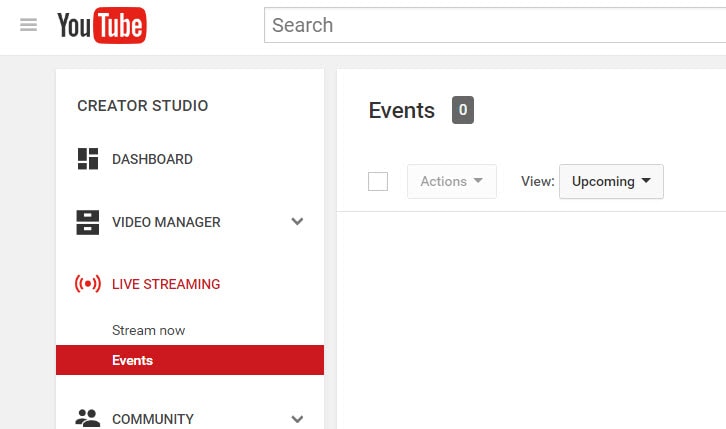
You can now also record desktop screen with the features in YouTube. To start recording the screen using YouTube, you just need to sign-in to the website using your Google Account. Click “Creator Studio”. Go to Live Streaming and choose “Events”. You’ll be directed to the “Create Event” page. Provide the title for your screencast video, set the video’s privacy to either Private or Unlisted.
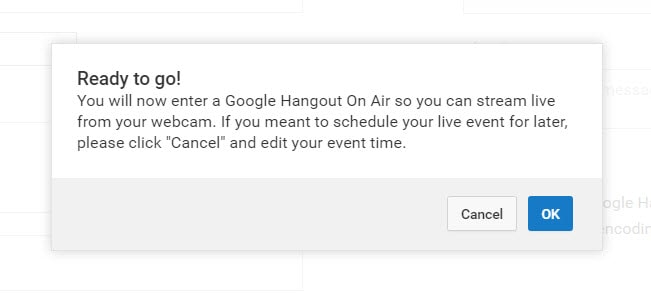
Click “Go Live Now” The Hangouts on Air page will open. Start the webcam from recording by clicking the camera icon. If you don’t want to record audio, you can just click the microphone icon.
Click “Screenshare” and choose a desktop window that you want to record for the screencast. Click “Start Screenshare” to share the screen then click the “Start Broadcast” button to begin recording the screen. When you’re done recording, just “Stop Broadcast” and go to the YouTube website. The new screencast video is stored in your YouTube video dashboard. You can share the video or download it to your Google Drive.
For more details, you can check How to record YouTube videos . If you’re looking for more online screen recorders for YouTube, you can check our picks of the 10 Best Free Online Screen Recorders .
2. Using FlexClip - Free Online Screen Recorder
FlexClip is a complete bundle of creativity. Why so? It is because it’s a web-based tool that helps you with image and video editing and post-production. It also offers a free online screen recording option.
FlexClip lets you record your webcam, screen, and audio with a simple click. Contrarily, you can also record simultaneous screens without a hitch! It can record almost anything that is being displayed on your computer screen. So be it gameplays, seminars, courses, presentations, or anything, you can always use this program to save your recording.
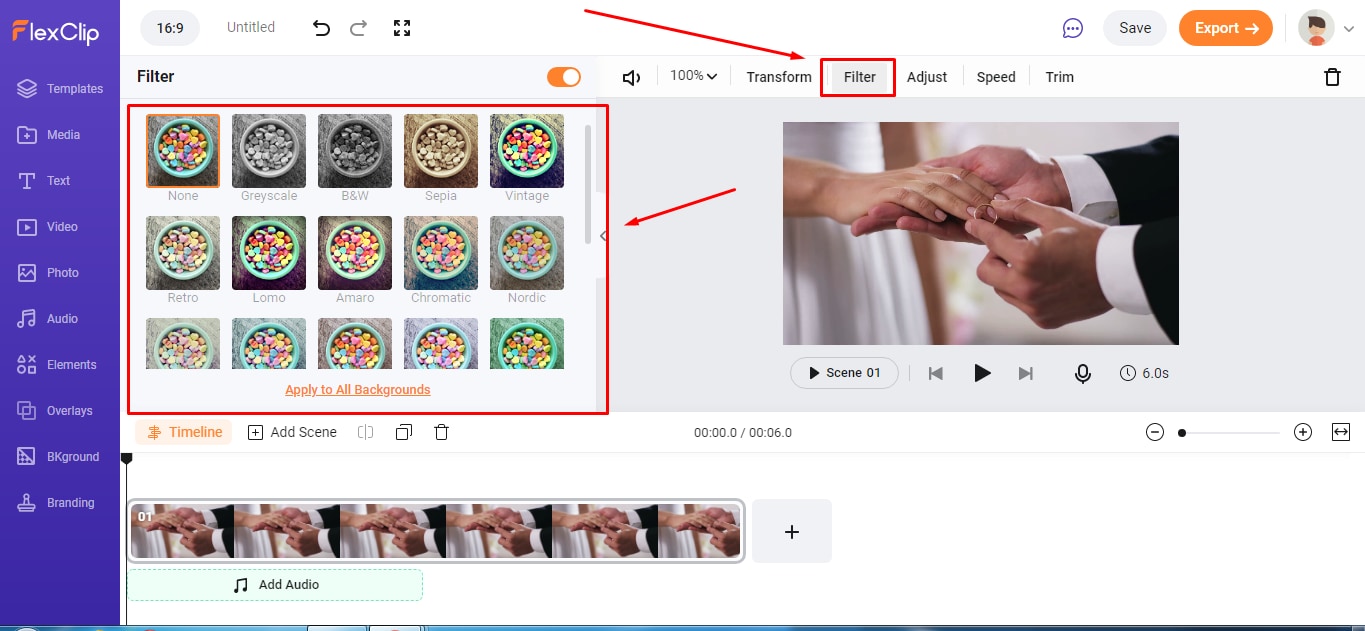
And once you’re done capturing the screen, FlexClip also allows you to edit your recording. You can add subtitles, highlights, overlays, and annotations to increase your video’s worth. So no wonder why FlexClip is one of the leading web-based software for free online screen capturing, especially if you want to make great YouTube videos.
The recording process is easy. All you need to do is visit the website and click the “Start Recording” button.
Then, choose your layout to start recording the screen and audio. When you’re finished, just hit the “Stop” button to end recording to edit the video in FlexClip’s built-in video editor. Lastly, download the screencast to upload it to your YouTube channel.
3. Using Apowersoft - Online Screen Recorder (Free)
Apowersoft is a renowned company that creates digital products, including file compressors, watermark removers, and more. Since there’s a growing demand for screen recorders for YouTube, the Apowersoft creators have also launched a “Free Online Screen Recorder.” Yup! You’re reading the right name.
Apowersoft – Free Online Screen Recorder eases the screen recording process. While it’s an online tool, you can also download the app on your Mac or Windows OS.
It’s a free program with simple features, such as a screen and webcam recording with audio. So if your YouTube content doesn’t require overlays, subtitles, or other editing stuff, this software is ideal due to its simplicity.
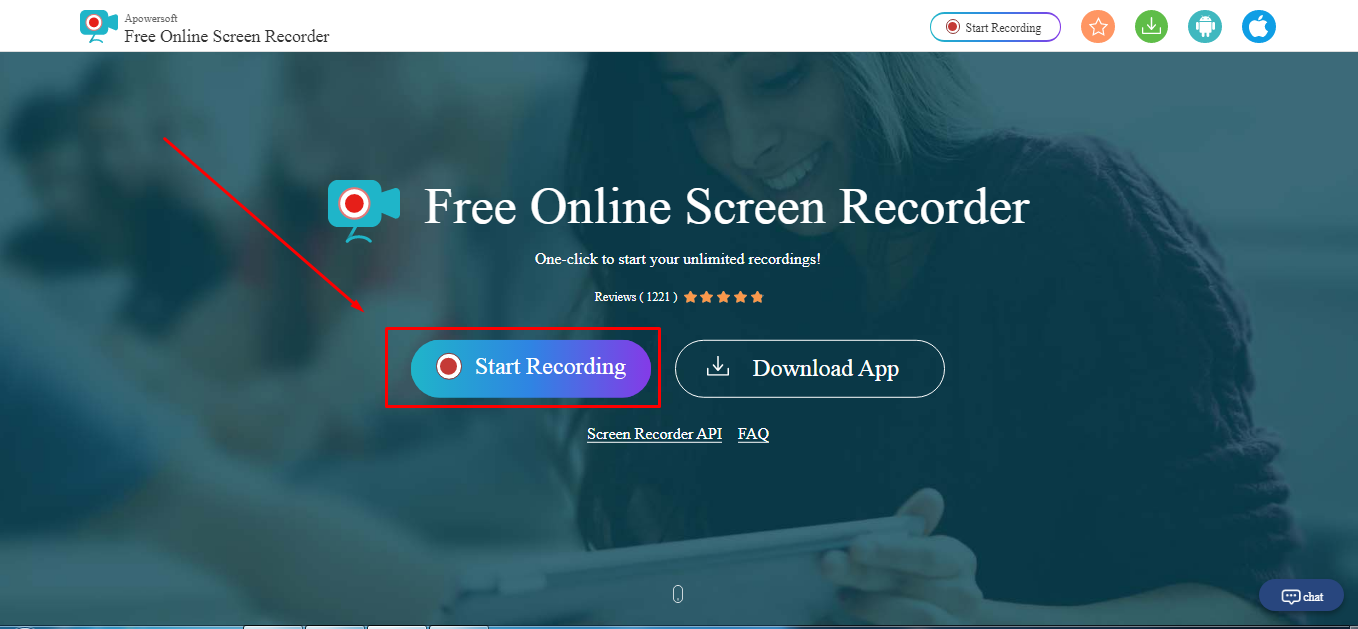
You can click the “Start Recording” button to get started.
.
Then, select the screen you wish to record, and save the captured screen to your local disk or cloud so you can upload the videos later to your YouTube channel.
Part 3: How to Record Screen for YouTube with Free Screen Recorder on Mac
1. Using QuickTime Player
QuickTime Player can be used to record movies from your camera or the screen of your iPad, iPod touch or iPhone. It can also record your Mac’s screen or record audio from your microphone. To record the screen of your Pad, iPod touch or iPhone, you should use the movie-recording function. You can use it to record the screen for YouTube video, or you can also record the YouTube video and empower it with your creativity.
For more details of using QuickTime Player to record YouTube videos, check our guide: How to record videos with Quicktime.
2. Using Screen Flow
Screen Flow is our second pick for Mac. Although it’s paid software, you can still enjoy the blessings of this screen recorder through the trial version. It’s a very handy tool that allows Mac screen recording and all iOS devices, such as iPhones and iPad.
Okay! So what’s good about screen flow? Let’s uncover. Firstly, it’s an editor + screen recorder specifically made for YouTube. You can capture the screen and edit the footage before uploading it to your channel.
Secondly, this software allows you to record simultaneous screens and your webcam. Plus, you can also record your voice through its mic recording option.
Another great thing about Screen Flow is that it has numerous video filters and a customizable title library. It also permits you to save screen recordings on your Mac or directly share them to your YouTube channel, other social media accounts, websites, or cloud storage in a few clicks.
Here’s a video to help you get started with screen recording on your Mac using Screen Flow:
3. Using Vmaker
Vmaker is another authentic software to record screens for your YouTube videos. It’s a free program, but you can buy premium versions to unlock more features.
The tool is trusted by many software review websites, such as “crozdesk.” It is available on both Mac and Windows OS. However, it seems like this software performs well on Mac operating systems.
Vmaker allows you to record your screen, your favorite YouTube videos, and the audio – all together! You can record the entire Mac screen or a specific portion in HD quality. Moreover, the software allows you to pick resolutions up to 4K to record the media.
This program also offers editing features like adding subtitles, music, flip, blur, trim, and more to create an awesome video. All videos are saved to your cloud workspace once you finish recording. Then, you can share the recorded video screens on your YouTube.
The tool is ideal for making tutorials, courses, demos, and product review videos. All you need to do is download Vmaker on your Mac. Choose a webcam, screen, or both with audio for recording. Start recording in the highest quality. Edit your video and share it on your YouTube channel.
Conclusion
Above are some screen recorders that you can use to record YouTube videos or record the screen and webcam simultaneously to make a video and upload it it to YouTube. If you want to record a screen video and edit it further, you should try Wondershare Filmora video editor.
Download Mac Version ](https://tools.techidaily.com/wondershare/filmora/download/ )
FAQs
Q1. How do you record your screen on a Mac for YouTube?
There are some great tools for screen recording on Mac for YouTube. The most loved and enjoyed program is Filmora by Wondershare. It’s a professional tool for screen recording and video editing. Most importantly, it has a user-friendly interface and records your screen in high quality.
Another option is the Quick Time Player. This program also allows screen recording. Likewise, Screen Flow is also a great program for screen capturing for YouTube on Mac.
Q2. Can I screen-record and upload it to YouTube?
There are two ways to do it. First, you can download the free or paid screen recording software on your Windows or macOS. Second, you can look for online screen recorders like FlexClip or the built-in YouTube recorder and directly share the recorded video to your channel.
Some tools, like Apowersoft and Vmaker, save screen recordings to the cloud or local disk. And there’s no direct sharing of the recorded screens to your YouTube channel. So if you’re using such programs, you will need to sign in to your YouTube channel and upload the file from your computer hard drive.
Q3. How do I record my computer screen for 2022?
Some of the greatest video editing and screen recording tools like Filmora, Bandicam, and FlexClip allow you to record your computer screen. Depending on the software, you can directly share the video to your YouTube channel. Or, save the video on your computer and then upload it on your channel.
Richard Bennett
Richard Bennett is a writer and a lover of all things video.
Follow @Richard Bennett
Richard Bennett
Mar 27, 2024• Proven solutions
Recording the screen, including the audio, can help you introduce your gaming flow, show how to perform a task on the computer, or create a presentation. You can also upload the screen record to YouTube for free. There are several solutions if you want to record your screen and upload it to YouTube. You can record the screen with some screen recording software on your Mac or your Windows PC or with some online screen recording software or the screen recording feature built-in YouTube itself. In this article, we will show you how to to record screens and upload to YouTube on Windows and Mac with some screen recorders , some of which are free to use, or freemium, which are built in your computer. Check it out now.
- Part 1: Record Screen and Upload to YouTube Directly on PC
- Part 2: Record Screen and Upload to YouTube Online
- Part 3: Record Screen and Upload it to YouTube on Mac
Recommended YouTube Screen Recorders to Record Screen and Upload to YouTube Directly [Windows & Mac]
The following YouTube screen recording software can be used on both Windows and Mac computers. You can record the entire screen or a particular portion of the screen, record your own voiceover or add music to the recorded video and then upload it to YouTube directly.
Using Wondershare Filmora
Filmora is an easy-to-use yet powerful enough video editing software which features the Recording tools. Using Filmora, you can record the desktop screen , audio and webcam simultaneously. But compared with Filmora, the highest frame rates that Filmora can capture at 1 second is 60FPS.
Launch Wondershare Filmora and choose Full Feature mode to begin a project. Go to the Record tab and choose Record PC Screen. There are three types of screen recording to choose from – Target Window, Full Screen and Custom. You can also choose to record computer system audio or record from microphone. Click the icons to turn them off or on accordingly. Click Settings to see if there’s anything you need to adjust before recording.
Download Mac Version ](https://tools.techidaily.com/wondershare/filmora/download/ )
The recorded footage will be loaded to the Media panel directly, you can then cut out imperfect frames, add some texts and titles, or apply transitions and filters to it. To upload the recorded screen video, click the Export in the main interface, and then switch to YouTube tab in the Export window.
Sign in your YouTube account and complete the video info accordingly and then click the Export button to upload the recorded video to YouTube directly.
If you are looking for more screen recorders which can run on Windows, Mac, Linux, Android, iOS or online for different purposes, you can check our picks of the best screen recorders for all platforms based on different purposes.
Part 1: How to Record Screen on Windows PC and Upload to YouTube Directly
1. Bandicam
To record screen using Bandicam, select “Screen Recording” and a green-edged rectangle window will appear. Adjust the rectangle window on the video then play the video.
Clicking the REC button will change the green-edged line of the rectangle window to red. Click the stop button to stop recording. To watch the recorded video, go to the “General” tab and click “Open.”
You can also upload your desired videos to YouTube from Bandicam by clicking the “Upload” button found under Bandicam’s “Output” tab.
2. Using Microsoft Expression Encoder 4
You can download Microsoft Expression Encoder 4 to record the screen of your device and upload it to YouTube. The software has a screen capture tool and encoder. Install the software as you would usually do. There’ll be 2 shortcuts in the start menu – Microsoft Expression Encoder 4 Screen Capture (used to capture the screen) and Microsoft Expression Encoder 4 (converts the screen into a video that can be uploaded to YouTube).
3. Using Ezvid
Ezvid can record screen and audio simultaneously. It can also capture the whole area of the screen, making it perfect for tutorial videos. Ezvid also has speech synthesis that translates text captions into artificial human language, so it can easily produce human sound with only a click of a button.
4. Using Smartpixel
Smartpixel is a screen recorder for Android and Windows. It has a user-friendly interface and different editing as well as recording functions. Smartpixel can export various video formats such as 3gp, MP4, wmv, avi and flv. It also allows you to upload videos to different online platforms like GoPlay and YouTube.
Part 2: How to Record Screen Online
1. Using YouTube
You can now also record desktop screen with the features in YouTube. To start recording the screen using YouTube, you just need to sign-in to the website using your Google Account. Click “Creator Studio”. Go to Live Streaming and choose “Events”. You’ll be directed to the “Create Event” page. Provide the title for your screencast video, set the video’s privacy to either Private or Unlisted.
Click “Go Live Now” The Hangouts on Air page will open. Start the webcam from recording by clicking the camera icon. If you don’t want to record audio, you can just click the microphone icon.
Click “Screenshare” and choose a desktop window that you want to record for the screencast. Click “Start Screenshare” to share the screen then click the “Start Broadcast” button to begin recording the screen. When you’re done recording, just “Stop Broadcast” and go to the YouTube website. The new screencast video is stored in your YouTube video dashboard. You can share the video or download it to your Google Drive.
For more details, you can check How to record YouTube videos . If you’re looking for more online screen recorders for YouTube, you can check our picks of the 10 Best Free Online Screen Recorders .
2. Using FlexClip - Free Online Screen Recorder
FlexClip is a complete bundle of creativity. Why so? It is because it’s a web-based tool that helps you with image and video editing and post-production. It also offers a free online screen recording option.
FlexClip lets you record your webcam, screen, and audio with a simple click. Contrarily, you can also record simultaneous screens without a hitch! It can record almost anything that is being displayed on your computer screen. So be it gameplays, seminars, courses, presentations, or anything, you can always use this program to save your recording.
And once you’re done capturing the screen, FlexClip also allows you to edit your recording. You can add subtitles, highlights, overlays, and annotations to increase your video’s worth. So no wonder why FlexClip is one of the leading web-based software for free online screen capturing, especially if you want to make great YouTube videos.
The recording process is easy. All you need to do is visit the website and click the “Start Recording” button.
Then, choose your layout to start recording the screen and audio. When you’re finished, just hit the “Stop” button to end recording to edit the video in FlexClip’s built-in video editor. Lastly, download the screencast to upload it to your YouTube channel.
3. Using Apowersoft - Online Screen Recorder (Free)
Apowersoft is a renowned company that creates digital products, including file compressors, watermark removers, and more. Since there’s a growing demand for screen recorders for YouTube, the Apowersoft creators have also launched a “Free Online Screen Recorder.” Yup! You’re reading the right name.
Apowersoft – Free Online Screen Recorder eases the screen recording process. While it’s an online tool, you can also download the app on your Mac or Windows OS.
It’s a free program with simple features, such as a screen and webcam recording with audio. So if your YouTube content doesn’t require overlays, subtitles, or other editing stuff, this software is ideal due to its simplicity.
You can click the “Start Recording” button to get started.
.
Then, select the screen you wish to record, and save the captured screen to your local disk or cloud so you can upload the videos later to your YouTube channel.
Part 3: How to Record Screen for YouTube with Free Screen Recorder on Mac
1. Using QuickTime Player
QuickTime Player can be used to record movies from your camera or the screen of your iPad, iPod touch or iPhone. It can also record your Mac’s screen or record audio from your microphone. To record the screen of your Pad, iPod touch or iPhone, you should use the movie-recording function. You can use it to record the screen for YouTube video, or you can also record the YouTube video and empower it with your creativity.
For more details of using QuickTime Player to record YouTube videos, check our guide: How to record videos with Quicktime.
2. Using Screen Flow
Screen Flow is our second pick for Mac. Although it’s paid software, you can still enjoy the blessings of this screen recorder through the trial version. It’s a very handy tool that allows Mac screen recording and all iOS devices, such as iPhones and iPad.
Okay! So what’s good about screen flow? Let’s uncover. Firstly, it’s an editor + screen recorder specifically made for YouTube. You can capture the screen and edit the footage before uploading it to your channel.
Secondly, this software allows you to record simultaneous screens and your webcam. Plus, you can also record your voice through its mic recording option.
Another great thing about Screen Flow is that it has numerous video filters and a customizable title library. It also permits you to save screen recordings on your Mac or directly share them to your YouTube channel, other social media accounts, websites, or cloud storage in a few clicks.
Here’s a video to help you get started with screen recording on your Mac using Screen Flow:
3. Using Vmaker
Vmaker is another authentic software to record screens for your YouTube videos. It’s a free program, but you can buy premium versions to unlock more features.
The tool is trusted by many software review websites, such as “crozdesk.” It is available on both Mac and Windows OS. However, it seems like this software performs well on Mac operating systems.
Vmaker allows you to record your screen, your favorite YouTube videos, and the audio – all together! You can record the entire Mac screen or a specific portion in HD quality. Moreover, the software allows you to pick resolutions up to 4K to record the media.
This program also offers editing features like adding subtitles, music, flip, blur, trim, and more to create an awesome video. All videos are saved to your cloud workspace once you finish recording. Then, you can share the recorded video screens on your YouTube.
The tool is ideal for making tutorials, courses, demos, and product review videos. All you need to do is download Vmaker on your Mac. Choose a webcam, screen, or both with audio for recording. Start recording in the highest quality. Edit your video and share it on your YouTube channel.
Conclusion
Above are some screen recorders that you can use to record YouTube videos or record the screen and webcam simultaneously to make a video and upload it it to YouTube. If you want to record a screen video and edit it further, you should try Wondershare Filmora video editor.
Download Mac Version ](https://tools.techidaily.com/wondershare/filmora/download/ )
FAQs
Q1. How do you record your screen on a Mac for YouTube?
There are some great tools for screen recording on Mac for YouTube. The most loved and enjoyed program is Filmora by Wondershare. It’s a professional tool for screen recording and video editing. Most importantly, it has a user-friendly interface and records your screen in high quality.
Another option is the Quick Time Player. This program also allows screen recording. Likewise, Screen Flow is also a great program for screen capturing for YouTube on Mac.
Q2. Can I screen-record and upload it to YouTube?
There are two ways to do it. First, you can download the free or paid screen recording software on your Windows or macOS. Second, you can look for online screen recorders like FlexClip or the built-in YouTube recorder and directly share the recorded video to your channel.
Some tools, like Apowersoft and Vmaker, save screen recordings to the cloud or local disk. And there’s no direct sharing of the recorded screens to your YouTube channel. So if you’re using such programs, you will need to sign in to your YouTube channel and upload the file from your computer hard drive.
Q3. How do I record my computer screen for 2022?
Some of the greatest video editing and screen recording tools like Filmora, Bandicam, and FlexClip allow you to record your computer screen. Depending on the software, you can directly share the video to your YouTube channel. Or, save the video on your computer and then upload it on your channel.
Richard Bennett
Richard Bennett is a writer and a lover of all things video.
Follow @Richard Bennett
Solutions for Missing Shorts Thumbnails on YouTube
Video thumbnails are important since they encourage people to click and watch the video. But what if your set YouTube Shorts thumbnail is not showing? YouTube will use a random part of the video as the thumbnail. It may be an unflattering or uninteresting shot. Then, your Shorts video is doomed.
That said, it is a problem you want to solve. Here are 7 FAQs about YouTube Shorts thumbnails. They may help you with fixing this issue.

Q1. Can I Customize YouTube Shorts Thumbnails?
Yes, you can. YouTube did allow short-form video creators to upload custom thumbnails for their Shorts. However, they aren’t that optimized. For instance, some people may not see them on the Shorts shelf. Also, if you share a link to the video somewhere else, the old video thumbnail may show instead of the new one.
Adding a custom thumbnail for YouTube Shorts is the same as adding one for long-form videos on the platform. Follow these steps:
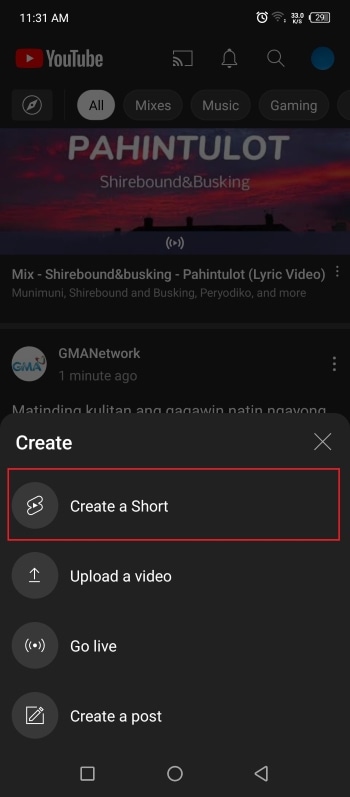
- Open the YouTube mobile app. Click the “Plus” icon at the bottom center > “Create Short.” Upload, edit, and post your video.
- Get to your desktop computer or laptop. Open your channel’s YouTube Studio.

- On the left navigation menu, click “Content.”

- Click the “pencil” icon next to the Shorts you just uploaded. This video should be at the top of the list.
- Navigate to the Thumbnail section. Click “Create Thumbnail.”

Q2. Why Are YouTube Shorts Thumbnails Not Showing?
It’s not you who’s the only one with Shorts thumbnails not showing. Many short-form content creators on the platform are also facing this issue. A YouTuber took to Reddit to complain about how he uploaded custom thumbnails for all his videos. The thumbnails are correct in the editor. However, YouTube still displays a random frame as the thumbnail on the Shorts shelf.
“They ALL have randomly selected different parts of each video I have uploaded & somehow generated a new/unknown thumbnail that was neither what I uploaded as the custom option nor 1 of the 3 that YouTube auto populated.”
The reason behind this is the difference in the thumbnail size. Regular YouTube video thumbnails are in the ratio of 16:9. Meanwhile, Shorts uses a ratio of 9:16. The thing is that YouTube does not yet allow you to upload 9:16 thumbnails. Thus, the thumbnail for Shorts may show correctly on the video section but not on the Shorts shelf.
Q3. How to Fix YouTube Shorts Thumbnail Problem?
Unfortunately, there is no reliable fix to this problem yet. YouTubers have tried different things in hopes that YouTube will display the correct thumbnail for their Shorts.
Some YouTubers have tried using different images. Others have experimented with changing the aspect ratio of the thumbnail or using Adobe editor for ratios. Clearing histories and cache, using different browsers, resizing, and changing the images’ resolution have also been done. Sadly, these are all failed attempts.
Q4. How To Boost Views When I Have no Control Over YouTube Shorts Thumbnails?
Attracting viewers on Shorts is the same as attracting viewers on the main YouTube. You use interesting thumbnails and video titles. Since thumbnails are out of the options, selecting great video titles has become even more important.
Here are some pointers. Your title should be at most 40 characters. Also, it should be concise and irresistible. And forget about SEO since no one is searching for YouTube Shorts anyway. People consume what they see in their feeds. So instead, the title should be “snappy.” It should intrigue, entertain, or enlighten the viewers. That will net you some views for your Shorts content.
Q5. How To Get More Views on YouTube Shorts?
Forgoing the intro is the way to go. An intro will just prolong the video when people are in Shorts to find bite-sized videos. So jump right into the video content. You can also start the video with a still frame instead. Using hashtags, captions, and text effects are also recommended. And interacting with your audience through comments and pinned comments will keep them coming back to your Shorts channel.
Of course, ensuring that the video quality is high is key to getting more views. For that, you need a good video editor. You can try Wondershare Filmora , a powerful and easy-to-use video editor.
Free Download For Win 7 or later(64-bit)
Free Download For macOS 10.14 or later
The best thing is that you don’t need to transfer the video from your phone to your computer and back. Wondershare Filmora is available on mobile. And it’s one of the best tools for enhancing a short-form video.
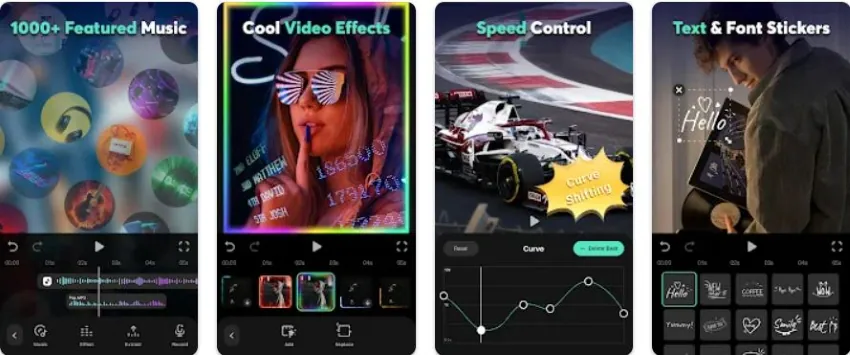
Short-form video watchers love filters, transitions, and effects. And Filmora gives you access to all of that. It provides you with fun and amazing filters, effects, transitions, and stamps that can add a wow factor to your short-form video.
Q6. Do YouTube Shorts Make Money?
Making money from YouTube Shorts was challenging. The platform pays content creators who are doing well through the Creator Fund. However, as Shorts grew, the payout became smaller.
Luckily, that’s going to change. Starting this year, Shorts will be a part of the YouTube Partner Program. This means that you can make money from the ads that people watch on Shorts. According to YouTube, creators will keep 45% of the revenue. It will be distributed based on your share of total Shorts views.
YouTube also adjusted the requirements to qualify for the YPP. They made it easier for Shorts content creators to get into the program.
Q7. How Do You Make YouTube Shorts Play Normal?
You can watch Shorts like normal YouTube videos where you can rewind when you want to. Follow these steps.
On a Desktop Computer
- Open a Shorts video on YouTube.

- Pause the video.

- Click “Library” on the left panel.

- Select the Shorts you just watched. It should be on the top and first on the list.

On a Mobile Phone
- Open the YouTube app. Watch a Shorts video.

- Like the Shorts video.

- Tap “Library”

- Scroll down to find “Liked Videos.” Click on it.

- Select the Shorts video you just watched. It should be at the top of the list.

Conclusion
Unfortunately, custom thumbnails not showing on Shorts does not have a fix yet. So to attract viewers, you must leverage the things in your control. You must title your videos in a way that will make users click the video. Also, adding effects and filters on the video using an editor like Wondershare Filmora can help.
Users can subscribe to Shorts channels. And if they see that your videos are well-edited and high-quality, they’ll be more likely to do so. Once they are subscribed, they will see and watch your videos more often.
Free Download For macOS 10.14 or later
The best thing is that you don’t need to transfer the video from your phone to your computer and back. Wondershare Filmora is available on mobile. And it’s one of the best tools for enhancing a short-form video.
Short-form video watchers love filters, transitions, and effects. And Filmora gives you access to all of that. It provides you with fun and amazing filters, effects, transitions, and stamps that can add a wow factor to your short-form video.
Q6. Do YouTube Shorts Make Money?
Making money from YouTube Shorts was challenging. The platform pays content creators who are doing well through the Creator Fund. However, as Shorts grew, the payout became smaller.
Luckily, that’s going to change. Starting this year, Shorts will be a part of the YouTube Partner Program. This means that you can make money from the ads that people watch on Shorts. According to YouTube, creators will keep 45% of the revenue. It will be distributed based on your share of total Shorts views.
YouTube also adjusted the requirements to qualify for the YPP. They made it easier for Shorts content creators to get into the program.
Q7. How Do You Make YouTube Shorts Play Normal?
You can watch Shorts like normal YouTube videos where you can rewind when you want to. Follow these steps.
On a Desktop Computer
- Open a Shorts video on YouTube.
- Pause the video.
- Click “Library” on the left panel.
- Select the Shorts you just watched. It should be on the top and first on the list.
On a Mobile Phone
- Open the YouTube app. Watch a Shorts video.
- Like the Shorts video.
- Tap “Library”
- Scroll down to find “Liked Videos.” Click on it.
- Select the Shorts video you just watched. It should be at the top of the list.
Conclusion
Unfortunately, custom thumbnails not showing on Shorts does not have a fix yet. So to attract viewers, you must leverage the things in your control. You must title your videos in a way that will make users click the video. Also, adding effects and filters on the video using an editor like Wondershare Filmora can help.
Users can subscribe to Shorts channels. And if they see that your videos are well-edited and high-quality, they’ll be more likely to do so. Once they are subscribed, they will see and watch your videos more often.
Also read:
- [New] How to Create GIFs From YouTube Videos on Desktop and Mobile Devices
- Elevate Your Soundtrack Journey Subscribe for Our Picks of 20 YouTube Musicians
- Unveil Your Video Potential Streaming Google Meet to YouTube Guide
- [New] Decode Your YouTube Preferences with These 6 Fan-Favorite Questionnaires
- Transform FLV Into YouTube Hits with These Top Alternatives
- Simplify Audio Extraction Find the Most Affordable Solutions
- Complete Unpacking The World of Virtual Idols
- How to Avoid and Reverse Strikes on Your YouTube Account
- Pros in the Field Pick Their Favorite ASMR Mics
- Learning Leaders Most Influential Edu Tutorials YT
- Craft Your Channel's Moniker YouTube Naming Tools and Tips
- Designing Memorable Try-On Videos for Online Audiences for 2024
- Beginning the Video Odyssey How to Create an Engaging YouTube Channel
- 2024 Approved A Compreranstive Approach to High-Fidelity Recording, No Mic Necessary
- In 2024, Average Earnings Per View What's the Income for YouTubers per Ad Playback?
- Efficiency at Fingertips Swiftly Upload Videos From iPhone/iPad to YouTube for 2024
- Discovering the Power Behind YouTube Statistics Interpretation for 2024
- 2024 Approved Dominate Discussion How to Trend on Social Media Platforms
- In 2024, Ace Advertising and Analytics YouTube's Universal Monetization Techniques
- [New] Compre-Web Resources for Effortless YouTube Template Access
- 2024 Approved Dive Deep Into Video Creation with These Top 12 Vlogger-Friendly Cameras
- [New] Deciphering Digital Marketing The Power of YouTube Keywords
- [Updated] Engineering Endgame Echoes
- [New] Discover the 7 Most Wanted Apps to Boost Your YouTube LIVE Quality
- [Updated] A Comprehensive Walkthrough Creating Channel Banners
- The Art of Initiating Your YouTube Content Compellingly
- [New] Download YouTube Images with Ease Online
- Transforming Viewers' Experience The Impact of Text on YouTube Media
- [New] Earth’s Premier Online Income Tycoon
- OBS and Youtube A Beginner's Live Stream Blueprint
- Troubleshoot and Eliminate Green Screen Issues on Mac
- [Updated] 4 Creative Ways to Insert YouTube Content in Presentations
- Step-by-Step Techniques for Seamless YouTube Subtitling & Captions
- [Updated] Achieving Excellence in Work and Online Content
- 10 Budget-Friendly Platforms for YouTube Branding Mastery
- The Ultimate Strategy for Stellar Valorant Video Thumbnails on YouTube
- Vlogger's Verdict Youtube Vs. TikTok
- Securely Distributing Exclusive YouTube Videos Through Gmail
- Discover Your Rhythm Assembling Tailored YouTube Playlists for the Digital Age (Web/Mobile) for 2024
- Earnings Explorer What You Get for Watching One Million Videos?
- Discovering the Most Innovative Youtube Channel Names A Vlogger's Must-Have List (Maximum Length 156 Characters) for 2024
- 2024 Approved Best Practices for YouTube Thumbnail Dimensions
- Instant Influence Youtube's Hourly Video Tops
- A Compreenas Guide to Choosing Ideal Lenses for Filmmaking
- Proven Techniques for Captivating Viewers with Live Video Graphics
- In 2024, Detailed Guidance on Crafting Dynamic YT Profiles
- Navigating Two Worlds A Practical Guide to Multistream on Youtube and Twitch
- [Updated] DSLR Camera's Stand Against Mirrorless for Videographers
- 2024 Approved Elite Influencer Economy Leaders
- [New] Essential Offline iOS Game List - Unplugged Fun Awaits for 2024
- Unveiling Magix Video Pro X Capabilities
- In 2024, Techniques to Overcome Blackout During OBS Fullscreen
- 2024 Approved Tips on Troubleshooting Frozen OBS Fullscreen Problem
- Updated In 2024, Are You Looking Forward to Edit the Videos for YouTube or Edit some Family Videos, This Professional and Easy to Use AVI Editor Will Always Help You Out
- New How to Convert MP3 to Text Online 4 Easy Ways for 2024
- [New] Elite Group of 12 Tools for Endless Video Capture for 2024
- [Updated] In 2024, Rapid-Fire Rise to Fame with Customizable TikTok Templates
- [New] Top 7 Free Apps to Record Screens of Budget PCs for 2024
- [New] In 2024, Direct Approaches to Storing Google Voice Communications
- [Updated] 2024 Approved Mastering Your Video Projects with Superior Recorder Software
- In 2024, Easy Steps on How To Create a New Apple ID Account On iPhone 12
- In 2024, All About Apple iPhone 14 Pro Max Unlock Chip You Need to Know
- New What Is an AI Editor? | Wondershare Virbo Glossary for 2024
- How to Mirror Apple iPhone 12 mini to PC via USB? | Dr.fone
- Unveiling the Ultimate Top 10 4K Displays for MacBook Users
- Updated In 2024, Pianofilm Harmonies A Premium Assembly of Royalty-Free Cinematic Scores Perfect for Visual Media Production
- Your Step-by-Step KineMaster Meme Creation
- [Updated] Elite Virtual Classrooms Finding Value Outside Udemy's Ecosystem for 2024
- In 2024, Free Your Camera's Potential Best Screens Recording Apps Reviewed
- Updated 2 Effective Ways to Make SRT File Translation Like a Pro for 2024
- How to share/fake gps on Uber for Oppo Reno 11F 5G | Dr.fone
- [Updated] Guide to Recording Adobe Presentation Videos for 2024
- [Updated] How to Perfectly Record and Preserve Your PS3 Games for 2024
- Latest way to get Shiny Meltan Box in Pokémon Go Mystery Box On Motorola Edge 40 Pro | Dr.fone
- The Ultimate Cheatsheet to 15 Adobe Animate Alternatives for 2024
- In 2024, How to Unlock Apple ID Activation Lock On Apple iPhone 12 mini?
- New From Noisy to Silent A Filmmakers Guide to Perfecting Audio Quality with Filmora Software
- Ultimate Guide on Oppo F25 Pro 5G FRP Bypass
- [New] Upgrade Your Experience #10 High-Performance Drives for 2024
- [Updated] 2024 Approved Masterclass Perfecting the Art of Facial Recording
- [Updated] Maximizing User Experience for Live Streams on Discord Platform for 2024
- For People Wanting to Mock GPS on Xiaomi Redmi K70 Devices | Dr.fone
- 2024 Approved Amplify Your Profile Pull Clever Hacks That Work on Tinder
- [New] 2024 Approved Sharing Videos Tweet-Tumble Route
- Top IMEI Unlokers for Your Oppo Find N3 Flip Phone
- In 2024, How to Unlock Apple iPhone 13 Pro When We Dont Have Apple ID or Password?
- New Being an After Effects Editor, You Often Find Yourself the Need to Add Motion Blur After Effects. This Guide Has Got You Covered. Follow to Find Out How to Add Motion Blur in After Effects for 2024
- Updated Best Practical Tips to Improve Your Lighting in the Sun
- Title: Record Screen and Upload to YouTube [PC, Mac, Online]
- Author: Kevin
- Created at : 2024-05-25 16:13:55
- Updated at : 2024-05-26 16:13:55
- Link: https://youtube-videos.techidaily.com/record-screen-and-upload-to-youtube-pc-mac-online/
- License: This work is licensed under CC BY-NC-SA 4.0.
