
:max_bytes(150000):strip_icc()/Android-Auto-vs-Apple-Carplay-392b0e27330d42f4be8ac186a3257459.jpg)
"Pro-Level Cams for Aspiring YouTube Creators"
Pro-Level Cams for Aspiring YouTube Creators
The Best Cameras for YouTube from Beginners to Professionals

Max Wales
Mar 27, 2024• Proven solutions
Whether you’re a beginner or a pro as a YouTuber, your YouTube equipment shouldn’t be the thing that holds you back from becoming a YouTube star. But, how do you find the best camera for making YouTube videos? What options do you have?
In this article, we’re going to explore some of the best cameras for YouTube. We’ll label each one based on what we believe is best for particular uses, so that you can better parse what it is that you want to purchase. All of this is in hopes that you can find the video camera for YouTube that is right for you and what you need.
Part 1: 7 Best Best Camera for Youtube to Make Videos
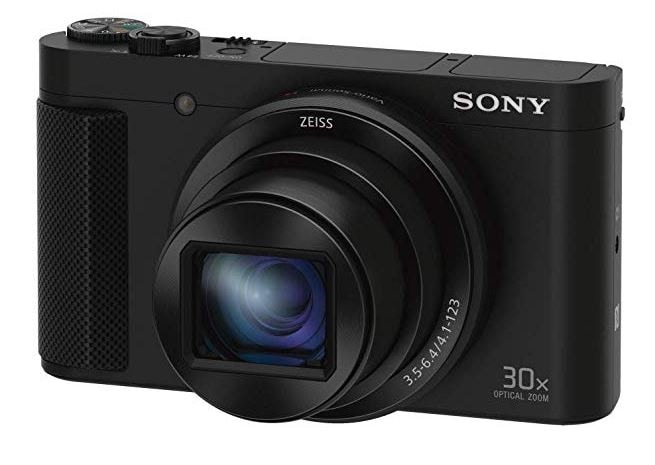
1. Sony DSC WX350 Digital Camera – Best Point and Shoot Video Camera
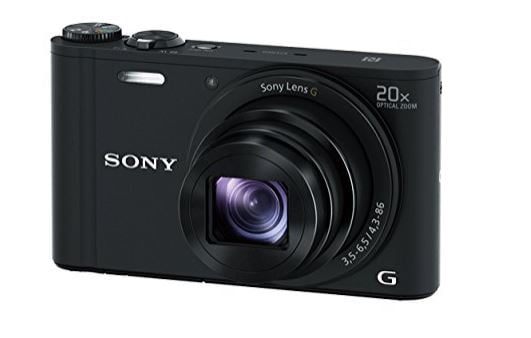
Specifications:
- 40x clear image zoom; 20x optical zoom
- Lock-on Auto Focus
- Wi-Fi with NFC3 connectivity for mobile devices
- 4 megapixels
- CMOS sensor that provides top quality images, even in low lighting
- Motion shot video with up to 4k quality output
Description: Have you been looking for a 20x zoom camera that fits in your pocket ? Get the best pictures with the Sony DSC WX350. This camera offers both still photos and video recording, using technology that minimizes how much the camera shakes, even if you’re filming on the go.
Pros: The image stabilizer makes this one of the best cameras for making YouTube videos out there, alongside of the 20x optical zoom. The battery life is quite long as well, which means you can get a lot of content done without any problems. Lastly, you can film in HD, which makes any YouTube influencer happy.
Cons: The LED screen can be quite dim, so it’s hard to see it when you’re out in bright sunlight; be sure you make adjustments before you go outside. There is also not your typical viewfinder installed, so experienced videographers may not like using it.
2. GoPro HERO8 Action Camera - Best Wearable Sports Camera
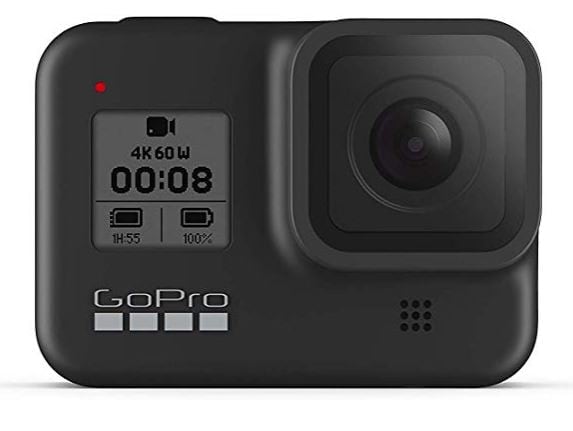
Specifications:
- Up to 60 FPS
- 4k and HD capabilities
- HyperSmooth 2.0 stabilization options.
- Optional Battery Mod available.
- Integrated Mount
- Crisp, easy to use and navigate LCD.
Description: If you need an on-the-go video camera for YouTube, there’s nothing better than a GoPro. With their HERO series of GoPros, they have all sorts of great features that allow you to capture the smoothest video, even when you’re out and on the go. Their top end stabilization makes their cameras the best for the active YouTuber.
Pros: The rugged, waterproof design of the HERO7 is a great option for anyone who is looking to be on the go with their YouTube. The integrated mount makes it simple for anyone who wants to put it on a selfie stick or something else, and it even has a companion app for easy, on the go editing!
Cons: The Wi-Fi capabilities are great, but the video transfer can take a bit of time due to how large the files may be. So, if you’re uploading the transfer, you may want to consider using the USB port instead. Also, the memory card slot is in an awkward place near the mount, so those with larger fingers may have trouble putting a card in there.
3. Logitech BRIO HD Webcam for Video – Best Video Recording and Streaming Camera
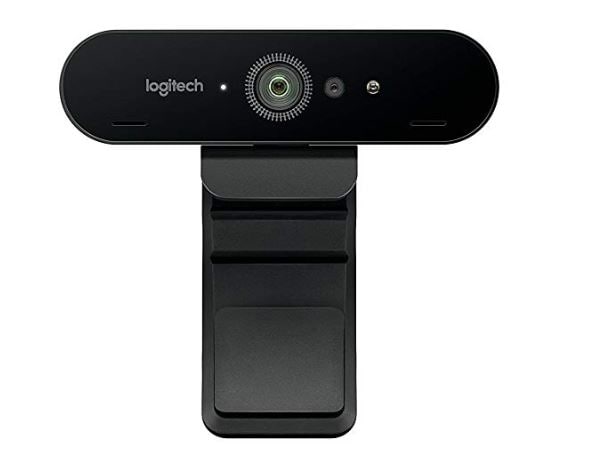
Specifications:
- 5x zoom
- Premium glass lens
- 4k image sensor for videoing and HDR with autofocus
- Light exposure automatically adjusts for whatever lighting that you’re filming in.
- Streaming and recording available.
- Enterprise ready for any use.
- Plug and play software automatically installs upon first use.
- Cover clip so you can cover the camera quickly, when needed.
Description: If you need an easy to use, simple to install option for filming and streaming from your computer, then this Logitech is the best camera for YouTube videos of this type. With multiple features and a design that has been made for streamers like you, you’ll always be able to just turn it on, make adjustments with ease, and get streaming in no time.
Pros: The camera is incredibly easy to use and install; it connects to your PC with a USB type C to USB type 3.0 cord (backwards compatible to 2.0). You can easily tinker with all of the settings and such in the included software.
Cons: The arm is designed for thick edges; those with flat monitors or borderless monitors may find that it’s difficult to attach it to your monitor. The software is easy to use, but it’s missing a handful of settings that more experienced streamers would want to have available. There is a crop out background feature, but it can be hard to find and use.
4. PANASONIC Lumix G7 4K Digital Camera - Best Mirrorless Camera for Professionals

Specifications:
- 16 megapixels
- No pass filter with four thirds sensor
- Wi-Fi capability
- 4k and HD video capture available at 30 frames per second.
- Aperture and shutter settings are adjusted via knobs, not menus.
- 3 inch tilt and swivel display
- High resolution viewfinder
Description: If you want to have professional looking photos and videos, the PANASONIC Lumix G7 4K is a solid choice for a mirrorless camera. All of the controls make it easy to get things the way that you want it, and it comes with multiple ports so that you can plug it into any device and get it ready to go.
Pros: This one of the best 4k video options out there, and you don’t need to spend an arm and a leg on it. The dual control dials and the variable touch LCD allow for maximum control, making it simple to film what you want with minimal editing after you’ve filmed.
Cons: There is a tracking focus, which can be good, but it makes the burst rate (which helps with motion blur) a lot slower. It does have a plastic build, rather than metal, so it’s not as heavy duty as other options. And, you need to purchase it with everything included, instead of just purchasing the body.
5. Sony CX405 Full HD - Best Camcorder (Only) for Video
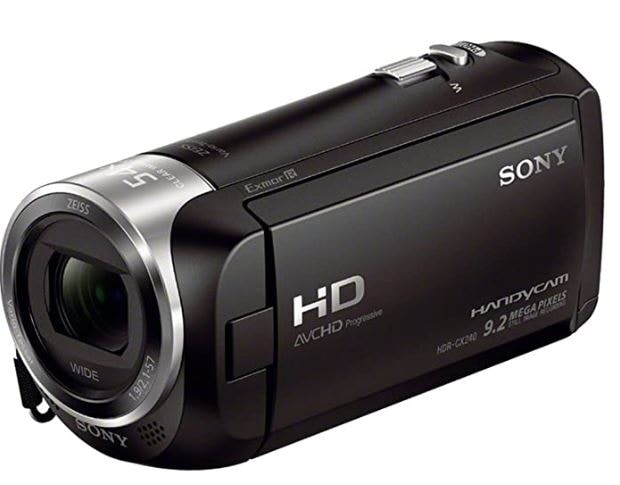
Specifications:
- 60x clear image zoom with Zeiss Lens
- 50 Mbps XAVC
- MP4 and AVCHD codecs
- SteadyShot image stabilization
- Built-in USB cable
- Face detection and noise reduction
- 7 picture effects for video
Description: If you’re looking for the best cheap camera for YouTube, this is a pretty solid option. It has a Carl Zeiss lens (low light capable) and SteadyShot technology for stabilization. It’s the starter camera that beginners dream of due to its ease of use and affordability.
Pros: The image stabilization is some of the best out there, and it’s got a user friendly interface. Dual recording options make for great YouTube and other social media use. Lightweight makes it easy to take anywhere.
Cons: Connectivity ports are in strange spots, and can be hard to get to. You cannot add an external mic, so you have to use the on-board ones. After extensive use of the ports, the on-board USB cable may have some issues with connectivity over time.
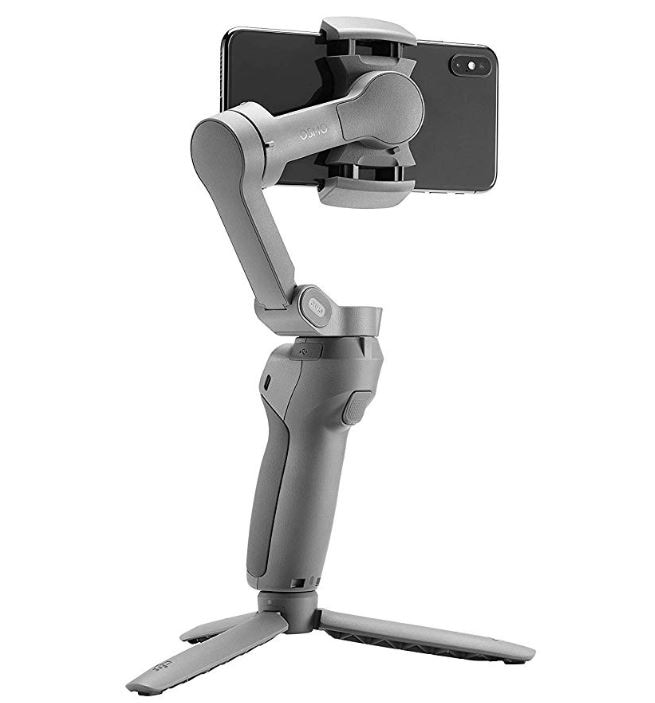
6. DJI OSMO Handheld Gimbal – Best Easy to Use Holder for Camera Phone for Beginners
Specifications:
- 3 axis Gimbal that reduces shaky footage
- Ultra-responsive design reacts in real time.
- Easily folds up for maximum portability
- Battery operated ensures that you don’t always need a connection
- Comfortable grip allows you to use the gimbal without discomfort or pain.
Description: If your phone is currently the best camera for YouTube videos, then the DJI OSMO Handheld Gimbal makes it really easy for you to use it on the go. This has been designed to keep your camera flat, no matter where you’re moving, and it helps you take some pretty great shots. This is an option if you need freedom in your movement.
Pros: The DJI OSMO Handheld Gimbal is really easy to use and compatible with most mobile phones that are out there. With multiple settings and options, you can easily turn your phone into the very best option for getting footage, even if your regular video camera isn’t nearby.
Cons: Some people note that it doesn’t work with wide-screen mobile devices or “phablets” as they are called. Another complaint is that it can be difficult to get used the construction of the Gimbal, but that’s something that you can sort out with practice.
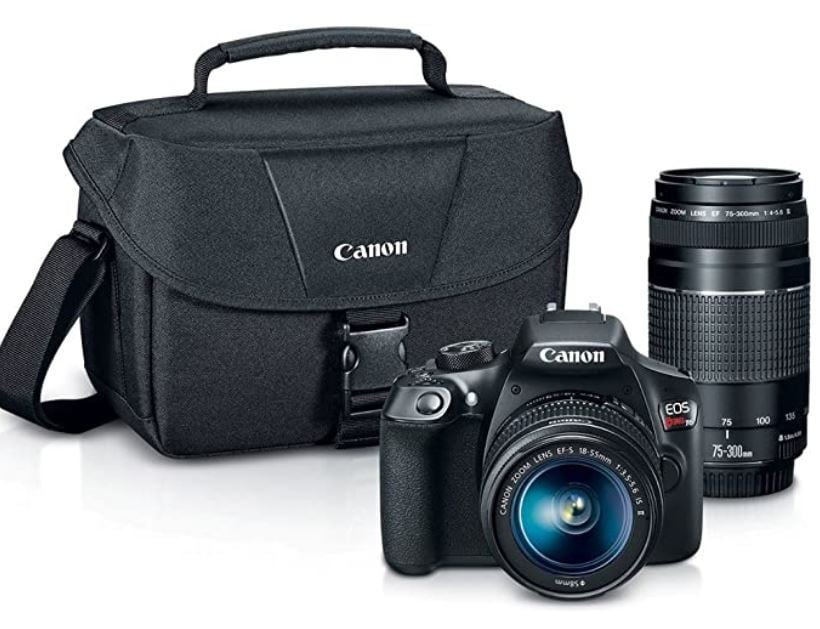
7. Canon Digital SLR Camera Kit – Best Cheap SLR Choice
Specifications:
- Wi-Fi and NFC built in for ease of video and photo transfer
- 18 Megapixel
- Image sensor with an IS of 100 to 6400 (and the option to expand to 12800)
- Full HD videos with manual controls for focus and exposure
- 3 inch LCD monitor turns and adjusts as needed.
- Interchangeable lens, Bayonet mount for tripods and selfie sticks.
Description: The Canon Digital SLR Camera Kit is an all-in-one kit that makes it simple for you to start making videos right out of the bag. Complete with everything that you need in order to use an SLR well, you’ll find it’s quite simple to get the hang of, and that you have a lot of flexibility in how you use it.
Pros: The Canon Digital SLR Camera Kit has Wi-Fi capability, offers a great auto focus and is made from heavy duty materials. Plus, it can shoot stills, video, and rolls, which makes it really versatile for anyone.
Cons: This particular set doesn’t have Bluetooth with it, so you can’t connect a remote. Its lens is interchangeable, but you can only use Canon lenses and flashes with it, so that decreases the number of options you have here.
Want to know more about camera? Watch this!
What Gear Do Creators Actually Use | Vidcon 2023 | Sony vs Canon
Part 2: Frequently Asked Questions
1. What is a good camera for YouTube beginners?
Sony DSCHX80/B Point & Shoot Camera is the best cheap camera for YouTube that you can find if you’re on any sort of budget. It has a 60x clear image zoom and incredibly versatile video with multiple viewfinder and autofocus options. It’s selfie ready with a multi-angle LCD display and you can customize your setting sin whatever way that you wish to do so. It also comes with pretty much anything that you need in the box, so you’re ready to start filming as soon as you charge it.
2. What equipment do you need to start a YouTube channel?
- A camera that meets all of your needs and purposes.
- A microphone that is easy to use and produces high quality audio options.
- A sturdy, reliable tripod that is compatible with your camera
- Lighting equipment for the space that you’re filming in.
- An idea as to what you’re going to do and how you’d like to proceed.
3. What software do YouTubers use to edit videos?
There are a number of different options that you can consider if you’re looking to edit your videos well. Here is a quick list of some of the top options that you’ll see them using alongside of the best cameras for YouTube
Beginners
- Filmora : A simple to download and use option which can create high-quality videos in just a few clicks.
- iMovie: Only for Macs, this is a simple to use, intuitively designed video editor has a lot of features, and comes pre-installed on most Macs.
- Adobe Rush: Adobe Rush is a simple to use, browser based, video editing program that is also available as a phone app.
Professional
- Adobe Premiere: One of the top programs out there for editing video, this is part of the Adobe series and has endless options and features.
- Final Cut Pro: A Mac-Only, high end video editing software, many people who use the best YouTube camera also use this.
Max Wales
Max Wales is a writer and a lover of all things video.
Follow @Max Wales
Max Wales
Mar 27, 2024• Proven solutions
Whether you’re a beginner or a pro as a YouTuber, your YouTube equipment shouldn’t be the thing that holds you back from becoming a YouTube star. But, how do you find the best camera for making YouTube videos? What options do you have?
In this article, we’re going to explore some of the best cameras for YouTube. We’ll label each one based on what we believe is best for particular uses, so that you can better parse what it is that you want to purchase. All of this is in hopes that you can find the video camera for YouTube that is right for you and what you need.
Part 1: 7 Best Best Camera for Youtube to Make Videos
1. Sony DSC WX350 Digital Camera – Best Point and Shoot Video Camera
Specifications:
- 40x clear image zoom; 20x optical zoom
- Lock-on Auto Focus
- Wi-Fi with NFC3 connectivity for mobile devices
- 4 megapixels
- CMOS sensor that provides top quality images, even in low lighting
- Motion shot video with up to 4k quality output
Description: Have you been looking for a 20x zoom camera that fits in your pocket ? Get the best pictures with the Sony DSC WX350. This camera offers both still photos and video recording, using technology that minimizes how much the camera shakes, even if you’re filming on the go.
Pros: The image stabilizer makes this one of the best cameras for making YouTube videos out there, alongside of the 20x optical zoom. The battery life is quite long as well, which means you can get a lot of content done without any problems. Lastly, you can film in HD, which makes any YouTube influencer happy.
Cons: The LED screen can be quite dim, so it’s hard to see it when you’re out in bright sunlight; be sure you make adjustments before you go outside. There is also not your typical viewfinder installed, so experienced videographers may not like using it.
2. GoPro HERO8 Action Camera - Best Wearable Sports Camera
Specifications:
- Up to 60 FPS
- 4k and HD capabilities
- HyperSmooth 2.0 stabilization options.
- Optional Battery Mod available.
- Integrated Mount
- Crisp, easy to use and navigate LCD.
Description: If you need an on-the-go video camera for YouTube, there’s nothing better than a GoPro. With their HERO series of GoPros, they have all sorts of great features that allow you to capture the smoothest video, even when you’re out and on the go. Their top end stabilization makes their cameras the best for the active YouTuber.
Pros: The rugged, waterproof design of the HERO7 is a great option for anyone who is looking to be on the go with their YouTube. The integrated mount makes it simple for anyone who wants to put it on a selfie stick or something else, and it even has a companion app for easy, on the go editing!
Cons: The Wi-Fi capabilities are great, but the video transfer can take a bit of time due to how large the files may be. So, if you’re uploading the transfer, you may want to consider using the USB port instead. Also, the memory card slot is in an awkward place near the mount, so those with larger fingers may have trouble putting a card in there.
3. Logitech BRIO HD Webcam for Video – Best Video Recording and Streaming Camera
Specifications:
- 5x zoom
- Premium glass lens
- 4k image sensor for videoing and HDR with autofocus
- Light exposure automatically adjusts for whatever lighting that you’re filming in.
- Streaming and recording available.
- Enterprise ready for any use.
- Plug and play software automatically installs upon first use.
- Cover clip so you can cover the camera quickly, when needed.
Description: If you need an easy to use, simple to install option for filming and streaming from your computer, then this Logitech is the best camera for YouTube videos of this type. With multiple features and a design that has been made for streamers like you, you’ll always be able to just turn it on, make adjustments with ease, and get streaming in no time.
Pros: The camera is incredibly easy to use and install; it connects to your PC with a USB type C to USB type 3.0 cord (backwards compatible to 2.0). You can easily tinker with all of the settings and such in the included software.
Cons: The arm is designed for thick edges; those with flat monitors or borderless monitors may find that it’s difficult to attach it to your monitor. The software is easy to use, but it’s missing a handful of settings that more experienced streamers would want to have available. There is a crop out background feature, but it can be hard to find and use.
4. PANASONIC Lumix G7 4K Digital Camera - Best Mirrorless Camera for Professionals
Specifications:
- 16 megapixels
- No pass filter with four thirds sensor
- Wi-Fi capability
- 4k and HD video capture available at 30 frames per second.
- Aperture and shutter settings are adjusted via knobs, not menus.
- 3 inch tilt and swivel display
- High resolution viewfinder
Description: If you want to have professional looking photos and videos, the PANASONIC Lumix G7 4K is a solid choice for a mirrorless camera. All of the controls make it easy to get things the way that you want it, and it comes with multiple ports so that you can plug it into any device and get it ready to go.
Pros: This one of the best 4k video options out there, and you don’t need to spend an arm and a leg on it. The dual control dials and the variable touch LCD allow for maximum control, making it simple to film what you want with minimal editing after you’ve filmed.
Cons: There is a tracking focus, which can be good, but it makes the burst rate (which helps with motion blur) a lot slower. It does have a plastic build, rather than metal, so it’s not as heavy duty as other options. And, you need to purchase it with everything included, instead of just purchasing the body.
5. Sony CX405 Full HD - Best Camcorder (Only) for Video
Specifications:
- 60x clear image zoom with Zeiss Lens
- 50 Mbps XAVC
- MP4 and AVCHD codecs
- SteadyShot image stabilization
- Built-in USB cable
- Face detection and noise reduction
- 7 picture effects for video
Description: If you’re looking for the best cheap camera for YouTube, this is a pretty solid option. It has a Carl Zeiss lens (low light capable) and SteadyShot technology for stabilization. It’s the starter camera that beginners dream of due to its ease of use and affordability.
Pros: The image stabilization is some of the best out there, and it’s got a user friendly interface. Dual recording options make for great YouTube and other social media use. Lightweight makes it easy to take anywhere.
Cons: Connectivity ports are in strange spots, and can be hard to get to. You cannot add an external mic, so you have to use the on-board ones. After extensive use of the ports, the on-board USB cable may have some issues with connectivity over time.
6. DJI OSMO Handheld Gimbal – Best Easy to Use Holder for Camera Phone for Beginners
Specifications:
- 3 axis Gimbal that reduces shaky footage
- Ultra-responsive design reacts in real time.
- Easily folds up for maximum portability
- Battery operated ensures that you don’t always need a connection
- Comfortable grip allows you to use the gimbal without discomfort or pain.
Description: If your phone is currently the best camera for YouTube videos, then the DJI OSMO Handheld Gimbal makes it really easy for you to use it on the go. This has been designed to keep your camera flat, no matter where you’re moving, and it helps you take some pretty great shots. This is an option if you need freedom in your movement.
Pros: The DJI OSMO Handheld Gimbal is really easy to use and compatible with most mobile phones that are out there. With multiple settings and options, you can easily turn your phone into the very best option for getting footage, even if your regular video camera isn’t nearby.
Cons: Some people note that it doesn’t work with wide-screen mobile devices or “phablets” as they are called. Another complaint is that it can be difficult to get used the construction of the Gimbal, but that’s something that you can sort out with practice.
7. Canon Digital SLR Camera Kit – Best Cheap SLR Choice
Specifications:
- Wi-Fi and NFC built in for ease of video and photo transfer
- 18 Megapixel
- Image sensor with an IS of 100 to 6400 (and the option to expand to 12800)
- Full HD videos with manual controls for focus and exposure
- 3 inch LCD monitor turns and adjusts as needed.
- Interchangeable lens, Bayonet mount for tripods and selfie sticks.
Description: The Canon Digital SLR Camera Kit is an all-in-one kit that makes it simple for you to start making videos right out of the bag. Complete with everything that you need in order to use an SLR well, you’ll find it’s quite simple to get the hang of, and that you have a lot of flexibility in how you use it.
Pros: The Canon Digital SLR Camera Kit has Wi-Fi capability, offers a great auto focus and is made from heavy duty materials. Plus, it can shoot stills, video, and rolls, which makes it really versatile for anyone.
Cons: This particular set doesn’t have Bluetooth with it, so you can’t connect a remote. Its lens is interchangeable, but you can only use Canon lenses and flashes with it, so that decreases the number of options you have here.
Want to know more about camera? Watch this!
What Gear Do Creators Actually Use | Vidcon 2023 | Sony vs Canon
Part 2: Frequently Asked Questions
1. What is a good camera for YouTube beginners?
Sony DSCHX80/B Point & Shoot Camera is the best cheap camera for YouTube that you can find if you’re on any sort of budget. It has a 60x clear image zoom and incredibly versatile video with multiple viewfinder and autofocus options. It’s selfie ready with a multi-angle LCD display and you can customize your setting sin whatever way that you wish to do so. It also comes with pretty much anything that you need in the box, so you’re ready to start filming as soon as you charge it.
2. What equipment do you need to start a YouTube channel?
- A camera that meets all of your needs and purposes.
- A microphone that is easy to use and produces high quality audio options.
- A sturdy, reliable tripod that is compatible with your camera
- Lighting equipment for the space that you’re filming in.
- An idea as to what you’re going to do and how you’d like to proceed.
3. What software do YouTubers use to edit videos?
There are a number of different options that you can consider if you’re looking to edit your videos well. Here is a quick list of some of the top options that you’ll see them using alongside of the best cameras for YouTube
Beginners
- Filmora : A simple to download and use option which can create high-quality videos in just a few clicks.
- iMovie: Only for Macs, this is a simple to use, intuitively designed video editor has a lot of features, and comes pre-installed on most Macs.
- Adobe Rush: Adobe Rush is a simple to use, browser based, video editing program that is also available as a phone app.
Professional
- Adobe Premiere: One of the top programs out there for editing video, this is part of the Adobe series and has endless options and features.
- Final Cut Pro: A Mac-Only, high end video editing software, many people who use the best YouTube camera also use this.
Max Wales
Max Wales is a writer and a lover of all things video.
Follow @Max Wales
Master the Art of Budget-Friendly YouTubes Intros and Ends
How to Create YouTube Intros & End Cards - Free and Easy

Shanoon Cox
Oct 26, 2023• Proven solutions
Part1: Intros
Elements of an Intro
Intros should only last about five seconds, and that can be cut down to two or three if you have a larger following.
When your intro video is longer than five seconds viewers are more likely to click away. The first 15 seconds of a video is when viewers are most likely to decide to click on one of the recommended videos, or go back to their search results and choose something else. The odds of them leaving within these first 15 seconds are greater if you do not get right to the main point of your video. That is why long intro sequences are bad for your watch time.
Whether it is better to put your intro at the very beginning of your video, or after you introduce your topic, will depend on your viewers. You may want to try it both ways and then look at your retention report (found in your YouTube Creator Studio under Analytics) to see which works best for you.
Top Intro Sites
There are a few different sites where you can download animated intros, customized to include your username or logo. Here are two of the best:
FlixPress.com
This is probably the most popular intro site. There are a lot of great animated intros available for under $5, or even for free.
IntroMaker.net
This is another site with really professional looking intros for $5. They only have two free options, though.
Creating an Intro in Filmora
You can create a simple intro card in Filmora.


- Choose your background. You may want to use a short clip as your intro, or you may just want a colored background.
- Drag your clip or background into the video track of your timeline and trim it down to five seconds.
- If you have a logo, import it into Filmora and drag it into your picture-in-picture track.
- With your logo selected, click on the Green Screen icon. In the pop-up, select the background of your logo to make it transparent. For this to work your logo cannot be the same color as its background.
- Click on the editing icon with your logo selected and choose an animation.
- Go to the Text/Titles menu and choose an animated title that suits your channel. Drag it into your text track and edit it to include your name.
- The last piece of your intro is sound. You can choose a song from Filmora’s library and cut it down to five seconds, or import your sound effect.
- Export your video and save it for use in all of your other videos.
Part 2: End Cards
When your video ends, YouTube will recommend a selection of videos users may want to watch next. Often, these recommendations will not include more of your videos.
To keep viewers on your channel, you can create your End Card which recommends other content you have created.
Elements of an End Card
An end card includes clips from two or three of your videos, muted, and shrunk down to thumbnail-size. Using spotlight annotations you can make these thumbnails click-able.
It is also important that your end card includes multiple calls to action. A call to action is meant to spur a viewer to some kind of action. Writing ‘Check out this video’ above one of your thumbnails is a call to action.
You should also have a subscribe link somewhere in your end card, ideally a very noticeable button with a proven call to action like ‘Subscribe Now!’.
Some creators will leave their end cards at that and play music overtop, but it can be even more effective to include a voiceover where you ask viewers to subscribe and watch your other videos.
How To Make an End Card
- Choose a static background. You may want to download an end card template or create one in a drawing program. If you do, make sure to include calls to action like ‘Watch more!’ and ‘Subscribe’.
- Drag your background into your timeline at the end of your video.
- Import two or three of your previous videos and drag them into your picture in picture tracks. Each clip should be on its track.
- Trim the clips in your picture in picture track down to the same length as your end card.
- Shrink your clips down to thumbnail-size by dragging their corners in the preview window.
- Position your clips so they are spaced evenly by dragging them in the preview screen.
- Mute your clips.
- If your background does not include any calls to action, choose a title from the Text/Titles menu in Filmora and create at least two – one asking viewers to subscribe, and one asking them to watch your suggested videos.
- Export your video from Filmora and upload it to YouTube.
- Go to your Video Manager and select Annotations in the drop-down menu next to your video.
- Go to your end card in the previewer, as that is where you want to add your annotations.
- Click Add Annotation and add a spotlight annotation to your video. Stretch it over one of your thumbnails and then check the Link box under your Annotation’s timing. Insert a link to the video you are previewing.
- Repeat for any other thumbnails. For your subscribe button, change where it said ‘Video’ to ‘Subscribe’ and enter your channel URL.
- Click Apply Changes.
Shanoon Cox
Shanoon Cox is a writer and a lover of all things video.
Follow @Shanoon Cox
Shanoon Cox
Oct 26, 2023• Proven solutions
Part1: Intros
Elements of an Intro
Intros should only last about five seconds, and that can be cut down to two or three if you have a larger following.
When your intro video is longer than five seconds viewers are more likely to click away. The first 15 seconds of a video is when viewers are most likely to decide to click on one of the recommended videos, or go back to their search results and choose something else. The odds of them leaving within these first 15 seconds are greater if you do not get right to the main point of your video. That is why long intro sequences are bad for your watch time.
Whether it is better to put your intro at the very beginning of your video, or after you introduce your topic, will depend on your viewers. You may want to try it both ways and then look at your retention report (found in your YouTube Creator Studio under Analytics) to see which works best for you.
Top Intro Sites
There are a few different sites where you can download animated intros, customized to include your username or logo. Here are two of the best:
FlixPress.com
This is probably the most popular intro site. There are a lot of great animated intros available for under $5, or even for free.
IntroMaker.net
This is another site with really professional looking intros for $5. They only have two free options, though.
Creating an Intro in Filmora
You can create a simple intro card in Filmora.
- Choose your background. You may want to use a short clip as your intro, or you may just want a colored background.
- Drag your clip or background into the video track of your timeline and trim it down to five seconds.
- If you have a logo, import it into Filmora and drag it into your picture-in-picture track.
- With your logo selected, click on the Green Screen icon. In the pop-up, select the background of your logo to make it transparent. For this to work your logo cannot be the same color as its background.
- Click on the editing icon with your logo selected and choose an animation.
- Go to the Text/Titles menu and choose an animated title that suits your channel. Drag it into your text track and edit it to include your name.
- The last piece of your intro is sound. You can choose a song from Filmora’s library and cut it down to five seconds, or import your sound effect.
- Export your video and save it for use in all of your other videos.
Part 2: End Cards
When your video ends, YouTube will recommend a selection of videos users may want to watch next. Often, these recommendations will not include more of your videos.
To keep viewers on your channel, you can create your End Card which recommends other content you have created.
Elements of an End Card
An end card includes clips from two or three of your videos, muted, and shrunk down to thumbnail-size. Using spotlight annotations you can make these thumbnails click-able.
It is also important that your end card includes multiple calls to action. A call to action is meant to spur a viewer to some kind of action. Writing ‘Check out this video’ above one of your thumbnails is a call to action.
You should also have a subscribe link somewhere in your end card, ideally a very noticeable button with a proven call to action like ‘Subscribe Now!’.
Some creators will leave their end cards at that and play music overtop, but it can be even more effective to include a voiceover where you ask viewers to subscribe and watch your other videos.
How To Make an End Card
- Choose a static background. You may want to download an end card template or create one in a drawing program. If you do, make sure to include calls to action like ‘Watch more!’ and ‘Subscribe’.
- Drag your background into your timeline at the end of your video.
- Import two or three of your previous videos and drag them into your picture in picture tracks. Each clip should be on its track.
- Trim the clips in your picture in picture track down to the same length as your end card.
- Shrink your clips down to thumbnail-size by dragging their corners in the preview window.
- Position your clips so they are spaced evenly by dragging them in the preview screen.
- Mute your clips.
- If your background does not include any calls to action, choose a title from the Text/Titles menu in Filmora and create at least two – one asking viewers to subscribe, and one asking them to watch your suggested videos.
- Export your video from Filmora and upload it to YouTube.
- Go to your Video Manager and select Annotations in the drop-down menu next to your video.
- Go to your end card in the previewer, as that is where you want to add your annotations.
- Click Add Annotation and add a spotlight annotation to your video. Stretch it over one of your thumbnails and then check the Link box under your Annotation’s timing. Insert a link to the video you are previewing.
- Repeat for any other thumbnails. For your subscribe button, change where it said ‘Video’ to ‘Subscribe’ and enter your channel URL.
- Click Apply Changes.
Shanoon Cox
Shanoon Cox is a writer and a lover of all things video.
Follow @Shanoon Cox
Also read:
- [Updated] Can Instant Subscription Lead to Higher Watch Time?
- 2024 Approved Erasing the Spotlight Hide Visuals in Shared Media
- Unleash YouTube Potential with Imaginative Splitscreens
- [New] Elevate Your Channels - YouTube's Partner Program
- [New] Crafting Engaging YouTube Beginnings Two Methods
- 2024 Approved Elevating Video Previews A Compreayer Approach for YouTube
- Shorts Shown – No More Hidden Videos
- The Pivotal Role of Thumbnails in Video Success Stories
- In 2024, Elevate Your Content YouTube's Keyword Strategies Exposed
- Discover the Ultimate Blend of Mind, Body, and Spirit in Yoga for 2024
- Epic Video Journeys The Fastest Hits Reaching 100M Views by '24 for 2024
- Essential YouTube Equipment For Starting Your Channel
- Crafting Splitscreen YouTube Videos A Guide to Creativity for 2024
- Unlock the Full Potential of Your YouTube Videos Top 11 SEO Tips
- What Is the Best Video Format for YouTube for 2024
- Premium 10 Volume Enhancers Windows, Apple, Android
- Educators' Guide to Thriving YouTube Channels – 10 Must-Know Secrets
- [Updated] Secure TikTok Follower Expansion Companies for 2024
- Evaluate Cloud Price Plans A Side-by-Side Review & Recommendations
- [Updated] 2024 Approved Acclaimed Screen Logger - For Your Win11 Display
- New Seeking Out Wolves Haunting Howls in Audio Form for 2024
- 2024 Approved Encapsulate PowerPoint Visuals in Media
- Converting MP3 to MP4? Dont Forget These Crucial Steps for 2024
- New Resize Images Online 8 Efficient Aspect Ratio Changers
- 2024 Approved Learn Everything About 3D LUT Creator & Mobile App
- [Updated] 2024 Approved Virtual Interaction at Its Peak Facebook's Guide to Screenshare Success
- Updated 2024 Approved Abyss of Harmony Premium Selection of Free, Original Piano Compositions for Screen Projects
- Updated Beyond Beats Exploring Social Impact and Cultural Significance in Rap
- New In 2024, Free MKV Clipper Software Top 10 Recommendations
- Undelete lost music from Tecno Pova 5 Pro
- New Diving Into Splice Video Editor A Full Evaluation and Recommendation for 2024
- In 2024, Safe and Secure Top 10+ Websites to Download Games Online
- Title: "Pro-Level Cams for Aspiring YouTube Creators"
- Author: Kevin
- Created at : 2024-05-25 16:12:20
- Updated at : 2024-05-26 16:12:20
- Link: https://youtube-videos.techidaily.com/pro-level-cams-for-aspiring-youtube-creators/
- License: This work is licensed under CC BY-NC-SA 4.0.
