
:max_bytes(150000):strip_icc()/Byte-4de5ae614d4846359420990391e4ebb9.jpg)
Premium 7 Vlog Cameras Boosting Audience Engagement & Retention
Premium 7 Vlog Cameras Boosting Audience Engagement & Retention
Best 7 DSLR Vlogging Cameras

Shanoon Cox
Nov 01, 2022• Proven solutions
DSLR cameras are great for vloggers who are serious about filmmaking. But with so many DSLR cameras to choose from, it can be difficult to make a decision on one. We have come up with a list of seven of the best DSLR vlogging cameras to help you with your search.
WHAT TO LOOK FOR IN A VLOGGING CAMERA
1. Fully articulated screen (flip screen)
2. Good continual autofocus while recording video
3. Good focus priority through face recognition
4. Touch to focus
5. Good low-light performance
6. external mic jack, hot/cold shoe bracket
7. optical image stabilization
8. good battery life
Check out my full list of 10 Things To Look For In A Vlogging Camera to understand the importance of these camera features.
THE 7 BEST DSLR CAMERAS FOR VLOGGING
| Camera | Release Date | Sensor Size | Flip Screen | Mic Port | Price | |
|---|---|---|---|---|---|---|
| CanonEOS6D Mark II | 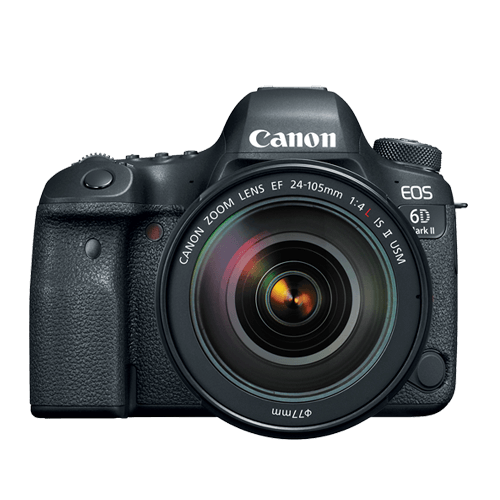 |
June2017 | Full frame(35.9 x 24 mm) | Fully Articulated | Yes | $$ |
| CanonEOS RebelSL2 | 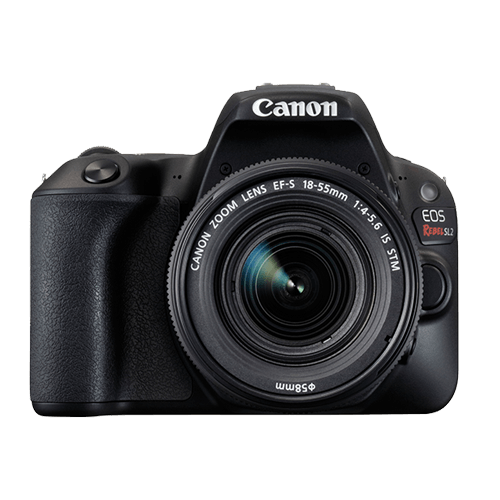 |
June2017 | APS-C(22.3 x 14.9 mm) | Fully Articulated | Yes | $ |
| CanonEOS RebelT7i | 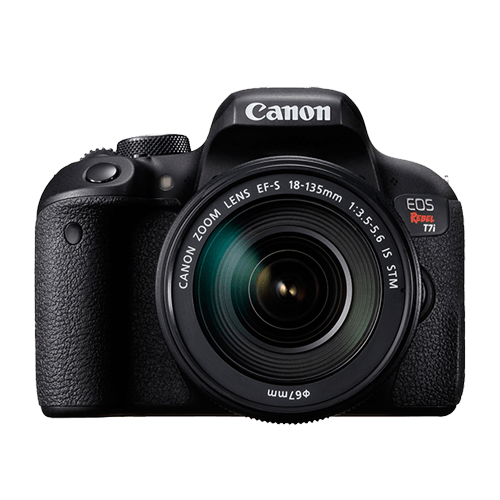 |
February2017 | APS-C(22.3 x 14.9 mm) | Fully Articulated | Yes | $- |
| CanonEOS77D |  |
February2017 | APS-C(22.3 x 14.9 mm) | Fully Articulated | Yes | $- |
| NikonD5600 | 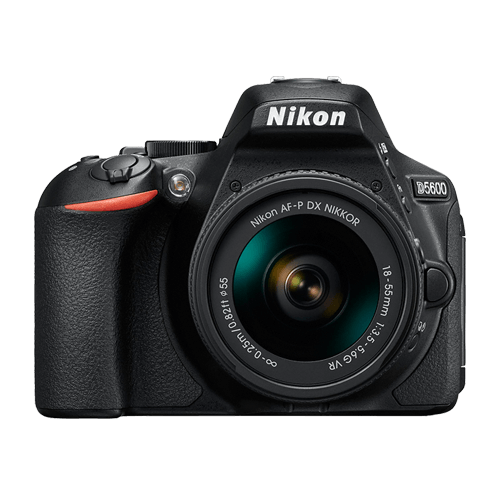 |
November2016 | APS-C(23.5 x 15.6 mm) | Fully Articulated | Yes | $- |
| CanonEOS5D Mark IV | 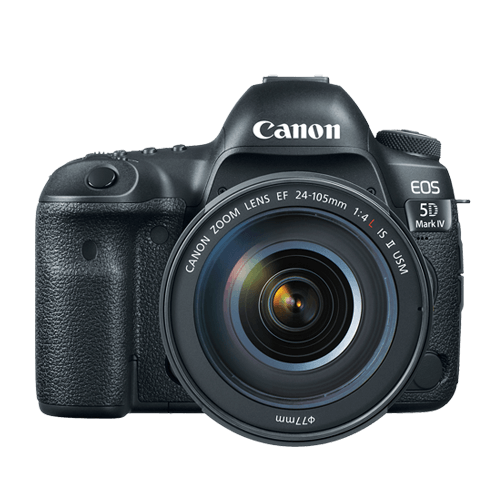 |
August2017 | Full frame(36 x 24 mm) | No | Yes | $$$ |
| CanonEOS80D | 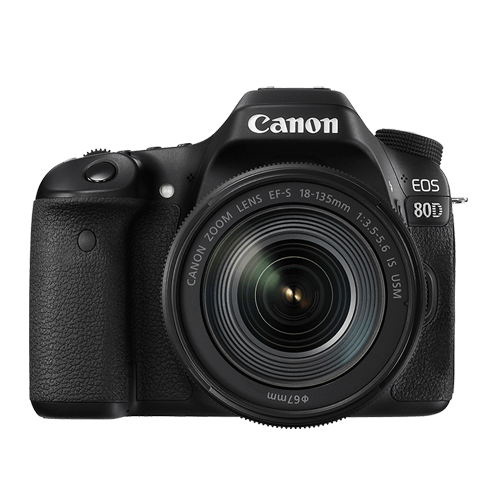 |
February2016 | APS-C(22.5 x 15 mm) | Fully Articulated | Yes | $$ |
|
Best daily DSLR camera for vlogging: Canon EOS T7i The camera you use to record your daily vlogs doesn’t have to be the best camera on the market. It just has to offer enough options to make the process of making a vlog as smooth as it can possibly be. The T7i is not the most powerful DSLR camera out there, but its 24.2 MP APS-C CMOS sensor and a DIGIC 7 image processor are more than enough to meet the needs of most daily vloggers. You can record full HD 1080p videos at 60 fps and use this camera to create HDR and time-lapse movies. You can set the T7i’s ISO up as high as 51200, which is pretty good. The T7i’s dual pixel CMOS AF system makes sure that the camera focuses quickly and it helps you avoid creating video clips that are out focus. There’s also a built-in Wi-FI with an NFC feature that enables you to share your videos with a smartphone device you connect to the camera. PROS - Long battery life - Remarkable image quality at high ISO values CONS - Can’t record 4K videos - Viewfinder is tiny |
|---|---|
|
Best entry-level DSLR camera for vlogging: Canon EOS SL2 The Canon EOS SL2 was released just a year ago and it wins our 2018 vote for the best entry-level DSLR camera for vlogging. The SL2 packs a lot of features in a compact camera body. The camera only weighs 1 lb, which is considered light among most DSLR cameras. Many vloggers may enjoy the fact that they can hold up this light camera in front of themselves with more ease. Like a lot of entry-level DSLR cameras, the SL2 comes with an APS-C crop sensor. With ISO capabilities that can reach up to 51200, you’ll be able to film up to full HD 1080p videos at 60 fps, even under low light conditions. All recent Canon cameras perform very well when it comes to autofocus and the SL2 is no exception. It does, however, have fewer points of focus. The SL2 comes with a 9-point AF system. The SL2 also has a fully-articulated screen and a microphone jack. PROS - Microphone jack - Wi-Fi connectivity CONS - No 4K video support - Optical image stabilizer could be better |
|
Best mid-range DSLR camera for vlogging: Canon EOS 80D The Canon EOS 80D is the successor of the 70D which was at one time considered by many YouTubers the ultimate DSLR camera for vlogging. The 80D is a larger camera than the SL2, weighing 1.61 lbs. In its larger build, this camera additionally (compared to the SL2) packs a 45-point AF system, longer battery life, a headphone port, and it is environmentally sealed so you can shoot in tough conditions. This camera’s great performance in autofocusing makes it a great mid-range DSLR camera for vlogging. PROS - Feature-rich - Continuous AF feature performs beautifully while recording high-res videos CONS - Just one SD card slot - PC sync connection features could be better |
|
Best professional DSLR camera for vlogging: Canon EOS 6D Mark II There’s a lot of DSLR cameras that come with a fully-articulated screen and a microphone jack, but the Canon EOS 6D Mark II is actually the only one in the market that comes equipped with both of those, plus a full-frame sensor. It is its full-frame sensor that really sets this camera apart from the other vlogging DLSR cameras. Because of its full-frame sensor, this camera performs much better in low light conditions. With this larger sensor, you’ll also be able to capture footage that looks more cinematic with high-quality bokeh (more blur to your out-of-focus areas). The 6D Mark II also has great battery life compared to all the reviewed cameras above. Unfortunately, this camera does not shoot in 4K. PROS - ISO sensitivity goes up to 102400 - Amazing touchscreen controls CONS - No 4K video recording option - No USB 3.0 |
Want to compare even more cameras? Check out…
12 Best Vlogging Cameras
Top 11 Cheap Vlogging Cameras
8 Best Mirrorless Cameras For Vlogging
12 Best Vlogging Cameras With A Flip Screen
Shanoon Cox
Shanoon Cox is a writer and a lover of all things video.
Follow @Shanoon Cox
Shanoon Cox
Nov 01, 2022• Proven solutions
DSLR cameras are great for vloggers who are serious about filmmaking. But with so many DSLR cameras to choose from, it can be difficult to make a decision on one. We have come up with a list of seven of the best DSLR vlogging cameras to help you with your search.
WHAT TO LOOK FOR IN A VLOGGING CAMERA
1. Fully articulated screen (flip screen)
2. Good continual autofocus while recording video
3. Good focus priority through face recognition
4. Touch to focus
5. Good low-light performance
6. external mic jack, hot/cold shoe bracket
7. optical image stabilization
8. good battery life
Check out my full list of 10 Things To Look For In A Vlogging Camera to understand the importance of these camera features.
THE 7 BEST DSLR CAMERAS FOR VLOGGING
| Camera | Release Date | Sensor Size | Flip Screen | Mic Port | Price | |
|---|---|---|---|---|---|---|
| CanonEOS6D Mark II | |
June2017 | Full frame(35.9 x 24 mm) | Fully Articulated | Yes | $$ |
| CanonEOS RebelSL2 | |
June2017 | APS-C(22.3 x 14.9 mm) | Fully Articulated | Yes | $ |
| CanonEOS RebelT7i | |
February2017 | APS-C(22.3 x 14.9 mm) | Fully Articulated | Yes | $- |
| CanonEOS77D | |
February2017 | APS-C(22.3 x 14.9 mm) | Fully Articulated | Yes | $- |
| NikonD5600 | |
November2016 | APS-C(23.5 x 15.6 mm) | Fully Articulated | Yes | $- |
| CanonEOS5D Mark IV | |
August2017 | Full frame(36 x 24 mm) | No | Yes | $$$ |
| CanonEOS80D | |
February2016 | APS-C(22.5 x 15 mm) | Fully Articulated | Yes | $$ |
|
Best daily DSLR camera for vlogging: Canon EOS T7i The camera you use to record your daily vlogs doesn’t have to be the best camera on the market. It just has to offer enough options to make the process of making a vlog as smooth as it can possibly be. The T7i is not the most powerful DSLR camera out there, but its 24.2 MP APS-C CMOS sensor and a DIGIC 7 image processor are more than enough to meet the needs of most daily vloggers. You can record full HD 1080p videos at 60 fps and use this camera to create HDR and time-lapse movies. You can set the T7i’s ISO up as high as 51200, which is pretty good. The T7i’s dual pixel CMOS AF system makes sure that the camera focuses quickly and it helps you avoid creating video clips that are out focus. There’s also a built-in Wi-FI with an NFC feature that enables you to share your videos with a smartphone device you connect to the camera. PROS - Long battery life - Remarkable image quality at high ISO values CONS - Can’t record 4K videos - Viewfinder is tiny |
|---|---|
|
Best entry-level DSLR camera for vlogging: Canon EOS SL2 The Canon EOS SL2 was released just a year ago and it wins our 2018 vote for the best entry-level DSLR camera for vlogging. The SL2 packs a lot of features in a compact camera body. The camera only weighs 1 lb, which is considered light among most DSLR cameras. Many vloggers may enjoy the fact that they can hold up this light camera in front of themselves with more ease. Like a lot of entry-level DSLR cameras, the SL2 comes with an APS-C crop sensor. With ISO capabilities that can reach up to 51200, you’ll be able to film up to full HD 1080p videos at 60 fps, even under low light conditions. All recent Canon cameras perform very well when it comes to autofocus and the SL2 is no exception. It does, however, have fewer points of focus. The SL2 comes with a 9-point AF system. The SL2 also has a fully-articulated screen and a microphone jack. PROS - Microphone jack - Wi-Fi connectivity CONS - No 4K video support - Optical image stabilizer could be better |
|
Best mid-range DSLR camera for vlogging: Canon EOS 80D The Canon EOS 80D is the successor of the 70D which was at one time considered by many YouTubers the ultimate DSLR camera for vlogging. The 80D is a larger camera than the SL2, weighing 1.61 lbs. In its larger build, this camera additionally (compared to the SL2) packs a 45-point AF system, longer battery life, a headphone port, and it is environmentally sealed so you can shoot in tough conditions. This camera’s great performance in autofocusing makes it a great mid-range DSLR camera for vlogging. PROS - Feature-rich - Continuous AF feature performs beautifully while recording high-res videos CONS - Just one SD card slot - PC sync connection features could be better |
|
Best professional DSLR camera for vlogging: Canon EOS 6D Mark II There’s a lot of DSLR cameras that come with a fully-articulated screen and a microphone jack, but the Canon EOS 6D Mark II is actually the only one in the market that comes equipped with both of those, plus a full-frame sensor. It is its full-frame sensor that really sets this camera apart from the other vlogging DLSR cameras. Because of its full-frame sensor, this camera performs much better in low light conditions. With this larger sensor, you’ll also be able to capture footage that looks more cinematic with high-quality bokeh (more blur to your out-of-focus areas). The 6D Mark II also has great battery life compared to all the reviewed cameras above. Unfortunately, this camera does not shoot in 4K. PROS - ISO sensitivity goes up to 102400 - Amazing touchscreen controls CONS - No 4K video recording option - No USB 3.0 |
Want to compare even more cameras? Check out…
12 Best Vlogging Cameras
Top 11 Cheap Vlogging Cameras
8 Best Mirrorless Cameras For Vlogging
12 Best Vlogging Cameras With A Flip Screen
Shanoon Cox
Shanoon Cox is a writer and a lover of all things video.
Follow @Shanoon Cox
Tailor-Made Edits: Customizing Videos in Studio
Create High-Quality Video - Wondershare Filmora
An easy and powerful YouTube video editor
Numerous video and audio effects to choose from
Detailed tutorials provided by the official channel
Have you ever wished to modify a video on YouTube? If that’s the case, this guide will show you how. YouTube Studio Editor is built right into YouTube, allowing you to modify videos straight in your browser. You may add text subtitles and outline overlays to your videos to make them more accessible.
This article will lead you through the steps required to edit your YouTube videos and give them the highest quality possible on their platform.
In this article
02 How to Edit Videos With YouTube Studio?
03 Is YouTube Studio editor enough for editing videos?
What Is YouTube Studio?
YouTube Studio is a free, cloud-based video production software. It’s the ideal way to create, distribute, and measure the overall success of your films on YouTube, Google+, and the web. It provides powerful editing tools, real-time feedback on how your films are performing, and one-click posting from your PC or smartphone. YouTube Studio provides several features:
1. Manages Multiple Channels
YouTube Studio makes managing a couple of channels a lot easier. You can see all of your channels on one screen and switch from one to the other without difficulty. Simply select Manage Channels from the account icon in the top right corner. When you have a lot of money owing to you, you can modify it.
2. Get Real-Time Data On Your Channels
It’s critical to monitor where your YouTube channel is at all times as a YouTube content creator. If you want to access your YouTube channel analytics and use all of the other equipment and features in the app, go to the analytics section of the menu.
2. Get Real-Time Data On Your Channels
It’s critical to monitor where your YouTube channel is at all times as a YouTube content creator. If you want to access your YouTube channel analytics and use all of the other equipment and features in the app, go to the analytics section of the menu.
3. Make video edits
The YouTube Studio app is most useful for creating fast, vlog-style videos, but it can also handle other types of material. With titles, photographs and captions, transitions, and even music, it could create a number of videos with different purposes.
4. Scheduled Video Uploads
A few films will need to be posted later, given a content creator’s schedule or habit. When you’re in the publishing section of your project, you’ll see a visibility option that lets you schedule the release of your video.
5. Add more Users
It is possible to add partners to the studio if you are working on a project requiring teamwork. To make this option available, go to your settings and then adjust permissions. Authenticate the account you’re using and click the + symbol to add other users.
How to Edit Videos With YouTube Studio?
Get Started with YouTube Studio
Step 1: Go to YouTube Studio and sign in with your desired account. A menu will appear on the left side of the home screen.
Step 2: Select the video you want to modify by clicking its title or thumbnail.

Step 3: From the left-hand menu, choose Editor, and then click Get Started in the center of the page.
Trim your video’s beginning or ending
1. Go to the Trim button. In the Editor, a blue box will appear.

2. Click and drag the blue box’s sides. Stop when the box encloses the video segment that you want to save. You will eliminate anything from the video that is not in the box.
3. Select Preview to double-check your changes and save your file.
Remove a segment of your video
- Go to the Trim menu. In the Editor, a blue box will appear.
- Select the blue box at the start of the section you want to delete.
- Choose Split.
- Drag the blue bar to the end of the part you want to delete by clicking and dragging it.
Is YouTube Studio editor enough for editing videos?
For film editing, YouTube’s video editor is insufficient. It includes a few basic features, but if you want to do some serious altering, you’ll need a third-party program.
Modern video editing software is fairly complex, and it allows you to make professional-looking movies without a lot of training. Several video editing tools are available that take things to the next level. They can use unique effects, transitions, and even 360-degree rotation to change the scene. Here are a few video editors to choose from.
1. Adobe Premiere Pro

One of the most well-known video editing software programs is Adobe Premiere Pro. It’s been used for professional video editing, design, and rendering by editors. Adobe’s most essential seasoned academic courses will teach you how to utilize the video editing program as well as its advanced features.
Adobe Premiere Pro may be used in a variety of unique ways. It may be used as a simple video editor or a program for editing motion pictures.
2. Filmora
Filmora Video Editor is an easy-to-use video editing program for beginners. Filmora Video Editor is the best solution for you if you are seeking a simple but efficient video editor that will assist you in making your movies seem professional. With this video editor, you can easily create a professional video with no learning curve.
It allows you to make the most beautiful and delicious videos for YouTube, social media channels or posting on many websites such as Facebook, Instagram, Vimeo, and YouTube.
For Win 7 or later (64-bit)
For macOS 10.12 or later
3. Blender

Blender is a free and open-source 3D computer graphics software tool program. Modeling, rigging, animation, simulation, rendering, compositing, and movement tracking, as well as video enhancement and game development, are all aided by it. Its straightforward and easy-to-use foundation makes it simple for beginners to start improving right away.
4. Hitfilm Pro
Hitfilm is a video editor with a wide range of features and effects to help you make your videos stand out. It has a variety of video editing features, such as the ability to trim and merge clips, making it simple to build personalized motion pictures and add finishing touches. It also features excellent color-correcting, which you can use to give your videos a professional look.
5. Lightworks
Lightworks is a strong, easy-to-use enhancement tool that works with a variety of codecs. It contains equipment that keeps the user in control and is built for speed, performance, and accessibility.
Their basic software package is available for free download and includes a wide range of features. The software program can export to various formats and supports 1080p HD images.
Conclusion
● As you can see, using YouTube Studio Editor to enhance your video is simple. We hope that these suggestions will help you edit and proportion your videos more efficiently in the future. If you liked the piece, please consider sharing it on social media or by email with a friend. Are there any more tidbits or tricks you’d want to learn more about?
Have you ever wished to modify a video on YouTube? If that’s the case, this guide will show you how. YouTube Studio Editor is built right into YouTube, allowing you to modify videos straight in your browser. You may add text subtitles and outline overlays to your videos to make them more accessible.
This article will lead you through the steps required to edit your YouTube videos and give them the highest quality possible on their platform.
In this article
02 How to Edit Videos With YouTube Studio?
03 Is YouTube Studio editor enough for editing videos?
What Is YouTube Studio?
YouTube Studio is a free, cloud-based video production software. It’s the ideal way to create, distribute, and measure the overall success of your films on YouTube, Google+, and the web. It provides powerful editing tools, real-time feedback on how your films are performing, and one-click posting from your PC or smartphone. YouTube Studio provides several features:
1. Manages Multiple Channels
YouTube Studio makes managing a couple of channels a lot easier. You can see all of your channels on one screen and switch from one to the other without difficulty. Simply select Manage Channels from the account icon in the top right corner. When you have a lot of money owing to you, you can modify it.
2. Get Real-Time Data On Your Channels
It’s critical to monitor where your YouTube channel is at all times as a YouTube content creator. If you want to access your YouTube channel analytics and use all of the other equipment and features in the app, go to the analytics section of the menu.
2. Get Real-Time Data On Your Channels
It’s critical to monitor where your YouTube channel is at all times as a YouTube content creator. If you want to access your YouTube channel analytics and use all of the other equipment and features in the app, go to the analytics section of the menu.
3. Make video edits
The YouTube Studio app is most useful for creating fast, vlog-style videos, but it can also handle other types of material. With titles, photographs and captions, transitions, and even music, it could create a number of videos with different purposes.
4. Scheduled Video Uploads
A few films will need to be posted later, given a content creator’s schedule or habit. When you’re in the publishing section of your project, you’ll see a visibility option that lets you schedule the release of your video.
5. Add more Users
It is possible to add partners to the studio if you are working on a project requiring teamwork. To make this option available, go to your settings and then adjust permissions. Authenticate the account you’re using and click the + symbol to add other users.
How to Edit Videos With YouTube Studio?
Get Started with YouTube Studio
Step 1: Go to YouTube Studio and sign in with your desired account. A menu will appear on the left side of the home screen.
Step 2: Select the video you want to modify by clicking its title or thumbnail.
Step 3: From the left-hand menu, choose Editor, and then click Get Started in the center of the page.
Trim your video’s beginning or ending
1. Go to the Trim button. In the Editor, a blue box will appear.
2. Click and drag the blue box’s sides. Stop when the box encloses the video segment that you want to save. You will eliminate anything from the video that is not in the box.
3. Select Preview to double-check your changes and save your file.
Remove a segment of your video
- Go to the Trim menu. In the Editor, a blue box will appear.
- Select the blue box at the start of the section you want to delete.
- Choose Split.
- Drag the blue bar to the end of the part you want to delete by clicking and dragging it.
Is YouTube Studio editor enough for editing videos?
For film editing, YouTube’s video editor is insufficient. It includes a few basic features, but if you want to do some serious altering, you’ll need a third-party program.
Modern video editing software is fairly complex, and it allows you to make professional-looking movies without a lot of training. Several video editing tools are available that take things to the next level. They can use unique effects, transitions, and even 360-degree rotation to change the scene. Here are a few video editors to choose from.
1. Adobe Premiere Pro
One of the most well-known video editing software programs is Adobe Premiere Pro. It’s been used for professional video editing, design, and rendering by editors. Adobe’s most essential seasoned academic courses will teach you how to utilize the video editing program as well as its advanced features.
Adobe Premiere Pro may be used in a variety of unique ways. It may be used as a simple video editor or a program for editing motion pictures.
2. Filmora
Filmora Video Editor is an easy-to-use video editing program for beginners. Filmora Video Editor is the best solution for you if you are seeking a simple but efficient video editor that will assist you in making your movies seem professional. With this video editor, you can easily create a professional video with no learning curve.
It allows you to make the most beautiful and delicious videos for YouTube, social media channels or posting on many websites such as Facebook, Instagram, Vimeo, and YouTube.
For Win 7 or later (64-bit)
For macOS 10.12 or later
3. Blender
Blender is a free and open-source 3D computer graphics software tool program. Modeling, rigging, animation, simulation, rendering, compositing, and movement tracking, as well as video enhancement and game development, are all aided by it. Its straightforward and easy-to-use foundation makes it simple for beginners to start improving right away.
4. Hitfilm Pro
Hitfilm is a video editor with a wide range of features and effects to help you make your videos stand out. It has a variety of video editing features, such as the ability to trim and merge clips, making it simple to build personalized motion pictures and add finishing touches. It also features excellent color-correcting, which you can use to give your videos a professional look.
5. Lightworks
Lightworks is a strong, easy-to-use enhancement tool that works with a variety of codecs. It contains equipment that keeps the user in control and is built for speed, performance, and accessibility.
Their basic software package is available for free download and includes a wide range of features. The software program can export to various formats and supports 1080p HD images.
Conclusion
● As you can see, using YouTube Studio Editor to enhance your video is simple. We hope that these suggestions will help you edit and proportion your videos more efficiently in the future. If you liked the piece, please consider sharing it on social media or by email with a friend. Are there any more tidbits or tricks you’d want to learn more about?
Also read:
- Anime's Best of 2023 on YouTube A Guide to Your Daily Dose
- Cutting-Edge Strategies for YouTube Shorts to MP4 Exportation
- Mastering Playlist Conversion 5 Preferred Tools for YouTube Streams
- Dive Deep Into Unreal Worlds with These Titles for 2024
- Tips for a Secure YouTube Identity Check
- In 2024, Craft Stellar Channels Best 10 Apps for Artistic Banner Design
- [Updated] DIY Dynamics Unlock Creative Animation Potential
- 2024 Approved Cutting-Edge Unboxing Strategies to Boost Viewership and Engagement
- Charting the Course to Trending YouTubers for 2024
- [New] Best YouTube-to-WebM Tools A Compreenasive Review & Ranking
- Capture Chill Vibes Top Winter Bg Ideas for YT for 2024
- Thumbnail Design for Engagement A YouTube Resizing Guide
- 2024 Approved Cutting-Edge Tips Elevating Content with Tags
- [New] Elevate Your Content with Insightful Channel Descriptions
- Mastering YouTube Video Cuts A Beginner's Guide
- Unwind with Laughter Curating 15 Hilarious YouTube Masterpieces
- Transforming Video Tutorials Into Playable Animated GIFs Online
- Debugging Techniques Identifying and Resolving Common JavaScript Errors
- 2024 Approved Channel Worth Watching YouTube Music Groups
- Seamless Addition of YouTube Video Selections for Sites
- Swiftly Switch Songs in YT Playlist, Here's How
- A Comprehensive Look Editing and Polishing YT Videos via Movie Maker
- Chart Your Course Navigating the Waters of YouTube Subscription Surges
- [Updated] A Filmmaker's Guide to Mastering Green Screen Technology
- 2024 Approved Detailed Insights Into YouTube's Monthly Income Model
- In 2024, Avoid Oversaturated Greenscreen Effective Strategies for Mac Editors
- Upgrade Your Channel's Visual Appeal
- Boosting Your Youtube Shorts Profits Key Requirements & Earning Potential
- 2024 Approved Automating the Creation of YouTube Subscriber Links
- [New] Customizing YouTube Viewing Policies for Your Content
- How Much Can You Earn on YouTube via Ad Revenue?
- Essential Insights for Integrating Hashtags Into Game-Focused YT Content for 2024
- The Professional's Path Expert Strategies for 360° Youtube Live Broadcasting
- In 2024, Editing Elegance Into News Summations
- Free Visual Templates to Upgrade Your Profile
- Best 2023 YouTubers for Daily Inspiration From Animated Series for 2024
- [New] Elevate Your Content's Reach in YouTube Shorts Formats
- Ajey's YouTube Earnings Insight - 2023 for 2024
- [New] Cracking the Code Calculating Your Income From YouTube's CPM
- 2024 Approved Behind the Scenes How Much Creators Earn From YouTube Shorts
- Animated Text That Jumps Master Class with Easy Steps for 2024
- [Updated] Break Free From Fee-Free Youtube - Start at 500+ Subscriber Level
- Navigating the Seamless Shift From iMovie to YouTube Broadcasts
- [Updated] Essential Tips for Creating Compelling Free Ads on YouTube
- [Updated] Academic Journey Across Time Top 10 History YouTubers
- [New] 2024 Approved Exclusive List of 8 Best Apps To Enhance Facebook Likes
- New 2024 Approved Free and Fantastic Top 10 Video Editing Tools for Ubuntu
- In 2024, How to Hide/Fake Snapchat Location on Your Motorola Moto G24 | Dr.fone
- Guide to Downgrade From Sierra to El Capitan on Macs
- [Updated] The Great Video App Race Will LikeEclipses TikTok’s Dominance?
- A Detailed Guide on Faking Your Location in Mozilla Firefox On Tecno Camon 30 Pro 5G | Dr.fone
- [New] Starry Nights in Focus Advice on Night Portraiture
- In 2024, Can I Bypass a Forgotten Phone Password Of Infinix?
- How to Unlock Your iPhone 6s Plus Passcode 4 Easy Methods (With or Without iTunes) | Dr.fone
- [Updated] Mastering Personal Branding Essential Strategies for Facebook Bio Crafting
- New Using Track Matte and Tracking in Adobe After Effects Reviewing All Possibilities
- In 2024, Exploring the 25 Premium Real-Time Voice Overhaul Tools – A Comprehensive Analysis
- Updated 10 Blockbuster Films Edited with Final Cut Pro
- Why Your Nokia G310 Screen Might be Unresponsive and How to Fix It | Dr.fone
- In 2024, Essential Video Communication Tools List
- Updated How to Create OBS Slideshow for 2024
- Dynamic Titles for Adobe After Effects
- [New] 2024 Approved Unveiling the Secrets to Slow-Motion Screenshots in Snapchat
- Updated 2024 Approved Mastering Aspect Ratio in Final Cut Pro Essential Skills for Video Editors
- Title: Premium 7 Vlog Cameras Boosting Audience Engagement & Retention
- Author: Kevin
- Created at : 2024-05-25 16:11:51
- Updated at : 2024-05-26 16:11:51
- Link: https://youtube-videos.techidaily.com/premium-7-vlog-cameras-boosting-audience-engagement-and-retention/
- License: This work is licensed under CC BY-NC-SA 4.0.
