
"Pinnacle Creator The Duo of Media Elements"
Pinnacle Creator: The Duo of Media Elements
People capture loads of photos of the places they visit and the events they attend for social media and future memories. If you check the online trend, users are shifting from static photos to short videos for a better visual experience. That is why you can consider creating videos out of the photos you have captured and adding suitable music in the background to make your memories visually pleasing.
All you need is a video maker with music and pictures. There is no dearth of video makers, but not all live up to the expectation. There are online video markers as well as video maker software applications available. In this article, we have picked the best video maker with photos and music and illustrated how to make a video with music and photos. We have also listed the popular video makers for your consideration.
Part 1. Best Video maker with music and pictures
We recommend Wondershare Filmora as the best video maker with photos and music. Filmora is considered one of the best video makers and editors in the world. Filmora allows you to import photos of different file formats so that you can make slideshow-like video. There are loads of transitions as well as effects available that you can place in between the photos so that the transition becomes eye-pleasing.
Similarly, you can import any audio or music file. Besides, there are stock music files available that you can apply to your slideshow video. You can even add colourful titles and graphical elements to enhance the video content. Here are the steps on how to make a video with your photos and music.
For Win 7 or later (64-bit)
For macOS 10.12 or later
Step 1: Install Filmora and Start Your Project
Download and install Wondershare Filmora as per your operating system. Filmora is available for Windows and Mac. Launch Filmora and click on New Project. Drag and drop your photos on Project Media folder.
Step 2: Import Photos and Arrange Them in Order
Drag and drop the photos on the timeline as per your sequence you want in your slideshow video. You can change the order of the photos as well as stretch durations of photos in the video from the timeline. You have to arrange the photos side by side without any gap so that there is no black screen in between the transition.

Step 3: Add Transition Effects
After arranging the photos side by side, you have to apply transition effects so that the change from one photo to another is eye-soothing. There are loads of transitions available and you can get them from Transition option located at the top bar.
Go through the different categories of transitions. Drag and drop the transition you want on to the photo after which you want the transition effect to play. Do the same for all photos except the last one. You can apply different transitions effects for different photos as per your preference.

Step 4: Add Background Music
Now it is time to add a background music to the entire video. You can drag and drop any music file from your hard drive to Filmora Project Media. Thereafter, you can drag and drop the audio file on the audio timeline below the photo timeline. You can also add audio effects from the top bar if required.

Step 5: Export Your Video
Once you are done adding photos, transitions, and music, you should play the video on Filmora and make adjustments wherever required. Thereafter, click on Export button and save the video file on your hard drive in your desired file format.

Part 2. Popular video makers with photos and music
Here is the list of the popular premium and free video maker with music and pictures that you can consider for making slideshow videos.
1. Invideo
Invideo is a popular online video maker with music and pictures along with 5000 customizable templates. These templates help users to transform photos into videos with background music in a few minutes. Besides, the platform offers a wide range of stock media files. You can create videos in more than 70 languages, and the editor is user-friendly for users of all ages.
All you need to do is select a template and customize it if required. Thereafter, you need to import the photos, add text effects, and finally add music. There are options for trimming, cropping, and adding stickers, texts and transitions. The free version lets you export 60 videos per month but with a watermark. Here are the top features of Invideo.
- 5000+ customizable templates for all video types.
- 9+ million stocks videos, photos, and audio files.
- Add transitions, stickers, animations, and texts to videos.
- Trim and crop videos and audio files.
- Add voiceover as well as fade-in and fade-out effects.
- Work in collaboration with team members.

2. Icecream slideshow maker
Icecream slideshow maker is a free video maker with music and pictures for Windows users only. The software is compatible with Windows 10, 8, 7 and XP. You can create a high-quality video from your photos with music instantly. There is no need for any prior experience to use the video maker. There are beautiful transitions available that will enhance the video quality and make your presentation stand out. The free version allows up to 10 slides per video and saving the video in Webm file format. You can upgrade to Pro version to get rid of the limitations.
You can change photo and transition duration as per requirements. The software supports various audio file formats that you can import for your video. You can also add animations to texts so that they can shine in your video. The software allows sharing the video directly to YouTube. Besides, you can save it on Google Drive and Dropbox. Here are all the features of Icecream slideshow maker that you should be aware of.
- Super intuitive user interface for all users.
- Add colourful text, transitions, and animations.
- Save and resume project work as per time availability.
- Pro version allows saving video in 4K resolution.
- Video output in MP4, AVI, MOV and WEBM formats.
- Suitable for low-end computers.

3. PhotoStage Slideshow
PhotoStage Slideshow by NCH Software is another video maker software for Windows users. The software comes with an easy and automated wizard for users to transform photos with a video instantly. There is also an image editor available to adjust different parameters of your photos before making a video out of them.
Besides, there are various transitions available to apply and you can add captions and narration as per your requirements. In fact, along with photos, you can add video clips to create the ultimate video. Moreover, there are tools available to edit your audio and music file and add different effects. Here are the top features of PhotoStage Slideshow Software.
- Supports Full HD and 4K video resolution.
- Edit and fine-tune photos and add captions.
- Wide range of eye-catching and popular transitions.
- Edit audio and music file and add different effects.
- Save video file in MOV, MP4, GIF, AVI, 3GP and more.
- Directly share on YouTube, Vimeo, Flickr, HTML5.

4. Clideo video maker
Clideo Video Maker is a free online video maker with song. All you need to do is upload photos from your hard drive and choose a preset depending on the online platform where you want to upload the video. Thereafter, add audio and trim it as per video length. Then add smooth transitions and the video will be ready to export on your hard drive or cloud storage.
The online video maker supports different video and audio file format for importing and exporting. You can use the editor on any device starting from Windows and Mac to Android and iPhone. The user interface is very simple to use and it does not store video files for more than a day. Here are all the features of Clideo video maker.
- Upload photos from hard drive, and cloud storage.
- Presets for Instagram, Stories, YouTube, and Facebook videos.
- Add different photos, audio, and video clips to make videos.
- Zoom & crop option along with image duration elongation.
- Suitable for computer and mobile phone users.

5. Movavi Slideshow Maker
Movavi Slideshow Maker is available for both Windows and Mac users. The software comes with a wizard to allow users to create video from photos. However, advanced users can create video from photos manually as well. You get to add photos, audio files and video clips of different file formats. Most importantly, there are various templates available to create professional-quality videos.
There are loads of effects, filters, titles, and stickers available to apply on your video. The free version is limited to seven days usage. The output video will have watermark on it and you can purchase the premium version to avoid all limitations. Here are the top features of Movavi Slideshow Maker.
- Slideshow wizard for fast and easy video creation.
- Manual mode for advanced users to create customized video.
- Supports different types of media file formats.
- Different types of templates for instant video making.
- Wide ranges of transitions, filters, titles, and stickers.

Conclusion
If you are making a video from your photos, you can use an online video maker with photos and music free. If you are someone who wants to make professional-quality videos from photos, a premium video maker is best for you. If you are going to upload your slideshow videos on social media and video streaming platforms, we recommend Wondershare Filmora as the best video maker with music and pictures.
For macOS 10.12 or later
Step 1: Install Filmora and Start Your Project
Download and install Wondershare Filmora as per your operating system. Filmora is available for Windows and Mac. Launch Filmora and click on New Project. Drag and drop your photos on Project Media folder.
Step 2: Import Photos and Arrange Them in Order
Drag and drop the photos on the timeline as per your sequence you want in your slideshow video. You can change the order of the photos as well as stretch durations of photos in the video from the timeline. You have to arrange the photos side by side without any gap so that there is no black screen in between the transition.
Step 3: Add Transition Effects
After arranging the photos side by side, you have to apply transition effects so that the change from one photo to another is eye-soothing. There are loads of transitions available and you can get them from Transition option located at the top bar.
Go through the different categories of transitions. Drag and drop the transition you want on to the photo after which you want the transition effect to play. Do the same for all photos except the last one. You can apply different transitions effects for different photos as per your preference.
Step 4: Add Background Music
Now it is time to add a background music to the entire video. You can drag and drop any music file from your hard drive to Filmora Project Media. Thereafter, you can drag and drop the audio file on the audio timeline below the photo timeline. You can also add audio effects from the top bar if required.
Step 5: Export Your Video
Once you are done adding photos, transitions, and music, you should play the video on Filmora and make adjustments wherever required. Thereafter, click on Export button and save the video file on your hard drive in your desired file format.
Part 2. Popular video makers with photos and music
Here is the list of the popular premium and free video maker with music and pictures that you can consider for making slideshow videos.
1. Invideo
Invideo is a popular online video maker with music and pictures along with 5000 customizable templates. These templates help users to transform photos into videos with background music in a few minutes. Besides, the platform offers a wide range of stock media files. You can create videos in more than 70 languages, and the editor is user-friendly for users of all ages.
All you need to do is select a template and customize it if required. Thereafter, you need to import the photos, add text effects, and finally add music. There are options for trimming, cropping, and adding stickers, texts and transitions. The free version lets you export 60 videos per month but with a watermark. Here are the top features of Invideo.
- 5000+ customizable templates for all video types.
- 9+ million stocks videos, photos, and audio files.
- Add transitions, stickers, animations, and texts to videos.
- Trim and crop videos and audio files.
- Add voiceover as well as fade-in and fade-out effects.
- Work in collaboration with team members.
2. Icecream slideshow maker
Icecream slideshow maker is a free video maker with music and pictures for Windows users only. The software is compatible with Windows 10, 8, 7 and XP. You can create a high-quality video from your photos with music instantly. There is no need for any prior experience to use the video maker. There are beautiful transitions available that will enhance the video quality and make your presentation stand out. The free version allows up to 10 slides per video and saving the video in Webm file format. You can upgrade to Pro version to get rid of the limitations.
You can change photo and transition duration as per requirements. The software supports various audio file formats that you can import for your video. You can also add animations to texts so that they can shine in your video. The software allows sharing the video directly to YouTube. Besides, you can save it on Google Drive and Dropbox. Here are all the features of Icecream slideshow maker that you should be aware of.
- Super intuitive user interface for all users.
- Add colourful text, transitions, and animations.
- Save and resume project work as per time availability.
- Pro version allows saving video in 4K resolution.
- Video output in MP4, AVI, MOV and WEBM formats.
- Suitable for low-end computers.
3. PhotoStage Slideshow
PhotoStage Slideshow by NCH Software is another video maker software for Windows users. The software comes with an easy and automated wizard for users to transform photos with a video instantly. There is also an image editor available to adjust different parameters of your photos before making a video out of them.
Besides, there are various transitions available to apply and you can add captions and narration as per your requirements. In fact, along with photos, you can add video clips to create the ultimate video. Moreover, there are tools available to edit your audio and music file and add different effects. Here are the top features of PhotoStage Slideshow Software.
- Supports Full HD and 4K video resolution.
- Edit and fine-tune photos and add captions.
- Wide range of eye-catching and popular transitions.
- Edit audio and music file and add different effects.
- Save video file in MOV, MP4, GIF, AVI, 3GP and more.
- Directly share on YouTube, Vimeo, Flickr, HTML5.
4. Clideo video maker
Clideo Video Maker is a free online video maker with song. All you need to do is upload photos from your hard drive and choose a preset depending on the online platform where you want to upload the video. Thereafter, add audio and trim it as per video length. Then add smooth transitions and the video will be ready to export on your hard drive or cloud storage.
The online video maker supports different video and audio file format for importing and exporting. You can use the editor on any device starting from Windows and Mac to Android and iPhone. The user interface is very simple to use and it does not store video files for more than a day. Here are all the features of Clideo video maker.
- Upload photos from hard drive, and cloud storage.
- Presets for Instagram, Stories, YouTube, and Facebook videos.
- Add different photos, audio, and video clips to make videos.
- Zoom & crop option along with image duration elongation.
- Suitable for computer and mobile phone users.
5. Movavi Slideshow Maker
Movavi Slideshow Maker is available for both Windows and Mac users. The software comes with a wizard to allow users to create video from photos. However, advanced users can create video from photos manually as well. You get to add photos, audio files and video clips of different file formats. Most importantly, there are various templates available to create professional-quality videos.
There are loads of effects, filters, titles, and stickers available to apply on your video. The free version is limited to seven days usage. The output video will have watermark on it and you can purchase the premium version to avoid all limitations. Here are the top features of Movavi Slideshow Maker.
- Slideshow wizard for fast and easy video creation.
- Manual mode for advanced users to create customized video.
- Supports different types of media file formats.
- Different types of templates for instant video making.
- Wide ranges of transitions, filters, titles, and stickers.
Conclusion
If you are making a video from your photos, you can use an online video maker with photos and music free. If you are someone who wants to make professional-quality videos from photos, a premium video maker is best for you. If you are going to upload your slideshow videos on social media and video streaming platforms, we recommend Wondershare Filmora as the best video maker with music and pictures.
Watch Deleted YouTube: Secrets to Accessing Lost Content
How to Watch Deleted YouTube Videos Online in 2 Ways | Ultimate Guide

Richard Bennett
Mar 27, 2024• Proven solutions


YouTube features a wide variety of corporate and user-generated content ranging from music to DIY videos. Along with all this massive inflow, there are scenarios where the video content that you like or wanted to watch gets deleted for any reason. Either the uploading channel deleted the video, or YouTube sometimes deletes videos for violating any of the platform’s rules – showing the dismal message “We’re sorry, this video is no longer available”. You’ll be thinking it is probably impossible to access deleted YouTube videos that you wanted to watch so badly. Though it may be true to some extent, in reality, nothing gets deleted from the internet. To help you watch deleted YouTube videos, we’ll dive into the two most handy methods down below. So, let get started.
You might be interested in How to Make a Playlist of Uploaded Videos and Others’ Video on YouTube>>>
- Part 1: Watch Deleted YouTube Videos with a URL
- Part 2: Watch Deleted YouTube Videos without a URL
- Part 3: Bonus Tip—Make Your Own YouTube Video with Wondershare FilmoraX
Part 1: Watch Deleted YouTube Videos with a URL
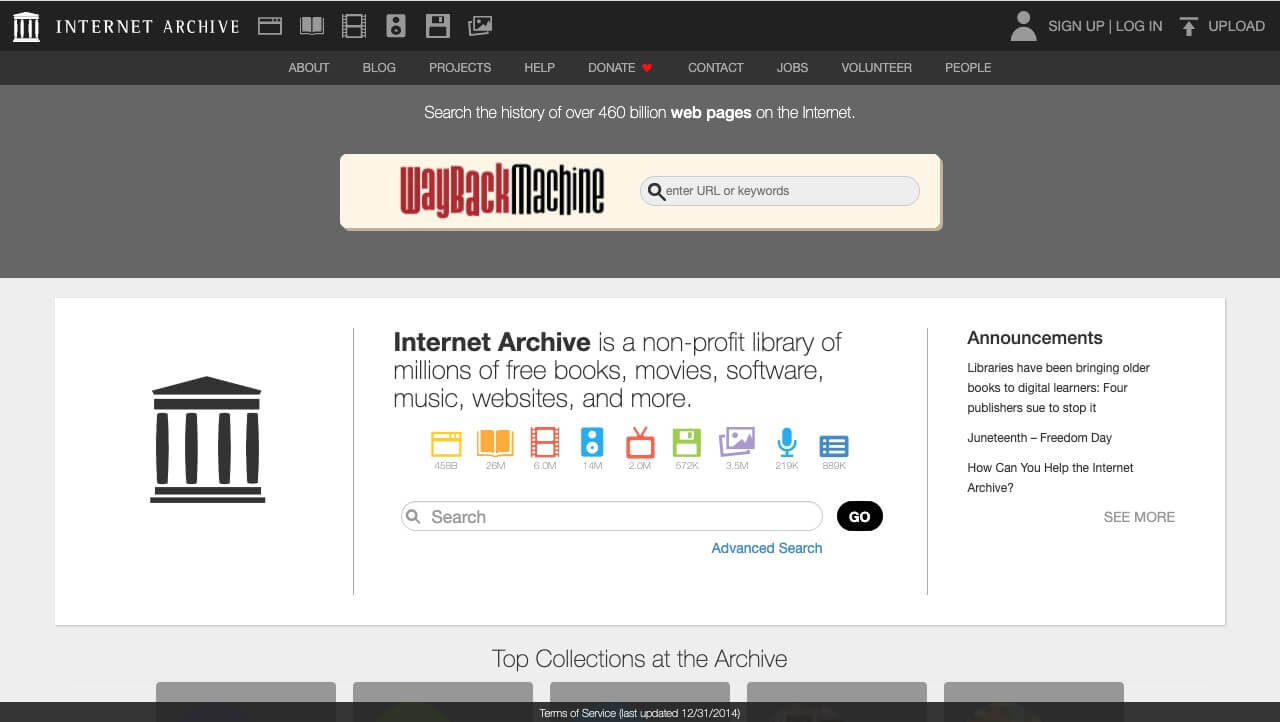
Internet Archive(known as the Wayback Machine) is a website archival system that has been collecting and cataloging websites since 1996. This means the system has effectively saved the site’s current layout and data. This enormous world archive of the Web’s past has amassed over 100 terabytes of storage with around 10 billion web pages.
On the archive.org website, you can find many of your favorite web site’s “snapshot” at a time in the past. For our case, we need to find and watch deleted YouTube videos, so for that, all we need is the link of the video, and we can most probably find it on archive.org. The steps for finding and restoring deleted YouTube videos are simple and as follows.
1. First of all, find the URL in your YouTube email, channel account if you’re searching for your uploaded video. You can find the link in browser history, in YouTube history, or you may have shared the link on social media.
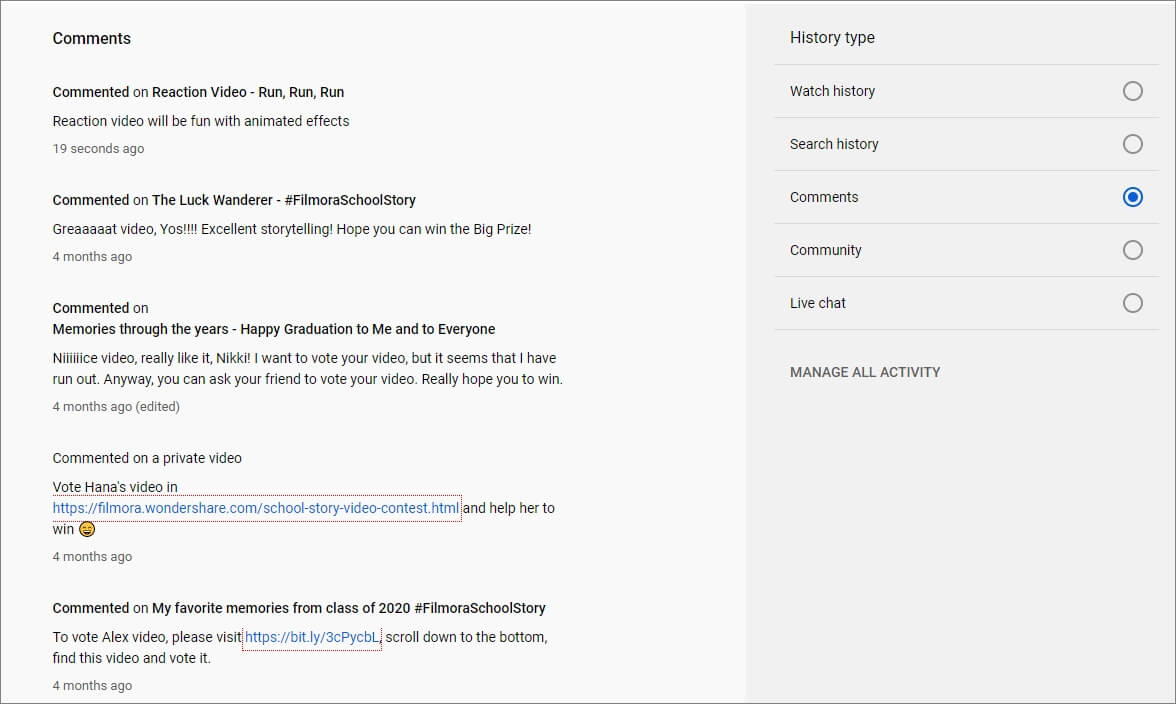
If you want to watch a deleted YouTube video using the Wayback Machine, you must find the link to the video you want to access; without the URL, you won’t be able to access the deleted YouTube video.
2. Head over to the archive.org website and paste the YouTube video URL in the search bar and press return.
3. Once you find your video on the internet archive, you can see the details of the video.
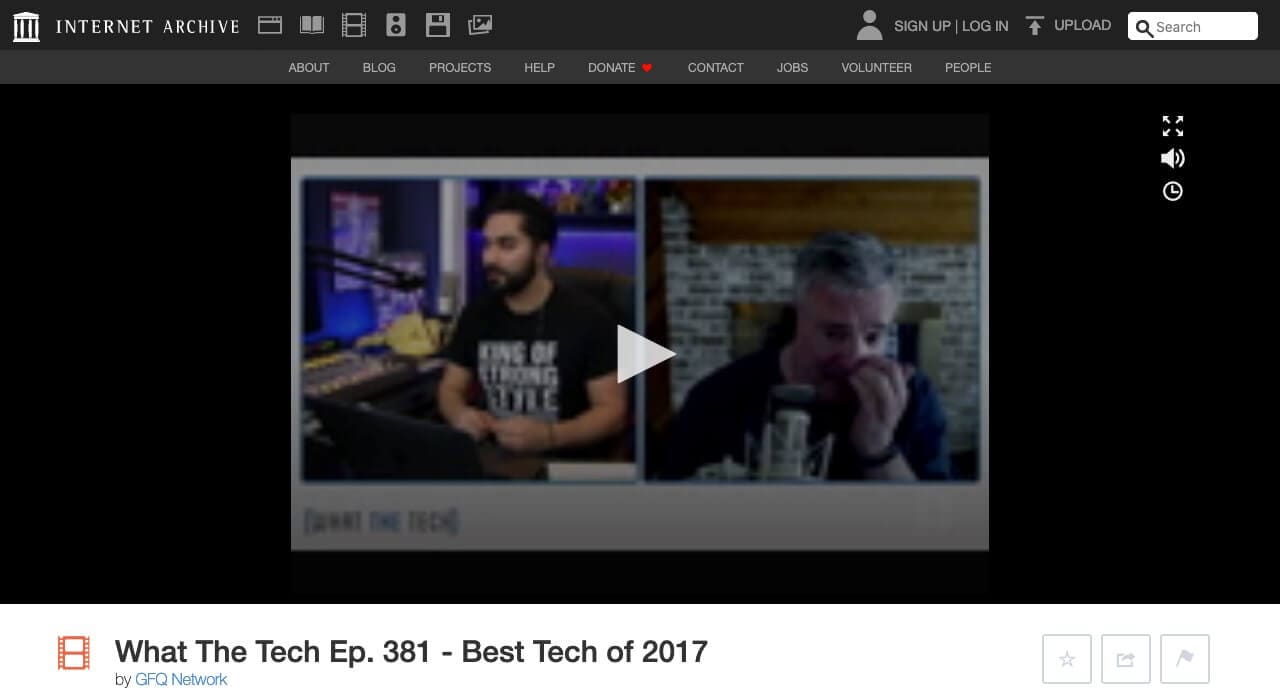
4. You won’t be able to play the video directly, but you should be able to download it. Right, click the video to find the option to download the video.

This method works mostly as the Wayback machine is pretty active and regularly crawls the web to archive the sites. But sometimes, this method may not work and would require a more sophisticated way to watch deleted YouTube videos.
Part 2: Watch Deleted YouTube Videos without a URL
But what if you don’t have a URL for the deleted YouTube video? The internet is a global village network. Everything on the internet is connected, and that connection makes it more useful for example, even though a YouTube video might be deleted, you can somehow access and watch the deleted YouTube videos without a URL because people always replicate videos and share them on other YouTube channels or social media platforms. To make sure you get to watch your favorite YouTube video again, we will dive into the vast internet and find the deleted YouTube videos.
This method can be a bit complicated and would require you to give full attention to find the video you want to watch that badly that you’ve landed on this article.
1. Open a new tab in your browser and go to the Google search bar. We’re going to employ a technique from the SEO expert’s toolbox – Google Search Operators.
2. In the search bar, type “site:www.youtube.com + name Of TheVideo”
3. This way Google will crawl all the name relevant videos only from the YouTube databases and move us closer to finding our deleted YouTube video.
4. If you know the video was shared by someone on Facebook or any other social media platform, you can change the site URL in the search bar, replacing YouTube with Facebook, for example.
5. Once you find the video URL, you can simply go back to the first method that we discussed and paste the URL into the internet archive. The archive will give you the video and you can enjoy watching a deleted YouTube video.
Note: If you still cannot find the video using this method, I’m sorry to tell you the video may be completely deleted from the server, and you cannot access it anymore.
Part 3: Bonus Tip—Make Your Own YouTube Video with Wondershare Filmora
Want to make a YouTube video again? Wondershare Filmora is a relatively lightweight and powerful platform you get an intuitive interface and the power to create wonderful, unique content. To help you make your own YouTube video with Filmora, we’ll go through a short introduction of the flow and features first:
- Organize media with folders and projects
- Cutting and trimming raw footage
- Unlimited Layering
- Visual effects and filters
- Attach/detach audio and music
- Add creative text and icons with a wide range of templates to choose from
- Advanced color correction tools
- Export videos to YouTube directly and support various output formats
Make a YouTube video with several clicks using Wondershare Filmora:
1. Download and install Wondershare Filmora on your computer by tapping the download wizard below. Remember to join the Wondershare Video Community to connect with other video creators.
2. Launch Wondershare Filmora, add your videos to the Media Library. And you’ll also be greeted with a sleek and simple interface with controls for everything such as transitions, titles, layering clips, soundtrack, and more.

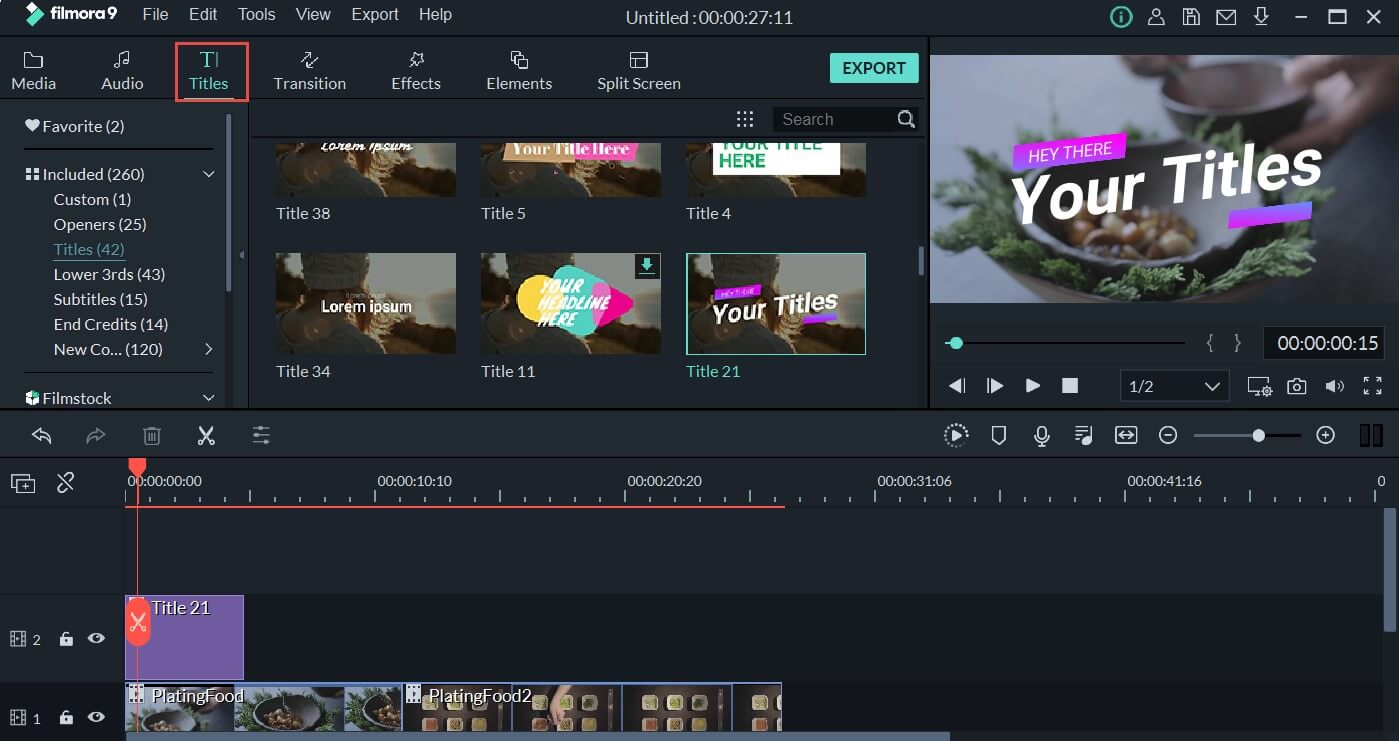
3. Add your video to the timeline, then go to the Titles tab, and you will see hundreds of titles and text templates. Select the template you love and add it to the video.
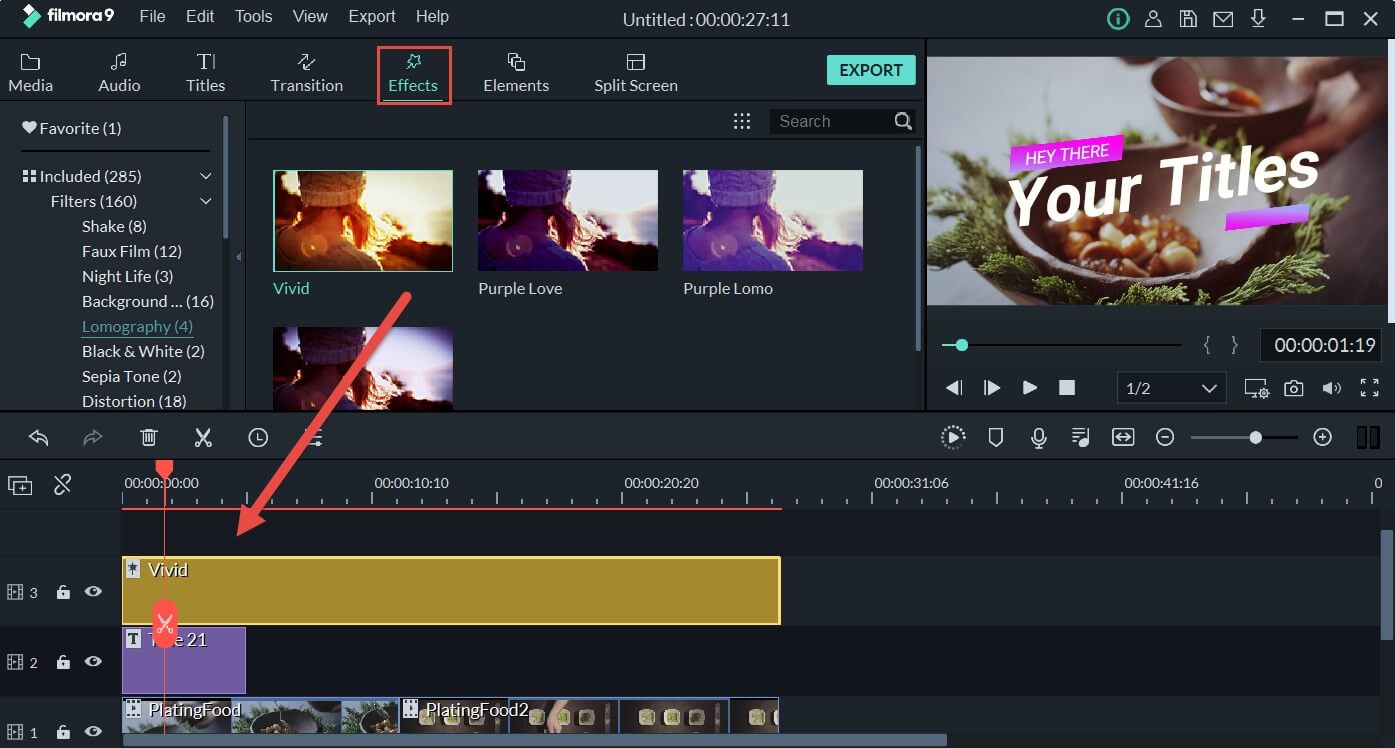
4. Then you can also go to the Effects tab and apply astonishing filters to the video
5. Once you’re done, you can click Export and upload your video to YouTube directly.
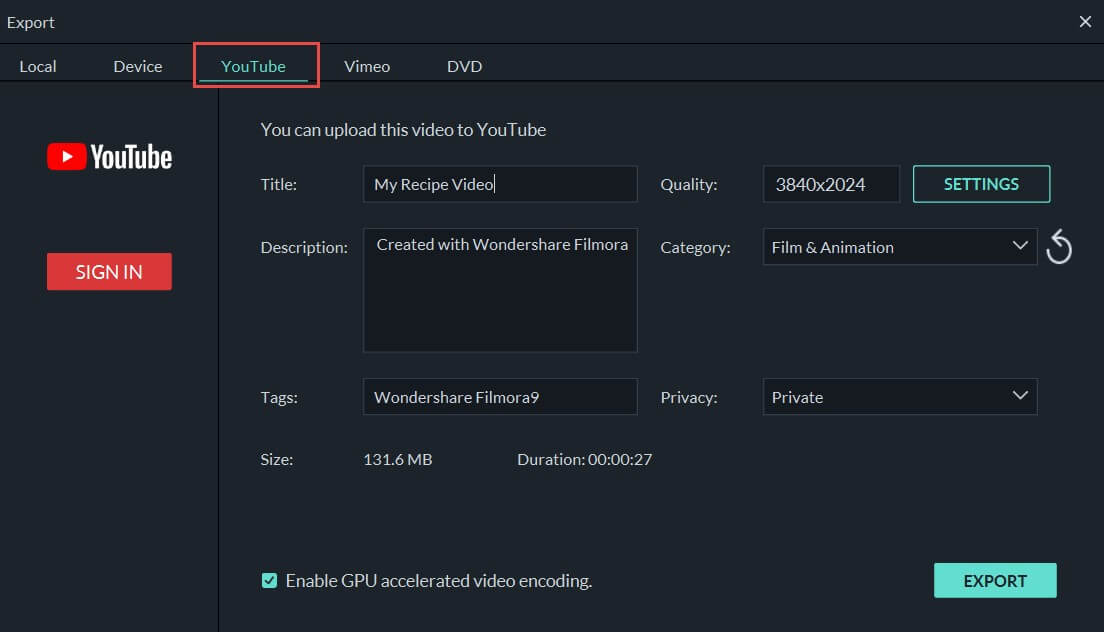
The free version will have a watermark on the exported video.
There’s nothing more delightful than to put your skills to work and save time by using Filmora. The time you save can be put into making more content and editing videos to boast of your creativity to friends.
Conclusion
YouTube has immersed so much in our day-to-day life that on average a mobile viewing session lasts more than 40 mins. To satiate our thirst for video content, YouTube has become the sole free platform. But even if your favorite song or movie gets deleted, you don’t have to worry as I’ve compiled the best solution to watch deleted YouTube videos and even be able to restore deleted YouTube videos to relish watching them with your friends and family. Leave your comments below if you love this article.
Richard Bennett
Richard Bennett is a writer and a lover of all things video.
Follow @Richard Bennett
Richard Bennett
Mar 27, 2024• Proven solutions
YouTube features a wide variety of corporate and user-generated content ranging from music to DIY videos. Along with all this massive inflow, there are scenarios where the video content that you like or wanted to watch gets deleted for any reason. Either the uploading channel deleted the video, or YouTube sometimes deletes videos for violating any of the platform’s rules – showing the dismal message “We’re sorry, this video is no longer available”. You’ll be thinking it is probably impossible to access deleted YouTube videos that you wanted to watch so badly. Though it may be true to some extent, in reality, nothing gets deleted from the internet. To help you watch deleted YouTube videos, we’ll dive into the two most handy methods down below. So, let get started.
You might be interested in How to Make a Playlist of Uploaded Videos and Others’ Video on YouTube>>>
- Part 1: Watch Deleted YouTube Videos with a URL
- Part 2: Watch Deleted YouTube Videos without a URL
- Part 3: Bonus Tip—Make Your Own YouTube Video with Wondershare FilmoraX
Part 1: Watch Deleted YouTube Videos with a URL
Internet Archive(known as the Wayback Machine) is a website archival system that has been collecting and cataloging websites since 1996. This means the system has effectively saved the site’s current layout and data. This enormous world archive of the Web’s past has amassed over 100 terabytes of storage with around 10 billion web pages.
On the archive.org website, you can find many of your favorite web site’s “snapshot” at a time in the past. For our case, we need to find and watch deleted YouTube videos, so for that, all we need is the link of the video, and we can most probably find it on archive.org. The steps for finding and restoring deleted YouTube videos are simple and as follows.
1. First of all, find the URL in your YouTube email, channel account if you’re searching for your uploaded video. You can find the link in browser history, in YouTube history, or you may have shared the link on social media.
If you want to watch a deleted YouTube video using the Wayback Machine, you must find the link to the video you want to access; without the URL, you won’t be able to access the deleted YouTube video.
2. Head over to the archive.org website and paste the YouTube video URL in the search bar and press return.
3. Once you find your video on the internet archive, you can see the details of the video.
4. You won’t be able to play the video directly, but you should be able to download it. Right, click the video to find the option to download the video.
This method works mostly as the Wayback machine is pretty active and regularly crawls the web to archive the sites. But sometimes, this method may not work and would require a more sophisticated way to watch deleted YouTube videos.
Part 2: Watch Deleted YouTube Videos without a URL
But what if you don’t have a URL for the deleted YouTube video? The internet is a global village network. Everything on the internet is connected, and that connection makes it more useful for example, even though a YouTube video might be deleted, you can somehow access and watch the deleted YouTube videos without a URL because people always replicate videos and share them on other YouTube channels or social media platforms. To make sure you get to watch your favorite YouTube video again, we will dive into the vast internet and find the deleted YouTube videos.
This method can be a bit complicated and would require you to give full attention to find the video you want to watch that badly that you’ve landed on this article.
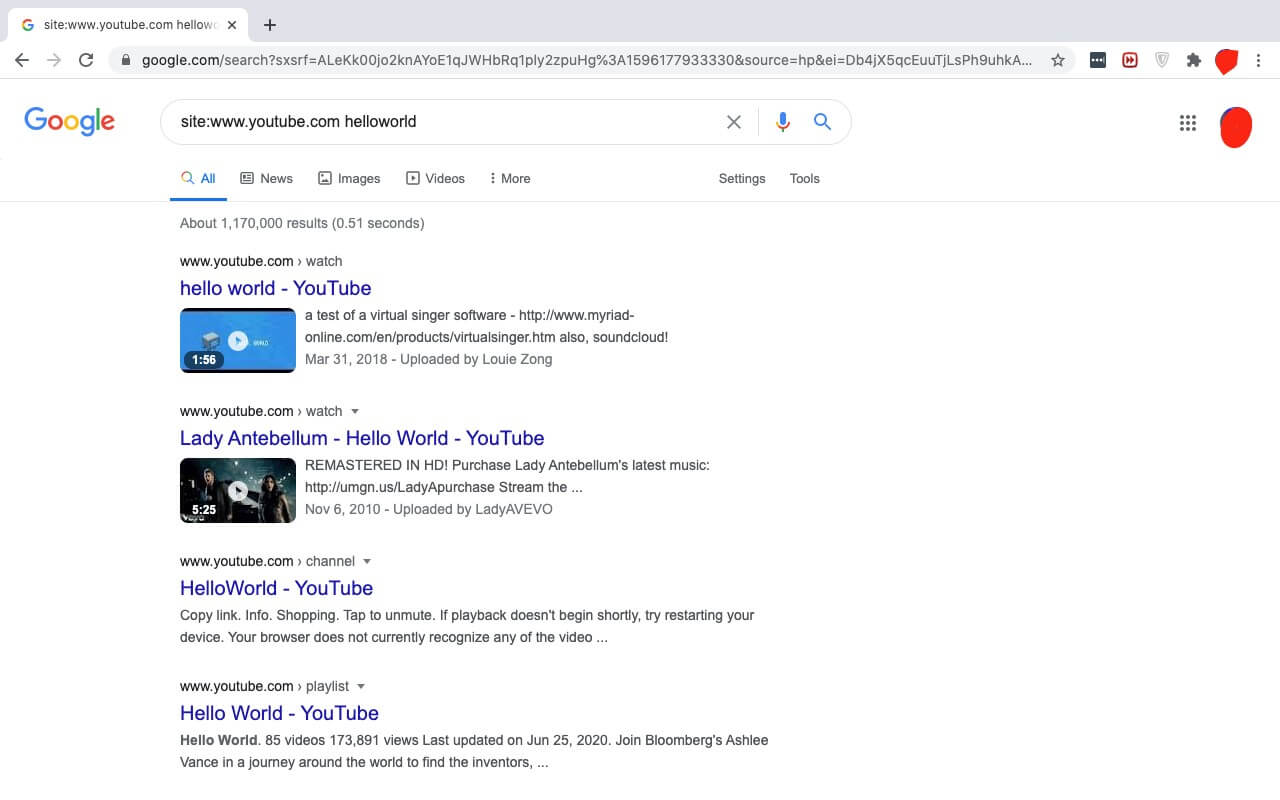
1. Open a new tab in your browser and go to the Google search bar. We’re going to employ a technique from the SEO expert’s toolbox – Google Search Operators.
2. In the search bar, type “site:www.youtube.com + name Of TheVideo”
3. This way Google will crawl all the name relevant videos only from the YouTube databases and move us closer to finding our deleted YouTube video.
4. If you know the video was shared by someone on Facebook or any other social media platform, you can change the site URL in the search bar, replacing YouTube with Facebook, for example.
5. Once you find the video URL, you can simply go back to the first method that we discussed and paste the URL into the internet archive. The archive will give you the video and you can enjoy watching a deleted YouTube video.
Note: If you still cannot find the video using this method, I’m sorry to tell you the video may be completely deleted from the server, and you cannot access it anymore.
Part 3: Bonus Tip—Make Your Own YouTube Video with Wondershare Filmora
Want to make a YouTube video again? Wondershare Filmora is a relatively lightweight and powerful platform you get an intuitive interface and the power to create wonderful, unique content. To help you make your own YouTube video with Filmora, we’ll go through a short introduction of the flow and features first:
- Organize media with folders and projects
- Cutting and trimming raw footage
- Unlimited Layering
- Visual effects and filters
- Attach/detach audio and music
- Add creative text and icons with a wide range of templates to choose from
- Advanced color correction tools
- Export videos to YouTube directly and support various output formats
Make a YouTube video with several clicks using Wondershare Filmora:
1. Download and install Wondershare Filmora on your computer by tapping the download wizard below. Remember to join the Wondershare Video Community to connect with other video creators.
2. Launch Wondershare Filmora, add your videos to the Media Library. And you’ll also be greeted with a sleek and simple interface with controls for everything such as transitions, titles, layering clips, soundtrack, and more.
3. Add your video to the timeline, then go to the Titles tab, and you will see hundreds of titles and text templates. Select the template you love and add it to the video.
4. Then you can also go to the Effects tab and apply astonishing filters to the video
5. Once you’re done, you can click Export and upload your video to YouTube directly.
The free version will have a watermark on the exported video.
There’s nothing more delightful than to put your skills to work and save time by using Filmora. The time you save can be put into making more content and editing videos to boast of your creativity to friends.
Conclusion
YouTube has immersed so much in our day-to-day life that on average a mobile viewing session lasts more than 40 mins. To satiate our thirst for video content, YouTube has become the sole free platform. But even if your favorite song or movie gets deleted, you don’t have to worry as I’ve compiled the best solution to watch deleted YouTube videos and even be able to restore deleted YouTube videos to relish watching them with your friends and family. Leave your comments below if you love this article.
Richard Bennett
Richard Bennett is a writer and a lover of all things video.
Follow @Richard Bennett
Richard Bennett
Mar 27, 2024• Proven solutions
YouTube features a wide variety of corporate and user-generated content ranging from music to DIY videos. Along with all this massive inflow, there are scenarios where the video content that you like or wanted to watch gets deleted for any reason. Either the uploading channel deleted the video, or YouTube sometimes deletes videos for violating any of the platform’s rules – showing the dismal message “We’re sorry, this video is no longer available”. You’ll be thinking it is probably impossible to access deleted YouTube videos that you wanted to watch so badly. Though it may be true to some extent, in reality, nothing gets deleted from the internet. To help you watch deleted YouTube videos, we’ll dive into the two most handy methods down below. So, let get started.
You might be interested in How to Make a Playlist of Uploaded Videos and Others’ Video on YouTube>>>
- Part 1: Watch Deleted YouTube Videos with a URL
- Part 2: Watch Deleted YouTube Videos without a URL
- Part 3: Bonus Tip—Make Your Own YouTube Video with Wondershare FilmoraX
Part 1: Watch Deleted YouTube Videos with a URL
Internet Archive(known as the Wayback Machine) is a website archival system that has been collecting and cataloging websites since 1996. This means the system has effectively saved the site’s current layout and data. This enormous world archive of the Web’s past has amassed over 100 terabytes of storage with around 10 billion web pages.
On the archive.org website, you can find many of your favorite web site’s “snapshot” at a time in the past. For our case, we need to find and watch deleted YouTube videos, so for that, all we need is the link of the video, and we can most probably find it on archive.org. The steps for finding and restoring deleted YouTube videos are simple and as follows.
1. First of all, find the URL in your YouTube email, channel account if you’re searching for your uploaded video. You can find the link in browser history, in YouTube history, or you may have shared the link on social media.
If you want to watch a deleted YouTube video using the Wayback Machine, you must find the link to the video you want to access; without the URL, you won’t be able to access the deleted YouTube video.
2. Head over to the archive.org website and paste the YouTube video URL in the search bar and press return.
3. Once you find your video on the internet archive, you can see the details of the video.
4. You won’t be able to play the video directly, but you should be able to download it. Right, click the video to find the option to download the video.
This method works mostly as the Wayback machine is pretty active and regularly crawls the web to archive the sites. But sometimes, this method may not work and would require a more sophisticated way to watch deleted YouTube videos.
Part 2: Watch Deleted YouTube Videos without a URL
But what if you don’t have a URL for the deleted YouTube video? The internet is a global village network. Everything on the internet is connected, and that connection makes it more useful for example, even though a YouTube video might be deleted, you can somehow access and watch the deleted YouTube videos without a URL because people always replicate videos and share them on other YouTube channels or social media platforms. To make sure you get to watch your favorite YouTube video again, we will dive into the vast internet and find the deleted YouTube videos.
This method can be a bit complicated and would require you to give full attention to find the video you want to watch that badly that you’ve landed on this article.
1. Open a new tab in your browser and go to the Google search bar. We’re going to employ a technique from the SEO expert’s toolbox – Google Search Operators.
2. In the search bar, type “site:www.youtube.com + name Of TheVideo”
3. This way Google will crawl all the name relevant videos only from the YouTube databases and move us closer to finding our deleted YouTube video.
4. If you know the video was shared by someone on Facebook or any other social media platform, you can change the site URL in the search bar, replacing YouTube with Facebook, for example.
5. Once you find the video URL, you can simply go back to the first method that we discussed and paste the URL into the internet archive. The archive will give you the video and you can enjoy watching a deleted YouTube video.
Note: If you still cannot find the video using this method, I’m sorry to tell you the video may be completely deleted from the server, and you cannot access it anymore.
Part 3: Bonus Tip—Make Your Own YouTube Video with Wondershare Filmora
Want to make a YouTube video again? Wondershare Filmora is a relatively lightweight and powerful platform you get an intuitive interface and the power to create wonderful, unique content. To help you make your own YouTube video with Filmora, we’ll go through a short introduction of the flow and features first:
- Organize media with folders and projects
- Cutting and trimming raw footage
- Unlimited Layering
- Visual effects and filters
- Attach/detach audio and music
- Add creative text and icons with a wide range of templates to choose from
- Advanced color correction tools
- Export videos to YouTube directly and support various output formats
Make a YouTube video with several clicks using Wondershare Filmora:
1. Download and install Wondershare Filmora on your computer by tapping the download wizard below. Remember to join the Wondershare Video Community to connect with other video creators.
2. Launch Wondershare Filmora, add your videos to the Media Library. And you’ll also be greeted with a sleek and simple interface with controls for everything such as transitions, titles, layering clips, soundtrack, and more.
3. Add your video to the timeline, then go to the Titles tab, and you will see hundreds of titles and text templates. Select the template you love and add it to the video.
4. Then you can also go to the Effects tab and apply astonishing filters to the video
5. Once you’re done, you can click Export and upload your video to YouTube directly.
The free version will have a watermark on the exported video.
There’s nothing more delightful than to put your skills to work and save time by using Filmora. The time you save can be put into making more content and editing videos to boast of your creativity to friends.
Conclusion
YouTube has immersed so much in our day-to-day life that on average a mobile viewing session lasts more than 40 mins. To satiate our thirst for video content, YouTube has become the sole free platform. But even if your favorite song or movie gets deleted, you don’t have to worry as I’ve compiled the best solution to watch deleted YouTube videos and even be able to restore deleted YouTube videos to relish watching them with your friends and family. Leave your comments below if you love this article.
Richard Bennett
Richard Bennett is a writer and a lover of all things video.
Follow @Richard Bennett
Also read:
- In 2024, Cut Down Clutter Discover These 7 Ultimate Android App Blockers
- Intelligent Viewing Syncing YouTube with Televisions
- [New] Discover YouTube's Frame Advantage - Five Free Tools
- [New] Binge-Watching to Billions Jake Paul's Video Venture
- 2024 Approved Crafting Competitive Edge Assessing Personal and Marketplace Videos
- Cutting-Edge Taggification Top 7 Affordable Online Extractors for YouTube for 2024
- Capturing Life in Motion Top 9 Smartphone Props for Dynamic Cinematography
- 2024 Approved Essential Photo Tools Top 9 CamGear Enhancers for Filmmakers
- [New] Audio Artisans Crafting a Personal Library with 6 Best Free YouTube Apps
- The Ultimate Guide to Choosing a Screen Swivel Cam for Your Needs
- [New] Avoiding YouTube's Controversial Scrutiny
- [New] Effective YouTube Card Usage Guide
- Crafting Your Custom YouTube Subscriber URL
- Augment Your VFX Arsenal - Explore These Top 8 Sites for Free Eco-Backgrounds
- 2024 Approved Download Free YouTube Pics & Templates
- In 2024, Curb Automated YouTube Content Feeds
- Rapid Share Tactics for YouTube Lists
- [New] Decoding Chroma Techniques From Raw Footage to Final Cut
- 2024 Approved 2023'S Leading Applications for Downloading Facebook Lite Videos
- iPhone 7 Plus Asking for Passcode after iOS 17/14 Update, What to Do? | Dr.fone
- Evaluating Active Presenter 8'S Performance
- Updated In 2024, Transforming Videos Into Photos The Top 10 Conversion Tools
- [New] 2024 Approved Delving Deep Into IO's Video Recording Capabilities
- [New] Climbing the Social Ladder 6 Precise Methods for Gaining Instagram Verification for 2024
- Updated Free Home Security Camera Software Top 10 Choices for Protection
- 9 Best Free Android Monitoring Apps to Monitor Phone Remotely For your Lava Yuva 3 | Dr.fone
- Ultimate Choice of GoPro Film-Editing Programs
- [New] Ignite User Interaction via Thoughtfully-Crafted Insta Lives for 2024
- Title: "Pinnacle Creator The Duo of Media Elements"
- Author: Kevin
- Created at : 2024-05-25 16:11:01
- Updated at : 2024-05-26 16:11:01
- Link: https://youtube-videos.techidaily.com/pinnacle-creator-the-duo-of-media-elements/
- License: This work is licensed under CC BY-NC-SA 4.0.
