Next Gen of Video Visionaries
Next Gen of Video Visionaries
The YouTube Creator Summit - A Getaway for YouTube’s Top Talent

Richard Bennett
Oct 26, 2023• Proven solutions
YouTube Creator Summit has been held for several years. In 2019, it was held in Tokyo, Japan, but back in 2016, 2017 and 2018, it was held in New York City. This article just introduced the YouTube Creator Summit in 2017.
Tons of big-name creators were flown out by YouTube for a week of activities, networking opportunities, interesting speakers, and unicorn petting zoos. We assume.
Lilly’s Creator Summit adventures.
The Creator Summit is invite-only, and only 120 YouTubers attended including Grace Helbig, Lilly Singh, Matthew Santoro, Eva Gutowski, Jon Cozart, and Hannah Hart. We can really only imagine what went on based on what some YouTubers chose to share with us over social media. That’s how we know there were appearances from off-YouTube celebrities too, like Will Smith and Riz Ahmed.

Will Smith was one of the speakers at the summit. Turns out he’s a big fan of Lilly Singh.
Thanks to Nick from nickatnyte, for example, we have a pretty clear picture of the kinds of swag YouTube was giving away.
Nick talks about arriving in New York and goes through the swag box waiting in his hotel room.
There were some clues as to what the rest of the summit was like hiding amongst the swag too. Here’s what was in the box:
1. A map of Dumbo
The hotel YouTube put the creators up in was in Dumbo, Brooklyn. ‘Dumbo’ is an acronym for Down Under the Manhattan Bridge Overpass. While it used to be primarily an industrial area, Dumbo is now the most expensive neighborhood in Brooklyn with many of the old industrial spaces now serving as luxury residential lofts. Dumbo is also a hub for tech startups.
Tess takes you to some of her favorite places in Dumbo.
Dumbo is home to an interesting mix of ‘past’ and ‘future’. The creators who attended the summit probably had a lot of fun exploring it.
2. Post Cards
One of the major benefits of attending this summit would have been networking with other creators, but because of how busy everyone was and how awkward it can be to arrange ‘bumping into’ someone YouTube created a way for creators to send each other notes. All they had to do was write a note on one of the postcards YouTube provided them with and stick it in one of the red mailboxes at the event. YouTube took care of making sure the person it was addressed to got it.
3. S’well bottle
S’well bottles are stainless steel beverage containers that keep drinks hot or cold. They retail for around $45. YouTubers invited to the Creator Summit received ones with YouTube branding on them. A good water bottle is a convention/conference essential, so this was a very practical gift.
4. Branded slippers
To help them relax after long days at the summit, YouTube provided creators with YouTube-branded slippers. They look pretty comfy. Plus, now every time these YouTubers look down at their feet they’ll be reminded to go make some videos.
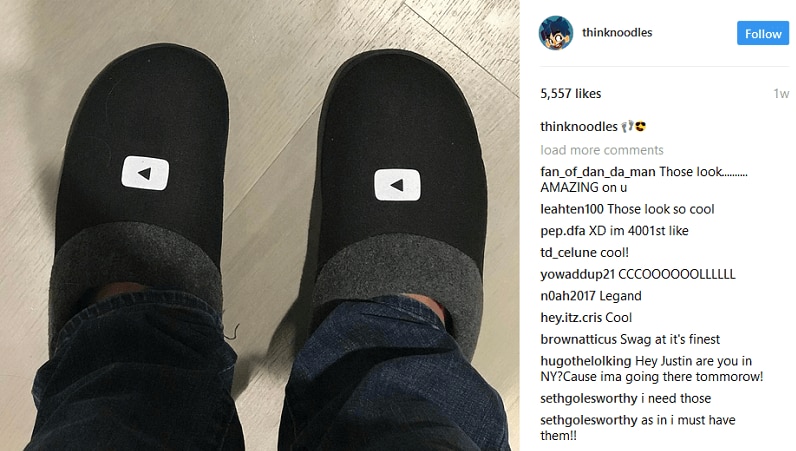
thinknoodles wearing his YouTube slippers.
5. Pins, pins, pins
There were numerous custom pins available at different events at the summit. Aside from a complementary Brooklyn and 1 Hotel Brooklyn Bridge (the hotel the creators were staying at) pins, the creators did not receive these in their swag boxes – they had to collect them.
6. Denim jacket
A denim jacket with a play button on it was also in the box. The idea was that creators would collect pins and display them on their new jackets. At the end of the week, they would have a great souvenir reminding them of every event they attended at the summit.

Hannah Hart posted this photo from a river cruise she and other YouTubers went on while in New York for the summit.
Most creators here on Filmora are still trying to grow their channels, but one day I hope you’ll be able to attend an event like the YouTube Creator Summit and tell us all about it!
Want to join the YouTube Creator Summit in the future? We all know that there is a long way to go, but we can start making good YouTube videos now. Remember to use Filmora with the templates and effects to touch up your YouTube videos.


Richard Bennett
Richard Bennett is a writer and a lover of all things video.
Follow @Richard Bennett
Richard Bennett
Oct 26, 2023• Proven solutions
YouTube Creator Summit has been held for several years. In 2019, it was held in Tokyo, Japan, but back in 2016, 2017 and 2018, it was held in New York City. This article just introduced the YouTube Creator Summit in 2017.
Tons of big-name creators were flown out by YouTube for a week of activities, networking opportunities, interesting speakers, and unicorn petting zoos. We assume.
Lilly’s Creator Summit adventures.
The Creator Summit is invite-only, and only 120 YouTubers attended including Grace Helbig, Lilly Singh, Matthew Santoro, Eva Gutowski, Jon Cozart, and Hannah Hart. We can really only imagine what went on based on what some YouTubers chose to share with us over social media. That’s how we know there were appearances from off-YouTube celebrities too, like Will Smith and Riz Ahmed.
Will Smith was one of the speakers at the summit. Turns out he’s a big fan of Lilly Singh.
Thanks to Nick from nickatnyte, for example, we have a pretty clear picture of the kinds of swag YouTube was giving away.
Nick talks about arriving in New York and goes through the swag box waiting in his hotel room.
There were some clues as to what the rest of the summit was like hiding amongst the swag too. Here’s what was in the box:
1. A map of Dumbo
The hotel YouTube put the creators up in was in Dumbo, Brooklyn. ‘Dumbo’ is an acronym for Down Under the Manhattan Bridge Overpass. While it used to be primarily an industrial area, Dumbo is now the most expensive neighborhood in Brooklyn with many of the old industrial spaces now serving as luxury residential lofts. Dumbo is also a hub for tech startups.
Tess takes you to some of her favorite places in Dumbo.
Dumbo is home to an interesting mix of ‘past’ and ‘future’. The creators who attended the summit probably had a lot of fun exploring it.
2. Post Cards
One of the major benefits of attending this summit would have been networking with other creators, but because of how busy everyone was and how awkward it can be to arrange ‘bumping into’ someone YouTube created a way for creators to send each other notes. All they had to do was write a note on one of the postcards YouTube provided them with and stick it in one of the red mailboxes at the event. YouTube took care of making sure the person it was addressed to got it.
3. S’well bottle
S’well bottles are stainless steel beverage containers that keep drinks hot or cold. They retail for around $45. YouTubers invited to the Creator Summit received ones with YouTube branding on them. A good water bottle is a convention/conference essential, so this was a very practical gift.
4. Branded slippers
To help them relax after long days at the summit, YouTube provided creators with YouTube-branded slippers. They look pretty comfy. Plus, now every time these YouTubers look down at their feet they’ll be reminded to go make some videos.
thinknoodles wearing his YouTube slippers.
5. Pins, pins, pins
There were numerous custom pins available at different events at the summit. Aside from a complementary Brooklyn and 1 Hotel Brooklyn Bridge (the hotel the creators were staying at) pins, the creators did not receive these in their swag boxes – they had to collect them.
6. Denim jacket
A denim jacket with a play button on it was also in the box. The idea was that creators would collect pins and display them on their new jackets. At the end of the week, they would have a great souvenir reminding them of every event they attended at the summit.
Hannah Hart posted this photo from a river cruise she and other YouTubers went on while in New York for the summit.
Most creators here on Filmora are still trying to grow their channels, but one day I hope you’ll be able to attend an event like the YouTube Creator Summit and tell us all about it!
Want to join the YouTube Creator Summit in the future? We all know that there is a long way to go, but we can start making good YouTube videos now. Remember to use Filmora with the templates and effects to touch up your YouTube videos.
Richard Bennett
Richard Bennett is a writer and a lover of all things video.
Follow @Richard Bennett
The Path to Precision Audio: A No-Mic Approach
How to Record Good Audio Without a Microphone?
Richard Bennett
Oct 26, 2023• Proven solutions
Audio quality is more important than video quality on YouTube. You’ve probably heard that before – viewers might forgive sub-par video quality if they’re interested in what you’re saying, but if it’s hard to understand what you’re saying they’ll click away.
Getting an external mic (even a $10 one-off Amazon ) is one of the best ways to improve your videos. That said, maybe your budget is $0. Or, maybe you just don’t happen to have a mic now and don’t want to wait to make videos. It could even be that you just don’t want to bother with an external mic.
Luckily, there are a lot of easy, free, things you can do to protect the quality of your audio recording even if you’re not using an external mic. Here are a few tips:
- 1. Keep Your Camera Close
- 2. Shoot Somewhere Quiet
- 3. Pick a Good Room
- 4. Protect your Built-In Mic from Wind
- 5. Use a Free Audio App
- 6. Do a Sound Check
1. Keep Your Camera Close (like, really close)
The biggest problem with the mic built into any camera or phone is just that, since it’s with the camera, it’s usually too far away from you. Built-in mics can record decent audio up close, but usually, your camera will be set up farther away from you than an external mic would be.
For example, your camera’s mic might be just as good as a clip-on LAV, but that LAV is right by your mouth and the camera is a couple of big steps away.
Moving your camera/smartphone physically closer to you will make it hard to include anything besides your head and shoulders in your shot, but it will get you significantly better audio.
2.Shoot Somewhere Quiet
The best way to limit the amount of background noise you pick up in your sound recording is to shoot somewhere where there’s no background noise. That probably seems really basic, but it’s something a lot of people just don’t do. It’s easy to default to recording in your home office, even though it’s right next to the kitchen where your family is bustling around, or in your bedroom even though there’s a busy street right outside your window.
Sometimes the best thing you can do for your audio is simply to scout out a quiet room in your house where the sound recording conditions are better. Speaking of recording conditions…
3. Pick a Good Room
There’s more that goes into picking a good room than how quiet it is. If you try to record in a room that’s too big your voice might sound to distant, and if you try to record in a room that’s too small your audio will be too echo-y. You need a room that’s just right.
You should also pay attention to what’s in the room you’re recording in. Avoid hard, reflective, surfaces like appliances and mirrors which your voice will bounce off of. The same conditions that make you sound great when you sing in the shower will – like recording in a small space -make your voiceover unpleasantly echo-y.
Look for a room that has a lot of soft things in it, like beds and sofas.
4. Protect your Built-In Mic from Wind
If you shoot outside, then the wind passing over your built-in mic will do terrible things to your audio. You can do a lot to counter-act this problem by physically blocking the wind.
There are a few ways to do this. If you’re doing hand-held shots you can partially cover your camera or phone’s mic with your finger. You don’t want to completely cover it/press down or your audio will be muffled. What you’re trying to do is create a barrier blocking out the wind.
On movie sets, they block out wind by covering the microphones with big fuzzy things called ‘dead cats’. You can also block out wind noise by attaching something fuzzy to your microphone. If your camera’s built-in mic is on front of it then you just need something big and fluffy you can loop around the lens. You can use a piece of a boa, a fuzzy novelty scrunchie – you can even murder a fuzzy stuffed animal! Do you have an old coat with a fuzz around the hood? That fuzz would do nicely.
The pompom used in this video cost $2, but you might already have something that would work!
If your built-in mic is on top of your camera you can get something called a ‘micromuff’. A micromuff is essentially a circular or rectangular piece of velcro with long strands of fluff on top. It’s open in the middle so it doesn’t actually cover your mic, but the surrounding fuzz blocks out the wind.

You use the adhesive backing to attach the base velcro to your camera. The other side of the velcro has your fluff attached to the back.
The only thing about a micromuff is that it costs about $30, and if you’re going to spend $30 on audio equipment then you could just buy yourself an inexpensive LAV mic. I only bring up the micromuff because it’s a very simple design you can probably DIY – you just need velcro with adhesive backing and any of the fluff-sources we just discussed.
5. Use a Free Audio App
If you’re recording on a smartphone, you can download a free app that will let you make adjustments to your audio as you record it. With the right app, you can adjust your gain (volume is how you control ‘output’ audio, and gain is for ‘input’ audio. By turning up your gain, you can make your mic more sensitive), tempo, and more. A lot of the time, your audio recording app will also let you edit your audio afterward.
Even if you’re not recording video from your smartphone, it might be a good idea to use your phone as your mic and record a separate audio file. You’ll be able to use an app to fine-tune your recording, and you can set your phone up closer to you the way you would an external mic while keeping your camera back a bit farther.
Free audio apps: Hi-Q MP3 Voice Recorder (Android), RecForge II (Android), Smart Voice Recorder (Android), Audio Memos (iOS), and Recorder Plus (iOS).
6. Do a Sound Check
Once you think you’ve got good audio set up – test it! You don’t want to do a whole video and find out when you play it back that your audio doesn’t sound good.
Do you have any of your own audio tips to pass on? Leave them in the comments!
This topic was suggested by RS Beauty over in the forums. Thanks for the idea!
Polish Your YouTube Videos with Filmora
As one of the most widely used video editing software in YouTube video editing, Filmora allows you to record voiceover and edit the recorded audio with mixer, equalizer and provides lots of templates and effects with an intuitive interface, which saves much time. Download the free trial version and get started now.
Richard Bennett
Richard Bennett is a writer and a lover of all things video.
Follow @Richard Bennett
Richard Bennett
Oct 26, 2023• Proven solutions
Audio quality is more important than video quality on YouTube. You’ve probably heard that before – viewers might forgive sub-par video quality if they’re interested in what you’re saying, but if it’s hard to understand what you’re saying they’ll click away.
Getting an external mic (even a $10 one-off Amazon ) is one of the best ways to improve your videos. That said, maybe your budget is $0. Or, maybe you just don’t happen to have a mic now and don’t want to wait to make videos. It could even be that you just don’t want to bother with an external mic.
Luckily, there are a lot of easy, free, things you can do to protect the quality of your audio recording even if you’re not using an external mic. Here are a few tips:
- 1. Keep Your Camera Close
- 2. Shoot Somewhere Quiet
- 3. Pick a Good Room
- 4. Protect your Built-In Mic from Wind
- 5. Use a Free Audio App
- 6. Do a Sound Check
1. Keep Your Camera Close (like, really close)
The biggest problem with the mic built into any camera or phone is just that, since it’s with the camera, it’s usually too far away from you. Built-in mics can record decent audio up close, but usually, your camera will be set up farther away from you than an external mic would be.
For example, your camera’s mic might be just as good as a clip-on LAV, but that LAV is right by your mouth and the camera is a couple of big steps away.
Moving your camera/smartphone physically closer to you will make it hard to include anything besides your head and shoulders in your shot, but it will get you significantly better audio.
2.Shoot Somewhere Quiet
The best way to limit the amount of background noise you pick up in your sound recording is to shoot somewhere where there’s no background noise. That probably seems really basic, but it’s something a lot of people just don’t do. It’s easy to default to recording in your home office, even though it’s right next to the kitchen where your family is bustling around, or in your bedroom even though there’s a busy street right outside your window.
Sometimes the best thing you can do for your audio is simply to scout out a quiet room in your house where the sound recording conditions are better. Speaking of recording conditions…
3. Pick a Good Room
There’s more that goes into picking a good room than how quiet it is. If you try to record in a room that’s too big your voice might sound to distant, and if you try to record in a room that’s too small your audio will be too echo-y. You need a room that’s just right.
You should also pay attention to what’s in the room you’re recording in. Avoid hard, reflective, surfaces like appliances and mirrors which your voice will bounce off of. The same conditions that make you sound great when you sing in the shower will – like recording in a small space -make your voiceover unpleasantly echo-y.
Look for a room that has a lot of soft things in it, like beds and sofas.
4. Protect your Built-In Mic from Wind
If you shoot outside, then the wind passing over your built-in mic will do terrible things to your audio. You can do a lot to counter-act this problem by physically blocking the wind.
There are a few ways to do this. If you’re doing hand-held shots you can partially cover your camera or phone’s mic with your finger. You don’t want to completely cover it/press down or your audio will be muffled. What you’re trying to do is create a barrier blocking out the wind.
On movie sets, they block out wind by covering the microphones with big fuzzy things called ‘dead cats’. You can also block out wind noise by attaching something fuzzy to your microphone. If your camera’s built-in mic is on front of it then you just need something big and fluffy you can loop around the lens. You can use a piece of a boa, a fuzzy novelty scrunchie – you can even murder a fuzzy stuffed animal! Do you have an old coat with a fuzz around the hood? That fuzz would do nicely.
The pompom used in this video cost $2, but you might already have something that would work!
If your built-in mic is on top of your camera you can get something called a ‘micromuff’. A micromuff is essentially a circular or rectangular piece of velcro with long strands of fluff on top. It’s open in the middle so it doesn’t actually cover your mic, but the surrounding fuzz blocks out the wind.
You use the adhesive backing to attach the base velcro to your camera. The other side of the velcro has your fluff attached to the back.
The only thing about a micromuff is that it costs about $30, and if you’re going to spend $30 on audio equipment then you could just buy yourself an inexpensive LAV mic. I only bring up the micromuff because it’s a very simple design you can probably DIY – you just need velcro with adhesive backing and any of the fluff-sources we just discussed.
5. Use a Free Audio App
If you’re recording on a smartphone, you can download a free app that will let you make adjustments to your audio as you record it. With the right app, you can adjust your gain (volume is how you control ‘output’ audio, and gain is for ‘input’ audio. By turning up your gain, you can make your mic more sensitive), tempo, and more. A lot of the time, your audio recording app will also let you edit your audio afterward.
Even if you’re not recording video from your smartphone, it might be a good idea to use your phone as your mic and record a separate audio file. You’ll be able to use an app to fine-tune your recording, and you can set your phone up closer to you the way you would an external mic while keeping your camera back a bit farther.
Free audio apps: Hi-Q MP3 Voice Recorder (Android), RecForge II (Android), Smart Voice Recorder (Android), Audio Memos (iOS), and Recorder Plus (iOS).
6. Do a Sound Check
Once you think you’ve got good audio set up – test it! You don’t want to do a whole video and find out when you play it back that your audio doesn’t sound good.
Do you have any of your own audio tips to pass on? Leave them in the comments!
This topic was suggested by RS Beauty over in the forums. Thanks for the idea!
Polish Your YouTube Videos with Filmora
As one of the most widely used video editing software in YouTube video editing, Filmora allows you to record voiceover and edit the recorded audio with mixer, equalizer and provides lots of templates and effects with an intuitive interface, which saves much time. Download the free trial version and get started now.
Richard Bennett
Richard Bennett is a writer and a lover of all things video.
Follow @Richard Bennett
Also read:
- [New] Achieving YouTube Excellence with Gamers' Channel Graphics
- [New] In 2024, Stunning Slideshow for Social Sharing
- [Updated] How to Safely Increase Your YouTube Fanbase To One Million
- 2024 Approved Budget-Friendly Webinar Strategies for YouTube
- Diagnosing and Repairing the Critical Process Died (STOP) 0X0000003D Problem on Windows PCs
- Error 2E in Windows: How to Resume Update Process
- GIFアニメーションで文字表示を追加する手引き:初学者のためのガイド
- In 2024, 2 Ways to Transfer Text Messages from Realme 11X 5G to iPhone 15/14/13/12/11/X/8/ | Dr.fone
- In 2024, Chronicles of Time Student-Approved Historical YT Content
- In 2024, How to Unlock Gionee F3 Pro Phone with Broken Screen
- In 2024, How to Unlock Xiaomi Redmi 13C Phone without Google Account?
- Leading Platforms for Premium 4K Streaming Content: Your Definitive Selection Guide
- Mobile-Savvy Tailoring YouTube Video Thumbnails with Phones
- The Complete Guide to Edit Your Video with YouTube Studio Editor
- Title: Next Gen of Video Visionaries
- Author: Kevin
- Created at : 2024-12-09 16:44:55
- Updated at : 2024-12-16 16:14:58
- Link: https://youtube-videos.techidaily.com/next-gen-of-video-visionaries/
- License: This work is licensed under CC BY-NC-SA 4.0.