
![[New] Create Standout Videos with These Top 7 Free Thumbnail Builders](https://www.lifewire.com/thmb/iWtxzOACOnG_uyFFcUmFDT7X-Co=/400x300/filters:no_upscale():max_bytes(150000):strip_icc()/Vendoo-cofounder-Josh-75719038e6f2495b8047a5297bc9d046.png)
[New] Create Standout Videos with These Top 7 Free Thumbnail Builders
Create Standout Videos with These Top 7 Free Thumbnail Builders
Top 12 Free YouTube Thumbnail Makers - Filmora

Richard Bennett
Mar 27, 2024• Proven solutions
Video thumbnails are vital to get your videos more views. Many successful YouTubers make nice thumbnails which help them get lots of views and thus tons of subscribers.
If you are searching for software tools that can assist in the creation of YouTube video thumbnails, then you are on the right page because the details available below will provide you with complete information about the top 10+ highly rated YouTube Thumbnail Makers on both desktop and mobile devices. Some of them are free to create YouTube thumbnails; others may need to pay to get more advanced features. Besides, I’ll also show you how to create a thumbnail in the Filmora video editor in detail.
- Part 1: Best Free YouTube Thumbnail Makers for Online Users
- Part 2: How to Make Video Thumbnail with Wondershare Filmora [Creative Ways]
- Part 3: FAQs About YouTube Thumbnail
Before we get started, it is highly recommended to watch this video, teaching you how to make a YouTube Thumbnail in 30 seconds with Filmora.
You might be interested in
- How to Make Fortnite Thumbnail Super Easy and Free >>
- Best Size, Best Practices of Making YouTube Thumbnail >>


Part 1:10+ Free YouTube Thumbnail Makers for Windows/Mac/Online/Android/iPhone/iPad
In this part, we will share with you some Free YouTube Thumbnail Makers that you can use. Some of them are online solutions, so there is no need to download them, some of them can be downloaded on Windows or Mac computers.
If you prefer to edit videos on mobile devices, then it is good to have an app that allows you to create video thumbnails for YouTube videos. So in this part, we have included some video thumbnail maker apps that you can use on iPhone and Android phones.
1. Canva
It is a free thumbnail maker that can be accessed from its official website at Canva.com. This Video Thumbnail Maker is useful for graphic designers as it offers incredible features. The simple to use drag and drop type functions are wonderful, and the effects available for your Thumbnail Creation include free stock-type photos, Illustrations, Lines, Shapes, Frames, Grids, Backgrounds, Text, etc. The quick customer support facility is appreciable. Note: You need to sign up to use the thumbnail templates.
Main Features of this free YouTube Thumbnail Maker:
- It offers a customized YouTube thumbnail design
- You can change images, colors and fonts easily
- You can get more styles and templates if you pay
- Registration needed
2. Wondershare PixStudio
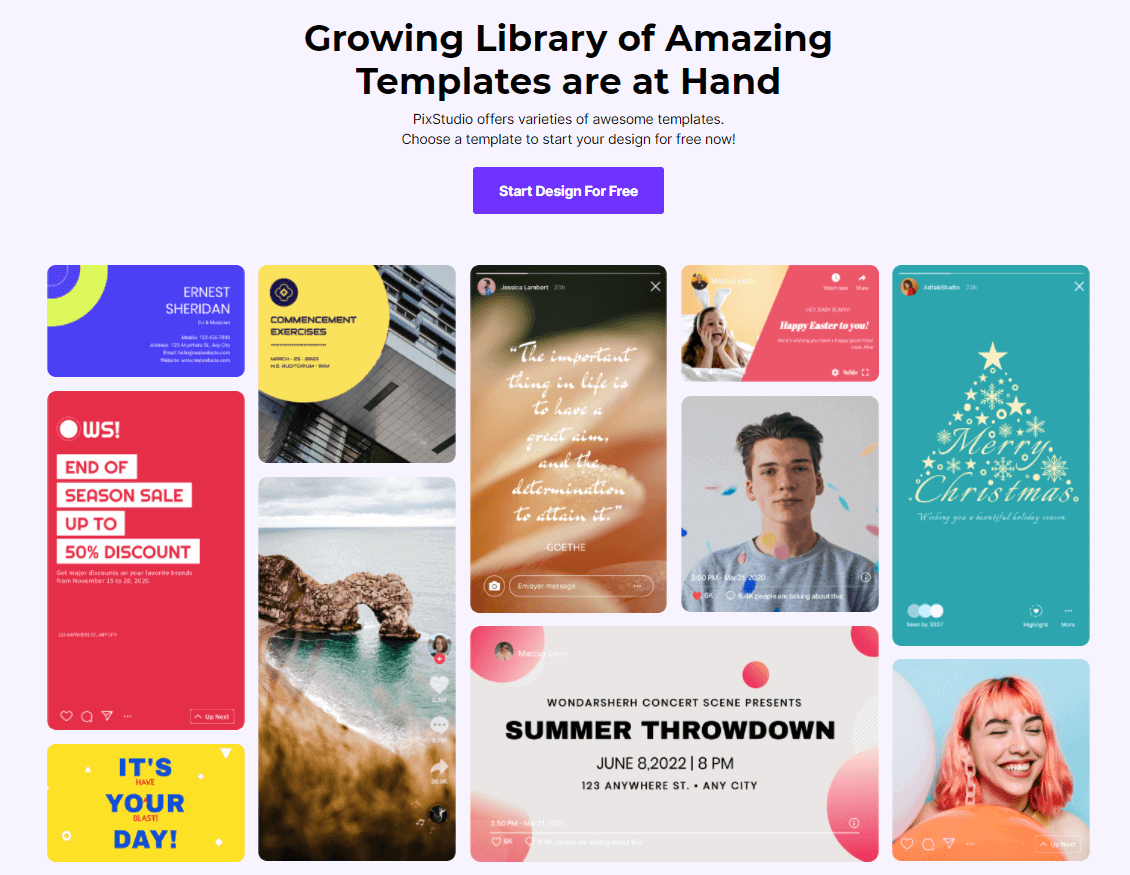
Wondershare PixStudio is an all-in-one and powerful online graphic design maker for everyone. It has various types of templates for YouTube Thumbnails, Logos, Posters, etc. You can create a beautiful design by simply dragging and dropping the elements and photos. The online platform is free to use all templates, just One-Click to download your creations and share to your Facebook, Instagram Story, YouTube Thumbnails, etc. immediately.
Features :
- Various types of templates
- Simple and Fast Design
- Background remover
Available:
Online
iPhone/iPad
Android
3. PicMonkey

This online thumbnail maker provides numerous filters, exclusive overlays, fonts, frames, and extra beautifying touch-up type tools to users with a single registration to Picmonkey’s premium membership. The exclusive effects like Ombre, zombify, premium fonts and Mirror are a really good collection of this tool. Now you can easily design beautiful collages, edit your memories, and create professional thumbnails with Picmonkey.com. Because of its wide range of options, it is probably the second most popular option for YouTubers who want to make professional thumbnails, right after Canva. One major difference between Picmonkey and Canva is that Picmonkey is no longer free. It costs $4 per month.
Features:
- As a youtube thumbnail maker, you also can touch up facial beautification
- Design tools make creative logos
- Provides 100+ designer-crafted thumbnail templates
Available :
Online
iPhone/iPad
Android
4. Fotor
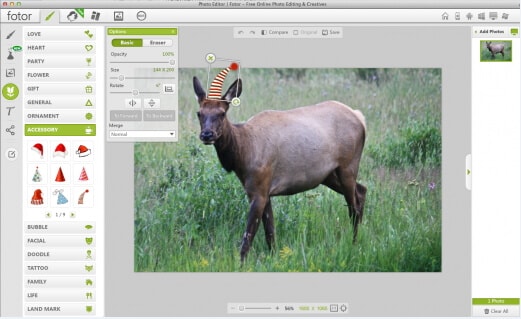
It is possible to get something outstanding even out of your simple content without making much effort because Fotor serves you with all advanced features, and it covers attractive themes from all over the world. Fotor allows you to re-discover your art and skills without any limitation as it offers all quick editing services online. It is very interactive and simple to use with all rich features, so even beginners who haven’t made any thumbnail before can make a video thumbnail with it easily.
Features:
- Your thumbnail will be saved on the cloud
- Fast processing speed while exporting your work
- Provides YouTube thumbnail templates for different scenarios
Available :
Online
iPhone/iPad
Android
5. Fotojet
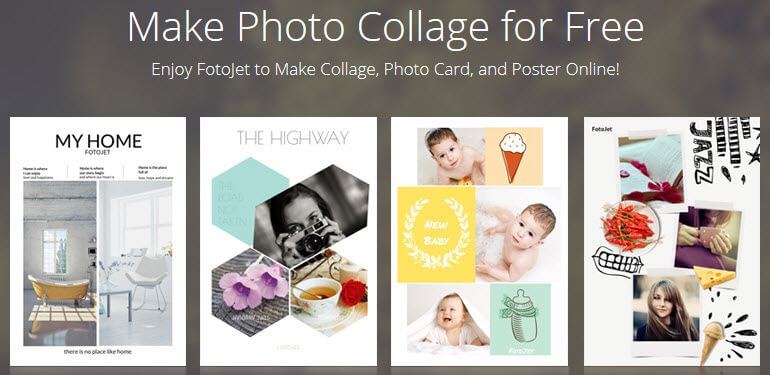
The fotojet.com online tool provides numerous facilities, whereas it is preferably used for collage making, graphic designing, and as a photo editor. With this advanced thumbnail creator tool, now you can easily rotate, crop, resize or filter your images while creating direct posts for social media pages such as Instagram, Facebook, etc. Fotojet.com possesses more than 600 stunning collage making templates that are suitable for your special events.
Features:
- It owns many templates for you to use
- Easy to have a high-quality thumbnail with only a few clicks
- 3 Steps to make a YouTube thumbnail
Available :
Online
Windows
Mac
6. Backgrounder
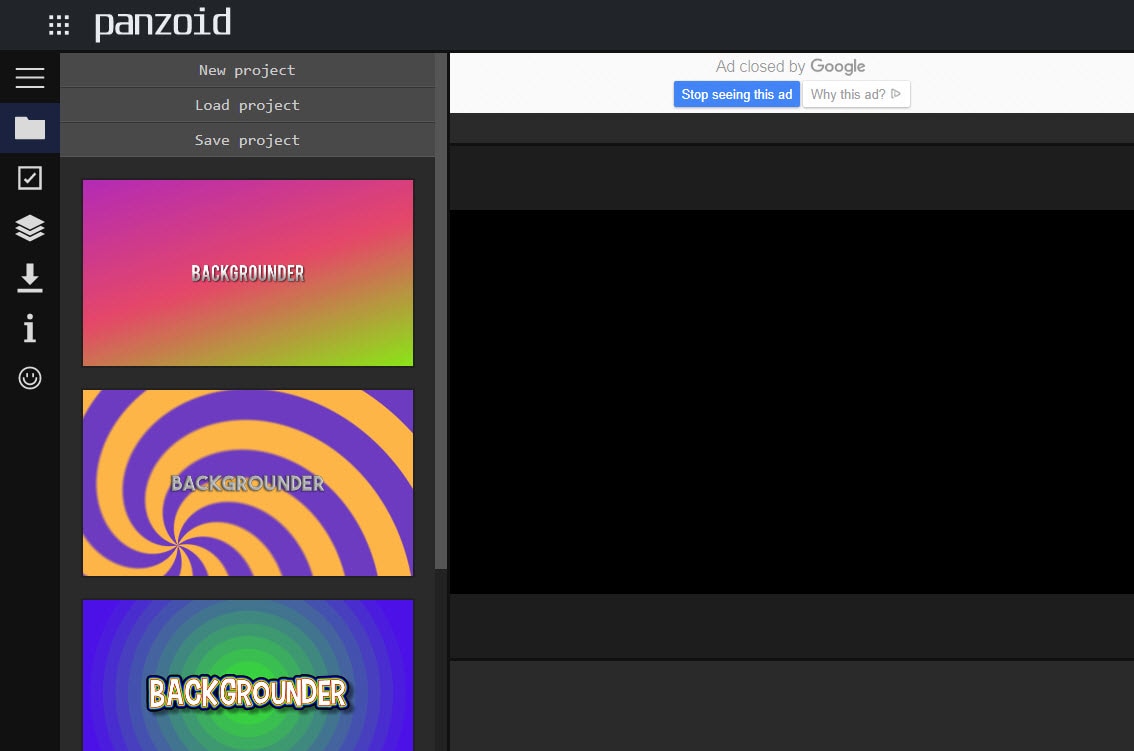
It allows you to design masterpieces of customized professional art, avatars, and thumbnails for videos on YouTube, Facebook, Twitter, etc. It is simple to use and contains an interactive user interface that is suitable for professionals as well as beginners.
Features:
- It owns a community that you can share works with other people
- The interface is extremely straightforward
Available :
Online
7. Pixlr:
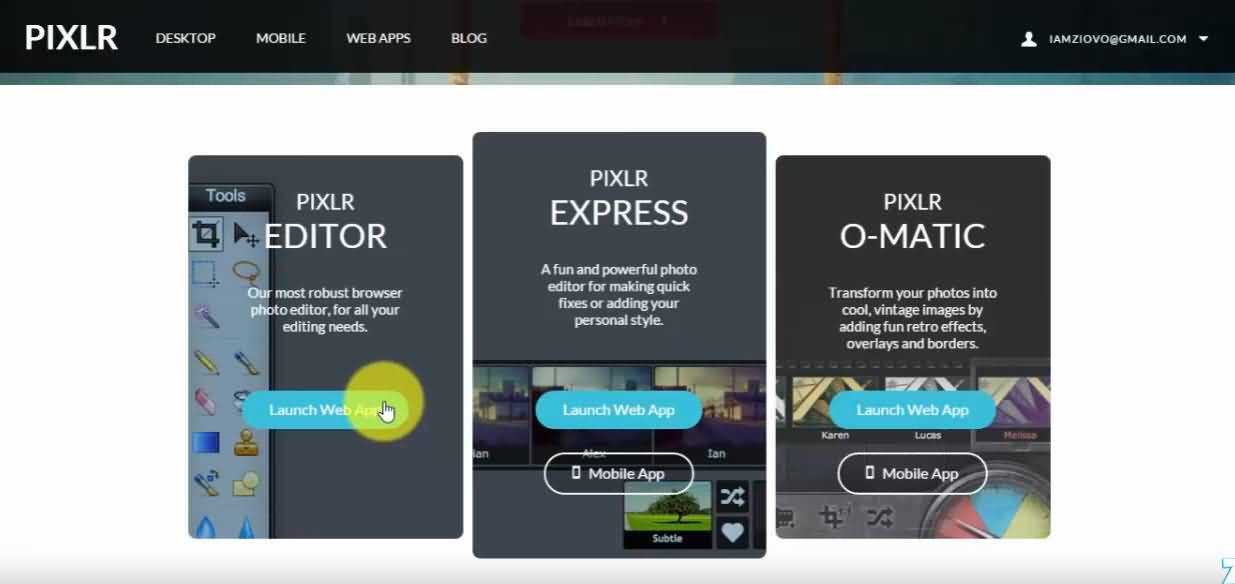
It is a specially designs app version of well known Pixlr website where you can feel free to add overlays to your thumbnails. The choice of filters is also good for her with a high-end resolution as compared to available online solutions.
Features:
- Its free effects are a great source to come up with a new YouTube thumbnail
- Comprehensive editing tools are handy to use every day
Available :
Online
iPhone/iPad
Android
8. Photo Editor:
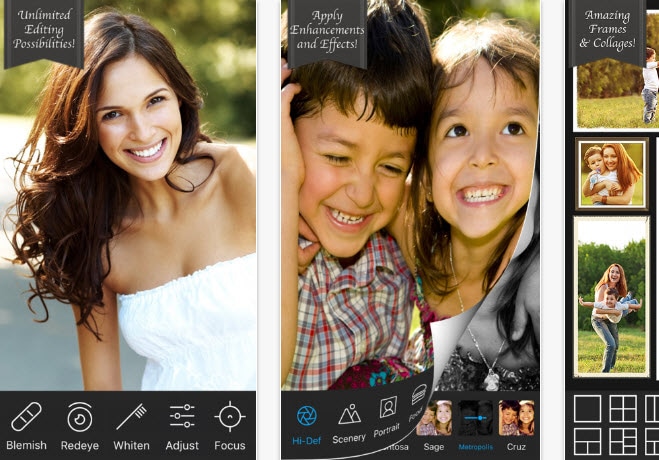
Photo Editor is one of the most popular applications that assist users in the easy addition of stickers, frames, etc while it makes adjustment of redeye, brightness, and sharpness much easier. Most people love this application more due to its ability to create memes with available images and text for those images can be adjusted easily. The photo editor also makes it much easier to share edited stuff on Instagram and the quality of edited images use to be very high in this case.
Features:
- Color splash is a great tool to brighten up your thumbnail
- You can easily crop, rotate and flip
Available :
iPhone/iPad
9. Insta Collage:
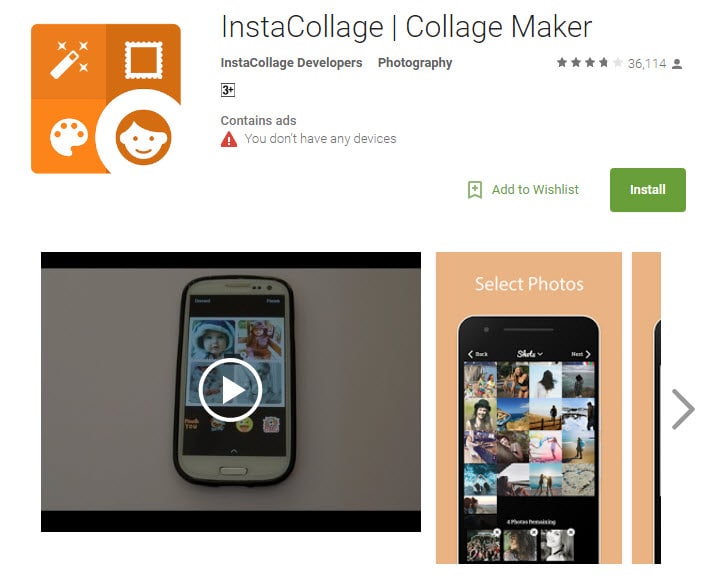
The name of this application describes its most special feature that is it allows users to create wonderful collages within very little time. This tool comes with easy editing and sharing features so that users can have an easy interface on other platforms too. There are lots of effects that can be added to images while designing thumbnails and it is rated to have an outstanding quality of results.
Features:
- The personalized layout will give you a catchy thumbnail
- It owns 30 patterns and 18 frames to select
Available :
Android
10. Cropic:
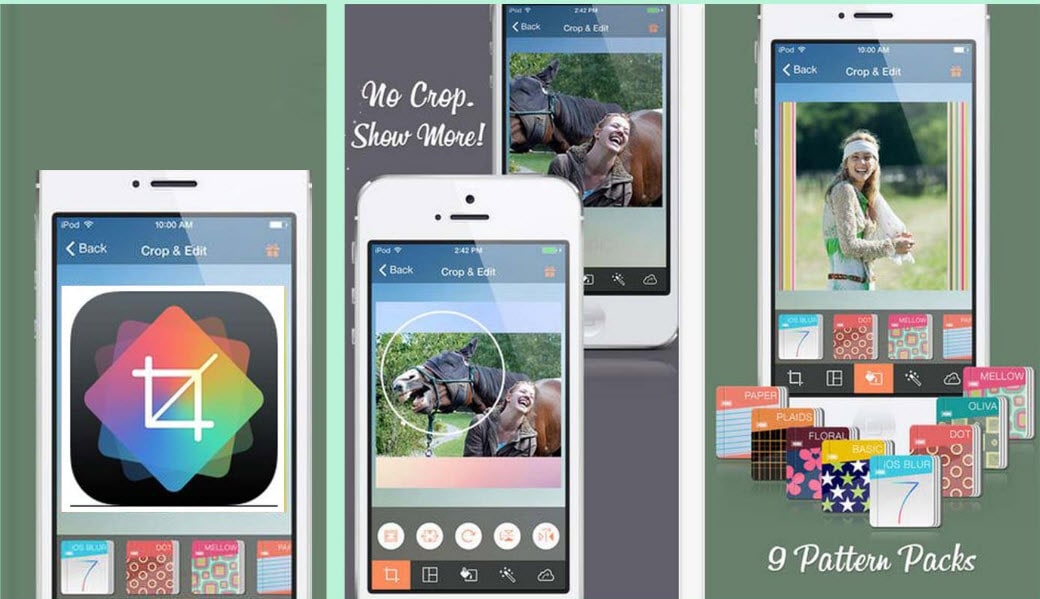
Here is one more application for you that you will need for easy customization as well as fast sharing to YouTube as well as Instagram. Users can bring all size types to this platform, and it is also possible to add text at the time of editing. This tool is suggested for beginners as well as professionals due to its great results.
Features:
- You can scale the image by hand and cut it
- Pro version is more powerful for supporting 1224x1224 pixels
Available :
iPhone/iPad
With all these available software tools, it becomes much easier to create video Thumbnails for YouTube. The easy-to-follow steps are well described in different articles on the internet, but first of all, you need to make a selection between whether you need to use the online tool or wish to download the app on your device.
For the second case, you need to spare some memory in your device, whereas for the first one it demands a fast internet connection for easy services. Besides those specially designed YouTube Thumbnail makers, you can also create a thumbnail in Filmora if you’ve already installed it.
11. Snappa:
If you’re looking for a tool that can be upgraded later, then Snappa could be for you. Offering users both free and paid functions, Snappa will allow users to generate some truly alluring thumbnails, while still being able to use the tools for work on other social media platforms.
Features:
- Pre-Made Templates Available
- Easily Customize Backgrounds
- Place Custom Text Anywhere You Want
- Create a Truly Bespoke YouTube Thumbnail
Available :
Online
iPhone/iPad
Android
12. Adobe Spark:
Not only is Adobe recognized for creating images in many different contexts, but it is also able to offer YouTubers a free tool to ensure that their video thumbnails are catching the eye of social network visitors.
Features:
- A Basic and Easy-To-Use Platform
- Ideal for Beginners
- Customize Colors, Backgrounds, and Text with Ease
- Add Additional Images if Needed
Available :
Windows 7 or newer
Mac OS X
Chromebook
Part 2: How to Make YouTube Thumbnails in Wondershare Filmora?
Filmora is easy to use and powerful video editing software for your YouTube videos, which allows you not only to cut, rotate, crop, reverse, or speed up your videos, but also to apply some advanced editing effects like green screen, PIP, audio editing, etc. within clicks.
Here are several creative ways of making thumbnails in Filmora. You can easily create a thumbnail in 30 seconds with Filmora’s new feature, AI portrait.
You can add your image or background image to Filmora and then add some filters, texts, overlay, or elements to the photo, and then take a snapshot, since Filmora features the snapshot tool which allows you to pick up the most attractive images from the video and use it as a video thumbnail.
Thumbnail created from a photo in Filmora
Or, you can extract frames from the video and use it as a thumbnail and upload it to YouTube later.
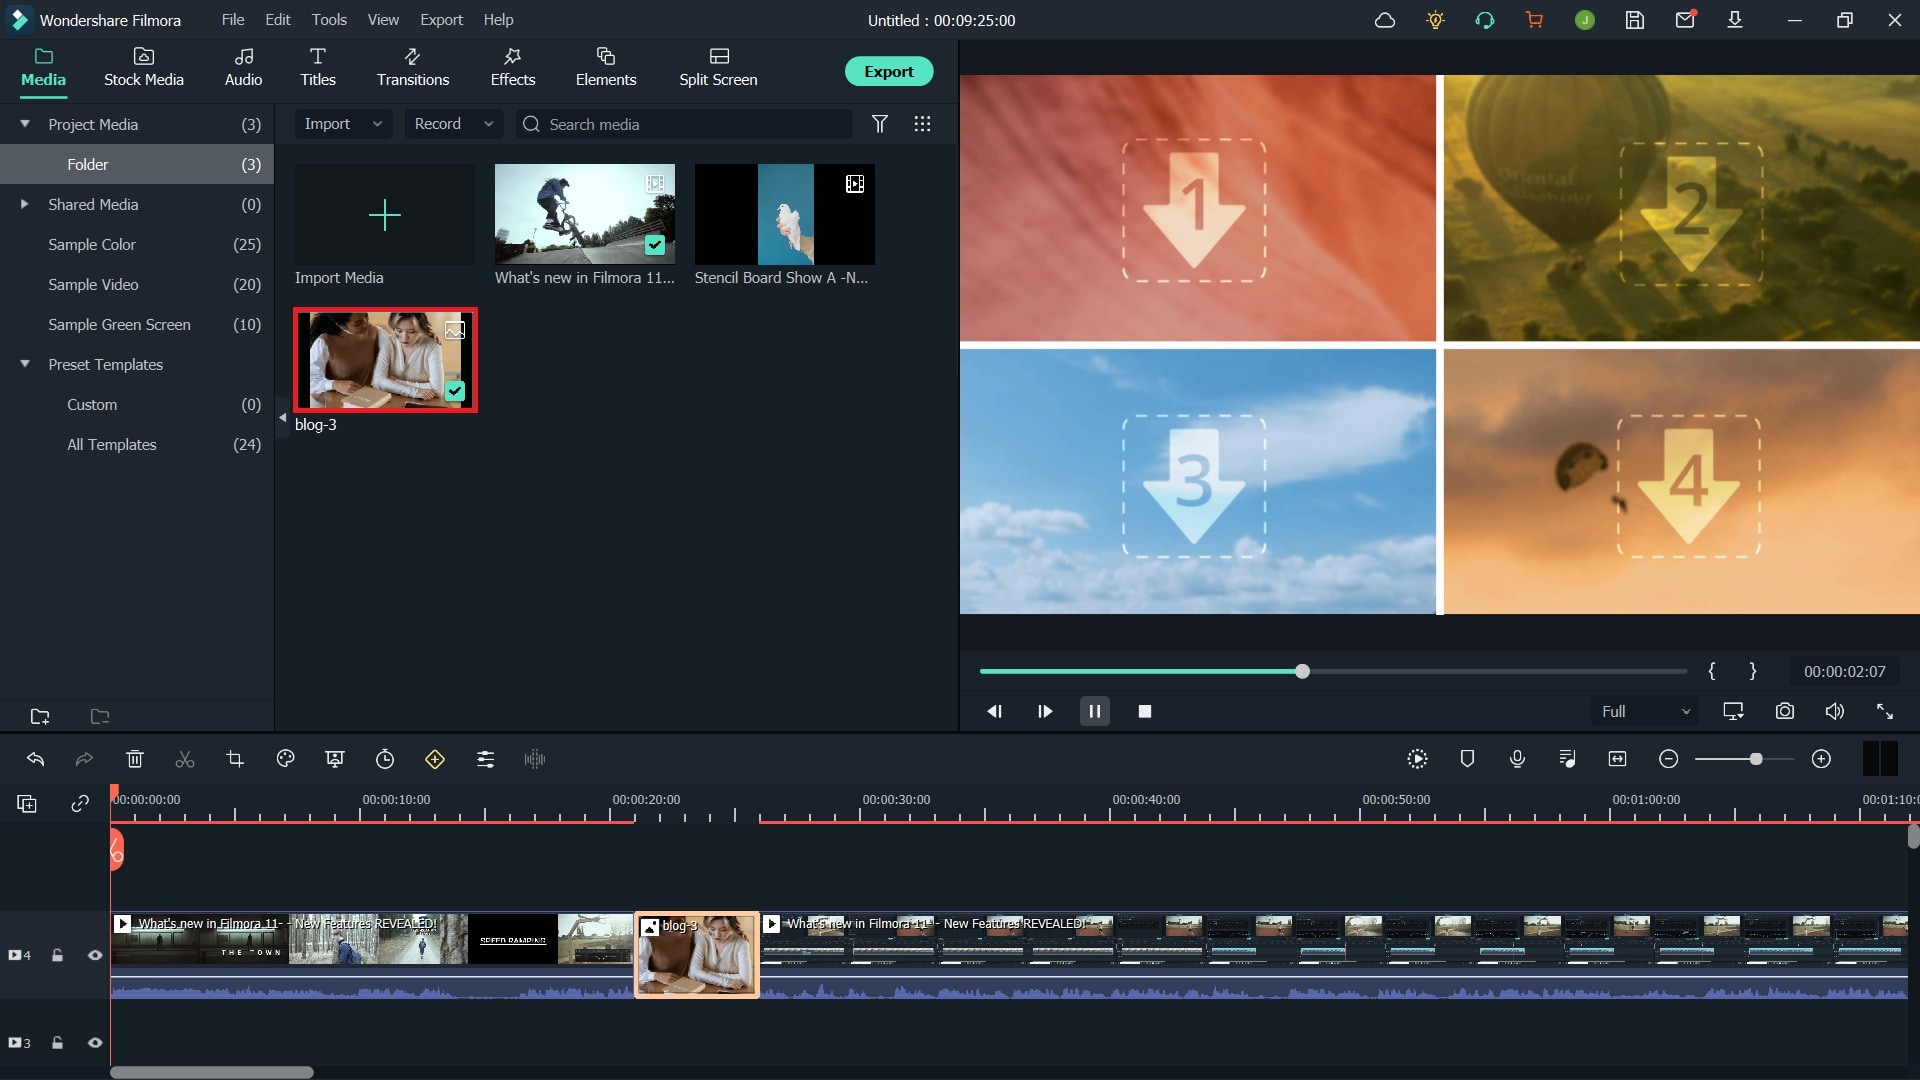
Thumbnail extracted from video footage in Filmora
One more creative way is to compositevideo footage with the green screen feature .
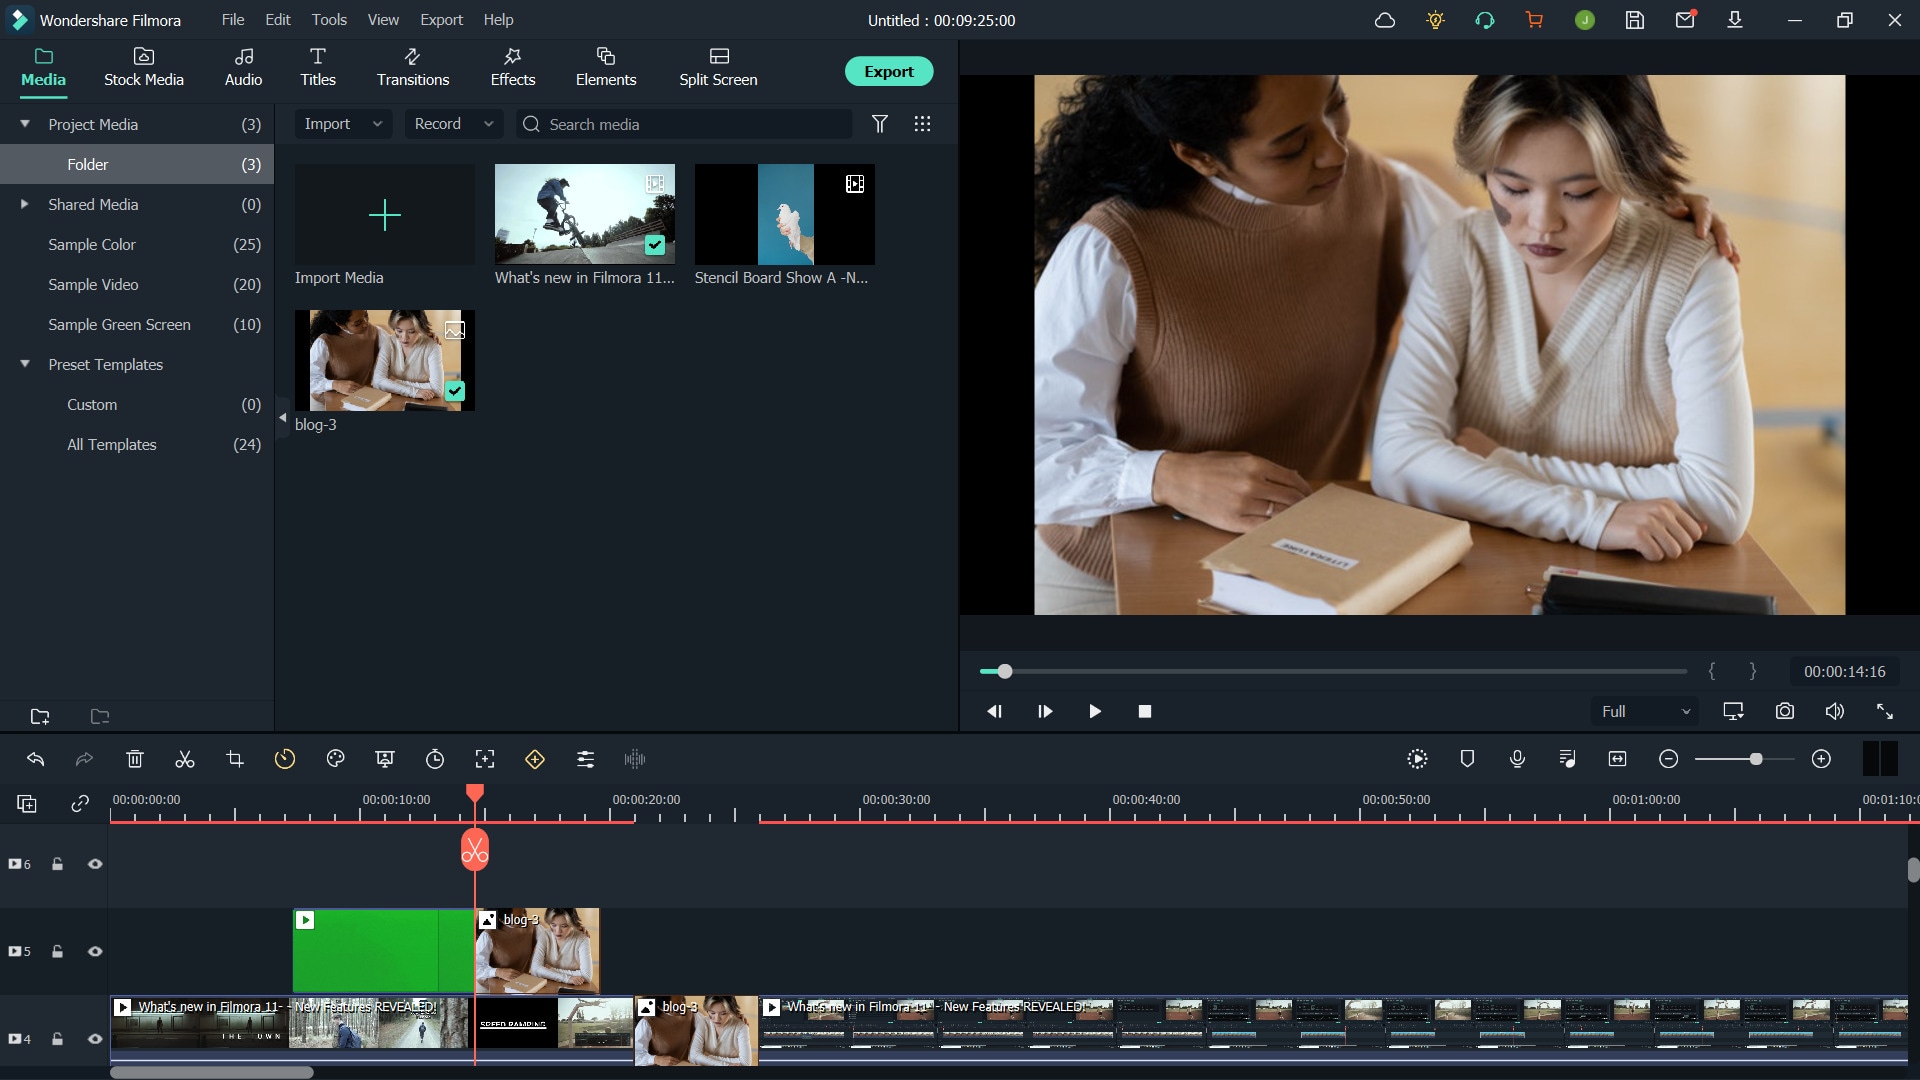
Use Green Screen to Create Video Thumbnail in Filmora
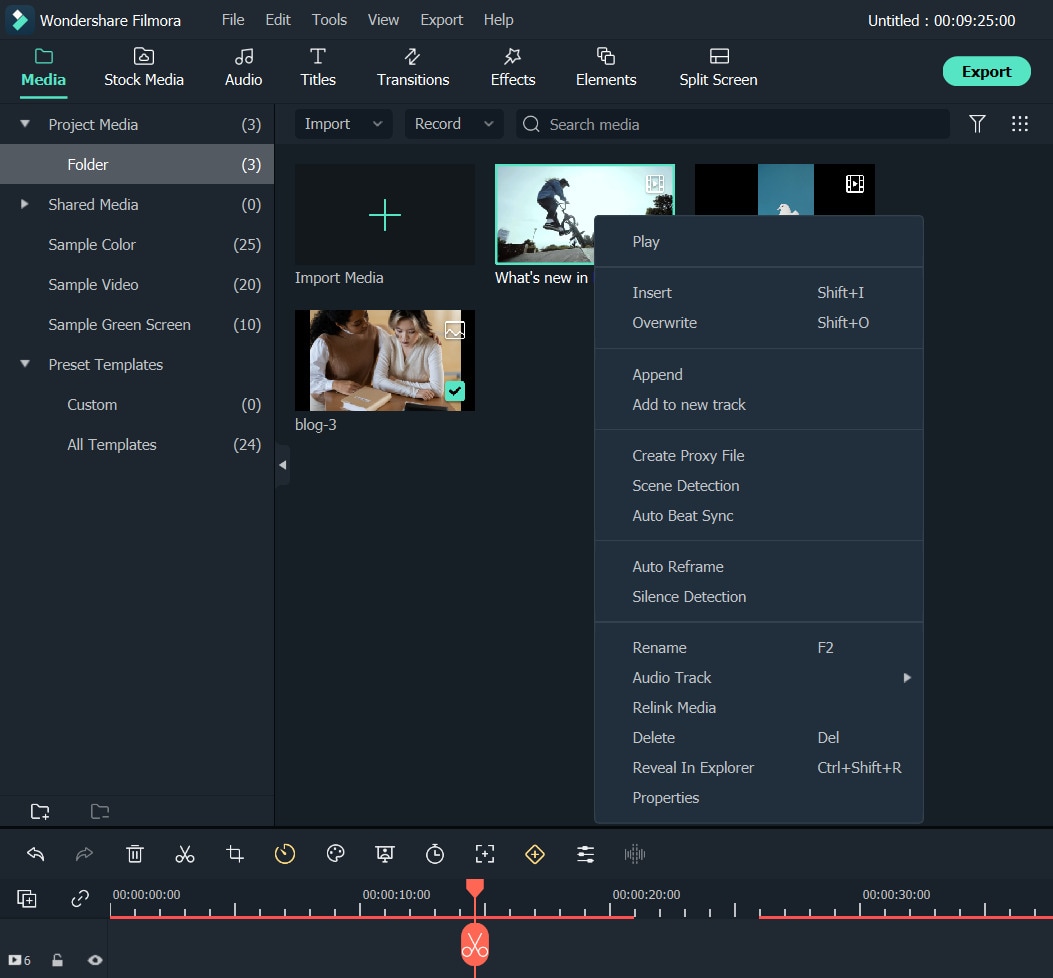
Where to find the thumbnail photo in Wondershare Filmora?
After clicking the Camera icon in Filmora to take a screenshot, you can find the photos by right-clicking the image in the Media library and then selecting Reveal in Explorer to check it.
Download Mac Version ](https://tools.techidaily.com/wondershare/filmora/download/ )
Part 3: FAQs About YouTube Thumbnail
1. What Does Thumbnail Mean on YouTube?
Thumbnails are reduced-size versions of images or videos. The name is an allusion to images being reduced to roughly the size of a human thumbnail. Thumbnails have special significance in YouTube SEO. They are used for drawing the viewers’ attention. A well-made thumbnail can bring millions of views for a YouTuber .
2. Which Is the Best Thumbnail Maker for YouTube?
Besides the thumbnail maker introduced above, the Filmora video editor and be used as an excellent thumbnail maker as well. Instead of going through the hassle of installing or subscribing to a separate program or website, it is better to use the extensive features of Filmora. It can take free snapshots for you, which you can modify within Filmora. There are stunning title templates, effects, overlays, transitions, and a large library of stock content at your service. From Part 2 in this article, you can see that making a YouTube thumbnail in Filmora is easy and efficient.
Richard Bennett
Richard Bennett is a writer and a lover of all things video.
Follow @Richard Bennett
Richard Bennett
Mar 27, 2024• Proven solutions
Video thumbnails are vital to get your videos more views. Many successful YouTubers make nice thumbnails which help them get lots of views and thus tons of subscribers.
If you are searching for software tools that can assist in the creation of YouTube video thumbnails, then you are on the right page because the details available below will provide you with complete information about the top 10+ highly rated YouTube Thumbnail Makers on both desktop and mobile devices. Some of them are free to create YouTube thumbnails; others may need to pay to get more advanced features. Besides, I’ll also show you how to create a thumbnail in the Filmora video editor in detail.
- Part 1: Best Free YouTube Thumbnail Makers for Online Users
- Part 2: How to Make Video Thumbnail with Wondershare Filmora [Creative Ways]
- Part 3: FAQs About YouTube Thumbnail
Before we get started, it is highly recommended to watch this video, teaching you how to make a YouTube Thumbnail in 30 seconds with Filmora.
You might be interested in
- How to Make Fortnite Thumbnail Super Easy and Free >>
- Best Size, Best Practices of Making YouTube Thumbnail >>
Part 1:10+ Free YouTube Thumbnail Makers for Windows/Mac/Online/Android/iPhone/iPad
In this part, we will share with you some Free YouTube Thumbnail Makers that you can use. Some of them are online solutions, so there is no need to download them, some of them can be downloaded on Windows or Mac computers.
If you prefer to edit videos on mobile devices, then it is good to have an app that allows you to create video thumbnails for YouTube videos. So in this part, we have included some video thumbnail maker apps that you can use on iPhone and Android phones.
1. Canva
It is a free thumbnail maker that can be accessed from its official website at Canva.com. This Video Thumbnail Maker is useful for graphic designers as it offers incredible features. The simple to use drag and drop type functions are wonderful, and the effects available for your Thumbnail Creation include free stock-type photos, Illustrations, Lines, Shapes, Frames, Grids, Backgrounds, Text, etc. The quick customer support facility is appreciable. Note: You need to sign up to use the thumbnail templates.
Main Features of this free YouTube Thumbnail Maker:
- It offers a customized YouTube thumbnail design
- You can change images, colors and fonts easily
- You can get more styles and templates if you pay
- Registration needed
2. Wondershare PixStudio
Wondershare PixStudio is an all-in-one and powerful online graphic design maker for everyone. It has various types of templates for YouTube Thumbnails, Logos, Posters, etc. You can create a beautiful design by simply dragging and dropping the elements and photos. The online platform is free to use all templates, just One-Click to download your creations and share to your Facebook, Instagram Story, YouTube Thumbnails, etc. immediately.
Features :
- Various types of templates
- Simple and Fast Design
- Background remover
Available:
Online
iPhone/iPad
Android
3. PicMonkey
This online thumbnail maker provides numerous filters, exclusive overlays, fonts, frames, and extra beautifying touch-up type tools to users with a single registration to Picmonkey’s premium membership. The exclusive effects like Ombre, zombify, premium fonts and Mirror are a really good collection of this tool. Now you can easily design beautiful collages, edit your memories, and create professional thumbnails with Picmonkey.com. Because of its wide range of options, it is probably the second most popular option for YouTubers who want to make professional thumbnails, right after Canva. One major difference between Picmonkey and Canva is that Picmonkey is no longer free. It costs $4 per month.
Features:
- As a youtube thumbnail maker, you also can touch up facial beautification
- Design tools make creative logos
- Provides 100+ designer-crafted thumbnail templates
Available :
Online
iPhone/iPad
Android
4. Fotor
It is possible to get something outstanding even out of your simple content without making much effort because Fotor serves you with all advanced features, and it covers attractive themes from all over the world. Fotor allows you to re-discover your art and skills without any limitation as it offers all quick editing services online. It is very interactive and simple to use with all rich features, so even beginners who haven’t made any thumbnail before can make a video thumbnail with it easily.
Features:
- Your thumbnail will be saved on the cloud
- Fast processing speed while exporting your work
- Provides YouTube thumbnail templates for different scenarios
Available :
Online
iPhone/iPad
Android
5. Fotojet
The fotojet.com online tool provides numerous facilities, whereas it is preferably used for collage making, graphic designing, and as a photo editor. With this advanced thumbnail creator tool, now you can easily rotate, crop, resize or filter your images while creating direct posts for social media pages such as Instagram, Facebook, etc. Fotojet.com possesses more than 600 stunning collage making templates that are suitable for your special events.
Features:
- It owns many templates for you to use
- Easy to have a high-quality thumbnail with only a few clicks
- 3 Steps to make a YouTube thumbnail
Available :
Online
Windows
Mac
6. Backgrounder
It allows you to design masterpieces of customized professional art, avatars, and thumbnails for videos on YouTube, Facebook, Twitter, etc. It is simple to use and contains an interactive user interface that is suitable for professionals as well as beginners.
Features:
- It owns a community that you can share works with other people
- The interface is extremely straightforward
Available :
Online
7. Pixlr:
It is a specially designs app version of well known Pixlr website where you can feel free to add overlays to your thumbnails. The choice of filters is also good for her with a high-end resolution as compared to available online solutions.
Features:
- Its free effects are a great source to come up with a new YouTube thumbnail
- Comprehensive editing tools are handy to use every day
Available :
Online
iPhone/iPad
Android
8. Photo Editor:
Photo Editor is one of the most popular applications that assist users in the easy addition of stickers, frames, etc while it makes adjustment of redeye, brightness, and sharpness much easier. Most people love this application more due to its ability to create memes with available images and text for those images can be adjusted easily. The photo editor also makes it much easier to share edited stuff on Instagram and the quality of edited images use to be very high in this case.
Features:
- Color splash is a great tool to brighten up your thumbnail
- You can easily crop, rotate and flip
Available :
iPhone/iPad
9. Insta Collage:
The name of this application describes its most special feature that is it allows users to create wonderful collages within very little time. This tool comes with easy editing and sharing features so that users can have an easy interface on other platforms too. There are lots of effects that can be added to images while designing thumbnails and it is rated to have an outstanding quality of results.
Features:
- The personalized layout will give you a catchy thumbnail
- It owns 30 patterns and 18 frames to select
Available :
Android
10. Cropic:
Here is one more application for you that you will need for easy customization as well as fast sharing to YouTube as well as Instagram. Users can bring all size types to this platform, and it is also possible to add text at the time of editing. This tool is suggested for beginners as well as professionals due to its great results.
Features:
- You can scale the image by hand and cut it
- Pro version is more powerful for supporting 1224x1224 pixels
Available :
iPhone/iPad
With all these available software tools, it becomes much easier to create video Thumbnails for YouTube. The easy-to-follow steps are well described in different articles on the internet, but first of all, you need to make a selection between whether you need to use the online tool or wish to download the app on your device.
For the second case, you need to spare some memory in your device, whereas for the first one it demands a fast internet connection for easy services. Besides those specially designed YouTube Thumbnail makers, you can also create a thumbnail in Filmora if you’ve already installed it.
11. Snappa:
If you’re looking for a tool that can be upgraded later, then Snappa could be for you. Offering users both free and paid functions, Snappa will allow users to generate some truly alluring thumbnails, while still being able to use the tools for work on other social media platforms.
Features:
- Pre-Made Templates Available
- Easily Customize Backgrounds
- Place Custom Text Anywhere You Want
- Create a Truly Bespoke YouTube Thumbnail
Available :
Online
iPhone/iPad
Android
12. Adobe Spark:
Not only is Adobe recognized for creating images in many different contexts, but it is also able to offer YouTubers a free tool to ensure that their video thumbnails are catching the eye of social network visitors.
Features:
- A Basic and Easy-To-Use Platform
- Ideal for Beginners
- Customize Colors, Backgrounds, and Text with Ease
- Add Additional Images if Needed
Available :
Windows 7 or newer
Mac OS X
Chromebook
Part 2: How to Make YouTube Thumbnails in Wondershare Filmora?
Filmora is easy to use and powerful video editing software for your YouTube videos, which allows you not only to cut, rotate, crop, reverse, or speed up your videos, but also to apply some advanced editing effects like green screen, PIP, audio editing, etc. within clicks.
Here are several creative ways of making thumbnails in Filmora. You can easily create a thumbnail in 30 seconds with Filmora’s new feature, AI portrait.
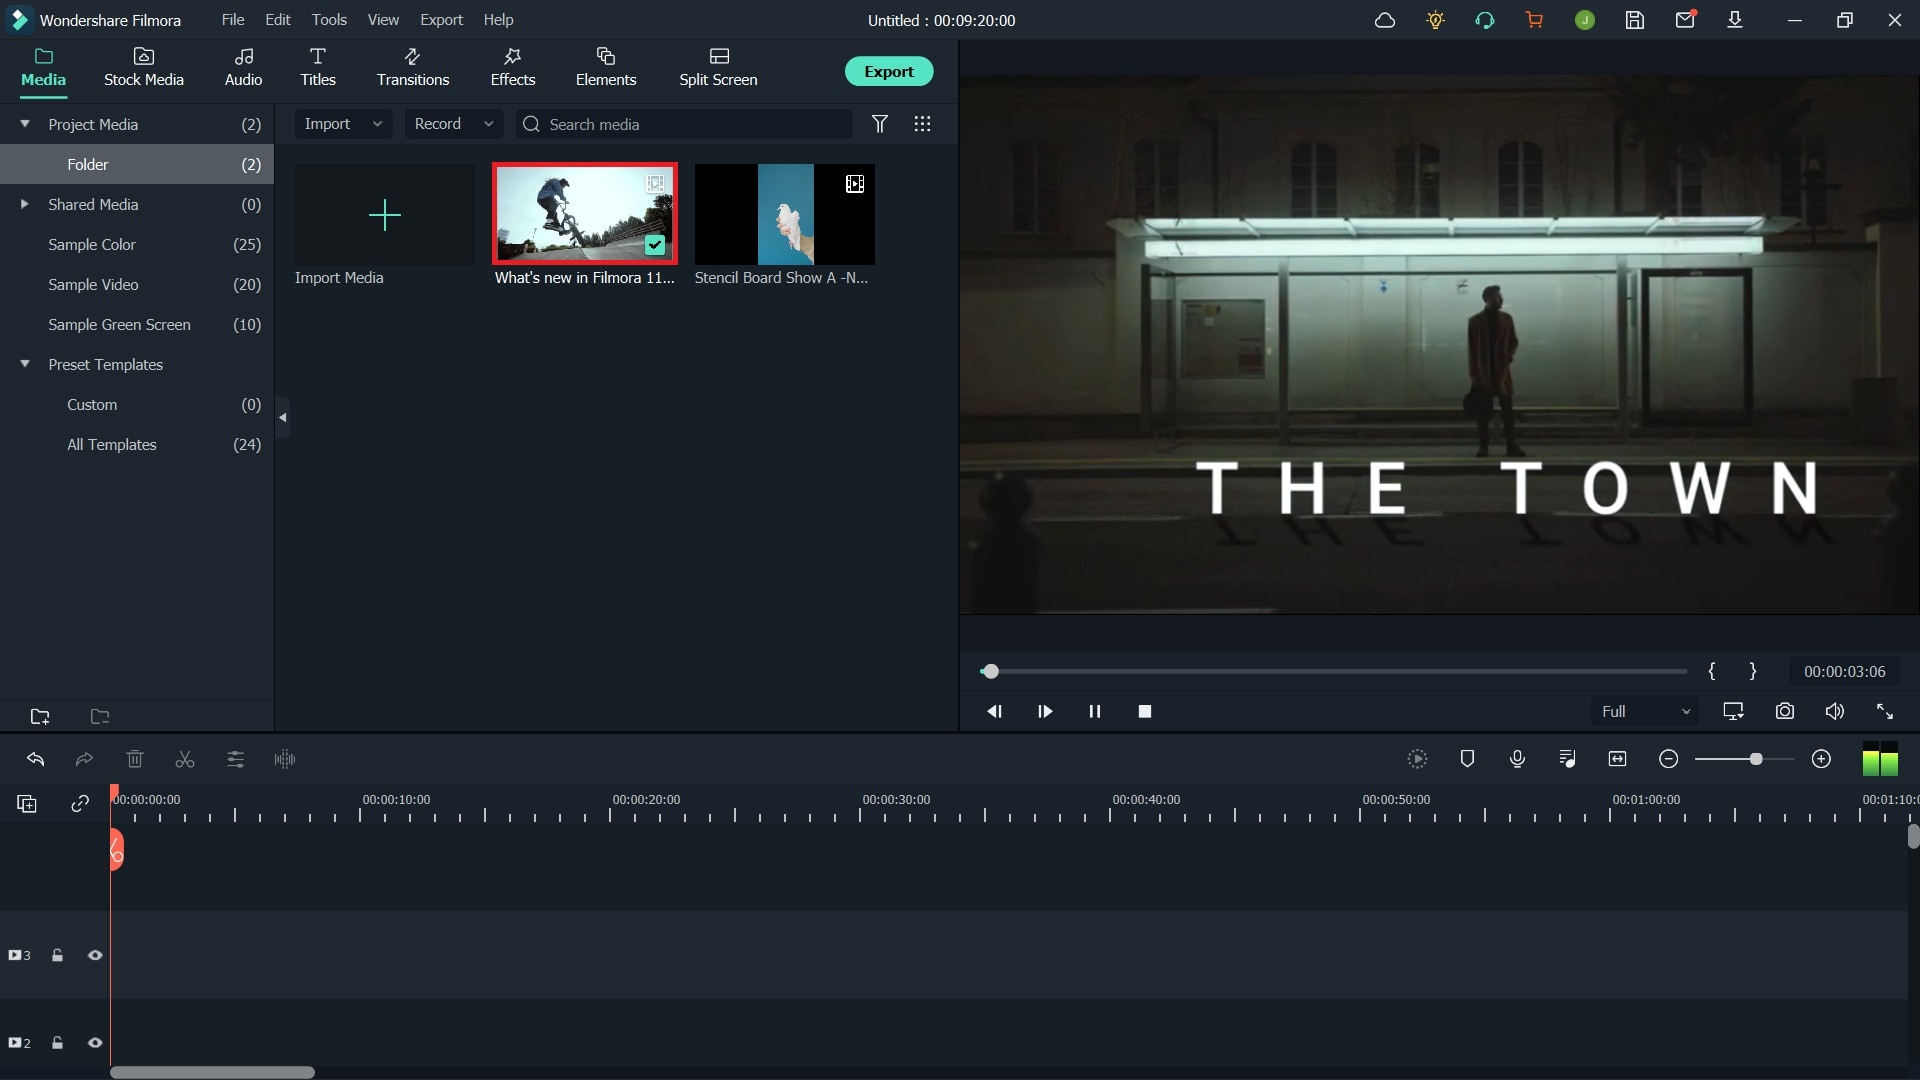
You can add your image or background image to Filmora and then add some filters, texts, overlay, or elements to the photo, and then take a snapshot, since Filmora features the snapshot tool which allows you to pick up the most attractive images from the video and use it as a video thumbnail.
Thumbnail created from a photo in Filmora
Or, you can extract frames from the video and use it as a thumbnail and upload it to YouTube later.
Thumbnail extracted from video footage in Filmora
One more creative way is to compositevideo footage with the green screen feature .
Use Green Screen to Create Video Thumbnail in Filmora
Where to find the thumbnail photo in Wondershare Filmora?
After clicking the Camera icon in Filmora to take a screenshot, you can find the photos by right-clicking the image in the Media library and then selecting Reveal in Explorer to check it.
Download Mac Version ](https://tools.techidaily.com/wondershare/filmora/download/ )
Part 3: FAQs About YouTube Thumbnail
1. What Does Thumbnail Mean on YouTube?
Thumbnails are reduced-size versions of images or videos. The name is an allusion to images being reduced to roughly the size of a human thumbnail. Thumbnails have special significance in YouTube SEO. They are used for drawing the viewers’ attention. A well-made thumbnail can bring millions of views for a YouTuber .
2. Which Is the Best Thumbnail Maker for YouTube?
Besides the thumbnail maker introduced above, the Filmora video editor and be used as an excellent thumbnail maker as well. Instead of going through the hassle of installing or subscribing to a separate program or website, it is better to use the extensive features of Filmora. It can take free snapshots for you, which you can modify within Filmora. There are stunning title templates, effects, overlays, transitions, and a large library of stock content at your service. From Part 2 in this article, you can see that making a YouTube thumbnail in Filmora is easy and efficient.
Richard Bennett
Richard Bennett is a writer and a lover of all things video.
Follow @Richard Bennett
Richard Bennett
Mar 27, 2024• Proven solutions
Video thumbnails are vital to get your videos more views. Many successful YouTubers make nice thumbnails which help them get lots of views and thus tons of subscribers.
If you are searching for software tools that can assist in the creation of YouTube video thumbnails, then you are on the right page because the details available below will provide you with complete information about the top 10+ highly rated YouTube Thumbnail Makers on both desktop and mobile devices. Some of them are free to create YouTube thumbnails; others may need to pay to get more advanced features. Besides, I’ll also show you how to create a thumbnail in the Filmora video editor in detail.
- Part 1: Best Free YouTube Thumbnail Makers for Online Users
- Part 2: How to Make Video Thumbnail with Wondershare Filmora [Creative Ways]
- Part 3: FAQs About YouTube Thumbnail
Before we get started, it is highly recommended to watch this video, teaching you how to make a YouTube Thumbnail in 30 seconds with Filmora.
You might be interested in
- How to Make Fortnite Thumbnail Super Easy and Free >>
- Best Size, Best Practices of Making YouTube Thumbnail >>
Part 1:10+ Free YouTube Thumbnail Makers for Windows/Mac/Online/Android/iPhone/iPad
In this part, we will share with you some Free YouTube Thumbnail Makers that you can use. Some of them are online solutions, so there is no need to download them, some of them can be downloaded on Windows or Mac computers.
If you prefer to edit videos on mobile devices, then it is good to have an app that allows you to create video thumbnails for YouTube videos. So in this part, we have included some video thumbnail maker apps that you can use on iPhone and Android phones.
1. Canva
It is a free thumbnail maker that can be accessed from its official website at Canva.com. This Video Thumbnail Maker is useful for graphic designers as it offers incredible features. The simple to use drag and drop type functions are wonderful, and the effects available for your Thumbnail Creation include free stock-type photos, Illustrations, Lines, Shapes, Frames, Grids, Backgrounds, Text, etc. The quick customer support facility is appreciable. Note: You need to sign up to use the thumbnail templates.
Main Features of this free YouTube Thumbnail Maker:
- It offers a customized YouTube thumbnail design
- You can change images, colors and fonts easily
- You can get more styles and templates if you pay
- Registration needed
2. Wondershare PixStudio
Wondershare PixStudio is an all-in-one and powerful online graphic design maker for everyone. It has various types of templates for YouTube Thumbnails, Logos, Posters, etc. You can create a beautiful design by simply dragging and dropping the elements and photos. The online platform is free to use all templates, just One-Click to download your creations and share to your Facebook, Instagram Story, YouTube Thumbnails, etc. immediately.
Features :
- Various types of templates
- Simple and Fast Design
- Background remover
Available:
Online
iPhone/iPad
Android
3. PicMonkey
This online thumbnail maker provides numerous filters, exclusive overlays, fonts, frames, and extra beautifying touch-up type tools to users with a single registration to Picmonkey’s premium membership. The exclusive effects like Ombre, zombify, premium fonts and Mirror are a really good collection of this tool. Now you can easily design beautiful collages, edit your memories, and create professional thumbnails with Picmonkey.com. Because of its wide range of options, it is probably the second most popular option for YouTubers who want to make professional thumbnails, right after Canva. One major difference between Picmonkey and Canva is that Picmonkey is no longer free. It costs $4 per month.
Features:
- As a youtube thumbnail maker, you also can touch up facial beautification
- Design tools make creative logos
- Provides 100+ designer-crafted thumbnail templates
Available :
Online
iPhone/iPad
Android
4. Fotor
It is possible to get something outstanding even out of your simple content without making much effort because Fotor serves you with all advanced features, and it covers attractive themes from all over the world. Fotor allows you to re-discover your art and skills without any limitation as it offers all quick editing services online. It is very interactive and simple to use with all rich features, so even beginners who haven’t made any thumbnail before can make a video thumbnail with it easily.
Features:
- Your thumbnail will be saved on the cloud
- Fast processing speed while exporting your work
- Provides YouTube thumbnail templates for different scenarios
Available :
Online
iPhone/iPad
Android
5. Fotojet
The fotojet.com online tool provides numerous facilities, whereas it is preferably used for collage making, graphic designing, and as a photo editor. With this advanced thumbnail creator tool, now you can easily rotate, crop, resize or filter your images while creating direct posts for social media pages such as Instagram, Facebook, etc. Fotojet.com possesses more than 600 stunning collage making templates that are suitable for your special events.
Features:
- It owns many templates for you to use
- Easy to have a high-quality thumbnail with only a few clicks
- 3 Steps to make a YouTube thumbnail
Available :
Online
Windows
Mac
6. Backgrounder
It allows you to design masterpieces of customized professional art, avatars, and thumbnails for videos on YouTube, Facebook, Twitter, etc. It is simple to use and contains an interactive user interface that is suitable for professionals as well as beginners.
Features:
- It owns a community that you can share works with other people
- The interface is extremely straightforward
Available :
Online
7. Pixlr:
It is a specially designs app version of well known Pixlr website where you can feel free to add overlays to your thumbnails. The choice of filters is also good for her with a high-end resolution as compared to available online solutions.
Features:
- Its free effects are a great source to come up with a new YouTube thumbnail
- Comprehensive editing tools are handy to use every day
Available :
Online
iPhone/iPad
Android
8. Photo Editor:
Photo Editor is one of the most popular applications that assist users in the easy addition of stickers, frames, etc while it makes adjustment of redeye, brightness, and sharpness much easier. Most people love this application more due to its ability to create memes with available images and text for those images can be adjusted easily. The photo editor also makes it much easier to share edited stuff on Instagram and the quality of edited images use to be very high in this case.
Features:
- Color splash is a great tool to brighten up your thumbnail
- You can easily crop, rotate and flip
Available :
iPhone/iPad
9. Insta Collage:
The name of this application describes its most special feature that is it allows users to create wonderful collages within very little time. This tool comes with easy editing and sharing features so that users can have an easy interface on other platforms too. There are lots of effects that can be added to images while designing thumbnails and it is rated to have an outstanding quality of results.
Features:
- The personalized layout will give you a catchy thumbnail
- It owns 30 patterns and 18 frames to select
Available :
Android
10. Cropic:
Here is one more application for you that you will need for easy customization as well as fast sharing to YouTube as well as Instagram. Users can bring all size types to this platform, and it is also possible to add text at the time of editing. This tool is suggested for beginners as well as professionals due to its great results.
Features:
- You can scale the image by hand and cut it
- Pro version is more powerful for supporting 1224x1224 pixels
Available :
iPhone/iPad
With all these available software tools, it becomes much easier to create video Thumbnails for YouTube. The easy-to-follow steps are well described in different articles on the internet, but first of all, you need to make a selection between whether you need to use the online tool or wish to download the app on your device.
For the second case, you need to spare some memory in your device, whereas for the first one it demands a fast internet connection for easy services. Besides those specially designed YouTube Thumbnail makers, you can also create a thumbnail in Filmora if you’ve already installed it.
11. Snappa:
If you’re looking for a tool that can be upgraded later, then Snappa could be for you. Offering users both free and paid functions, Snappa will allow users to generate some truly alluring thumbnails, while still being able to use the tools for work on other social media platforms.
Features:
- Pre-Made Templates Available
- Easily Customize Backgrounds
- Place Custom Text Anywhere You Want
- Create a Truly Bespoke YouTube Thumbnail
Available :
Online
iPhone/iPad
Android
12. Adobe Spark:
Not only is Adobe recognized for creating images in many different contexts, but it is also able to offer YouTubers a free tool to ensure that their video thumbnails are catching the eye of social network visitors.
Features:
- A Basic and Easy-To-Use Platform
- Ideal for Beginners
- Customize Colors, Backgrounds, and Text with Ease
- Add Additional Images if Needed
Available :
Windows 7 or newer
Mac OS X
Chromebook
Part 2: How to Make YouTube Thumbnails in Wondershare Filmora?
Filmora is easy to use and powerful video editing software for your YouTube videos, which allows you not only to cut, rotate, crop, reverse, or speed up your videos, but also to apply some advanced editing effects like green screen, PIP, audio editing, etc. within clicks.
Here are several creative ways of making thumbnails in Filmora. You can easily create a thumbnail in 30 seconds with Filmora’s new feature, AI portrait.
You can add your image or background image to Filmora and then add some filters, texts, overlay, or elements to the photo, and then take a snapshot, since Filmora features the snapshot tool which allows you to pick up the most attractive images from the video and use it as a video thumbnail.
Thumbnail created from a photo in Filmora
Or, you can extract frames from the video and use it as a thumbnail and upload it to YouTube later.
Thumbnail extracted from video footage in Filmora
One more creative way is to compositevideo footage with the green screen feature .
Use Green Screen to Create Video Thumbnail in Filmora
Where to find the thumbnail photo in Wondershare Filmora?
After clicking the Camera icon in Filmora to take a screenshot, you can find the photos by right-clicking the image in the Media library and then selecting Reveal in Explorer to check it.
Download Mac Version ](https://tools.techidaily.com/wondershare/filmora/download/ )
Part 3: FAQs About YouTube Thumbnail
1. What Does Thumbnail Mean on YouTube?
Thumbnails are reduced-size versions of images or videos. The name is an allusion to images being reduced to roughly the size of a human thumbnail. Thumbnails have special significance in YouTube SEO. They are used for drawing the viewers’ attention. A well-made thumbnail can bring millions of views for a YouTuber .
2. Which Is the Best Thumbnail Maker for YouTube?
Besides the thumbnail maker introduced above, the Filmora video editor and be used as an excellent thumbnail maker as well. Instead of going through the hassle of installing or subscribing to a separate program or website, it is better to use the extensive features of Filmora. It can take free snapshots for you, which you can modify within Filmora. There are stunning title templates, effects, overlays, transitions, and a large library of stock content at your service. From Part 2 in this article, you can see that making a YouTube thumbnail in Filmora is easy and efficient.
Richard Bennett
Richard Bennett is a writer and a lover of all things video.
Follow @Richard Bennett
Incor Writings on the Best Practices for YouTube Commentary
How to Add YouTube Annotations and Cards?
Richard Bennett
Mar 27, 2024• Proven solutions
Update: YouTube has replaced annotation with end screen. You can find the latest informaiton about YouTube screen and YouTube cards here.
YouTube Cards and Annotations are very useful if you want to encourage your viewrs to take an action, like Subscribe, go to another video or associated website, etc. Today, we’re going to show you the differences between cards and annotations, and how to add them in YouTube videos.
Do you want to make your YouTube video more attractive? Wondershare Filmora is a such video editing software designed for YouTube creator. It not only allows you cut, trim, crop, zoom, reverse, rotate the video clips, but also makes the advanced features like green screen, PIP, tilt-shift and mosaic easy like a piece of cake. With Wondershare Filmora, you can ignite your YouTube videos with over 300 effects like Fashion, Beauty, Block Buster, Travel, etc.
Download Mac Version ](https://tools.techidaily.com/wondershare/filmora/download/ )
The main difference between annotation and cards is their outlook. Cards are more graphical whereas annotations are text based. The cards slide in once you click the small “i” button on the video where as the annotation is there based on the timings set by the user. Moreover the main differences between the two are:
1. YouTube Cards are small and unobtrusive, unless a viewer chooses to click on them, which is why they are the better option when you are trying to get views on other videos. Irritating a few people with a big annotation might be worth it if you also draw other people’s attention to your cause or website, but it is not a good way to endear yourself to people you are trying to get views and subscriptions from. When a card is clicked a thumbnail will appear with a link to your additional content. YouTube Cards are often better than annotations for adding links to your videos because they look much tidier. Also, unlike annotations, cards will be visible to people watching your videos on their mobile devices.
2. You cannot use Cards just to insert notes into your videos, though, and you cannot adjust their size like you can with annotations. So, if you do need a link to be large and extremely noticeable, annotations might still be your best option. Cards and annotations can even be used in combination sometimes.
How to add YouTube Cards
YouTube Cards are similar to annotations but more interactive. They allow the owner of the video to add images and other links. A small box appears, clicking on which will activate the cards.
- Click on the “Video Manager” tab

- Click “Edit” tab under the video screen shot you want to add the card on
- Click on the “Cards” tab

- On the right panel click on “Add Card” drop down menu and select the type of card you want to add
- Click on the create button which will open the corresponding video
- Once you finish the subsequent information required click create card
- Select the timeline for the playhead to appear which leads to the card slide

- Apply changes and exit
How to add YouTube annotations
YouTube Annotation is addition of a text layer, link or hotspots over your video. They add interactive boxes which link to other websites or videos (any link you want).
- Click on the video manager tab
- Click edit tab under the video screen shot you want to add the annotation on
- Click on the “End screen & Annotation” tab

- On the right panel click on “+ Add Element” and select the kind of annotation you want to add
- Adjust the position of Annotation, you can drag the rectangle to locate it at any position of the video, move the slide to set the start and end time of the annotation

- Apply changes
The types of YouTube annotations:
1. Speech Bubbles
Speech Bubbles: look like the dialogue box in a comic strip. There is a tail which you can adjust so it looks like one of the people in your video is saying what is written in the annotation. Speech bubbles are great for adding in funny comments.
2. Notes
Notes: come in a limited selection of colors and can be adjusted to take up a maximum of 30% of your player screen. Sometimes you need a huge annotation to get an important point across, but using huge note annotations too often – especially near the beginnings of your videos – will annoy viewers. If you need a large note annotation make sure to place it later in your video, when a viewer will already be invested in what they are watching and less likely to click away.
3. Titles
Titles: are large pieces of text that go either at the beginning of your video or in-between different topics within your video. YouTube’s titles are not very nice to look at, but they are a decent option if you do not have access to video editing software.
4. Spotlights
Spotlights: have a subtle border and are completely clear inside. Your text only appears when a user hovers over the spotlight. Spotlights are great for turning elements within your video into links.
5. Labels
Labels: are completely transparent, like spotlights, but the user does not have to hover over them for your text to be visible.
6. Pauses
Pauses: are no longer available to add to your videos, although Pause Annotations added before they were removed still work. Pause Annotations used to stop your video for a set period of time when your annotation appeared.
If somebody watches your video and gets to the end then that means they enjoyed it and will probably be open to checking out more of your content. Rather than hoping that your other videos show up in the ‘Suggested Videos’ YouTube will show after yours has finished playing you should always include an outro, or ending card, after your video to recommend your own work. Annotations are used in a lot of successful YouTuber’s ending cards.
One form this takes is small Note annotations in the bottom corners of the screen, one linking to your previous video and one to the next. Sometimes your viewers might not necessarily get the most enjoyment out of your videos by watching them in order, though. Sometimes you want to link viewers to the videos that are most related to the one they just watched.
The best outros also include a subscribe button, which can be created using annotations. These annotations work best when combined with a verbal call to action. Make sure your outro lasts long enough for people to make the decision to subscribe or click another video.
No matter what kind of annotations you are using, you should never use more than two of them at a time anywhere except for your outro. You should also never place annotations at the very top of your screen, or in the middle at the bottom. If your video is embedding on a separate website then the player will cover annotations at the top of the screen, and ads might cover annotations placed in the bottom-middle of the screen. Keep in mind when using annotations that they will not be visible to users watching your videos on mobile devices. If mobile traffic is very important to you then consider using YouTube Cards.
Richard Bennett
Richard Bennett is a writer and a lover of all things video.
Follow @Richard Bennett
Richard Bennett
Mar 27, 2024• Proven solutions
Update: YouTube has replaced annotation with end screen. You can find the latest informaiton about YouTube screen and YouTube cards here.
YouTube Cards and Annotations are very useful if you want to encourage your viewrs to take an action, like Subscribe, go to another video or associated website, etc. Today, we’re going to show you the differences between cards and annotations, and how to add them in YouTube videos.
Do you want to make your YouTube video more attractive? Wondershare Filmora is a such video editing software designed for YouTube creator. It not only allows you cut, trim, crop, zoom, reverse, rotate the video clips, but also makes the advanced features like green screen, PIP, tilt-shift and mosaic easy like a piece of cake. With Wondershare Filmora, you can ignite your YouTube videos with over 300 effects like Fashion, Beauty, Block Buster, Travel, etc.
Download Mac Version ](https://tools.techidaily.com/wondershare/filmora/download/ )
The main difference between annotation and cards is their outlook. Cards are more graphical whereas annotations are text based. The cards slide in once you click the small “i” button on the video where as the annotation is there based on the timings set by the user. Moreover the main differences between the two are:
1. YouTube Cards are small and unobtrusive, unless a viewer chooses to click on them, which is why they are the better option when you are trying to get views on other videos. Irritating a few people with a big annotation might be worth it if you also draw other people’s attention to your cause or website, but it is not a good way to endear yourself to people you are trying to get views and subscriptions from. When a card is clicked a thumbnail will appear with a link to your additional content. YouTube Cards are often better than annotations for adding links to your videos because they look much tidier. Also, unlike annotations, cards will be visible to people watching your videos on their mobile devices.
2. You cannot use Cards just to insert notes into your videos, though, and you cannot adjust their size like you can with annotations. So, if you do need a link to be large and extremely noticeable, annotations might still be your best option. Cards and annotations can even be used in combination sometimes.
How to add YouTube Cards
YouTube Cards are similar to annotations but more interactive. They allow the owner of the video to add images and other links. A small box appears, clicking on which will activate the cards.
- Click on the “Video Manager” tab
- Click “Edit” tab under the video screen shot you want to add the card on
- Click on the “Cards” tab
- On the right panel click on “Add Card” drop down menu and select the type of card you want to add
- Click on the create button which will open the corresponding video
- Once you finish the subsequent information required click create card
- Select the timeline for the playhead to appear which leads to the card slide
- Apply changes and exit
How to add YouTube annotations
YouTube Annotation is addition of a text layer, link or hotspots over your video. They add interactive boxes which link to other websites or videos (any link you want).
- Click on the video manager tab
- Click edit tab under the video screen shot you want to add the annotation on
- Click on the “End screen & Annotation” tab
- On the right panel click on “+ Add Element” and select the kind of annotation you want to add
- Adjust the position of Annotation, you can drag the rectangle to locate it at any position of the video, move the slide to set the start and end time of the annotation
- Apply changes
The types of YouTube annotations:
1. Speech Bubbles
Speech Bubbles: look like the dialogue box in a comic strip. There is a tail which you can adjust so it looks like one of the people in your video is saying what is written in the annotation. Speech bubbles are great for adding in funny comments.
2. Notes
Notes: come in a limited selection of colors and can be adjusted to take up a maximum of 30% of your player screen. Sometimes you need a huge annotation to get an important point across, but using huge note annotations too often – especially near the beginnings of your videos – will annoy viewers. If you need a large note annotation make sure to place it later in your video, when a viewer will already be invested in what they are watching and less likely to click away.
3. Titles
Titles: are large pieces of text that go either at the beginning of your video or in-between different topics within your video. YouTube’s titles are not very nice to look at, but they are a decent option if you do not have access to video editing software.
4. Spotlights
Spotlights: have a subtle border and are completely clear inside. Your text only appears when a user hovers over the spotlight. Spotlights are great for turning elements within your video into links.
5. Labels
Labels: are completely transparent, like spotlights, but the user does not have to hover over them for your text to be visible.
6. Pauses
Pauses: are no longer available to add to your videos, although Pause Annotations added before they were removed still work. Pause Annotations used to stop your video for a set period of time when your annotation appeared.
If somebody watches your video and gets to the end then that means they enjoyed it and will probably be open to checking out more of your content. Rather than hoping that your other videos show up in the ‘Suggested Videos’ YouTube will show after yours has finished playing you should always include an outro, or ending card, after your video to recommend your own work. Annotations are used in a lot of successful YouTuber’s ending cards.
One form this takes is small Note annotations in the bottom corners of the screen, one linking to your previous video and one to the next. Sometimes your viewers might not necessarily get the most enjoyment out of your videos by watching them in order, though. Sometimes you want to link viewers to the videos that are most related to the one they just watched.
The best outros also include a subscribe button, which can be created using annotations. These annotations work best when combined with a verbal call to action. Make sure your outro lasts long enough for people to make the decision to subscribe or click another video.
No matter what kind of annotations you are using, you should never use more than two of them at a time anywhere except for your outro. You should also never place annotations at the very top of your screen, or in the middle at the bottom. If your video is embedding on a separate website then the player will cover annotations at the top of the screen, and ads might cover annotations placed in the bottom-middle of the screen. Keep in mind when using annotations that they will not be visible to users watching your videos on mobile devices. If mobile traffic is very important to you then consider using YouTube Cards.
Richard Bennett
Richard Bennett is a writer and a lover of all things video.
Follow @Richard Bennett
Also read:
- [Updated] Achieve Perfect Views with Aspect Ratio Knowledge on YOUTUBE
- Sound Savings Guide Youtuber's Selection of Affordable Mics
- Streamer's Selection Most Popular Livestream Software and Devices
- Maximize Your SEO Top 7 Budget-Friendly Youtube Tags Extractors Reviewed
- 2024 Approved Earth’s Premier Online Income Tycoon
- Daily Dosage of Serenity Top Yoga Channels for Life for 2024
- [Updated] Best 7 Multimedia Cameras For Quality Live Streams & Video Blogs
- Closing Powerhouses Free Top 6 Video Closers for 2024
- [Updated] Demystifying Creator Studio A Practical Handbook
- [New] Chuckle Chronicles Top YouTube Humorists' Masterpieces
- In 2024, A Gamer's Guide to Twisting Videos on YouTube (2E)
- The Ultimate GIF Making Software Showdown
- 9 YouTube Video Extraction Tools for Android Reviewed
- Safeguarding Your Digital Footprint on YouTube
- The Soundscapes of Success Building YouTube Playlists with Precision
- In 2024, 2017 Data Overload Infographics & Surprising YT Stats
- Build Stellar YouTube Beginnings on a Shoestring Budget for 2024
- [New] Cinematic Dialogue Assembler
- 2024 Approved Craft Engaging Videos Insights Into YouTube Movie Maker
- In 2024, Channel Upgrade The Beginner's Roadmap to Video Mastery
- 2024 Approved Editing Excellence Sports Videos That Stand Out
- [Updated] Amplify Earnings Monetize YouTube on the Go with Effective Techniques
- 2024 Approved A Compre Written in Code Deciphering YouTube Backlink Building Techniques
- Insight Into TSeries' Earnings and Profitability Through YouTube Channels
- Designing Direct URLs for Automatic Content Subscription for 2024
- Simplified Approach to Embedding Multiple Video Playlists From YouTube
- In 2024, Comedy in Catchy Notes Best Parody Songs List
- [Updated] Blending Past and Present Film Aesthetics
- 2024 Approved Boost Views and Engagement Top-Rated Online Keyword Generators
- Free Visual Templates to Upgrade Your Profile
- [New] Dominate the Digital Arena Audience Expansion on Youtube
- [New] Elevate Your Short-Form Content Top 10 Edits for iOS/Android
- In 2024, A Step-by-Step Guide to Removing YouTube Ads Across Platforms
- [New] In 2024, Produce FB Profile Visuals
- [Updated] Behind-the-Lens Wisdom The Best Cinemagraph Tips
- In 2024, What You Should Know About Speech-to-Text Technology
- [Updated] In 2024, Funnies Frontier Emerging Comedy Sensations on TikTok
- [Updated] In 2024, Watch Unseen Selective Tools for Insta Enthusiasts
- New Best AR Video Apps for 2024
- New In 2024, Pro-Quality Videos Made Easy Top Video Stabilizer Apps
- All You Need To Know About Mega Greninja For Samsung Galaxy A34 5G | Dr.fone
- In 2024, Calculating Video Data Use in a Full-Day Watch
- [Updated] 2024 Approved Audio Enhancement for Professional Instagram Posts
- In 2024, Forgot iPhone Passcode Again? Unlock Apple iPhone 6 Plus Without Passcode Now
- Efficient Techniques for Distributing YouTube Videos via Facebook
- New Silence Is Golden A Step-by-Step Guide to Noise Reduction in FCPX for 2024
- Title: [New] Create Standout Videos with These Top 7 Free Thumbnail Builders
- Author: Kevin
- Created at : 2024-05-25 15:59:21
- Updated at : 2024-05-26 15:59:21
- Link: https://youtube-videos.techidaily.com/new-create-standout-videos-with-these-top-7-free-thumbnail-builders/
- License: This work is licensed under CC BY-NC-SA 4.0.
