
!["[New] Crafting Eye-Catching Video Summaries 3 Neon Border Methods"](https://www.lifewire.com/thmb/Ieqo8YRlMCtlE-OyiprzvT0zaaY=/400x300/filters:no_upscale():max_bytes(150000):strip_icc():format(webp)/GettyImages-1139232374-700d343900854115ad26acf3f1dd80b3.jpg)
"[New] Crafting Eye-Catching Video Summaries 3 Neon Border Methods"
Crafting Eye-Catching Video Summaries: 3 Neon Border Methods
Your YouTube video, or any other clip published on any forum, gets a larger number of hits if it has an attractive thumbnail. And, the fact is, a thumbnail becomes 10x more attractive when the main character that the image has have a neon border around it.
With that said, in the following sections, you will learn a couple of methods on how to add a YouTube thumbnail border around the main characters and/or objects that are significant to the clip.
In this article
01 Add Glowing Neon Border to YouTube Thumbnail with Filmora
02 Add a Glowing Neon Border in YouTube Thumbnail with Canva
03 Outline a Person in a YouTube Thumbnail with Photoshop
Part 1: How to Add Neon Border to YouTube Thumbnail for Free with Filmora
Being one of the most versatile and intuitive post-production tools available in the market today, Wondershare Filmora X allows you to add a neon border to a YouTube thumbnail quite conveniently. You can learn how to get this done on Windows or Mac by following the steps given below.
For Win 7 or later (64-bit)
For macOS 10.12 or later
Step 1: Define Project Settings and Add Image to the Timeline
Launch Wondershare Filmora X on your PC (a MacBook Pro M1 is used here), ensure that the project aspect ratio is set to 16:9 (Widescreen) on the splash screen, and click New Project. On the main interface, click the Preview quality and display settings icon from the upper-right area of the Timeline, click Change Project Aspect Ratio, click to select 1280 x 720 (HD) from the Resolution menu of the Project Settings box, and click OK to save the custom project settings.

Then select My Media from the menu bar if not already selected, click Project Media from the navigation pane, and click Import from the Media box to select and import the image of the main character or object that you want to use in the thumbnail.

Now, drag the image from the Media box to the Timeline at the bottom.

Step 2: Clear Image Background, Add Border, and Add Custom Background
Go to Effects from the menu bar, click to select the Default tab and then AI Portrait from the navigation pane, and click and drag the Human Segmentation preset from the right box, and place it over the image track in the Timeline.

Double-click the image layer, scroll down the upper-left box to the Video Effects section, and use the Edge Thickness and Edge Feather sliders to adjust the character’s edges to make them as realistic as possible. Click OK when done.

Next, click and drag the Human Border preset over the image track in the Timeline, and follow the same procedure to customize the border. This will give the character a neon border effect.

Now, use the method explained earlier to import a custom image for the background, and drag and place it under the previous track in the Timeline.

If you are running the latest version of Filmora, you will find there are some neon light effects available under AI Portrait as well.

Step 3: Add Titles to Thumbnail
Go to Titles from the menu bar, click to select the Default tab and then Lower 3rds from the navigation pane, and click and drag your preferred lower-third preset from the right window to a separate layer in the Timeline. Double-click the lower-third layer, and use the available options in the upper-left window to change the text, its color, etc., and drag the textbox to place it to your preferred position on the image as well. Click OK to save the changes.
Next, click to select Titles from the navigation pane, and drag your preferred title from the right window to the upper-most track in the Timeline. Now use the method explained earlier to edit the text, its color, position, etc. to make it look professional.

For more tips and tricks for creating YouTube thumbnail, you can check this You Tube thumbnail creating guide.
Step 4: Get the Neon Border Thumbnail
Click the Snapshot (Camera) icon from the upper-right area of the Timeline, go to My Media from the menu bar, right-click the thumbnail of the screenshot you captured, and click Reveal in Finder (on Mac) or Reveal in Explorer (on Windows) to get to the folder the YouTube thumbnail border is saved in.

Part 2: How to Add a Glowing Neon Border in Your YouTube Thumbnail with Canva
Canva is another intuitive editing program that works on the web interface rather than having you download and install an app on your PC. You can add a neon border for YouTube thumbnails using Canva by following the instructions given below:
Step 1: Define Project Settings and Add a Background
After signing in to your Canva account, click Create a design from the top-right corner of the page, click Custom size from the bottom, define 1280 and 720 in the Width and Height fields on the box that appears respectively, and click Create new design.

Now, click to select Background from the navigation bar on the left (if the Background tool is not visible, click More and then choose Background from the expanded list), and click to select a background from the images available in the center pane.

Step 2: Upload an Image and Add Effects
Click Uploads from the navigation bar, click the More icon from the right of the Upload media button present at the top of the center pane, choose your preferred method to upload the image (with the transparent background) that you want to use, upload the image, and drag it from the center pane to the Canvas.
Note: You can use any of the tools available online to remove the background from your image for free.

To add a YouTube thumbnail border, make sure that the image that you added to the Canvas is selected, click the Duplicate icon from the upper-right area, and use the scaling handles of the copy of the image to increase its size a bit. Reposition the image back to its original location as well.
Then, click Edit image from the upper-left corner of the Canvas, click Duotone from the Edit image pane at the center, if need be, click See all, choose your preferred duotone effect to apply on the image, choose your preferred highlight and shadow colors from the box that appears next, and click Back from the top of the pane.

Next, click See all next to the Adjust section from the center pane, and drag the Blur slider to the right to increase the blur effect on the image.

Step 3: Position the Layers
While keeping the duplicate image selected, click the Position button from the upper-right area of the Canvas, and click Background to send the second image behind the first one to get the neon border effect for the photo.

Part 3: How to Outline a Person in a YouTube Thumbnail with Photoshop
Because YouTube thumbnails are nothing but static images, creating YouTube thumbnail border with Adobe Photoshop is comparatively easier. The process of doing this is given below:
Step 1: Define Document Preferences and Import an Image
Launch Adobe Photoshop on your PC, click Create new, and on the New Document customization box, define the width and height values to 1280 and 720 pixels respectively. Select Transparent from the Background Contents menu as well if not already selected. Click Create from the bottom to create a new Photoshop document with the specified document settings. Next, open the folder that contains the source image, drag the photo to Photoshop, and press Enter to place the photo.

Step 2: Remove Background from the Image
Make sure that the image layer is selected in the Layers panel on the right, go to Select from the menu bar at the top, and click Subject. From the bottom of the Layers panel, click the Add a mask icon to get rid of the background, leaving only the human on the Canvas.

Step 3: Add a Custom Background and an Outline Around the Subject
Use the method explained earlier to import a background image of your choice to Photoshop. Drag the background image layer to the bottom in the Layers panel. Double-click the masked layer, click to select Stroke from the left pane of the Layer Style box, and use the options available on the right to manage the size, color, position, etc. of the stroke that has been added around the human subject. Click OK when done, and then export the image normally to use it as a YouTube thumbnail border.

Summary
It is important to know that the default resolution of a YouTube thumbnail is 1280 x 720 pixels that is usually written and referred to as 720p. While adding a YouTube thumbnail border, it is also imperative to have a good sense of color combination and fonts. Furthermore, a decent tool like Wondershare Filmora X must be used to add an appealing neon border around the main subject in the thumbnail image easily and quickly.
02 Add a Glowing Neon Border in YouTube Thumbnail with Canva
03 Outline a Person in a YouTube Thumbnail with Photoshop
Part 1: How to Add Neon Border to YouTube Thumbnail for Free with Filmora
Being one of the most versatile and intuitive post-production tools available in the market today, Wondershare Filmora X allows you to add a neon border to a YouTube thumbnail quite conveniently. You can learn how to get this done on Windows or Mac by following the steps given below.
For Win 7 or later (64-bit)
For macOS 10.12 or later
Step 1: Define Project Settings and Add Image to the Timeline
Launch Wondershare Filmora X on your PC (a MacBook Pro M1 is used here), ensure that the project aspect ratio is set to 16:9 (Widescreen) on the splash screen, and click New Project. On the main interface, click the Preview quality and display settings icon from the upper-right area of the Timeline, click Change Project Aspect Ratio, click to select 1280 x 720 (HD) from the Resolution menu of the Project Settings box, and click OK to save the custom project settings.
Then select My Media from the menu bar if not already selected, click Project Media from the navigation pane, and click Import from the Media box to select and import the image of the main character or object that you want to use in the thumbnail.
Now, drag the image from the Media box to the Timeline at the bottom.
Step 2: Clear Image Background, Add Border, and Add Custom Background
Go to Effects from the menu bar, click to select the Default tab and then AI Portrait from the navigation pane, and click and drag the Human Segmentation preset from the right box, and place it over the image track in the Timeline.
Double-click the image layer, scroll down the upper-left box to the Video Effects section, and use the Edge Thickness and Edge Feather sliders to adjust the character’s edges to make them as realistic as possible. Click OK when done.
Next, click and drag the Human Border preset over the image track in the Timeline, and follow the same procedure to customize the border. This will give the character a neon border effect.
Now, use the method explained earlier to import a custom image for the background, and drag and place it under the previous track in the Timeline.
If you are running the latest version of Filmora, you will find there are some neon light effects available under AI Portrait as well.
Step 3: Add Titles to Thumbnail
Go to Titles from the menu bar, click to select the Default tab and then Lower 3rds from the navigation pane, and click and drag your preferred lower-third preset from the right window to a separate layer in the Timeline. Double-click the lower-third layer, and use the available options in the upper-left window to change the text, its color, etc., and drag the textbox to place it to your preferred position on the image as well. Click OK to save the changes.
Next, click to select Titles from the navigation pane, and drag your preferred title from the right window to the upper-most track in the Timeline. Now use the method explained earlier to edit the text, its color, position, etc. to make it look professional.
For more tips and tricks for creating YouTube thumbnail, you can check this You Tube thumbnail creating guide.
Step 4: Get the Neon Border Thumbnail
Click the Snapshot (Camera) icon from the upper-right area of the Timeline, go to My Media from the menu bar, right-click the thumbnail of the screenshot you captured, and click Reveal in Finder (on Mac) or Reveal in Explorer (on Windows) to get to the folder the YouTube thumbnail border is saved in.
Part 2: How to Add a Glowing Neon Border in Your YouTube Thumbnail with Canva
Canva is another intuitive editing program that works on the web interface rather than having you download and install an app on your PC. You can add a neon border for YouTube thumbnails using Canva by following the instructions given below:
Step 1: Define Project Settings and Add a Background
After signing in to your Canva account, click Create a design from the top-right corner of the page, click Custom size from the bottom, define 1280 and 720 in the Width and Height fields on the box that appears respectively, and click Create new design.
Now, click to select Background from the navigation bar on the left (if the Background tool is not visible, click More and then choose Background from the expanded list), and click to select a background from the images available in the center pane.
Step 2: Upload an Image and Add Effects
Click Uploads from the navigation bar, click the More icon from the right of the Upload media button present at the top of the center pane, choose your preferred method to upload the image (with the transparent background) that you want to use, upload the image, and drag it from the center pane to the Canvas.
Note: You can use any of the tools available online to remove the background from your image for free.
To add a YouTube thumbnail border, make sure that the image that you added to the Canvas is selected, click the Duplicate icon from the upper-right area, and use the scaling handles of the copy of the image to increase its size a bit. Reposition the image back to its original location as well.
Then, click Edit image from the upper-left corner of the Canvas, click Duotone from the Edit image pane at the center, if need be, click See all, choose your preferred duotone effect to apply on the image, choose your preferred highlight and shadow colors from the box that appears next, and click Back from the top of the pane.
Next, click See all next to the Adjust section from the center pane, and drag the Blur slider to the right to increase the blur effect on the image.
Step 3: Position the Layers
While keeping the duplicate image selected, click the Position button from the upper-right area of the Canvas, and click Background to send the second image behind the first one to get the neon border effect for the photo.
Part 3: How to Outline a Person in a YouTube Thumbnail with Photoshop
Because YouTube thumbnails are nothing but static images, creating YouTube thumbnail border with Adobe Photoshop is comparatively easier. The process of doing this is given below:
Step 1: Define Document Preferences and Import an Image
Launch Adobe Photoshop on your PC, click Create new, and on the New Document customization box, define the width and height values to 1280 and 720 pixels respectively. Select Transparent from the Background Contents menu as well if not already selected. Click Create from the bottom to create a new Photoshop document with the specified document settings. Next, open the folder that contains the source image, drag the photo to Photoshop, and press Enter to place the photo.
Step 2: Remove Background from the Image
Make sure that the image layer is selected in the Layers panel on the right, go to Select from the menu bar at the top, and click Subject. From the bottom of the Layers panel, click the Add a mask icon to get rid of the background, leaving only the human on the Canvas.
Step 3: Add a Custom Background and an Outline Around the Subject
Use the method explained earlier to import a background image of your choice to Photoshop. Drag the background image layer to the bottom in the Layers panel. Double-click the masked layer, click to select Stroke from the left pane of the Layer Style box, and use the options available on the right to manage the size, color, position, etc. of the stroke that has been added around the human subject. Click OK when done, and then export the image normally to use it as a YouTube thumbnail border.
Summary
It is important to know that the default resolution of a YouTube thumbnail is 1280 x 720 pixels that is usually written and referred to as 720p. While adding a YouTube thumbnail border, it is also imperative to have a good sense of color combination and fonts. Furthermore, a decent tool like Wondershare Filmora X must be used to add an appealing neon border around the main subject in the thumbnail image easily and quickly.
10 Reasons Why Your YouTube Videos Has 0 Views & Solution
Create High-Quality Video - Wondershare Filmora
An easy and powerful YouTube video editor
Numerous video and audio effects to choose from
Detailed tutorials provided by the official channel
Many content creators wonder why they have 0 views YouTube. Everyone wants tons of people to watch their YouTube videos when they upload them on their channel. This guide will go through some of the reasons why your videos are not gaining any views. We will also explain how you can fix each problem so that your YouTube videos can amass views.
In this article
01 How Many Videos on YouTube Have 0 Views?
02 10 Reasons Why Your YouTube Videos Have 0 Views & Solutions
How Many Videos on YouTube Have 0 Views?
According to Pex, around 90% of videos people upload on their YouTube channels never reach 1,000 views. For a video-sharing site that gets more than 5 billion views daily, it is surprising that a high percentage of the uploaded videos never reach the target audience.
10 Reasons Why Your YouTube Videos Have 0 Views & Solutions
If you’re asking yourself: Why do my videos have 0 views YouTube? We have got you covered. Here are ten reasons that might be causing this:
1) Your YouTube Video Thumbnail Is Not Catchy
A video thumbnail is the first thing your audience will see on search results. It allows viewers to see a quick snapshot of a video while browsing YouTube. For these reasons, it plays a role in helping you get more views on YouTube.
Titles and thumbnails are like billboards, as they help viewers determine if they will watch your videos on YouTube. A well-designed thumbnail and a video title will undoubtedly attract more followers to your channel. In turn, more people will watch your videos. Additionally, this will make your content appealing to many YouTube advertisers.
Most of the YouTube videos with 0 views do not have an image or thumbnail that is eye-catching. Therefore, viewers can end up skipping over them.
How to Fix It
Create contrasting, engaging thumbnails for your YouTube videos to get more views. Avoid selecting screenshots from your video as your thumbnail picture. Instead, make sure you use high-quality and high-resolution images for your thumbnails.
2) You Are Not Consistent
Consistency gives your audience, subscribers, and viewers reason to be thrilled about your next YouTube video. If you are consistent, your audience will always know what they will get.
Failing to show consistency will see your viewers’ count dropping significantly. Your subscribers won’t know when you’ll be posting your next video on your channel.
What’s more? Failing to upload videos regularly may damage your ranking on YouTube. YouTube algorithm keeps channels that upload videos regularly and those that are consistent on top.
How to Fix It
Decide when and what you’ll be publishing videos and stick to it. Be sure to stay with the relative niche and be clear on what kind of YouTube videos you’ll be creating and uploading. In turn, you will increase the probability of YouTube’s algorithm picking your channel quickly.
3) Low-quality Videos
Videos with the most views on YouTube are of high quality. Viewers do not like watching videos with poor audio and video quality. That makes it a crucial factor you need to consider before uploading YouTube videos.
How to Fix It
Use Filmora to create high-quality YouTube videos. This software improves the quality of videos with low resolution. The tool can remove the shakiness in your video to make it look professional. You can also adjust white balance, 3D LUT, brightness, contrast, and tone.
You can improve the quality of your audio by adjusting the pitch, fade-out, fade-in, and output volume. The best part is: Filmora allows you to remove the background noises and add overlays, filters, and transitions to your videos.
For Win 7 or later (64-bit)
For macOS 10.12 or later
4) You Are Not Making the Content That Your Audience Wants
A high percentage of YouTube videos with 0 views is that the content isn’t for your audience. A YouTube channel can only grow when it is getting niche visitors to watch its videos. For that reason, the viewers watching your YouTube videos have to be interested in the niche of your video to allow your channel to grow naturally.
If the videos you create are not for your audience, you’ll get 0 views YouTube never, as you’ll not build subscribers. Your current subscribers will also stop watching your videos because they believe they won’t do anything for them.
How to Fix It
You need to choose your niche and analyze your viewers to find out what topics they are interested in; YouTube Analytics can help you find out which topics are trending. You can also get the details of interesting topics, enabling you to create relevant content for your target audience.
5) Not Responding to Your Audience
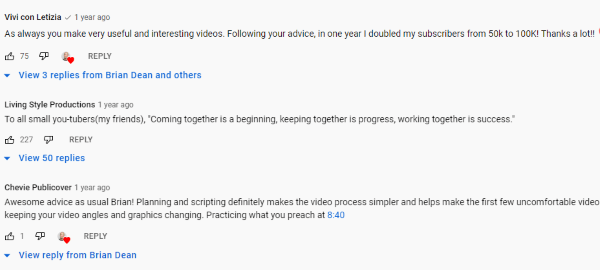
Engaging with your audience will create trust. If you do not respond to your viewers, they might stop watching your videos. And your future videos could end up with zero views.
How to Fix It
Be active on your channel, community, and other social media channels. Reply in the comment section, and this will make sure the videos you upload next will get views.
6) Your Videos Are Not Optimized
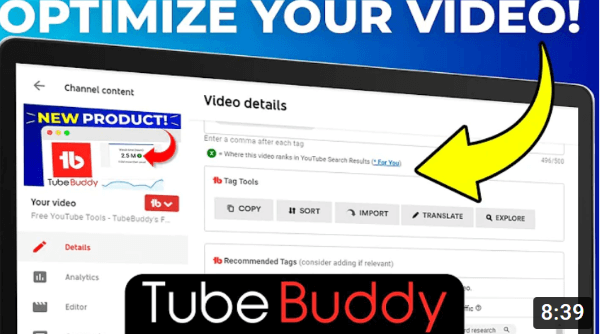
You can’t just upload your videos and expect millions of views without doing anything. If you look at a random YouTube video with 0 views, you’ll likely find it is not optimized. YouTube optimization can help to take your videos an extra step further.
How to Fix It
If you want your videos to get views, you have to do optimization with the factors below:
- Channel Design
- SEO
- Search Volume
- Keywords
- Target Niche and Viewers
- Custom Thumbnails
The most successful YouTubers constantly implement the above YouTube optimization methods. Input relevant keywords and titles for your videos. Using online tools to optimize your videos and channel with the latest techniques will help you earn YouTube views. YouTube optimization tools can find the best keywords to use on your videos.
7) You Didn’t Use the Right Tags
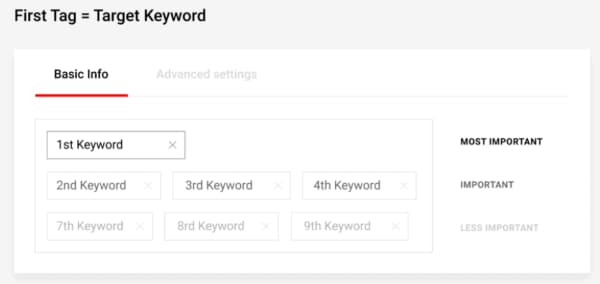
Always follow YouTube SEO optimization methods and never leave the tag section blank. When you use tags, make sure you choose the right ones. YouTube works just like Google: Viewers enter a keyword for the YouTube video they are searching for, and it lists down the videos that best match the keyword. The more relevant YouTube thinks your videos are, the higher they will be positioned in the rank. Videos in the top pages of YouTube’s search engine earn the most views, and YouTube videos with 0 views will often appear at the lowest portion.
How to Fix It
Insert the specific keyword tags first when creating video tags. YouTube’s search engine prioritizes the first tag. You can use any YouTube optimization tool to make tags. After that, you can now enter the other video tags types, including generic tags and compound tags.
8) Your YouTube Videos Don’t Provide Any Value to Your Audience
Value is an essential part of being a content creator; it’s also a vital aspect of recognizing what you are bringing to the table in the viewer to YouTube relationship. Viewers will come to your channel if they have a reason to watch the videos you upload, whether for information or entertainment purposes. Before you upload a video, take a step back and ask yourself will people love it.
How to Fix It
Make sure you create value-rich content that your audience will find useful. Have a clear goal before you start making a video. There are always people who lack the knowledge you have, and they would love to learn it from you.
Think about what your audience is looking for when they come to YouTube and provide them with what they need. Do not forget to look for trending topics, searchable topics within your niche, and related topics. Your videos should answer all the questions your viewers have. They should also provide an exhilarating experience.
9) You Are Not Sharing Your Videos on Your Social Channels

Social media platforms are a powerful tool that helps YouTubers get more visitors to their channel. In turn, your video will get views. If you do not share your videos on your social media platform, none of your friends and followers will know about it, and you can end up having 0 views YouTube.
How to Fix It
You can get YouTube views from social media platforms like SubReddits, Facebook, Instagram, Quora, and more. Be sure to follow the terms and conditions of these platforms. You can also self-promote your videos on these platforms to get views. However, you should avoid spamming your YouTube videos in a community for the forum you belong to.
10) You Are Not Patient
Most YouTubers fail because they are not patient enough to run their channel. They upload a video and want it to get views immediately. If you’re serious about making videos on YouTube, you need patience and determination. If you continue uploading videos consistently, they will get views.
How to Fix It
Once you post your videos, give them some time to see if people will view them. Allow your videos to settle in the YouTube algorithm and search engine, and you’ll see the magic soon.
Conclusion
● These are the main reasons your videos have 0 views YouTube and their solutions. Remember the quality of your videos can affect your YouTube view count. Use Filmora to create HD videos that will attract more viewers.
Many content creators wonder why they have 0 views YouTube. Everyone wants tons of people to watch their YouTube videos when they upload them on their channel. This guide will go through some of the reasons why your videos are not gaining any views. We will also explain how you can fix each problem so that your YouTube videos can amass views.
In this article
01 How Many Videos on YouTube Have 0 Views?
02 10 Reasons Why Your YouTube Videos Have 0 Views & Solutions
How Many Videos on YouTube Have 0 Views?
According to Pex, around 90% of videos people upload on their YouTube channels never reach 1,000 views. For a video-sharing site that gets more than 5 billion views daily, it is surprising that a high percentage of the uploaded videos never reach the target audience.
10 Reasons Why Your YouTube Videos Have 0 Views & Solutions
If you’re asking yourself: Why do my videos have 0 views YouTube? We have got you covered. Here are ten reasons that might be causing this:
1) Your YouTube Video Thumbnail Is Not Catchy
A video thumbnail is the first thing your audience will see on search results. It allows viewers to see a quick snapshot of a video while browsing YouTube. For these reasons, it plays a role in helping you get more views on YouTube.
Titles and thumbnails are like billboards, as they help viewers determine if they will watch your videos on YouTube. A well-designed thumbnail and a video title will undoubtedly attract more followers to your channel. In turn, more people will watch your videos. Additionally, this will make your content appealing to many YouTube advertisers.
Most of the YouTube videos with 0 views do not have an image or thumbnail that is eye-catching. Therefore, viewers can end up skipping over them.
How to Fix It
Create contrasting, engaging thumbnails for your YouTube videos to get more views. Avoid selecting screenshots from your video as your thumbnail picture. Instead, make sure you use high-quality and high-resolution images for your thumbnails.
2) You Are Not Consistent
Consistency gives your audience, subscribers, and viewers reason to be thrilled about your next YouTube video. If you are consistent, your audience will always know what they will get.
Failing to show consistency will see your viewers’ count dropping significantly. Your subscribers won’t know when you’ll be posting your next video on your channel.
What’s more? Failing to upload videos regularly may damage your ranking on YouTube. YouTube algorithm keeps channels that upload videos regularly and those that are consistent on top.
How to Fix It
Decide when and what you’ll be publishing videos and stick to it. Be sure to stay with the relative niche and be clear on what kind of YouTube videos you’ll be creating and uploading. In turn, you will increase the probability of YouTube’s algorithm picking your channel quickly.
3) Low-quality Videos
Videos with the most views on YouTube are of high quality. Viewers do not like watching videos with poor audio and video quality. That makes it a crucial factor you need to consider before uploading YouTube videos.
How to Fix It
Use Filmora to create high-quality YouTube videos. This software improves the quality of videos with low resolution. The tool can remove the shakiness in your video to make it look professional. You can also adjust white balance, 3D LUT, brightness, contrast, and tone.
You can improve the quality of your audio by adjusting the pitch, fade-out, fade-in, and output volume. The best part is: Filmora allows you to remove the background noises and add overlays, filters, and transitions to your videos.
For Win 7 or later (64-bit)
For macOS 10.12 or later
4) You Are Not Making the Content That Your Audience Wants
A high percentage of YouTube videos with 0 views is that the content isn’t for your audience. A YouTube channel can only grow when it is getting niche visitors to watch its videos. For that reason, the viewers watching your YouTube videos have to be interested in the niche of your video to allow your channel to grow naturally.
If the videos you create are not for your audience, you’ll get 0 views YouTube never, as you’ll not build subscribers. Your current subscribers will also stop watching your videos because they believe they won’t do anything for them.
How to Fix It
You need to choose your niche and analyze your viewers to find out what topics they are interested in; YouTube Analytics can help you find out which topics are trending. You can also get the details of interesting topics, enabling you to create relevant content for your target audience.
5) Not Responding to Your Audience
Engaging with your audience will create trust. If you do not respond to your viewers, they might stop watching your videos. And your future videos could end up with zero views.
How to Fix It
Be active on your channel, community, and other social media channels. Reply in the comment section, and this will make sure the videos you upload next will get views.
6) Your Videos Are Not Optimized
You can’t just upload your videos and expect millions of views without doing anything. If you look at a random YouTube video with 0 views, you’ll likely find it is not optimized. YouTube optimization can help to take your videos an extra step further.
How to Fix It
If you want your videos to get views, you have to do optimization with the factors below:
- Channel Design
- SEO
- Search Volume
- Keywords
- Target Niche and Viewers
- Custom Thumbnails
The most successful YouTubers constantly implement the above YouTube optimization methods. Input relevant keywords and titles for your videos. Using online tools to optimize your videos and channel with the latest techniques will help you earn YouTube views. YouTube optimization tools can find the best keywords to use on your videos.
7) You Didn’t Use the Right Tags
Always follow YouTube SEO optimization methods and never leave the tag section blank. When you use tags, make sure you choose the right ones. YouTube works just like Google: Viewers enter a keyword for the YouTube video they are searching for, and it lists down the videos that best match the keyword. The more relevant YouTube thinks your videos are, the higher they will be positioned in the rank. Videos in the top pages of YouTube’s search engine earn the most views, and YouTube videos with 0 views will often appear at the lowest portion.
How to Fix It
Insert the specific keyword tags first when creating video tags. YouTube’s search engine prioritizes the first tag. You can use any YouTube optimization tool to make tags. After that, you can now enter the other video tags types, including generic tags and compound tags.
8) Your YouTube Videos Don’t Provide Any Value to Your Audience
Value is an essential part of being a content creator; it’s also a vital aspect of recognizing what you are bringing to the table in the viewer to YouTube relationship. Viewers will come to your channel if they have a reason to watch the videos you upload, whether for information or entertainment purposes. Before you upload a video, take a step back and ask yourself will people love it.
How to Fix It
Make sure you create value-rich content that your audience will find useful. Have a clear goal before you start making a video. There are always people who lack the knowledge you have, and they would love to learn it from you.
Think about what your audience is looking for when they come to YouTube and provide them with what they need. Do not forget to look for trending topics, searchable topics within your niche, and related topics. Your videos should answer all the questions your viewers have. They should also provide an exhilarating experience.
9) You Are Not Sharing Your Videos on Your Social Channels
Social media platforms are a powerful tool that helps YouTubers get more visitors to their channel. In turn, your video will get views. If you do not share your videos on your social media platform, none of your friends and followers will know about it, and you can end up having 0 views YouTube.
How to Fix It
You can get YouTube views from social media platforms like SubReddits, Facebook, Instagram, Quora, and more. Be sure to follow the terms and conditions of these platforms. You can also self-promote your videos on these platforms to get views. However, you should avoid spamming your YouTube videos in a community for the forum you belong to.
10) You Are Not Patient
Most YouTubers fail because they are not patient enough to run their channel. They upload a video and want it to get views immediately. If you’re serious about making videos on YouTube, you need patience and determination. If you continue uploading videos consistently, they will get views.
How to Fix It
Once you post your videos, give them some time to see if people will view them. Allow your videos to settle in the YouTube algorithm and search engine, and you’ll see the magic soon.
Conclusion
● These are the main reasons your videos have 0 views YouTube and their solutions. Remember the quality of your videos can affect your YouTube view count. Use Filmora to create HD videos that will attract more viewers.
Also read:
- YouTube Studio Mastery A Comprehensive Video Editing Guide
- In 2024, Amass 1,000 Supporters for Your Channel
- Enhancing Visual Appeal YouTube Images in Presentations for 2024
- [New] Bite-Sized Script Producer
- In 2024, Automate Playlist Retrieval From YouTube Directly
- [New] 15 YouTube Starter Templates A Guide to Popularity
- 2024 Approved Best Mac Slicer Software Enhance Video Production Prowess
- Recording with Precision Perfecting iOS Device Features on YouTube
- [Updated] Beginning the Video Odyssey How to Create an Engaging YouTube Channel
- How to Address and Overcome a YouTube Content ID Issue
- [New] Elite Yoga Routines YouTube's Leading Fitness Sites
- Mastering YT Thumbnail Design for Enhanced Views
- Ultimate Ratio Breakdown for YouTube Content Formats
- Unlock iPhone/iPad Potential Upload to YouTube with Ease
- How to Write a Script for a YouTube Video
- 2024 Approved Bringing Heartwarmth to the Winter 5 Snug Cinematographic Tips
- Spark Interest - Everyone's Free With Our YouTube Banner Samples
- [Updated] End Scenes Unlocked Tutorials to Enhance Viewing Experience
- Elevate Your Team with Expert Talent Selections
- Spoofing Success The Path to Parody Proficiency
- Ultimate Selection of Free YouTube Introduction Makers
- 2024 Approved Evaluate Subforsub’s Impact on Safe YouTube Subscriber Increase
- Financial Forecasts in Focus Select Stock YouTube Channels
- [New] Elevating Income with Mobile Video Monetization Techniques for YouTubers
- In 2024, Beauty Bliss Essential Tutorials for Ultimate Style
- In 2024, Chart-Topping Tunes Compiling an Impressive YouTube Playlist
- In 2024, A Step-by-Step Approach to Crafting Your Video' Market Standouts
- [Updated] Best Composers for the Ultimate Video-Photographic Symphony
- In 2024, Audiovisual Quality Its Significance in Video Ranking
- [Updated] Discover 9 Affordable Online Editors for YouTube
- The Ultimate Source of High-Quality Video Downloaders
- Your Stocks, Your Screen Ideal YouTube Groups
- In 2024, Compre Written Guide on Incorporating Markup Features in YouTube
- Dominating the Digital Space 5 Tips for Video Visibility Victory
- Masterclass Crafting Cinematic YouTube Videos with Adobe Premiere
- In 2024, How to Change OnePlus Ace 2V Location on Skout | Dr.fone
- Proven Methods to Grow Your Followers The Power of TikTok Hashtags
- New 2024 Approved Alternatives and Step by Step Guide for Apowersoft Audio Recorder
- Updated In 2024, Elite CD and MP3 Labeling Suite for PCs and Macs – Best Selection
- New The Art of Converting YouTube Videos to MP3 Choosing the Right Converter for 2024
- Tecno Pop 8 ADB Format Tool for PC vs. Other Unlocking Tools Which One is the Best?
- Updated Free Video Invitation Design Tools The Ultimate 2024 List
- How To Fix Unresponsive Touch Screen on Samsung Galaxy A15 5G | Dr.fone
- How to Change GPS Location on Vivo V27 Easily & Safely | Dr.fone
- In 2024, 3 Effective Ways to Bypass Activation Lock on iPhone 7 Plus
- Fix Unfortunately Settings Has Stopped on Realme C53 Quickly | Dr.fone
- Top 10 Fixes for Phone Keep Disconnecting from Wi-Fi On Tecno Spark 20 Pro+ | Dr.fone
- In 2024, Tune Tracker Prodigies The Finest Song Identification Apps Enhancing Your Android Musical Experience
- Updated In 2024, Ultimate Stop Motion Animation Guide Software Options and Tutorials
- Updated In 2024, A Detailed Breakdown Cambridge Audios CXU System Review
- 2024 Approved Free Online Video Smoothers Our Top Picks
- [New] Laughing Fingers The Hottest TikTok Game Sensations
- [New] In 2024, Top TikTok Metrics Optimizing Account Performance Tools
- How to recover deleted pictures from Redmi Note 12R.
- In 2024, 5 Techniques to Transfer Data from Realme 11 5G to iPhone 15/14/13/12 | Dr.fone
- Planning to Use a Pokemon Go Joystick on Oppo Reno 9A? | Dr.fone
- New 2024 Approved What Is the Best Free Video Trimmer for Windows 10? Here Is a List of the Best Video Trimmers for Windows 10 Computers
- Exclusive List The Most Reliable 10 Vimeo Downloader Apps
- [New] Excellent iOS Options for Emulating Top-Notch PSP Games for 2024
- Updated The Best in Show A Comprehensive Review of the 10 Most Effective Podcast to Text Apps for 2024
- [New] Revolutionize Your Mobile Viewing Experience for 2024
- iPhone Is Disabled? Here Is The Way To Unlock Disabled iPhone 6s Plus | Dr.fone
- How Do I SIM Unlock My iPhone 6s Plus?
- Title: "[New] Crafting Eye-Catching Video Summaries 3 Neon Border Methods"
- Author: Kevin
- Created at : 2024-05-25 15:58:58
- Updated at : 2024-05-26 15:58:58
- Link: https://youtube-videos.techidaily.com/new-crafting-eye-catching-video-summaries-3-neon-border-methods/
- License: This work is licensed under CC BY-NC-SA 4.0.
