
!["[New] Charting Your Course Building Plays on YouTube"](https://www.lifewire.com/thmb/k5I9Kx2EHd53X_H0bXc4e-ReKzc=/400x300/filters:no_upscale():max_bytes(150000):strip_icc()/what-is-clean-technology-5115131-cf950079eb644a1db42b1cae93c61c66.jpg)
"[New] Charting Your Course Building Plays on YouTube"
Charting Your Course: Building Plays on YouTube
How to Create a Playlist on YouTube

Richard Bennett
Mar 27, 2024• Proven solutions
Want to watch the missed-out episodes of your favorite serial? As well know it irritates to find out every single episode on order? But why to worry when YouTube has a separate playlist on your famous tv-series. Want to watch new trending music of 2020? YouTube has a playlist for it. Missing comedy videos from the favorite show on TV? YouTube has a playlist on it. Need to know different ideas about marketing on improving your brand? Yes, you got my point. There is a playlist on YouTube for that as well.

Although it isn’t the latest one on the Internet, it is still the unbeatable application that brings everything in a single screen from trending tunes, entertaining videos, industry backgrounds, and the latest news to your notice that happens every second. Especially if you are an individual with a marketing background or a brand developer, YouTube playlists can do a lot from its side? Need to know what are its benefits and how to create a playlist on YouTube? You are in the right spot.
- Part 1: What is a YouTube Playlist?
- Part 2: YouTube Channel vs. YouTube Playlist
- Part 3: Benefits of Creating a playlist on YouTube
- Part 4: How to Make a YouTube Playlist?
- Part 5: Tips to Improve Your Video SEO
What is a YouTube Playlist?
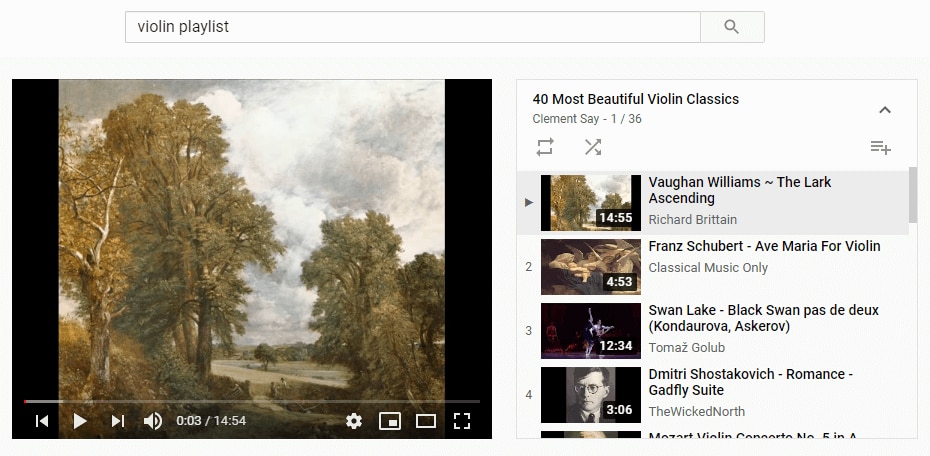
Irritated from surfing over the Internet for videos related to your concept or topic you are searching for? Else are you a party-hard person who needs continuously playing of fantastic music to keeping the fun going? YouTube playlists are the better option: a collection of videos that keep playing in order, sequentially, and play one after another automatically unless you change it manually.
It is closely related to the music playlists like the ones we find in Spotify and Apple music. Different playlists on YouTube are available in all genres, like entertainment, fun, relaxation, thrilling, and educational niches. Do you have a monotonous routine at the office? Let’s play something crazy and fun-filled like the comedy series or bloopers? Need some workout ideas? Check out the compilation of different custom fitness workouts as a playlist on YouTube. Whatever you want, you can find everything in YouTube playlists.
It is a fantastic app that can do wonders that one could think. Besides being used for the fun-filled purposes, they are content curation tools that can be used by marketers as a platform to attract customers and engage with them with various product videos under a single roof called playlists.
If you are a tricky person who has a changing mindset and different mood-offs, you can create your playlists that combine all your favorite videos from varied niches.
Difference between a Channel and a Playlist on YouTube
There are times where one gets confused with the YouTube channels and playlists. While some say they are similar, the fact is both are different. A person with a specific name creates a channel, and it is the place where the person posts all the videos or uploads them for his/her subscribers to get likes and more audience.
But YouTube playlists are auto-generated contents that consist of videos from different channels but with the same content concept. For example, a PewDiePie channel will have his uploaded videos. Still, PewDiePie playlists will have all his videos and the ones similar to his stream but off the channel. Likewise, self-created playlists will have videos that you have saved to see them later or often.
What are the benefits of a playlist on YouTube?
There are various YouTube and video creators who have undervalued playlists’ importance, and hence the hidden benefits are often off-screen. So, we have listed the top 5 reasons why YouTube playlists are essential and how a YouTuber can benefit from playlists.
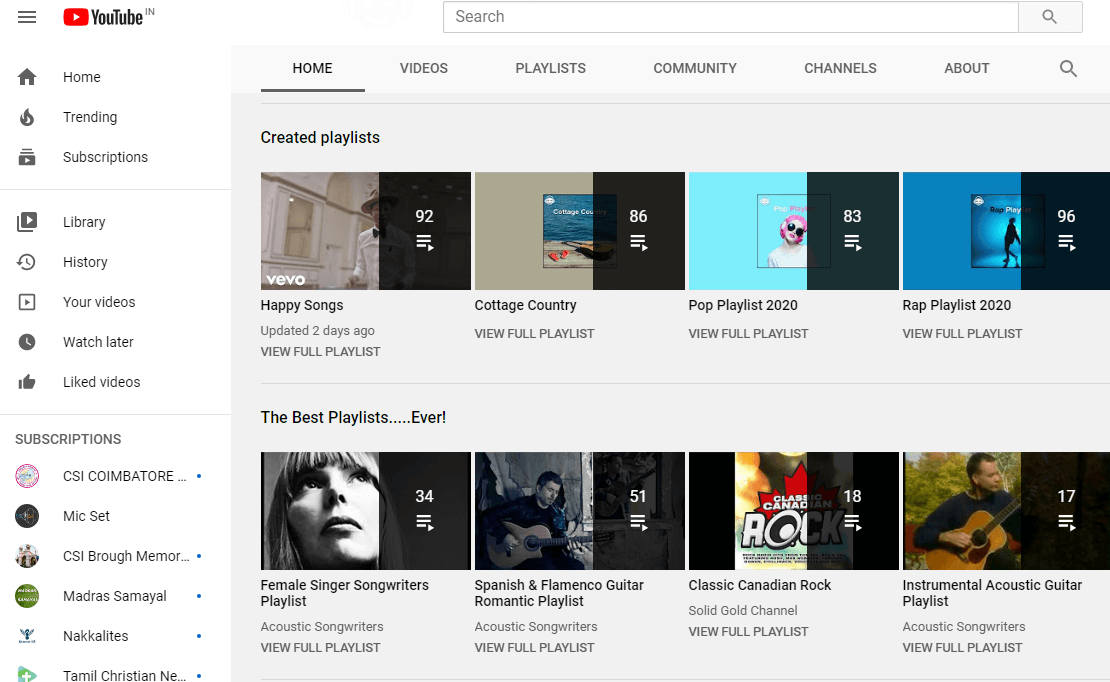
1. YouTube playlists help you organize videos in order
YouTube these days appears scattered with numerous information where some are important at the critical instances of time. You also have some playlists that are the effective ones grouped based on a common theme. Suppose your company focuses on selling musical equipment. In that case, you can make separate playlists for a guitar or pianos so that viewers can come across different equipment styles, available variants allowing them to navigate through various parts in your channel. Alongside this, you can tell your viewers what the YouTube channel or the organization is all about at first glance as the first impression is the best expression!
2. Increase the rank of your video
If your video gets added to a playlist, there are high chances for it to be in the YouTube watchlist even it is less popular but related to the ones that the audience prefers. In turn, this act raises your video’s rank as the “total watch time” is a vital factor that drives your video to the highly ranked video list.
3. Playlists account to discoverability and improve visibility on search engines
Apart from being enlisted as single videos, individual videos indexed in playlists get opportunities to appear on the search engines based on the keywords. Playlists are bread slices packed with jam as keywords providing likelihood to emerge on multiple times. But to catch the gain of this method, one has to enrich the video with an outstanding keyword, titles, or description and optimize the video with remarkable SEO techniques.
4. Get more views
When your video comes under a theme and is categorized, the YouTube algorithm places it over with the other related to each other. The next time, your video will appear on the right sidebar below the “related videos.” As the video plays automatically, one after the other, the number of views increases. “Amazing playlists can make viewers watch it longer!”
5. Playlists are best for video SEO
Such playlists can boost and help one to reach your YouTube channel. Especially when it comes to educators or artists, they provide value and save time. Playlists get ranked for keywords that help your audience in reaching you on YouTube.
How to Make a YouTube Playlist?
Surprised to know that a simple playlist has handy benefits that you weren’t aware of still now? Are you excited and eager to create your playlists on YouTube? Here is a step-by-step guide that will guide you on how to make a playlist on YouTube.
1. Open your channel page on YouTube
To start with, open your YouTube channel page and tap the “Customize Channel” button.
2. Create your YouTube playlist
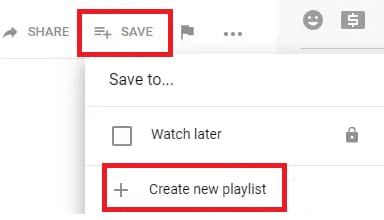
Now, find or select the video you wish to add to the playlist. To save it, click on the “Plus” icon. You can click on “Watch later” that will add the video to your already created playlist from the drop-down.
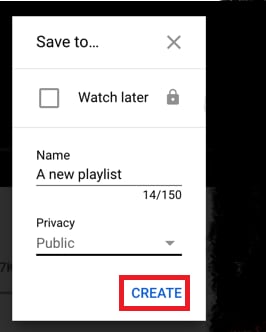
3. Give the playlist a name
Name your new YouTube playlist and make sure it fulfills the criteria of a maximum of 150 characters. Specify the privacy level and make it to the public so that anyone can view it. Once satisfied, tap the “Create” option.
4. Your YouTube playlist is now live
You have successfully made the playlist and added the video to find by clicking on the “Library” option.
Tips to Improve Your Video SEO
As said before, to improve your video playlist and bring it to rank, optimizing your playlists with SEO is mandatory.
1. Make use of appealing titles and depiction
While many viewers don’t prefer reading through the entire description, the title and the Metadata are the major factors that attract viewers at first glance. Hence, pay attention and spend time to build and craft an appealing title. Give importance to the thumbnail image and ensure that it is engaging.
2. Concentrate on keywords
Surf through the various playlists and find keywords used in popular videos related to your niche. Remember, keywords can be included in your titles and increase the chances of increasing the ranking of the video.
3. Prefer the optimal video hosting platform
Set a goal and choose a wise video hosting platform to gain traffic and generate new leads. Before deciding with the right one, consider making trails or find a review from the Internet.
Conclusion
So, now you know every nook and corner on the answers to how to make YouTube playlists and create them through a simple guide yourself. Besides using it for product marketing or brand deliverance, you can use it to make your YouTube channel a popular one. Yes, do you have a collection of videos to showcase the world? Upload them on YouTube as a playlist and optimize it with SEO tips discussed today. Maybe it is an ASMR video or a vlogging one. It can help in reaching your YouTube target audience for sure!
Richard Bennett
Richard Bennett is a writer and a lover of all things video.
Follow @Richard Bennett
Richard Bennett
Mar 27, 2024• Proven solutions
Want to watch the missed-out episodes of your favorite serial? As well know it irritates to find out every single episode on order? But why to worry when YouTube has a separate playlist on your famous tv-series. Want to watch new trending music of 2020? YouTube has a playlist for it. Missing comedy videos from the favorite show on TV? YouTube has a playlist on it. Need to know different ideas about marketing on improving your brand? Yes, you got my point. There is a playlist on YouTube for that as well.
Although it isn’t the latest one on the Internet, it is still the unbeatable application that brings everything in a single screen from trending tunes, entertaining videos, industry backgrounds, and the latest news to your notice that happens every second. Especially if you are an individual with a marketing background or a brand developer, YouTube playlists can do a lot from its side? Need to know what are its benefits and how to create a playlist on YouTube? You are in the right spot.
- Part 1: What is a YouTube Playlist?
- Part 2: YouTube Channel vs. YouTube Playlist
- Part 3: Benefits of Creating a playlist on YouTube
- Part 4: How to Make a YouTube Playlist?
- Part 5: Tips to Improve Your Video SEO
What is a YouTube Playlist?
Irritated from surfing over the Internet for videos related to your concept or topic you are searching for? Else are you a party-hard person who needs continuously playing of fantastic music to keeping the fun going? YouTube playlists are the better option: a collection of videos that keep playing in order, sequentially, and play one after another automatically unless you change it manually.
It is closely related to the music playlists like the ones we find in Spotify and Apple music. Different playlists on YouTube are available in all genres, like entertainment, fun, relaxation, thrilling, and educational niches. Do you have a monotonous routine at the office? Let’s play something crazy and fun-filled like the comedy series or bloopers? Need some workout ideas? Check out the compilation of different custom fitness workouts as a playlist on YouTube. Whatever you want, you can find everything in YouTube playlists.
It is a fantastic app that can do wonders that one could think. Besides being used for the fun-filled purposes, they are content curation tools that can be used by marketers as a platform to attract customers and engage with them with various product videos under a single roof called playlists.
If you are a tricky person who has a changing mindset and different mood-offs, you can create your playlists that combine all your favorite videos from varied niches.
Difference between a Channel and a Playlist on YouTube
There are times where one gets confused with the YouTube channels and playlists. While some say they are similar, the fact is both are different. A person with a specific name creates a channel, and it is the place where the person posts all the videos or uploads them for his/her subscribers to get likes and more audience.
But YouTube playlists are auto-generated contents that consist of videos from different channels but with the same content concept. For example, a PewDiePie channel will have his uploaded videos. Still, PewDiePie playlists will have all his videos and the ones similar to his stream but off the channel. Likewise, self-created playlists will have videos that you have saved to see them later or often.
What are the benefits of a playlist on YouTube?
There are various YouTube and video creators who have undervalued playlists’ importance, and hence the hidden benefits are often off-screen. So, we have listed the top 5 reasons why YouTube playlists are essential and how a YouTuber can benefit from playlists.
1. YouTube playlists help you organize videos in order
YouTube these days appears scattered with numerous information where some are important at the critical instances of time. You also have some playlists that are the effective ones grouped based on a common theme. Suppose your company focuses on selling musical equipment. In that case, you can make separate playlists for a guitar or pianos so that viewers can come across different equipment styles, available variants allowing them to navigate through various parts in your channel. Alongside this, you can tell your viewers what the YouTube channel or the organization is all about at first glance as the first impression is the best expression!
2. Increase the rank of your video
If your video gets added to a playlist, there are high chances for it to be in the YouTube watchlist even it is less popular but related to the ones that the audience prefers. In turn, this act raises your video’s rank as the “total watch time” is a vital factor that drives your video to the highly ranked video list.
3. Playlists account to discoverability and improve visibility on search engines
Apart from being enlisted as single videos, individual videos indexed in playlists get opportunities to appear on the search engines based on the keywords. Playlists are bread slices packed with jam as keywords providing likelihood to emerge on multiple times. But to catch the gain of this method, one has to enrich the video with an outstanding keyword, titles, or description and optimize the video with remarkable SEO techniques.
4. Get more views
When your video comes under a theme and is categorized, the YouTube algorithm places it over with the other related to each other. The next time, your video will appear on the right sidebar below the “related videos.” As the video plays automatically, one after the other, the number of views increases. “Amazing playlists can make viewers watch it longer!”
5. Playlists are best for video SEO
Such playlists can boost and help one to reach your YouTube channel. Especially when it comes to educators or artists, they provide value and save time. Playlists get ranked for keywords that help your audience in reaching you on YouTube.
How to Make a YouTube Playlist?
Surprised to know that a simple playlist has handy benefits that you weren’t aware of still now? Are you excited and eager to create your playlists on YouTube? Here is a step-by-step guide that will guide you on how to make a playlist on YouTube.
1. Open your channel page on YouTube
To start with, open your YouTube channel page and tap the “Customize Channel” button.
2. Create your YouTube playlist
Now, find or select the video you wish to add to the playlist. To save it, click on the “Plus” icon. You can click on “Watch later” that will add the video to your already created playlist from the drop-down.
3. Give the playlist a name
Name your new YouTube playlist and make sure it fulfills the criteria of a maximum of 150 characters. Specify the privacy level and make it to the public so that anyone can view it. Once satisfied, tap the “Create” option.
4. Your YouTube playlist is now live
You have successfully made the playlist and added the video to find by clicking on the “Library” option.
Tips to Improve Your Video SEO
As said before, to improve your video playlist and bring it to rank, optimizing your playlists with SEO is mandatory.
1. Make use of appealing titles and depiction
While many viewers don’t prefer reading through the entire description, the title and the Metadata are the major factors that attract viewers at first glance. Hence, pay attention and spend time to build and craft an appealing title. Give importance to the thumbnail image and ensure that it is engaging.
2. Concentrate on keywords
Surf through the various playlists and find keywords used in popular videos related to your niche. Remember, keywords can be included in your titles and increase the chances of increasing the ranking of the video.
3. Prefer the optimal video hosting platform
Set a goal and choose a wise video hosting platform to gain traffic and generate new leads. Before deciding with the right one, consider making trails or find a review from the Internet.
Conclusion
So, now you know every nook and corner on the answers to how to make YouTube playlists and create them through a simple guide yourself. Besides using it for product marketing or brand deliverance, you can use it to make your YouTube channel a popular one. Yes, do you have a collection of videos to showcase the world? Upload them on YouTube as a playlist and optimize it with SEO tips discussed today. Maybe it is an ASMR video or a vlogging one. It can help in reaching your YouTube target audience for sure!
Richard Bennett
Richard Bennett is a writer and a lover of all things video.
Follow @Richard Bennett
Audiovisual Attraction: 3 Approaches to Neon-Bordered YouTubes
Your YouTube video, or any other clip published on any forum, gets a larger number of hits if it has an attractive thumbnail. And, the fact is, a thumbnail becomes 10x more attractive when the main character that the image has have a neon border around it.
With that said, in the following sections, you will learn a couple of methods on how to add a YouTube thumbnail border around the main characters and/or objects that are significant to the clip.
In this article
01 Add Glowing Neon Border to YouTube Thumbnail with Filmora
02 Add a Glowing Neon Border in YouTube Thumbnail with Canva
03 Outline a Person in a YouTube Thumbnail with Photoshop
Part 1: How to Add Neon Border to YouTube Thumbnail for Free with Filmora
Being one of the most versatile and intuitive post-production tools available in the market today, Wondershare Filmora X allows you to add a neon border to a YouTube thumbnail quite conveniently. You can learn how to get this done on Windows or Mac by following the steps given below.
For Win 7 or later (64-bit)
For macOS 10.12 or later
Step 1: Define Project Settings and Add Image to the Timeline
Launch Wondershare Filmora X on your PC (a MacBook Pro M1 is used here), ensure that the project aspect ratio is set to 16:9 (Widescreen) on the splash screen, and click New Project. On the main interface, click the Preview quality and display settings icon from the upper-right area of the Timeline, click Change Project Aspect Ratio, click to select 1280 x 720 (HD) from the Resolution menu of the Project Settings box, and click OK to save the custom project settings.

Then select My Media from the menu bar if not already selected, click Project Media from the navigation pane, and click Import from the Media box to select and import the image of the main character or object that you want to use in the thumbnail.

Now, drag the image from the Media box to the Timeline at the bottom.

Step 2: Clear Image Background, Add Border, and Add Custom Background
Go to Effects from the menu bar, click to select the Default tab and then AI Portrait from the navigation pane, and click and drag the Human Segmentation preset from the right box, and place it over the image track in the Timeline.

Double-click the image layer, scroll down the upper-left box to the Video Effects section, and use the Edge Thickness and Edge Feather sliders to adjust the character’s edges to make them as realistic as possible. Click OK when done.

Next, click and drag the Human Border preset over the image track in the Timeline, and follow the same procedure to customize the border. This will give the character a neon border effect.

Now, use the method explained earlier to import a custom image for the background, and drag and place it under the previous track in the Timeline.

If you are running the latest version of Filmora, you will find there are some neon light effects available under AI Portrait as well.

Step 3: Add Titles to Thumbnail
Go to Titles from the menu bar, click to select the Default tab and then Lower 3rds from the navigation pane, and click and drag your preferred lower-third preset from the right window to a separate layer in the Timeline. Double-click the lower-third layer, and use the available options in the upper-left window to change the text, its color, etc., and drag the textbox to place it to your preferred position on the image as well. Click OK to save the changes.
Next, click to select Titles from the navigation pane, and drag your preferred title from the right window to the upper-most track in the Timeline. Now use the method explained earlier to edit the text, its color, position, etc. to make it look professional.

For more tips and tricks for creating YouTube thumbnail, you can check this You Tube thumbnail creating guide.
Step 4: Get the Neon Border Thumbnail
Click the Snapshot (Camera) icon from the upper-right area of the Timeline, go to My Media from the menu bar, right-click the thumbnail of the screenshot you captured, and click Reveal in Finder (on Mac) or Reveal in Explorer (on Windows) to get to the folder the YouTube thumbnail border is saved in.

Part 2: How to Add a Glowing Neon Border in Your YouTube Thumbnail with Canva
Canva is another intuitive editing program that works on the web interface rather than having you download and install an app on your PC. You can add a neon border for YouTube thumbnails using Canva by following the instructions given below:
Step 1: Define Project Settings and Add a Background
After signing in to your Canva account, click Create a design from the top-right corner of the page, click Custom size from the bottom, define 1280 and 720 in the Width and Height fields on the box that appears respectively, and click Create new design.

Now, click to select Background from the navigation bar on the left (if the Background tool is not visible, click More and then choose Background from the expanded list), and click to select a background from the images available in the center pane.

Step 2: Upload an Image and Add Effects
Click Uploads from the navigation bar, click the More icon from the right of the Upload media button present at the top of the center pane, choose your preferred method to upload the image (with the transparent background) that you want to use, upload the image, and drag it from the center pane to the Canvas.
Note: You can use any of the tools available online to remove the background from your image for free.

To add a YouTube thumbnail border, make sure that the image that you added to the Canvas is selected, click the Duplicate icon from the upper-right area, and use the scaling handles of the copy of the image to increase its size a bit. Reposition the image back to its original location as well.
Then, click Edit image from the upper-left corner of the Canvas, click Duotone from the Edit image pane at the center, if need be, click See all, choose your preferred duotone effect to apply on the image, choose your preferred highlight and shadow colors from the box that appears next, and click Back from the top of the pane.

Next, click See all next to the Adjust section from the center pane, and drag the Blur slider to the right to increase the blur effect on the image.

Step 3: Position the Layers
While keeping the duplicate image selected, click the Position button from the upper-right area of the Canvas, and click Background to send the second image behind the first one to get the neon border effect for the photo.

Part 3: How to Outline a Person in a YouTube Thumbnail with Photoshop
Because YouTube thumbnails are nothing but static images, creating YouTube thumbnail border with Adobe Photoshop is comparatively easier. The process of doing this is given below:
Step 1: Define Document Preferences and Import an Image
Launch Adobe Photoshop on your PC, click Create new, and on the New Document customization box, define the width and height values to 1280 and 720 pixels respectively. Select Transparent from the Background Contents menu as well if not already selected. Click Create from the bottom to create a new Photoshop document with the specified document settings. Next, open the folder that contains the source image, drag the photo to Photoshop, and press Enter to place the photo.

Step 2: Remove Background from the Image
Make sure that the image layer is selected in the Layers panel on the right, go to Select from the menu bar at the top, and click Subject. From the bottom of the Layers panel, click the Add a mask icon to get rid of the background, leaving only the human on the Canvas.

Step 3: Add a Custom Background and an Outline Around the Subject
Use the method explained earlier to import a background image of your choice to Photoshop. Drag the background image layer to the bottom in the Layers panel. Double-click the masked layer, click to select Stroke from the left pane of the Layer Style box, and use the options available on the right to manage the size, color, position, etc. of the stroke that has been added around the human subject. Click OK when done, and then export the image normally to use it as a YouTube thumbnail border.

Summary
It is important to know that the default resolution of a YouTube thumbnail is 1280 x 720 pixels that is usually written and referred to as 720p. While adding a YouTube thumbnail border, it is also imperative to have a good sense of color combination and fonts. Furthermore, a decent tool like Wondershare Filmora X must be used to add an appealing neon border around the main subject in the thumbnail image easily and quickly.
02 Add a Glowing Neon Border in YouTube Thumbnail with Canva
03 Outline a Person in a YouTube Thumbnail with Photoshop
Part 1: How to Add Neon Border to YouTube Thumbnail for Free with Filmora
Being one of the most versatile and intuitive post-production tools available in the market today, Wondershare Filmora X allows you to add a neon border to a YouTube thumbnail quite conveniently. You can learn how to get this done on Windows or Mac by following the steps given below.
For Win 7 or later (64-bit)
For macOS 10.12 or later
Step 1: Define Project Settings and Add Image to the Timeline
Launch Wondershare Filmora X on your PC (a MacBook Pro M1 is used here), ensure that the project aspect ratio is set to 16:9 (Widescreen) on the splash screen, and click New Project. On the main interface, click the Preview quality and display settings icon from the upper-right area of the Timeline, click Change Project Aspect Ratio, click to select 1280 x 720 (HD) from the Resolution menu of the Project Settings box, and click OK to save the custom project settings.
Then select My Media from the menu bar if not already selected, click Project Media from the navigation pane, and click Import from the Media box to select and import the image of the main character or object that you want to use in the thumbnail.
Now, drag the image from the Media box to the Timeline at the bottom.
Step 2: Clear Image Background, Add Border, and Add Custom Background
Go to Effects from the menu bar, click to select the Default tab and then AI Portrait from the navigation pane, and click and drag the Human Segmentation preset from the right box, and place it over the image track in the Timeline.
Double-click the image layer, scroll down the upper-left box to the Video Effects section, and use the Edge Thickness and Edge Feather sliders to adjust the character’s edges to make them as realistic as possible. Click OK when done.
Next, click and drag the Human Border preset over the image track in the Timeline, and follow the same procedure to customize the border. This will give the character a neon border effect.
Now, use the method explained earlier to import a custom image for the background, and drag and place it under the previous track in the Timeline.
If you are running the latest version of Filmora, you will find there are some neon light effects available under AI Portrait as well.
Step 3: Add Titles to Thumbnail
Go to Titles from the menu bar, click to select the Default tab and then Lower 3rds from the navigation pane, and click and drag your preferred lower-third preset from the right window to a separate layer in the Timeline. Double-click the lower-third layer, and use the available options in the upper-left window to change the text, its color, etc., and drag the textbox to place it to your preferred position on the image as well. Click OK to save the changes.
Next, click to select Titles from the navigation pane, and drag your preferred title from the right window to the upper-most track in the Timeline. Now use the method explained earlier to edit the text, its color, position, etc. to make it look professional.
For more tips and tricks for creating YouTube thumbnail, you can check this You Tube thumbnail creating guide.
Step 4: Get the Neon Border Thumbnail
Click the Snapshot (Camera) icon from the upper-right area of the Timeline, go to My Media from the menu bar, right-click the thumbnail of the screenshot you captured, and click Reveal in Finder (on Mac) or Reveal in Explorer (on Windows) to get to the folder the YouTube thumbnail border is saved in.
Part 2: How to Add a Glowing Neon Border in Your YouTube Thumbnail with Canva
Canva is another intuitive editing program that works on the web interface rather than having you download and install an app on your PC. You can add a neon border for YouTube thumbnails using Canva by following the instructions given below:
Step 1: Define Project Settings and Add a Background
After signing in to your Canva account, click Create a design from the top-right corner of the page, click Custom size from the bottom, define 1280 and 720 in the Width and Height fields on the box that appears respectively, and click Create new design.
Now, click to select Background from the navigation bar on the left (if the Background tool is not visible, click More and then choose Background from the expanded list), and click to select a background from the images available in the center pane.
Step 2: Upload an Image and Add Effects
Click Uploads from the navigation bar, click the More icon from the right of the Upload media button present at the top of the center pane, choose your preferred method to upload the image (with the transparent background) that you want to use, upload the image, and drag it from the center pane to the Canvas.
Note: You can use any of the tools available online to remove the background from your image for free.
To add a YouTube thumbnail border, make sure that the image that you added to the Canvas is selected, click the Duplicate icon from the upper-right area, and use the scaling handles of the copy of the image to increase its size a bit. Reposition the image back to its original location as well.
Then, click Edit image from the upper-left corner of the Canvas, click Duotone from the Edit image pane at the center, if need be, click See all, choose your preferred duotone effect to apply on the image, choose your preferred highlight and shadow colors from the box that appears next, and click Back from the top of the pane.
Next, click See all next to the Adjust section from the center pane, and drag the Blur slider to the right to increase the blur effect on the image.
Step 3: Position the Layers
While keeping the duplicate image selected, click the Position button from the upper-right area of the Canvas, and click Background to send the second image behind the first one to get the neon border effect for the photo.
Part 3: How to Outline a Person in a YouTube Thumbnail with Photoshop
Because YouTube thumbnails are nothing but static images, creating YouTube thumbnail border with Adobe Photoshop is comparatively easier. The process of doing this is given below:
Step 1: Define Document Preferences and Import an Image
Launch Adobe Photoshop on your PC, click Create new, and on the New Document customization box, define the width and height values to 1280 and 720 pixels respectively. Select Transparent from the Background Contents menu as well if not already selected. Click Create from the bottom to create a new Photoshop document with the specified document settings. Next, open the folder that contains the source image, drag the photo to Photoshop, and press Enter to place the photo.
Step 2: Remove Background from the Image
Make sure that the image layer is selected in the Layers panel on the right, go to Select from the menu bar at the top, and click Subject. From the bottom of the Layers panel, click the Add a mask icon to get rid of the background, leaving only the human on the Canvas.
Step 3: Add a Custom Background and an Outline Around the Subject
Use the method explained earlier to import a background image of your choice to Photoshop. Drag the background image layer to the bottom in the Layers panel. Double-click the masked layer, click to select Stroke from the left pane of the Layer Style box, and use the options available on the right to manage the size, color, position, etc. of the stroke that has been added around the human subject. Click OK when done, and then export the image normally to use it as a YouTube thumbnail border.
Summary
It is important to know that the default resolution of a YouTube thumbnail is 1280 x 720 pixels that is usually written and referred to as 720p. While adding a YouTube thumbnail border, it is also imperative to have a good sense of color combination and fonts. Furthermore, a decent tool like Wondershare Filmora X must be used to add an appealing neon border around the main subject in the thumbnail image easily and quickly.
Also read:
- Crafting Captivating Edu-Vids on YouTube A Step-by-Step Guide
- Twice the Joy, Twice the Fun Televised Repetition Made Easy
- [New] End Scenes Unlocked Tutorials to Enhance Viewing Experience
- Essential YouTube Equipment For Starting Your Channel - What Do You Really Need, In 2024
- Fast-Paced Favorites Leading Background Music in YT Shorts
- [New] Dazzle Viewers Visuals on Thumbnails
- Navigating Channel Disabling PC & Phone Guide
- 2024 Approved Best 5 Headsets A YouTube Gamer's Guide
- Enhance Video Pace - YouTube via Desktops & Phones
- Discover 8 Trustworthy Online Content Promoters
- Spark Sponsorships A Guide to Easy Fundraising for Budget Channels
- Transform Your Video Appeal Incorporating Own Thumbnails
- Unlock YouTube Star Status Becoming a Self-Assured Vlogger
- Elevate Your Video with Smart End Screen Techniques
- [New] Avoid Buffering Switch AV1 Codec on YouTube
- [Updated] Curated List of Top 10 YouTube Video Cutting Apps
- No. 1 Ranked YouTube To Text Online Service
- 2024 Approved Deconstructing the Revenue Stream of TSeries in YouTube Economy
- Professional 3D Design Apps - Top 5 for Youtubers
- A Guide to Free You From YouTube's Extra Bar Width for 2024
- Bite-Sized Tips for Aspiring Video Editors for 2024
- 2024 Approved Connecting YouTube & TikTok Your Ultimate Step-by-Step Walkthrough
- Cultivating a Unique Vibe in Your Own Mukbang Content
- Craftsmanship in Marvellous Marvel Creation
- Financial Insights for Vids How Much Do YouTubers Earn Per Sponsorship?
- Guide on How To Change Your Apple ID Email Address On Apple iPhone 13
- New Silence the Chaos Innovative Noise Management with Premiere Pros Audio Effects
- Essential Tips for Vimeo Video Logging for 2024
- [New] 2024 Approved Quick Recap Essential Use of Discord Spoiler Labels
- Best FF Browser Add-Ons for FB Videos
- Effective Ways To Fix Checkra1n Error 31 On iPhone 7 Plus
- In 2024, How to use Snapchat Location Spoofer to Protect Your Privacy On Vivo V29 Pro? | Dr.fone
- The Most Reliable GoPro Cases - #1-10 Showdown
- Stay Ahead of the Game - Use Mematic
- [New] In 2024, Successful Patch OBS Full Screen Functionality
- In 2024, 3 Facts You Need to Know about Screen Mirroring Vivo Y27s | Dr.fone
- Updated What Is AI Marketing?
- [Updated] 2024 Approved Fine-Tuning Your OBS Live Feeds for Facebook Audience
- [Updated] Superior Free Tools for Online Streaming Recording for 2024
- [Updated] In 2024, Accurate Money Forecasting Apps for TikTok Users
- A Step-by-Step Guide on Using ADB and Fastboot to Remove FRP Lock from your Honor X7b
- Updated In 2024, Online Learning Module A Complete Overview
- Capture GIFs Flawlessly with Mac's Top Apps
- In 2024, Getting the Pokemon Go GPS Signal Not Found 11 Error in Tecno Phantom V Flip | Dr.fone
- [New] Unveiling the Art of Reshaping Your TikTok Avatar for 2024
- In 2024, How To Bypass iCloud By Checkra1n Even On Apple iPhone 6s Plus If Youve Tried Everything
- New The Art of Discretion Blurring Faces with Pro Video Editors for 2024
- Title: "[New] Charting Your Course Building Plays on YouTube"
- Author: Kevin
- Created at : 2024-05-25 15:56:48
- Updated at : 2024-05-26 15:56:48
- Link: https://youtube-videos.techidaily.com/new-charting-your-course-building-plays-on-youtube/
- License: This work is licensed under CC BY-NC-SA 4.0.
