![[New] Budget-Friendly Methods for YouTube Card Creation](https://thmb.techidaily.com/f5fc965758dead74b06c9dd7514fff9b2e384059ddee924706920d8dd594b0c4.jpg)
"[New] Budget-Friendly Methods for YouTube Card Creation"
Budget-Friendly Methods for YouTube Card Creation
How to Create YouTube Intros & End Cards - Free and Easy

Shanoon Cox
Oct 26, 2023• Proven solutions
Part1: Intros
Elements of an Intro
Intros should only last about five seconds, and that can be cut down to two or three if you have a larger following.
When your intro video is longer than five seconds viewers are more likely to click away. The first 15 seconds of a video is when viewers are most likely to decide to click on one of the recommended videos, or go back to their search results and choose something else. The odds of them leaving within these first 15 seconds are greater if you do not get right to the main point of your video. That is why long intro sequences are bad for your watch time.
Whether it is better to put your intro at the very beginning of your video, or after you introduce your topic, will depend on your viewers. You may want to try it both ways and then look at your retention report (found in your YouTube Creator Studio under Analytics) to see which works best for you.
Top Intro Sites
There are a few different sites where you can download animated intros, customized to include your username or logo. Here are two of the best:
FlixPress.com
This is probably the most popular intro site. There are a lot of great animated intros available for under $5, or even for free.
IntroMaker.net
This is another site with really professional looking intros for $5. They only have two free options, though.
Creating an Intro in Filmora
You can create a simple intro card in Filmora.


- Choose your background. You may want to use a short clip as your intro, or you may just want a colored background.
- Drag your clip or background into the video track of your timeline and trim it down to five seconds.
- If you have a logo, import it into Filmora and drag it into your picture-in-picture track.
- With your logo selected, click on the Green Screen icon. In the pop-up, select the background of your logo to make it transparent. For this to work your logo cannot be the same color as its background.
- Click on the editing icon with your logo selected and choose an animation.
- Go to the Text/Titles menu and choose an animated title that suits your channel. Drag it into your text track and edit it to include your name.
- The last piece of your intro is sound. You can choose a song from Filmora’s library and cut it down to five seconds, or import your sound effect.
- Export your video and save it for use in all of your other videos.
Part 2: End Cards
When your video ends, YouTube will recommend a selection of videos users may want to watch next. Often, these recommendations will not include more of your videos.
To keep viewers on your channel, you can create your End Card which recommends other content you have created.
Elements of an End Card
An end card includes clips from two or three of your videos, muted, and shrunk down to thumbnail-size. Using spotlight annotations you can make these thumbnails click-able.
It is also important that your end card includes multiple calls to action. A call to action is meant to spur a viewer to some kind of action. Writing ‘Check out this video’ above one of your thumbnails is a call to action.
You should also have a subscribe link somewhere in your end card, ideally a very noticeable button with a proven call to action like ‘Subscribe Now!’.
Some creators will leave their end cards at that and play music overtop, but it can be even more effective to include a voiceover where you ask viewers to subscribe and watch your other videos.
How To Make an End Card
- Choose a static background. You may want to download an end card template or create one in a drawing program. If you do, make sure to include calls to action like ‘Watch more!’ and ‘Subscribe’.
- Drag your background into your timeline at the end of your video.
- Import two or three of your previous videos and drag them into your picture in picture tracks. Each clip should be on its track.
- Trim the clips in your picture in picture track down to the same length as your end card.
- Shrink your clips down to thumbnail-size by dragging their corners in the preview window.
- Position your clips so they are spaced evenly by dragging them in the preview screen.
- Mute your clips.
- If your background does not include any calls to action, choose a title from the Text/Titles menu in Filmora and create at least two – one asking viewers to subscribe, and one asking them to watch your suggested videos.
- Export your video from Filmora and upload it to YouTube.
- Go to your Video Manager and select Annotations in the drop-down menu next to your video.
- Go to your end card in the previewer, as that is where you want to add your annotations.
- Click Add Annotation and add a spotlight annotation to your video. Stretch it over one of your thumbnails and then check the Link box under your Annotation’s timing. Insert a link to the video you are previewing.
- Repeat for any other thumbnails. For your subscribe button, change where it said ‘Video’ to ‘Subscribe’ and enter your channel URL.
- Click Apply Changes.
Shanoon Cox
Shanoon Cox is a writer and a lover of all things video.
Follow @Shanoon Cox
Shanoon Cox
Oct 26, 2023• Proven solutions
Part1: Intros
Elements of an Intro
Intros should only last about five seconds, and that can be cut down to two or three if you have a larger following.
When your intro video is longer than five seconds viewers are more likely to click away. The first 15 seconds of a video is when viewers are most likely to decide to click on one of the recommended videos, or go back to their search results and choose something else. The odds of them leaving within these first 15 seconds are greater if you do not get right to the main point of your video. That is why long intro sequences are bad for your watch time.
Whether it is better to put your intro at the very beginning of your video, or after you introduce your topic, will depend on your viewers. You may want to try it both ways and then look at your retention report (found in your YouTube Creator Studio under Analytics) to see which works best for you.
Top Intro Sites
There are a few different sites where you can download animated intros, customized to include your username or logo. Here are two of the best:
FlixPress.com
This is probably the most popular intro site. There are a lot of great animated intros available for under $5, or even for free.
IntroMaker.net
This is another site with really professional looking intros for $5. They only have two free options, though.
Creating an Intro in Filmora
You can create a simple intro card in Filmora.
- Choose your background. You may want to use a short clip as your intro, or you may just want a colored background.
- Drag your clip or background into the video track of your timeline and trim it down to five seconds.
- If you have a logo, import it into Filmora and drag it into your picture-in-picture track.
- With your logo selected, click on the Green Screen icon. In the pop-up, select the background of your logo to make it transparent. For this to work your logo cannot be the same color as its background.
- Click on the editing icon with your logo selected and choose an animation.
- Go to the Text/Titles menu and choose an animated title that suits your channel. Drag it into your text track and edit it to include your name.
- The last piece of your intro is sound. You can choose a song from Filmora’s library and cut it down to five seconds, or import your sound effect.
- Export your video and save it for use in all of your other videos.
Part 2: End Cards
When your video ends, YouTube will recommend a selection of videos users may want to watch next. Often, these recommendations will not include more of your videos.
To keep viewers on your channel, you can create your End Card which recommends other content you have created.
Elements of an End Card
An end card includes clips from two or three of your videos, muted, and shrunk down to thumbnail-size. Using spotlight annotations you can make these thumbnails click-able.
It is also important that your end card includes multiple calls to action. A call to action is meant to spur a viewer to some kind of action. Writing ‘Check out this video’ above one of your thumbnails is a call to action.
You should also have a subscribe link somewhere in your end card, ideally a very noticeable button with a proven call to action like ‘Subscribe Now!’.
Some creators will leave their end cards at that and play music overtop, but it can be even more effective to include a voiceover where you ask viewers to subscribe and watch your other videos.
How To Make an End Card
- Choose a static background. You may want to download an end card template or create one in a drawing program. If you do, make sure to include calls to action like ‘Watch more!’ and ‘Subscribe’.
- Drag your background into your timeline at the end of your video.
- Import two or three of your previous videos and drag them into your picture in picture tracks. Each clip should be on its track.
- Trim the clips in your picture in picture track down to the same length as your end card.
- Shrink your clips down to thumbnail-size by dragging their corners in the preview window.
- Position your clips so they are spaced evenly by dragging them in the preview screen.
- Mute your clips.
- If your background does not include any calls to action, choose a title from the Text/Titles menu in Filmora and create at least two – one asking viewers to subscribe, and one asking them to watch your suggested videos.
- Export your video from Filmora and upload it to YouTube.
- Go to your Video Manager and select Annotations in the drop-down menu next to your video.
- Go to your end card in the previewer, as that is where you want to add your annotations.
- Click Add Annotation and add a spotlight annotation to your video. Stretch it over one of your thumbnails and then check the Link box under your Annotation’s timing. Insert a link to the video you are previewing.
- Repeat for any other thumbnails. For your subscribe button, change where it said ‘Video’ to ‘Subscribe’ and enter your channel URL.
- Click Apply Changes.
Shanoon Cox
Shanoon Cox is a writer and a lover of all things video.
Follow @Shanoon Cox
Essential Mobile Media Creation Tools: IPhone vs Android Review
Best Camera Apps to Shoot and Record Videos on iPhone and Andriod Phones

Richard Bennett
Oct 26, 2023• Proven solutions
Smartphone cameras, especially the newest models, are capable of recording great videos. Depending on what kind of videos you make, you might not actually need a separate camera.
The majority of phone cameras record in full HD now, and some can even manage 4K. Where things get tricky is shooting in less than ideal conditions, i.e low light. You cannot make the same adjustments and customizations to your settings with a smartphone camera as you can with a DSLR.
You don’t have the same level of control.
But don’t worry – there are 5 camera apps that will allow you to record videos and get even more creative with how you use your phone’s camera.
- Part 1: Bonus Tip-Make Your Own Video with Wondershare Filmora
- Part 2: Best 5 Camera Apps to Record Videos on iPhone and Android
Part 1: Bonus Tip-Make Your Own Video with Wondershare Filmora
Wondershare Filmora is an amazing video editor for both professional staff and beginners. Its intuitive interface, fast timeline rendering, advanced color tuning, and surprising video effects, etc will make your video stand out! Just download it and edit your smartphone videos with Wondershare Filmora!
Part 2: Best 5 Camera Apps to Record Videos on iPhone and Android
Let’s dive!
1. Open Camera – Free, Android Only

This camera app gives you control over your exposure, flash, focus, ISO, shutter speed, torch, and white balance. How much control you have is up to you. If managing all these things manually is a hassle for you, you can use its automatic or semi-manual modes instead of manual mode.
This is a great camera app to record time-lapses. It is simplistic compared to some of the other apps on this list, but it is also extremely easy to use.
2. ProShot - $4, iOS or Android
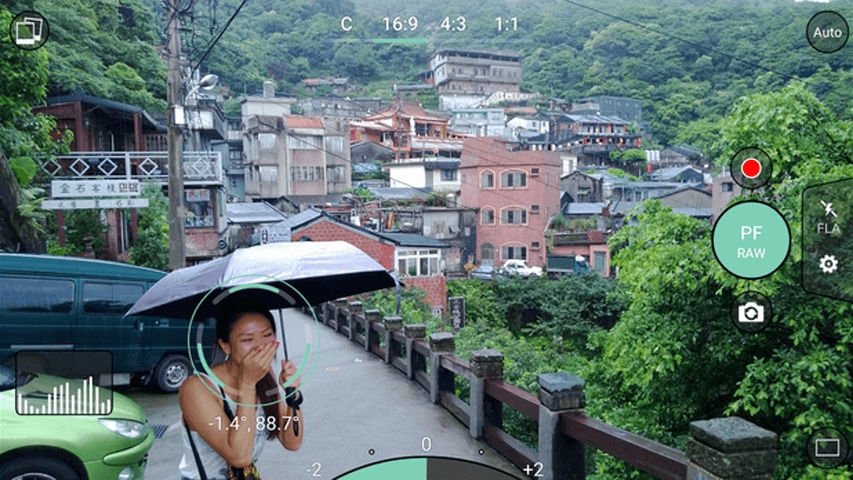
ProShot lets you adjust your frame rate, which is important if you want to shoot slow motion or time-lapse videos. You can also adjust your brightness while filming. One of the most useful features of this camera app is that it provides a real-time audio level meter, so you won’t be surprised by a poor sound recording when you watch your videos back.
3. ProCamera - $5, iOS Only
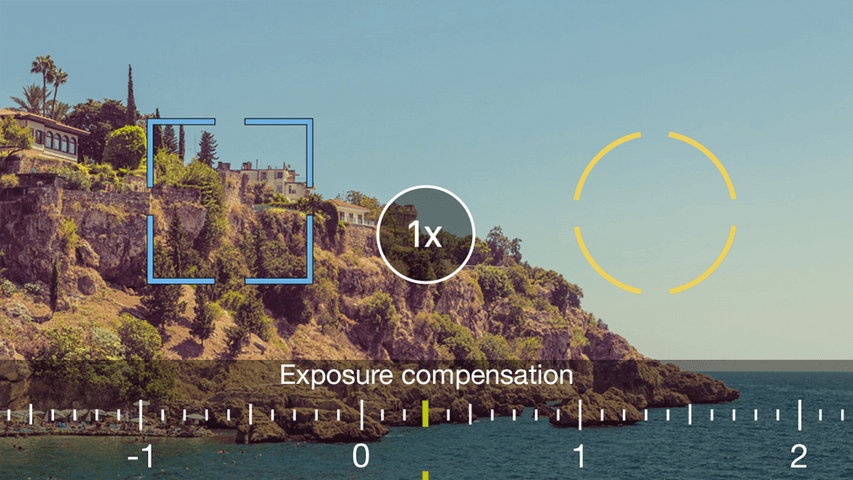
This is one of the most frequently recommended camera apps for iPhones. It makes it easy for you to adjust your focus, iOS, and exposure. You can also play with different filters and effects right in the app. One of the only downsides of this app is that some of its most useful features, like Lowlight Plus, are in-app purchases.
4. Sun Seeker - $10, iOS or Android

A lot of the time when you’re shooting with your phone, you’re shooting outside. When you’re shooting outside, the most important thing you need to keep track of is the sun. Sun Seeker is the perfect app for figuring out where the sun will be in the sky at any given time, which will tell you the best time to go out and make your video.
For more information on making videos with natural light, check out Indoor Natural Lighting Tips .
Besides just keeping track of the sun, Sun Seeker provides an augmented reality view of its path and how it will affect specific locations.
5. FiLMiC Pro - $10, iOS or Android
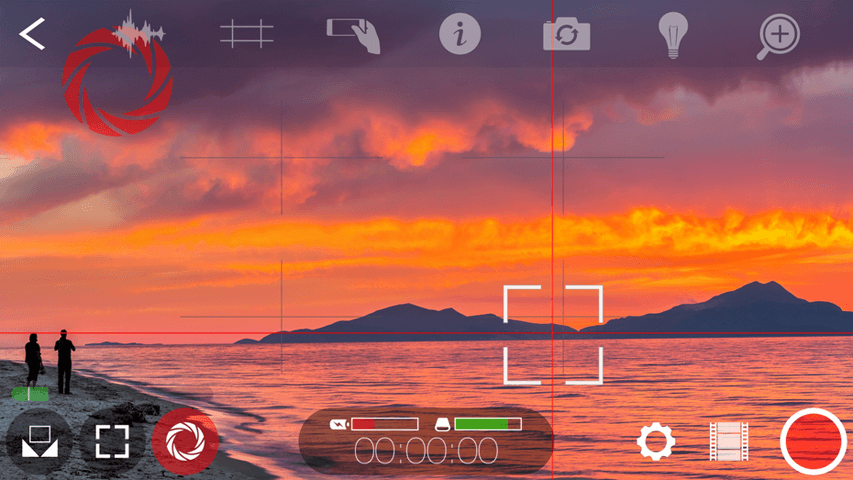
This is probably the best all-purpose camera app available. It gives you exactly the same kind of control over your smartphone camera as you would have over a DSLR. You can manually adjust your focus, exposure, ISO, shutter speed, tint, and color temperature. There are even voice processing audio filters, so you can capture better audio while you’re shooting and have less to fix in post.
Final Words
Because mobile cameras already perform so well, it can be easy to think to have more to adjust would only make things more complicated. However, there are occasions where you need to be able to make these adjustments. Are the videos you take inside at night at a lower quality than the ones you record during the day, for example? If you could set a higher ISO, you would be able to fix that.
Another example: just the other day, there was a question here about shooting green screen videos on a mobile device. One of our community members, Vivekpanwar, was having an issue with motion blur. Motion blur isn’t always distracting in normal videos, but it becomes a huge issue when you apply a Chroma key effect. The best way to avoid motion blur is to set a high shutter speed, which you can do if you download a quality camera app.
Richard Bennett
Richard Bennett is a writer and a lover of all things video.
Follow @Richard Bennett
Richard Bennett
Oct 26, 2023• Proven solutions
Smartphone cameras, especially the newest models, are capable of recording great videos. Depending on what kind of videos you make, you might not actually need a separate camera.
The majority of phone cameras record in full HD now, and some can even manage 4K. Where things get tricky is shooting in less than ideal conditions, i.e low light. You cannot make the same adjustments and customizations to your settings with a smartphone camera as you can with a DSLR.
You don’t have the same level of control.
But don’t worry – there are 5 camera apps that will allow you to record videos and get even more creative with how you use your phone’s camera.
- Part 1: Bonus Tip-Make Your Own Video with Wondershare Filmora
- Part 2: Best 5 Camera Apps to Record Videos on iPhone and Android
Part 1: Bonus Tip-Make Your Own Video with Wondershare Filmora
Wondershare Filmora is an amazing video editor for both professional staff and beginners. Its intuitive interface, fast timeline rendering, advanced color tuning, and surprising video effects, etc will make your video stand out! Just download it and edit your smartphone videos with Wondershare Filmora!
Part 2: Best 5 Camera Apps to Record Videos on iPhone and Android
Let’s dive!
1. Open Camera – Free, Android Only
This camera app gives you control over your exposure, flash, focus, ISO, shutter speed, torch, and white balance. How much control you have is up to you. If managing all these things manually is a hassle for you, you can use its automatic or semi-manual modes instead of manual mode.
This is a great camera app to record time-lapses. It is simplistic compared to some of the other apps on this list, but it is also extremely easy to use.
2. ProShot - $4, iOS or Android
ProShot lets you adjust your frame rate, which is important if you want to shoot slow motion or time-lapse videos. You can also adjust your brightness while filming. One of the most useful features of this camera app is that it provides a real-time audio level meter, so you won’t be surprised by a poor sound recording when you watch your videos back.
3. ProCamera - $5, iOS Only
This is one of the most frequently recommended camera apps for iPhones. It makes it easy for you to adjust your focus, iOS, and exposure. You can also play with different filters and effects right in the app. One of the only downsides of this app is that some of its most useful features, like Lowlight Plus, are in-app purchases.
4. Sun Seeker - $10, iOS or Android
A lot of the time when you’re shooting with your phone, you’re shooting outside. When you’re shooting outside, the most important thing you need to keep track of is the sun. Sun Seeker is the perfect app for figuring out where the sun will be in the sky at any given time, which will tell you the best time to go out and make your video.
For more information on making videos with natural light, check out Indoor Natural Lighting Tips .
Besides just keeping track of the sun, Sun Seeker provides an augmented reality view of its path and how it will affect specific locations.
5. FiLMiC Pro - $10, iOS or Android
This is probably the best all-purpose camera app available. It gives you exactly the same kind of control over your smartphone camera as you would have over a DSLR. You can manually adjust your focus, exposure, ISO, shutter speed, tint, and color temperature. There are even voice processing audio filters, so you can capture better audio while you’re shooting and have less to fix in post.
Final Words
Because mobile cameras already perform so well, it can be easy to think to have more to adjust would only make things more complicated. However, there are occasions where you need to be able to make these adjustments. Are the videos you take inside at night at a lower quality than the ones you record during the day, for example? If you could set a higher ISO, you would be able to fix that.
Another example: just the other day, there was a question here about shooting green screen videos on a mobile device. One of our community members, Vivekpanwar, was having an issue with motion blur. Motion blur isn’t always distracting in normal videos, but it becomes a huge issue when you apply a Chroma key effect. The best way to avoid motion blur is to set a high shutter speed, which you can do if you download a quality camera app.
Richard Bennett
Richard Bennett is a writer and a lover of all things video.
Follow @Richard Bennett
Also read:
- [New] Key Cutting Strategies in Modern Cinema
- [Updated] 2024 Approved Optimized Techniques for Capturing Win10 Games
- [Updated] 2024 Approved YouTube Cover Pics Made Easy – Top 5 Free Downloader Lists
- [Updated] QuickQuip QuarterMotion Grip for 2024
- 2024 Approved Best Online Stock Market Channels Reviewed
- 2024 Approved Social Media Strategy Broadcasting Twitch to Facebook
- Binge-Worthy Films with Ease: Connecting Fandango to Apple TV for Seamless Viewing
- Implementing Divine Window Controls in Windows 11
- In 2024, Chuckle Campaign 7 Ingenious Ideas for Funny YouTube Videos
- Quick Ways to Randomize YouTube Playlist On PC/Phones/TVs
- Top 5 Kostenloses Clonen-Software Für SSDs: Schnelles Kopieren Von HDD Auf SSD
- Ultra-Compact Apple Vision Pro Protective Case - Smaller Than Ever Before!
- Uncovering the Truth Behind 4-Second YouTube Subscriptions
- Title: [New] Budget-Friendly Methods for YouTube Card Creation
- Author: Kevin
- Created at : 2024-12-24 16:18:23
- Updated at : 2024-12-25 16:05:53
- Link: https://youtube-videos.techidaily.com/new-budget-friendly-methods-for-youtube-card-creation/
- License: This work is licensed under CC BY-NC-SA 4.0.