
!["[New] Bridging Mac & Monetization IMovie Editing to YouTube Success"](https://www.lifewire.com/thmb/rHRZPbsfIIPtMA1RYRKO2Ze8ZiM=/400x300/filters:no_upscale():max_bytes(150000):strip_icc()/nowifivisio-47f9584b5e24444db43e46a2fc630b10.jpg)
"[New] Bridging Mac & Monetization IMovie Editing to YouTube Success"
Bridging Mac & Monetization: IMovie Editing to YouTube Success
How to Upload a Video from iMovie to YouTube?

Liza Brown
Aug 18, 2022• Proven solutions
“Is iMovie good for YouTube?”
The iMovie is not only good for YouTube but various other social media platforms. The thing is, you have to compromise with the quality offered by Apple’s video editor iMovie. Well, iMovie is perfect for getting started for beginners. But, the professionals and ones who want a bit high features than basic ones should look elsewhere. Thus, we always recommend alternatives to a particular software for our audience. In this article, there is a mention of Wondershare Filmora to overcome the drawbacks of iMovie.
Without further ado, let’s begin with how to upload a video from iMovie to YouTube. We want to lead with the best iMovie export settings, specific troubleshooting issues, and our alternative intro section to overcome iMovie’s limitations.
Part 1: How to Upload a Video from iMovie to YouTube?
iMovie is ideal for making YouTube videos if you are too basic and are not looking for advanced features. Remember that professionalism pays in these platforms and helps you stand better among others. If you’re still interested in making introductory videos, here is a step-by-step guide on uploading a video to YouTube from iMovie on Mac first and leading with iPhone.
Step-by-Step Tutorial on how to upload a video from iMovie to YouTube on Mac
Step 1: Create a Project
On the first step, go to iMovie on Mac and click the Create New tab below.
Step 2: Import Media
Click the Import Media button and browse the files on your computer, as shown below.
Step 3: Edit Clips
It’s time to edit video footage. Drag your video to the timeline, as shown below.
Then, you can trim and drag the edges of video clips to allow editing.
Step 4: Add Titles
You can add titles by clicking the Title tab and further drag the Title’s template into the timeline.
Step 5: Export the Video
Click the Export button as follows after editing is over.
Select YouTube to upload your video over the platform directly.
Step 6: Save
After selecting the desired platform, click the Next tab to proceed with saving the file.
At last, save your video as shown below.
Step-by-Step Tutorial on how to upload iMovie to YouTube from iPhone
Step 1: Share the iMovie Project
Go to iMovie on your iPhone. Open the iMovie project on your iPhone and tap the Share button to select YouTube. Enter the information of Title, Description, Size, Tags, Privacy, and Location (optional).
Step 2: Upload iMovie Files
For ease of use, you can upload saved videos in Photo Library on your iPhone. Then, you can upload iMovie videos via the YouTube iOS app. Sign In to YouTube and click the Camera icon at the top of the Home page. Select your iPhone Photo Library file and set the video Title, Description, Size, Tags, and Privacy. Then, hit the Upload button to confirm.
Part 2: The Best iMovie Export Settings for YouTube Videos
As we all know that iMovie consists of a bit long procedure to export projects. Here are some tips on the best iMovie export settings to avoid an unnecessary headache.
- Set small resolution: Small resolution plays a more significant role, especially while uploading. Thus, you can set the smallest resolution in the Email tab of the Export button.
2. Change Export settings in the File tab: There is a File tab under the Export button. Click it and find various settings that you need to change to get the best export settings for YouTube 2021. Make the Title of the video as small as possible. Set the resolution at 1080P than 4K.
However, it isn’t going to upgrade the resolution if your video is already in the 1080P definition. Now, the last setting that will crazily offer you the best quality and lots of space-saving. You have to select Best (ProRes) in quality settings for this purpose. These settings also take less time to upload to YouTube.
3. Compress is not for speed: Various options you see in the Compresstab are not for speed. They are for how you save the video on a desktop. Thus, always choose the Better Quality tab than Faster.
- Do not export directly to YouTube: iMovie is pretty basic and doesn’t offer great settings to upload your video instantly. You may have to make changes to the uploaded video even if you do this as per our step-by-step guide mentioned above.
Part 3: How to fix the “Failed to Upload to YouTube” Error on iMovie?
The “iMovie to YouTube failed” problem occurs when you directly upload a YouTube video from iMovie. The issue will result if you upload from any third-party uploader. That is why the direct upload doesn’t work, especially in iMovie. You can opt to share your video to the desktop first and then drag it to upload to the YouTube platform.
Part 4: Upload Videos to YouTube with the Best Alternative to iMovie - Wondershare Filmora
“What can I use instead of iMovie to overcome its limitations?”
When you see that iMovie is not uploading to YouTube or iMovie upload to YouTube got stuck, go for a better alternative. In this section, we’d like to recommend Wondershare Filmora that offers the best export settings compared to iMovie. It is the go-to solution if you can’t upload video from iMovie to YouTube directly. Filmora further provides intuitive editing tools that professionally make your YouTube video projects.
Export Key Aspects of Wondershare Filmora in comparison to iMovie:
- It offers a long list of export resolutions to choose from.
- You get separate video and audio settings such as Encoder, Channel, Frame Rate, Bit Rate, Resolution, etc.
- It is further compatible with export to various devices including the iPhone, Samsung, iPod, Apple TV, iPad, Google Pixel, PSP, Smart TV, etc.
Step-by-Step Guide on how to upload a video from iMovie to YouTube via Wondershare Filmora
Step 1: Click the Export button and select resolution
After your project in Wondershare Filmora is over, click the Export tab and select video resolution from the Local tab, as shown below.
It has a list of formats. You can also edit the Name and saving location here.
Step 2: Select Quality
Select the Settings button and choose from three quality levels of Best, Better, and Good. You can also adjust video and audio parameters, including the Encoder, Frame Rate, Resolution, Bit Rate, etc.
Step 3: Select platform
Select the YouTube tab, Sign In to your YouTube account, and hit the Export button after modifying the Title and Quality if needed. Also, make sure to check the Enable GPU accelerated video encoding tab.
Select Wondershare Filmora as the ultimate solution even if iMovie upload to YouTube not showing up.
Conclusion
Hopefully, we’ve informed you of the relevant facts on how to upload a video from iMovie to YouTube. We have also examined the number of troubleshooting issues involved in the iMovie video editor. Well, you will get to face similar kinds of export difficulties in the iMovie editor. Also, the entire procedure to end the exporting task is a bit long in iMovie compared to any other video editing software. Thus, it’s crucial to check out what other alternatives the technological world has today. We can’t state to you a better beginner-friendly yet advanced editing option than Wondershare Filmora that rightly outtakes the iMovie video editor in all aspects.
Liza Brown
Liza Brown is a writer and a lover of all things video.
Follow @Liza Brown
Liza Brown
Aug 18, 2022• Proven solutions
“Is iMovie good for YouTube?”
The iMovie is not only good for YouTube but various other social media platforms. The thing is, you have to compromise with the quality offered by Apple’s video editor iMovie. Well, iMovie is perfect for getting started for beginners. But, the professionals and ones who want a bit high features than basic ones should look elsewhere. Thus, we always recommend alternatives to a particular software for our audience. In this article, there is a mention of Wondershare Filmora to overcome the drawbacks of iMovie.
Without further ado, let’s begin with how to upload a video from iMovie to YouTube. We want to lead with the best iMovie export settings, specific troubleshooting issues, and our alternative intro section to overcome iMovie’s limitations.
Part 1: How to Upload a Video from iMovie to YouTube?
iMovie is ideal for making YouTube videos if you are too basic and are not looking for advanced features. Remember that professionalism pays in these platforms and helps you stand better among others. If you’re still interested in making introductory videos, here is a step-by-step guide on uploading a video to YouTube from iMovie on Mac first and leading with iPhone.
Step-by-Step Tutorial on how to upload a video from iMovie to YouTube on Mac
Step 1: Create a Project
On the first step, go to iMovie on Mac and click the Create New tab below.
Step 2: Import Media
Click the Import Media button and browse the files on your computer, as shown below.
Step 3: Edit Clips
It’s time to edit video footage. Drag your video to the timeline, as shown below.
Then, you can trim and drag the edges of video clips to allow editing.
Step 4: Add Titles
You can add titles by clicking the Title tab and further drag the Title’s template into the timeline.
Step 5: Export the Video
Click the Export button as follows after editing is over.
Select YouTube to upload your video over the platform directly.
Step 6: Save
After selecting the desired platform, click the Next tab to proceed with saving the file.
At last, save your video as shown below.
Step-by-Step Tutorial on how to upload iMovie to YouTube from iPhone
Step 1: Share the iMovie Project
Go to iMovie on your iPhone. Open the iMovie project on your iPhone and tap the Share button to select YouTube. Enter the information of Title, Description, Size, Tags, Privacy, and Location (optional).
Step 2: Upload iMovie Files
For ease of use, you can upload saved videos in Photo Library on your iPhone. Then, you can upload iMovie videos via the YouTube iOS app. Sign In to YouTube and click the Camera icon at the top of the Home page. Select your iPhone Photo Library file and set the video Title, Description, Size, Tags, and Privacy. Then, hit the Upload button to confirm.
Part 2: The Best iMovie Export Settings for YouTube Videos
As we all know that iMovie consists of a bit long procedure to export projects. Here are some tips on the best iMovie export settings to avoid an unnecessary headache.
- Set small resolution: Small resolution plays a more significant role, especially while uploading. Thus, you can set the smallest resolution in the Email tab of the Export button.
2. Change Export settings in the File tab: There is a File tab under the Export button. Click it and find various settings that you need to change to get the best export settings for YouTube 2021. Make the Title of the video as small as possible. Set the resolution at 1080P than 4K.
However, it isn’t going to upgrade the resolution if your video is already in the 1080P definition. Now, the last setting that will crazily offer you the best quality and lots of space-saving. You have to select Best (ProRes) in quality settings for this purpose. These settings also take less time to upload to YouTube.
3. Compress is not for speed: Various options you see in the Compresstab are not for speed. They are for how you save the video on a desktop. Thus, always choose the Better Quality tab than Faster.
- Do not export directly to YouTube: iMovie is pretty basic and doesn’t offer great settings to upload your video instantly. You may have to make changes to the uploaded video even if you do this as per our step-by-step guide mentioned above.
Part 3: How to fix the “Failed to Upload to YouTube” Error on iMovie?
The “iMovie to YouTube failed” problem occurs when you directly upload a YouTube video from iMovie. The issue will result if you upload from any third-party uploader. That is why the direct upload doesn’t work, especially in iMovie. You can opt to share your video to the desktop first and then drag it to upload to the YouTube platform.
Part 4: Upload Videos to YouTube with the Best Alternative to iMovie - Wondershare Filmora
“What can I use instead of iMovie to overcome its limitations?”
When you see that iMovie is not uploading to YouTube or iMovie upload to YouTube got stuck, go for a better alternative. In this section, we’d like to recommend Wondershare Filmora that offers the best export settings compared to iMovie. It is the go-to solution if you can’t upload video from iMovie to YouTube directly. Filmora further provides intuitive editing tools that professionally make your YouTube video projects.
Export Key Aspects of Wondershare Filmora in comparison to iMovie:
- It offers a long list of export resolutions to choose from.
- You get separate video and audio settings such as Encoder, Channel, Frame Rate, Bit Rate, Resolution, etc.
- It is further compatible with export to various devices including the iPhone, Samsung, iPod, Apple TV, iPad, Google Pixel, PSP, Smart TV, etc.
Step-by-Step Guide on how to upload a video from iMovie to YouTube via Wondershare Filmora
Step 1: Click the Export button and select resolution
After your project in Wondershare Filmora is over, click the Export tab and select video resolution from the Local tab, as shown below.
It has a list of formats. You can also edit the Name and saving location here.
Step 2: Select Quality
Select the Settings button and choose from three quality levels of Best, Better, and Good. You can also adjust video and audio parameters, including the Encoder, Frame Rate, Resolution, Bit Rate, etc.
Step 3: Select platform
Select the YouTube tab, Sign In to your YouTube account, and hit the Export button after modifying the Title and Quality if needed. Also, make sure to check the Enable GPU accelerated video encoding tab.
Select Wondershare Filmora as the ultimate solution even if iMovie upload to YouTube not showing up.
Conclusion
Hopefully, we’ve informed you of the relevant facts on how to upload a video from iMovie to YouTube. We have also examined the number of troubleshooting issues involved in the iMovie video editor. Well, you will get to face similar kinds of export difficulties in the iMovie editor. Also, the entire procedure to end the exporting task is a bit long in iMovie compared to any other video editing software. Thus, it’s crucial to check out what other alternatives the technological world has today. We can’t state to you a better beginner-friendly yet advanced editing option than Wondershare Filmora that rightly outtakes the iMovie video editor in all aspects.
Liza Brown
Liza Brown is a writer and a lover of all things video.
Follow @Liza Brown
Peeking Behind the Scenes: Deciphering YouTube’s Unlisted Content
Complete Guide: What Does Unlisted Mean on YouTube

Richard Bennett
Mar 27, 2024• Proven solutions
Whether personal or professional purposes, YouTube is a great platform for sharing videos but, there are times, when you don’t wish to share it with each and everyone across the globe. The YouTube unlisted meaning is a video which can be viewed only by the users having the link to it. At the back of your mind, you may be wondering how safe an unlisted video is. Let’s learn in detail what does unlisted mean on YouTube.
- Part 1: What is Unlisted Video on YouTube
- Part 2: How to Make YouTube Videos Unlisted
- Part 3: How to Share Unlisted Video
Wondershare Filmora video editor is one of the most widely used video editing software for YouTubers, it makes the video editing simplified with the pre-programmed effects and templates. You can download the free trial version to check.


Part 1: What Does Unlisted Video Mean on YouTube
The YouTube unlisted meaning is that your video will neither come up in the search results nor on your channel. Only the users who have the link to the video can view it. The link can be shared with anyone and everyone, even with the users who do not have a YouTube account. Many people don’t know the difference between private and unlisted YouTube videos . In order to understand what does unlisted mean on YouTube in a detailed way, let’s dive deeper into it and know the difference between public videos, unlisted videos, and private videos.
1. What is Unlisted YouTube Video
Between private and public, you can find the unlisted videos. What does unlisted mean on YouTube? An unlisted video does not appear in the search results, suggestions or video tab. If you unlist a new video, your subscribers won’t receive any notification informing about it. You can share an unlisted video with the people you wish to share and the users having a link to the video can see it. It can also be viewed by the friend of friends if they share the link with their friends.
The unlisted videos are treated like public videos by YouTube. This means that you cannot use the copyright audio or video and it will be reviewed by the YouTube team if other users flag it as inappropriate content within a timeframe of 24-hours .
What Unlisted YouTube Videos Can Do
The unlisted videos can be shared with family and friends. If you are conducting a webinar and wish to share the video with only the registered users, an unlisted video can be used. You may also use the unlisted video for giving access to the people who embedded it while cleaning the YouTube page. For getting feedback from closed groups for market research or to share online resume link for job applications, the unlisted videos can be of great help.
Takeaway: Unlisted videos are a great way to share personal videos with just your family and friends, or to get feedback from people you trust on videos before you decide whether to make them public.
2. What is Private YouTube Video
The videos that do not appear in the recommendations, search options in YouTube or in your tab are the private videos. When you select the private setting for a video, the subscribers don’t get a notification. The private videos can be seen only by the uploader and the mentioned Google accounts. It is not available for friends of friends which mean if you share a private video with a friend, only that person can see it. If your friend shares it with someone, it won’t be visible to others. If anyone wishes to view a private video, the person has to request permission to view to the uploader.

What Private Youtube Videos Can Do
By using private YouTube videos, the internal company information can be kept confidential, the family videos can be shared safely with the people you wish to, and also store your personal data without worrying about being hacked by the strangers. By choosing the private setting, you may upload and schedule the date and time when a video can be made public on YouTube. It helps in saving storage space on your phone.
Takeaway: A private YouTube video is only available to YouTube users that you invite to view it.
3. What are Public Youtube Videos
The Public setting in the YouTube video is a default setting which allows everyone to see the video you post. When you want your video to appear in the search engine results and want more and more viewers and traffic on your video, you can keep the Public default setting on.
What Public YouTube Videos Can Do
Do you wish to grow your brand awareness? Select the Public default setting as it is the best way to do it. You may use the Public setting in any of these situations below:
- Having a video sharing business like explainer videos, product reviews, commercials, etc. with customers or prospective viewers
- Targeting at earning money through YouTube videos
- Looking forward to the growing personal brand by a YouTuber
- Looking for more and more subscribers on YouTube
But, you must remember that once you post the video, it will be available for everyone throughout the world on YouTube. Even if you decide to change the settings or delete the video, later on, you will be subjected to judgment, professionally and personally. While posting a video with Public setting, you must have an answer to questions like-
- Shall the senior or your boss see this video?
- Can your job prospect hamper with this video?
- Does the video contain harassing or offensive content?
- Can your friends ridicule you after seeing the video content?
If all the questions are answered in YES… then it is better to think hard and long before uploading the video content with Public setting on YouTube. You may upload the content with unlisted or private settings.
Takeaway: If you make a video public, anyone will be able to find and watch it. When uploading a video using default settings through YouTube, it will always default to being a public video.
Below is a brief comparison table about the differences among YouTube Unlisted, Private and Public video settings.
| Feature | Unlisted | Private | Public |
|---|---|---|---|
| Can I share video URL to friends? | Yes | No | Yes |
| Can I add video to YouTube channel? | Yes | No | Yes |
| Can I shows up video in YouTube platform? | No | No | Yes |
| Can I post video on my channel? | No | No | Yes |
| Can I leave a comment? | Yes | No | Yes |
| Can I see it in landing page? | Yes | No | Yes |
| Do People need an account to watch it? | No | No | Yes |
Part 2: How to Make an Unlisted YouTube Video
Follow the below-mentioned steps to make an unlisted YouTube video -
- Log in to your YouTube channel
- In the top right corner, click the add video button
- Find the drop-down menu and choose Upload Video
- Select the setting by clicking on Public and a drop-down menu appears to unlisted
- Search the instruction select files to upload your video
- When you start uploading your video, a message box appears, Click Public on the right side corner and select unlisted from the drop-down menu
- Once you have selected unlisted, click Done in the top right corner and your video is published
Part 3: How to Share Your Unlisted Video
If you wish to share the unlisted video , just share the published video link with anyone you wish to share. A Google account is not required to see the video. So, if the person you shared the link with is not logged in to his Google account, still the video can be viewed. The people who have the link to your video can also share and re-share the link in a number of ways. It can be shared on the social media or just forwarded amongst their friends. But, if you don’t want your friends to re-share it, change the settings to Private.
You can see a message showing “this video is unlisted” on YouTube when you want to share someone else’s unlisted video on social platforms. Think before you consider sharing an unlisted video.
Conclusion
Now, that you clearly know what does unlisted mean on YouTube, consider the option while uploading a video. It helps in retaining the privacy of your video.
Richard Bennett
Richard Bennett is a writer and a lover of all things video.
Follow @Richard Bennett
Richard Bennett
Mar 27, 2024• Proven solutions
Whether personal or professional purposes, YouTube is a great platform for sharing videos but, there are times, when you don’t wish to share it with each and everyone across the globe. The YouTube unlisted meaning is a video which can be viewed only by the users having the link to it. At the back of your mind, you may be wondering how safe an unlisted video is. Let’s learn in detail what does unlisted mean on YouTube.
- Part 1: What is Unlisted Video on YouTube
- Part 2: How to Make YouTube Videos Unlisted
- Part 3: How to Share Unlisted Video
Wondershare Filmora video editor is one of the most widely used video editing software for YouTubers, it makes the video editing simplified with the pre-programmed effects and templates. You can download the free trial version to check.
Part 1: What Does Unlisted Video Mean on YouTube
The YouTube unlisted meaning is that your video will neither come up in the search results nor on your channel. Only the users who have the link to the video can view it. The link can be shared with anyone and everyone, even with the users who do not have a YouTube account. Many people don’t know the difference between private and unlisted YouTube videos . In order to understand what does unlisted mean on YouTube in a detailed way, let’s dive deeper into it and know the difference between public videos, unlisted videos, and private videos.
1. What is Unlisted YouTube Video
Between private and public, you can find the unlisted videos. What does unlisted mean on YouTube? An unlisted video does not appear in the search results, suggestions or video tab. If you unlist a new video, your subscribers won’t receive any notification informing about it. You can share an unlisted video with the people you wish to share and the users having a link to the video can see it. It can also be viewed by the friend of friends if they share the link with their friends.
The unlisted videos are treated like public videos by YouTube. This means that you cannot use the copyright audio or video and it will be reviewed by the YouTube team if other users flag it as inappropriate content within a timeframe of 24-hours .
What Unlisted YouTube Videos Can Do
The unlisted videos can be shared with family and friends. If you are conducting a webinar and wish to share the video with only the registered users, an unlisted video can be used. You may also use the unlisted video for giving access to the people who embedded it while cleaning the YouTube page. For getting feedback from closed groups for market research or to share online resume link for job applications, the unlisted videos can be of great help.
Takeaway: Unlisted videos are a great way to share personal videos with just your family and friends, or to get feedback from people you trust on videos before you decide whether to make them public.
2. What is Private YouTube Video
The videos that do not appear in the recommendations, search options in YouTube or in your tab are the private videos. When you select the private setting for a video, the subscribers don’t get a notification. The private videos can be seen only by the uploader and the mentioned Google accounts. It is not available for friends of friends which mean if you share a private video with a friend, only that person can see it. If your friend shares it with someone, it won’t be visible to others. If anyone wishes to view a private video, the person has to request permission to view to the uploader.
What Private Youtube Videos Can Do
By using private YouTube videos, the internal company information can be kept confidential, the family videos can be shared safely with the people you wish to, and also store your personal data without worrying about being hacked by the strangers. By choosing the private setting, you may upload and schedule the date and time when a video can be made public on YouTube. It helps in saving storage space on your phone.
Takeaway: A private YouTube video is only available to YouTube users that you invite to view it.
3. What are Public Youtube Videos
The Public setting in the YouTube video is a default setting which allows everyone to see the video you post. When you want your video to appear in the search engine results and want more and more viewers and traffic on your video, you can keep the Public default setting on.
What Public YouTube Videos Can Do
Do you wish to grow your brand awareness? Select the Public default setting as it is the best way to do it. You may use the Public setting in any of these situations below:
- Having a video sharing business like explainer videos, product reviews, commercials, etc. with customers or prospective viewers
- Targeting at earning money through YouTube videos
- Looking forward to the growing personal brand by a YouTuber
- Looking for more and more subscribers on YouTube
But, you must remember that once you post the video, it will be available for everyone throughout the world on YouTube. Even if you decide to change the settings or delete the video, later on, you will be subjected to judgment, professionally and personally. While posting a video with Public setting, you must have an answer to questions like-
- Shall the senior or your boss see this video?
- Can your job prospect hamper with this video?
- Does the video contain harassing or offensive content?
- Can your friends ridicule you after seeing the video content?
If all the questions are answered in YES… then it is better to think hard and long before uploading the video content with Public setting on YouTube. You may upload the content with unlisted or private settings.
Takeaway: If you make a video public, anyone will be able to find and watch it. When uploading a video using default settings through YouTube, it will always default to being a public video.
Below is a brief comparison table about the differences among YouTube Unlisted, Private and Public video settings.
| Feature | Unlisted | Private | Public |
|---|---|---|---|
| Can I share video URL to friends? | Yes | No | Yes |
| Can I add video to YouTube channel? | Yes | No | Yes |
| Can I shows up video in YouTube platform? | No | No | Yes |
| Can I post video on my channel? | No | No | Yes |
| Can I leave a comment? | Yes | No | Yes |
| Can I see it in landing page? | Yes | No | Yes |
| Do People need an account to watch it? | No | No | Yes |
Part 2: How to Make an Unlisted YouTube Video
Follow the below-mentioned steps to make an unlisted YouTube video -
- Log in to your YouTube channel
- In the top right corner, click the add video button
- Find the drop-down menu and choose Upload Video
- Select the setting by clicking on Public and a drop-down menu appears to unlisted
- Search the instruction select files to upload your video
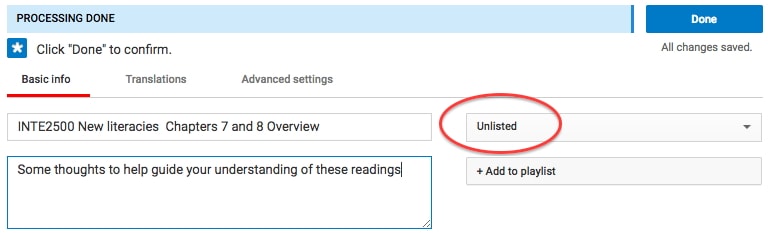
- When you start uploading your video, a message box appears, Click Public on the right side corner and select unlisted from the drop-down menu
- Once you have selected unlisted, click Done in the top right corner and your video is published
Part 3: How to Share Your Unlisted Video
If you wish to share the unlisted video , just share the published video link with anyone you wish to share. A Google account is not required to see the video. So, if the person you shared the link with is not logged in to his Google account, still the video can be viewed. The people who have the link to your video can also share and re-share the link in a number of ways. It can be shared on the social media or just forwarded amongst their friends. But, if you don’t want your friends to re-share it, change the settings to Private.
You can see a message showing “this video is unlisted” on YouTube when you want to share someone else’s unlisted video on social platforms. Think before you consider sharing an unlisted video.
Conclusion
Now, that you clearly know what does unlisted mean on YouTube, consider the option while uploading a video. It helps in retaining the privacy of your video.
Richard Bennett
Richard Bennett is a writer and a lover of all things video.
Follow @Richard Bennett
Also read:
- In 2024, Channel Creation Chronicles The Ultimate Beauty Blogging Start-Up
- In 2024, Advanced Presentation Techniques YouTube in Slides
- [Updated] Developing A Streamlined YouTube Subscribe Link
- [New] Crafting an Easy-to-Use YouTube Subscription Tagline
- Steady Your Screen The Key to Slowdown in YouTube Videos (48 Chars)
- Mastering the Art of Thumbnail Design with Your Mac
- Audio Visual Transcript Maker
- Best 5 Non-YouTube Editing Tools for Vids for 2024
- [Updated] Delving Into T-Series' Revenue Generation on Video Platforms
- [Updated] Deciphering YouTube Popularity Factors for Higher Placement
- [New] Beginning a Blogging Journey Profit From Your Passion
- [Updated] Design Guide YouTube Banners & Thumbnail Creation
- Next-Gen Film Viewers' Guide YouTube's Top Choices
- Dive Into Filmora’s Certified Creative Program for 2024
- In 2024, Banter Bonanza The Funniest Content on the Internet
- Access Exclusive Video Artwork – Free, Flawless, and Fast for 2024
- [Updated] Avoiding the Blank Thumbnail Scenario in Shorts
- Download Mastery 11 Key YouTube Extractors
- Best Websites to Download Classical Ringtones
- New Facebook Video Cover Dimensions A Guide to Getting It Right
- [Updated] 2024 Approved Premium Eco-Conscious Video Recorders How to Use
- How to Show Wi-Fi Password on Vivo V27e
- In 2024, Cheapest Entry-Level 4K Systems
- 2024 Approved Free Whiteboard Animation Software for Windows and Mac Top 10 Picks
- Will Pokémon Go Ban the Account if You Use PGSharp On Vivo S17t | Dr.fone
- In 2024, Ultimate Virtual Sound Devices
- Guide on How To Erase Apple iPhone 6s Data Completely | Dr.fone
- How do I reset my Oppo Find X6 Pro Phone without technical knowledge? | Dr.fone
- [New] 2024 Approved Facebook's Guide to Enhancing Past Recordings for Live Streaming
- [New] Elevate Your Facebook Profile with These 11 Superior Tools
- Updated 2024S Best Value Choices in Free PC-Based Sound Recording Tools
- New In 2024, Many People Think that There Isnt a Lot of Good Video Editing Software for Ubuntu, but This Isnt True. Here We Will Cover the Best Ubuntu Video Editor for Your Convenience
- In 2024, Mastering the Art of Guitar Production A Compilation of the Best 7 Digital Audio Workstations
- Forgot Your Apple ID Password and Email On Apple iPhone 6 Plus? Heres the Best Fixes
- Title: "[New] Bridging Mac & Monetization IMovie Editing to YouTube Success"
- Author: Kevin
- Created at : 2024-05-25 15:55:03
- Updated at : 2024-05-26 15:55:03
- Link: https://youtube-videos.techidaily.com/new-bridging-mac-and-monetization-imovie-editing-to-youtube-success/
- License: This work is licensed under CC BY-NC-SA 4.0.
