
![[New] Best Screen Reporter Toolkit for YouTube Streamers](https://www.lifewire.com/thmb/8DPY2jUm3Ja0KzAcKz1wMUfSeyA=/400x300/filters:no_upscale():max_bytes(150000):strip_icc()/fragmented-pieces-ed9aede8070749238add68007d7728d9.png)
[New] Best Screen Reporter Toolkit for YouTube Streamers
Best Screen Reporter Toolkit for YouTube Streamers
Best Screen Recorder for YouTube

Richard Bennett
Mar 27, 2024• Proven solutions
Taking viewers ‘in app’ is an effective way to show them how you work or play. A screen recording is a footage recorded not from your camera, but directly from the interface of your computer or mobile device. A screen recording might be footage from a game, a software tutorial, or a demonstration of your creative process in a program.
We have picked up the best 10 paid screen recorders for YouTube on Windows and Mac, but if you are looking for a complete solution to record videos on Windows, Mac, Android or iOS phone to make tutorial videos, how-to videos, or demonstration videos, or products/software review videos, or gameplay videos on YouTube, here is the all the information you need. This article will introduce you to the best screen recorders on computers, Android devices, and iPhones for YouTube.
- Part 1: Best Screen Recording Software for Recording Windows/Mac Screen for YouTube
- Part 2: Best Screen Capturing Apps for Recording Your Android Screen (No Root)
- Part 3: Best Screen Recording Apps for Recording on iOS Devices for YouTube Videos
Part 1: Best Software for Recording Your Computer Screen for YouTube Videos
1.Filmora Video Editor [Windows & Mac, Freemium]


In addition to being a powerful editing tool, Filmora can also be used to record your computer screen. In Filmora, just select Media and then Record. In the Record menu, click Record PC Screen. The recording window will pop up and you will be able to decide whether you want to record your full screen, a customized selection of it, or a specific target window. After you have finished recording your clip will automatically appear in the Media menu in your Filmora project so you can edit it right away. You can download Filmora from Filmora.wondershare.com if you do not have it yet.
If you just want to make a how-to video with some captured screens, Filmora will be a good choice. Check the video below about how to record Screen with Filmora.
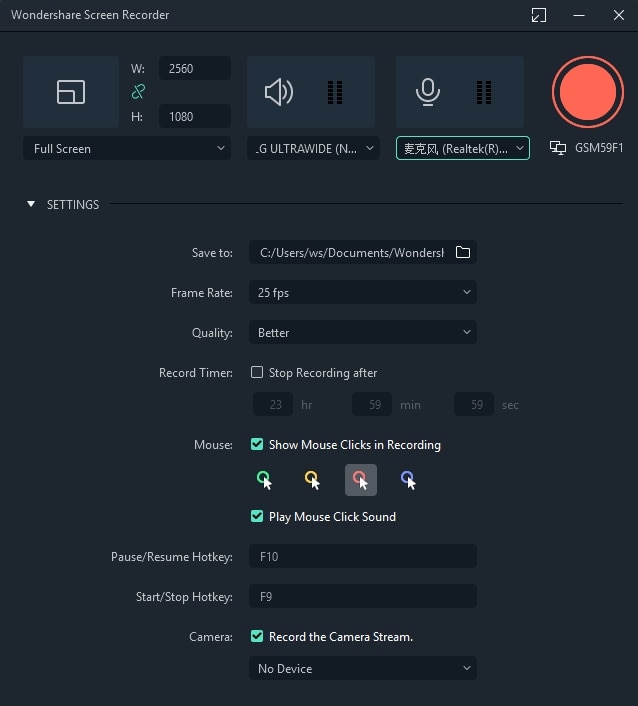
2.Wondershare DemoCreator
DemoCreator is a specially designed screen recording software from Wondershare for both gameplay recording, tutorial making, screen capturing, and webcam recording as well. You can use it to record the full screen of your Windows or Mac computer or a particular part on the screen. The best part is that you can both record and edit the video in DemoCreator and upload it to YouTube directly. This screen recorder for YouTube is a perfect solution for those who want to capture 120 frames per second and 4K videos.
3.VLC Media Player [Windows & Mac & Linux, Free]
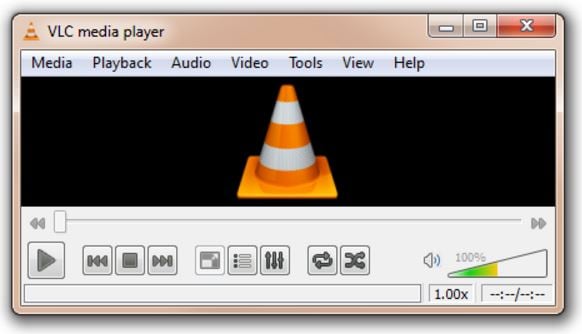
VLC Media Player is a free media player that has a great screen recording feature. You can download it from Video LAN.org. In order to take a screen recording using VLC you first need to click on View and Advanced Controls. A lot of the more advanced features, like screen recording, are initially hidden so as not to confuse users, but selecting Advanced Controls will make them visible. Then you can go to Media and Open Capture Device. In the window that opens choose Desktop next to Capture Mode and click Play. VLC will start displaying your desktop in the player window. Now you just have to click Record.
Learn more details about how to record YouTube videos with VLC
4.QuickTime [Mac, Free]

QuickTime is the default media player for Mac users. To access QuickTime’s screen recording feature select File and New Screen Recording. In the window that pops up click on the arrow next to the Record button and choose a microphone. Then you can press Record. Your recording will not start right away. First, a window will pop up explaining that you can stop your recording by pressing ‘command-control-escape’. Although QuickTime is available for PCs the PC version does not have a screen recording feature.
Learn more details about how to record YouTube video and audio with QuickTime Player on Mac
Part 2: Recording Your Android Screen for YouTube Videos (No Root)
We have already described 4 ways of recording screen videos on Android , while in this part, we will introduce some useful screen recording apps for recording YouTube videos on Android phones.
1. AZ Screen Recorder
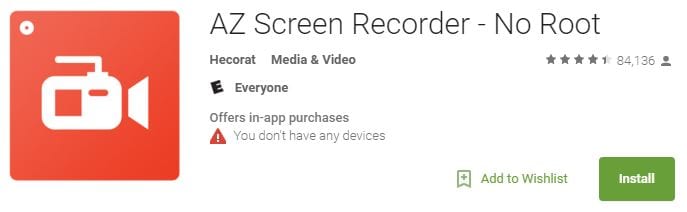
AZ Screen Recorder is free screen recording app for Android 5.0 Lollipop. Using AZ Screen Recorder you can simultaneously record from your phone’s camera and screen. This is useful if you want to shoot a video of yourself explaining an app to add into your final video. Although the basic version of AZ Screen Recorder is free there are in-app purchases.
2.Unlimited Screen Recorder
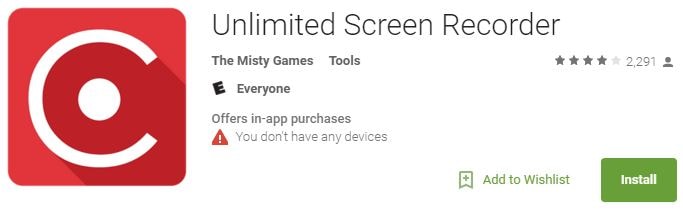
Unlimited Screen Recorder is also for 5.0 Lollipop and is free with in-app purchases. Like the name ‘Unlimited’ suggests you can use this app to record for as long as you want. There is no time limit. You can also record audio through Unlimited Screen Recorder so it is convenient to make a voiceover for your video.
There are very few options available for recording Android devices older than Lollipop without rooting your device.
Click here to check more screen recording apps to capture videos on Android
Part 3: Recording Your iOS Device Screen for YouTube Videos
With the release of iOS 11, recording on iPhone and iPad is much easier with the built-in screen recording tool . If your iOS is above 11 (including 11) version, you can record the screen with its in-app application, check this video to know the details:
Apart from recording with the built-in recording tool, you can also use some best iOS screen recording apps to record YouTube videos, or use some mirror software to record iPhone/iPad on Windows and Mac and create a YouTube video.
1.QuickTime
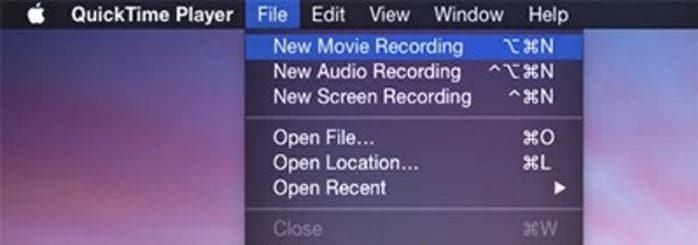
QuickTime can be used to record the screen of your iPhone or iPad in addition to the screen of your Mac. First you need to connect your device to your computer with a USB port. Instead of selecting ‘New Screen Recording’ in QuickTime, the way you would when recording your computer screen, select ‘New Movie Recording’. In the recording window click on the arrow next to the ‘Record’ button and choose your iOS device where it asks you to choose a camera. This method only works with the Mac version of QuickTime.
2.Reflector
Reflector is mirroring software available for Mac or PC. Mirroring software creates a clone of your device’s interface on your computer screen. Once your device is being displayed on the screen of your computer you can capture it by recording your computer screen. You can download Reflector from Airsquirrels.com.
In order to use Reflector to mirror your device, you will also need to use AirPlay on your iPhone or iPad, and your device and your computer will need to be connected to the same wifi network. In AirPlay, make sure mirroring is on and select your computer as a receiver. Your computer will not show up as an option if you do not have Reflector running.
Conclusion
Above are the screen and video recording software programs that we picked up for you to make a YouTube tutorial, how-to or software review video on most popular platforms including Windows and Mac computer and Android and iOS smartphones. Besides recording, you may also need thebest video editing software for editing YouTube videos . Watch the video tutorial to check how to edit your YouTube videos and get to know some terms in video editing. Remember to download Filmora and have a try today.
Richard Bennett
Richard Bennett is a writer and a lover of all things video.
Follow @Richard Bennett
Richard Bennett
Mar 27, 2024• Proven solutions
Taking viewers ‘in app’ is an effective way to show them how you work or play. A screen recording is a footage recorded not from your camera, but directly from the interface of your computer or mobile device. A screen recording might be footage from a game, a software tutorial, or a demonstration of your creative process in a program.
We have picked up the best 10 paid screen recorders for YouTube on Windows and Mac, but if you are looking for a complete solution to record videos on Windows, Mac, Android or iOS phone to make tutorial videos, how-to videos, or demonstration videos, or products/software review videos, or gameplay videos on YouTube, here is the all the information you need. This article will introduce you to the best screen recorders on computers, Android devices, and iPhones for YouTube.
- Part 1: Best Screen Recording Software for Recording Windows/Mac Screen for YouTube
- Part 2: Best Screen Capturing Apps for Recording Your Android Screen (No Root)
- Part 3: Best Screen Recording Apps for Recording on iOS Devices for YouTube Videos
Part 1: Best Software for Recording Your Computer Screen for YouTube Videos
1.Filmora Video Editor [Windows & Mac, Freemium]
In addition to being a powerful editing tool, Filmora can also be used to record your computer screen. In Filmora, just select Media and then Record. In the Record menu, click Record PC Screen. The recording window will pop up and you will be able to decide whether you want to record your full screen, a customized selection of it, or a specific target window. After you have finished recording your clip will automatically appear in the Media menu in your Filmora project so you can edit it right away. You can download Filmora from Filmora.wondershare.com if you do not have it yet.
If you just want to make a how-to video with some captured screens, Filmora will be a good choice. Check the video below about how to record Screen with Filmora.
2.Wondershare DemoCreator
DemoCreator is a specially designed screen recording software from Wondershare for both gameplay recording, tutorial making, screen capturing, and webcam recording as well. You can use it to record the full screen of your Windows or Mac computer or a particular part on the screen. The best part is that you can both record and edit the video in DemoCreator and upload it to YouTube directly. This screen recorder for YouTube is a perfect solution for those who want to capture 120 frames per second and 4K videos.
3.VLC Media Player [Windows & Mac & Linux, Free]
VLC Media Player is a free media player that has a great screen recording feature. You can download it from Video LAN.org. In order to take a screen recording using VLC you first need to click on View and Advanced Controls. A lot of the more advanced features, like screen recording, are initially hidden so as not to confuse users, but selecting Advanced Controls will make them visible. Then you can go to Media and Open Capture Device. In the window that opens choose Desktop next to Capture Mode and click Play. VLC will start displaying your desktop in the player window. Now you just have to click Record.
Learn more details about how to record YouTube videos with VLC
4.QuickTime [Mac, Free]
QuickTime is the default media player for Mac users. To access QuickTime’s screen recording feature select File and New Screen Recording. In the window that pops up click on the arrow next to the Record button and choose a microphone. Then you can press Record. Your recording will not start right away. First, a window will pop up explaining that you can stop your recording by pressing ‘command-control-escape’. Although QuickTime is available for PCs the PC version does not have a screen recording feature.
Learn more details about how to record YouTube video and audio with QuickTime Player on Mac
Part 2: Recording Your Android Screen for YouTube Videos (No Root)
We have already described 4 ways of recording screen videos on Android , while in this part, we will introduce some useful screen recording apps for recording YouTube videos on Android phones.
1. AZ Screen Recorder
AZ Screen Recorder is free screen recording app for Android 5.0 Lollipop. Using AZ Screen Recorder you can simultaneously record from your phone’s camera and screen. This is useful if you want to shoot a video of yourself explaining an app to add into your final video. Although the basic version of AZ Screen Recorder is free there are in-app purchases.
2.Unlimited Screen Recorder
Unlimited Screen Recorder is also for 5.0 Lollipop and is free with in-app purchases. Like the name ‘Unlimited’ suggests you can use this app to record for as long as you want. There is no time limit. You can also record audio through Unlimited Screen Recorder so it is convenient to make a voiceover for your video.
There are very few options available for recording Android devices older than Lollipop without rooting your device.
Click here to check more screen recording apps to capture videos on Android
Part 3: Recording Your iOS Device Screen for YouTube Videos
With the release of iOS 11, recording on iPhone and iPad is much easier with the built-in screen recording tool . If your iOS is above 11 (including 11) version, you can record the screen with its in-app application, check this video to know the details:
Apart from recording with the built-in recording tool, you can also use some best iOS screen recording apps to record YouTube videos, or use some mirror software to record iPhone/iPad on Windows and Mac and create a YouTube video.
1.QuickTime
QuickTime can be used to record the screen of your iPhone or iPad in addition to the screen of your Mac. First you need to connect your device to your computer with a USB port. Instead of selecting ‘New Screen Recording’ in QuickTime, the way you would when recording your computer screen, select ‘New Movie Recording’. In the recording window click on the arrow next to the ‘Record’ button and choose your iOS device where it asks you to choose a camera. This method only works with the Mac version of QuickTime.
2.Reflector
Reflector is mirroring software available for Mac or PC. Mirroring software creates a clone of your device’s interface on your computer screen. Once your device is being displayed on the screen of your computer you can capture it by recording your computer screen. You can download Reflector from Airsquirrels.com.
In order to use Reflector to mirror your device, you will also need to use AirPlay on your iPhone or iPad, and your device and your computer will need to be connected to the same wifi network. In AirPlay, make sure mirroring is on and select your computer as a receiver. Your computer will not show up as an option if you do not have Reflector running.
Conclusion
Above are the screen and video recording software programs that we picked up for you to make a YouTube tutorial, how-to or software review video on most popular platforms including Windows and Mac computer and Android and iOS smartphones. Besides recording, you may also need thebest video editing software for editing YouTube videos . Watch the video tutorial to check how to edit your YouTube videos and get to know some terms in video editing. Remember to download Filmora and have a try today.
Richard Bennett
Richard Bennett is a writer and a lover of all things video.
Follow @Richard Bennett
The Top Platform Trio: Which One Triumphs – Vimeo, YouTube, Dailymotion?
Vimeo vs YouTube vs Dailymotion: Which Video Platform is Right for You?

Ollie Mattison
Mar 27, 2024• Proven solutions
If you are an upcoming entrepreneur who is looking forward to an effective video marketing strategy then you have to come to a decision regarding the portal you want to use for your marketing. As you should know by now YouTube , Dailymotion and Vimeo are the 3 major players in the field of video marketing. In this article, we are going to give you a comparative analysis of all these video sharing platforms so that you can select the one most suited to your needs.
- Part 1: Detailed Comparison of Vimeo, YouTube, and DailyMotion
- Part 2: Tips for Editing Videos on YouTube, DailyMotion, and Vimeo
Compare Vimeo, YouTube, and DailyMotion in 4 Aspects
1. Content

Before deciding which video platform to choose, you need to find out about the content in which each of them specializes.
Youtube: If your content is more related to entertainment then YouTube is the platform to go for.
Vimeo: Vimeo is a closed community specializing in videos by artists from various genres and is considered to be a more creative platform than YouTube.
Dailymotion: Dailymotion has a fair share of both but it resembles the YouTube trend.
2. Audience Size and Membership

Youtube: YouTube’s audience is large, with over 1 billion users that watch hundreds of millions of hours of content – each day! Vimeo has a much smaller for their audience, its 170 million viewers, about 42 million are in the United States.
Vimeo: Vimeo comes with 4 membership options – the Basic which is available for free and the paid Plus, ($59.95/ year) Pro ($199.00 a year), and Business membership ($599.00 a year). The storage level and support for each membership option vary. The free membership is limited to just 500 MB/week. YouTube and Dailymotion on the other hand are totally free, and Youtube gives unlimited hosting. However YouTube Red is a $9.99 subscription service that will allow you to watch ad-free videos and download them for watching offline.
Read this Vimeo introduction >>>
Dailymotion: DailyMotion is the world’s second-largest video-sharing website behind YouTube, statistics claimed by both companies show that YouTube has a significant advantage over DailyMotion in terms of unique site visits, totaling one billion visits per month compared with DailyMotion’s 112 million visits per month.
Know more about Dailymotion >>>
3. Limitation of Videos

Youtube: One of the best parts about this platform is that it doesn’t come with any upload limit.
Dailymotion: Regular users can upload 60 minutes videos of 2 GB limit and the quality of upload is limited to 1280 720p.
Vimeo: With a Basic plan, you can upload 500MB/week, with a Plus plan you can upload 5GB/week and with Pro plan you will be able to upload unlimited videos with a per-file limit of 25 GB.
4. User Experience
To begin with, both Vimeo and YouTube had a very similar kind of user interface. This has gradually evolved over the years and these days the user interface of Vimeo is more attractive than YouTube. Vimeo would give the user fewer adverts, offer easy navigation and of course, allow them to watch the videos on a large video player. Though these days YouTube is also offering a ‘theatre mode’ for the full-screen view along with a skip adoption, yet the quality of its user experience is still isn’t at par with Vimeo. YouTube is still trying its best to satisfy its one billion/month users but still, Vimeo is the winner when it comes to unparalleled user experience.
Tips for Editing Videos on YouTube, DailyMotion, and Vimeo
Before uploading your video on any one of these above-mentioned platforms the first thing you have to do is get your videos edited. The Wondershare Filmora is a comprehensive video editor that is ideal for use by beginners. With this software, you will be able to nicely edit a video even if you have no prior knowledge about video editing. This easy to use video editing software is loaded with lots of useful features which can be effectively used by the casual and novice editors. This software is packed with all you need to create good quality videos for your audience on YouTube, Vimeo, or DailyMotion. All you need to do is import the video clips and choose a piece of pre-programmed music and theme for your video. The software would then analyze your video clips and automatically create a video for you.
Ollie Mattison
Ollie Mattison is a writer and a lover of all things video.
Follow @Ollie Mattison
Ollie Mattison
Mar 27, 2024• Proven solutions
If you are an upcoming entrepreneur who is looking forward to an effective video marketing strategy then you have to come to a decision regarding the portal you want to use for your marketing. As you should know by now YouTube , Dailymotion and Vimeo are the 3 major players in the field of video marketing. In this article, we are going to give you a comparative analysis of all these video sharing platforms so that you can select the one most suited to your needs.
- Part 1: Detailed Comparison of Vimeo, YouTube, and DailyMotion
- Part 2: Tips for Editing Videos on YouTube, DailyMotion, and Vimeo
Compare Vimeo, YouTube, and DailyMotion in 4 Aspects
1. Content
Before deciding which video platform to choose, you need to find out about the content in which each of them specializes.
Youtube: If your content is more related to entertainment then YouTube is the platform to go for.
Vimeo: Vimeo is a closed community specializing in videos by artists from various genres and is considered to be a more creative platform than YouTube.
Dailymotion: Dailymotion has a fair share of both but it resembles the YouTube trend.
2. Audience Size and Membership
Youtube: YouTube’s audience is large, with over 1 billion users that watch hundreds of millions of hours of content – each day! Vimeo has a much smaller for their audience, its 170 million viewers, about 42 million are in the United States.
Vimeo: Vimeo comes with 4 membership options – the Basic which is available for free and the paid Plus, ($59.95/ year) Pro ($199.00 a year), and Business membership ($599.00 a year). The storage level and support for each membership option vary. The free membership is limited to just 500 MB/week. YouTube and Dailymotion on the other hand are totally free, and Youtube gives unlimited hosting. However YouTube Red is a $9.99 subscription service that will allow you to watch ad-free videos and download them for watching offline.
Read this Vimeo introduction >>>
Dailymotion: DailyMotion is the world’s second-largest video-sharing website behind YouTube, statistics claimed by both companies show that YouTube has a significant advantage over DailyMotion in terms of unique site visits, totaling one billion visits per month compared with DailyMotion’s 112 million visits per month.
Know more about Dailymotion >>>
3. Limitation of Videos
Youtube: One of the best parts about this platform is that it doesn’t come with any upload limit.
Dailymotion: Regular users can upload 60 minutes videos of 2 GB limit and the quality of upload is limited to 1280 720p.
Vimeo: With a Basic plan, you can upload 500MB/week, with a Plus plan you can upload 5GB/week and with Pro plan you will be able to upload unlimited videos with a per-file limit of 25 GB.
4. User Experience
To begin with, both Vimeo and YouTube had a very similar kind of user interface. This has gradually evolved over the years and these days the user interface of Vimeo is more attractive than YouTube. Vimeo would give the user fewer adverts, offer easy navigation and of course, allow them to watch the videos on a large video player. Though these days YouTube is also offering a ‘theatre mode’ for the full-screen view along with a skip adoption, yet the quality of its user experience is still isn’t at par with Vimeo. YouTube is still trying its best to satisfy its one billion/month users but still, Vimeo is the winner when it comes to unparalleled user experience.
Tips for Editing Videos on YouTube, DailyMotion, and Vimeo
Before uploading your video on any one of these above-mentioned platforms the first thing you have to do is get your videos edited. The Wondershare Filmora is a comprehensive video editor that is ideal for use by beginners. With this software, you will be able to nicely edit a video even if you have no prior knowledge about video editing. This easy to use video editing software is loaded with lots of useful features which can be effectively used by the casual and novice editors. This software is packed with all you need to create good quality videos for your audience on YouTube, Vimeo, or DailyMotion. All you need to do is import the video clips and choose a piece of pre-programmed music and theme for your video. The software would then analyze your video clips and automatically create a video for you.
Ollie Mattison
Ollie Mattison is a writer and a lover of all things video.
Follow @Ollie Mattison
Also read:
- Flashing Frequencies Role-Music Synopsis
- Navigating iPhone/iPad Mastering YouTube Video Uploads
- Comprehensive Guide to YouTube Content Moderation Rules
- Boosting Traffic with Smart YouTube Title & Tag Use
- YouTube Enhancement The Art of Background Blur
- Building a Channel Team-Up Videography Guide
- 2024 Approved Compile of Free, High-Quality Sound Clips for Videos
- Crafting Powerful Video Titles & Sizes
- [New] Amplify Your Content, Increase Your Subs Quickly
- 10 Top Must-Have Gear Items for YouTubers
- [New] Discover the Leading Free iOS Video Editor A Comprehensive Guide
- [Updated] CarryMinati's Income Blueprint Journey Through 2023
- Breaking the Monotony Innovative YT Playlist Shuffling
- Elevate Your Mobile Shoot - Ranking the Best 9 CamGear Innovations for 2024
- [Updated] Academic Journey Across Time Top 10 History YouTubers
- [Updated] Counteract Vibration for Clear Captures
- Pioneering 8 YouTube Groups with Steady Surge
- 10 Strategies to Make Money on YouTube Shorts Easily
- Ignite Interest Top-Tier Content to Motivate Viewers
- From Hundreds to Millions A YouTube Growth Journey
- In 2024, A Perfect Guide To Remove or Disable Google Smart Lock On Vivo Y36
- Updated 2024 Approved Mastering MP3 Conversion Essential Techniques for Podcasts
- How To Change Motorola Moto G Stylus 5G (2023) Lock Screen Password?
- [Updated] 2024 Approved Essential Shortcuts for Efficient Mac Screen Recording
- [New] 2024 Approved Step-by-Step Fabric Fixing with TikTok Tips
- In 2024, Melody Cleanse Free Your Content From Unwanted Musical Elements
- Updated 2024 Approved Social Strategy Sessions The Top 2023 List of Podcast Episodes for Brands
- How to Detect and Remove Spyware on ZTE Axon 40 Lite? | Dr.fone
- New In 2024, Top 6 Celebrity Text to Speech AI Voice Generators You May Like
- [New] 2024 Approved Maximizing Efficiency in Remote Group Meetings
- Fast Forward Fame Insta Popularity Through Content
- How to Generate a Noise-Free AVI Version for Presentation Purposes for 2024
- How to Transfer Data from Tecno Spark Go (2023) to Any iOS Devices | Dr.fone
- In 2024, Ultimate guide to get the meltan box pokemon go For Apple iPhone XS | Dr.fone
- [New] 2024 Approved Snapchat Artistry Integrating Anime-Inspired Effects
- [New] IPhone Slow Motion Shooting Essentials for 2024
- Title: [New] Best Screen Reporter Toolkit for YouTube Streamers
- Author: Kevin
- Created at : 2024-05-25 15:53:36
- Updated at : 2024-05-26 15:53:36
- Link: https://youtube-videos.techidaily.com/new-best-screen-reporter-toolkit-for-youtube-streamers/
- License: This work is licensed under CC BY-NC-SA 4.0.
