
![[New] Best 10 YouTube Volume Boosters for Windows, macOS, Android, and iPhone](https://www.lifewire.com/thmb/NgJyQBGFmsrhkEXhA5pREWNGnoI=/400x300/filters:no_upscale():max_bytes(150000):strip_icc():format(webp)/photo-editor-working-on-computer-at-desk-in-office-946928370-5b85791746e0fb0025b40d84.jpg)
[New] Best 10 YouTube Volume Boosters for Windows, macOS, Android, and iPhone
Pinnacle 10 Sound Superchargers: PC, Mac & Phones
Best 10 YouTube Volume Boosters for Windows, macOS, Android, and iPhone

Shanoon Cox
Mar 27, 2024• Proven solutions
Have you ever listened to a YouTube video on max volume but still the sound wasn’t audible - even after turning up the YouTube volume as well as device audio? It is super annoying and inconvenient when you increase volume to max yet the video remains inaudible. YouTube volume issue could be due to various reasons such as poor audio quality of the built-in speakers or low original video sound. Well, there is a simple way to combat this problem i.e., sound booster. You can set different volume levels for the YouTube app on your PC or smartphone’s native volume controls. There are different YouTube volume boosters for Android, Windows, macOS, and iOS devices.
From listening to your favorite podcast to watching vlogs with your friends, you can use the best volume booster apps to increase the media sound volume and quality!
- Part 1: Best YouTube Volume Boosters for Windows and macOS
- Part 2: Best YouTube Volume Boosters for Android and iOS
- Part 3: Best YouTube Video Editing Software-Wondershare Filmora (Bonus Tip)
Part 1: Best YouTube Volume Boosters for Windows and macOS
Let’s introduce the best YouTube volume boosters for Windows and macOS:
1. FxSound (Windows and Mac)
FxSound is a very powerful tool that is made for Windows and macOS to enhance and boost the quality and volume of sound. This app comes with many features. For example, this audio software provides better sound quality, volume booster, and sound effects. Now you can listen to music, watch movies and play games without any distortion. Easily boost base, get customized effects and play with custom presets. You can download this app for your PC for free through the official website. People like this equalizer because it can make any audio format sound good even if it is 100 years old!

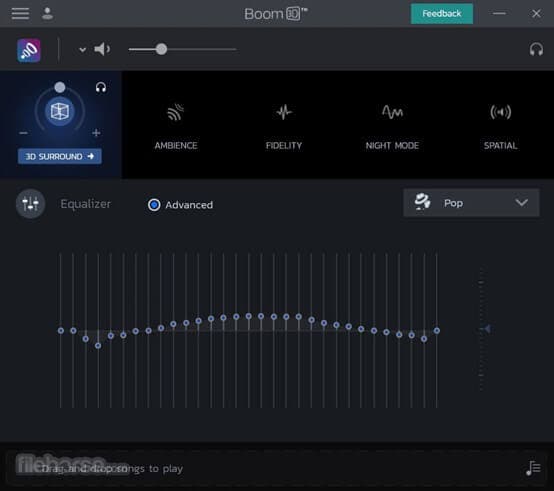
2. Boom 3D (Windows and macOS)
Boom 3D is a very popular app among many Windows and macOS users. This software is designed to help improve the audio on speakers or headphones that are connected to your computer. Boom 3D audio booster software also works with the Bluetooth devices that are connected to your PC. It can make any sound louder, clearer, and much better without buying any external devices. It provides us a 3D audio experience and works with any music player, video player, etc.!
3. Chrome Volume Booster Plugin (Windows)
This plugin has been rated 5 stars on the chrome web store as it is the best plugin for boosting up your volume on windows PC. This booster is so easy to download; you just have to go to the chrome web store and add the extension to your Google Chrome Browser. After adding it you can simply click on the icon and boost your volume up to 1000%! This plugin is free in the chrome store, just add it and choose how much louder you want your sound to be.

4. Letasoft Sound Booster (Windows)
Letasoft Sound Booster can only be used on windows. You can download it through the official website of Letasoft. It comes with a 14 days free trial period but after that, you have to buy their license to keep using it. This software is made to be used as an extra amplifier to boost up the volume of your audio or video if you think it is too low. The Letasoft Sound Booster app is very easy to use as you can control the volume from the slider. Moreover, it auto-starts and has no sound distortion.

5. Froyosoft Sound Booster (Mac)
Froyosoft Sound Booster is made for macOS users so they can boost video and audio file volumes. Individual application volumes can also be adjusted with the help of the Froyosoft Sound Booster. The good thing about this booster is that it is free for all users and it is 100% safe - you will not get any virus on your PC. You can download it from their website and increase the volume as high as you want to. So, get ready to get a clear and enhanced sound with the help of this app!

Part 2: Best YouTube Volume Boosters for Android and iOS
Following are the best YouTube sound boosters for Android and iOS devices:
1. AmpMe (Android and iOS)
With the help of AmpMe, you can start your little party through music apps. You don’t just get to listen to music but you can also chat with your friends - yup that’s right, it is a two-in-one app! The AmpMe app helps you to play the same music with your friends at the same time. It is one of the best volume booster apps that is available for both Android and iOS. It uses Bluetooth to connect with several devices, and the more the devices the higher the volume of the music. AmpMe offers a free trial and it costs $9.99 per week.

2. Super Volume Booster (Android)
To enjoy your music more than ever, you need a good volume enhancer. And, what can be better than an app that is free and boosts your audio? Android users are in luck because Super Volume Booster is a user-friendly app that allows you to increase the volume of YouTube and other apps. It gives you the best music experience. Moreover, it is clean, simple and has a one-touch operation. Not to forget that it has amazing reviews on Playstore. This app also increases the bass and also supports headphones and Bluetooth.

3. Volume Booster GOODEV (Android)
Volume Booster GOODEV is another app that boosts up the audio for you from 20 to 30% more! If you want to listen to an audiobook, watch a YouTube video or a movie on Netflix, volume Booster GOODEV can help you increase the volume of any media on any app! The volume can get so high that it might be dangerous for your ears so be careful. It offers a sound equalizer and is simple to use.

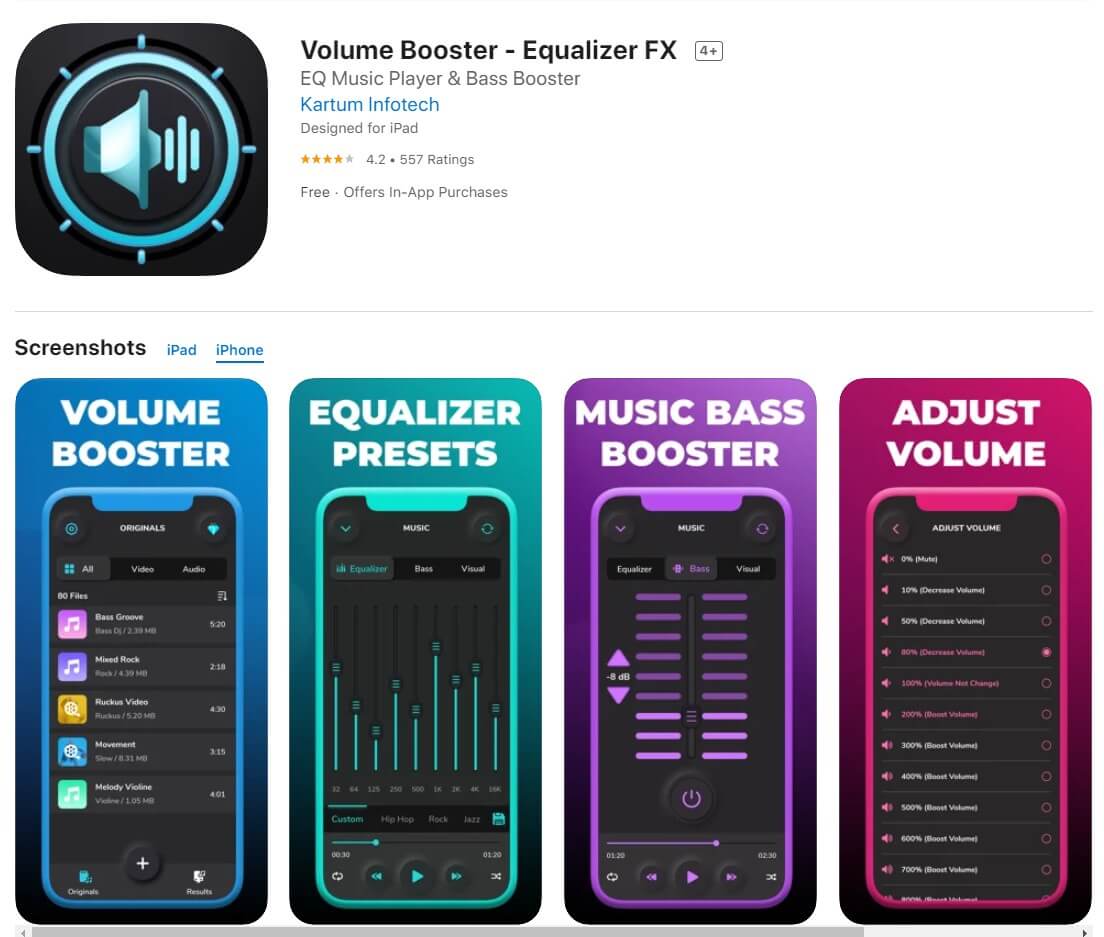
4. Volume Booster - Equalizer FX (iOS)
Volume Booster Equalizer FX can increase your volume higher than the default audio controller. With the help of this app, your device’s speaker will give the best result. You can adjust the sound effect levels according to your need. It makes the sound quality better and boosts up the volume with a single tap. You can get a weekly, monthly or yearly subscription. It is a great premium YouTube Volume booster for all iOS devices.
5. Max Volume Booster (iOS)
Max Volume Booster, as the name shows, boosts the volume to the maximum. You can find this app in the AppStore for free but it offers a premium version as well. With the help of the premium version, you can get an ad-free experience with no time limit. You can decrease or increase the volume based on your needs. Max Volume Booster gives you the experience and you will get addicted to it because it is a high-quality YouTube volume booster.

Part 3: Best YouTube Video Editing Software-Wondershare Filmora (Bonus Tip)
Wondershare Filmora is one of the most popular and user-friendly video editing software available. From beginners to pros, this app world for all. With Filmora you can create home videos, vlogs, Instagram reels, tutorials, guides, podcasts, and more! Wondershare Filmora is also the best YouTube video editor you will find! From editing to volume booster, you will find all the tools to create the perfect YouTube videos.


Here are some of the key features of Filmora that can help YouTubers make their YouTube videos:
- Offers multiple drawing video editing tools like speed control, volume booster, and color grading
- Offers special effects to enhance the appearance of your videos
- Allows you to custom create different animations
- Green Screen feature to help you change backgrounds and make the perfect videos
- Cross-platform accessibility as you can use it on both Windows and Mac
- Supports multiple file formats
- Ultra 4k HD support for the best quality of videos
- Free download and super easy to use with an intuitive interface
- Anyone can use it whether beginner or pro
- Online customer support available 24/7
Summing up
Stop worrying about low audio. Use one of the YouTube volume booster apps mentioned in this article. If you are making vlogs, tutorials, and other YouTube content, you can increase volume and create ideal videos with Wondershare video editor. So, to create the perfect videos with high-quality sound get Wondershare Filmora!
Shanoon Cox
Shanoon Cox is a writer and a lover of all things video.
Follow @Shanoon Cox
Shanoon Cox
Mar 27, 2024• Proven solutions
Have you ever listened to a YouTube video on max volume but still the sound wasn’t audible - even after turning up the YouTube volume as well as device audio? It is super annoying and inconvenient when you increase volume to max yet the video remains inaudible. YouTube volume issue could be due to various reasons such as poor audio quality of the built-in speakers or low original video sound. Well, there is a simple way to combat this problem i.e., sound booster. You can set different volume levels for the YouTube app on your PC or smartphone’s native volume controls. There are different YouTube volume boosters for Android, Windows, macOS, and iOS devices.
From listening to your favorite podcast to watching vlogs with your friends, you can use the best volume booster apps to increase the media sound volume and quality!
- Part 1: Best YouTube Volume Boosters for Windows and macOS
- Part 2: Best YouTube Volume Boosters for Android and iOS
- Part 3: Best YouTube Video Editing Software-Wondershare Filmora (Bonus Tip)
Part 1: Best YouTube Volume Boosters for Windows and macOS
Let’s introduce the best YouTube volume boosters for Windows and macOS:
1. FxSound (Windows and Mac)
FxSound is a very powerful tool that is made for Windows and macOS to enhance and boost the quality and volume of sound. This app comes with many features. For example, this audio software provides better sound quality, volume booster, and sound effects. Now you can listen to music, watch movies and play games without any distortion. Easily boost base, get customized effects and play with custom presets. You can download this app for your PC for free through the official website. People like this equalizer because it can make any audio format sound good even if it is 100 years old!
2. Boom 3D (Windows and macOS)
Boom 3D is a very popular app among many Windows and macOS users. This software is designed to help improve the audio on speakers or headphones that are connected to your computer. Boom 3D audio booster software also works with the Bluetooth devices that are connected to your PC. It can make any sound louder, clearer, and much better without buying any external devices. It provides us a 3D audio experience and works with any music player, video player, etc.!
3. Chrome Volume Booster Plugin (Windows)
This plugin has been rated 5 stars on the chrome web store as it is the best plugin for boosting up your volume on windows PC. This booster is so easy to download; you just have to go to the chrome web store and add the extension to your Google Chrome Browser. After adding it you can simply click on the icon and boost your volume up to 1000%! This plugin is free in the chrome store, just add it and choose how much louder you want your sound to be.
4. Letasoft Sound Booster (Windows)
Letasoft Sound Booster can only be used on windows. You can download it through the official website of Letasoft. It comes with a 14 days free trial period but after that, you have to buy their license to keep using it. This software is made to be used as an extra amplifier to boost up the volume of your audio or video if you think it is too low. The Letasoft Sound Booster app is very easy to use as you can control the volume from the slider. Moreover, it auto-starts and has no sound distortion.
5. Froyosoft Sound Booster (Mac)
Froyosoft Sound Booster is made for macOS users so they can boost video and audio file volumes. Individual application volumes can also be adjusted with the help of the Froyosoft Sound Booster. The good thing about this booster is that it is free for all users and it is 100% safe - you will not get any virus on your PC. You can download it from their website and increase the volume as high as you want to. So, get ready to get a clear and enhanced sound with the help of this app!
Part 2: Best YouTube Volume Boosters for Android and iOS
Following are the best YouTube sound boosters for Android and iOS devices:
1. AmpMe (Android and iOS)
With the help of AmpMe, you can start your little party through music apps. You don’t just get to listen to music but you can also chat with your friends - yup that’s right, it is a two-in-one app! The AmpMe app helps you to play the same music with your friends at the same time. It is one of the best volume booster apps that is available for both Android and iOS. It uses Bluetooth to connect with several devices, and the more the devices the higher the volume of the music. AmpMe offers a free trial and it costs $9.99 per week.
2. Super Volume Booster (Android)
To enjoy your music more than ever, you need a good volume enhancer. And, what can be better than an app that is free and boosts your audio? Android users are in luck because Super Volume Booster is a user-friendly app that allows you to increase the volume of YouTube and other apps. It gives you the best music experience. Moreover, it is clean, simple and has a one-touch operation. Not to forget that it has amazing reviews on Playstore. This app also increases the bass and also supports headphones and Bluetooth.
3. Volume Booster GOODEV (Android)
Volume Booster GOODEV is another app that boosts up the audio for you from 20 to 30% more! If you want to listen to an audiobook, watch a YouTube video or a movie on Netflix, volume Booster GOODEV can help you increase the volume of any media on any app! The volume can get so high that it might be dangerous for your ears so be careful. It offers a sound equalizer and is simple to use.
4. Volume Booster - Equalizer FX (iOS)
Volume Booster Equalizer FX can increase your volume higher than the default audio controller. With the help of this app, your device’s speaker will give the best result. You can adjust the sound effect levels according to your need. It makes the sound quality better and boosts up the volume with a single tap. You can get a weekly, monthly or yearly subscription. It is a great premium YouTube Volume booster for all iOS devices.
5. Max Volume Booster (iOS)
Max Volume Booster, as the name shows, boosts the volume to the maximum. You can find this app in the AppStore for free but it offers a premium version as well. With the help of the premium version, you can get an ad-free experience with no time limit. You can decrease or increase the volume based on your needs. Max Volume Booster gives you the experience and you will get addicted to it because it is a high-quality YouTube volume booster.
Part 3: Best YouTube Video Editing Software-Wondershare Filmora (Bonus Tip)
Wondershare Filmora is one of the most popular and user-friendly video editing software available. From beginners to pros, this app world for all. With Filmora you can create home videos, vlogs, Instagram reels, tutorials, guides, podcasts, and more! Wondershare Filmora is also the best YouTube video editor you will find! From editing to volume booster, you will find all the tools to create the perfect YouTube videos.
Here are some of the key features of Filmora that can help YouTubers make their YouTube videos:
- Offers multiple drawing video editing tools like speed control, volume booster, and color grading
- Offers special effects to enhance the appearance of your videos
- Allows you to custom create different animations
- Green Screen feature to help you change backgrounds and make the perfect videos
- Cross-platform accessibility as you can use it on both Windows and Mac
- Supports multiple file formats
- Ultra 4k HD support for the best quality of videos
- Free download and super easy to use with an intuitive interface
- Anyone can use it whether beginner or pro
- Online customer support available 24/7
Summing up
Stop worrying about low audio. Use one of the YouTube volume booster apps mentioned in this article. If you are making vlogs, tutorials, and other YouTube content, you can increase volume and create ideal videos with Wondershare video editor. So, to create the perfect videos with high-quality sound get Wondershare Filmora!
Shanoon Cox
Shanoon Cox is a writer and a lover of all things video.
Follow @Shanoon Cox
Minute-by-Minute Fortnite Tile Methods
How to Make Fortnite Thumbnail for Free and Easy in 2024

Ollie Mattison
Mar 27, 2024• Proven solutions
To grow a Youtube channel, you need to focus on several different factors and elements. Having an attractive and eye-catching thumbnail is one of those top factors that contribute to the growth of your channel. No matter how good your content is, if you cannot attract users to click on your videos, it will not benefit your channel. In this article, we are going to show you how you can make a Fortnite thumbnail in few simple steps using Filmora X. If you are a content creator and love to make Fortnite videos, then this article will be very helpful for you.
Filmora has recently introduced a new feature named AI Portrait that uses Artificial Intelligence to remove the background from a portrait or image. This feature doesn’t require any green screen to do that. Filmora also contains a wide range of elements and titles that help you enhance the Thumbnail and make look stunning and eye-catching.
Step 01: To start making a Fortnite thumbnail, it is important to have a screenshot of your gameplay. We can make a perfect screenshot using Fortnite Replay Mode. If you have recently played a Fortnite match, you can access its replay under the Career tab. Under the Career tab select Replays.

Step 02: If you are using a console, the game will only store 10 recent gameplays, but if you are using a PC, it will store 100 recent gameplays in this section. From all these gameplays, select the one that you want to use for the Thumbnail. Once you choose gameplay, you can control everything in it. The angle, speed, and camera mode.

Step 03: For creating a perfect thumbnail, select “Drone Free Camera” mode from the camera mode located on the bottom right corner of the screen. It will allow us to change the angle the way we want. Choose an angle of your choice and take the screenshot.

Step 04: Open Filmora X, make sure to select the 16:9 screen ratio. Import the screenshot using the import button.

Step 05: Drag and drop the screenshot into the timeline.

Step 06: Now, let’s separate the background and character. Go to the Effects, then AI Portrait, select Human Segmentation, and drop it into the screenshot.

Step 07: Filmora will ask you to purchase it, but you can now hit “Try it” to use it.

Step 08: It will remove the background of the screenshot.

Step 09: To add a background, go to the media and navigate to “Sample Color.” Drag a color of your choice and drop it below the screenshot.

Step 10: To add titles in the Thumbnail, go to the Titles tab. Here you can find several categories of titles. Find your preferred title and drop it above all the layers. You can choose titles, lower thirds, and other texts depending upon your need and requirement.

Step 11: We can make this Fortnite Thumbnail look more attractive by adding elements such as stickers and icons. Filmora contains a wide range of stickers. To access them, navigate to the Elements tab. Here you can find so many categories of elements. Choose any elements according to your need and drop them in the timeline above all other layers. If you cannot find a suitable sticker, you can download one from the internet and use it by importing it into Filmora.

Step 12: Once you are satisfied with the final results, you can take the screenshot of the Thumbnail using the Snapshot icon located below the preview panel. It will create a screenshot in the media panel of Filmora.

Step 13: To access the directory where this screenshot is saved, right-click on the screenshot and click on “Reveal in Explorer.” It will open the folder that contains all the screenshots you take through Filmora. Your Fortnite Thumbnail is ready to be used on your Youtube videos.

Conclusion
With Filmora, there are no limits. You can use your imagination to create amazing Fortnite thumbnails or thumbnails for other purposes. This article is just a demo teaching you how you use Filmora X to develop free and astounding thumbnails. Explore other options and elements of Filmora to take your thumbnails to another level.
Ollie Mattison
Ollie Mattison is a writer and a lover of all things video.
Follow @Ollie Mattison
Ollie Mattison
Mar 27, 2024• Proven solutions
To grow a Youtube channel, you need to focus on several different factors and elements. Having an attractive and eye-catching thumbnail is one of those top factors that contribute to the growth of your channel. No matter how good your content is, if you cannot attract users to click on your videos, it will not benefit your channel. In this article, we are going to show you how you can make a Fortnite thumbnail in few simple steps using Filmora X. If you are a content creator and love to make Fortnite videos, then this article will be very helpful for you.
Filmora has recently introduced a new feature named AI Portrait that uses Artificial Intelligence to remove the background from a portrait or image. This feature doesn’t require any green screen to do that. Filmora also contains a wide range of elements and titles that help you enhance the Thumbnail and make look stunning and eye-catching.
Step 01: To start making a Fortnite thumbnail, it is important to have a screenshot of your gameplay. We can make a perfect screenshot using Fortnite Replay Mode. If you have recently played a Fortnite match, you can access its replay under the Career tab. Under the Career tab select Replays.
Step 02: If you are using a console, the game will only store 10 recent gameplays, but if you are using a PC, it will store 100 recent gameplays in this section. From all these gameplays, select the one that you want to use for the Thumbnail. Once you choose gameplay, you can control everything in it. The angle, speed, and camera mode.
Step 03: For creating a perfect thumbnail, select “Drone Free Camera” mode from the camera mode located on the bottom right corner of the screen. It will allow us to change the angle the way we want. Choose an angle of your choice and take the screenshot.
Step 04: Open Filmora X, make sure to select the 16:9 screen ratio. Import the screenshot using the import button.
Step 05: Drag and drop the screenshot into the timeline.
Step 06: Now, let’s separate the background and character. Go to the Effects, then AI Portrait, select Human Segmentation, and drop it into the screenshot.
Step 07: Filmora will ask you to purchase it, but you can now hit “Try it” to use it.
Step 08: It will remove the background of the screenshot.
Step 09: To add a background, go to the media and navigate to “Sample Color.” Drag a color of your choice and drop it below the screenshot.
Step 10: To add titles in the Thumbnail, go to the Titles tab. Here you can find several categories of titles. Find your preferred title and drop it above all the layers. You can choose titles, lower thirds, and other texts depending upon your need and requirement.
Step 11: We can make this Fortnite Thumbnail look more attractive by adding elements such as stickers and icons. Filmora contains a wide range of stickers. To access them, navigate to the Elements tab. Here you can find so many categories of elements. Choose any elements according to your need and drop them in the timeline above all other layers. If you cannot find a suitable sticker, you can download one from the internet and use it by importing it into Filmora.
Step 12: Once you are satisfied with the final results, you can take the screenshot of the Thumbnail using the Snapshot icon located below the preview panel. It will create a screenshot in the media panel of Filmora.
Step 13: To access the directory where this screenshot is saved, right-click on the screenshot and click on “Reveal in Explorer.” It will open the folder that contains all the screenshots you take through Filmora. Your Fortnite Thumbnail is ready to be used on your Youtube videos.
Conclusion
With Filmora, there are no limits. You can use your imagination to create amazing Fortnite thumbnails or thumbnails for other purposes. This article is just a demo teaching you how you use Filmora X to develop free and astounding thumbnails. Explore other options and elements of Filmora to take your thumbnails to another level.
Ollie Mattison
Ollie Mattison is a writer and a lover of all things video.
Follow @Ollie Mattison
Also read:
- Protect Your Data While Converting YouTube Videos to MP3 Tracks
- 2024 Approved A Step-by-Step Guide to Embedding Timestamp Metadata
- 2024 Approved Charting the Course of Creative Conquests Self Vs. Competitors on YouTube
- Dominate the Scene The Best Hashtag Tactics for YouTube Gamers
- Unveiling the Best 3 Video Hosts Post-YouTube Era
- Inside Look Comprehensive Analysis of V-Tubers
- [New] Crafting the Perfect Introduction 15 Viral YouTube Video Intros
- 2024 Approved Channel-Changing Ideas Inspiring Videos to Enhance Creativity
- In 2024, Enhance and Clean Up YouTube Footage Borderless Tutorial
- Clip Description Creator for 2024
- In 2024, Boost Online Presence Innovative YouTube Channel Names
- Crafting the Perfect Gaming Channel Header
- Integrating YouTube Tracks Into iMovie Projects Easily
- [New] Elevate Engagement Top Video Release Slots
- [Updated] Avoid Shaky Footage Proper Tripod Usage Techniques in Vlog Creation
- 11 Useful YouTube SEO Tips to Rank Your Video
- Step-by-Step Guide to Brighter YouTube Video Editing
- Ideal Cutting Edge Apps Top 10 for Editing Youtube Shorts
- 2024 Approved Crafting Viral Videos on YouTube A Strategic Plan
- Brief Video Explanations, All-Inclusive for 2024
- Premium Gaming Intro Ideas for YouTube Free vs Paid Models
- In 2024, Dissecting the Safety of Using Subforsup For YouTube Growth
- Investors' Guide to Best Financial YouTube Sources
- Unlocking the Secrets of Creative YouTube Channel Names for Vloggers & Filmmakers (Maximum Length 156 Characters)
- In 2024, Cutting-Edge Unboxing Strategies to Boost Viewership and Engagement
- Innovators Intertwining Video with Melodious Images
- Entering the Fullscreen Realm Choosing a CMS
- Effortless Shuffle of Your YouTube Playlists for 2024
- In 2024, Enhancing User Engagement How to Use YouTube Tags Effectively
- Double Down on YouTube Visibility (2 Quick Methods) for 2024
- Curating Historical Wisdom The Ultimate Student-Friendly Channel List (#1-10)
- Set Longer Duration for Your YouTube Film
- Earning Excellence A Guide to Maximize Money From Mobile YouTube Viewers for 2024
- Unveiling the Secrets to Youtube Success Titles & Tags
- Beat Buzzers Up-and-Coming Background Scores For YT Shorts
- 15 Premier Sci-Tech Vloggers for Enlightened Learning
- Seamless Blend of Text & Video Without Payment
- Engaging Audiences with Effective Haul Video Strategies for 2024
- The Essential Guide for Game Channels Banner Integration
- [Updated] 5 Leading Tools for Crafting Superior Video Titles and Tags
- Bridging Gaps Transforming Trend Data Into Video Concepts
- In 2024, 10 Premier Yoga Educators on YouTube
- Beauty Vlogs From Basics to Brilliance Launching a YouTube Channel for 2024
- [New] Brand Your Channel Innovative Banner Templates for Gamers
- Discovering the Excellent 10 Yoga Programs for Better Wellness
- Designing Direct URLs for Automatic Content Subscription for 2024
- Chilling Yet Heating Top 5 Winter Scenes for Vids
- How to Change the Privacy Setting on Your YouTube Videos
- How to Mirror Poco C55 to Mac? | Dr.fone
- Exclusive, No-Cost Premiere Pro Resource Pack
- [New] Screen Grab King MacOS Recorder, Free
- [New] The Ultimate Guide to Exclusive Content on Discord's DiscoNitro Plan for 2024
- How to Fix the Soft Bricked Honor Magic 6 Pro? | Dr.fone
- [Updated] In 2024, 10 Standout Educational Websites for Self-Paced Learning
- [Updated] Top 2 Video Editing Apps Compared Filmora & Democracy Creator for 2024
- In 2024, How To Do Realme V30 Screen Sharing | Dr.fone
- How to Transfer Data from Realme GT 5 to Any iOS Devices | Dr.fone
- 2024 Approved Best Footage Top 10 Action Cams With Stabilization
- [Updated] Broadcast Elegance Gamers' Guide to Using OBS for 2024
- Cellular Network Not Available for Voice Calls On Sony Xperia 1 V | Dr.fone
- In 2024, The Pro's Guide to Documenting Your Online Facebook Interactions
- [Updated] Greatest 7 Web-Based Recording Tools 2023 for 2024
- New IMovie Not Available on Android? No Problem! Try These for 2024
- [Updated] 2024 Approved Grandmasters' Guide to Virtual Combat Excellence
- Updated 20 Best Text To Speech Software Windows, Mac, Android, iPhone & O for 2024
- [New] In 2024, Blending Beats with Video Footage on Vimeo Platform
- How to Remove a Previously Synced Google Account from Your Honor Play 8T
- Capturing Win10 Our Best Screen Recorder Picks
- In 2024, Leading Voice Modification Tools at Zero Cost An In-Depth Filmora Video Voice Editing Handbook
- Record to Remember A Curated Selection of Tools and Gadgets for Capturing Favorite Tunes with Ease
- 2024 Approved VirtualDub Competitors A Review of the Best Video Editing Tools
- 5 Most Effective Methods to Unlock iPhone 13 mini in Lost Mode | Dr.fone
- In 2024, Best Infinix Note 30 VIP Pattern Lock Removal Tools Remove Android Pattern Lock Without Losing Data
- 2024 Approved Amazon's Favorite Originals - Twitter Top Picks
- New Uncovering the Secrets of the Best OGG Converters
- How to Change Infinix Hot 40i Location on Skout | Dr.fone
- New 2024 Approved Free Audio Integration in Digital Photography Across Multiple Operating Systems
- In 2024, CatchEmAll Celebrate National Pokémon Day with Virtual Location On Nubia Red Magic 9 Pro | Dr.fone
- [New] In 2024, Inventory of Facebook Video Ratios
- [New] Complete Analysis of the High-Def Sony FDR-X1000 Videographer
- In 2024, Does PokeGo++ still work on Apple iPhone XS/iPad? | Dr.fone
- [New] 8 Best Free TikTok Video Editing Apps/Website on Mac for 2024
- The Ultimate Blueprint for Memetic Virality
- New In 2024, Dual-View Video Editing The Best Apps for iOS and Android
- New How To Make a Video by Mouse in Filmora for 2024
- Update 6 Best Voice Changers You Cant Miss for 2024
- [New] How to Capture & Share Vlogs Effectively (FB via OBS) for 2024
- New Evaluating MAGIX Samplitudes Market Position Against Other Audio Editing Suites
- Does Airplane Mode Turn off GPS Location On Motorola Moto G04? | Dr.fone
- [Updated] In 2024, Upload Footage Seamlessly to Facebook, PC & Android Style
- New Top-Rated No-Cost Vocal Transformer Guide and Professional Audio Sculpting with Filmora Tutorials
- [New] In 2024, Perfecting Presence Zooming Past Background Imperfections
- [Updated] In 2024, Superior Free FB Visual Storyteller Tool
- How to Track Vivo V27 Pro by Phone Number | Dr.fone
- In 2024, 5 Hassle-Free Solutions to Fake Location on Find My Friends Of Nokia C12 Pro | Dr.fone
- Title: [New] Best 10 YouTube Volume Boosters for Windows, macOS, Android, and iPhone
- Author: Kevin
- Created at : 2024-05-25 15:53:05
- Updated at : 2024-05-26 15:53:05
- Link: https://youtube-videos.techidaily.com/new-best-10-youtube-volume-boosters-for-windows-macos-android-and-iphone/
- License: This work is licensed under CC BY-NC-SA 4.0.
