
:max_bytes(150000):strip_icc()/search-error-e0cf43ae96b248189eb82768561c2087.png)
Navigating the Online Marketplace for Profitable YT Content
Navigating the Online Marketplace for Profitable YT Content
Building a following on a YouTube channel to monetize it can be difficult. It is even more difficult to turn it into a full-time occupation, especially if you are a beginner. So, it makes sense buying monetized YouTube channel. When you buy a monetized YouTube channel, it relieves you of the struggle of churning out high-quality content that connects with an audience. You also get a fully functional stream of generating additional income. In this article, we explore the top sites that offer monetized YouTube channel for sale, giving you an easier start on the platform.
YouTube Monetization Editor A cross-platform for editing any kind of videos and add creative effects to make them more attarctive!
Free Download Free Download Learn More

Part 1. Top 10 Sites to Buy Monetized YouTube Channels
Investing in a pre-existing, monetized YouTube channel is a great idea. It saves you time, allowing you to focus on creating quality content. However, make sure you buy a monetized YouTube channel from a reliable seller. Let’s have a look at the top sites to buy monetized YouTube channels:
1. UseViral
This is one of the best options available to buy monetize YouTube channel. They offer precious monetized YouTube channel packages. Your new channel will be ready for monetization with more than 4,000 watch time hours and a 1,000+ subscriber base.
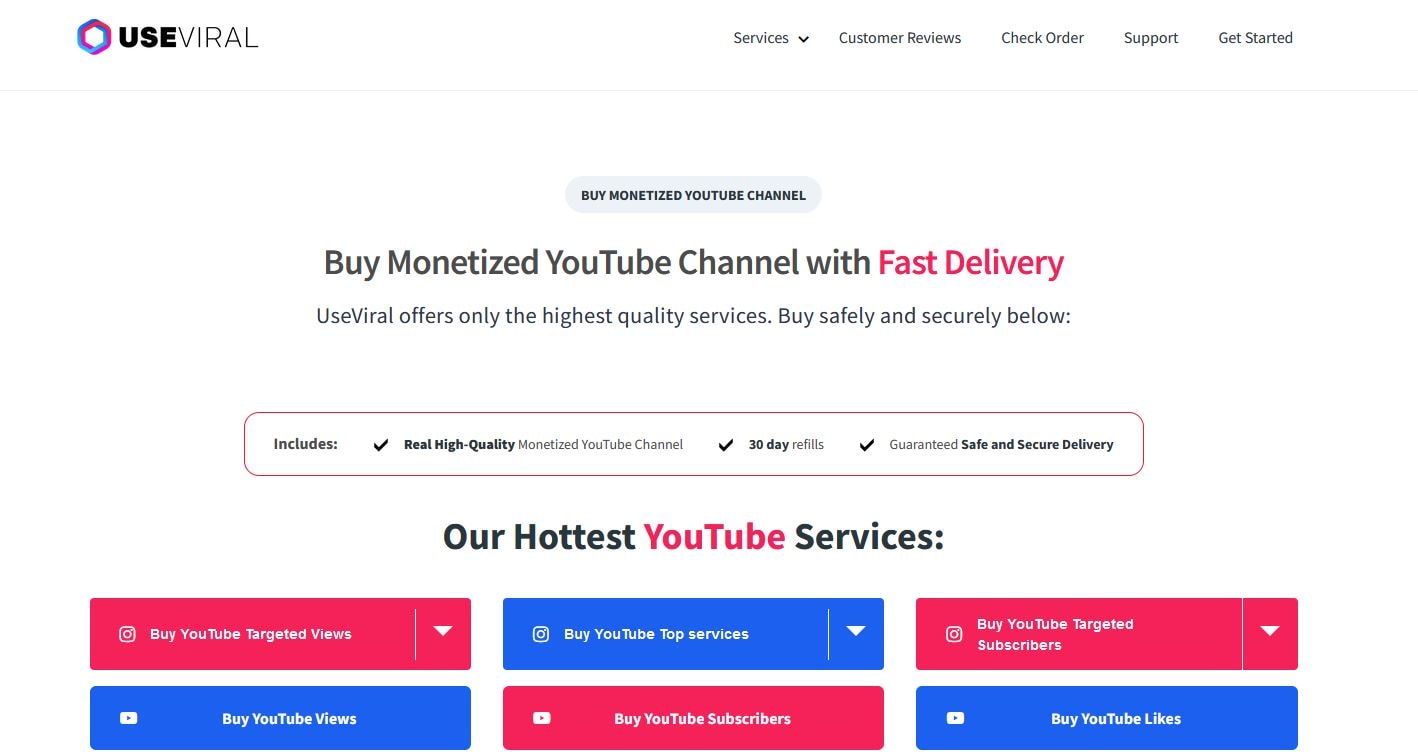
To get your monetized channel, you will be required to fill out a brief questionnaire. Explain your ideal market and video production needs to allow the UseViral team to understand what you are looking for. They let you know what you are paying for any extras.
Price: $599
Customer Rating: 9.5/10
2. SlidesMedia
This is a well-known social media growth strategist that allows you to buy a monetized YouTube channel. The site stands out for offering assistance with growing the YouTube channel and other social media platforms.

SlidesMedia promises to use only human editors on your YouTube channel. They give you a channel with genuine content. You also get the assurance that the content is not bot-generated..
Price: $529 - $2400.
Customer Rating: 9.3/10
3. AudienceGain
AudienceGain is a popular social media marketing platform. They offer a wide range of services, including selling monetized YouTube channels.
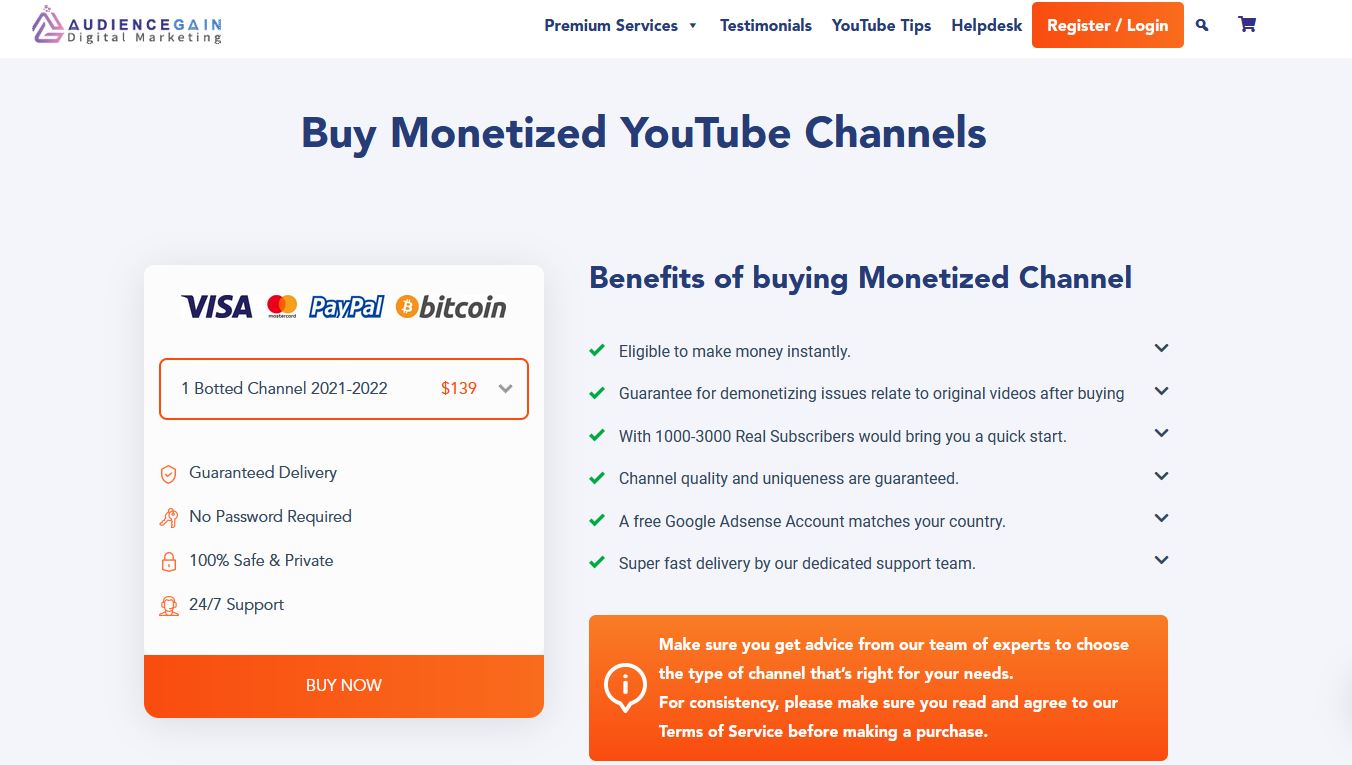
With a proven track record, AudienceGain stands out for offering quality customer service. They support you before, during, and after the purchase. They also provide organically grown channels to make sure you are not demonetized.
Price: $ 129 - $390
Customer Rating: 9.5/10
4. Fameswap
This is a flexible marketplace for selling and buying monetized YouTube channels. The site stands out for being selective in the kind of channels it features.
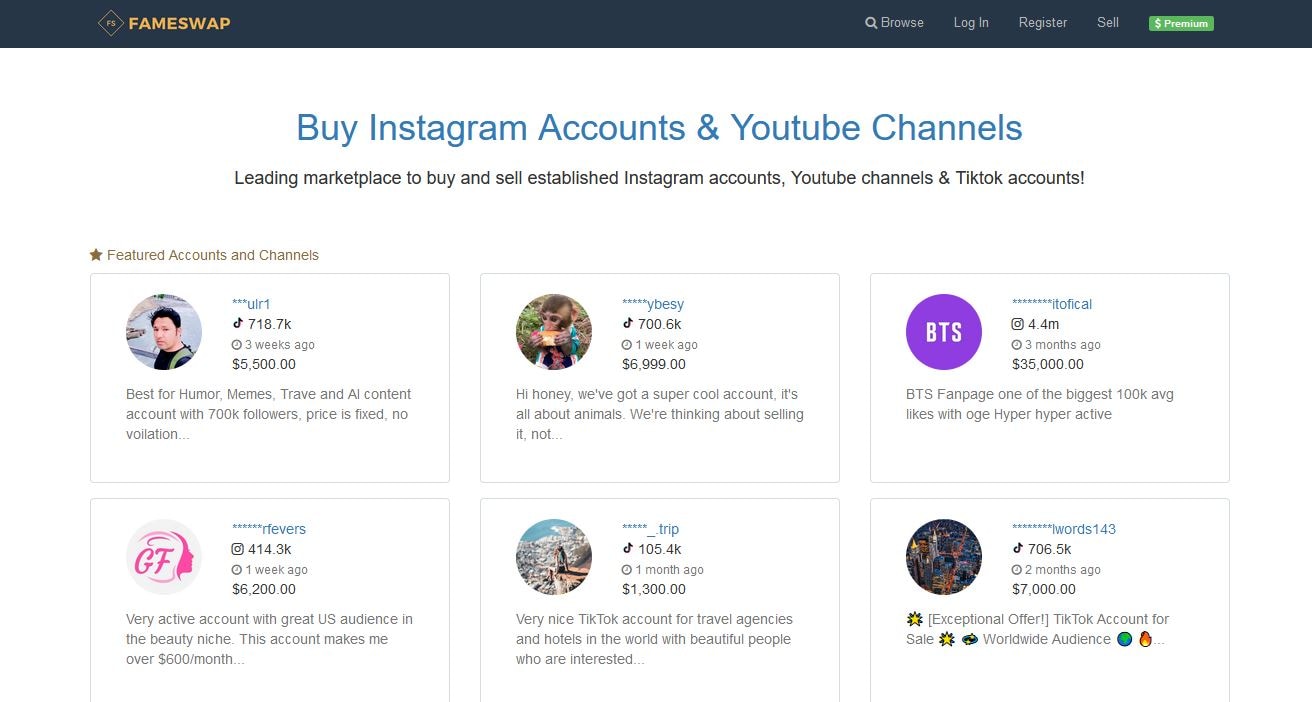
Fameswap offers a safe method of communication between vendors and buyers through an internal messaging system. You can invest in a channel that you are interested in, ranging from topics like fashion and beauty to entertainment and sports.
Price: Customized pricing
Customer Rating: 8.5/10
5. Eazy Viral
Another excellent choice is to buy a monetized YouTube channel. It allows you to choose from numerous channel types. Users also specify the number of subscribers and watch times they want.
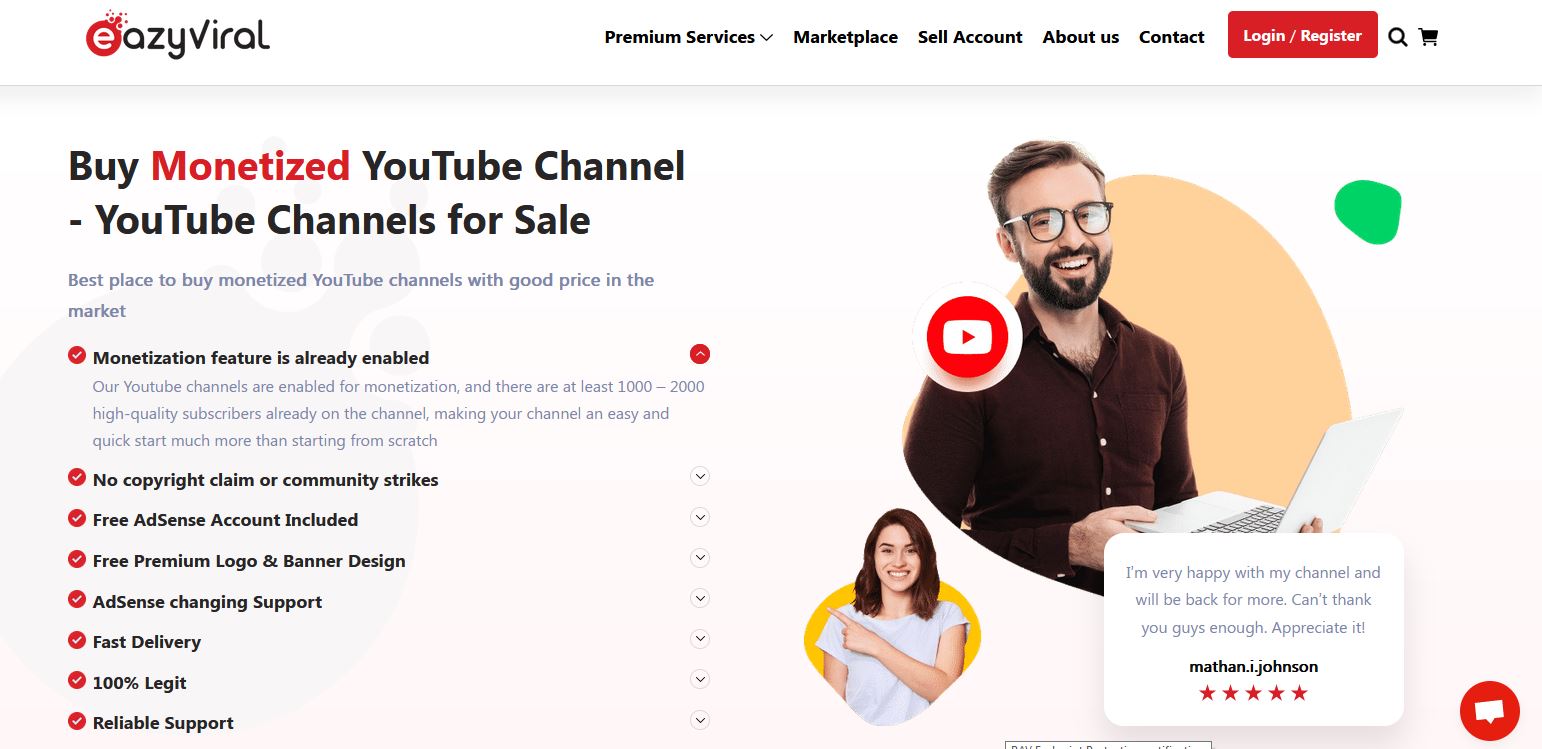
Eazy Viral promises quality content that will not infringe on the rights of others. They also make it simple to monetize your videos and safeguard your AdSense account.
Price: $249 - $1100
Customer Rating: 9/10
6. EazySMM
With EazySMM, you get a unique starting point on your YouTube journey. Choose a YouTube monetized channel for sale on a niche you are interested in at a low price to get started.

EazySMM watches over its clients to make sure they are growing organically. They promise genuine channel views and subscriptions. Their services are also quick, delivering monetized channels within 12 to 48 hours of the purchase.
Price: Custom Pricing
Customer Rating: 8/10
7. 123accs
This platform allows you to buy YouTube channels that have not yet made money. You can then monetize the channel since it has already met the YouTube Partner Program eligibility criteria.
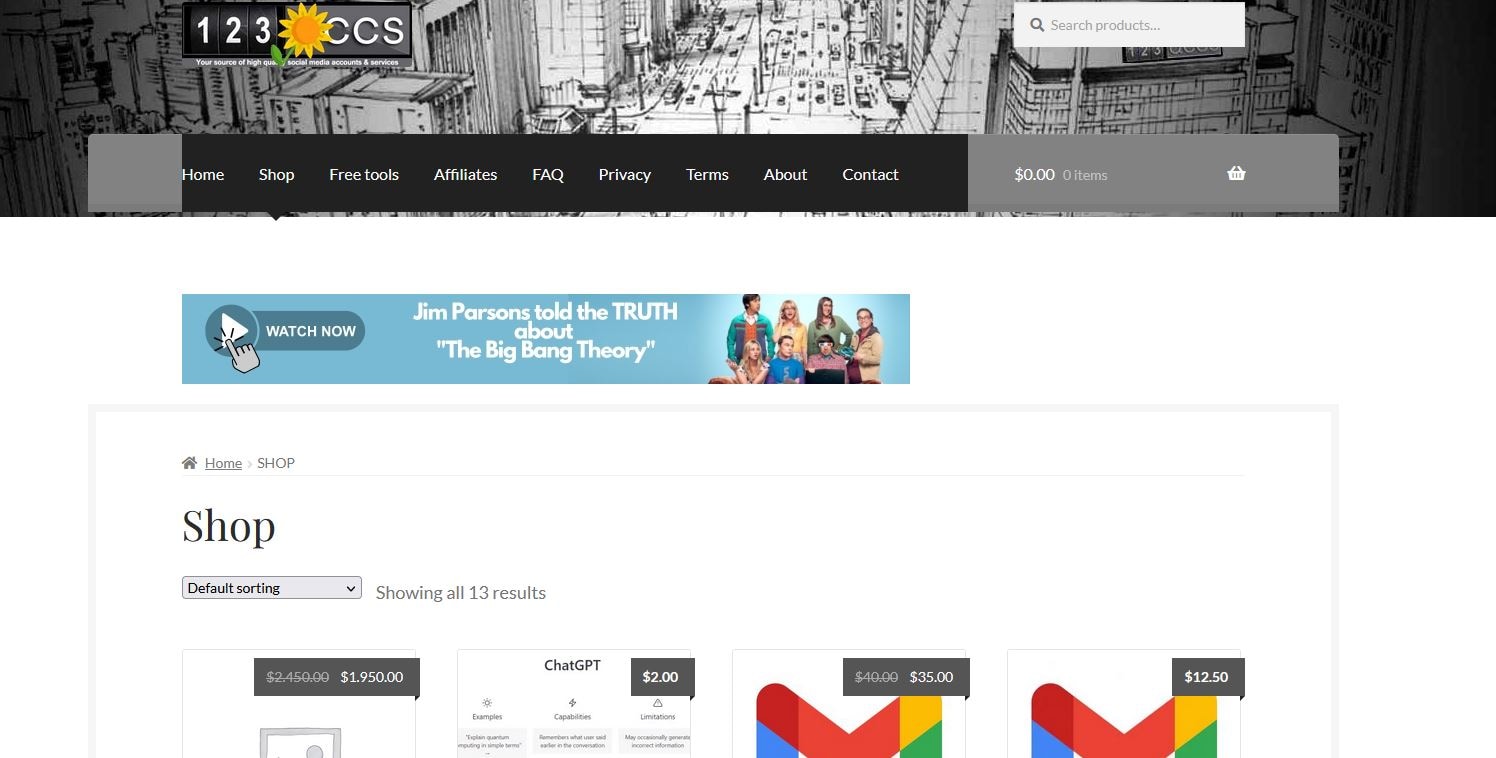
123accs offers new and affordable PVA accounts. Therefore, you can use the service to buy a monetized YouTube channel. Available options include 5 PVA accounts, 25 UK followers, 10 US follower accounts, and more.
Price: Custom Pricing
Customer Rating: 8/10
8. PlayerUp
PlayerUp offers monetized YouTube channels for sale in its marketplace. The platform offers authentic and affordable channels that users can rely on.
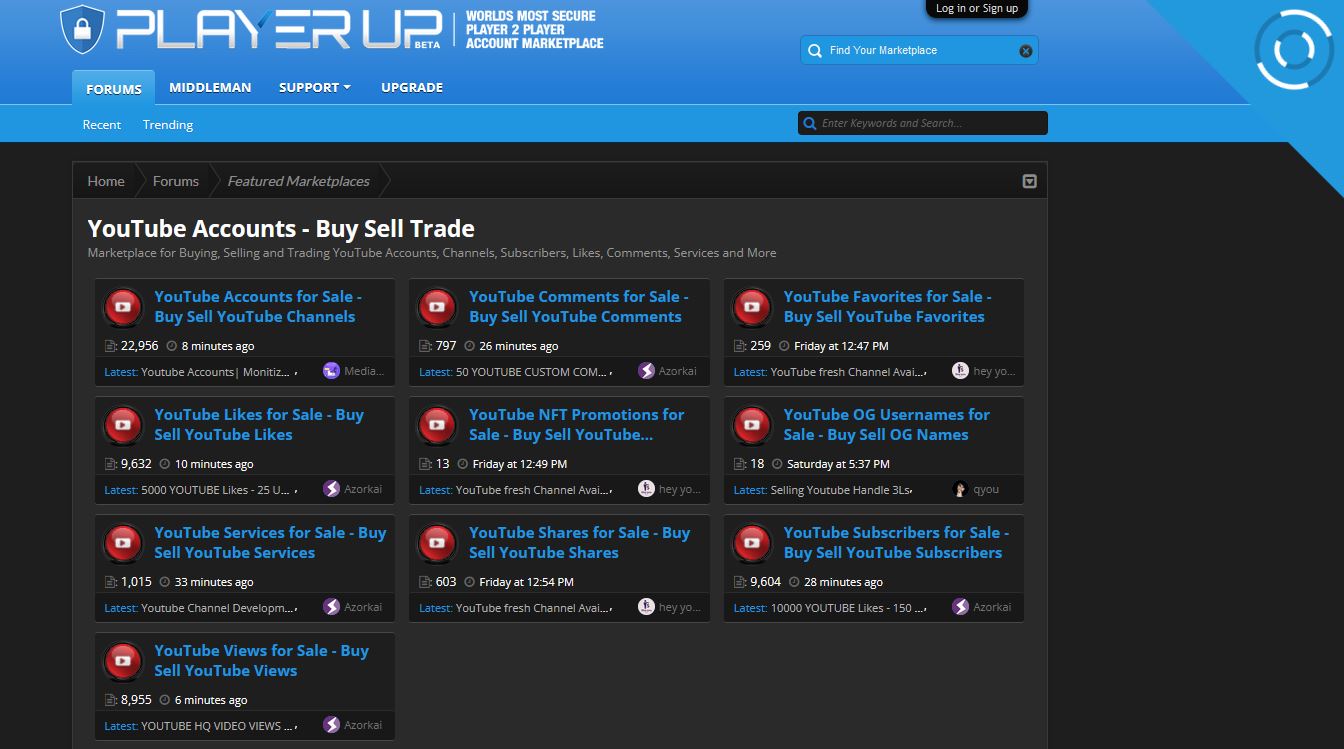
The high quality of the videos posted in the channels under sale will make them stand out in marketing campaigns. This is also a great platform for buying branded content and advanced filters.
Price: Custom Pricing
Customer Rating: 7.5/10
9. Trustiu
This is a great choice for for satisfying shopping experience. The platform makes it easy to purchase YouTube channels almost instantly.

Trustiu stands out for its affordable prices and a wide selection of choices. Users also have the freedom to choose the language they want for their channels.
Price: Custom Pricing
Customer Rating: 7.5/10
10. Accs Market
This social media marketplace allows you to buy monetized YouTube channels in a matter of few steps. Choose channels in entertainment of lifestyle niches.
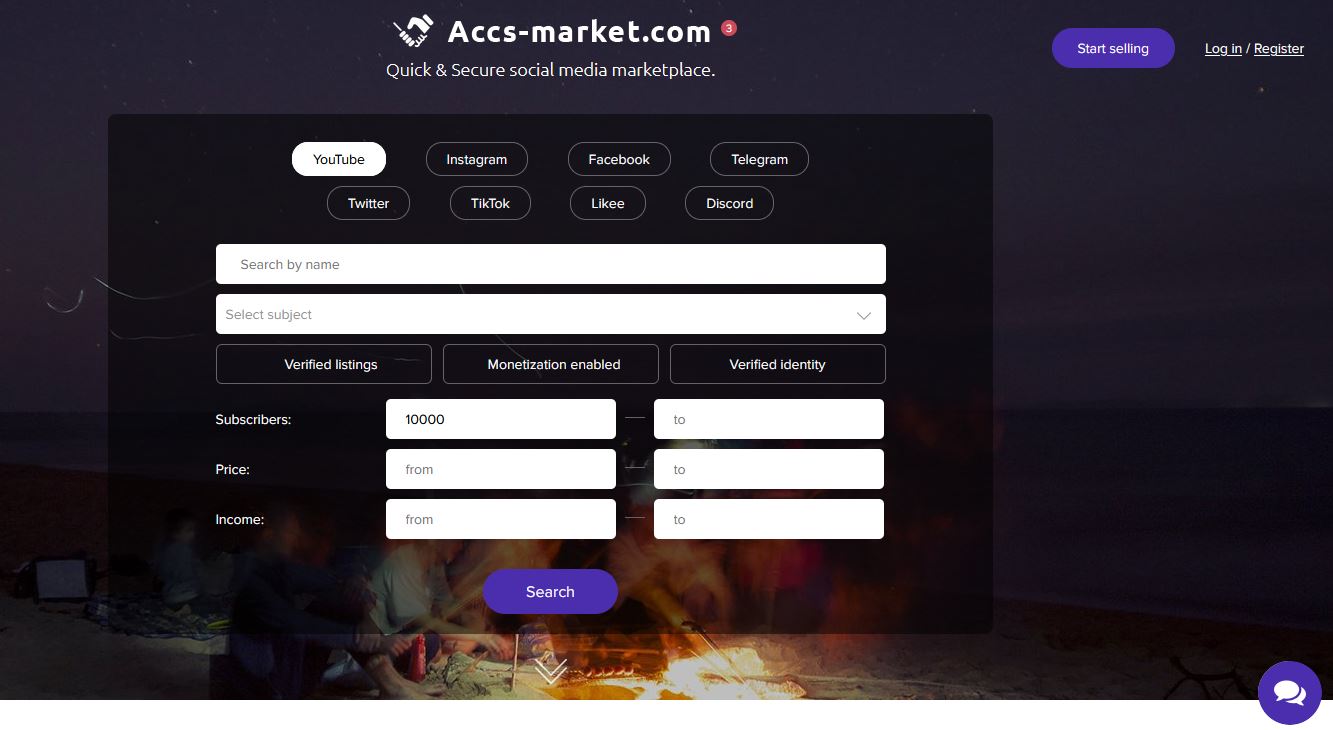
Accs market offers an affordable option for any type of video genre for sellers. From TV shows to movies, Accs Market has something for you.
Part 2. Editing YouTube Videos for Monetization with Wondershare Filmora
In addition to buying a monetized YouTube channel, you will need to create quality videos to remain relevant. This requires good video editing software. With Wondershare Filmora, you can edit any kind of video and add creative effects to make it more interesting. With the option to edit on your desktop or phone on the go, the software gives you more versatility.
Free Download For Win 7 or later(64-bit)
Free Download For macOS 10.14 or later
Wondershare offers a wide range of features that make video editing fun and easy. From automation tools to video enhancement, you can do a lot to your video on the same platform. The most useful features for YouTube monetization include:
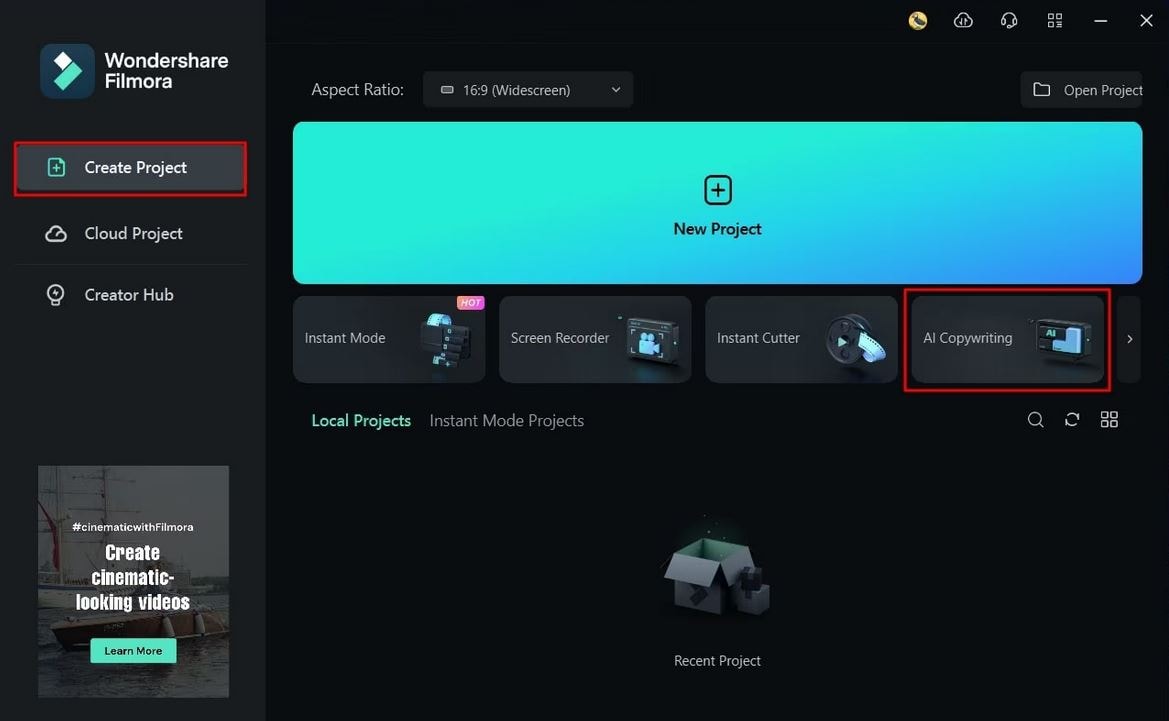
1. AI Copywriting
This feature integrates the ChatGPT API, allowing you to get inspiration through AI-generating scripts. You can also generate text during video editing, as well as YouTube Titles and Descriptions.
2. Auto Synchronization
The auto-synchronization feature allows you to effortlessly match your audio with the video. This makes it sound more clear and gives your audience a better watching experience.

3. Auto Reframe
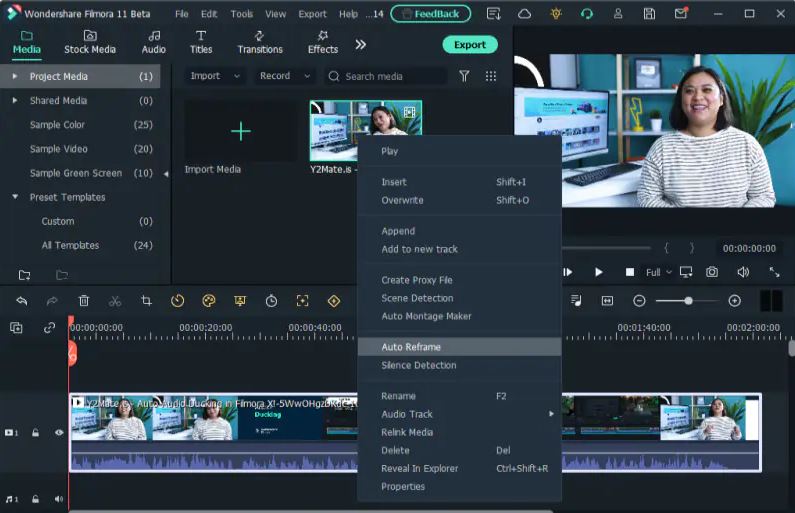
With the rise of YouTube Shorts, reframing your videos is now more of a necessity than an option. You need to appeal to both YouTube viewers and those who consume content in the vertical orientation. The Filmora Auto Reframe feature allows you to automatically resize your videos with no editing skills needed. To use this feature:
Step 1Start the Auto Reframe Feature
One of the ways is by clicking on the Auto Reframe option when you launch Filmora. The other option is to import the media and right-click on it to find the Auto Reframe feature.
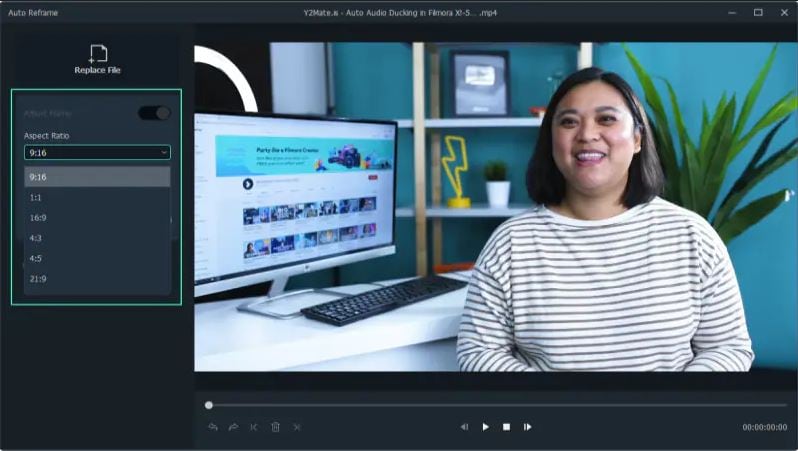
Step 2Adjust the Aspect Ratio and Motion Speed
Define the aspect ratio in the dialogue box that opens. A widescreen has an aspect ratio of 16:9 while a vertical one is 9:16.
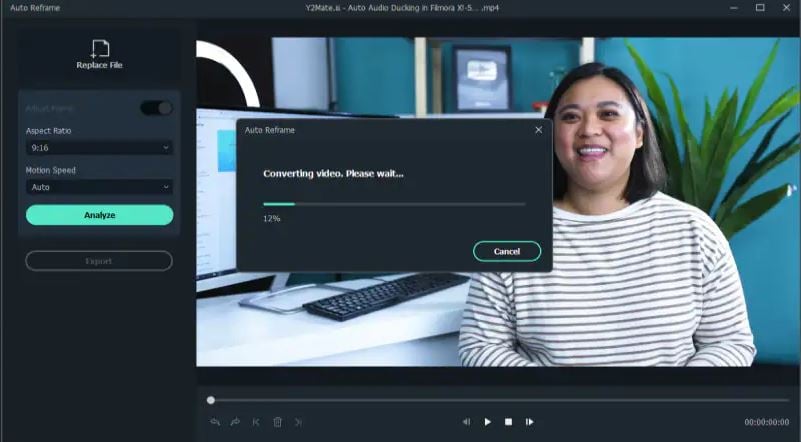
Step 3Analyze and Auto Reframe the Video
After adjusting the settings, tap on the Analysis option. This will prompt Filmora to analyze your video for completion. The video will be automatically reframed to your specified aspect ratio and speed.
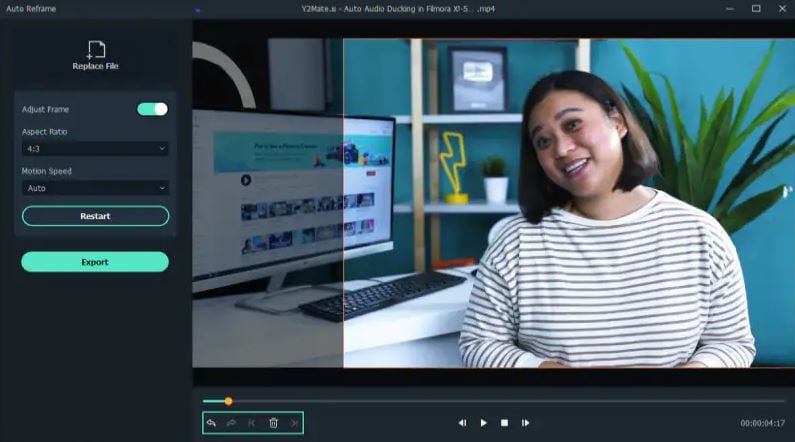
Step 4Preview and Export the Reframed Video
You can now preview the final video to make sure it runs as desired. Make any changes if necessary, and export the reframed video in MP4 format, ready for uploading to YouTube.
Conclusion
The first step to running a successful channel is to be accepted into the YouTube Partner Program. However, building a YouTube Channel from 0 views to meet the eligibility status can be difficult. That’s why buying a monetized YouTube channel is a great place to start. You will only need to focus on creating highly engaging content to continue earning and growing your channel. To ensure that the content you create is of high quality, we recommend using Wondershare Filmora. The video editing software comes with fantastic features that help you create great videos for your channel.
Free Download Free Download Learn More
Part 1. Top 10 Sites to Buy Monetized YouTube Channels
Investing in a pre-existing, monetized YouTube channel is a great idea. It saves you time, allowing you to focus on creating quality content. However, make sure you buy a monetized YouTube channel from a reliable seller. Let’s have a look at the top sites to buy monetized YouTube channels:
1. UseViral
This is one of the best options available to buy monetize YouTube channel. They offer precious monetized YouTube channel packages. Your new channel will be ready for monetization with more than 4,000 watch time hours and a 1,000+ subscriber base.
To get your monetized channel, you will be required to fill out a brief questionnaire. Explain your ideal market and video production needs to allow the UseViral team to understand what you are looking for. They let you know what you are paying for any extras.
Price: $599
Customer Rating: 9.5/10
2. SlidesMedia
This is a well-known social media growth strategist that allows you to buy a monetized YouTube channel. The site stands out for offering assistance with growing the YouTube channel and other social media platforms.
SlidesMedia promises to use only human editors on your YouTube channel. They give you a channel with genuine content. You also get the assurance that the content is not bot-generated..
Price: $529 - $2400.
Customer Rating: 9.3/10
3. AudienceGain
AudienceGain is a popular social media marketing platform. They offer a wide range of services, including selling monetized YouTube channels.
With a proven track record, AudienceGain stands out for offering quality customer service. They support you before, during, and after the purchase. They also provide organically grown channels to make sure you are not demonetized.
Price: $ 129 - $390
Customer Rating: 9.5/10
4. Fameswap
This is a flexible marketplace for selling and buying monetized YouTube channels. The site stands out for being selective in the kind of channels it features.
Fameswap offers a safe method of communication between vendors and buyers through an internal messaging system. You can invest in a channel that you are interested in, ranging from topics like fashion and beauty to entertainment and sports.
Price: Customized pricing
Customer Rating: 8.5/10
5. Eazy Viral
Another excellent choice is to buy a monetized YouTube channel. It allows you to choose from numerous channel types. Users also specify the number of subscribers and watch times they want.
Eazy Viral promises quality content that will not infringe on the rights of others. They also make it simple to monetize your videos and safeguard your AdSense account.
Price: $249 - $1100
Customer Rating: 9/10
6. EazySMM
With EazySMM, you get a unique starting point on your YouTube journey. Choose a YouTube monetized channel for sale on a niche you are interested in at a low price to get started.
EazySMM watches over its clients to make sure they are growing organically. They promise genuine channel views and subscriptions. Their services are also quick, delivering monetized channels within 12 to 48 hours of the purchase.
Price: Custom Pricing
Customer Rating: 8/10
7. 123accs
This platform allows you to buy YouTube channels that have not yet made money. You can then monetize the channel since it has already met the YouTube Partner Program eligibility criteria.
123accs offers new and affordable PVA accounts. Therefore, you can use the service to buy a monetized YouTube channel. Available options include 5 PVA accounts, 25 UK followers, 10 US follower accounts, and more.
Price: Custom Pricing
Customer Rating: 8/10
8. PlayerUp
PlayerUp offers monetized YouTube channels for sale in its marketplace. The platform offers authentic and affordable channels that users can rely on.
The high quality of the videos posted in the channels under sale will make them stand out in marketing campaigns. This is also a great platform for buying branded content and advanced filters.
Price: Custom Pricing
Customer Rating: 7.5/10
9. Trustiu
This is a great choice for for satisfying shopping experience. The platform makes it easy to purchase YouTube channels almost instantly.
Trustiu stands out for its affordable prices and a wide selection of choices. Users also have the freedom to choose the language they want for their channels.
Price: Custom Pricing
Customer Rating: 7.5/10
10. Accs Market
This social media marketplace allows you to buy monetized YouTube channels in a matter of few steps. Choose channels in entertainment of lifestyle niches.
Accs market offers an affordable option for any type of video genre for sellers. From TV shows to movies, Accs Market has something for you.
Part 2. Editing YouTube Videos for Monetization with Wondershare Filmora
In addition to buying a monetized YouTube channel, you will need to create quality videos to remain relevant. This requires good video editing software. With Wondershare Filmora, you can edit any kind of video and add creative effects to make it more interesting. With the option to edit on your desktop or phone on the go, the software gives you more versatility.
Free Download For Win 7 or later(64-bit)
Free Download For macOS 10.14 or later
Wondershare offers a wide range of features that make video editing fun and easy. From automation tools to video enhancement, you can do a lot to your video on the same platform. The most useful features for YouTube monetization include:
1. AI Copywriting
This feature integrates the ChatGPT API, allowing you to get inspiration through AI-generating scripts. You can also generate text during video editing, as well as YouTube Titles and Descriptions.
2. Auto Synchronization
The auto-synchronization feature allows you to effortlessly match your audio with the video. This makes it sound more clear and gives your audience a better watching experience.
3. Auto Reframe
With the rise of YouTube Shorts, reframing your videos is now more of a necessity than an option. You need to appeal to both YouTube viewers and those who consume content in the vertical orientation. The Filmora Auto Reframe feature allows you to automatically resize your videos with no editing skills needed. To use this feature:
Step 1Start the Auto Reframe Feature
One of the ways is by clicking on the Auto Reframe option when you launch Filmora. The other option is to import the media and right-click on it to find the Auto Reframe feature.
Step 2Adjust the Aspect Ratio and Motion Speed
Define the aspect ratio in the dialogue box that opens. A widescreen has an aspect ratio of 16:9 while a vertical one is 9:16.
Step 3Analyze and Auto Reframe the Video
After adjusting the settings, tap on the Analysis option. This will prompt Filmora to analyze your video for completion. The video will be automatically reframed to your specified aspect ratio and speed.
Step 4Preview and Export the Reframed Video
You can now preview the final video to make sure it runs as desired. Make any changes if necessary, and export the reframed video in MP4 format, ready for uploading to YouTube.
Conclusion
The first step to running a successful channel is to be accepted into the YouTube Partner Program. However, building a YouTube Channel from 0 views to meet the eligibility status can be difficult. That’s why buying a monetized YouTube channel is a great place to start. You will only need to focus on creating highly engaging content to continue earning and growing your channel. To ensure that the content you create is of high quality, we recommend using Wondershare Filmora. The video editing software comes with fantastic features that help you create great videos for your channel.
Craft a Striking Thumbnail for YouTube Videos
Your YouTube video, or any other clip published on any forum, gets a larger number of hits if it has an attractive thumbnail. And, the fact is, a thumbnail becomes 10x more attractive when the main character that the image has have a neon border around it.
With that said, in the following sections, you will learn a couple of methods on how to add a YouTube thumbnail border around the main characters and/or objects that are significant to the clip.
In this article
01 Add Glowing Neon Border to YouTube Thumbnail with Filmora
02 Add a Glowing Neon Border in YouTube Thumbnail with Canva
03 Outline a Person in a YouTube Thumbnail with Photoshop
Part 1: How to Add Neon Border to YouTube Thumbnail for Free with Filmora
Being one of the most versatile and intuitive post-production tools available in the market today, Wondershare Filmora X allows you to add a neon border to a YouTube thumbnail quite conveniently. You can learn how to get this done on Windows or Mac by following the steps given below.
For Win 7 or later (64-bit)
For macOS 10.12 or later
Step 1: Define Project Settings and Add Image to the Timeline
Launch Wondershare Filmora X on your PC (a MacBook Pro M1 is used here), ensure that the project aspect ratio is set to 16:9 (Widescreen) on the splash screen, and click New Project. On the main interface, click the Preview quality and display settings icon from the upper-right area of the Timeline, click Change Project Aspect Ratio, click to select 1280 x 720 (HD) from the Resolution menu of the Project Settings box, and click OK to save the custom project settings.

Then select My Media from the menu bar if not already selected, click Project Media from the navigation pane, and click Import from the Media box to select and import the image of the main character or object that you want to use in the thumbnail.

Now, drag the image from the Media box to the Timeline at the bottom.

Step 2: Clear Image Background, Add Border, and Add Custom Background
Go to Effects from the menu bar, click to select the Default tab and then AI Portrait from the navigation pane, and click and drag the Human Segmentation preset from the right box, and place it over the image track in the Timeline.

Double-click the image layer, scroll down the upper-left box to the Video Effects section, and use the Edge Thickness and Edge Feather sliders to adjust the character’s edges to make them as realistic as possible. Click OK when done.

Next, click and drag the Human Border preset over the image track in the Timeline, and follow the same procedure to customize the border. This will give the character a neon border effect.

Now, use the method explained earlier to import a custom image for the background, and drag and place it under the previous track in the Timeline.

If you are running the latest version of Filmora, you will find there are some neon light effects available under AI Portrait as well.

Step 3: Add Titles to Thumbnail
Go to Titles from the menu bar, click to select the Default tab and then Lower 3rds from the navigation pane, and click and drag your preferred lower-third preset from the right window to a separate layer in the Timeline. Double-click the lower-third layer, and use the available options in the upper-left window to change the text, its color, etc., and drag the textbox to place it to your preferred position on the image as well. Click OK to save the changes.
Next, click to select Titles from the navigation pane, and drag your preferred title from the right window to the upper-most track in the Timeline. Now use the method explained earlier to edit the text, its color, position, etc. to make it look professional.

For more tips and tricks for creating YouTube thumbnail, you can check this You Tube thumbnail creating guide.
Step 4: Get the Neon Border Thumbnail
Click the Snapshot (Camera) icon from the upper-right area of the Timeline, go to My Media from the menu bar, right-click the thumbnail of the screenshot you captured, and click Reveal in Finder (on Mac) or Reveal in Explorer (on Windows) to get to the folder the YouTube thumbnail border is saved in.

Part 2: How to Add a Glowing Neon Border in Your YouTube Thumbnail with Canva
Canva is another intuitive editing program that works on the web interface rather than having you download and install an app on your PC. You can add a neon border for YouTube thumbnails using Canva by following the instructions given below:
Step 1: Define Project Settings and Add a Background
After signing in to your Canva account, click Create a design from the top-right corner of the page, click Custom size from the bottom, define 1280 and 720 in the Width and Height fields on the box that appears respectively, and click Create new design.

Now, click to select Background from the navigation bar on the left (if the Background tool is not visible, click More and then choose Background from the expanded list), and click to select a background from the images available in the center pane.

Step 2: Upload an Image and Add Effects
Click Uploads from the navigation bar, click the More icon from the right of the Upload media button present at the top of the center pane, choose your preferred method to upload the image (with the transparent background) that you want to use, upload the image, and drag it from the center pane to the Canvas.
Note: You can use any of the tools available online to remove the background from your image for free.

To add a YouTube thumbnail border, make sure that the image that you added to the Canvas is selected, click the Duplicate icon from the upper-right area, and use the scaling handles of the copy of the image to increase its size a bit. Reposition the image back to its original location as well.
Then, click Edit image from the upper-left corner of the Canvas, click Duotone from the Edit image pane at the center, if need be, click See all, choose your preferred duotone effect to apply on the image, choose your preferred highlight and shadow colors from the box that appears next, and click Back from the top of the pane.

Next, click See all next to the Adjust section from the center pane, and drag the Blur slider to the right to increase the blur effect on the image.

Step 3: Position the Layers
While keeping the duplicate image selected, click the Position button from the upper-right area of the Canvas, and click Background to send the second image behind the first one to get the neon border effect for the photo.

Part 3: How to Outline a Person in a YouTube Thumbnail with Photoshop
Because YouTube thumbnails are nothing but static images, creating YouTube thumbnail border with Adobe Photoshop is comparatively easier. The process of doing this is given below:
Step 1: Define Document Preferences and Import an Image
Launch Adobe Photoshop on your PC, click Create new, and on the New Document customization box, define the width and height values to 1280 and 720 pixels respectively. Select Transparent from the Background Contents menu as well if not already selected. Click Create from the bottom to create a new Photoshop document with the specified document settings. Next, open the folder that contains the source image, drag the photo to Photoshop, and press Enter to place the photo.

Step 2: Remove Background from the Image
Make sure that the image layer is selected in the Layers panel on the right, go to Select from the menu bar at the top, and click Subject. From the bottom of the Layers panel, click the Add a mask icon to get rid of the background, leaving only the human on the Canvas.

Step 3: Add a Custom Background and an Outline Around the Subject
Use the method explained earlier to import a background image of your choice to Photoshop. Drag the background image layer to the bottom in the Layers panel. Double-click the masked layer, click to select Stroke from the left pane of the Layer Style box, and use the options available on the right to manage the size, color, position, etc. of the stroke that has been added around the human subject. Click OK when done, and then export the image normally to use it as a YouTube thumbnail border.

Summary
It is important to know that the default resolution of a YouTube thumbnail is 1280 x 720 pixels that is usually written and referred to as 720p. While adding a YouTube thumbnail border, it is also imperative to have a good sense of color combination and fonts. Furthermore, a decent tool like Wondershare Filmora X must be used to add an appealing neon border around the main subject in the thumbnail image easily and quickly.
02 Add a Glowing Neon Border in YouTube Thumbnail with Canva
03 Outline a Person in a YouTube Thumbnail with Photoshop
Part 1: How to Add Neon Border to YouTube Thumbnail for Free with Filmora
Being one of the most versatile and intuitive post-production tools available in the market today, Wondershare Filmora X allows you to add a neon border to a YouTube thumbnail quite conveniently. You can learn how to get this done on Windows or Mac by following the steps given below.
For Win 7 or later (64-bit)
For macOS 10.12 or later
Step 1: Define Project Settings and Add Image to the Timeline
Launch Wondershare Filmora X on your PC (a MacBook Pro M1 is used here), ensure that the project aspect ratio is set to 16:9 (Widescreen) on the splash screen, and click New Project. On the main interface, click the Preview quality and display settings icon from the upper-right area of the Timeline, click Change Project Aspect Ratio, click to select 1280 x 720 (HD) from the Resolution menu of the Project Settings box, and click OK to save the custom project settings.
Then select My Media from the menu bar if not already selected, click Project Media from the navigation pane, and click Import from the Media box to select and import the image of the main character or object that you want to use in the thumbnail.
Now, drag the image from the Media box to the Timeline at the bottom.
Step 2: Clear Image Background, Add Border, and Add Custom Background
Go to Effects from the menu bar, click to select the Default tab and then AI Portrait from the navigation pane, and click and drag the Human Segmentation preset from the right box, and place it over the image track in the Timeline.
Double-click the image layer, scroll down the upper-left box to the Video Effects section, and use the Edge Thickness and Edge Feather sliders to adjust the character’s edges to make them as realistic as possible. Click OK when done.
Next, click and drag the Human Border preset over the image track in the Timeline, and follow the same procedure to customize the border. This will give the character a neon border effect.
Now, use the method explained earlier to import a custom image for the background, and drag and place it under the previous track in the Timeline.
If you are running the latest version of Filmora, you will find there are some neon light effects available under AI Portrait as well.
Step 3: Add Titles to Thumbnail
Go to Titles from the menu bar, click to select the Default tab and then Lower 3rds from the navigation pane, and click and drag your preferred lower-third preset from the right window to a separate layer in the Timeline. Double-click the lower-third layer, and use the available options in the upper-left window to change the text, its color, etc., and drag the textbox to place it to your preferred position on the image as well. Click OK to save the changes.
Next, click to select Titles from the navigation pane, and drag your preferred title from the right window to the upper-most track in the Timeline. Now use the method explained earlier to edit the text, its color, position, etc. to make it look professional.
For more tips and tricks for creating YouTube thumbnail, you can check this You Tube thumbnail creating guide.
Step 4: Get the Neon Border Thumbnail
Click the Snapshot (Camera) icon from the upper-right area of the Timeline, go to My Media from the menu bar, right-click the thumbnail of the screenshot you captured, and click Reveal in Finder (on Mac) or Reveal in Explorer (on Windows) to get to the folder the YouTube thumbnail border is saved in.
Part 2: How to Add a Glowing Neon Border in Your YouTube Thumbnail with Canva
Canva is another intuitive editing program that works on the web interface rather than having you download and install an app on your PC. You can add a neon border for YouTube thumbnails using Canva by following the instructions given below:
Step 1: Define Project Settings and Add a Background
After signing in to your Canva account, click Create a design from the top-right corner of the page, click Custom size from the bottom, define 1280 and 720 in the Width and Height fields on the box that appears respectively, and click Create new design.
Now, click to select Background from the navigation bar on the left (if the Background tool is not visible, click More and then choose Background from the expanded list), and click to select a background from the images available in the center pane.
Step 2: Upload an Image and Add Effects
Click Uploads from the navigation bar, click the More icon from the right of the Upload media button present at the top of the center pane, choose your preferred method to upload the image (with the transparent background) that you want to use, upload the image, and drag it from the center pane to the Canvas.
Note: You can use any of the tools available online to remove the background from your image for free.
To add a YouTube thumbnail border, make sure that the image that you added to the Canvas is selected, click the Duplicate icon from the upper-right area, and use the scaling handles of the copy of the image to increase its size a bit. Reposition the image back to its original location as well.
Then, click Edit image from the upper-left corner of the Canvas, click Duotone from the Edit image pane at the center, if need be, click See all, choose your preferred duotone effect to apply on the image, choose your preferred highlight and shadow colors from the box that appears next, and click Back from the top of the pane.
Next, click See all next to the Adjust section from the center pane, and drag the Blur slider to the right to increase the blur effect on the image.
Step 3: Position the Layers
While keeping the duplicate image selected, click the Position button from the upper-right area of the Canvas, and click Background to send the second image behind the first one to get the neon border effect for the photo.
Part 3: How to Outline a Person in a YouTube Thumbnail with Photoshop
Because YouTube thumbnails are nothing but static images, creating YouTube thumbnail border with Adobe Photoshop is comparatively easier. The process of doing this is given below:
Step 1: Define Document Preferences and Import an Image
Launch Adobe Photoshop on your PC, click Create new, and on the New Document customization box, define the width and height values to 1280 and 720 pixels respectively. Select Transparent from the Background Contents menu as well if not already selected. Click Create from the bottom to create a new Photoshop document with the specified document settings. Next, open the folder that contains the source image, drag the photo to Photoshop, and press Enter to place the photo.
Step 2: Remove Background from the Image
Make sure that the image layer is selected in the Layers panel on the right, go to Select from the menu bar at the top, and click Subject. From the bottom of the Layers panel, click the Add a mask icon to get rid of the background, leaving only the human on the Canvas.
Step 3: Add a Custom Background and an Outline Around the Subject
Use the method explained earlier to import a background image of your choice to Photoshop. Drag the background image layer to the bottom in the Layers panel. Double-click the masked layer, click to select Stroke from the left pane of the Layer Style box, and use the options available on the right to manage the size, color, position, etc. of the stroke that has been added around the human subject. Click OK when done, and then export the image normally to use it as a YouTube thumbnail border.
Summary
It is important to know that the default resolution of a YouTube thumbnail is 1280 x 720 pixels that is usually written and referred to as 720p. While adding a YouTube thumbnail border, it is also imperative to have a good sense of color combination and fonts. Furthermore, a decent tool like Wondershare Filmora X must be used to add an appealing neon border around the main subject in the thumbnail image easily and quickly.
Also read:
- [New] Comparative Review Smartphone Usage of the Leading Video Apps
- YouTube Rotation Simplified Techniques for Any Degree [Updated Edition]
- Optimal Livestream Capture Options for Video Artists
- Unlocking Financial Potential How to Earn with YouTube Shorts
- [Updated] A Convenient Compilation Finding Your YT Comments
- Discover the Best Top 10 No-Cost Cinema Treasures Online for 2024
- In 2024, Direct Route Uploading From YouTube to Dailymotion
- [New] Channel Title Genius Ideas for Your Video Hub
- [Updated] Analyzing Channels Monetization Status at a Glance
- [New] 10 Best Travel Youtube Channels to Follow
- Navigating the World of ASMR Video Content
- Making Waves in the Gaming Community on YouTube
- Transforming Viewers' Experience The Impact of Text on YouTube Media
- 2024 Approved Bypassing Barriers Privately Share YouTube Video via Google
- [New] Enhance Video Pace - YouTube via Desktops & Phones
- Enrich Thumbnails Introducing Radiant Neon Elements
- In 2024, Buy YouTube Likes? Does It Really Help Boost Your Channel?
- 2024 Approved Best Approach for Managing CC Rights & Usage
- Navigating The Network Of YouTube Multitasking Mastery
- In 2024, Earning Insights Average AdSense Earning for Every 1,000 YouTube Views
- In 2024, Discovering 8 YouTube Channels on the Rise at Lightning Speed
- [Updated] Chart a Course for Success Top 5 Effective Video Marketing Strategies on YouTube
- Propel Content to Prominence Leverage TubeBuddy's Power
- Double Down on YouTube Visibility (2 Quick Methods) for 2024
- Channel Design Mastery Selecting the Right YT Banner & Art Sizes
- [Updated] Channel Success Metrics Subscriber & Play Buttons
- [Updated] Comprehensive YouTube Etiquette Guide
- 2024 Approved Enrich Viewers' Experience A Comprehensive Guide to Youtube End Screens
- 7 Ways to Unlock a Locked Realme C67 4G Phone
- [Updated] Unveiling the Top 10 Facebook Video Platforms
- In 2024, How does the stardust trade cost In pokemon go On Samsung Galaxy XCover 6 Pro Tactical Edition? | Dr.fone
- In 2024, How to Cast Honor Play 40C Screen to PC Using WiFi | Dr.fone
- [Updated] Revolutionizing Advertising on Facebook with the Best Video Tactics for 2024
- [New] In 2024, Zoom for the First Timer Easy-to-Follow Guidelines
- Tips for Removing Spotify's Auto-Suggesting Podcasts
- [Updated] Harnessing Your Camera's Power for Live Online Content on Personal Computers for 2024
- In 2024, Shooting Up Expert Advice for Creating Vertical Content on Your Phone
- In 2024, Top 10 Password Cracking Tools For Vivo Y17s
- In 2024, 16 Unique Metaverse Scenarios Demonstrating VR's Impact
- Updated Master Your Sound Without Spending a Dime Top 11 Free Audio Tools for PC & Mac Users for 2024
- Precise Screen Record - AZ's Full App Dissection
- 2024 Approved How to Change Aspect Ratio in iMovie
- How to use Pokemon Go Joystick on Apple iPhone 15? | Dr.fone
- How To Unlink Apple ID From iPhone 8 Plus
- Updated Silence Your Surroundings Advanced Strategies for Background Music Removal in Audacity for 2024
- Title: Navigating the Online Marketplace for Profitable YT Content
- Author: Kevin
- Created at : 2024-05-25 15:48:14
- Updated at : 2024-05-26 15:48:14
- Link: https://youtube-videos.techidaily.com/navigating-the-online-marketplace-for-profitable-yt-content/
- License: This work is licensed under CC BY-NC-SA 4.0.
