
:max_bytes(150000):strip_icc()/difference-between-usb-and-aux-534612-8a6e2fd2677145eaaa8fb0d8635b39d5.png)
"Maximize Video Quality Top 8 YouTube to AVI Converters"
Maximize Video Quality: Top 8 YouTube to AVI Converters
YouTube to AVI: Tutorial + 8 Best YouTube to AVI Converters

Richard Bennett
Mar 27, 2024• Proven solutions
Playing AVI (audio video interleave) files on VLC media player or Windows media player costs nothing, and the number of free YouTube to AVI converters is innumerable. Then, why misuse your data or money viewing videos on YouTube? To download and convert a video to AVI file takes less than a minute.
And the biggest advantage: you can stream AVI audios and videos files online on your computer the whole day.
In this article, I’ll show you how to convert YouTube videos to AVI file formats in three easy ways. Also included are the best 10 YouTube to AVI converters.
You will Learn :
- What is an AVI File?
- How To Convert YouTube To AVI?
- Best AVI Video Players For Windows, Mac, iPhone, and Android
- 8 Best YouTube to AVI Converters
What is an AVI File?
Before we get into the full episode, let’s start by understanding the definition of .AVI file.
AVI stands for audio video interleave. An AVI is a video container format that capture, store and play audio- videos. The AVI file extensions are abbreviated as .avi.
It was developed by Microsoft in 1992 and works based on Resource Interchange File Format (RIFF). Its users enjoy built-in support in every Microsoft Windows application.
AVI encodes its audio and video data on codecs like XviD, DivX and MPEG-2. A codec is a software or hardware used to compress or decompress digital video.
If you have limited storage, avoid AVI files because they are non-compressed and occupy large space. Conversely, AVI format stores high-quality videos since they are less compressed.
Streaming videos from YouTube is expensive. To watch your favorite videos repeatedly, you have to download the YouTube videos and convert to AVI file.
How To Convert YouTube To AVI: Best Solutions For Windows And Mac?
Have you ever tried to convert YouTube videos to AVI online? It’s next to impossibility! The easiest and fastest way is to start by downloading the video.
To convert YouTube to AVI, you require software that supports all file formats. Why? YouTube videos are uploaded in many formats. To avoid trial and error methods, the best-recommended software to use is Filmora.
Filmora works pretty well with Windows10/8/7 and mac. Do you want to know how to download and convert YouTube videos to AVI using Filmora for free? Follow the steps below.
Step 1: On the Filmora product page, select Windows or Mac, and then click the Free Download button below. Follow the prompts to install it.


Step 2: Search for the YouTube video to convert. To download a YouTube video easily subscribers to YouTube Premium. Otherwise, download directly from your browser directly using plugins like Dlnowsoft .
Step 3: Now double-click the Filmora icon to start your new video conversion project. You can change the aspect ratio if necessary.

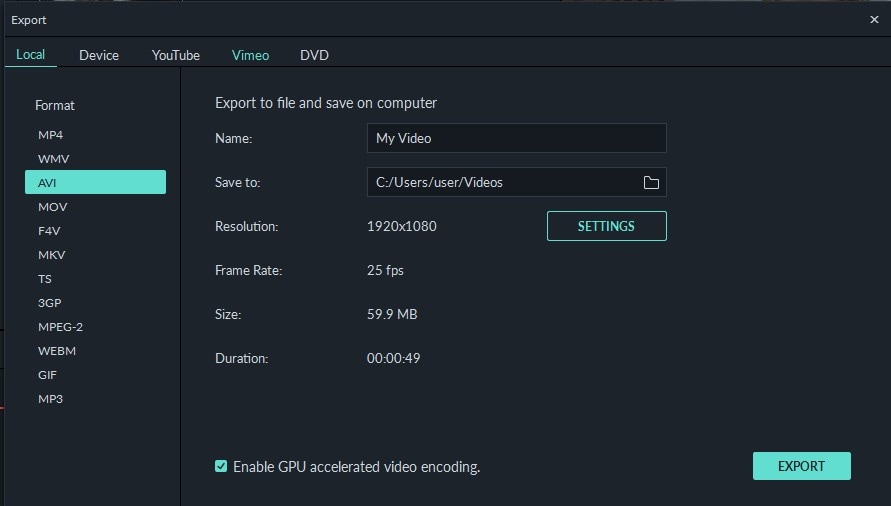
Step 4: Tap on the new project timeline for the editor menu to load. Head over to the Import menu and drop down to Import files to select your downloaded YouTube video. Click the “EXPORT” to open the file format options.
Step 5: Select AVI, rename the project and choose where to save the converted YouTube video.
Click the Export menu at the bottom and wait for the video to convert.
To learn more about Wondershare Filmora video editor in 60 seconds, click the video below.
Back to our main topic. Not every media player can play AVI files. Likewise, you cannot use any video converting software to convert YouTube to AVI.
Therefore, to quickly understand the YouTube to AVI converter to use and the AVI video media players for windows, mac, iPhone or Android, I’ve subdivided this part into two parts.
- Part 1: Best AVI Video Players
- Part 2: 8 Best YouTube to AVI Converter
Best AVI Video Players For Windows, Mac, iPhone, and Android
Days are gone when Windows Media Player was the most commonly preferred media player. The launch of devices like Mac, iPhone, and Android has led to the development of AVI players that are compatible with the in-built systems.
You may also like: 10 Best Free Outro Makers Online to Create Perfect Outro Templates >>
Top AVI Players For Windows 10/8/7
Microsoft Windows is the most used operating system. The top AVI video players for Windows are:
- JetVideo
- KM Player
- Rules Player
- VLC Player
- Real Player
- FreeSmith Video Player
Best 6 AVI Players For iPhone/iPad
Today’s technological advancements have placed the iOS operating system on a global competition with other systems. To play AVI videos on iPhone or iPad, use the following video players:
- RockPlayer2
- VLC Media Player
- Video Stream
- AirPlayit
- Oplayer Lite
- Infuse3
Top 5 AVI Players for Android
The majority of smartphone owners have Android phones. The Android operating system supports a myriad of AVI media players. Here the top AVI players for Android to download:
- Dice Player
- BS Player
- VLC Media Player
- GPlayer
6 Best Free AVI Player For Mac
Mac is renowned for its simplicity and compatibility with many third-party applications. The best and easiest AVI players for mac include:
- 5KPlayer
- Gom Player
- QuickTime
- VLC Media Player
- Plex
- Elmedia
Now that you know which player to download, which AVI converters are suitable for your device? Select the best from the next part.
8 Best YouTube to AVI Converters
Without a doubt, the number of YouTube to AVI converters available online surpasses everyone’s demand. Whereas some works best for mac and Windows, others are developed for Android and iPad.
A reliable YouTube video converter should have options for you to save and reset the resolution. Online video converters are the best for you only have copy-paste the URL and then convert. They also negate YouTube video download policies.
You may also like: YouTube Outro Complete Guide [+Best Makers & Free Templates] >>
1. OnlineVideoConverter
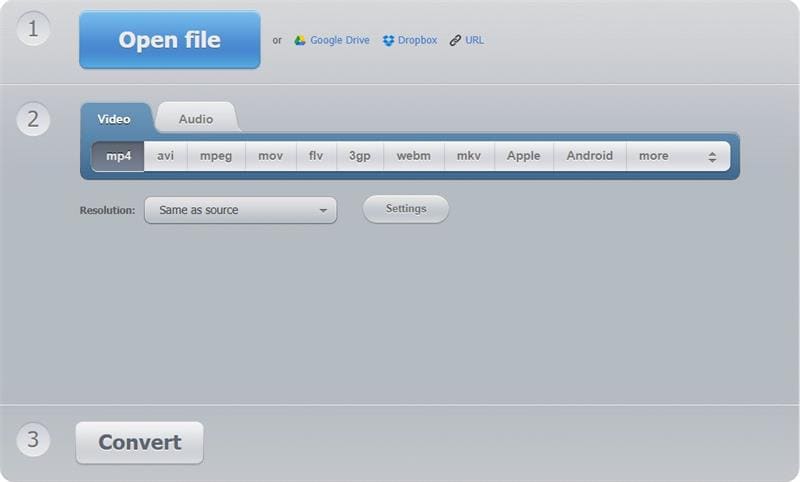
Besides the AVI format OnlineVideoConverter, converts videos into MPEG, MP4, OGG, M4A, WMA, MP3, FLV, and MOV. It’s a versatile application that’s suitable for both Windows and Android devices.
As a powerful online video converting app, you can download any video or file format and convert it within a minute. Start by copying any video file URL and then select the file format you want. Click start to convert your Youtube to AVI.
Features
- Works smoothly with modern browsers
- It’s compatible with many video portals like Vimeo, Facebook, Ted, YouTube, and Dailymotion.
- It has a high-speed download and conversion rate
- No installation nor registration is required
- No conversion limits
You may also like: How to Convert YouTube to MP4 Safely? [Step by Step Guide] >>
2. iConvert Media
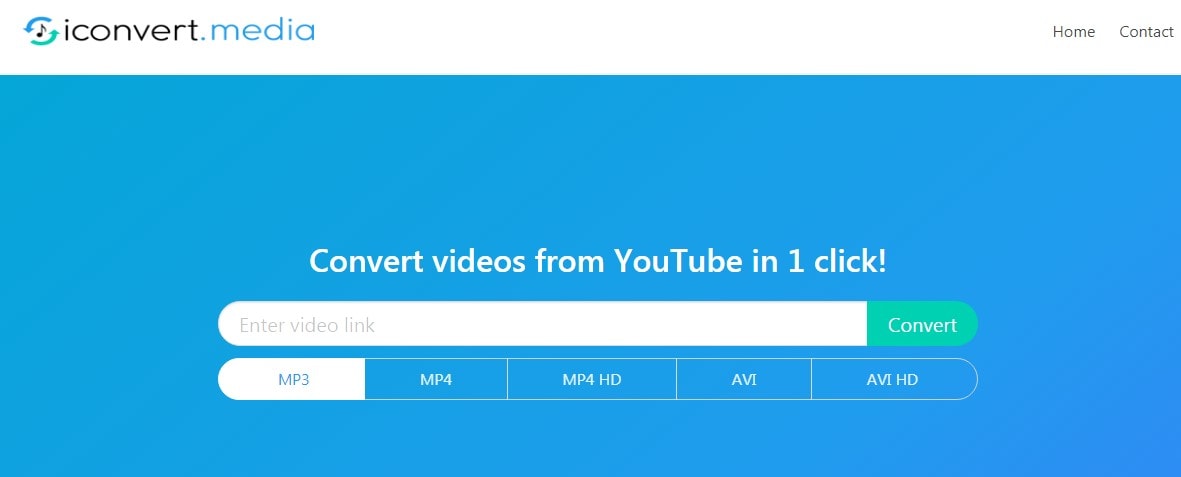
iConvert.Media is a free online video converting tool that produces high-quality videos. The biggest advantage with this tool is you can use on Android, iPhone, iPad, Windows, and Mac. Type any YouTube file format and it will be transformed into the file you want.
To convert a YouTube video, enter the video link on the blank space, select AVI and click “Convert” to convert and download your video.
Features
- No registration requirements or conditions
- Can converts YouTube videos into MP3, AVI, MP4 HD and AVI HD
- Provides high definition audio-video clips
- Offers YouTube video download option
3. y2mate
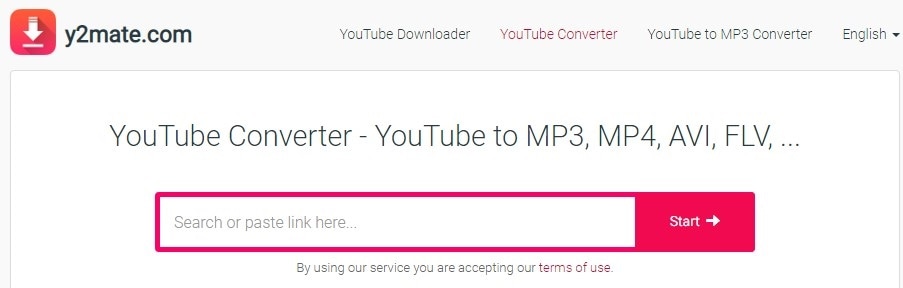
With over 162.2 million monthly visitors, y2mate is among the most used YouTube to AVI converter in the world. This is because of its ease of use, user-friendly interface and speed of video conversion.
Apart from converting YouTube videos to AVI, you can also download MP3, M4A, MP4, 3GP videos from YouTube. Want to convert YouTube to MP3 files? Use y2mate and you won’t regret. It’s compatible with windows, Mac, iOS, Linux and Android.
Features
- Free to download and convert YouTube videos
- Easy to use
- High-speed conversion rate
- Supports innumerable file formats
4. FLVTO
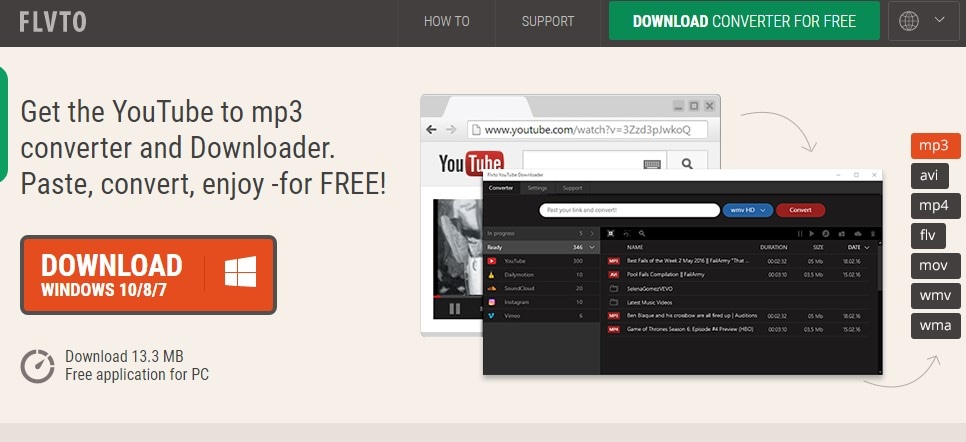
You’ll get these offers after downloading FLVTO; YouTube video downloader, YouTube converter, YouTube song downloader and YouTube video ripper. You can convert any YouTube video file to formats like MP3, AVI, MP4, MOV, and WMV.
FLVTO works on Windows 8, Linux and Mac. Among its amazing features are the inbuilt media player and ID3 tag for quick identification of downloaded videos. If you want to get crystal clear videos, download FLVTO now.
Features
- Works will all video and audio file formats
- Allows download and conversion of up to 99 files at once
- Amazing fast video download and conversion speed
- Download and transfer YouTube music to iTunes
5. 2CONV
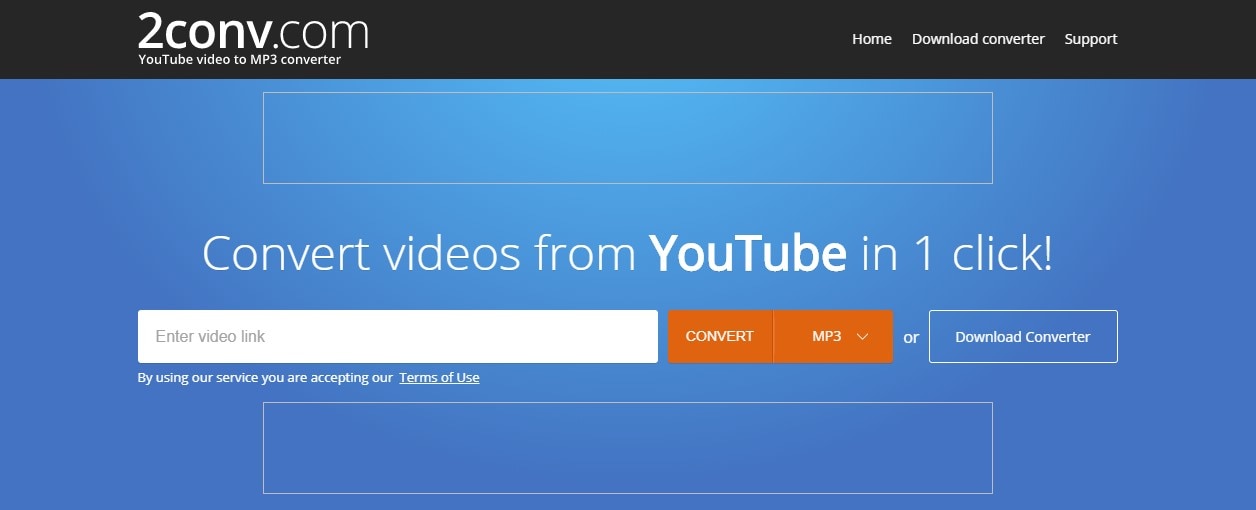
You can either convert YouTube to AVI online by copy-pasting video URL or downloading the app and then converting videos. 2CONV runs on Windows, Linux, Mac OS, Android, and iPhones. Apart from converting videos to AVI/ AVI HD, you can also convert videos to MP3, MP4 HD, and MP4.
No registration and personal details are required to download or convert videos to any format. Whether new or a tech expert, you don’t need any tutorial to use this app.
Features
- Ultra-fast download and conversion speed
- YouTube Video downloader option
- Comes in different languages
6. VideoMP3Converter
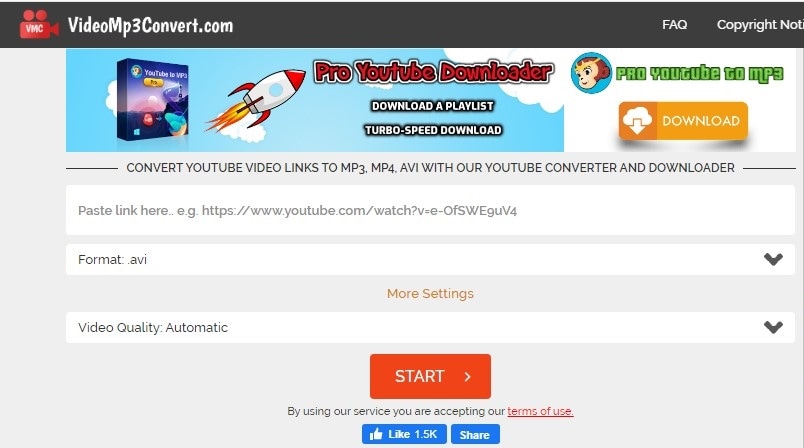
Exceptionally, this web application allows you to select your desired output video bitrate and supports over 10 conversion file formats. No fee, registration or installation is required to use this app.
VideoMP3Converter is not limited to YouTube videos. You can also download videos from Vimeo, Dailymotion, and Liveleak. Do you own a smartphone? VMC is compatible with Androids, iPhone and iPad.
Features
- Compatibility with all modern browsers
- Unlimited free video downloads and conversions in a format of your choice from different hosting platforms.
7. YouTube2Video

This is the most sought free video conversion app due to its ease of use and compatibility with every operating system. You can download YouTube videos to AVI by searching, copying, pasting and converting its URL on the blank field. With YouTube2Video, MacBook users can download videos directly from YouTube.
YouTube2Video supports video downloads from platforms like Reddit, Facebook, Flickr, Tumbler and VK.Com. The accepted file formats include MKV, MP3, AVI, MAV, and MP4. Its multi-functional platform supports YouTube to MP3 and MP4 downloads.
Features
- Simple and straight forward user interface
- Plenty of videos and song suggestion on the website
- Unlimited free YouTube video downloads
8. ClipConverter
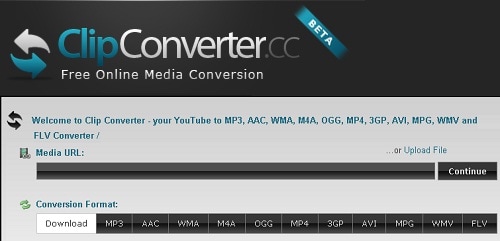
The Clip Converter interface format is clearly showing its simplicity of use. I recommend this app if it’s your first time to convert YouTube to AVI. This is how to convert YouTube to AVI in three easy steps:
- Search for a video on YouTube, copy its URL and paste at “Video URL” on the app
- Choose AVI and select output video resolution then press start.
- Wait to convert and save to your files
Clip Converter supports services like Facebook and Vimeo. It’s pretty good for producing HD, 1080p, 2K, and 4K videos.
Features
- Supports immerse a number of file conversion formats
- Option to choose a video output bitrate
- Absolutely free to use online
- File upload options from Google Drive, DropBox, My Computer and One Drive.
With all the YouTube to Avi converters above at your disposal, how do you convert YouTube videos without compromising its quality?
You may also like: How to Record YouTube Videos on Your PC [Only 5 Steps] >>
Tips of YouTube To AVI Converting For Beginners
To convert YouTube videos to AVI, there are factors you have to consider. Otherwise, the video won’t play or may cause malfunction to your device.
Here are the tips;
- Know your device features- This factor tops our list because it’s where all the actions will take place. Know its operating system, memory status, and screen resolution.
- Choose a multi-functional YouTube to AVI converter- Don’t waste your device memory by downloading a YouTube video downloader that cannot convert the video to AVI.
- Choose a converter that supports many file formats- YouTube supports a large number of file formats. To be able to select any video, the converting app should be able to convert the uploaded video.
- Video resolution- Compare the video resolution and those supported by the converting app. Some converters can only handle low bitrate videos.
Converting YouTube Videos to AVI is more simplified by the above-listed apps and software. But the biggest question is, can you upload AVI to YouTube? Check for the next article to learn more.
Before that, It’s good to learn how to download youtube videos without any Software. To read more, click here >>>>How to Download YouTube Videos without Any Software [12 Proven Ways]
Bottom Line
We all love to watch videos on YouTube. I know, if you knew how to download the videos, convert their file formats and then play on your smart TV, computer or smartphone, watching videos would become a hobby.
Only ignorance is baring you from this. Converting YouTube to AVI costs nothing. Some apps can convert a dozen YouTube videos at an extreme speed. With others, you can download and convert the videos to any format and even change their resolution to suit your device.
Use this article to convert and watch your most favorite videos. Was this article helpful to you? Kindly share your comments and views below.
f
Richard Bennett
Richard Bennett is a writer and a lover of all things video.
Follow @Richard Bennett
Richard Bennett
Mar 27, 2024• Proven solutions
Playing AVI (audio video interleave) files on VLC media player or Windows media player costs nothing, and the number of free YouTube to AVI converters is innumerable. Then, why misuse your data or money viewing videos on YouTube? To download and convert a video to AVI file takes less than a minute.
And the biggest advantage: you can stream AVI audios and videos files online on your computer the whole day.
In this article, I’ll show you how to convert YouTube videos to AVI file formats in three easy ways. Also included are the best 10 YouTube to AVI converters.
You will Learn :
- What is an AVI File?
- How To Convert YouTube To AVI?
- Best AVI Video Players For Windows, Mac, iPhone, and Android
- 8 Best YouTube to AVI Converters
What is an AVI File?
Before we get into the full episode, let’s start by understanding the definition of .AVI file.
AVI stands for audio video interleave. An AVI is a video container format that capture, store and play audio- videos. The AVI file extensions are abbreviated as .avi.
It was developed by Microsoft in 1992 and works based on Resource Interchange File Format (RIFF). Its users enjoy built-in support in every Microsoft Windows application.
AVI encodes its audio and video data on codecs like XviD, DivX and MPEG-2. A codec is a software or hardware used to compress or decompress digital video.
If you have limited storage, avoid AVI files because they are non-compressed and occupy large space. Conversely, AVI format stores high-quality videos since they are less compressed.
Streaming videos from YouTube is expensive. To watch your favorite videos repeatedly, you have to download the YouTube videos and convert to AVI file.
How To Convert YouTube To AVI: Best Solutions For Windows And Mac?
Have you ever tried to convert YouTube videos to AVI online? It’s next to impossibility! The easiest and fastest way is to start by downloading the video.
To convert YouTube to AVI, you require software that supports all file formats. Why? YouTube videos are uploaded in many formats. To avoid trial and error methods, the best-recommended software to use is Filmora.
Filmora works pretty well with Windows10/8/7 and mac. Do you want to know how to download and convert YouTube videos to AVI using Filmora for free? Follow the steps below.
Step 1: On the Filmora product page, select Windows or Mac, and then click the Free Download button below. Follow the prompts to install it.
Step 2: Search for the YouTube video to convert. To download a YouTube video easily subscribers to YouTube Premium. Otherwise, download directly from your browser directly using plugins like Dlnowsoft .
Step 3: Now double-click the Filmora icon to start your new video conversion project. You can change the aspect ratio if necessary.
Step 4: Tap on the new project timeline for the editor menu to load. Head over to the Import menu and drop down to Import files to select your downloaded YouTube video. Click the “EXPORT” to open the file format options.
Step 5: Select AVI, rename the project and choose where to save the converted YouTube video.
Click the Export menu at the bottom and wait for the video to convert.
To learn more about Wondershare Filmora video editor in 60 seconds, click the video below.
Back to our main topic. Not every media player can play AVI files. Likewise, you cannot use any video converting software to convert YouTube to AVI.
Therefore, to quickly understand the YouTube to AVI converter to use and the AVI video media players for windows, mac, iPhone or Android, I’ve subdivided this part into two parts.
- Part 1: Best AVI Video Players
- Part 2: 8 Best YouTube to AVI Converter
Best AVI Video Players For Windows, Mac, iPhone, and Android
Days are gone when Windows Media Player was the most commonly preferred media player. The launch of devices like Mac, iPhone, and Android has led to the development of AVI players that are compatible with the in-built systems.
You may also like: 10 Best Free Outro Makers Online to Create Perfect Outro Templates >>
Top AVI Players For Windows 10/8/7
Microsoft Windows is the most used operating system. The top AVI video players for Windows are:
- JetVideo
- KM Player
- Rules Player
- VLC Player
- Real Player
- FreeSmith Video Player
Best 6 AVI Players For iPhone/iPad
Today’s technological advancements have placed the iOS operating system on a global competition with other systems. To play AVI videos on iPhone or iPad, use the following video players:
- RockPlayer2
- VLC Media Player
- Video Stream
- AirPlayit
- Oplayer Lite
- Infuse3
Top 5 AVI Players for Android
The majority of smartphone owners have Android phones. The Android operating system supports a myriad of AVI media players. Here the top AVI players for Android to download:
- Dice Player
- BS Player
- VLC Media Player
- GPlayer
6 Best Free AVI Player For Mac
Mac is renowned for its simplicity and compatibility with many third-party applications. The best and easiest AVI players for mac include:
- 5KPlayer
- Gom Player
- QuickTime
- VLC Media Player
- Plex
- Elmedia
Now that you know which player to download, which AVI converters are suitable for your device? Select the best from the next part.
8 Best YouTube to AVI Converters
Without a doubt, the number of YouTube to AVI converters available online surpasses everyone’s demand. Whereas some works best for mac and Windows, others are developed for Android and iPad.
A reliable YouTube video converter should have options for you to save and reset the resolution. Online video converters are the best for you only have copy-paste the URL and then convert. They also negate YouTube video download policies.
You may also like: YouTube Outro Complete Guide [+Best Makers & Free Templates] >>
1. OnlineVideoConverter
Besides the AVI format OnlineVideoConverter, converts videos into MPEG, MP4, OGG, M4A, WMA, MP3, FLV, and MOV. It’s a versatile application that’s suitable for both Windows and Android devices.
As a powerful online video converting app, you can download any video or file format and convert it within a minute. Start by copying any video file URL and then select the file format you want. Click start to convert your Youtube to AVI.
Features
- Works smoothly with modern browsers
- It’s compatible with many video portals like Vimeo, Facebook, Ted, YouTube, and Dailymotion.
- It has a high-speed download and conversion rate
- No installation nor registration is required
- No conversion limits
You may also like: How to Convert YouTube to MP4 Safely? [Step by Step Guide] >>
2. iConvert Media
iConvert.Media is a free online video converting tool that produces high-quality videos. The biggest advantage with this tool is you can use on Android, iPhone, iPad, Windows, and Mac. Type any YouTube file format and it will be transformed into the file you want.
To convert a YouTube video, enter the video link on the blank space, select AVI and click “Convert” to convert and download your video.
Features
- No registration requirements or conditions
- Can converts YouTube videos into MP3, AVI, MP4 HD and AVI HD
- Provides high definition audio-video clips
- Offers YouTube video download option
3. y2mate
With over 162.2 million monthly visitors, y2mate is among the most used YouTube to AVI converter in the world. This is because of its ease of use, user-friendly interface and speed of video conversion.
Apart from converting YouTube videos to AVI, you can also download MP3, M4A, MP4, 3GP videos from YouTube. Want to convert YouTube to MP3 files? Use y2mate and you won’t regret. It’s compatible with windows, Mac, iOS, Linux and Android.
Features
- Free to download and convert YouTube videos
- Easy to use
- High-speed conversion rate
- Supports innumerable file formats
4. FLVTO
You’ll get these offers after downloading FLVTO; YouTube video downloader, YouTube converter, YouTube song downloader and YouTube video ripper. You can convert any YouTube video file to formats like MP3, AVI, MP4, MOV, and WMV.
FLVTO works on Windows 8, Linux and Mac. Among its amazing features are the inbuilt media player and ID3 tag for quick identification of downloaded videos. If you want to get crystal clear videos, download FLVTO now.
Features
- Works will all video and audio file formats
- Allows download and conversion of up to 99 files at once
- Amazing fast video download and conversion speed
- Download and transfer YouTube music to iTunes
5. 2CONV
You can either convert YouTube to AVI online by copy-pasting video URL or downloading the app and then converting videos. 2CONV runs on Windows, Linux, Mac OS, Android, and iPhones. Apart from converting videos to AVI/ AVI HD, you can also convert videos to MP3, MP4 HD, and MP4.
No registration and personal details are required to download or convert videos to any format. Whether new or a tech expert, you don’t need any tutorial to use this app.
Features
- Ultra-fast download and conversion speed
- YouTube Video downloader option
- Comes in different languages
6. VideoMP3Converter
Exceptionally, this web application allows you to select your desired output video bitrate and supports over 10 conversion file formats. No fee, registration or installation is required to use this app.
VideoMP3Converter is not limited to YouTube videos. You can also download videos from Vimeo, Dailymotion, and Liveleak. Do you own a smartphone? VMC is compatible with Androids, iPhone and iPad.
Features
- Compatibility with all modern browsers
- Unlimited free video downloads and conversions in a format of your choice from different hosting platforms.
7. YouTube2Video
This is the most sought free video conversion app due to its ease of use and compatibility with every operating system. You can download YouTube videos to AVI by searching, copying, pasting and converting its URL on the blank field. With YouTube2Video, MacBook users can download videos directly from YouTube.
YouTube2Video supports video downloads from platforms like Reddit, Facebook, Flickr, Tumbler and VK.Com. The accepted file formats include MKV, MP3, AVI, MAV, and MP4. Its multi-functional platform supports YouTube to MP3 and MP4 downloads.
Features
- Simple and straight forward user interface
- Plenty of videos and song suggestion on the website
- Unlimited free YouTube video downloads
8. ClipConverter
The Clip Converter interface format is clearly showing its simplicity of use. I recommend this app if it’s your first time to convert YouTube to AVI. This is how to convert YouTube to AVI in three easy steps:
- Search for a video on YouTube, copy its URL and paste at “Video URL” on the app
- Choose AVI and select output video resolution then press start.
- Wait to convert and save to your files
Clip Converter supports services like Facebook and Vimeo. It’s pretty good for producing HD, 1080p, 2K, and 4K videos.
Features
- Supports immerse a number of file conversion formats
- Option to choose a video output bitrate
- Absolutely free to use online
- File upload options from Google Drive, DropBox, My Computer and One Drive.
With all the YouTube to Avi converters above at your disposal, how do you convert YouTube videos without compromising its quality?
You may also like: How to Record YouTube Videos on Your PC [Only 5 Steps] >>
Tips of YouTube To AVI Converting For Beginners
To convert YouTube videos to AVI, there are factors you have to consider. Otherwise, the video won’t play or may cause malfunction to your device.
Here are the tips;
- Know your device features- This factor tops our list because it’s where all the actions will take place. Know its operating system, memory status, and screen resolution.
- Choose a multi-functional YouTube to AVI converter- Don’t waste your device memory by downloading a YouTube video downloader that cannot convert the video to AVI.
- Choose a converter that supports many file formats- YouTube supports a large number of file formats. To be able to select any video, the converting app should be able to convert the uploaded video.
- Video resolution- Compare the video resolution and those supported by the converting app. Some converters can only handle low bitrate videos.
Converting YouTube Videos to AVI is more simplified by the above-listed apps and software. But the biggest question is, can you upload AVI to YouTube? Check for the next article to learn more.
Before that, It’s good to learn how to download youtube videos without any Software. To read more, click here >>>>How to Download YouTube Videos without Any Software [12 Proven Ways]
Bottom Line
We all love to watch videos on YouTube. I know, if you knew how to download the videos, convert their file formats and then play on your smart TV, computer or smartphone, watching videos would become a hobby.
Only ignorance is baring you from this. Converting YouTube to AVI costs nothing. Some apps can convert a dozen YouTube videos at an extreme speed. With others, you can download and convert the videos to any format and even change their resolution to suit your device.
Use this article to convert and watch your most favorite videos. Was this article helpful to you? Kindly share your comments and views below.
f
Richard Bennett
Richard Bennett is a writer and a lover of all things video.
Follow @Richard Bennett
The Ultimate Guide to Free, Accurate YouTube Transcript Creation
How to Transcribe a YouTube Video for FREE
Richard Bennett
Mar 27, 2024• Proven solutions
If you want to transcribe your videos to make the dialogs and speeches available in text format, you can use YouTube Transcribe feature that the streaming site offers for free. In this article, I’ll share with you a couple of methods to transcribe a YouTube video for free.
- Part 1: Transcribe YouTube Video Automatically for Free [2 Ways]
- Part 2: Transcribe YouTube Video to Text Online with Third-Party Service
- Part 3: Benefits of Transcribing YouTube Videos
- Part 4: YouTube Video Transcription FAQs
Part 1: How to Transcribe YouTube Video Automatically for Free [2 Ways]
Besides the basic video editing features on the YouTube platform, you can now quickly transcribe YouTube videos to the text as well. The good thing is, you can either use the automatic transcription feature that YouTube offers, or upload it manually while adjusting the timing as you go further.
Below are the two methods to transcribe your YouTube videos for free:
Method 1: Use the Automated Transcription Service on YouTube
As the name suggests, YouTube automatic transcription service works automatically. This means you don’t even have to click the ‘Transcribe’ button anymore to transcribe a YouTube video, and the website takes care of it on its own. All you need to do is, choose English as the language of the video when setting up subtitles. You can follow the instructions given below to do so:
Step 1 Upload a Video
Sign in to your YouTube account, click your profile picture from the top-right corner, and click YouTube Studio from the menu. Next, click CREATE from the upper-right corner, click Upload videos from the menu, and drag and drop a video from your computer to the Upload videos box that appears next.

Step 2 Select Transcription Language
On the Details page of the next box that appears, scroll down and click MORE OPTIONS, and select English in the Video language drop-down list under the Language, subtitles, and closed captions (CC) section.

Step 3 Publish the Video
Follow the on-screen instructions from this point to publish the video, and wait while YouTube automatically transcribes and adds the close captions to it.
Note: Depending on the duration of the clip, the time YouTube would take to transcribe may vary.
After YouTube has transcribed the video, you can download the transcription file in your preferred format. The instructions are given below explain how you can do so:
- Get to the Subtitles Window
While on the YouTube Studio page, click Subtitles from the left pane to go to the Channel subtitles page. And then click the video you want to modify.
- Get to Classic Studio
In the video subtitle page of the target video, hover mouse on the Published Automatic status under the Subtitles column, click the Options icon (with three vertical dots) that appears, and click Edit on Classic Studio.

- Download Transcription File
Click and open the Actions drop-down list from the top-left corner of the left pane, click your preferred transcription format including .vtt, .srt and .sbv from the list, and save the file on your local hard disk.

Method 2: Get YouTube Transcription when Watching
In addition, if you are watching any other video, you can make YouTube transcribe that for you as well. You can follow the instructions given below to get the YouTube video to text transcription:
Step 1: Play the Video
Go to the video on YouTube and start playing it. Make sure NOT to get to full-screen mode as doing so would hide the option to transcribe the clip.
Step 2: Enable Transcription
Click the More icon (with three horizontal dots) from under the bottom-right corner of the video player, and click Open transcript to see the video transcription in the Transcript pane that appears in the right.
Step 3: Manage Timestamps
Click the Options icon (with three vertical dots) from the top-right corner of the Transcript pane, and click Toggle timestamp to enable or disable the timestamps in the video transcription.
Limitations of Using YouTube Transcribe
Although YouTube’s automatic transcription is a decent feature that saves you a lot of time, since Google uses machine learning algorithms to convert the speech to text, the level of accuracy may vary depending on the accent of the speaker, and the clarity of the audio the video has. Also, even sometime you may not be satisfied with the end-results.
Alternatively, you can use Kapwing to transcribe a YouTube video and download the transcription file with the below step-by-step instructions:
Step 1: Add YouTube Video
Copy the URL of YouTube video you want to transcribe, go to https://www.kapwing.com/subtitles , paste the URL in the Paste a URL field, wait while Kapwing fetches the content of the video, and opens the Add subtitles to Video page.
Step 2: Transcribe the Video
Click Auto-generate from the right window, and follow the on-screen instructions to transcribe YouTube video to text.

Step 3: Download the Transcription File
Click Download SRT from the left pane, and follow the instructions from there to download the transcription file in *.srt format.

Pros
- Kapwing is free to use
- The auto-transcription process is quick and less tedious
- Kapwing also allows manual transcription and uploading of an existing *.srt file
Cons
- The auto-transcribed text might lack accuracy as the task is done by the speech-to-text tools that work in the background
You can follow the step-by-step instructions to transcribe a YouTube video and download the transcription file using Kapwing:
Step 1: Add YouTube Video
Copy the URL of YouTube video you want to transcribe, go to https://www.kapwing.com/subtitles , paste the URL in the Paste a URL field, wait while Kapwing fetches the content of the video, and opens the Add subtitles to Video page.
Step 2: Transcribe the Video
Click Auto-generate from the right window, and follow the on-screen instructions to transcribe YouTube video to text.
Step 3: Download the Transcription File
Click Download SRT from the left pane, and follow the instructions from there to download the transcription file in *.srt format.
Pros
- Kapwing is free to use
- The auto-transcription process is quick and less tedious
- Kapwing also allows manual transcription and uploading of an existing *.srt file
Cons
- The auto-transcribed text might lack accuracy as the task is done by the speech-to-text tools that work in the background
Part 3: Benefits of Transcribing YouTube Videos
You may need video transcriptions for several reasons, such as analyzing the summary of the entire speech in the video, extracting a single phrase or quote that was spoken in the clip, or making the video helpful even for those suffering from hearing impairment. When you transcribe a YouTube video, the transcript can be useful in many ways. Some of the most common benefits of transcribing a video include:
- Search Engine Optimization
When you add subtitles, the text can appear in Google search results when someone types a similar phrase in the search box. This helps get more views to your videos, thus giving your channel popularity, and you, monetary gains in the long run.
- Accent
If the speaker in the video is from a different region and is using an accent that you are not much comfortable with, you can turn on the subtitles and read the dialogs along with the video.
- Repurposing on Blogs
If you own a blog that you have embedded your video to, the transcription could be used to add text to it so the target audience can get a fair idea of what the video is all about. This is useful because many people prefer reading over watching.
YouTube Video Transcription FAQs
1. How to Transcribe YouTube Video to Text
Usually the transcription files have *.srt extension that are globally accepted and supported by almost all media players. However, there might be instances when you want to have the subtitles in plain text.
That said, to convert an SRT file to TXT, you can:
- Right-click the SRT file
- Go to Rename
- Replace srt with txt and press Enter
- Click OK on the confirmation box that appears next to convert SRT to TXT
After this, you can simply double-click the file, and read and modify the transcribed content as needed.
2. How to Edit and Upload Edited Transcript to YouTube
If you made any modifications to the transcript that was automatically generated by YouTube or any other third-party transcription tool, you can follow the steps given below to upload the new file to the YouTube video:
- Go to YouTube Studio and then to the Channel subtitles page as explained earlier
- Expand the Languages column of the target video
- Click the Options icon that appears under the Subtitles column when you hover mouse on to it
- Click Edit on Classic Studio
- On the next page, click Edit from the top-right corner

- Click to open the Actions drop-down list from the upper-left corner
- Click Upload a file
- Follow the on-screen instructions from there to upload the modified transcription file
- Click Save Changes from the top-right corner of the page when done
Conclusion
If you are looking for a quick and easy way of adding subtitles to your videos, letting YouTube transcribe for you could be a good approach. However, because these auto-generated transcriptions are created by machine learning algorithms, their accuracy cannot be counted on. Therefore, the best way to get the job done accurately is, let YouTube auto-transcribe your video, download the transcription file, make the necessary changes to it, and then upload the file back to the video.
Richard Bennett
Richard Bennett is a writer and a lover of all things video.
Follow @Richard Bennett
Richard Bennett
Mar 27, 2024• Proven solutions
If you want to transcribe your videos to make the dialogs and speeches available in text format, you can use YouTube Transcribe feature that the streaming site offers for free. In this article, I’ll share with you a couple of methods to transcribe a YouTube video for free.
- Part 1: Transcribe YouTube Video Automatically for Free [2 Ways]
- Part 2: Transcribe YouTube Video to Text Online with Third-Party Service
- Part 3: Benefits of Transcribing YouTube Videos
- Part 4: YouTube Video Transcription FAQs
Part 1: How to Transcribe YouTube Video Automatically for Free [2 Ways]
Besides the basic video editing features on the YouTube platform, you can now quickly transcribe YouTube videos to the text as well. The good thing is, you can either use the automatic transcription feature that YouTube offers, or upload it manually while adjusting the timing as you go further.
Below are the two methods to transcribe your YouTube videos for free:
Method 1: Use the Automated Transcription Service on YouTube
As the name suggests, YouTube automatic transcription service works automatically. This means you don’t even have to click the ‘Transcribe’ button anymore to transcribe a YouTube video, and the website takes care of it on its own. All you need to do is, choose English as the language of the video when setting up subtitles. You can follow the instructions given below to do so:
Step 1 Upload a Video
Sign in to your YouTube account, click your profile picture from the top-right corner, and click YouTube Studio from the menu. Next, click CREATE from the upper-right corner, click Upload videos from the menu, and drag and drop a video from your computer to the Upload videos box that appears next.
Step 2 Select Transcription Language
On the Details page of the next box that appears, scroll down and click MORE OPTIONS, and select English in the Video language drop-down list under the Language, subtitles, and closed captions (CC) section.
Step 3 Publish the Video
Follow the on-screen instructions from this point to publish the video, and wait while YouTube automatically transcribes and adds the close captions to it.
Note: Depending on the duration of the clip, the time YouTube would take to transcribe may vary.
After YouTube has transcribed the video, you can download the transcription file in your preferred format. The instructions are given below explain how you can do so:
- Get to the Subtitles Window
While on the YouTube Studio page, click Subtitles from the left pane to go to the Channel subtitles page. And then click the video you want to modify.
- Get to Classic Studio
In the video subtitle page of the target video, hover mouse on the Published Automatic status under the Subtitles column, click the Options icon (with three vertical dots) that appears, and click Edit on Classic Studio.
- Download Transcription File
Click and open the Actions drop-down list from the top-left corner of the left pane, click your preferred transcription format including .vtt, .srt and .sbv from the list, and save the file on your local hard disk.
Method 2: Get YouTube Transcription when Watching
In addition, if you are watching any other video, you can make YouTube transcribe that for you as well. You can follow the instructions given below to get the YouTube video to text transcription:
Step 1: Play the Video
Go to the video on YouTube and start playing it. Make sure NOT to get to full-screen mode as doing so would hide the option to transcribe the clip.
Step 2: Enable Transcription
Click the More icon (with three horizontal dots) from under the bottom-right corner of the video player, and click Open transcript to see the video transcription in the Transcript pane that appears in the right.
Step 3: Manage Timestamps
Click the Options icon (with three vertical dots) from the top-right corner of the Transcript pane, and click Toggle timestamp to enable or disable the timestamps in the video transcription.
Limitations of Using YouTube Transcribe
Although YouTube’s automatic transcription is a decent feature that saves you a lot of time, since Google uses machine learning algorithms to convert the speech to text, the level of accuracy may vary depending on the accent of the speaker, and the clarity of the audio the video has. Also, even sometime you may not be satisfied with the end-results.
Alternatively, you can use Kapwing to transcribe a YouTube video and download the transcription file with the below step-by-step instructions:
Step 1: Add YouTube Video
Copy the URL of YouTube video you want to transcribe, go to https://www.kapwing.com/subtitles , paste the URL in the Paste a URL field, wait while Kapwing fetches the content of the video, and opens the Add subtitles to Video page.
Step 2: Transcribe the Video
Click Auto-generate from the right window, and follow the on-screen instructions to transcribe YouTube video to text.
Step 3: Download the Transcription File
Click Download SRT from the left pane, and follow the instructions from there to download the transcription file in *.srt format.
Pros
- Kapwing is free to use
- The auto-transcription process is quick and less tedious
- Kapwing also allows manual transcription and uploading of an existing *.srt file
Cons
- The auto-transcribed text might lack accuracy as the task is done by the speech-to-text tools that work in the background
You can follow the step-by-step instructions to transcribe a YouTube video and download the transcription file using Kapwing:
Step 1: Add YouTube Video
Copy the URL of YouTube video you want to transcribe, go to https://www.kapwing.com/subtitles , paste the URL in the Paste a URL field, wait while Kapwing fetches the content of the video, and opens the Add subtitles to Video page.
Step 2: Transcribe the Video
Click Auto-generate from the right window, and follow the on-screen instructions to transcribe YouTube video to text.
Step 3: Download the Transcription File
Click Download SRT from the left pane, and follow the instructions from there to download the transcription file in *.srt format.
Pros
- Kapwing is free to use
- The auto-transcription process is quick and less tedious
- Kapwing also allows manual transcription and uploading of an existing *.srt file
Cons
- The auto-transcribed text might lack accuracy as the task is done by the speech-to-text tools that work in the background
Part 3: Benefits of Transcribing YouTube Videos
You may need video transcriptions for several reasons, such as analyzing the summary of the entire speech in the video, extracting a single phrase or quote that was spoken in the clip, or making the video helpful even for those suffering from hearing impairment. When you transcribe a YouTube video, the transcript can be useful in many ways. Some of the most common benefits of transcribing a video include:
- Search Engine Optimization
When you add subtitles, the text can appear in Google search results when someone types a similar phrase in the search box. This helps get more views to your videos, thus giving your channel popularity, and you, monetary gains in the long run.
- Accent
If the speaker in the video is from a different region and is using an accent that you are not much comfortable with, you can turn on the subtitles and read the dialogs along with the video.
- Repurposing on Blogs
If you own a blog that you have embedded your video to, the transcription could be used to add text to it so the target audience can get a fair idea of what the video is all about. This is useful because many people prefer reading over watching.
YouTube Video Transcription FAQs
1. How to Transcribe YouTube Video to Text
Usually the transcription files have *.srt extension that are globally accepted and supported by almost all media players. However, there might be instances when you want to have the subtitles in plain text.
That said, to convert an SRT file to TXT, you can:
- Right-click the SRT file
- Go to Rename
- Replace srt with txt and press Enter
- Click OK on the confirmation box that appears next to convert SRT to TXT
After this, you can simply double-click the file, and read and modify the transcribed content as needed.
2. How to Edit and Upload Edited Transcript to YouTube
If you made any modifications to the transcript that was automatically generated by YouTube or any other third-party transcription tool, you can follow the steps given below to upload the new file to the YouTube video:
- Go to YouTube Studio and then to the Channel subtitles page as explained earlier
- Expand the Languages column of the target video
- Click the Options icon that appears under the Subtitles column when you hover mouse on to it
- Click Edit on Classic Studio
- On the next page, click Edit from the top-right corner
- Click to open the Actions drop-down list from the upper-left corner
- Click Upload a file
- Follow the on-screen instructions from there to upload the modified transcription file
- Click Save Changes from the top-right corner of the page when done
Conclusion
If you are looking for a quick and easy way of adding subtitles to your videos, letting YouTube transcribe for you could be a good approach. However, because these auto-generated transcriptions are created by machine learning algorithms, their accuracy cannot be counted on. Therefore, the best way to get the job done accurately is, let YouTube auto-transcribe your video, download the transcription file, make the necessary changes to it, and then upload the file back to the video.
Richard Bennett
Richard Bennett is a writer and a lover of all things video.
Follow @Richard Bennett
Also read:
- [Updated] Can Genuine Interests Lead to Natural Channel Growth?
- Boosting Views From Zeros The Top 10 Reasons & Fixes for 2024
- In 2024, Elevate Traffic Ethical Practices for Amplifying Content Views
- Boost Length on YouTube Entry Filming
- 2024 Approved Detailed Tutorial Convert Your Shorts to the Best MP4
- [New] Dissecting the Financial Strategy of T-Series in Video Platforms
- The Ultimate GIF Making Software Showdown
- 2024 Approved Elevating Channel Excellence with Ideas & Vision
- In 2024, Essential Free MCB Theme Templates
- [Updated] Cost-Free Translation Made Easy with These Subtitle Downloader Apps
- [Updated] Earnings Enlightenment Joshi and YouTube Success Stories
- Discover the Best Top 10 No-Cost Cinema Treasures Online for 2024
- Gamer Guides and Tips Best Streamers
- [New] Blueprint Strategies for Authentic Life Enrichment Videos
- 2024 Approved Demystifying YouTube's SEO A Keyword Research Guide
- [New] Behind-the-Scenes Filmmaking Tips From YouTube Experts
- [Updated] Building a Strong Network How to Form Effective YouTube Partner Relationships
- Unleash Creative Potential at No Expense Dive Into the World of Green Screen with Free Lessons From YouTube Channels
- Charting the Course A Comprehensive Guide to YouTube Teaser Vids
- Intelligent Viewing Syncing YouTube with Televisions
- 2024 Approved Essential Science YouTube Networks Expand Your Mind
- In 2024, Blueprints for Breaking Ground in Edu-Video Production on YouTube Channels
- Hidden Details You Need to Know About YouTube TV Service
- 2024 Approved A Streamlined System for Scrutinizing YouTube Subscriber Profits 3-Step Guide
- From Unknown to Famous Boosting Video Views on YouTube Step-by-Step
- 2024 Approved Command the Stage of YouTube with Studio Skills
- [Updated] 8 Best Mirrorless Cameras Vloggers Should Know
- [New] Crafting Engaging Content with Google Trends Analytics
- In 2024, 7 Star-Rated Apps for Effortless YouTube LIVE Broadcast From iPhone and Android
- Top YouTube Film Series Collections
- Pioneering Methods to Develop a Memorable YouTube Introduction
- How to Unlock Nubia Z50S Pro Phone without Google Account?
- Updated 2024 Approved The Complete Guide to Podcast Editing with Audacity
- [New] In 2024, Essential Tips Capturing Clear Voice Overs on Camera
- In 2024, Perfect Your Skype Interviews with Professional Recording Tactics
- Prolific Performance Our Picks for Top 8 Workflow Planners for 2024
- 4 Feasible Ways to Fake Location on Facebook For your Samsung Galaxy A24 | Dr.fone
- In 2024, How To Remove or Bypass Knox Enrollment Service On Poco C50
- In 2024, Agriculture Pals Top 10 Friendly Farm Games
- In 2024, Ultimate guide to get the meltan box pokemon go For Apple iPhone XS Max | Dr.fone
- In 2024, Top 10 AirPlay Apps in Tecno Camon 30 Pro 5G for Streaming | Dr.fone
- Overview of the Best Motorola Moto G24 Screen Mirroring App | Dr.fone
- In 2024, Unlock Oppo Find N3 Flip Phone Password Without Factory Reset Full Guide Here
- [Updated] Organizing Epics Implementing Chapters in Vimeo Media for 2024
- Title: "Maximize Video Quality Top 8 YouTube to AVI Converters"
- Author: Kevin
- Created at : 2024-05-25 15:46:05
- Updated at : 2024-05-26 15:46:05
- Link: https://youtube-videos.techidaily.com/maximize-video-quality-top-8-youtube-to-avi-converters/
- License: This work is licensed under CC BY-NC-SA 4.0.
