
:max_bytes(150000):strip_icc()/Headshot3Stephanie-9863b086590245458d3751b89cac98f4.jpeg)
Mastering YouTube Uploads in Adobe Premiere
Mastering YouTube Uploads in Adobe Premiere
How Do I Use Adobe Premiere To Upload YouTube Videos?

Benjamin Arango
Mar 27, 2024• Proven solutions
Whilst getting the editing and post work just right on any project is what we all aim for, the ultimate aim is for other people to see our creations, and the most popular way to achieve that is YouTube . Chances are, if you are producing video, you will be putting some of it on YouTube at some point, so let’s have a look at the most efficient way to get your work from Premiere to YouTube.
Check if your computer meet the Premiere System Requirements >>
This is a basic tutorial about Adobe Premiere, professional video editing software. However, if video editing is new to you, consider Wondershare Filmora , which is a powerful but easy-to-use tool for users just starting out. Download the free trial version below.
 Download Mac Version ](https://tools.techidaily.com/wondershare/filmora/download/ )
How Do I Use Adobe Premiere To Upload YouTube Videos
1. Master Copy
Before exporting your work, it is important to first create a master copy of your project that is ‘as is’, in that it reflects the settings and codecs used in the original footage.
To do this you simply select the sequence within the Timeline or in the Project Panel, and go through the menu tree via File > Export > Media to bring up the export dialogue.

To create your Master Copy, simply select the first option of ‘Match Sequence Settings’, this exports a file that is of the same quality as your original footage, essentially producing a digital copy of the work for archiving before anything else is done.
With you work safe and secure it is now time to look at ensuring the project is suitable for YouTube. With our sequence selected in the Timeline or Project Panel again, we go through the same File > Export > Media path to bring up the media export dialogue as before.
2. Container
The first option we have to consider is the file format that our finished video needs to be in. Here you should refer to YouTube for its guidelines, whilst they do accept a number of file formats, digging through the YouTube help system to find the settings for highest quality we find that they recommend MPEG4 as the container, using the codec.

We can also see further recommended settings in this screenshot that will be covered later.
The good news is that Premiere automatically selects the appropriate container for us when we select our codec, however it is worth knowing the file type YouTube is expecting just to check yourself.
3. Video Codec
So having established that YouTube recommends the MPEG4 container using the codec, the first option we need to look for in the media export dialogue is to select the appropriate Format.
This is the first drop down in the dialogue box, and in this case we simply select from the list.

Once you select you can check the ‘output name’ field and see that premiere is automatically set the output file to .mp4 which is exactly what we need.
4. Preset
The next field we come to is the ‘Preset’ dropdown menu. This is a major help to most people, as Adobe have very kindly included large numbers of presets to quickly adapt video settings to suit specific uses. They vary depending on the exact version of Premiere you are using, and each format type does have its own list of presets, as we can see has a large number for YouTube, but also has many presets for specific devices (presets for iPad, Kindle, Nook, various other tablets and phones, Vimeo and a host of others) to make getting the right settings that bit easier for us.

It is important here to select the correct preset from the various YouTube options. You want to select the resolution and frame rate that match your source file, for the best results. So, if your source file is 1080p with a frame rate of 29.97 fps then that is the YouTube setting you would select.
Once a preset is selected a summary of the settings is displayed below, normally these will be well suited to your project, however you can fine tune anything you wish by selecting the video or audio tabs at the bottom which give you the chance to adjust each parameter individually. If you do this, you can save these changes as a custom preset by clicking the button at the side of the Preset dropdown menu and simply use it on later projects by selecting it from the list the same as any other, a great time saving tool.

5. Rendering
Once you are satisfied with the settings, either from the Preset alone or if you have adjusted anything yourself, you are nearly ready to render the file and export it.
For YouTube it is recommended you select the ‘Use Maximum Render Quality’ option to maintain the best output you can, it does add time to the render process but if you value the quality of your work it is worthwhile.
Finally you can choose a suitable filename and the destination of the file by clicking on the ‘Output Name’ field.
I normally use a filename that includes the destination medium so I can differentiate between different versions of a project and know which one to upload where, in this case I include ‘youtube’, but if I were planning on uploading clips of the project to vimeo as well for instance there may be a cut of the project with ‘vimeo’ in the name too. The destination is personal preference, because I do use filenames to differentiate versions I can put the various iterations into a single project file, others have folder structures for each type of file , so all YouTube output goes into a single folder and so on, how you organize is entirely dependent on how you work.

Once those are selected clicking ‘Export’ starts the rendering process, and eventually (how long depends on the speed of your computer and the size and type of file involved), you will end up with your YouTube optimized video in the location you chose.
Here I created 4 key frames that let the ‘Animation’ object move around the ‘Demo Text’ Object and finally come to rest below it. Whilst this type of effect does look very effective on screen, such is the ease of use of After Effects it really is just a few minutes work to achieve.
Learn more details about How to add text in Premiere >>
6. Uploading
Now you have your file, the next step is to go to your YouTube account and log in if you need to.
On the top of your homepage on the right is the upload button, selecting that brings up the select file menu as below.

You can either drag your file into the window or click on it to open a standard file browser to locate the desired file, click and the upload will begin. The dropdown underneath allows you to set the video as Public, Unlisted or Private. You can change this at any time once the video is uploaded as well.
This opens the upload progress window, where you can add in a name, description and tags as well as add the video to a playlist or adjust the privacy settings as the video is uploading.

Once the upload as finished, you can do final adjustments to settings and choose a thumbnail for the video. The final step is to click the ‘Publish’ button and your video will be processed and go live.

Benjamin Arango
Benjamin Arango is a writer and a lover of all things video.
Follow @Benjamin Arango
Benjamin Arango
Mar 27, 2024• Proven solutions
Whilst getting the editing and post work just right on any project is what we all aim for, the ultimate aim is for other people to see our creations, and the most popular way to achieve that is YouTube . Chances are, if you are producing video, you will be putting some of it on YouTube at some point, so let’s have a look at the most efficient way to get your work from Premiere to YouTube.
Check if your computer meet the Premiere System Requirements >>
This is a basic tutorial about Adobe Premiere, professional video editing software. However, if video editing is new to you, consider Wondershare Filmora , which is a powerful but easy-to-use tool for users just starting out. Download the free trial version below.
Download Mac Version ](https://tools.techidaily.com/wondershare/filmora/download/ )
How Do I Use Adobe Premiere To Upload YouTube Videos
1. Master Copy
Before exporting your work, it is important to first create a master copy of your project that is ‘as is’, in that it reflects the settings and codecs used in the original footage.
To do this you simply select the sequence within the Timeline or in the Project Panel, and go through the menu tree via File > Export > Media to bring up the export dialogue.
To create your Master Copy, simply select the first option of ‘Match Sequence Settings’, this exports a file that is of the same quality as your original footage, essentially producing a digital copy of the work for archiving before anything else is done.
With you work safe and secure it is now time to look at ensuring the project is suitable for YouTube. With our sequence selected in the Timeline or Project Panel again, we go through the same File > Export > Media path to bring up the media export dialogue as before.
2. Container
The first option we have to consider is the file format that our finished video needs to be in. Here you should refer to YouTube for its guidelines, whilst they do accept a number of file formats, digging through the YouTube help system to find the settings for highest quality we find that they recommend MPEG4 as the container, using the codec.
We can also see further recommended settings in this screenshot that will be covered later.
The good news is that Premiere automatically selects the appropriate container for us when we select our codec, however it is worth knowing the file type YouTube is expecting just to check yourself.
3. Video Codec
So having established that YouTube recommends the MPEG4 container using the codec, the first option we need to look for in the media export dialogue is to select the appropriate Format.
This is the first drop down in the dialogue box, and in this case we simply select from the list.
Once you select you can check the ‘output name’ field and see that premiere is automatically set the output file to .mp4 which is exactly what we need.
4. Preset
The next field we come to is the ‘Preset’ dropdown menu. This is a major help to most people, as Adobe have very kindly included large numbers of presets to quickly adapt video settings to suit specific uses. They vary depending on the exact version of Premiere you are using, and each format type does have its own list of presets, as we can see has a large number for YouTube, but also has many presets for specific devices (presets for iPad, Kindle, Nook, various other tablets and phones, Vimeo and a host of others) to make getting the right settings that bit easier for us.
It is important here to select the correct preset from the various YouTube options. You want to select the resolution and frame rate that match your source file, for the best results. So, if your source file is 1080p with a frame rate of 29.97 fps then that is the YouTube setting you would select.
Once a preset is selected a summary of the settings is displayed below, normally these will be well suited to your project, however you can fine tune anything you wish by selecting the video or audio tabs at the bottom which give you the chance to adjust each parameter individually. If you do this, you can save these changes as a custom preset by clicking the button at the side of the Preset dropdown menu and simply use it on later projects by selecting it from the list the same as any other, a great time saving tool.
5. Rendering
Once you are satisfied with the settings, either from the Preset alone or if you have adjusted anything yourself, you are nearly ready to render the file and export it.
For YouTube it is recommended you select the ‘Use Maximum Render Quality’ option to maintain the best output you can, it does add time to the render process but if you value the quality of your work it is worthwhile.
Finally you can choose a suitable filename and the destination of the file by clicking on the ‘Output Name’ field.
I normally use a filename that includes the destination medium so I can differentiate between different versions of a project and know which one to upload where, in this case I include ‘youtube’, but if I were planning on uploading clips of the project to vimeo as well for instance there may be a cut of the project with ‘vimeo’ in the name too. The destination is personal preference, because I do use filenames to differentiate versions I can put the various iterations into a single project file, others have folder structures for each type of file , so all YouTube output goes into a single folder and so on, how you organize is entirely dependent on how you work.
Once those are selected clicking ‘Export’ starts the rendering process, and eventually (how long depends on the speed of your computer and the size and type of file involved), you will end up with your YouTube optimized video in the location you chose.
Here I created 4 key frames that let the ‘Animation’ object move around the ‘Demo Text’ Object and finally come to rest below it. Whilst this type of effect does look very effective on screen, such is the ease of use of After Effects it really is just a few minutes work to achieve.
Learn more details about How to add text in Premiere >>
6. Uploading
Now you have your file, the next step is to go to your YouTube account and log in if you need to.
On the top of your homepage on the right is the upload button, selecting that brings up the select file menu as below.
You can either drag your file into the window or click on it to open a standard file browser to locate the desired file, click and the upload will begin. The dropdown underneath allows you to set the video as Public, Unlisted or Private. You can change this at any time once the video is uploaded as well.
This opens the upload progress window, where you can add in a name, description and tags as well as add the video to a playlist or adjust the privacy settings as the video is uploading.
Once the upload as finished, you can do final adjustments to settings and choose a thumbnail for the video. The final step is to click the ‘Publish’ button and your video will be processed and go live.
Benjamin Arango
Benjamin Arango is a writer and a lover of all things video.
Follow @Benjamin Arango
How to Brand Your YouTube Channel to Get More Subscribers
How to Brand Your YouTube Channel to Get More Subscribers

Shanoon Cox
Nov 01, 2022• Proven solutions
Epic Meal Time. Michelle Phan. Peter McKinnon. When you think of each of these YouTube creators, what comes to mind? The feelings and thoughts you have are vastly different because each one of these channels has its own unique branding.
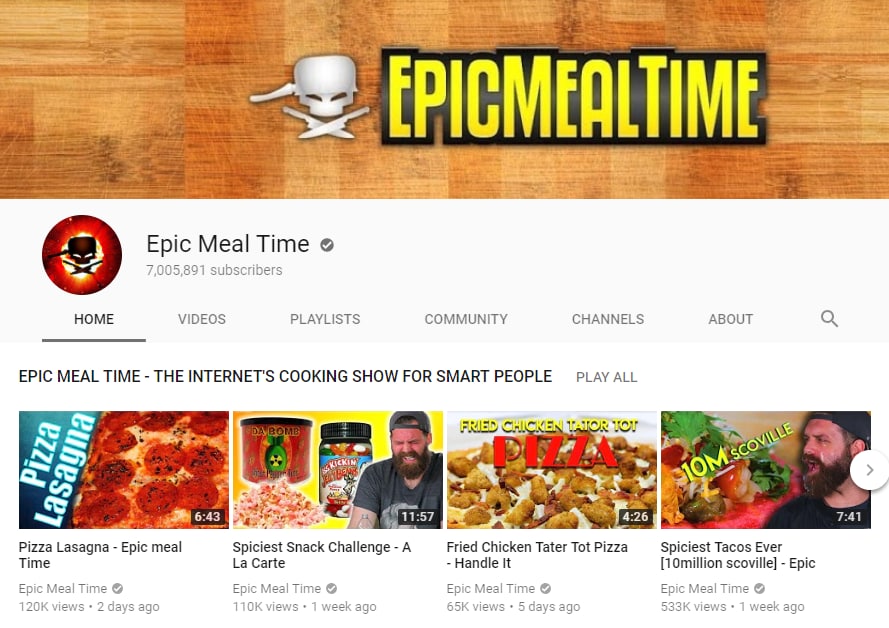
Epic Meal Time’s YouTube brand is in-your-face and intense. It pumps you full of adrenaline and increases your heart rate.
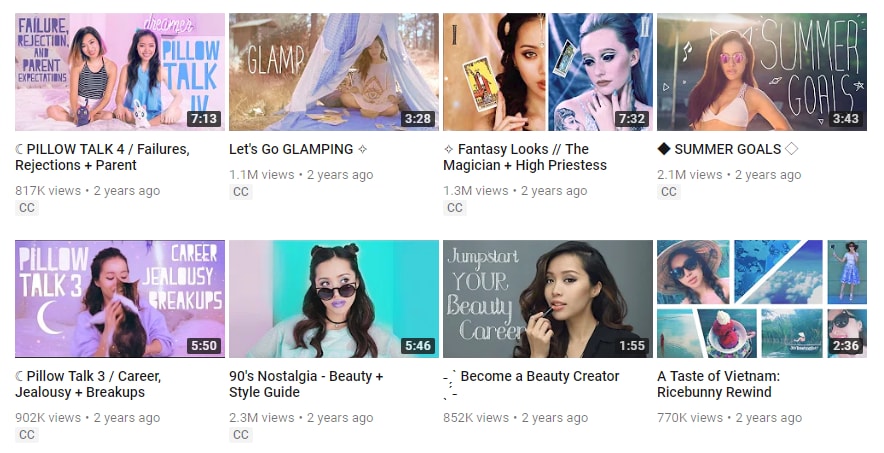
Michelle Phan’s YouTube brand is calm, whimsical, and aspirational.
The color palette she chose is pleasing to the eyes and doesn’t evoke any of the stress we get from Epic Meal Time.
They have different branding because they want to reflect different feelings for different audiences.
Bad Branding Causes Mistrust
When a branding element does not align with the message or the tone does not match with the material, then the audience is not going to trust what you offer. Without trust, you won’t be able to get the advocacy that is essential for a YouTube channel to grow.
Imagine Michelle Phan using the aggressive colors of Epic Meal Time or vice versa. Pretty weird, huh?
What is YouTube Branding?
You might think that branding simply comes together while making videos, but that’s not true. Branding takes a bit of preparation and foresight.
YouTube branding is the idea your viewers have in mind and the emotion they get when they think about your channel.
Here are notable elements of your channel’s branding:
- Channel name
- Channel art
- Video thumbnail
- Video title
- Icon
- Watermark
- Catchphrase
- Style of video
How to Start Branding Your YouTube Channel?
Before you start designing thumbnails and coming up with a catchphrase, the first step in branding is understanding the purpose of your channel. Once you have a purpose, you will know how you want your viewers to feel.
Here is a quick exercise to find your channel’s purpose:
Draw a 3 circle Venn diagram.
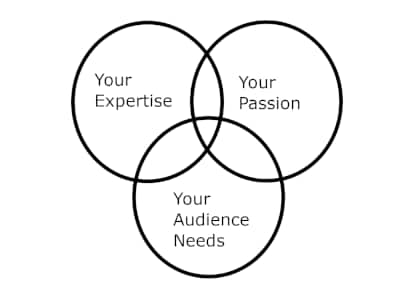
In circle 1, write down everything you consider yourself an expert in.
- What do your friends know you for?
- What can you give advice on?
- What did you go to school to learn?
In circle 2, write down all the topics you are passionate about.
- What can you talk effortlessly about for hours?
- At a party, where do you lead conversations towards?
In circle 3, write down everything that people will pay for that you can supply. Here is where you find the demand of the audience.
- Can you give me travel advice?
- Can you make people forget about their stressful day?
- Do you have experience in a specialized field?
Understanding what people will pay money for will help guide you in creating content that has true value.
In the center, come up with all the ideas that can be associated with all three circles. This will be the ideal purpose for your YouTube channel as it harnesses your expertise, your passion, and the demand of a viewership.
Examples:
Epic Meal Time
Expertise = Eating
Passion = Fast Food Culture
Demand = Unique Meals
PURPOSE: Showcase a unique combination of fast food people won’t make at home.
Michelle Phan
Expertise = Beauty Products
Passion = Makeup and Fashion
Demand = Beauty School
PURPOSE: Give people more confidence in beauty products.
How Is Your Channel Different From the Others?
Now that you have your purpose, it’s time to separate you from others with similar purposes. YouTube is a crowded space for content creators. If your channel is mimicking another more successful channel, you will be in the shadows.
Good branding allows you to differentiate from others .
Pick a Unique and Memorable Name
If your name is Michelle Phan, and you are not the Michelle Phan, I’m sorry, but you will need to pick another name for your YouTube channel:
If you do have to pick another name or if your channel is an ensemble with multiple members, make sure the name you choose is original, memorable, and short (4 words max).
Picking an Icon
Not every YouTuber needs to design an original logo for their brand. In fact, if the channel is about you — the YouTuber — you are the brand, so using a high-quality picture of yourself as the icon is okay.
However, if your channel has a specific theme or topic and you want your branding to convey it so it sticks in the viewers’ heads, especially if it’s their first time viewing your channel. A clear logo will help in amplifying your message:
Create Video Thumbnails That Stand Out
The power of good branding is that your viewers will be able to spot your brand in a crowded space. On YouTube, the crowded space is the suggested video section.

Epic Meal Time thumbnails standing out amongst other loud thumbnails.
Once you have the feeling you want to evoke, test out different thumbnails. Go incognito, search up your videos, and see how the visuals appear beside your competitions. Do they all have the same style or is your far more impressive?
Good branding doesn’t happen in the first try so keep experimenting.
Designing Your Icon, Thumbnail, and Channel Art
There is a lot to consider when designing all the visual elements for your channel. I won’t get into all of it, but here are some tips that you should always keep in mind.
- Less is more: Don’t clutter your icons, thumbnails, or banner.
- Have a single focus: A channel and a video can have a lot of different topics, but the image can’t show everything a video can. Pick one important area and highlight that in the image.
- Quality matters: Your audience is savvier than ever. If they see a pixelated image, they will judge your channel poorly. That’s bad branding. Always use high-quality pictures.
- Make sure the color pops and the text is visible: Use eye-catching colors and visible text. This is a billboard, you have milliseconds to get people’s attention as they scroll past.
Want more resources for creating your channel’s visual elements? Yes? Well, we made this for you:
- How to Make YouTube Video Thumbnail
How to Make Your Visuals Consistent?
When a viewer finds your video and considers it pretty interesting, they will then go into your channel page to learn more. Here is where they make their decision: subscribe or not subscribe?
Consistent branding affirms the viewer that they are in the right place. Peter McKinnon’s brand is built upon his amazing photography, it only makes sense that his visual elements are awesome.
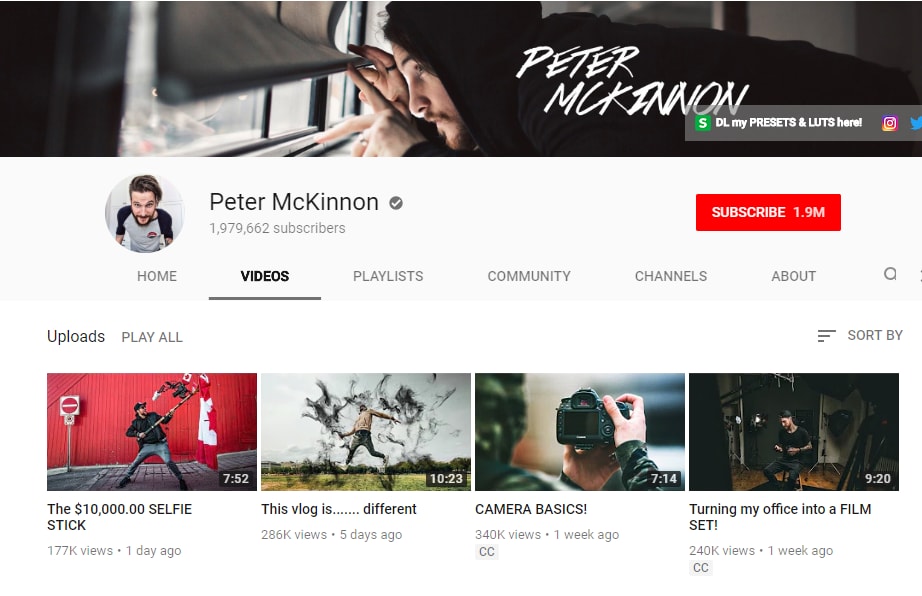
Peter McKinnon is best known for his photography and cinematography, and his branding amplifies that.
But Branding Is Not Designing, It’s A Feeling
Don’t get too caught up with a design.
Look at PewDiePie’s branding. You can argue that it is inconsistent and the design is not professional, but actually, his branding is spot on, because he is making you feel a certain way.
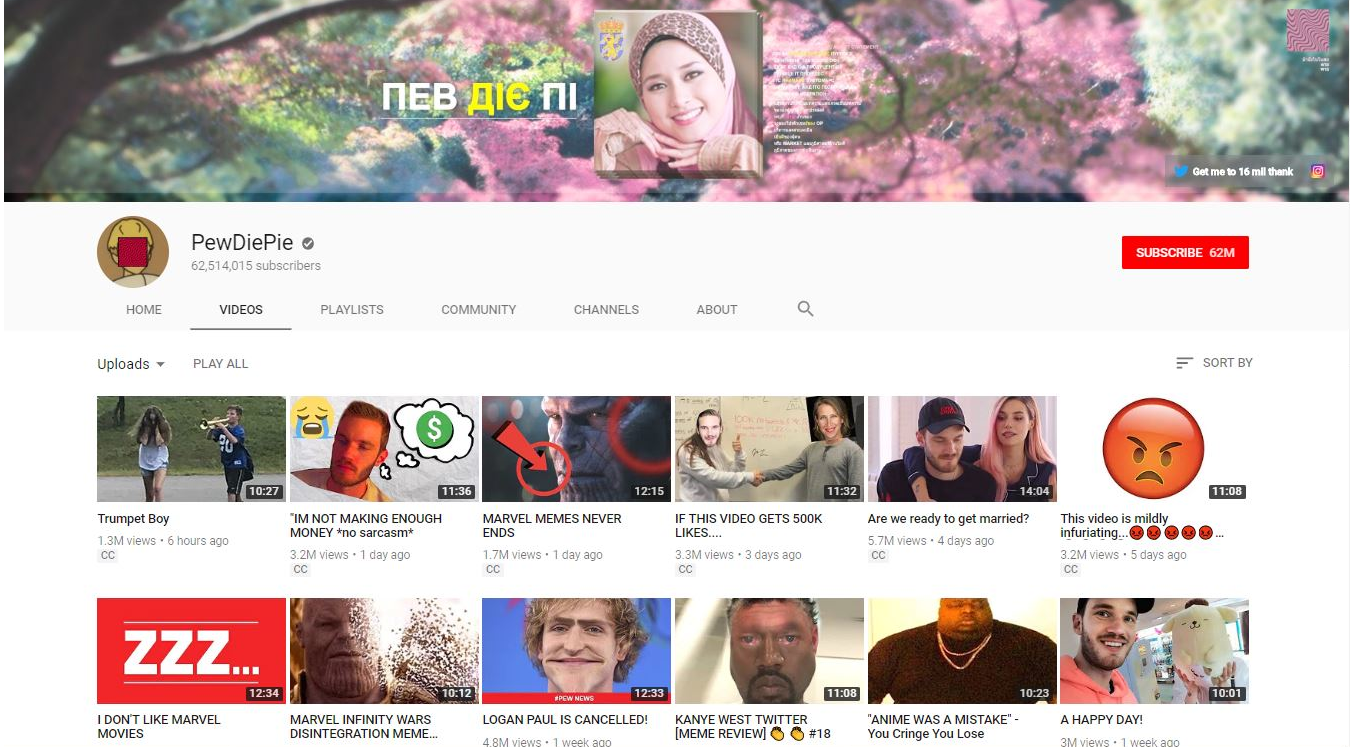
PewDiePie’s brand highlights its upbeat and unpredictable personality.
PewDiePie wants you to laugh. He is not branding his expertise like Peter McKinnon is, he’s branding his personality.
Consistent branding is about making the elements of your channel: channel art, logo, thumbnails, titles, etc. all harmonize together to evoke a sensation.
The humor in PewDiePie’s brand is consistent, even though his thumbnails don’t look like Philip DeFranco’s. It is up to you how you define consistency, and that will happen over time.
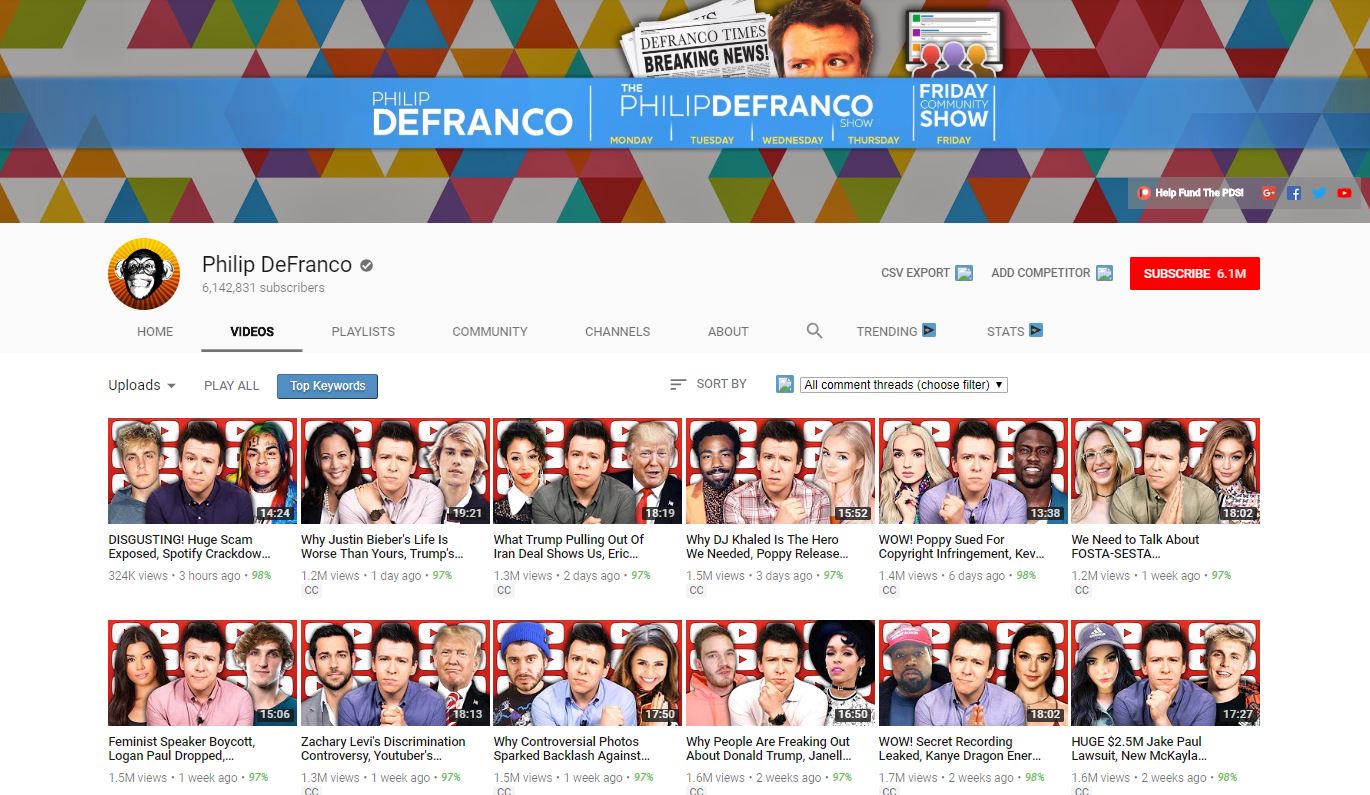
Philip DeFranco supplies commentary on current events with a satirical flair. Like a news broadcast, his branding and video format are consistent, while the daily news is different.
Inserting A Watermark
The main point of a watermark is to let the viewers know when they are watching your video that it is in fact your video.
Let’s be honest, YouTube content can all look the same, especially if you are making content that is quite general (like beauty or tech), so a watermark helps differentiate, so when viewers are ready to subscribe, they have an extra branding element connecting them to your channel.
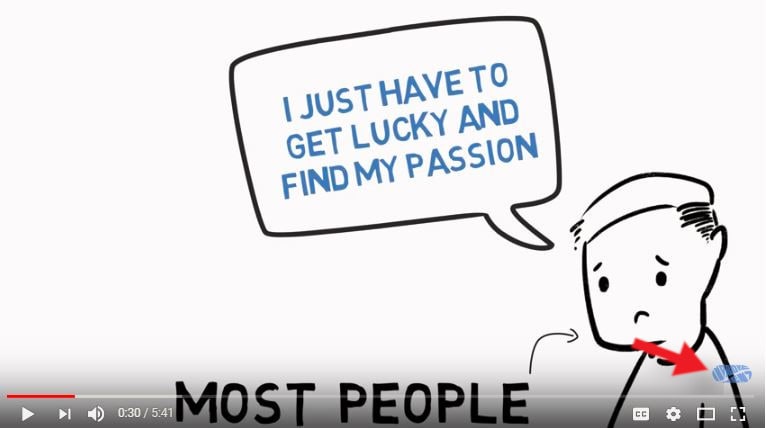
Improvement Pill is a YouTube channel focused on inspiring and motivating its viewer to live a better life.
Above we see an example of a watermark from the YouTube channel Improvement Pill. You can see the watermark in the lower right-hand corner.
Improvement Pill is not the only channel that uses whiteboard animation to illustrate their story, and because of that, they need to set themselves apart. A watermark helps do that.
When a viewer lands on their video, the watermark gives the viewer another way to get more familiar with the channel, and if they are to scroll over the watermark a subscription button pops up.
Want to set up your subscription watermark? Here is a quick tutorial:
Coming Up With A Catchphrase
A catchphrase can be your greeting or sign off, but it doesn’t have to be an original line, it can simply be the way you say “hello.”
Check out some of the popular YouTuber’s catchphrases:
When coming up with a catchphrase that is connected to your channel’s branding remember how you want the viewer to feel. Do you want to leave them with a smile? Or do you want them to take action?
Final Thoughts On YouTube Branding
As you build and grow your YouTube channel, you can expand your purpose while still sticking within the overall theme. You might have started a channel that focused on the topic of nutrition, but as you grow, you will discover that your audience may also be interested in fitness tips or workout accessories as well. Take it slowly and grow with purpose.
Your branding doesn’t dictate the content you create, but it does affect how you go about making it.
Got more questions about branding your YouTube channel? Let us know in the comments below.
Shanoon Cox
Shanoon Cox is a writer and a lover of all things video.
Follow @Shanoon Cox
Shanoon Cox
Nov 01, 2022• Proven solutions
Epic Meal Time. Michelle Phan. Peter McKinnon. When you think of each of these YouTube creators, what comes to mind? The feelings and thoughts you have are vastly different because each one of these channels has its own unique branding.
Epic Meal Time’s YouTube brand is in-your-face and intense. It pumps you full of adrenaline and increases your heart rate.
Michelle Phan’s YouTube brand is calm, whimsical, and aspirational.
The color palette she chose is pleasing to the eyes and doesn’t evoke any of the stress we get from Epic Meal Time.
They have different branding because they want to reflect different feelings for different audiences.
Bad Branding Causes Mistrust
When a branding element does not align with the message or the tone does not match with the material, then the audience is not going to trust what you offer. Without trust, you won’t be able to get the advocacy that is essential for a YouTube channel to grow.
Imagine Michelle Phan using the aggressive colors of Epic Meal Time or vice versa. Pretty weird, huh?
What is YouTube Branding?
You might think that branding simply comes together while making videos, but that’s not true. Branding takes a bit of preparation and foresight.
YouTube branding is the idea your viewers have in mind and the emotion they get when they think about your channel.
Here are notable elements of your channel’s branding:
- Channel name
- Channel art
- Video thumbnail
- Video title
- Icon
- Watermark
- Catchphrase
- Style of video
How to Start Branding Your YouTube Channel?
Before you start designing thumbnails and coming up with a catchphrase, the first step in branding is understanding the purpose of your channel. Once you have a purpose, you will know how you want your viewers to feel.
Here is a quick exercise to find your channel’s purpose:
Draw a 3 circle Venn diagram.
In circle 1, write down everything you consider yourself an expert in.
- What do your friends know you for?
- What can you give advice on?
- What did you go to school to learn?
In circle 2, write down all the topics you are passionate about.
- What can you talk effortlessly about for hours?
- At a party, where do you lead conversations towards?
In circle 3, write down everything that people will pay for that you can supply. Here is where you find the demand of the audience.
- Can you give me travel advice?
- Can you make people forget about their stressful day?
- Do you have experience in a specialized field?
Understanding what people will pay money for will help guide you in creating content that has true value.
In the center, come up with all the ideas that can be associated with all three circles. This will be the ideal purpose for your YouTube channel as it harnesses your expertise, your passion, and the demand of a viewership.
Examples:
Epic Meal Time
Expertise = Eating
Passion = Fast Food Culture
Demand = Unique Meals
PURPOSE: Showcase a unique combination of fast food people won’t make at home.
Michelle Phan
Expertise = Beauty Products
Passion = Makeup and Fashion
Demand = Beauty School
PURPOSE: Give people more confidence in beauty products.
How Is Your Channel Different From the Others?
Now that you have your purpose, it’s time to separate you from others with similar purposes. YouTube is a crowded space for content creators. If your channel is mimicking another more successful channel, you will be in the shadows.
Good branding allows you to differentiate from others .
Pick a Unique and Memorable Name
If your name is Michelle Phan, and you are not the Michelle Phan, I’m sorry, but you will need to pick another name for your YouTube channel:
If you do have to pick another name or if your channel is an ensemble with multiple members, make sure the name you choose is original, memorable, and short (4 words max).
Picking an Icon
Not every YouTuber needs to design an original logo for their brand. In fact, if the channel is about you — the YouTuber — you are the brand, so using a high-quality picture of yourself as the icon is okay.
However, if your channel has a specific theme or topic and you want your branding to convey it so it sticks in the viewers’ heads, especially if it’s their first time viewing your channel. A clear logo will help in amplifying your message:
Create Video Thumbnails That Stand Out
The power of good branding is that your viewers will be able to spot your brand in a crowded space. On YouTube, the crowded space is the suggested video section.
Epic Meal Time thumbnails standing out amongst other loud thumbnails.
Once you have the feeling you want to evoke, test out different thumbnails. Go incognito, search up your videos, and see how the visuals appear beside your competitions. Do they all have the same style or is your far more impressive?
Good branding doesn’t happen in the first try so keep experimenting.
Designing Your Icon, Thumbnail, and Channel Art
There is a lot to consider when designing all the visual elements for your channel. I won’t get into all of it, but here are some tips that you should always keep in mind.
- Less is more: Don’t clutter your icons, thumbnails, or banner.
- Have a single focus: A channel and a video can have a lot of different topics, but the image can’t show everything a video can. Pick one important area and highlight that in the image.
- Quality matters: Your audience is savvier than ever. If they see a pixelated image, they will judge your channel poorly. That’s bad branding. Always use high-quality pictures.
- Make sure the color pops and the text is visible: Use eye-catching colors and visible text. This is a billboard, you have milliseconds to get people’s attention as they scroll past.
Want more resources for creating your channel’s visual elements? Yes? Well, we made this for you:
- How to Make YouTube Video Thumbnail
How to Make Your Visuals Consistent?
When a viewer finds your video and considers it pretty interesting, they will then go into your channel page to learn more. Here is where they make their decision: subscribe or not subscribe?
Consistent branding affirms the viewer that they are in the right place. Peter McKinnon’s brand is built upon his amazing photography, it only makes sense that his visual elements are awesome.
Peter McKinnon is best known for his photography and cinematography, and his branding amplifies that.
But Branding Is Not Designing, It’s A Feeling
Don’t get too caught up with a design.
Look at PewDiePie’s branding. You can argue that it is inconsistent and the design is not professional, but actually, his branding is spot on, because he is making you feel a certain way.
PewDiePie’s brand highlights its upbeat and unpredictable personality.
PewDiePie wants you to laugh. He is not branding his expertise like Peter McKinnon is, he’s branding his personality.
Consistent branding is about making the elements of your channel: channel art, logo, thumbnails, titles, etc. all harmonize together to evoke a sensation.
The humor in PewDiePie’s brand is consistent, even though his thumbnails don’t look like Philip DeFranco’s. It is up to you how you define consistency, and that will happen over time.
Philip DeFranco supplies commentary on current events with a satirical flair. Like a news broadcast, his branding and video format are consistent, while the daily news is different.
Inserting A Watermark
The main point of a watermark is to let the viewers know when they are watching your video that it is in fact your video.
Let’s be honest, YouTube content can all look the same, especially if you are making content that is quite general (like beauty or tech), so a watermark helps differentiate, so when viewers are ready to subscribe, they have an extra branding element connecting them to your channel.
Improvement Pill is a YouTube channel focused on inspiring and motivating its viewer to live a better life.
Above we see an example of a watermark from the YouTube channel Improvement Pill. You can see the watermark in the lower right-hand corner.
Improvement Pill is not the only channel that uses whiteboard animation to illustrate their story, and because of that, they need to set themselves apart. A watermark helps do that.
When a viewer lands on their video, the watermark gives the viewer another way to get more familiar with the channel, and if they are to scroll over the watermark a subscription button pops up.
Want to set up your subscription watermark? Here is a quick tutorial:
Coming Up With A Catchphrase
A catchphrase can be your greeting or sign off, but it doesn’t have to be an original line, it can simply be the way you say “hello.”
Check out some of the popular YouTuber’s catchphrases:
When coming up with a catchphrase that is connected to your channel’s branding remember how you want the viewer to feel. Do you want to leave them with a smile? Or do you want them to take action?
Final Thoughts On YouTube Branding
As you build and grow your YouTube channel, you can expand your purpose while still sticking within the overall theme. You might have started a channel that focused on the topic of nutrition, but as you grow, you will discover that your audience may also be interested in fitness tips or workout accessories as well. Take it slowly and grow with purpose.
Your branding doesn’t dictate the content you create, but it does affect how you go about making it.
Got more questions about branding your YouTube channel? Let us know in the comments below.
Shanoon Cox
Shanoon Cox is a writer and a lover of all things video.
Follow @Shanoon Cox
Also read:
- [New] Cool Climates, Cozy Cinematics Selecting Winter Backgrounds
- Crafting a Commercial Channel YouTube's Premium Pathway Guide for 2024
- Best of Breed Top 10 YouTube Stations for Journalism
- [Updated] Elevate Your Video Guide with Annotations on YouTube
- In 2024, Cool Climates, Cozy Cinematics Selecting Winter Backgrounds
- Audiovisual Symphony Adding Music to Your YouTube Masterpieces
- 2024 Approved Decoding the Secrets of YouTube's Content Hub
- Techniques to Avoid Blackout Issues on Online Video Platform
- Professional 3D Design Apps - Top 5 for Youtubers
- Captivating Clicks The Top 8 YT Thumbnails to Use for 2024
- 2024 Approved Cinematic Composer Software
- [Updated] 5 Critical Equipment Items to Start Your Channel Right
- Hourly High-Stakes Views YT's #1 to #10 Rankings
- 2024 Approved Effortless Free Extraction of YouTube Desktops
- Ultimate List Non-YouTube Mobile Video Platforms
- Best of Breed Top-Rated Youtuber's Streaming Arsenal for 2024
- In 2024, Earnings Expertise in Streams A Comparative Study
- [Updated] Channel Branding Made Simple & Free
- Expand Your Reach Effective YouTube Campaigns
- In 2024, Clear, Distraction-Free Viewing of Old YouTube Content
- Escalate Your Content Reach Leveraging Synergistic YouTube Outros for 2024
- Discover Device-Friendly Ways to Locate Your YT Comments
- Navigating the World of YouTube Editing Using FinalCut Pro
- In 2024, Enhance Engagement Top Tools and Tips for Properly Tagged Videos
- Uncover the Top 10 YouTube Channels for Reliable News
- Captivating Your Audience YouTube Intro Excellence with iMovie for 2024
- Easy-to-Navigate Top 10 YouTube Downloader Tools
- Simple Sound Transformation IPhone-Friendly Software for YouTube-to-MP3
- Guides on Creating Cost-Free YouTube Beginnings & Conclusions
- [New] Divergent Paths in Video Sharing Comparing IGTV & YouTube
- In 2024, Efficient Strategies for Saving Youtube Thumbnails on Any OS
- 2024 Approved Become a YT Hub Pro Complete Guide Revealed
- Hot TikTok Topics & Tags for Enhanced Interaction
- Sleek Skill Using Watch to Unlock Mac
- 2024 Approved 10 Best Cars Surveillance Systems Decoded
- How to Search Filters on Instagram and Get More Filters for Free
- [New] From Game to Giga Full PS4 Capture Using OBS for 2024
- Undeleted lost videos from Nokia G42 5G
- In 2024, How to Share/Fake Location on WhatsApp for Samsung Galaxy S21 FE 5G (2023) | Dr.fone
- How to Fix Corrupt video files of Itel S23 using Video Repair Utility?
- Ace Your Edits Pro-Level Tips for LunaPic Users for 2024
- Updated 2024 Approved The Ultimate Search Discovering the Best FLAC File Converter
- Navigating New Media The Marketer's Top 10 IG Editing Platforms for 2024
- In 2024, How To Unlock SIM Cards Of Oppo Find X6 Without PUK Codes
- Perfect Windows Photos Implementing Sound & Visual Filters Guide
- 2024 Approved The Ultimate List of Online Lyric Video Creators You Need to Know
- Title: Mastering YouTube Uploads in Adobe Premiere
- Author: Kevin
- Created at : 2024-05-25 15:45:43
- Updated at : 2024-05-26 15:45:43
- Link: https://youtube-videos.techidaily.com/mastering-youtube-uploads-in-adobe-premiere/
- License: This work is licensed under CC BY-NC-SA 4.0.
