"Mastering Customization Seamlessly Embedding Text & Links in Youtube Videos"
Mastering Customization: Seamlessly Embedding Text & Links in Youtube Videos
How to Add YouTube Annotations and Cards?

Richard Bennett
Mar 27, 2024• Proven solutions
Update: YouTube has replaced annotation with end screen. You can find the latest informaiton about YouTube screen and YouTube cards here.
YouTube Cards and Annotations are very useful if you want to encourage your viewrs to take an action, like Subscribe, go to another video or associated website, etc. Today, we’re going to show you the differences between cards and annotations, and how to add them in YouTube videos.
Do you want to make your YouTube video more attractive? Wondershare Filmora is a such video editing software designed for YouTube creator. It not only allows you cut, trim, crop, zoom, reverse, rotate the video clips, but also makes the advanced features like green screen, PIP, tilt-shift and mosaic easy like a piece of cake. With Wondershare Filmora, you can ignite your YouTube videos with over 300 effects like Fashion, Beauty, Block Buster, Travel, etc.
 Download Mac Version ](https://tools.techidaily.com/wondershare/filmora/download/ )
The main difference between annotation and cards is their outlook. Cards are more graphical whereas annotations are text based. The cards slide in once you click the small “i” button on the video where as the annotation is there based on the timings set by the user. Moreover the main differences between the two are:
1. YouTube Cards are small and unobtrusive, unless a viewer chooses to click on them, which is why they are the better option when you are trying to get views on other videos. Irritating a few people with a big annotation might be worth it if you also draw other people’s attention to your cause or website, but it is not a good way to endear yourself to people you are trying to get views and subscriptions from. When a card is clicked a thumbnail will appear with a link to your additional content. YouTube Cards are often better than annotations for adding links to your videos because they look much tidier. Also, unlike annotations, cards will be visible to people watching your videos on their mobile devices.
2. You cannot use Cards just to insert notes into your videos, though, and you cannot adjust their size like you can with annotations. So, if you do need a link to be large and extremely noticeable, annotations might still be your best option. Cards and annotations can even be used in combination sometimes.
How to add YouTube Cards
YouTube Cards are similar to annotations but more interactive. They allow the owner of the video to add images and other links. A small box appears, clicking on which will activate the cards.
- Click on the “Video Manager” tab

- Click “Edit” tab under the video screen shot you want to add the card on
- Click on the “Cards” tab

- On the right panel click on “Add Card” drop down menu and select the type of card you want to add
- Click on the create button which will open the corresponding video
- Once you finish the subsequent information required click create card
- Select the timeline for the playhead to appear which leads to the card slide

- Apply changes and exit
How to add YouTube annotations
YouTube Annotation is addition of a text layer, link or hotspots over your video. They add interactive boxes which link to other websites or videos (any link you want).
- Click on the video manager tab
- Click edit tab under the video screen shot you want to add the annotation on
- Click on the “End screen & Annotation” tab

- On the right panel click on “+ Add Element” and select the kind of annotation you want to add
- Adjust the position of Annotation, you can drag the rectangle to locate it at any position of the video, move the slide to set the start and end time of the annotation

- Apply changes
The types of YouTube annotations:
1. Speech Bubbles
Speech Bubbles: look like the dialogue box in a comic strip. There is a tail which you can adjust so it looks like one of the people in your video is saying what is written in the annotation. Speech bubbles are great for adding in funny comments.
2. Notes
Notes: come in a limited selection of colors and can be adjusted to take up a maximum of 30% of your player screen. Sometimes you need a huge annotation to get an important point across, but using huge note annotations too often – especially near the beginnings of your videos – will annoy viewers. If you need a large note annotation make sure to place it later in your video, when a viewer will already be invested in what they are watching and less likely to click away.
3. Titles
Titles: are large pieces of text that go either at the beginning of your video or in-between different topics within your video. YouTube’s titles are not very nice to look at, but they are a decent option if you do not have access to video editing software.
4. Spotlights
Spotlights: have a subtle border and are completely clear inside. Your text only appears when a user hovers over the spotlight. Spotlights are great for turning elements within your video into links.
5. Labels
Labels: are completely transparent, like spotlights, but the user does not have to hover over them for your text to be visible.
6. Pauses
Pauses: are no longer available to add to your videos, although Pause Annotations added before they were removed still work. Pause Annotations used to stop your video for a set period of time when your annotation appeared.
If somebody watches your video and gets to the end then that means they enjoyed it and will probably be open to checking out more of your content. Rather than hoping that your other videos show up in the ‘Suggested Videos’ YouTube will show after yours has finished playing you should always include an outro, or ending card, after your video to recommend your own work. Annotations are used in a lot of successful YouTuber’s ending cards.
One form this takes is small Note annotations in the bottom corners of the screen, one linking to your previous video and one to the next. Sometimes your viewers might not necessarily get the most enjoyment out of your videos by watching them in order, though. Sometimes you want to link viewers to the videos that are most related to the one they just watched.
The best outros also include a subscribe button, which can be created using annotations. These annotations work best when combined with a verbal call to action. Make sure your outro lasts long enough for people to make the decision to subscribe or click another video.
No matter what kind of annotations you are using, you should never use more than two of them at a time anywhere except for your outro. You should also never place annotations at the very top of your screen, or in the middle at the bottom. If your video is embedding on a separate website then the player will cover annotations at the top of the screen, and ads might cover annotations placed in the bottom-middle of the screen. Keep in mind when using annotations that they will not be visible to users watching your videos on mobile devices. If mobile traffic is very important to you then consider using YouTube Cards.
Richard Bennett
Richard Bennett is a writer and a lover of all things video.
Follow @Richard Bennett
Richard Bennett
Mar 27, 2024• Proven solutions
Update: YouTube has replaced annotation with end screen. You can find the latest informaiton about YouTube screen and YouTube cards here.
YouTube Cards and Annotations are very useful if you want to encourage your viewrs to take an action, like Subscribe, go to another video or associated website, etc. Today, we’re going to show you the differences between cards and annotations, and how to add them in YouTube videos.
Do you want to make your YouTube video more attractive? Wondershare Filmora is a such video editing software designed for YouTube creator. It not only allows you cut, trim, crop, zoom, reverse, rotate the video clips, but also makes the advanced features like green screen, PIP, tilt-shift and mosaic easy like a piece of cake. With Wondershare Filmora, you can ignite your YouTube videos with over 300 effects like Fashion, Beauty, Block Buster, Travel, etc.
Download Mac Version ](https://tools.techidaily.com/wondershare/filmora/download/ )
The main difference between annotation and cards is their outlook. Cards are more graphical whereas annotations are text based. The cards slide in once you click the small “i” button on the video where as the annotation is there based on the timings set by the user. Moreover the main differences between the two are:
1. YouTube Cards are small and unobtrusive, unless a viewer chooses to click on them, which is why they are the better option when you are trying to get views on other videos. Irritating a few people with a big annotation might be worth it if you also draw other people’s attention to your cause or website, but it is not a good way to endear yourself to people you are trying to get views and subscriptions from. When a card is clicked a thumbnail will appear with a link to your additional content. YouTube Cards are often better than annotations for adding links to your videos because they look much tidier. Also, unlike annotations, cards will be visible to people watching your videos on their mobile devices.
2. You cannot use Cards just to insert notes into your videos, though, and you cannot adjust their size like you can with annotations. So, if you do need a link to be large and extremely noticeable, annotations might still be your best option. Cards and annotations can even be used in combination sometimes.
How to add YouTube Cards
YouTube Cards are similar to annotations but more interactive. They allow the owner of the video to add images and other links. A small box appears, clicking on which will activate the cards.
- Click on the “Video Manager” tab
- Click “Edit” tab under the video screen shot you want to add the card on
- Click on the “Cards” tab
- On the right panel click on “Add Card” drop down menu and select the type of card you want to add
- Click on the create button which will open the corresponding video
- Once you finish the subsequent information required click create card
- Select the timeline for the playhead to appear which leads to the card slide
- Apply changes and exit
How to add YouTube annotations
YouTube Annotation is addition of a text layer, link or hotspots over your video. They add interactive boxes which link to other websites or videos (any link you want).
- Click on the video manager tab
- Click edit tab under the video screen shot you want to add the annotation on
- Click on the “End screen & Annotation” tab
- On the right panel click on “+ Add Element” and select the kind of annotation you want to add
- Adjust the position of Annotation, you can drag the rectangle to locate it at any position of the video, move the slide to set the start and end time of the annotation
- Apply changes
The types of YouTube annotations:
1. Speech Bubbles
Speech Bubbles: look like the dialogue box in a comic strip. There is a tail which you can adjust so it looks like one of the people in your video is saying what is written in the annotation. Speech bubbles are great for adding in funny comments.
2. Notes
Notes: come in a limited selection of colors and can be adjusted to take up a maximum of 30% of your player screen. Sometimes you need a huge annotation to get an important point across, but using huge note annotations too often – especially near the beginnings of your videos – will annoy viewers. If you need a large note annotation make sure to place it later in your video, when a viewer will already be invested in what they are watching and less likely to click away.
3. Titles
Titles: are large pieces of text that go either at the beginning of your video or in-between different topics within your video. YouTube’s titles are not very nice to look at, but they are a decent option if you do not have access to video editing software.
4. Spotlights
Spotlights: have a subtle border and are completely clear inside. Your text only appears when a user hovers over the spotlight. Spotlights are great for turning elements within your video into links.
5. Labels
Labels: are completely transparent, like spotlights, but the user does not have to hover over them for your text to be visible.
6. Pauses
Pauses: are no longer available to add to your videos, although Pause Annotations added before they were removed still work. Pause Annotations used to stop your video for a set period of time when your annotation appeared.
If somebody watches your video and gets to the end then that means they enjoyed it and will probably be open to checking out more of your content. Rather than hoping that your other videos show up in the ‘Suggested Videos’ YouTube will show after yours has finished playing you should always include an outro, or ending card, after your video to recommend your own work. Annotations are used in a lot of successful YouTuber’s ending cards.
One form this takes is small Note annotations in the bottom corners of the screen, one linking to your previous video and one to the next. Sometimes your viewers might not necessarily get the most enjoyment out of your videos by watching them in order, though. Sometimes you want to link viewers to the videos that are most related to the one they just watched.
The best outros also include a subscribe button, which can be created using annotations. These annotations work best when combined with a verbal call to action. Make sure your outro lasts long enough for people to make the decision to subscribe or click another video.
No matter what kind of annotations you are using, you should never use more than two of them at a time anywhere except for your outro. You should also never place annotations at the very top of your screen, or in the middle at the bottom. If your video is embedding on a separate website then the player will cover annotations at the top of the screen, and ads might cover annotations placed in the bottom-middle of the screen. Keep in mind when using annotations that they will not be visible to users watching your videos on mobile devices. If mobile traffic is very important to you then consider using YouTube Cards.
Richard Bennett
Richard Bennett is a writer and a lover of all things video.
Follow @Richard Bennett
Stepwise Strategies for Enhancing YT Game Coverage Through Effective Hashing
Hashtags are a great way to reach new viewers and subscribers interested in your content. But with so many hashtags out there, finding which ones are perfect for your YouTube gaming channel can be challenging.
That’s why we’ve extensively researched you and compiled a list of the 30 best tags/hashtags for YouTube gaming videos. We’ve also included tools to help you generate or plan your hashtags effectively to grow your channel and boost your subscription.
So, if you want to take your YouTube gaming channel to the next level, read on!
30 Best YouTube Gaming Hashtags
In recent years, YouTube has become the most popular platform for gamers worldwide. However, with millions of users uploading new videos daily, making your content stand out from the rest can take time and effort.
One way to alleviate the reach of your YouTube gaming videos is to use popular hashtags that can help you for many purposes like:
- Driving traffic toward your videos
- Increasing your brand awareness
- Expanding the search visibility of your content
You can also increase your video’s organic volume by using appropriate hashtags.
Here is the list of the 30 most popular hashtags with high search volume for YouTube gaming:
- #gamer
- #nintendo
- #games
- #livestream
- #videogames
- #gaming
- #youtubegamer
- #fortnite
- #PleaseForgiveMe
- #pcgaming
- #playfortnite
- #xbox
- #gamingcommunity
- #gamerguy
- #gamergirl
- #gamereview
- #livegaming
- #play
- #winning
- #videogameaddict
- #twitchstreamer
- #youtubegaming
- #reddead
- #playinggames
- #diablo
- #callofduty
- #xboxone
- #retrogaming
- #smallyoutuberarmy
- #nintendoswitch
Useful Tools For YouTube Gaming Hashtags
Well goes an old saying: “Better to teach someone to fish than to give him a fish.”
As a vlogger, you should use hashtags every time you upload a video to help your video spread and guide viewers to find more of your content. But it would help if you can ensure these hashtags are natural and relevant.
Hence, apart from providing the list of popular gaming hashtags, we have created this list of YouTube hashtag tools to help you generate such tags.
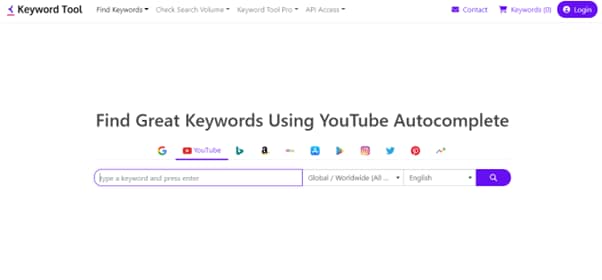
Keyword Tool
The Keyword Tool is a popular YouTube hashtags generator that can help you find popular gaming hashtags to use on YouTube. You can understand what keywords your audience is searching for with this tool.
New and popular YouTube gaming hashtags are just one click away with Keyword Tool. This tool makes developing variations, ideas, and other stuff relatively easy. It’s the best tool on the market now and gets updated regularly to provide the most relevant result each time.
The Keyword tool offers categories for each social platform and search engine where you can find the most popular tag for your videos. Hence, you can create more relevant content and reach more people on YouTube, Twitch streams, and Instagram posts. Moreover, it provides suggestions for combinations of titles. For example, it produces the fastest results and uses tolls to add the names of the games, providing you with more personalized results.
To use Keyword Tool, enter a topic into the search bar. You will then see a list of popular gaming hashtags related to your keyword. You can then use them to help promote your videos and get more views.
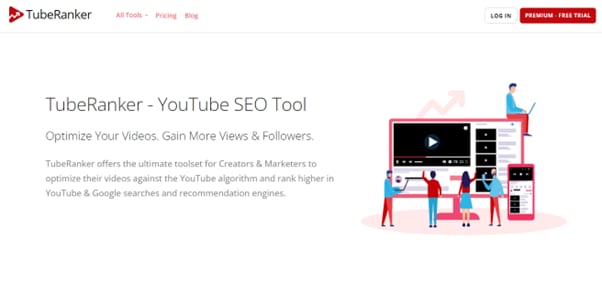
Tube Ranker
Tube Ranker is another excellent tool for ranking your videos on YouTube. This YouTube hashtag generator is fast, easy to use, and effective at getting your videos to the top of search results in no time.
Tube Ranker tool can work as a description generator, a channel auditor, a tags extractor, an SEO rank tracker, a keyword generator, and a title generator.
Therefore, if you want more views and engagement on your YouTube gaming videos, the Tube Ranker should be a must-have tool in your arsenal!
As to the price, TubeBuddy comes with a Pro version for $7.20/month, a Star version for $15.20/month, and a Legend version for $39.20/month in addition to the free version.
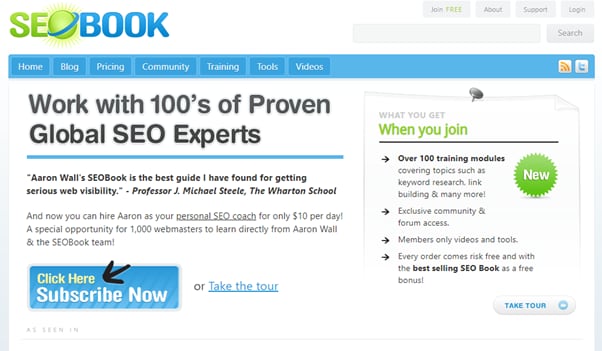
SEO Book
SEOBook is an excellent website for learning about search engine optimization (SEO). Aaron Wall, a leading expert on the topic, writes the book. This website covers everything from the basics of SEO to more advanced concepts.
The tool can help you generate relevant hashtags for your YouTube gaming videos and make your content more visible.
![]()
Note: If you want to optimize your YouTube gaming videos’ descriptions, tags and titles, click here to learn how!
Bonus: Using Filmora To Screen Record Or Edit The Gaming Video
Although we have talked about the most popular gaming hashtags and the useful tools for you videos, meanwhile, the quality and the content of the video are worth of high attention.
With the popularity of YouTube Gaming videos, how to record or edit content to make it more engaging and eye-capturing is important.
Therefore, we recommend using Filmora - a user-friendly video editing software for both Mac and Windows. It has all the features you need to edit, screen record, and export the edited videos to YouTube.
https://www.youtube.com/embed/
Free Download For Win 7 or later(64-bit)
Free Download For macOS 10.14 or later
There are many reasons to use Filmora, but here are the most important ones:
- Quick and easy to use, even for novice users
- It helps you screen record the footage of your game and webcam simultaneously while you are playing.
- Offers AI portrait, green screen, mask & blend, New BlueFX, and Boris FX effects
- Excellent and clear UI
- It lets you edit the video and add effects, transitions, and other elements to make it more engaging.
- It includes instant mode, PIP, preset templates for different occasions, WordArt, title editing, and motion tracking features.
- You can export the edited video to YouTube with just a few clicks.
Conclusion
This comprehensive article provides the 30 best tags/hashtags for YouTube gaming to help you improve your content visibility. We’ve also discussed the three most popular YouTube hashtags generator.
Moreover, we’ve recommended using Filmora to quickly screen record or edit your YouTube gaming videos before searching for popular hashtags.
We hope you’ve enjoyed reading this article and can now use the right hashtags for your YouTube gaming content.
Also read:
- [New] 2024 Approved Best Practices for Shooting Nighttime Selfies & Portraits
- [New] Achieve Professional-Level YouTube Transcription Without Spending
- 2024 Approved Driving Income Through YouTube Shorts Crucial Elements and Earnings Potential
- Best Practices for 6 Trendy MC Houses
- Complete Step-by-Step Tutorial on Upgrading Your PS5 with a New SSD
- Download & Update HP Deskjet Wireless Series 3630/3720 Printer Drivers - Easy Tutorial
- Enhancing YouTube Presence with Strategic Banners
- Essential Photo Tools Top 9 CamGear Enhancers for Filmmakers for 2024
- From Screen To Speakers Secrets to Successful Video Sharing
- Guerrilla Marketing for YouTube Upping Video Traffic
- In 2024, 5 Best Route Generator Apps You Should Try On Vivo X Flip | Dr.fone
- In 2024, Amplifying Your YouTube Presence Through Consistent Content Release
- In 2024, Effective Visual Brand Strategies for Your YouTube Logo
- In 2024, Every Creator's Guide to YouTube Revenue
- Integrating iMovie Productions Into YouTube
- Success Strategies to Fixed Installation Failure in Oculus WS11/WS10
- Troubleshooting Guide How to Fix an Unresponsive Itel P55 5G Screen | Dr.fone
- Title: Mastering Customization Seamlessly Embedding Text & Links in Youtube Videos
- Author: Kevin
- Created at : 2024-12-31 16:00:01
- Updated at : 2025-01-04 00:07:17
- Link: https://youtube-videos.techidaily.com/mastering-customization-seamlessly-embedding-text-and-links-in-youtube-videos/
- License: This work is licensed under CC BY-NC-SA 4.0.