
:max_bytes(150000):strip_icc()/AIrendering_CROPPED_Guillaume_GettyImages-1418477818-d0a9c5ce09584a1099f21a5f1f690a88.jpg)
"In 2024, Enhancing Visual Impact of YouTube Thumbnails - Neon Edition"
Enhancing Visual Impact of YouTube Thumbnails - Neon Edition
Your YouTube video, or any other clip published on any forum, gets a larger number of hits if it has an attractive thumbnail. And, the fact is, a thumbnail becomes 10x more attractive when the main character that the image has have a neon border around it.
With that said, in the following sections, you will learn a couple of methods on how to add a YouTube thumbnail border around the main characters and/or objects that are significant to the clip.
In this article
01 Add Glowing Neon Border to YouTube Thumbnail with Filmora
02 Add a Glowing Neon Border in YouTube Thumbnail with Canva
03 Outline a Person in a YouTube Thumbnail with Photoshop
Part 1: How to Add Neon Border to YouTube Thumbnail for Free with Filmora
Being one of the most versatile and intuitive post-production tools available in the market today, Wondershare Filmora X allows you to add a neon border to a YouTube thumbnail quite conveniently. You can learn how to get this done on Windows or Mac by following the steps given below.
For Win 7 or later (64-bit)
For macOS 10.12 or later
Step 1: Define Project Settings and Add Image to the Timeline
Launch Wondershare Filmora X on your PC (a MacBook Pro M1 is used here), ensure that the project aspect ratio is set to 16:9 (Widescreen) on the splash screen, and click New Project. On the main interface, click the Preview quality and display settings icon from the upper-right area of the Timeline, click Change Project Aspect Ratio, click to select 1280 x 720 (HD) from the Resolution menu of the Project Settings box, and click OK to save the custom project settings.

Then select My Media from the menu bar if not already selected, click Project Media from the navigation pane, and click Import from the Media box to select and import the image of the main character or object that you want to use in the thumbnail.

Now, drag the image from the Media box to the Timeline at the bottom.

Step 2: Clear Image Background, Add Border, and Add Custom Background
Go to Effects from the menu bar, click to select the Default tab and then AI Portrait from the navigation pane, and click and drag the Human Segmentation preset from the right box, and place it over the image track in the Timeline.

Double-click the image layer, scroll down the upper-left box to the Video Effects section, and use the Edge Thickness and Edge Feather sliders to adjust the character’s edges to make them as realistic as possible. Click OK when done.

Next, click and drag the Human Border preset over the image track in the Timeline, and follow the same procedure to customize the border. This will give the character a neon border effect.

Now, use the method explained earlier to import a custom image for the background, and drag and place it under the previous track in the Timeline.

If you are running the latest version of Filmora, you will find there are some neon light effects available under AI Portrait as well.

Step 3: Add Titles to Thumbnail
Go to Titles from the menu bar, click to select the Default tab and then Lower 3rds from the navigation pane, and click and drag your preferred lower-third preset from the right window to a separate layer in the Timeline. Double-click the lower-third layer, and use the available options in the upper-left window to change the text, its color, etc., and drag the textbox to place it to your preferred position on the image as well. Click OK to save the changes.
Next, click to select Titles from the navigation pane, and drag your preferred title from the right window to the upper-most track in the Timeline. Now use the method explained earlier to edit the text, its color, position, etc. to make it look professional.

For more tips and tricks for creating YouTube thumbnail, you can check this You Tube thumbnail creating guide.
Step 4: Get the Neon Border Thumbnail
Click the Snapshot (Camera) icon from the upper-right area of the Timeline, go to My Media from the menu bar, right-click the thumbnail of the screenshot you captured, and click Reveal in Finder (on Mac) or Reveal in Explorer (on Windows) to get to the folder the YouTube thumbnail border is saved in.

Part 2: How to Add a Glowing Neon Border in Your YouTube Thumbnail with Canva
Canva is another intuitive editing program that works on the web interface rather than having you download and install an app on your PC. You can add a neon border for YouTube thumbnails using Canva by following the instructions given below:
Step 1: Define Project Settings and Add a Background
After signing in to your Canva account, click Create a design from the top-right corner of the page, click Custom size from the bottom, define 1280 and 720 in the Width and Height fields on the box that appears respectively, and click Create new design.

Now, click to select Background from the navigation bar on the left (if the Background tool is not visible, click More and then choose Background from the expanded list), and click to select a background from the images available in the center pane.

Step 2: Upload an Image and Add Effects
Click Uploads from the navigation bar, click the More icon from the right of the Upload media button present at the top of the center pane, choose your preferred method to upload the image (with the transparent background) that you want to use, upload the image, and drag it from the center pane to the Canvas.
Note: You can use any of the tools available online to remove the background from your image for free.

To add a YouTube thumbnail border, make sure that the image that you added to the Canvas is selected, click the Duplicate icon from the upper-right area, and use the scaling handles of the copy of the image to increase its size a bit. Reposition the image back to its original location as well.
Then, click Edit image from the upper-left corner of the Canvas, click Duotone from the Edit image pane at the center, if need be, click See all, choose your preferred duotone effect to apply on the image, choose your preferred highlight and shadow colors from the box that appears next, and click Back from the top of the pane.

Next, click See all next to the Adjust section from the center pane, and drag the Blur slider to the right to increase the blur effect on the image.

Step 3: Position the Layers
While keeping the duplicate image selected, click the Position button from the upper-right area of the Canvas, and click Background to send the second image behind the first one to get the neon border effect for the photo.

Part 3: How to Outline a Person in a YouTube Thumbnail with Photoshop
Because YouTube thumbnails are nothing but static images, creating YouTube thumbnail border with Adobe Photoshop is comparatively easier. The process of doing this is given below:
Step 1: Define Document Preferences and Import an Image
Launch Adobe Photoshop on your PC, click Create new, and on the New Document customization box, define the width and height values to 1280 and 720 pixels respectively. Select Transparent from the Background Contents menu as well if not already selected. Click Create from the bottom to create a new Photoshop document with the specified document settings. Next, open the folder that contains the source image, drag the photo to Photoshop, and press Enter to place the photo.

Step 2: Remove Background from the Image
Make sure that the image layer is selected in the Layers panel on the right, go to Select from the menu bar at the top, and click Subject. From the bottom of the Layers panel, click the Add a mask icon to get rid of the background, leaving only the human on the Canvas.

Step 3: Add a Custom Background and an Outline Around the Subject
Use the method explained earlier to import a background image of your choice to Photoshop. Drag the background image layer to the bottom in the Layers panel. Double-click the masked layer, click to select Stroke from the left pane of the Layer Style box, and use the options available on the right to manage the size, color, position, etc. of the stroke that has been added around the human subject. Click OK when done, and then export the image normally to use it as a YouTube thumbnail border.

Summary
It is important to know that the default resolution of a YouTube thumbnail is 1280 x 720 pixels that is usually written and referred to as 720p. While adding a YouTube thumbnail border, it is also imperative to have a good sense of color combination and fonts. Furthermore, a decent tool like Wondershare Filmora X must be used to add an appealing neon border around the main subject in the thumbnail image easily and quickly.
02 Add a Glowing Neon Border in YouTube Thumbnail with Canva
03 Outline a Person in a YouTube Thumbnail with Photoshop
Part 1: How to Add Neon Border to YouTube Thumbnail for Free with Filmora
Being one of the most versatile and intuitive post-production tools available in the market today, Wondershare Filmora X allows you to add a neon border to a YouTube thumbnail quite conveniently. You can learn how to get this done on Windows or Mac by following the steps given below.
For Win 7 or later (64-bit)
For macOS 10.12 or later
Step 1: Define Project Settings and Add Image to the Timeline
Launch Wondershare Filmora X on your PC (a MacBook Pro M1 is used here), ensure that the project aspect ratio is set to 16:9 (Widescreen) on the splash screen, and click New Project. On the main interface, click the Preview quality and display settings icon from the upper-right area of the Timeline, click Change Project Aspect Ratio, click to select 1280 x 720 (HD) from the Resolution menu of the Project Settings box, and click OK to save the custom project settings.
Then select My Media from the menu bar if not already selected, click Project Media from the navigation pane, and click Import from the Media box to select and import the image of the main character or object that you want to use in the thumbnail.
Now, drag the image from the Media box to the Timeline at the bottom.
Step 2: Clear Image Background, Add Border, and Add Custom Background
Go to Effects from the menu bar, click to select the Default tab and then AI Portrait from the navigation pane, and click and drag the Human Segmentation preset from the right box, and place it over the image track in the Timeline.
Double-click the image layer, scroll down the upper-left box to the Video Effects section, and use the Edge Thickness and Edge Feather sliders to adjust the character’s edges to make them as realistic as possible. Click OK when done.
Next, click and drag the Human Border preset over the image track in the Timeline, and follow the same procedure to customize the border. This will give the character a neon border effect.
Now, use the method explained earlier to import a custom image for the background, and drag and place it under the previous track in the Timeline.
If you are running the latest version of Filmora, you will find there are some neon light effects available under AI Portrait as well.
Step 3: Add Titles to Thumbnail
Go to Titles from the menu bar, click to select the Default tab and then Lower 3rds from the navigation pane, and click and drag your preferred lower-third preset from the right window to a separate layer in the Timeline. Double-click the lower-third layer, and use the available options in the upper-left window to change the text, its color, etc., and drag the textbox to place it to your preferred position on the image as well. Click OK to save the changes.
Next, click to select Titles from the navigation pane, and drag your preferred title from the right window to the upper-most track in the Timeline. Now use the method explained earlier to edit the text, its color, position, etc. to make it look professional.
For more tips and tricks for creating YouTube thumbnail, you can check this You Tube thumbnail creating guide.
Step 4: Get the Neon Border Thumbnail
Click the Snapshot (Camera) icon from the upper-right area of the Timeline, go to My Media from the menu bar, right-click the thumbnail of the screenshot you captured, and click Reveal in Finder (on Mac) or Reveal in Explorer (on Windows) to get to the folder the YouTube thumbnail border is saved in.
Part 2: How to Add a Glowing Neon Border in Your YouTube Thumbnail with Canva
Canva is another intuitive editing program that works on the web interface rather than having you download and install an app on your PC. You can add a neon border for YouTube thumbnails using Canva by following the instructions given below:
Step 1: Define Project Settings and Add a Background
After signing in to your Canva account, click Create a design from the top-right corner of the page, click Custom size from the bottom, define 1280 and 720 in the Width and Height fields on the box that appears respectively, and click Create new design.
Now, click to select Background from the navigation bar on the left (if the Background tool is not visible, click More and then choose Background from the expanded list), and click to select a background from the images available in the center pane.
Step 2: Upload an Image and Add Effects
Click Uploads from the navigation bar, click the More icon from the right of the Upload media button present at the top of the center pane, choose your preferred method to upload the image (with the transparent background) that you want to use, upload the image, and drag it from the center pane to the Canvas.
Note: You can use any of the tools available online to remove the background from your image for free.
To add a YouTube thumbnail border, make sure that the image that you added to the Canvas is selected, click the Duplicate icon from the upper-right area, and use the scaling handles of the copy of the image to increase its size a bit. Reposition the image back to its original location as well.
Then, click Edit image from the upper-left corner of the Canvas, click Duotone from the Edit image pane at the center, if need be, click See all, choose your preferred duotone effect to apply on the image, choose your preferred highlight and shadow colors from the box that appears next, and click Back from the top of the pane.
Next, click See all next to the Adjust section from the center pane, and drag the Blur slider to the right to increase the blur effect on the image.
Step 3: Position the Layers
While keeping the duplicate image selected, click the Position button from the upper-right area of the Canvas, and click Background to send the second image behind the first one to get the neon border effect for the photo.
Part 3: How to Outline a Person in a YouTube Thumbnail with Photoshop
Because YouTube thumbnails are nothing but static images, creating YouTube thumbnail border with Adobe Photoshop is comparatively easier. The process of doing this is given below:
Step 1: Define Document Preferences and Import an Image
Launch Adobe Photoshop on your PC, click Create new, and on the New Document customization box, define the width and height values to 1280 and 720 pixels respectively. Select Transparent from the Background Contents menu as well if not already selected. Click Create from the bottom to create a new Photoshop document with the specified document settings. Next, open the folder that contains the source image, drag the photo to Photoshop, and press Enter to place the photo.
Step 2: Remove Background from the Image
Make sure that the image layer is selected in the Layers panel on the right, go to Select from the menu bar at the top, and click Subject. From the bottom of the Layers panel, click the Add a mask icon to get rid of the background, leaving only the human on the Canvas.
Step 3: Add a Custom Background and an Outline Around the Subject
Use the method explained earlier to import a background image of your choice to Photoshop. Drag the background image layer to the bottom in the Layers panel. Double-click the masked layer, click to select Stroke from the left pane of the Layer Style box, and use the options available on the right to manage the size, color, position, etc. of the stroke that has been added around the human subject. Click OK when done, and then export the image normally to use it as a YouTube thumbnail border.
Summary
It is important to know that the default resolution of a YouTube thumbnail is 1280 x 720 pixels that is usually written and referred to as 720p. While adding a YouTube thumbnail border, it is also imperative to have a good sense of color combination and fonts. Furthermore, a decent tool like Wondershare Filmora X must be used to add an appealing neon border around the main subject in the thumbnail image easily and quickly.
Master the Art of Streaming: Pick From the Leading 6 Cost-Free & On-Demand Short Video Downloads
We all are aware that recently YouTube has launched a new way to engage and attract more and more audiences with a shorter version of videos which are known as YouTube shorts. It is a video of 60 or fewer seconds which allows creators to create an eye-catchy video to maximize the views. Like other video platforms, YouTube shorts also doesn’t allow downloading options. This means however good content you find on YouTube shorts you can’t download through the app. So there has been a huge demand for YouTube shorts downloaders and one such way is to use third-party website services.
If you are looking forward to knowing about ways to download YouTube shorts and how do they work. Keep reading.
Note: We resolutely oppose all forms of copyright-infringing downloads. This tutorial is only for downloading YouTube videos/audio materials from your own channel.
In this article
01 Top 6 YouTube Shorts Downloaders in 2024
02 How to Download YouTube Shorts Easily?
03 FAQs about Downloading YouTube Videos
Part 1: Top 6 YouTube Shorts Downloaders in 2024
There is some YouTube shorts downloader online that allows you to download YouTube shorts for free. Here is the list of the best YouTube shorts download the app below:
1.shorts.savetube.me

This is one of the best YouTube shorts downloader online one could ever think of using. It is free and secure to use. Also, it has a feature of YouTube shorts to mp4 converter easily. This tool can be used for devices such as android, iPhone, and laptops too.
2.Shortsnoob.com

This tool allows you to download YouTube shorts in their HD original quality. You don’t need to sign-up or login here at all. Also, you can use this website on devices such as PC, tablets, mobiles, laptops, etc.
One good thing about this YouTube shorts downloader online is that it claims to provide an original quality video than other websites.
3.Heatfeed.com
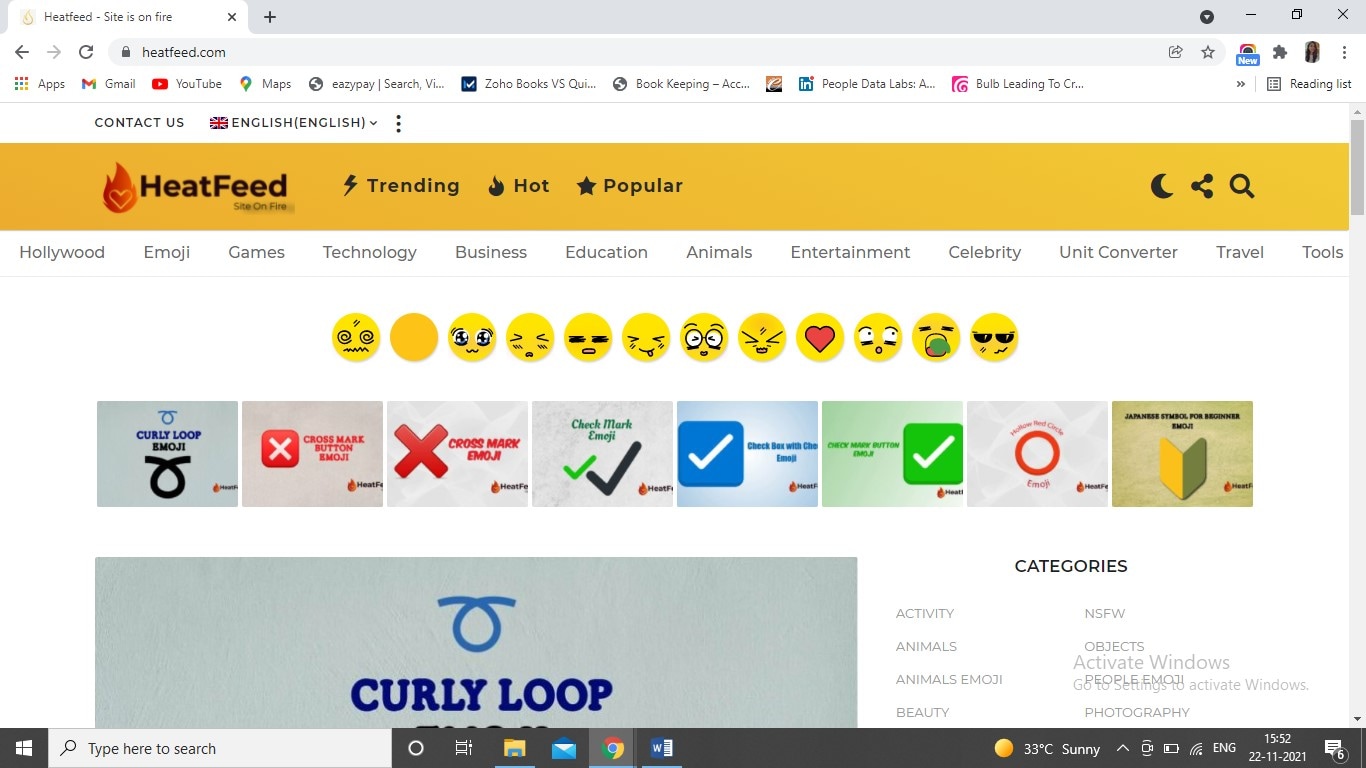
It is an all-in-one solution for YouTube shorts video download. Here it provides fast downloading, secured, HD video quality, and with easy to use interface. Also one could use this website with devices such as laptops, mac, PC, android, etc.
4.Shortsloader.com
It is among the top YouTube shorts downloader online. Here we can download any YouTube shorts with a single click and very easy steps. Along with that, it is known as YouTube shorts to mp4 converter too.
5.Tricksndtips.com
Herewith this tool the purpose to download YouTube shorts would get solved in a few minutes only. It has a very easy interface and delivers the best quality videos.
6.Y2mate.me
This online video downloader is known for providing high-quality YouTube shorts. Here no logins are required but you just need to copy and paste the link of the video on the empty area and videos will get downloaded instantly.
Part 2: How to Download YouTube Shorts Easily?
Now let’s discuss a step-by-step guide to download YouTube shorts using shorts.save tube.me:
Step 1: At first you need to select a YouTube short you want to download.
Step 2: Then after you need to go to “Share” and find a link to copy.
Step 3: Now open a web browser and https://ytshorts.savetube.me/ search for this website
Step 4: Once the website is opened you would find a space to paste a copied link.
Step 5: Click on Download and your job is done.
Thus YouTube shorts video download is a very easy-to-follow process to get your favorite video clip stored.
Part 3: FAQs about Downloading YouTube Videos
1. Is downloading video from YouTube illegal?
No downloading videos from YouTube are not illegal if it is for personal use. It is allowed to use third-party YouTube shorts downloader to download videos where there is no copyright given to it.
2. Can I edit someone else’s YouTube video?
Yes, you can edit someone’s video if the creator has permitted you to do that.
3. What is the best video editor for free?
If you are looking for the best video editor for free then the most obvious choice would be Wondershare Filmora. It has the finest video editing functions and rich filter effects to deliver outstanding video content ever.
Wondershare Filmora
Get started easily with Filmora’s powerful performance, intuitive interface, and countless effects!
Try It Free Try It Free Try It Free Learn More >

Conclusion
Thus we could say that YouTube shorts are one of the most amazing ways to deliver the most engaging content to your audience and appeal to them. Along with the launch of YouTube shorts, there have been many launches of YouTube shorts downloader online to help us to download our most favorite video content to our gallery. We have given detailed guidance about the best YouTube shorts downloader and how to use them.
So what are we waiting for? Let’s pick the right YouTube shorts downloader online and get a full dose of entertainment.
02 How to Download YouTube Shorts Easily?
03 FAQs about Downloading YouTube Videos
Part 1: Top 6 YouTube Shorts Downloaders in 2024
There is some YouTube shorts downloader online that allows you to download YouTube shorts for free. Here is the list of the best YouTube shorts download the app below:
1.shorts.savetube.me
This is one of the best YouTube shorts downloader online one could ever think of using. It is free and secure to use. Also, it has a feature of YouTube shorts to mp4 converter easily. This tool can be used for devices such as android, iPhone, and laptops too.
2.Shortsnoob.com
This tool allows you to download YouTube shorts in their HD original quality. You don’t need to sign-up or login here at all. Also, you can use this website on devices such as PC, tablets, mobiles, laptops, etc.
One good thing about this YouTube shorts downloader online is that it claims to provide an original quality video than other websites.
3.Heatfeed.com
It is an all-in-one solution for YouTube shorts video download. Here it provides fast downloading, secured, HD video quality, and with easy to use interface. Also one could use this website with devices such as laptops, mac, PC, android, etc.
4.Shortsloader.com
It is among the top YouTube shorts downloader online. Here we can download any YouTube shorts with a single click and very easy steps. Along with that, it is known as YouTube shorts to mp4 converter too.
5.Tricksndtips.com
Herewith this tool the purpose to download YouTube shorts would get solved in a few minutes only. It has a very easy interface and delivers the best quality videos.
6.Y2mate.me
This online video downloader is known for providing high-quality YouTube shorts. Here no logins are required but you just need to copy and paste the link of the video on the empty area and videos will get downloaded instantly.
Part 2: How to Download YouTube Shorts Easily?
Now let’s discuss a step-by-step guide to download YouTube shorts using shorts.save tube.me:
Step 1: At first you need to select a YouTube short you want to download.
Step 2: Then after you need to go to “Share” and find a link to copy.
Step 3: Now open a web browser and https://ytshorts.savetube.me/ search for this website
Step 4: Once the website is opened you would find a space to paste a copied link.
Step 5: Click on Download and your job is done.
Thus YouTube shorts video download is a very easy-to-follow process to get your favorite video clip stored.
Part 3: FAQs about Downloading YouTube Videos
1. Is downloading video from YouTube illegal?
No downloading videos from YouTube are not illegal if it is for personal use. It is allowed to use third-party YouTube shorts downloader to download videos where there is no copyright given to it.
2. Can I edit someone else’s YouTube video?
Yes, you can edit someone’s video if the creator has permitted you to do that.
3. What is the best video editor for free?
If you are looking for the best video editor for free then the most obvious choice would be Wondershare Filmora. It has the finest video editing functions and rich filter effects to deliver outstanding video content ever.
Wondershare Filmora
Get started easily with Filmora’s powerful performance, intuitive interface, and countless effects!
Try It Free Try It Free Try It Free Learn More >
Conclusion
Thus we could say that YouTube shorts are one of the most amazing ways to deliver the most engaging content to your audience and appeal to them. Along with the launch of YouTube shorts, there have been many launches of YouTube shorts downloader online to help us to download our most favorite video content to our gallery. We have given detailed guidance about the best YouTube shorts downloader and how to use them.
So what are we waiting for? Let’s pick the right YouTube shorts downloader online and get a full dose of entertainment.
Also read:
- Infinite Inspiration Cost-Free YouTube Theming
- Skyrocket Your Brand's Visibility with These Top Video Marketing Approaches
- Youtube's Rapid Rise Top 10 in a Flash
- [Updated] A Deep Dive Into YouTube App Features on Smartphones
- [New] Elite Content Consummation
- In 2024, Embarking on a YouTube Venture User Setup Essentials
- Quick Guide Embedding Time Markers on YouTube Videos (Desktop/Mobile)
- Unlisted YouTube Explained Beyond the Main Channels
- Boost Channels and Views Through Savvy YouTube Analysis for 2024
- [New] Brief Video Joust The Showdown Between YouTubes Shorts and TikTok's Flavor
- [Updated] Essential Info on Crafting Engaging YT Shorts
- A Decade of YouTube Dominance Breakthrough Videos Hitting a Billion Views
- [New] Boosting Views? Here Are the 10 Key Mistakes to Avoid
- How Does Purchasing Likes Impact Long-Term Success?
- Video Sharing Protocol Bridging YouTube and TikTok Networks
- 29 Cost-Free YouTube Sound Extractors Free YouTube Audio Downloads
- 2024 Approved Channeling Wealth Through Beauty Online Platforms
- YT Thumbnails Downloading via Browser, App & Command Line
- [New] Audience Allure 3 Ultimate Video Growth Methods
- Discerning T-Series' Profit Mechanisms From Youtube Views for 2024
- Unleashing YouTube Potential The Best Shortcuts to Higher Views
- Enhance Video Pace - YouTube via Desktops & Phones
- Streamlining the Process of Finding Your Own Musical Compilation on Youtube
- Audience Appreciation Assessment Self and Seekers Vs. Rival Repertoires
- 2024 Approved Boost Engagement Innovative Templates for Your Video Closings
- Get Started with YouTube Video Ad Building Without Spending
- [Updated] Broadcasting Brevity News Outro Tips
- Breakthrough Strategies for Peak Video Viewership Times
- [Updated] Conciseness in Content Editing Your YouTube Videos Smartly
- Crafting the Perfect YouTube Channel Url A Quick Guide for 2024
- 2024 Approved How to Add Logo/Watermark to YouTube Video
- Top Picks for Zero-Cost Film and Photography Resources
- [New] Dissecting the Hidden Mechanics Behind YouTube's Popularity Index
- Boost Engagement with Creative Video Titling and Tagging Techniques
- Capture, Create, Curate Mobiles in Action for YouTube Thumbnails
- [Updated] Breaking Down YouTube Short Barriers
- Mastering YouTube Video Extraction A Step-by-Step Guide
- Mastering Mobile Media The Art of Filming with a Smartphone
- Going Against Gravity Innovative Ways to Rewind YouTube Content
- 2024 Approved Premium MP4 Uploader for FB Networks
- In 2024, Achieving Peak Performance ZOOM + FB Live Techniques
- Exclusive Insider's Pick Best Open World Games for 2024
- The Step-by-Step Approach to Twitter Archive Usage
- [New] Go Full Screen with Ease Masterful Mac Scaling Methods for Insta Posts for 2024
- Updated In 2024, Essential Audioscape A List of Prime Online Hubs for Free Movie Clip Tracks
- Auditory Excellence Pinpointing the Best Songs to Accompany Your Montage Narrative
- [New] Seamless Editing Experience Built for Vimeo Videos
- How to recover old videos from your Samsung Galaxy A15 4G
- Nubia Red Magic 8S Pro+ Not Receiving Texts? 10 Hassle-Free Solutions Here | Dr.fone
- How to Stop Life360 from Tracking You On Oppo Reno 9A? | Dr.fone
- New Creative Audio Analysis Crafting an Interactive Waveform Animation Spectacle Within Premiere Pro for 2024
- In 2024, How PGSharp Save You from Ban While Spoofing Pokemon Go On Realme GT Neo 5? | Dr.fone
- In 2024, Harmony Hunters Excellent iOS and Android Apps That Help Identify Tracks Effortlessly
- 2024 Approved Master the Art of Message Interaction on Desktop/Mobile
- How to See Every Participant in Google Meet for 2024
- Updated 8 Best Video Editing Software for Low-End PCs for 2024
- In 2024, How to Come up With the Best Pokemon Team On Honor 100? | Dr.fone
- Full Tutorial to Bypass Your Honor 100 Face Lock?
- [Updated] In 2024, Mastering Social Media Tags Leading Tools Reviewed (FB/Twitter/Insta)
- How to Unlock Disabled Apple iPhone 14 Pro/iPad Without Computer
- In 2024, Ultimate Guide from Itel A60 FRP Bypass
- Updated The Audio Wizards Handbook Navigating Complex Editing Tasks with Sony Vegas Pro
- All Must-Knows to Use Fake GPS GO Location Spoofer On Realme V30 | Dr.fone
- Title: "In 2024, Enhancing Visual Impact of YouTube Thumbnails - Neon Edition"
- Author: Kevin
- Created at : 2024-05-25 15:39:07
- Updated at : 2024-05-26 15:39:07
- Link: https://youtube-videos.techidaily.com/in-2024-enhancing-visual-impact-of-youtube-thumbnails-neon-edition/
- License: This work is licensed under CC BY-NC-SA 4.0.
