
:max_bytes(150000):strip_icc()/oura-ring-2-6e4a655bf1204877b33c125fe0f2fff4.jpg)
In 2024, Elevate Your Online Impact with Effective Backlink Strategies
Elevate Your Online Impact with Effective Backlink Strategies
YouTube is the world’s 2nd most visited site. That means achieving a higher ranking can be beneficial for you. YouTube SEO can help you to boost traffic, get more views, and achieve higher rankings. In this article, we’ll explain what YouTube backlinks are and the safest way to get them.
In this article
01 [What Are YouTube Backlinks?](#Part 1)
02 [Are YouTube Backlinks Important?](#Part 2)
03 [How Can I Get YouTube Backlinks for My Videos?](#Part 3)
04 [A Few More SEO Factors for YouTube SEO](#Part 4)
What Are YouTube Backlinks?
Links between other sites to your YouTube videos are referred to as YouTube backlinks. Backlinks are crucial to growing traffic, increasing discovery speed, and improving ranks. Backlinks are almost akin to a site’s reputation as they can act as a vote of confidence for the quality of your videos.
The content of a video with more backlinks is seen as more valuable by search engines than those with less, as each backlink adds confidence that the video is worth linking to.
The popularity of the sites linking to a YouTube video also plays a part as they naturally lead to increased traffic coming to sites through backlinks. Search engines often check popular videos for new backlinks leading to the quick discovery of new content.
The quality of backlinks significantly impacts the ranking and visibility of a given video. Search engines consider links from relevant sources as more valuable as people are more likely to click them.
Lastly, placement and formatting of links play a part as a link that stands out is more likely to generate traffic than one that doesn’t.
Are YouTube Backlinks Important?
Yes. Backlinks are one of the vital aspects of SEO. They are essential to ranking well in Google search results, and they also help you stay ahead of your competition.
Backlinks act as a powerful source to attract your target audience. While getting people to your might be challenging, sending them to your other work is a breeze. You only have to include YouTube backlinks for free to do so. With 65% of people being visual learners, YouTube is a resourceful place for using backlinks.
How Can I Get YouTube Backlinks for My Videos?
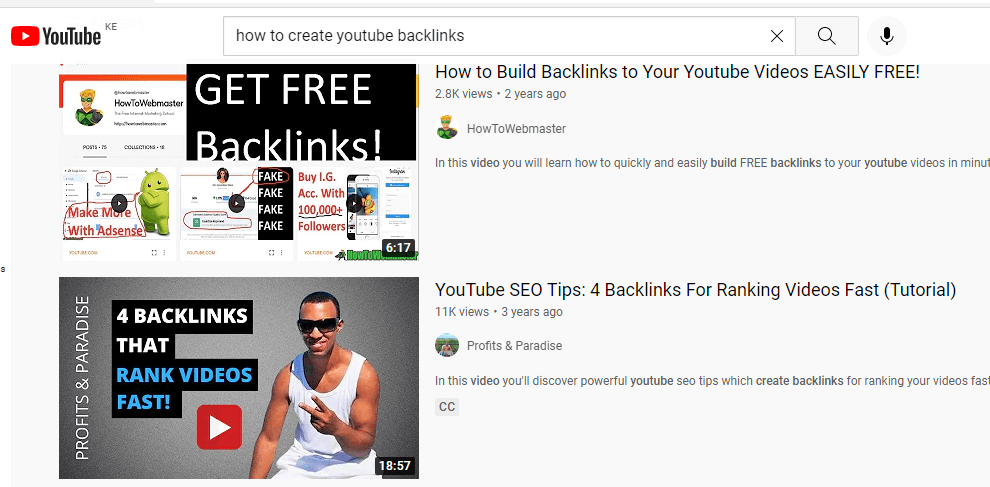
Getting high-quality backlinks can be challenging if you don’t know how to do it. The good news is that there are many different methods that you can use to get links that will benefit your YouTube videos; all it takes is a little creativity.
With that in mind, here are some of the safest ways of getting YouTube backlinks for free for your videos.
Guest Vlogging
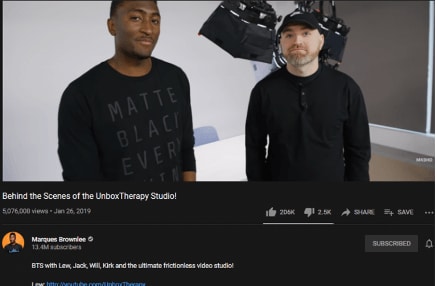
If you have a large social media following or even just a few loyal subscribers on YouTube, consider using that to your advantage. Many bloggers and popular vloggers will allow guest appearances in their videos — as long as they also get something out of it. If you are a vlogger in a specific niche, you could guest vlog for someone well-known in your niche, or anyone with higher ranking videos than yours.
Share Your Videos on Social Media
Posting original content on social media sites is also a great way to get high-quality backlinks for free. People will click your links, and this can help you to get more views and subscribers too. Many bloggers and vloggers often post the videos they feature on their social media platforms.
Web 2.0 Sites

The use of Web 2.0 sites is a great way to get backlinks for your YouTube videos. Web 2.0 sites, such as Squarespace, Blogger, Blog, Weebly, and WordPress allow you to embed your videos. You can post original content on these sites, which will then link back to yours. So this makes them powerful links indeed.
Incorporate such websites into your marketing strategy and then target your keywords correctly to get more user engagement. In turn, both your site and embedded video will rank on the top page of search engines, meaning you will rank for that particular search query.
Pinterest Video Pins

Pinterest video pins are another great option. They are simply a link to your YouTube video placed on the Pinterest site. With over 320 million monthly active users and more than 200 billion pins saved, this is a great way to get YouTube backlinks for free. It also helps you grow your following.
Creating backlinks using Pinterest video pins can help you tell a story about your brand, idea, or project. Video pins attract and grab the attention of your audience using a cover image. What’s more? You can create video adverts to advertise on Pinterest.
Unlinked Mentions

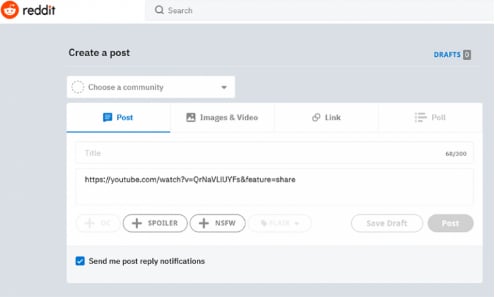
The use of unlinked mentions means that whenever someone writes about a YouTube video without linking it back, you provide them with a link yourself; this is a great way to obtain YouTube backlinks for free.
● Questions: Is it safe to buy YouTube backlinks?
● No, it is not. You should not buy backlinks because it’s against Google’s Webmaster Guidelines. If you get caught, you will get a Google penalty for trying to cheat the system.
A Few More SEO Factors for YouTube SEO
Quality of Your Videos
YouTube and Google rank high-quality HD videos higher than those of low quality. Use Filmora to create and edit your videos before uploading them to YouTube.
The software allows you to change the resolution of your videos; it has a range of resolution settings you can choose from to enhance the quality of your videos. You can also adjust the contrast, brightness, tint, and saturation of your videos.
Moreover, you can cut a section in the middle of a video and remove the shake from videos. Additionally, the program allows you to trim, crop, rotate and join videos.
The best part is: You don’t need to be tech-savvy to know how to use this software. It is easy to use and has an aesthetically pleasing interface.
Versatile Video Editor - Wondershare Filmora
An easy yet powerful editor
Numerous effects to choose from
Detailed tutorials provided by the official channel
Help you create high-quality YouTube video
Video Title
The title of your video has a significant effect on your YouTube SEO. Including your target keyword in your title will help your video rank higher. A compelling title also drives a high CTR (click-through rate). However, you should avoid creating clickbait titles, as this can hurt your ranking.
Engagement
YouTube ranking also depends on how viewers engage with your video. If users watch, share, like, and comment on your videos, Google and YouTube will give them a priority. As such, the more engagement your videos receive, the higher they will rank.
YouTube Tags
Tags allow YouTube to know what your video is about. For this reason, your first tag should be the target keyword. You should also include variations of the target keyword when adding tags.

Conclusion
Using these methods can help you gain high-quality links to boost your YouTube SEO and increase views and subscribers to your channel. Keeping this in mind, the quality of your video is one of the ranking factors. Use Filmora to edit and create HD videos that will get on top of search results.
02 [Are YouTube Backlinks Important?](#Part 2)
03 [How Can I Get YouTube Backlinks for My Videos?](#Part 3)
04 [A Few More SEO Factors for YouTube SEO](#Part 4)
What Are YouTube Backlinks?
Links between other sites to your YouTube videos are referred to as YouTube backlinks. Backlinks are crucial to growing traffic, increasing discovery speed, and improving ranks. Backlinks are almost akin to a site’s reputation as they can act as a vote of confidence for the quality of your videos.
The content of a video with more backlinks is seen as more valuable by search engines than those with less, as each backlink adds confidence that the video is worth linking to.
The popularity of the sites linking to a YouTube video also plays a part as they naturally lead to increased traffic coming to sites through backlinks. Search engines often check popular videos for new backlinks leading to the quick discovery of new content.
The quality of backlinks significantly impacts the ranking and visibility of a given video. Search engines consider links from relevant sources as more valuable as people are more likely to click them.
Lastly, placement and formatting of links play a part as a link that stands out is more likely to generate traffic than one that doesn’t.
Are YouTube Backlinks Important?
Yes. Backlinks are one of the vital aspects of SEO. They are essential to ranking well in Google search results, and they also help you stay ahead of your competition.
Backlinks act as a powerful source to attract your target audience. While getting people to your might be challenging, sending them to your other work is a breeze. You only have to include YouTube backlinks for free to do so. With 65% of people being visual learners, YouTube is a resourceful place for using backlinks.
How Can I Get YouTube Backlinks for My Videos?
Getting high-quality backlinks can be challenging if you don’t know how to do it. The good news is that there are many different methods that you can use to get links that will benefit your YouTube videos; all it takes is a little creativity.
With that in mind, here are some of the safest ways of getting YouTube backlinks for free for your videos.
Guest Vlogging
If you have a large social media following or even just a few loyal subscribers on YouTube, consider using that to your advantage. Many bloggers and popular vloggers will allow guest appearances in their videos — as long as they also get something out of it. If you are a vlogger in a specific niche, you could guest vlog for someone well-known in your niche, or anyone with higher ranking videos than yours.
Share Your Videos on Social Media
Posting original content on social media sites is also a great way to get high-quality backlinks for free. People will click your links, and this can help you to get more views and subscribers too. Many bloggers and vloggers often post the videos they feature on their social media platforms.
Web 2.0 Sites
The use of Web 2.0 sites is a great way to get backlinks for your YouTube videos. Web 2.0 sites, such as Squarespace, Blogger, Blog, Weebly, and WordPress allow you to embed your videos. You can post original content on these sites, which will then link back to yours. So this makes them powerful links indeed.
Incorporate such websites into your marketing strategy and then target your keywords correctly to get more user engagement. In turn, both your site and embedded video will rank on the top page of search engines, meaning you will rank for that particular search query.
Pinterest Video Pins
Pinterest video pins are another great option. They are simply a link to your YouTube video placed on the Pinterest site. With over 320 million monthly active users and more than 200 billion pins saved, this is a great way to get YouTube backlinks for free. It also helps you grow your following.
Creating backlinks using Pinterest video pins can help you tell a story about your brand, idea, or project. Video pins attract and grab the attention of your audience using a cover image. What’s more? You can create video adverts to advertise on Pinterest.
Unlinked Mentions
The use of unlinked mentions means that whenever someone writes about a YouTube video without linking it back, you provide them with a link yourself; this is a great way to obtain YouTube backlinks for free.
● Questions: Is it safe to buy YouTube backlinks?
● No, it is not. You should not buy backlinks because it’s against Google’s Webmaster Guidelines. If you get caught, you will get a Google penalty for trying to cheat the system.
A Few More SEO Factors for YouTube SEO
Quality of Your Videos
YouTube and Google rank high-quality HD videos higher than those of low quality. Use Filmora to create and edit your videos before uploading them to YouTube.
The software allows you to change the resolution of your videos; it has a range of resolution settings you can choose from to enhance the quality of your videos. You can also adjust the contrast, brightness, tint, and saturation of your videos.
Moreover, you can cut a section in the middle of a video and remove the shake from videos. Additionally, the program allows you to trim, crop, rotate and join videos.
The best part is: You don’t need to be tech-savvy to know how to use this software. It is easy to use and has an aesthetically pleasing interface.
Versatile Video Editor - Wondershare Filmora
An easy yet powerful editor
Numerous effects to choose from
Detailed tutorials provided by the official channel
Help you create high-quality YouTube video
Video Title
The title of your video has a significant effect on your YouTube SEO. Including your target keyword in your title will help your video rank higher. A compelling title also drives a high CTR (click-through rate). However, you should avoid creating clickbait titles, as this can hurt your ranking.
Engagement
YouTube ranking also depends on how viewers engage with your video. If users watch, share, like, and comment on your videos, Google and YouTube will give them a priority. As such, the more engagement your videos receive, the higher they will rank.
YouTube Tags
Tags allow YouTube to know what your video is about. For this reason, your first tag should be the target keyword. You should also include variations of the target keyword when adding tags.
Conclusion
Using these methods can help you gain high-quality links to boost your YouTube SEO and increase views and subscribers to your channel. Keeping this in mind, the quality of your video is one of the ranking factors. Use Filmora to edit and create HD videos that will get on top of search results.
A Stepwise Approach to Add YouTube Videos Into Slate
Create High-Quality Video - Wondershare Filmora
An easy and powerful YouTube video editor
Numerous video and audio effects to choose from
Detailed tutorials provided by the official channel
Google Slide presentation is a powerful tool for creators to keep their audience engaged. This online platform lets you create and demonstrate your ideas. It will capture your viewers’ attention from the very beginning. It also doesn’t matter whatever learning style you engage. Adding YouTube videos to Google Slide will appeal to all levels of individuals.
More so, it is the best way to provide a break for both the audience and the creator. You can break Google Slide presentations with videos to offer some break. Viewers and the presenter get a breather in the process. The presenter can take a short break from speaking while the video plays. Let’s now dive into how to embed a YouTube video in Google Slides.

In this article
01 Why should we add a video to Google Slides?
02 How to add a YouTube video to Google Slide
03 How to choose the right video for your Slides?
Why should we add a video to Google Slides?
There is a great impact of adding video to Google Slides.
For attention
Videos will automatically awaken you, especially if your thoughts have started to sway during a presentation. A video has a direct way of showing creativity. The audience automatically connects the dots between the video and the presentation lines alike.
To stimulate discussion
A picture is worth a thousand words. There is a way that an added video will help the audience connect to the day’s topic. It will bring up several ideas and stir up discussion with the presenter.
Easy following
With videos embedded in Google Slide, viewers will find it easy to understand and digest. Videos automatically eliminate boredom and make any topic interesting.
How to add a YouTube video to Google Slide
Use these two methods to add a YouTube video to Google Slides. Via the Search and Direct link.
Method 1. Embed YouTube video to Google Slide by search and selection
Google has owned YouTube since the year 2006. You can, therefore, integrate Google’s products with YouTube easily.
Step 1. First, go to the slide where you want to embed your video.
Step 2. Then choose the “Insert” option from the menu bar and hit the “Video” option.

Step 3. It would be best if you now viewed the “YouTube” search bar to type in the video you want to embed. You can use keywords to search for the video in question and view instant search results.
Step 4. Then select the video you want to embed, and you’ll see it appear on the “Slide.”

Step 5. Format your video. Remember that the entire video will be embedded. You don’t necessarily need the whole video. It is time to select just a brief but relevant clip from the video to use. Then position your video to the right point using the axes from the exact starting point to the finished part you want the video to appear in.
Method 2. Embed YouTube video to Google Slide by direct link
You can engage this method if you want to include the entire video.
Step 1. Get the URL of the specific YouTube video that you want to use.

Step 2. Then go to your browser’s “Address bar” to copy the YouTube link.
Step 3. Next, open the “Presentation” slide to put your video to.
Step 4. Choose the “Insert” tab from the menu bar.
Step 5. Then hit on the “Video” option from the drop-down menu that appears.
Step 6. A new window will open automatically. Choose the “By URL” tab.
Step 7. Then paste the YouTube video URL in the “Paste YouTube URL Here” bar section.

Step 8. Wait for the video file to load and press the “Select” option. The video will immediately appear in the presentation slide. Just drag and drop the video in your preferred position.
Note: You can do a few edits inside the application. Set the timer when your video should start and when to stop. You can also adjust the video player size.
How to choose the right video for your Slides?
Not all videos will make an impact on your Google Slide. You need to use the best shot that adds value to your presentation. These guidelines will help you to settle on the best video.
Be Professional – choose the best video for your presentation. Remember that the video is part of the presentation and carries more weight. Settling for quality video will bring out the professionalism in you.
Relevant – how do you know that what you are showing your audience corresponds to the presentation piece? Ensure that the video you add has something to do with the Google Slide presentation topic. The two should naturally flow to make it easy to understand the whole concept.
Precise – your presentation is not about the video. The ideal length should not exceed 60 seconds. The longer the video, the greater the chance for your audience to lose track along the way.
Know every footage you are working with – this will help you pick the best shots for your presentation. So, learn every aspect of the video before settling down to use it.
Add new content – even though one content may suit several presentations, don’t rely on the same piece each time. Your audience will want to feel something fresh each time you are presenting. So, compose different videos for different scenarios to make that big impact.
Create an eye-catching video for your Slides with Filmora
The video quality matters when it comes to creating your Slides. The best video creator – Filmora – works in simple steps to give you an eye-catching video. It will create videos for all scenarios like marketing, tutorial, gaming, etc.
Key features of Filmora
- It offers you advanced video effects like filters, motion elements, etc
- You can multiply your fun with multiple screens with the Split Screen feature
- Easily change backgrounds using the Green Screen feature
- The speed control lets you fast forward or slow down a special moment
- Import your video clips to social media platforms
- You can also adjust the audio of your tracks using the Audio Mixer feature
Follow this guide to create a video for your slide with Filmora
Step 1. Launch Filmora
First, begin by downloading and installing Filmora on your computer device. Once installed, launch it and allow it to run. You can either create a new project or open an existing project to work on.
Step 2. Create a new project
Here, click on the “New Project” tab on the app’s welcome screen. The editor should load immediately. Then proceed to register the product. Just hit on the “Register” tab.
Step 3. Import video
Check the upper left corner of your screen to see the “Import” tab. Click on it and choose the “Import Media Files” option. Next, navigate to the location of your computer’s local list to select the clip or video you want to edit. Then, hit the “Import” button to add the video to the timeline for editing.
Step 4. Edit video
Drag and drop the raw footage to Filmora’s timeline to begin editing. Here, you can trim, add other video clips, merge, and add effects as you wish. Likewise, you can add opening titles, subtitles, and end credits to your video. More so, this tool offers different templates to use. Just drag and drop the templates you wish to use to a specific location on the timeline.
Step 5. Preview your file
Last but not least, you can preview your files. Click on the “Play” tab to start previewing your video clips. The main essence of this part is to allow you to make the necessary changes to your clips if there is a need.
Step 6. Export and Share
With Filmora, you can export your file to various social media platforms. But first, go to the “Output window” and select the video file format to use. This software supports several output formats to apply to any platform and device. Just click on the “Format” tab and choose the file format to use. Then also change the resolution and other parameters like frame rate and channel of your video in the “Settings” section. Finally, share your video to your YouTube channel and get ready to add the video to the Google Slide presentation.
For Win 7 or later (64-bit)
For macOS 10.12 or later
Conclusion
● You now know how to put a YouTube video in Google Slides the simple way. You can search for your YouTube videos or directly use the URL link. Whatever the case, remember that it’s the quality of your video that carries more weight. Thanks to the availability of third-party apps that you can use to create and improve the quality of your videos.
● Filmora is at your service to create high-resolution videos that you can export in any format to your YouTube channel. The tool is intuitive, and it won’t matter whether you haven’t tried it before. It is a perfect choice for both professionals and first-time users.
Google Slide presentation is a powerful tool for creators to keep their audience engaged. This online platform lets you create and demonstrate your ideas. It will capture your viewers’ attention from the very beginning. It also doesn’t matter whatever learning style you engage. Adding YouTube videos to Google Slide will appeal to all levels of individuals.
More so, it is the best way to provide a break for both the audience and the creator. You can break Google Slide presentations with videos to offer some break. Viewers and the presenter get a breather in the process. The presenter can take a short break from speaking while the video plays. Let’s now dive into how to embed a YouTube video in Google Slides.
In this article
01 Why should we add a video to Google Slides?
02 How to add a YouTube video to Google Slide
03 How to choose the right video for your Slides?
Why should we add a video to Google Slides?
There is a great impact of adding video to Google Slides.
For attention
Videos will automatically awaken you, especially if your thoughts have started to sway during a presentation. A video has a direct way of showing creativity. The audience automatically connects the dots between the video and the presentation lines alike.
To stimulate discussion
A picture is worth a thousand words. There is a way that an added video will help the audience connect to the day’s topic. It will bring up several ideas and stir up discussion with the presenter.
Easy following
With videos embedded in Google Slide, viewers will find it easy to understand and digest. Videos automatically eliminate boredom and make any topic interesting.
How to add a YouTube video to Google Slide
Use these two methods to add a YouTube video to Google Slides. Via the Search and Direct link.
Method 1. Embed YouTube video to Google Slide by search and selection
Google has owned YouTube since the year 2006. You can, therefore, integrate Google’s products with YouTube easily.
Step 1. First, go to the slide where you want to embed your video.
Step 2. Then choose the “Insert” option from the menu bar and hit the “Video” option.
Step 3. It would be best if you now viewed the “YouTube” search bar to type in the video you want to embed. You can use keywords to search for the video in question and view instant search results.
Step 4. Then select the video you want to embed, and you’ll see it appear on the “Slide.”
Step 5. Format your video. Remember that the entire video will be embedded. You don’t necessarily need the whole video. It is time to select just a brief but relevant clip from the video to use. Then position your video to the right point using the axes from the exact starting point to the finished part you want the video to appear in.
Method 2. Embed YouTube video to Google Slide by direct link
You can engage this method if you want to include the entire video.
Step 1. Get the URL of the specific YouTube video that you want to use.
Step 2. Then go to your browser’s “Address bar” to copy the YouTube link.
Step 3. Next, open the “Presentation” slide to put your video to.
Step 4. Choose the “Insert” tab from the menu bar.
Step 5. Then hit on the “Video” option from the drop-down menu that appears.
Step 6. A new window will open automatically. Choose the “By URL” tab.
Step 7. Then paste the YouTube video URL in the “Paste YouTube URL Here” bar section.
Step 8. Wait for the video file to load and press the “Select” option. The video will immediately appear in the presentation slide. Just drag and drop the video in your preferred position.
Note: You can do a few edits inside the application. Set the timer when your video should start and when to stop. You can also adjust the video player size.
How to choose the right video for your Slides?
Not all videos will make an impact on your Google Slide. You need to use the best shot that adds value to your presentation. These guidelines will help you to settle on the best video.
Be Professional – choose the best video for your presentation. Remember that the video is part of the presentation and carries more weight. Settling for quality video will bring out the professionalism in you.
Relevant – how do you know that what you are showing your audience corresponds to the presentation piece? Ensure that the video you add has something to do with the Google Slide presentation topic. The two should naturally flow to make it easy to understand the whole concept.
Precise – your presentation is not about the video. The ideal length should not exceed 60 seconds. The longer the video, the greater the chance for your audience to lose track along the way.
Know every footage you are working with – this will help you pick the best shots for your presentation. So, learn every aspect of the video before settling down to use it.
Add new content – even though one content may suit several presentations, don’t rely on the same piece each time. Your audience will want to feel something fresh each time you are presenting. So, compose different videos for different scenarios to make that big impact.
Create an eye-catching video for your Slides with Filmora
The video quality matters when it comes to creating your Slides. The best video creator – Filmora – works in simple steps to give you an eye-catching video. It will create videos for all scenarios like marketing, tutorial, gaming, etc.
Key features of Filmora
- It offers you advanced video effects like filters, motion elements, etc
- You can multiply your fun with multiple screens with the Split Screen feature
- Easily change backgrounds using the Green Screen feature
- The speed control lets you fast forward or slow down a special moment
- Import your video clips to social media platforms
- You can also adjust the audio of your tracks using the Audio Mixer feature
Follow this guide to create a video for your slide with Filmora
Step 1. Launch Filmora
First, begin by downloading and installing Filmora on your computer device. Once installed, launch it and allow it to run. You can either create a new project or open an existing project to work on.
Step 2. Create a new project
Here, click on the “New Project” tab on the app’s welcome screen. The editor should load immediately. Then proceed to register the product. Just hit on the “Register” tab.
Step 3. Import video
Check the upper left corner of your screen to see the “Import” tab. Click on it and choose the “Import Media Files” option. Next, navigate to the location of your computer’s local list to select the clip or video you want to edit. Then, hit the “Import” button to add the video to the timeline for editing.
Step 4. Edit video
Drag and drop the raw footage to Filmora’s timeline to begin editing. Here, you can trim, add other video clips, merge, and add effects as you wish. Likewise, you can add opening titles, subtitles, and end credits to your video. More so, this tool offers different templates to use. Just drag and drop the templates you wish to use to a specific location on the timeline.
Step 5. Preview your file
Last but not least, you can preview your files. Click on the “Play” tab to start previewing your video clips. The main essence of this part is to allow you to make the necessary changes to your clips if there is a need.
Step 6. Export and Share
With Filmora, you can export your file to various social media platforms. But first, go to the “Output window” and select the video file format to use. This software supports several output formats to apply to any platform and device. Just click on the “Format” tab and choose the file format to use. Then also change the resolution and other parameters like frame rate and channel of your video in the “Settings” section. Finally, share your video to your YouTube channel and get ready to add the video to the Google Slide presentation.
For Win 7 or later (64-bit)
For macOS 10.12 or later
Conclusion
● You now know how to put a YouTube video in Google Slides the simple way. You can search for your YouTube videos or directly use the URL link. Whatever the case, remember that it’s the quality of your video that carries more weight. Thanks to the availability of third-party apps that you can use to create and improve the quality of your videos.
● Filmora is at your service to create high-resolution videos that you can export in any format to your YouTube channel. The tool is intuitive, and it won’t matter whether you haven’t tried it before. It is a perfect choice for both professionals and first-time users.
Also read:
- 2024 Approved Aesthetic Enigma The Ultimate Backdrop Collection for Video Thumbnails
- [New] Elevating Your Videography YouTube Enhancements Explained
- [Updated] Craft Your Best YouTubing Exit - Tips From Industry Leaders
- In 2024, Effortless Guide for Turning YouTube Shorts Into Mp4 Videos
- Creating a Singular Stream From Diverse YouTube Videos for 2024
- Deciphering Digital Marketing The Power of YouTube Keywords
- Efficient Techniques for YouTube Shorts Revenue
- Efficient Video Marketing Incorporating Timestamps Effectively
- [New] Broadcasting Brevity News Outro Tips
- In 2024, Elevate Your Youtube Profitability Anywhere, Anytime
- Brief Basslines & Rhythms Video Soundscapes
- Unveiling the Best Vimeo/YouTube Release Schedule
- [Updated] Crafting Attention A Look at the Best 15 Video Intro Plans
- Everyone's Guide to YouTube Success 10 Straightforward Video Tips for 2024
- Essential Video Marketing Strategies Top 8 Verified Services for 2024
- Keep Your Videos Secure - YouTube-to-MP4 Downloading Safely
- 2024 Approved Breaking Free From the Static of ZERO Views on YouTube Videos
- In 2024, Charting a Course to Your Signature Sphere
- Breaking the Internet Hashtag Wisdom for Short Films for 2024
- [New] Craft the Ultimate Outro with Pro Maker Advice
- In 2024, Crafting Compelling YouTube Content Through Split-Screens
- Navigating the Monetization Maze on Youtube
- [New] Effortlessly Post Videos on YouTube with Our Expert Guide
- 2024 Approved Direct YouTube to Dazzling Gif Creation with No Downloads
- [Updated] Ensuring Visual Presentation YouTube Shorts Thumbnails Fix
- Transfer Tactics for Seamless Online Video Sharing
- A Step-by-Step Guide to Edit YouTube Videos in FinalCut
- 2024 Approved Cutting-Edge Techniques for Incorporating Soundtracks in YouTube Creations
- In 2024, Combining YouTube and iMovie for Professional Results
- [New] Engage, Entertain and Captivate – Adopting Two-Point of View in Your Next YouTube Reaction Video (2 POV Method)
- Melodic Minutes Streamlined Strategies for Viral Music on YouTub
- [New] Brand Consistency in Action Inserting Logos/Watermarks Into Videos
- [New] In 2024, Fraps Revolutionizing Gamer's Screen Recording
- [New] In 2024, Leading 10 Covert Media Collection Tools
- Complete Guide For Apple iPhone 14 Lock Screen
- How to Fix Microsoft Excel 2000 Error Code 0x800A03EC? | Stellar
- New Slow and Steady Wins the Race VLC Slow Motion Guide for Desktop and Mobile for 2024
- [Updated] 2024 Approved Make an Impact Innovative PFP Ideas for Your TikTok Profile
- Updated Transform Your MP4 Files A Step-by-Step Video Editing Tutorial for Mac and Windows
- Recover iPhone X Data From iOS iTunes Backup | Dr.fone
- In 2024, Best Ways on How to Unlock/Bypass/Swipe/Remove Motorola Moto G24 Fingerprint Lock
- How to Sign Out of Apple ID On Apple iPhone 15 Pro Max without Password?
- Updated 2024 Approved Big News for Creators Filmora X Now Runs on ARM Devices
- The Ultimate Guide Top 8 Mac DAWs with In-Depth Analysis
- Mastering Android Device Manager The Ultimate Guide to Unlocking Your Infinix Smart 7 Device
- 2024 Approved Sculpting Visual Stories Editing Vertical Videos for IG in FCPX
- [New] ChuckleChrome MemoMasters
- 2024 Approved Secrets of Successful Twitch Stream Capturing
- [New] Comprehensive Review of Facetune's Latest Updates
- [New] Comprehensive Guide to Optimizing FaceTime Recording Quality for 2024
- New Boost Your Videos Visibility Expert YouTube Thumbnail Creation Tips
- 2024 Approved Sky-High Streams on Facebook A DJI Drone User's Guide
- In 2024, Elevate Your Audio Game with the Top 7 Android Apps for Flawless Speech Recording
- Play Store Stuck on Downloading Of Vivo X Fold 2? 7 Ways to Resolve | Dr.fone
- Play Store Not Working On Tecno Camon 20 Premier 5G? 8 Solutions Inside | Dr.fone
- Explore the Leading Audio Editors A Windows & Mac Comparison Guide
- [New] Master the Art of Messaging in Discord Apps
- In 2024, Top 15 Apps To Hack WiFi Password On Xiaomi Redmi Note 12T Pro
- In 2024, Smooth Sailing The Ultimate Guide to Free Online Video Stabilizers
- 2024 Approved Say Goodbye to iMovie Top 10 Android Video Editing Apps
- 2024 Approved Boosting Efficiency Creating Speed-Driven Google Collages
- Top 4 Ways to Trace Vivo Y36 Location | Dr.fone
- Title: In 2024, Elevate Your Online Impact with Effective Backlink Strategies
- Author: Kevin
- Created at : 2024-05-25 15:37:17
- Updated at : 2024-05-26 15:37:17
- Link: https://youtube-videos.techidaily.com/in-2024-elevate-your-online-impact-with-effective-backlink-strategies/
- License: This work is licensed under CC BY-NC-SA 4.0.
