
:max_bytes(150000):strip_icc():format(webp)/duet-c82ee94b39e24788bcfd51d1eea24288.jpg)
"In 2024, Cutting-Edge Methods to Reduce YouTube Video Size"
Cutting-Edge Methods to Reduce YouTube Video Size
How to Trim YouTube Videos?

Richard Bennett
Mar 27, 2024• Proven solutions
The world’s largest video sharing platform currently has nearly two billion active monthly users who upload over 400 hours of video content to their channels each minute. It is to see from these statistics why every video aspiring YouTubers post on their channels has to be perfect in every way in order to reach a wide audience. Fortunately, trimming a video even after you’ve uploaded it to YouTube is a quick and easy process, and in this article, we are going to show you a few different methods you can use to trim the videos you upload to YouTube. So, let’s get started.
In this article
- How to Trim a Video After You Upload it to Your YouTube Channel?
- Trimming a Video Before Posting On YouTube with Filmora Video Editor [4 Ways]
- Using Online Video Editing Platforms to Trim YouTube Videos
How to Trim a Video After You Upload it to Your YouTube Channel?
The YouTube Studio is no longer in beta phase, which means that the feature is here to stay. This is good news for all video creators who frequently update their YouTube videos after they upload them, as they no longer have to go through the endless uploads just because they wanted to trim a video.
Make sure that you’re signed into your YouTube channel, then click on your profile picture and select the YouTube Studio (Beta) option. On the left side of the screen, you’ll be able to see a menu that contains different subcategories like Analytics, Dashboard or Videos, so just click on the Videos option and proceed to select a video you’d like to trim. After the Videos submenu appears on the screen you should click on the Editor option and the video you selected will open in the YouTube’s video editor.

Click on the Trim button to start trimming the video and drag the blue bars located at the start and the end of the file to designate the portion of the video you’d like to remove. Preview the changes and confirm what you’ve made by clicking on the Save button located in the upper right corner of the screen and the new shortened version of the video will become available within a couple of hours.

In this way, you don’t need to take down the original video, edit it and re-upload. One of the benefits of trimming YouTube videos with the Trim feature in YouTube Editor is that this will keep your video URL and views and ranks etc.
Trimming a Video Before Posting On YouTube with Filmora Video Editor [4 Ways]


Method 1: Trim on Timeline
YouTubers who don’t want to rely on YouTube’s video editing capabilities can trim their footage with Filmora (to be honest, the Editor in YouTube platform has limited features). Filmora video editing software for PC and Mac computers offers a few different tools for trimming videos. After you’ve created a new project in Filmora, you should import a video clip into the editor by clicking on the Import drop-down menu and select the Import Media Files option. Each file you add to a project will be displayed in the Media tab, and you can just drag and drop it to a video track on the timeline.
All you have to do in order to trim a video after you’ve placed it on the timeline is drag one of its ends to the left or to the right. As you drag one of the clip’s edges the editor will only display the remaining footage while rendering the rest invisible. If at any point you want to access a portion of the video you’ve trimmed you just have to extend the file by dragging it until you’re able to see the segment you’re searching for.

Method 2: Using Filmora Split Tool
Filmora’s Split tool can help you separate the portion of the clip you want to remove from the segment you’d like to keep. Simply place the playhead at the exact location in the video clip where you want to make a cut, and click on the Split icon that looks like a pair of scissors. After the video is split, you should click on the clip you no longer need in order to select it and then hit the Delete button on your keyboard to remove it from the timeline.
Method 3: Using Scene Detection
Wondershare’s video editor also offers an automatic way to split a video clip into a number of separate scenes. Right-click on the video file located in the Filmora’s Media tab, and select the Scene Detection option from the menu and proceed to click on the Detect button, after the Scene Detection window pops up on the screen. The software will then automatically analyze the footage and divide it into separate scenes. Simply click on the Add to Timeline button once the process is completed to continue editing the video clip you’ve just split.

Method 4: Using Instant Cutter Tool
The Instant Cutter Tool enables you to quickly trim or merge high-resolution files recorded on action cameras as soon as you import them into a project in Filmora. Select the Import with Instant Cutter Tool option from the Import drop-down menu and wait for the Filmora Instant Cutter window to appear on the screen. In the upper left corner of this window, you will be able to see Trim and Merge tabs. Make sure that the Trim tab is selected and then click on the Open File button to import a video clip you’d like to trim. You can then use the trimming sliders to designate the parts of the video you’d like to remove or the set the In and Out points by clicking on the Set In Point or Set Out Point icons. Click on the Export button to save the new version of the video clip and click OK to complete the process.

Using Online Video Editing Platforms to Trim YouTube Videos
In case you’re looking for a tool that lets you save extracts of scenes from YouTube to your computer free of charge YT Cutter may be one of your best options.

This online video editing platform is remarkably easy to use since you just have to copy the link to the YouTube video you’d like to trim into YT Cutter’s URL box and then select how long the new video should be. Click on the Start and End buttons to set the duration of the video and click on the Download button to choose if you want to create a video, GIF or an audio file. The trimmed YouTube video will be available for download as soon as the platform processes it, and you just need to specify a folder on your hard drive before clicking on the Save button.
There’re many online video trimmers available on the market, some of them are totally free to use, check our guide about How to Trim Videos for Free Online .
Read More to Get : How to Download YouTube Videos without Any Software Easily >>
Conclusion
Trimming a video online or with a video editing software like Filmora is an effortless task that can be completed in just a couple of minutes. However, it is better to complete the entire video editing process before you upload a video to your YouTube channel because YouTube Studio and other online video editing platforms still offer only a limited amount of video editing tools. Which method of trimming YouTube videos do you like using the most? Leave a comment and share your opinions with us.
Richard Bennett
Richard Bennett is a writer and a lover of all things video.
Follow @Richard Bennett
Richard Bennett
Mar 27, 2024• Proven solutions
The world’s largest video sharing platform currently has nearly two billion active monthly users who upload over 400 hours of video content to their channels each minute. It is to see from these statistics why every video aspiring YouTubers post on their channels has to be perfect in every way in order to reach a wide audience. Fortunately, trimming a video even after you’ve uploaded it to YouTube is a quick and easy process, and in this article, we are going to show you a few different methods you can use to trim the videos you upload to YouTube. So, let’s get started.
In this article
- How to Trim a Video After You Upload it to Your YouTube Channel?
- Trimming a Video Before Posting On YouTube with Filmora Video Editor [4 Ways]
- Using Online Video Editing Platforms to Trim YouTube Videos
How to Trim a Video After You Upload it to Your YouTube Channel?
The YouTube Studio is no longer in beta phase, which means that the feature is here to stay. This is good news for all video creators who frequently update their YouTube videos after they upload them, as they no longer have to go through the endless uploads just because they wanted to trim a video.
Make sure that you’re signed into your YouTube channel, then click on your profile picture and select the YouTube Studio (Beta) option. On the left side of the screen, you’ll be able to see a menu that contains different subcategories like Analytics, Dashboard or Videos, so just click on the Videos option and proceed to select a video you’d like to trim. After the Videos submenu appears on the screen you should click on the Editor option and the video you selected will open in the YouTube’s video editor.
Click on the Trim button to start trimming the video and drag the blue bars located at the start and the end of the file to designate the portion of the video you’d like to remove. Preview the changes and confirm what you’ve made by clicking on the Save button located in the upper right corner of the screen and the new shortened version of the video will become available within a couple of hours.
In this way, you don’t need to take down the original video, edit it and re-upload. One of the benefits of trimming YouTube videos with the Trim feature in YouTube Editor is that this will keep your video URL and views and ranks etc.
Trimming a Video Before Posting On YouTube with Filmora Video Editor [4 Ways]
Method 1: Trim on Timeline
YouTubers who don’t want to rely on YouTube’s video editing capabilities can trim their footage with Filmora (to be honest, the Editor in YouTube platform has limited features). Filmora video editing software for PC and Mac computers offers a few different tools for trimming videos. After you’ve created a new project in Filmora, you should import a video clip into the editor by clicking on the Import drop-down menu and select the Import Media Files option. Each file you add to a project will be displayed in the Media tab, and you can just drag and drop it to a video track on the timeline.
All you have to do in order to trim a video after you’ve placed it on the timeline is drag one of its ends to the left or to the right. As you drag one of the clip’s edges the editor will only display the remaining footage while rendering the rest invisible. If at any point you want to access a portion of the video you’ve trimmed you just have to extend the file by dragging it until you’re able to see the segment you’re searching for.
Method 2: Using Filmora Split Tool
Filmora’s Split tool can help you separate the portion of the clip you want to remove from the segment you’d like to keep. Simply place the playhead at the exact location in the video clip where you want to make a cut, and click on the Split icon that looks like a pair of scissors. After the video is split, you should click on the clip you no longer need in order to select it and then hit the Delete button on your keyboard to remove it from the timeline.
Method 3: Using Scene Detection
Wondershare’s video editor also offers an automatic way to split a video clip into a number of separate scenes. Right-click on the video file located in the Filmora’s Media tab, and select the Scene Detection option from the menu and proceed to click on the Detect button, after the Scene Detection window pops up on the screen. The software will then automatically analyze the footage and divide it into separate scenes. Simply click on the Add to Timeline button once the process is completed to continue editing the video clip you’ve just split.
Method 4: Using Instant Cutter Tool
The Instant Cutter Tool enables you to quickly trim or merge high-resolution files recorded on action cameras as soon as you import them into a project in Filmora. Select the Import with Instant Cutter Tool option from the Import drop-down menu and wait for the Filmora Instant Cutter window to appear on the screen. In the upper left corner of this window, you will be able to see Trim and Merge tabs. Make sure that the Trim tab is selected and then click on the Open File button to import a video clip you’d like to trim. You can then use the trimming sliders to designate the parts of the video you’d like to remove or the set the In and Out points by clicking on the Set In Point or Set Out Point icons. Click on the Export button to save the new version of the video clip and click OK to complete the process.
Using Online Video Editing Platforms to Trim YouTube Videos
In case you’re looking for a tool that lets you save extracts of scenes from YouTube to your computer free of charge YT Cutter may be one of your best options.
This online video editing platform is remarkably easy to use since you just have to copy the link to the YouTube video you’d like to trim into YT Cutter’s URL box and then select how long the new video should be. Click on the Start and End buttons to set the duration of the video and click on the Download button to choose if you want to create a video, GIF or an audio file. The trimmed YouTube video will be available for download as soon as the platform processes it, and you just need to specify a folder on your hard drive before clicking on the Save button.
There’re many online video trimmers available on the market, some of them are totally free to use, check our guide about How to Trim Videos for Free Online .
Read More to Get : How to Download YouTube Videos without Any Software Easily >>
Conclusion
Trimming a video online or with a video editing software like Filmora is an effortless task that can be completed in just a couple of minutes. However, it is better to complete the entire video editing process before you upload a video to your YouTube channel because YouTube Studio and other online video editing platforms still offer only a limited amount of video editing tools. Which method of trimming YouTube videos do you like using the most? Leave a comment and share your opinions with us.
Richard Bennett
Richard Bennett is a writer and a lover of all things video.
Follow @Richard Bennett
Navigating and Adapting: YouTube’s Evolving Policy Landscape
YouTube has become more than an entertainment now. Most content creators are using the platform to earn and bring their skills to some use. Good knowledge of YouTube Community Guidelines would work in the long run.
The article introduces the YouTube Community and covers how to make community posts on YouTube. Additionally, stay tuned to find out how to get the community tab on YouTube. So let us begin!
In this article
02 How to Make A Community Post on YouTube?
03 How to Get Community Tab on YouTube?
04 How to Make Good Use of Community Tab on YouTube?
Part 1: What is YouTube Community?
Before getting into YouTube community posts, it is crucial to understand what YouTube Community is and how it affects the content creators. The YouTube community is an extensive range of viewers or followers that one needs to grow their channel. Creating a connection with the viewers helps because you have loyal followers; you have got it all.
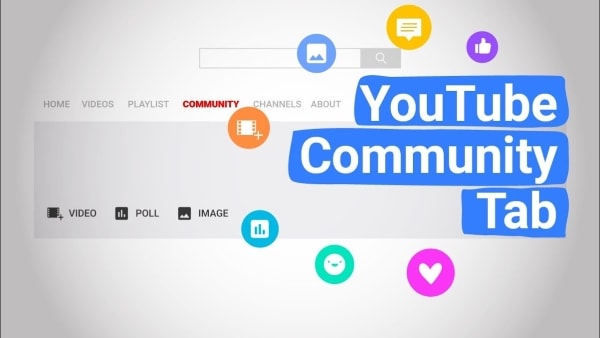
It is because the trusted followers would go above and beyond to share your content to their social media accounts and give you instant feedback. YouTube community tab works like a charm for creators to engage with the audience. They can use YouTube community posts such as polls, ask questions, use GIFs, and interact with the community.
Part 2: How to Make A Community Post on YouTube?
The first question to arise in one’s mind revolves around how to make a community post on YouTube. The community post YouTube helps in interaction with the general public and community. To make community posts YouTube via computer and mobile device, follow the guidelines below in detail.
Community Post YouTube Via Computer
The steps below shall help the reader to make a YouTube community post through the system.
Step 1: Launch YouTube from your browser and log in to your account. Now, click on the “Upload” button located at the top right corner of the screen.

Step 2: Tap on “Create Post” and type the message in the textbox. You can insert an image, GIF, or video as required. Now, pick the type of post.
Step 3: Hit “Post” afterward. The “Community” posts can be accessed from the “Community” tab in your account channel.

Community Post YouTube Via Mobile Phone
To know How to make community posts on YouTube mobile, follow the guidelines below:
Step 1: Launch the YouTube application from your iPhone or Android. Hit the “Create” icon that looks like a video camera located in the top right corner.

Step 2: Click on “Create Post,” add the post to the textbox and upload any required media. Choose the type of post and tap “Post.”
Part 3: How to Get Community Tab on YouTube?
The vital concern to be addressed in this section spins around how to enable a community tab on YouTube. On October 12, 2021, YouTube updated the policy that stated that a channel must have a minimal 500+ subscribers to get community tab YouTube.

Before October, the threshold for subscribers used to be 1000+. Now it has been reduced so that most channels can communicate and engage with the audience. The content creators can access the community tab on YouTube faster by following some pointers and tips.
For once, they can interact with the audience more and find ways to keep them in a loop. It creates a strong community of followers and subscribers. To do so, the account owners can reply to every comment, ask different questions, and pin the best comments. Additionally, you can ask for feedback and opinions in the comment tab to enable the community tab on YouTube.
Ask people their take on a certain stereotype, have a tip from viewers that can be shared with the community, and how they want to see the future. It also makes the community ponder upon the cruel realities of the world and express themselves out loud. You can also make more quality content videos to be a part of the community for good.
Part 4: How to Make Good Use of Community Tab on YouTube?
The users know how to get the community tab on your YouTube channel and how to post community posts on YouTube. It is time to know how to make good use of the community tab on YouTube. Having this knowledge shall help the new and old content creators to use their skills and bring good to the world.
So, without wasting any time, let us begin the process.
Showcase Behind the Scenes and Bloopers
Most viewers crave authenticity more than ever. The regular videos and updates on a channel and scripted and well-crafted, so there is no window for error. However, upload your life updates and BTS scenes from video production to engage the audience and use the community tab to its full potential.
Cross Channel Promotion Process
The community tab helps promote your various vlog or podcasts. It means that you can support new creators in the market and establish a cross-channel promotion network. Engaging with other creators helps the audience know about your community tab YouTube.
Use Teasers and Promos
Using different teasers and promos plays a significant role in developing the well-deserved hype for the show or video. It compels the audience to stay tuned to whatever the channel is bringing to the table. Moreover, the time between working on the video and uploading it can be filled by teasers that promote the upcoming project big time.
Exceptional and Planned Giveaways
Giveaways appear to be a devious plan to lure in the audience. However, if your content is worthy enough to stick around, you don’t need to worry much. Therefore, plan a giveaway and set some rules for it. The circle of interest is widely enhanced using this tactic from the platform of community tab on YouTube.
Hosting Q/A Sessions
Another effective way to use the YouTube community tab to its full potential revolves around hosting a Questions and Answer Session. The general public likes to relate to the bloggers and influencers and know about them. A Q/A session sparks the connection between the two where the viewers ask different personal and professional questions.
It is a huge possibility that you gain new followers, and they stick to the way you communicate and give importance to your subscribers.
Ask for Inspiration and Video
The most common practice of renowned content creators is to engage the audience and ask them for inspiration in the following video. You can ask your subscribers what they want to see you act on and what topic should be covered. Do not hesitate to use polls and gauge interest in general and stereotypical subjects.
Conclusion
YouTube has become a one-stop shop for watching impeccable content and earning through the creation of media. It is vital to know YouTube community guidelines to work better and efficiently.
To create good intros and outros for your YouTube channels, incorporate the usage of Wondershare Filmora . It offers some moving effects and transitions to create a spell-bound impact on the viewers.
Versatile Video Editor - Wondershare Filmora
An easy yet powerful editor
Numerous effects to choose from
Detailed tutorials provided by the official channel
02 How to Make A Community Post on YouTube?
03 How to Get Community Tab on YouTube?
04 How to Make Good Use of Community Tab on YouTube?
Part 1: What is YouTube Community?
Before getting into YouTube community posts, it is crucial to understand what YouTube Community is and how it affects the content creators. The YouTube community is an extensive range of viewers or followers that one needs to grow their channel. Creating a connection with the viewers helps because you have loyal followers; you have got it all.
It is because the trusted followers would go above and beyond to share your content to their social media accounts and give you instant feedback. YouTube community tab works like a charm for creators to engage with the audience. They can use YouTube community posts such as polls, ask questions, use GIFs, and interact with the community.
Part 2: How to Make A Community Post on YouTube?
The first question to arise in one’s mind revolves around how to make a community post on YouTube. The community post YouTube helps in interaction with the general public and community. To make community posts YouTube via computer and mobile device, follow the guidelines below in detail.
Community Post YouTube Via Computer
The steps below shall help the reader to make a YouTube community post through the system.
Step 1: Launch YouTube from your browser and log in to your account. Now, click on the “Upload” button located at the top right corner of the screen.
Step 2: Tap on “Create Post” and type the message in the textbox. You can insert an image, GIF, or video as required. Now, pick the type of post.
Step 3: Hit “Post” afterward. The “Community” posts can be accessed from the “Community” tab in your account channel.
Community Post YouTube Via Mobile Phone
To know How to make community posts on YouTube mobile, follow the guidelines below:
Step 1: Launch the YouTube application from your iPhone or Android. Hit the “Create” icon that looks like a video camera located in the top right corner.
Step 2: Click on “Create Post,” add the post to the textbox and upload any required media. Choose the type of post and tap “Post.”
Part 3: How to Get Community Tab on YouTube?
The vital concern to be addressed in this section spins around how to enable a community tab on YouTube. On October 12, 2021, YouTube updated the policy that stated that a channel must have a minimal 500+ subscribers to get community tab YouTube.
Before October, the threshold for subscribers used to be 1000+. Now it has been reduced so that most channels can communicate and engage with the audience. The content creators can access the community tab on YouTube faster by following some pointers and tips.
For once, they can interact with the audience more and find ways to keep them in a loop. It creates a strong community of followers and subscribers. To do so, the account owners can reply to every comment, ask different questions, and pin the best comments. Additionally, you can ask for feedback and opinions in the comment tab to enable the community tab on YouTube.
Ask people their take on a certain stereotype, have a tip from viewers that can be shared with the community, and how they want to see the future. It also makes the community ponder upon the cruel realities of the world and express themselves out loud. You can also make more quality content videos to be a part of the community for good.
Part 4: How to Make Good Use of Community Tab on YouTube?
The users know how to get the community tab on your YouTube channel and how to post community posts on YouTube. It is time to know how to make good use of the community tab on YouTube. Having this knowledge shall help the new and old content creators to use their skills and bring good to the world.
So, without wasting any time, let us begin the process.
Showcase Behind the Scenes and Bloopers
Most viewers crave authenticity more than ever. The regular videos and updates on a channel and scripted and well-crafted, so there is no window for error. However, upload your life updates and BTS scenes from video production to engage the audience and use the community tab to its full potential.
Cross Channel Promotion Process
The community tab helps promote your various vlog or podcasts. It means that you can support new creators in the market and establish a cross-channel promotion network. Engaging with other creators helps the audience know about your community tab YouTube.
Use Teasers and Promos
Using different teasers and promos plays a significant role in developing the well-deserved hype for the show or video. It compels the audience to stay tuned to whatever the channel is bringing to the table. Moreover, the time between working on the video and uploading it can be filled by teasers that promote the upcoming project big time.
Exceptional and Planned Giveaways
Giveaways appear to be a devious plan to lure in the audience. However, if your content is worthy enough to stick around, you don’t need to worry much. Therefore, plan a giveaway and set some rules for it. The circle of interest is widely enhanced using this tactic from the platform of community tab on YouTube.
Hosting Q/A Sessions
Another effective way to use the YouTube community tab to its full potential revolves around hosting a Questions and Answer Session. The general public likes to relate to the bloggers and influencers and know about them. A Q/A session sparks the connection between the two where the viewers ask different personal and professional questions.
It is a huge possibility that you gain new followers, and they stick to the way you communicate and give importance to your subscribers.
Ask for Inspiration and Video
The most common practice of renowned content creators is to engage the audience and ask them for inspiration in the following video. You can ask your subscribers what they want to see you act on and what topic should be covered. Do not hesitate to use polls and gauge interest in general and stereotypical subjects.
Conclusion
YouTube has become a one-stop shop for watching impeccable content and earning through the creation of media. It is vital to know YouTube community guidelines to work better and efficiently.
To create good intros and outros for your YouTube channels, incorporate the usage of Wondershare Filmora . It offers some moving effects and transitions to create a spell-bound impact on the viewers.
Versatile Video Editor - Wondershare Filmora
An easy yet powerful editor
Numerous effects to choose from
Detailed tutorials provided by the official channel
Also read:
- 2024 Approved Cut Down Clutter How to Efficiently Handle Unwanted YouTube Content (PC/Mobile)
- 10 Budget-Friendly Platforms for YouTube Branding Mastery
- In 2024, Become a Freelance Transcriber Tips and Tricks for YouTube Content
- [Updated] Achieve Unprecedented Image Quality via AV1 on YouTube
- 2024 Approved Enjoy Premium Video Artwork - Download at No Cost Today
- In 2024, Essential Hash Strategies for Optimizing YouTube Gameplay Videos
- In 2024, Achieving YouTube Earnings Excellence - Strategies and Beyond
- [Updated] Enhancing Engagement Through YouTube Advertising
- 2024 Approved Cross-Application Title Guidance YTB to Fb
- Crafting Charismatic Videos with DIY Camera Setups for 2024
- Streamline Your Creation Process with This YouTube Shorts Guide
- 2024 Approved Charting Your Course in the Realm of YouTube Shorts
- In 2024, Completely Erase Your Connection with YouTube Shorts
- [New] Captivate Viewers Social Media Strategies for YouTube
- Dissecting Your Profit Share in YouTube Short Creation for 2024
- Enhancing Storytelling with Jump Cuts Technique for 2024
- [Updated] How Do Beginners Make a Cool Video for YouTube on Mac
- In 2024, A Comprehenensive Guide to YouTube Studio's Editing Features
- 2024 Approved Does Immediate Subscription Enhance User Engagement on Youtube?
- Live From the Couch The Essential Do's & Don'ts of Home Streaming
- [Updated] Bridging Content Gap YouTube Videos to Instagram
- [Updated] Craft Compelling Videos Utilize No-Cost Templates & Samples
- [Updated] 10 Steps to Perfect YouTube Reactions – A Trio Guide
- Jake Paul's YouTube Success Story - All You Need to Know
- Epic Moments in Gameplay with Casters
- [Updated] Achieve Optimum Stability Incorrances for Tripods in Vlog Shoots
- [Updated] Audio Visual Synopsis Creator
- 2024 Approved A Compreayer's Guide to Polishing YouTube Content via iMovie Editing Techniques
- The Beginner's Blueprint for Creating a Sports Chain on Mac
- Ajey's YouTube Earnings Insight - 2023 for 2024
- In 2024, Add Fantastic Backgrounds for YouTube Thumbnails
- [Updated] AudioHarmony Editor for Professional PC Users
- [Updated] Engaging Audiences with Effective Haul Video Strategies
- In 2024, Average Income for YouTubers per Ad Displayed?
- Elevate Video Quality From YouTube to Crisp Avis Format for 2024
- [New] Auto Subscribe URL Creation for YouTube Enthusiasts
- Transform Videos with Easy-to-Use Sound Effects!
- [Updated] Discover Top Ten Unforgettable YouTube VR Videos
- Navigating the Legal Landscape of YouTube Guidelines
- 2024 Approved 15 Best Sites to Watch Cartoons Online Free And So Can You
- Play MOV movies on Samsung Galaxy F14 5G, is it possible?
- Updated In 2024, Unlock the Power of Voice Best Free Mac Speech Recognition Software
- [Updated] Inverted Intrigue Mastering the Art of Turning Photos for Instagram Glory for 2024
- Elevate Your Media Presentation Text & Captions Application in Microsoft Photos
- 2024 Approved A Comprehensive Walkthrough of Adding Text to Instagram Clips
- How to Make an Adorable Video for Your Babys First Year
- Unleashing the Best Video Footage with GoPro
- [New] Maximum Mobile Mastery Highlights Covers on iOS/Android for 2024
- In 2024, Full Guide to Catch 100 IV Pokémon Using a Map On Apple iPhone 6 Plus | Dr.fone
- In 2024, Best Vimeo Video Downloaders
- In 2024, How to Change Google Play Location On OnePlus Open | Dr.fone
- How To Bypass iCloud Activation Lock on Mac For Apple iPhone 12 mini?
- Mastering Virtual Identity Your Metaverse Persona Creation Companion
- Life360 Learn How Everything Works On Nubia Red Magic 9 Pro+ | Dr.fone
- Best Lava Blaze 2 Pro Pattern Lock Removal Tools Remove Android Pattern Lock Without Losing Data
- [Updated] Harness the Hype Tactics to Supercharge Your Social Media Status
- How to Change Lock Screen Wallpaper on Tecno Camon 20 Pro 5G
- How to Reset Vivo S17t without Losing Data | Dr.fone
- In 2024, Crowded Online Spaces Offering No-Cost Guitar Song Lines and Artwork
- [New] IOS Leading PS2 Simulators Top Picks for 2024
- Overcoming Video Send Failures in Facebook Chat IPhone/Android Guide
- 6 Proven Ways to Unlock Honor Magic 6 Pro Phone When You Forget the Password
- The Easiest Methods to Hard Reset Honor Play 7T | Dr.fone
- Title: "In 2024, Cutting-Edge Methods to Reduce YouTube Video Size"
- Author: Kevin
- Created at : 2024-05-25 15:32:27
- Updated at : 2024-05-26 15:32:27
- Link: https://youtube-videos.techidaily.com/in-2024-cutting-edge-methods-to-reduce-youtube-video-size/
- License: This work is licensed under CC BY-NC-SA 4.0.
