In 2024, Cutting and Compositing for YouTube Videos Using Premiere Pro
Cutting and Compositing for YouTube Videos Using Premiere Pro
How to Edit YouTube Videos in Adobe Premiere

Richard Bennett
Mar 27, 2024• Proven solutions
You just made a few videos, and you want to edit them first before uploading to YouTube. The truth is that you may find the editing part a bit more challenging compared to uploading. However, there are now tools like Adobe Premiere that can help make the editing process easier. Read on and learn how to edit YouTube videos with Adobe Premier so that you can create amazing videos.
Related article:Adobe Premiere User Guide
Adobe Premiere is largely targeted towards professional users, and the best alternative you can use today, whether you are a professional user or just a casual YouTube user, is Wondershare Filmora . This is not only a highly effective video editing program, but it is also user-friendly and very easy to use.
 Download Mac Version ](https://tools.techidaily.com/wondershare/filmora/download/ )
Adobe is well known for having some of the leading video production tools in the industry. In fact, most of their tools ranging from the Premier Pro and Photoshop to Audition and many others have been used in many video and movie productions, including some of the popular theatrical releases of our times. Their latest professional video editor, Adobe Premier can be summarized as one of the best editors with versatility, depth, and power for high-quality video editing.
How to edit YouTube Videos with Adobe Premier
Step 1: Import the Video Clips
The first step in how to edit YouTube videos with Adobe Premier is to basically import the video clips you want to edit. This is achieved using a simple process of clicking “import” from the “file” drop-down menu. Once you have finished importing your photos or video files, you can then drag them from the sidebar and into the editing area.

Note
- If the videos you want to import are already published online, you can start the process by first downloading them directly from YouTube first, making sure to save them as MP4 files.
- The best way of importing videos from YouTube is by using an innovative video converter like Wondershare Video Converter Ultimate. This program will help in downloading and converting files to a format that is supported by Adobe Premier.
Step 2: Editing
The next step in how edit YouTube videos with Adobe Premiere is to start modifying the video files or photos the way you want. To achieve this, click on “Effects Control” and apply the desired effects. If you want to insert some text or words into your video, select “title” and then click “new title.” Now choose how you would like the words to behave, for instance, “Default Roll” makes the text roll upwards in the page.
Now drag the text that you have created into the editor area. If you want to edit the text, simply double-click to select it, and it will bring up a separate page where you can make further edits. You can then modify the text, font, and the positioning as well. This page also allows you to set whether the text will crawl or roll.

The final part of the process is to import your chosen audio file. This could be the chosen soundtrack for your presentation. Simply drag the audio file onto your editor. You can then modify how the length of your videos or photos by selecting and dragging the specific photo or video. Finally, press enter and your video will start rendering.
Step 3: Save the Edited File and Upload to YouTube
It is important to note that even as you edit YouTube videos with Adobe Premier, the software does not allow direct uploads to YouTube. This means you will need to save the edited file first on your computer and ensure you use a YouTube supported format. The most effective option is to use the codec, which will then save your file in the MPEG-4 format. This is the preferred format for YouTube and Video uploads.
Richard Bennett
Richard Bennett is a writer and a lover of all things video.
Follow @Richard Bennett
Richard Bennett
Mar 27, 2024• Proven solutions
You just made a few videos, and you want to edit them first before uploading to YouTube. The truth is that you may find the editing part a bit more challenging compared to uploading. However, there are now tools like Adobe Premiere that can help make the editing process easier. Read on and learn how to edit YouTube videos with Adobe Premier so that you can create amazing videos.
Related article:Adobe Premiere User Guide
Adobe Premiere is largely targeted towards professional users, and the best alternative you can use today, whether you are a professional user or just a casual YouTube user, is Wondershare Filmora . This is not only a highly effective video editing program, but it is also user-friendly and very easy to use.
Download Mac Version ](https://tools.techidaily.com/wondershare/filmora/download/ )
Adobe is well known for having some of the leading video production tools in the industry. In fact, most of their tools ranging from the Premier Pro and Photoshop to Audition and many others have been used in many video and movie productions, including some of the popular theatrical releases of our times. Their latest professional video editor, Adobe Premier can be summarized as one of the best editors with versatility, depth, and power for high-quality video editing.
How to edit YouTube Videos with Adobe Premier
Step 1: Import the Video Clips
The first step in how to edit YouTube videos with Adobe Premier is to basically import the video clips you want to edit. This is achieved using a simple process of clicking “import” from the “file” drop-down menu. Once you have finished importing your photos or video files, you can then drag them from the sidebar and into the editing area.
Note
- If the videos you want to import are already published online, you can start the process by first downloading them directly from YouTube first, making sure to save them as MP4 files.
- The best way of importing videos from YouTube is by using an innovative video converter like Wondershare Video Converter Ultimate. This program will help in downloading and converting files to a format that is supported by Adobe Premier.
Step 2: Editing
The next step in how edit YouTube videos with Adobe Premiere is to start modifying the video files or photos the way you want. To achieve this, click on “Effects Control” and apply the desired effects. If you want to insert some text or words into your video, select “title” and then click “new title.” Now choose how you would like the words to behave, for instance, “Default Roll” makes the text roll upwards in the page.
Now drag the text that you have created into the editor area. If you want to edit the text, simply double-click to select it, and it will bring up a separate page where you can make further edits. You can then modify the text, font, and the positioning as well. This page also allows you to set whether the text will crawl or roll.
The final part of the process is to import your chosen audio file. This could be the chosen soundtrack for your presentation. Simply drag the audio file onto your editor. You can then modify how the length of your videos or photos by selecting and dragging the specific photo or video. Finally, press enter and your video will start rendering.
Step 3: Save the Edited File and Upload to YouTube
It is important to note that even as you edit YouTube videos with Adobe Premier, the software does not allow direct uploads to YouTube. This means you will need to save the edited file first on your computer and ensure you use a YouTube supported format. The most effective option is to use the codec, which will then save your file in the MPEG-4 format. This is the preferred format for YouTube and Video uploads.
Richard Bennett
Richard Bennett is a writer and a lover of all things video.
Follow @Richard Bennett
From YouTube to Excitement: Easy Guide to Making Animated GIFS
GIF editor: How to Make Animated GIF Images online from YouTube Video
Richard Bennett
Mar 27, 2024• Proven solutions
YouTube videos are fun and easy to access, they deliver a very good value and you will always have fun using them. But there are situations where these videos can integrate some interesting, funny moments and this is why creating a GIF out of them can be a good idea. You can make GIF from video if you want and all you need is a good GIF editor, which is very impressive to say the least.
You May Also Like:
Royalty free music for YouTube Videos >>
Best Screen Recorders for YouTube >>
It’s not a problem to use the GIF files as a way to express yourself so using a GIF editor to create the GIF you want is not only interesting, it can also bring in front a very good value and interesting options for sure. You should totally give it a shot if you can.
Tools that can help you make gif images from YouTube video
Lots of apps can help you do this and most of them are online based. This basically means that you can create a GIF from video without that much of a hassle. All you have to do is to find the right video and the best moments, edit it and then use this video to create the GIF you want. The process is easy and fun and it will provide you with a great value for sure.
1. imgur.com
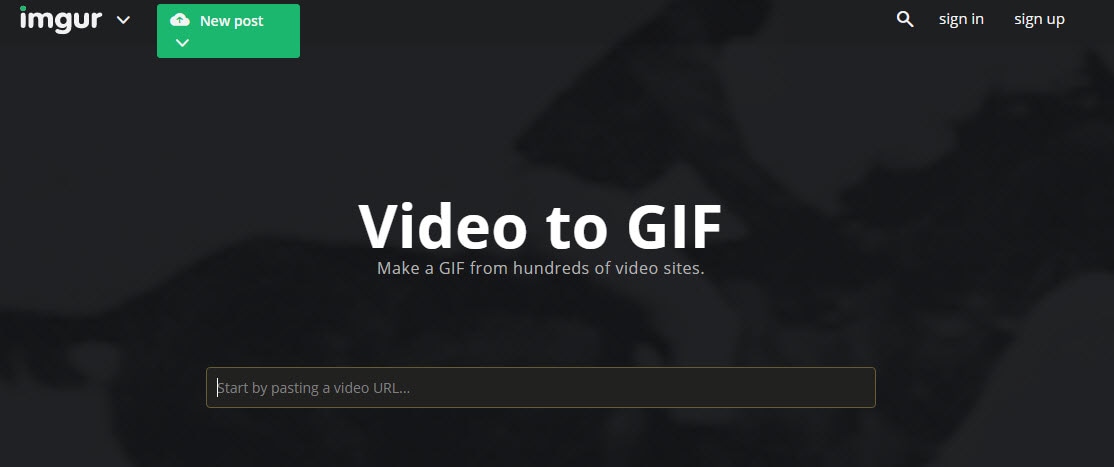
This tool requires you to add in the YouTube link and then you press Enter. Once you do that the app will do its job on its own. It’s certainly a very interesting option and one that will deliver a lot of value for all kinds of users. It’s an exciting experience for sure just because you get so much value and incredible results without that much of a hassle. You can add captions to the app which is great.
2. likeyoyo.com

Using this app is simple, you paste the URL, press Enter and then the GIF is created automatically. They integrate some share buttons and a set of tools to help you move this, but it’s not that hard to use and it’s very user friendly to be honest.
3. makeagif.com
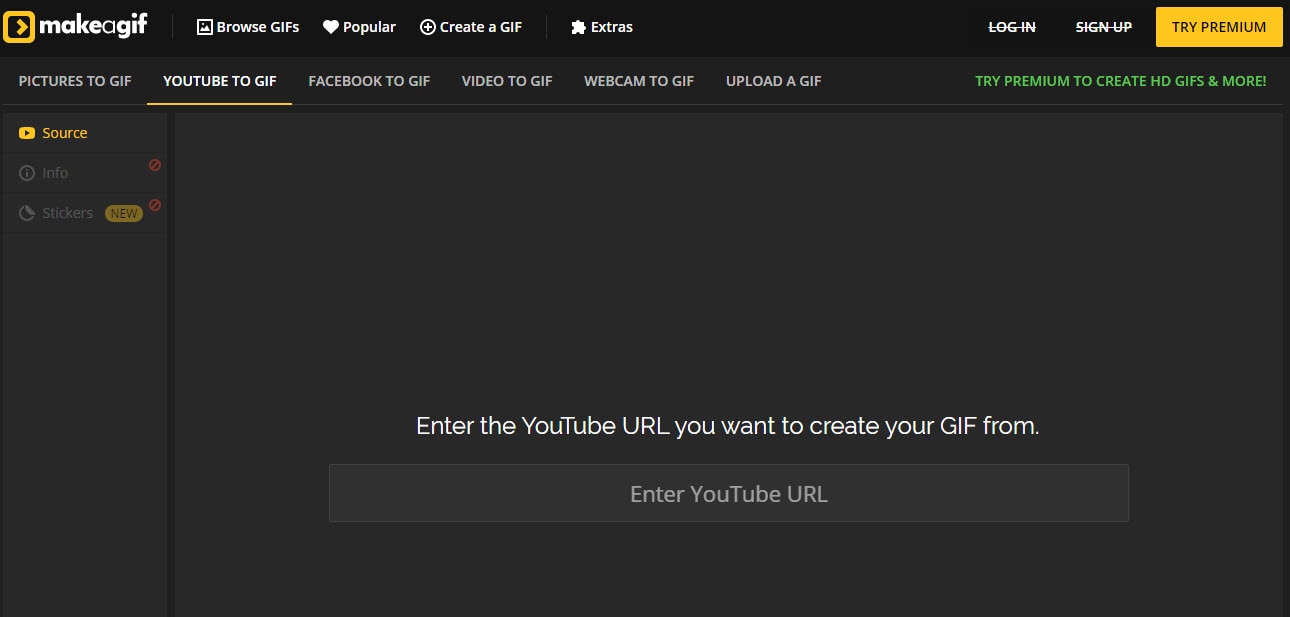
This is a great, easy to use online tool that just requires you to add in the video URL you want and then wait until it’s done. It’s certainly a great tool to use and one that will deliver a lot of value.
Add more fun on your GIF with Wondershare Filmora
Wondershare Filmora is a refined application that allows you to make GIF from video fast and with great results. It features an interesting set of tools, it’s very easy to modify and it does bring in front interesting options for sure. It’s designed with ease of use in mind and it does enable you to add in many animated effects which is always a major plus for this kind of tool.
However, if you want to make a GIF online, Filmora meme maker is your ultimate solution. It helps you make image, GIF and video memes directly without watermark. It is totally FREE to use and no sign up. You can change text size, color and position to create caption when you are editing. You can also put text inside or outside in GIF. Just with a few clicks, your GIF is done. Try it now!
Download Mac Version ](https://tools.techidaily.com/wondershare/filmora/download/ )
How to use?
Using Wondershare Filmora is actually very easy and the process is designed in order to deliver lots of value to the user without making the experience complex or boring. In fact, you just have to use the following steps in order to get the best results:
- At first you will have to import your GIF file and it allows you to bring in front immense possibilities since you can edit GIF on the fly.
- Once you have the file imported, you will need to drag that file you want to edit to the timeline.
- Double clik on the clip in the timeline. You will be able to edit GIF, you can rotate, scale or flip which is very helpful.
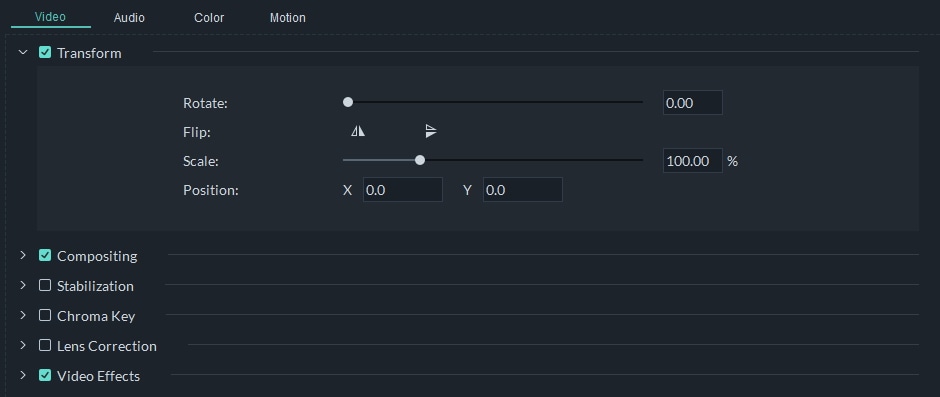
- Although it’s not mandatory, you can try to add filter to the GIF in order to make the experience more interesting.

- Lastly, when you are done with the process you can export to format GIF. This is a very good value and it will provide you with a stellar experience.

Conclusion
Using Wondershare Filmora in order to edit GIF and create GIF from video is a very good idea. The app is designed to offer some amazing features and it’s also very easy to use. If you want to take on such a task, then Wondershare Filmora is certainly the tool for you so just give it a shot and you are bound to love it!

Richard Bennett
Richard Bennett is a writer and a lover of all things video.
Follow @Richard Bennett
Richard Bennett
Mar 27, 2024• Proven solutions
YouTube videos are fun and easy to access, they deliver a very good value and you will always have fun using them. But there are situations where these videos can integrate some interesting, funny moments and this is why creating a GIF out of them can be a good idea. You can make GIF from video if you want and all you need is a good GIF editor, which is very impressive to say the least.
You May Also Like:
Royalty free music for YouTube Videos >>
Best Screen Recorders for YouTube >>
It’s not a problem to use the GIF files as a way to express yourself so using a GIF editor to create the GIF you want is not only interesting, it can also bring in front a very good value and interesting options for sure. You should totally give it a shot if you can.
Tools that can help you make gif images from YouTube video
Lots of apps can help you do this and most of them are online based. This basically means that you can create a GIF from video without that much of a hassle. All you have to do is to find the right video and the best moments, edit it and then use this video to create the GIF you want. The process is easy and fun and it will provide you with a great value for sure.
1. imgur.com
This tool requires you to add in the YouTube link and then you press Enter. Once you do that the app will do its job on its own. It’s certainly a very interesting option and one that will deliver a lot of value for all kinds of users. It’s an exciting experience for sure just because you get so much value and incredible results without that much of a hassle. You can add captions to the app which is great.
2. likeyoyo.com
Using this app is simple, you paste the URL, press Enter and then the GIF is created automatically. They integrate some share buttons and a set of tools to help you move this, but it’s not that hard to use and it’s very user friendly to be honest.
3. makeagif.com
This is a great, easy to use online tool that just requires you to add in the video URL you want and then wait until it’s done. It’s certainly a great tool to use and one that will deliver a lot of value.
Add more fun on your GIF with Wondershare Filmora
Wondershare Filmora is a refined application that allows you to make GIF from video fast and with great results. It features an interesting set of tools, it’s very easy to modify and it does bring in front interesting options for sure. It’s designed with ease of use in mind and it does enable you to add in many animated effects which is always a major plus for this kind of tool.
However, if you want to make a GIF online, Filmora meme maker is your ultimate solution. It helps you make image, GIF and video memes directly without watermark. It is totally FREE to use and no sign up. You can change text size, color and position to create caption when you are editing. You can also put text inside or outside in GIF. Just with a few clicks, your GIF is done. Try it now!
Download Mac Version ](https://tools.techidaily.com/wondershare/filmora/download/ )
How to use?
Using Wondershare Filmora is actually very easy and the process is designed in order to deliver lots of value to the user without making the experience complex or boring. In fact, you just have to use the following steps in order to get the best results:
- At first you will have to import your GIF file and it allows you to bring in front immense possibilities since you can edit GIF on the fly.
- Once you have the file imported, you will need to drag that file you want to edit to the timeline.
- Double clik on the clip in the timeline. You will be able to edit GIF, you can rotate, scale or flip which is very helpful.
- Although it’s not mandatory, you can try to add filter to the GIF in order to make the experience more interesting.
- Lastly, when you are done with the process you can export to format GIF. This is a very good value and it will provide you with a stellar experience.
Conclusion
Using Wondershare Filmora in order to edit GIF and create GIF from video is a very good idea. The app is designed to offer some amazing features and it’s also very easy to use. If you want to take on such a task, then Wondershare Filmora is certainly the tool for you so just give it a shot and you are bound to love it!
Richard Bennett
Richard Bennett is a writer and a lover of all things video.
Follow @Richard Bennett
Also read:
- [New] 2024 Approved Charting a Course Through Websites of YouTube Affiliates
- [New] Amplify Video Impact Leading Trackers for YouTube Ranks
- [New] In 2024, Boosting Stream Consistency with OBS Fixes
- [New] Navigating the Lands Marketplace of Product-Sponsored YouTube Content for 2024
- [Updated] Direct Download Destiny #10 Online Tool Reviewers' Choice
- [Updated] Simplifying the Process of Finding Facebook Watch History
- [Updated] YouTube Update Easy Access to Your Shorts
- 1. Cloneur De Disques Dur Vers SSD Avec Macrium Reflect - Solution Compacte Pour Sauvegarde Et Migration
- 2024 Approved Accelerated Pathway Through Keying Fundamentals
- 2024 Approved Optimizing Display YouTube's Zoom Mastery
- Dive Into the World of Expertise with YouTube's Top 10 Makeup Vloggers
- Gain Traction on YouTube Deciphering Ranking Principles
- In 2024, Cool Climates, Cozy Cinematics Selecting Winter Backgrounds
- Masterclass Softening Auditory Peaks Gently in Logic Pro
- Mastering Collaborative Video Creation A Guide to YouTube Partnering
- Streamlined Strategies for Joining Your YouTube Videos
- Your Pathway to Successful YouTube Beginnings (Techniques 1 & 2)
- Title: In 2024, Cutting and Compositing for YouTube Videos Using Premiere Pro
- Author: Kevin
- Created at : 2025-01-08 18:05:08
- Updated at : 2025-01-10 19:51:50
- Link: https://youtube-videos.techidaily.com/in-2024-cutting-and-compositing-for-youtube-videos-using-premiere-pro/
- License: This work is licensed under CC BY-NC-SA 4.0.