

In 2024, Bringing YouTube to Life on Google Slides
Bringing YouTube to Life on Google Slides
Create High-Quality Video - Wondershare Filmora
An easy and powerful YouTube video editor
Numerous video and audio effects to choose from
Detailed tutorials provided by the official channel
Google Slide presentation is a powerful tool for creators to keep their audience engaged. This online platform lets you create and demonstrate your ideas. It will capture your viewers’ attention from the very beginning. It also doesn’t matter whatever learning style you engage. Adding YouTube videos to Google Slide will appeal to all levels of individuals.
More so, it is the best way to provide a break for both the audience and the creator. You can break Google Slide presentations with videos to offer some break. Viewers and the presenter get a breather in the process. The presenter can take a short break from speaking while the video plays. Let’s now dive into how to embed a YouTube video in Google Slides.

In this article
01 Why should we add a video to Google Slides?
02 How to add a YouTube video to Google Slide
03 How to choose the right video for your Slides?
Why should we add a video to Google Slides?
There is a great impact of adding video to Google Slides.
For attention
Videos will automatically awaken you, especially if your thoughts have started to sway during a presentation. A video has a direct way of showing creativity. The audience automatically connects the dots between the video and the presentation lines alike.
To stimulate discussion
A picture is worth a thousand words. There is a way that an added video will help the audience connect to the day’s topic. It will bring up several ideas and stir up discussion with the presenter.
Easy following
With videos embedded in Google Slide, viewers will find it easy to understand and digest. Videos automatically eliminate boredom and make any topic interesting.
How to add a YouTube video to Google Slide
Use these two methods to add a YouTube video to Google Slides. Via the Search and Direct link.
Method 1. Embed YouTube video to Google Slide by search and selection
Google has owned YouTube since the year 2006. You can, therefore, integrate Google’s products with YouTube easily.
Step 1. First, go to the slide where you want to embed your video.
Step 2. Then choose the “Insert” option from the menu bar and hit the “Video” option.

Step 3. It would be best if you now viewed the “YouTube” search bar to type in the video you want to embed. You can use keywords to search for the video in question and view instant search results.
Step 4. Then select the video you want to embed, and you’ll see it appear on the “Slide.”

Step 5. Format your video. Remember that the entire video will be embedded. You don’t necessarily need the whole video. It is time to select just a brief but relevant clip from the video to use. Then position your video to the right point using the axes from the exact starting point to the finished part you want the video to appear in.
Method 2. Embed YouTube video to Google Slide by direct link
You can engage this method if you want to include the entire video.
Step 1. Get the URL of the specific YouTube video that you want to use.

Step 2. Then go to your browser’s “Address bar” to copy the YouTube link.
Step 3. Next, open the “Presentation” slide to put your video to.
Step 4. Choose the “Insert” tab from the menu bar.
Step 5. Then hit on the “Video” option from the drop-down menu that appears.
Step 6. A new window will open automatically. Choose the “By URL” tab.
Step 7. Then paste the YouTube video URL in the “Paste YouTube URL Here” bar section.

Step 8. Wait for the video file to load and press the “Select” option. The video will immediately appear in the presentation slide. Just drag and drop the video in your preferred position.
Note: You can do a few edits inside the application. Set the timer when your video should start and when to stop. You can also adjust the video player size.
How to choose the right video for your Slides?
Not all videos will make an impact on your Google Slide. You need to use the best shot that adds value to your presentation. These guidelines will help you to settle on the best video.
Be Professional – choose the best video for your presentation. Remember that the video is part of the presentation and carries more weight. Settling for quality video will bring out the professionalism in you.
Relevant – how do you know that what you are showing your audience corresponds to the presentation piece? Ensure that the video you add has something to do with the Google Slide presentation topic. The two should naturally flow to make it easy to understand the whole concept.
Precise – your presentation is not about the video. The ideal length should not exceed 60 seconds. The longer the video, the greater the chance for your audience to lose track along the way.
Know every footage you are working with – this will help you pick the best shots for your presentation. So, learn every aspect of the video before settling down to use it.
Add new content – even though one content may suit several presentations, don’t rely on the same piece each time. Your audience will want to feel something fresh each time you are presenting. So, compose different videos for different scenarios to make that big impact.
Create an eye-catching video for your Slides with Filmora
The video quality matters when it comes to creating your Slides. The best video creator – Filmora – works in simple steps to give you an eye-catching video. It will create videos for all scenarios like marketing, tutorial, gaming, etc.
Key features of Filmora
- It offers you advanced video effects like filters, motion elements, etc
- You can multiply your fun with multiple screens with the Split Screen feature
- Easily change backgrounds using the Green Screen feature
- The speed control lets you fast forward or slow down a special moment
- Import your video clips to social media platforms
- You can also adjust the audio of your tracks using the Audio Mixer feature
Follow this guide to create a video for your slide with Filmora
Step 1. Launch Filmora
First, begin by downloading and installing Filmora on your computer device. Once installed, launch it and allow it to run. You can either create a new project or open an existing project to work on.
Step 2. Create a new project
Here, click on the “New Project” tab on the app’s welcome screen. The editor should load immediately. Then proceed to register the product. Just hit on the “Register” tab.
Step 3. Import video
Check the upper left corner of your screen to see the “Import” tab. Click on it and choose the “Import Media Files” option. Next, navigate to the location of your computer’s local list to select the clip or video you want to edit. Then, hit the “Import” button to add the video to the timeline for editing.
Step 4. Edit video
Drag and drop the raw footage to Filmora’s timeline to begin editing. Here, you can trim, add other video clips, merge, and add effects as you wish. Likewise, you can add opening titles, subtitles, and end credits to your video. More so, this tool offers different templates to use. Just drag and drop the templates you wish to use to a specific location on the timeline.
Step 5. Preview your file
Last but not least, you can preview your files. Click on the “Play” tab to start previewing your video clips. The main essence of this part is to allow you to make the necessary changes to your clips if there is a need.
Step 6. Export and Share
With Filmora, you can export your file to various social media platforms. But first, go to the “Output window” and select the video file format to use. This software supports several output formats to apply to any platform and device. Just click on the “Format” tab and choose the file format to use. Then also change the resolution and other parameters like frame rate and channel of your video in the “Settings” section. Finally, share your video to your YouTube channel and get ready to add the video to the Google Slide presentation.
For Win 7 or later (64-bit)
For macOS 10.12 or later
Conclusion
● You now know how to put a YouTube video in Google Slides the simple way. You can search for your YouTube videos or directly use the URL link. Whatever the case, remember that it’s the quality of your video that carries more weight. Thanks to the availability of third-party apps that you can use to create and improve the quality of your videos.
● Filmora is at your service to create high-resolution videos that you can export in any format to your YouTube channel. The tool is intuitive, and it won’t matter whether you haven’t tried it before. It is a perfect choice for both professionals and first-time users.
Google Slide presentation is a powerful tool for creators to keep their audience engaged. This online platform lets you create and demonstrate your ideas. It will capture your viewers’ attention from the very beginning. It also doesn’t matter whatever learning style you engage. Adding YouTube videos to Google Slide will appeal to all levels of individuals.
More so, it is the best way to provide a break for both the audience and the creator. You can break Google Slide presentations with videos to offer some break. Viewers and the presenter get a breather in the process. The presenter can take a short break from speaking while the video plays. Let’s now dive into how to embed a YouTube video in Google Slides.
In this article
01 Why should we add a video to Google Slides?
02 How to add a YouTube video to Google Slide
03 How to choose the right video for your Slides?
Why should we add a video to Google Slides?
There is a great impact of adding video to Google Slides.
For attention
Videos will automatically awaken you, especially if your thoughts have started to sway during a presentation. A video has a direct way of showing creativity. The audience automatically connects the dots between the video and the presentation lines alike.
To stimulate discussion
A picture is worth a thousand words. There is a way that an added video will help the audience connect to the day’s topic. It will bring up several ideas and stir up discussion with the presenter.
Easy following
With videos embedded in Google Slide, viewers will find it easy to understand and digest. Videos automatically eliminate boredom and make any topic interesting.
How to add a YouTube video to Google Slide
Use these two methods to add a YouTube video to Google Slides. Via the Search and Direct link.
Method 1. Embed YouTube video to Google Slide by search and selection
Google has owned YouTube since the year 2006. You can, therefore, integrate Google’s products with YouTube easily.
Step 1. First, go to the slide where you want to embed your video.
Step 2. Then choose the “Insert” option from the menu bar and hit the “Video” option.
Step 3. It would be best if you now viewed the “YouTube” search bar to type in the video you want to embed. You can use keywords to search for the video in question and view instant search results.
Step 4. Then select the video you want to embed, and you’ll see it appear on the “Slide.”
Step 5. Format your video. Remember that the entire video will be embedded. You don’t necessarily need the whole video. It is time to select just a brief but relevant clip from the video to use. Then position your video to the right point using the axes from the exact starting point to the finished part you want the video to appear in.
Method 2. Embed YouTube video to Google Slide by direct link
You can engage this method if you want to include the entire video.
Step 1. Get the URL of the specific YouTube video that you want to use.
Step 2. Then go to your browser’s “Address bar” to copy the YouTube link.
Step 3. Next, open the “Presentation” slide to put your video to.
Step 4. Choose the “Insert” tab from the menu bar.
Step 5. Then hit on the “Video” option from the drop-down menu that appears.
Step 6. A new window will open automatically. Choose the “By URL” tab.
Step 7. Then paste the YouTube video URL in the “Paste YouTube URL Here” bar section.
Step 8. Wait for the video file to load and press the “Select” option. The video will immediately appear in the presentation slide. Just drag and drop the video in your preferred position.
Note: You can do a few edits inside the application. Set the timer when your video should start and when to stop. You can also adjust the video player size.
How to choose the right video for your Slides?
Not all videos will make an impact on your Google Slide. You need to use the best shot that adds value to your presentation. These guidelines will help you to settle on the best video.
Be Professional – choose the best video for your presentation. Remember that the video is part of the presentation and carries more weight. Settling for quality video will bring out the professionalism in you.
Relevant – how do you know that what you are showing your audience corresponds to the presentation piece? Ensure that the video you add has something to do with the Google Slide presentation topic. The two should naturally flow to make it easy to understand the whole concept.
Precise – your presentation is not about the video. The ideal length should not exceed 60 seconds. The longer the video, the greater the chance for your audience to lose track along the way.
Know every footage you are working with – this will help you pick the best shots for your presentation. So, learn every aspect of the video before settling down to use it.
Add new content – even though one content may suit several presentations, don’t rely on the same piece each time. Your audience will want to feel something fresh each time you are presenting. So, compose different videos for different scenarios to make that big impact.
Create an eye-catching video for your Slides with Filmora
The video quality matters when it comes to creating your Slides. The best video creator – Filmora – works in simple steps to give you an eye-catching video. It will create videos for all scenarios like marketing, tutorial, gaming, etc.
Key features of Filmora
- It offers you advanced video effects like filters, motion elements, etc
- You can multiply your fun with multiple screens with the Split Screen feature
- Easily change backgrounds using the Green Screen feature
- The speed control lets you fast forward or slow down a special moment
- Import your video clips to social media platforms
- You can also adjust the audio of your tracks using the Audio Mixer feature
Follow this guide to create a video for your slide with Filmora
Step 1. Launch Filmora
First, begin by downloading and installing Filmora on your computer device. Once installed, launch it and allow it to run. You can either create a new project or open an existing project to work on.
Step 2. Create a new project
Here, click on the “New Project” tab on the app’s welcome screen. The editor should load immediately. Then proceed to register the product. Just hit on the “Register” tab.
Step 3. Import video
Check the upper left corner of your screen to see the “Import” tab. Click on it and choose the “Import Media Files” option. Next, navigate to the location of your computer’s local list to select the clip or video you want to edit. Then, hit the “Import” button to add the video to the timeline for editing.
Step 4. Edit video
Drag and drop the raw footage to Filmora’s timeline to begin editing. Here, you can trim, add other video clips, merge, and add effects as you wish. Likewise, you can add opening titles, subtitles, and end credits to your video. More so, this tool offers different templates to use. Just drag and drop the templates you wish to use to a specific location on the timeline.
Step 5. Preview your file
Last but not least, you can preview your files. Click on the “Play” tab to start previewing your video clips. The main essence of this part is to allow you to make the necessary changes to your clips if there is a need.
Step 6. Export and Share
With Filmora, you can export your file to various social media platforms. But first, go to the “Output window” and select the video file format to use. This software supports several output formats to apply to any platform and device. Just click on the “Format” tab and choose the file format to use. Then also change the resolution and other parameters like frame rate and channel of your video in the “Settings” section. Finally, share your video to your YouTube channel and get ready to add the video to the Google Slide presentation.
For Win 7 or later (64-bit)
For macOS 10.12 or later
Conclusion
● You now know how to put a YouTube video in Google Slides the simple way. You can search for your YouTube videos or directly use the URL link. Whatever the case, remember that it’s the quality of your video that carries more weight. Thanks to the availability of third-party apps that you can use to create and improve the quality of your videos.
● Filmora is at your service to create high-resolution videos that you can export in any format to your YouTube channel. The tool is intuitive, and it won’t matter whether you haven’t tried it before. It is a perfect choice for both professionals and first-time users.
The Best of the Best: 12 YouTube Video Game Openers (FREE/PAID)
Best 12 YouTube Gaming Intro Makers - Free and Paid

Richard Bennett
Mar 27, 2024• Proven solutions
When searching the words “intro maker”, thousands of results jump into your eyes, but only a few of them are suitable for YouTube gamers . Luckily, we did it for you. After 34 hours’ research and comparison, we finally rounded up the 12 best gaming intro makers, sorted by online and desktop solutions. Hopefully, these intro makers will help you convert more viewers to your subscribers like those noted YouTubers did.
Read on to know how to take your video to the next level with these gaming intro makers and templates.
You may also like: Top 10 Best Free Music and Sound Effect Resources for Games >>
- Part 1: 4 Best Desktop YouTube Gaming Intro Makers
- Part 2: 8 Best Online Intro Makers for YouTube Gaming
- Part 3: 3 Easiest Ways to Make a Gaming Intro
- Bonus: Best Intro Templates for YouTube Gamer
Wondershare Filmstock Gaming Video Editing Skils ](https://filmstock.wondershare.com/creative-theme-game?source%5Fchannel=seo%5Farticle&spm=rs.filmora%5Fweb )
Part 1: Best YouTube Intro Makers for Gaming [Desktop Software Solutions for Windows/Mac/Linux]
Before I recommend the YouTube Gaming Intro Makers, I want to share how we make a stunning YouTube intro, so that you can see in creating a video intro, which elements should be included. Check the video tutorial below to get some tips and tricks for making YouTube Intro.


Those who wish to have more control over their video editing needs are advised to pick desktop software solutions like Filmora and After Effects, and Blender, etc. They can serve the editing needs of beginners as well as professionals. So, in the first part, I’ll show you some of the best gaming intro makers for YouTube video, some of them are free to use, others may need to subscribe.
1. Wondershare Filmora: Freemium
Wondershare Filmora is a great tool that you can use to create a film-look YouTube video, including gaming video intros. What’s more, it offers you lots of pre-made intros with text and title animation, elements, overlays, effects, and transitions. Besides the inbuilt presets and templates for making gaming intro makers, you can find more video effects for gaming intro making in the Filmstock effects store . The 8 Bit Gamer and blockbuster effects are also perfect choices for making gaming intros. After finishing the editing, you can directly upload the video to YouTube from the program.
Download Mac Version ](https://tools.techidaily.com/wondershare/filmora/download/ )
You may also like: Best 3D Intro Makers for YouTube Videos
2. After Effects: ($19.99/month)
Editing YouTube gaming intro task becomes easier when you have Adobe Effects on your desktop computer. Most of the professionals love to access this platform due to its wide range of effects and presentation templates.
Now, if you are a member of Filmstock, you can download some Free After Effects Templates and use it in After Effects to make a stunning gaming intro without paying extra money.
3. Blender: (Free)
It is a well known open source and free of cost gaming intro maker that can process 3D pipelines with ease. It can easily handle processes like motion tracking, composition, rendering, simulation, animation, rigging and modeling etc. It may appear difficult for beginners to make a gaming intro with this free intro maker but professionals can definitely create wonders with this software tool.
4. Cinema 4D: $3510.5
This is a complete and complex software for 3D video animation, it’s developed by MAXON Computer GmbH in Germany, and it gives you almost all the power and control over 3D design and creation. It is very expensive ($3510.5) and complex, so if you just want a simple and quick intro, we don’t recommend this to you to make a simple gaming intro.
Part 2: Best YouTube Intro Makers for Gaming - Online solution
If you are a beginner, then you should go ahead with the online free gaming intro maker tools below. They have a wide range of pre-made templates and you can operate them with ease even without messing up with deep any technical details.
1. Panzoid(Free):
It is a well known online video editing software tool that also possesses abilities of background editor and can also generate quick clips to fulfill instant needs. As it is available for free and works online so beginners can easily switch to this editor anytime from anywhere using their handheld devices. This free to use software tool allows users to complete editing tasks with advanced 3D animations , but the only downside of this tool is its too many annoying ads.
You can find many tutorials about how to use Panzoid on YouTube if you have any questions.
2. Renderfx ($24.99 only):
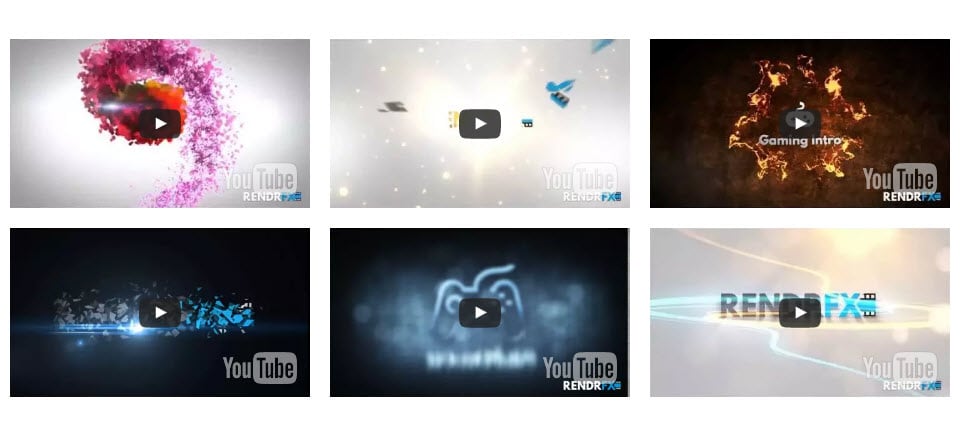
The high definition effect is the most beautiful part in my opinion. You would definitely love to have a professional class video editing solution for your YouTube gaming needs. Renderfx allows gamers to generate eye-catching videos for YouTube channel uploads; they can prepare presentations, outros, and intros over here.
3. Renderforest ($29.99/Export):

There are lots of interesting things to talk about Renderforest. It contains a wide range of video templates such as neon power logo, electromagnetic logo, neon lightroom, fly-in-fire logo, and many more. You can create various videos for free by utilizing all its advanced features, but in case if you want to expert your created video out without the watermark, then you have to pay $29.99 per export.
4. ivipid($1.99 to $34.99)
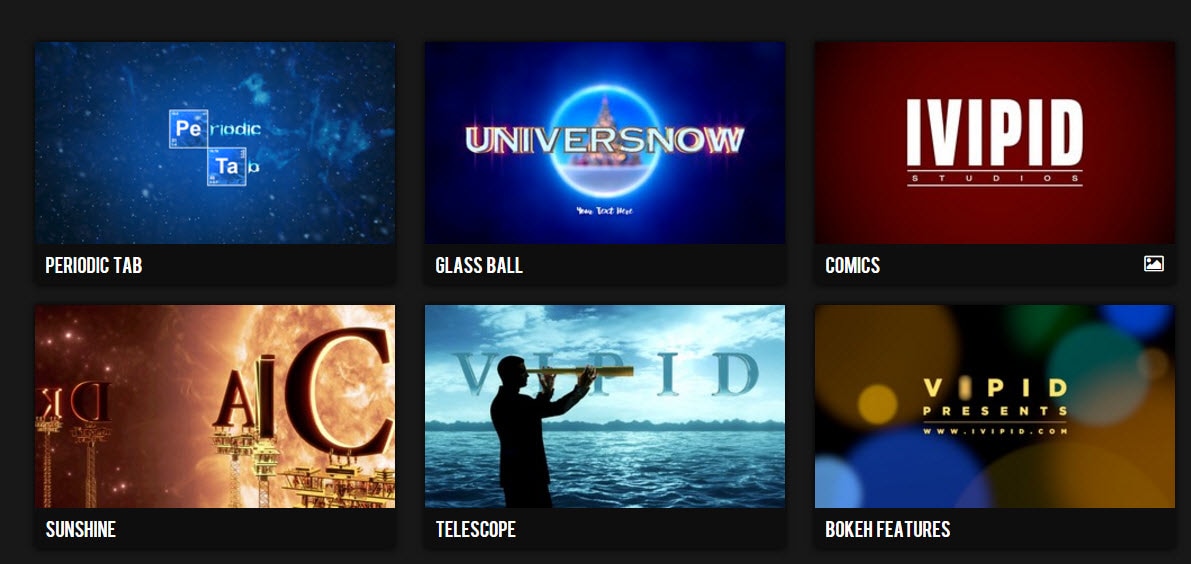
If you are more focused on customization needs and want to create something unique for your next YouTube gaming video, then Lvipid.com is here to serve all your needs. There are unlimited stunning themes, including awesome animation cards and video intro personalization options. Note that you have to use credits to start producing a new video on this platform.
5. Moovly Studio: ($5 per Month)

Here is an advanced multimedia solution that is hosted over the cloud platform and assists users in developing promotional videos and animations with a few simple to follow steps. You can enjoy these services with payment of $5/month only.
6. Introchamp: ($5 per template)
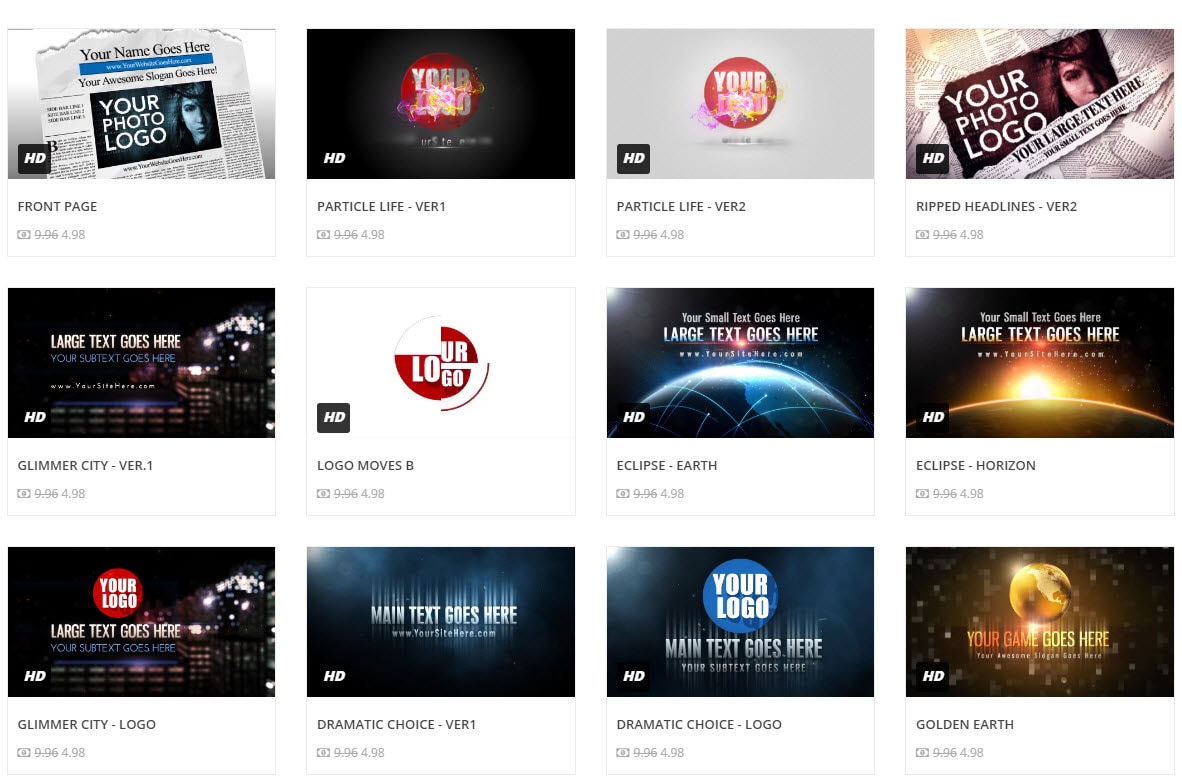
As the name indicates, this online tool is master in the creation of video intros, so you need not apply additional efforts to get desired results. Simply pay amount $4.98 to $11.95 and collect all fantastic graphics, text options, and music to complete your task.
7. Intromaker: ($5 to $20 only)
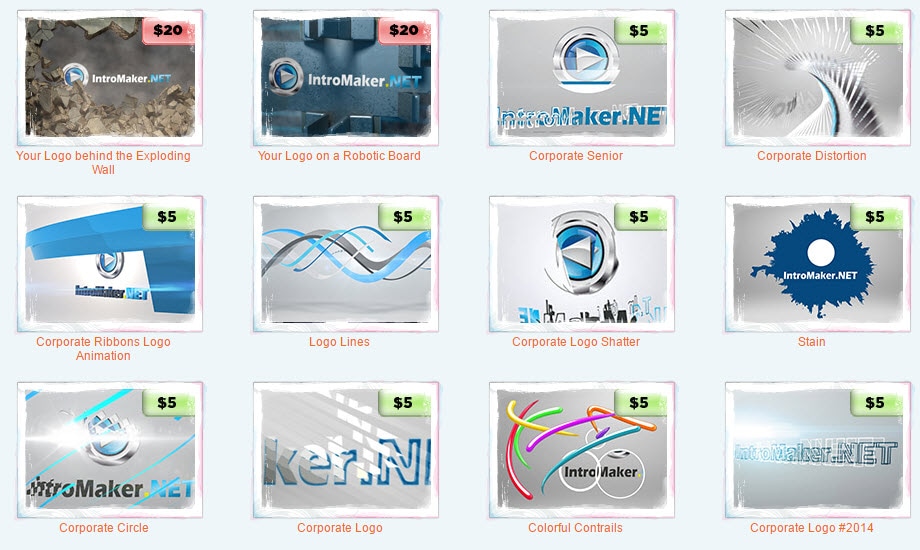
Its stunning designer wizard can assist you in logo designing; just upload your desired image with .jpg or .png extension and merge it into your video background to have impressive results. Its simple editing interface makes editing tasks much easier for beginners. One of the disadvantages is that you can’t preview the result before you finish the order.
8. Flixpress: ($49.44/month)
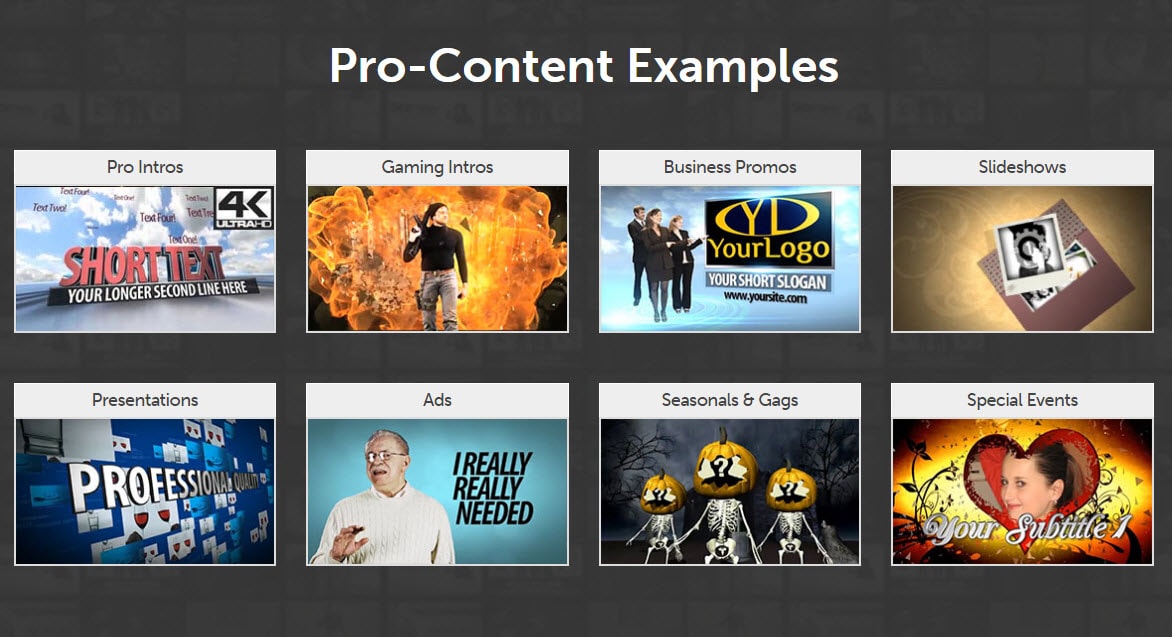
It provides a wide range of services like handling business promos, slideshows, ads, and YouTube Intros. It offers variable pricing plans so that beginners can start with free ones, and professionals can choose low-cost plans with ease. One can avail access to a full library with a payment of $49.44/month.
Part 3: 3 Easiest Ways to Make a Gaming Intro
If you’re new to YouTube video creation, here we introduce 3 easiest ways that can help you make fascinating gaming intros.
1. Using video intro makers
No matter you are a beginner or a professional, these intro makers offer you multiples options to make wonderful gaming intros from pre-made templates or from nothing.
2. Hiring freelancers
It is also possible to get professional assistance online from top platforms like Peopleperhour , Upwork , Fiverr and, Valoso etc. Those who are not able to find enough time to edit their game videos can hire a well experienced professional online. They charge an hourly basis or as per the work offered by you. They can complete the customization task on your behalf.
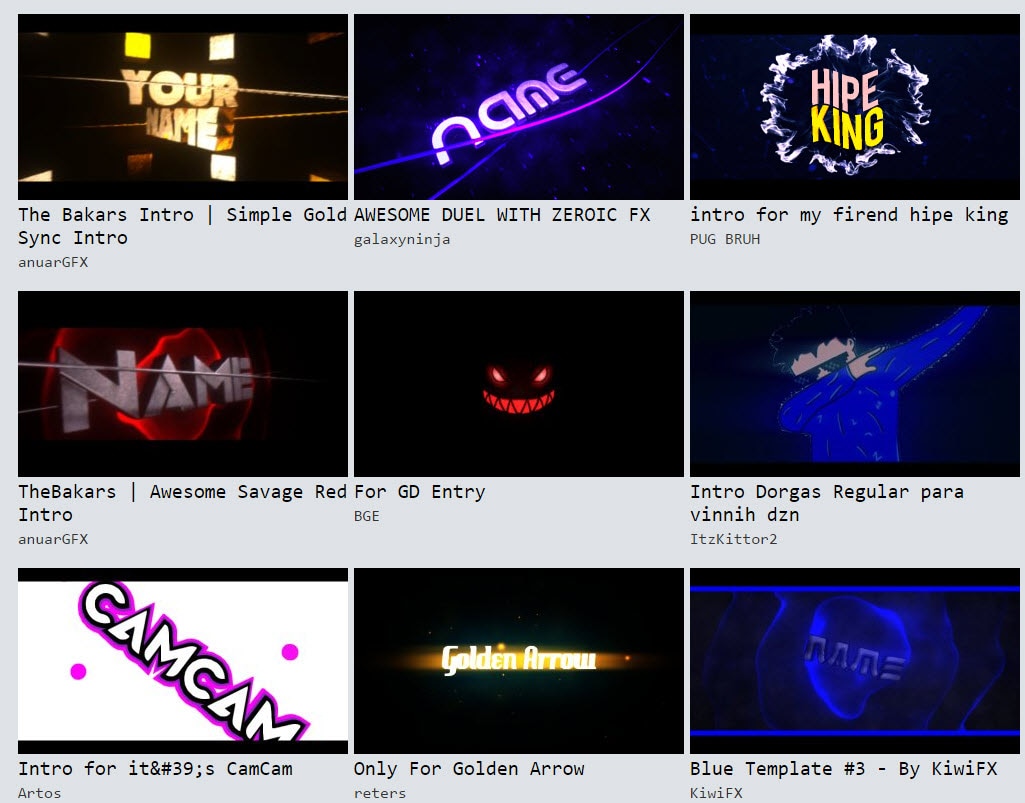
3. Taking use of pre-made intro templates
Some websites/YouTube channels over the Internet also offer attractive pre-made templates that are time-saving solutions and can definitely fulfill the purpose of excellent video intro. You can collect fantastic templates from sites like Editorsdepot, VideoBlocks, and Pushedtionsanity, etc.
Note: The intro part is needed to be very short; probably, a maximum of 5 seconds is sufficient to create the impact; otherwise, your audience will become impatient, and they will run away.
Part 4: Best Intro Templates for YouTube gamer [Free Intro Templates Download Sites]
If you’re using Blender, After Effects, Sony Vegas, Cinema 4D, etc, you’ll be happy to find that there are a lot of free intro templates on the Internet. Just download them, and replace the text by your channel name, no further editing skills asked. You can pick some of the best collections from here.
The newly released stock media library Filmstock effects store is a good website to download free intros and customize it based on your personalized needs.
Download Mac Version ](https://tools.techidaily.com/wondershare/filmora/download/ )
Click the image below to visit this effects store directly. If you are looking for some free items which are totally free to download and use, you can check the Free video effects, footage, music and photos .
Filmstock Stock Media Library ](https://tools.techidaily.com/wondershare/filmora/download/ )
1. Editors Depot
Editors depot has thousands of stock videos and templates with free intros available. You can download them then edit in Blender, Cinema 4D, After Effects, or Sony Vegas.
2. VideoBlocks
Videoblocks has after effect templates you can simply download and bring into Photoshop. All you need to do with these templates is insert your name and import the music, the background images and graphics are all generated.
3. Pushedtionsanity
PushedToInsanity is a site designed to provide the users with the latest and best FREE templates for Cinema 4D, After Effects, and Sony Vegas. You will find lots of Intro Templates, Outro Templates, Banner Templates, and almost everything you need for your YouTube videos. You can check their YouTube Channel to watch all the intro templates
After reading so many YouTube gaming intro makers, you may have exhausted. So we have made a simple comparison table about each intro maker, and below is the list of best online and desktop gaming intro makers that can complete the intro making the task as per your choice, pick any of these as per your needs.
You can click the platform name in the form to check the detailed intro about it directly.
| Type | Platform | Price |
|---|---|---|
| Online | Panzoid.com | Free |
| Renderfx | $24.99 to remove the watermark | |
| Renderforest | $29.99/export | |
| Ivipid.com | 1.99$ to $34.99 | |
| Moovly Studio | $5/month | |
| Introchamp | $5 per templates | |
| Intromaker | $5 to $20 | |
| Flixpress | $129.99 monthly for full libray and liftime storage | |
| Desktop | Wondershare Filmora | $59.99 lifetime |
| After Effects | $19.99/monthly | |
| Blender | Free | |
| Cinema 4D | $3510.5 |
Wondershare Filmora is an amazing intro maker for YouTube gamers, besides the various inbuilt titles, animations, filters, transitions and music library, Filmora also has some stunning editing tools to empower your creativity.
Richard Bennett
Richard Bennett is a writer and a lover of all things video.
Follow @Richard Bennett
Richard Bennett
Mar 27, 2024• Proven solutions
When searching the words “intro maker”, thousands of results jump into your eyes, but only a few of them are suitable for YouTube gamers . Luckily, we did it for you. After 34 hours’ research and comparison, we finally rounded up the 12 best gaming intro makers, sorted by online and desktop solutions. Hopefully, these intro makers will help you convert more viewers to your subscribers like those noted YouTubers did.
Read on to know how to take your video to the next level with these gaming intro makers and templates.
You may also like: Top 10 Best Free Music and Sound Effect Resources for Games >>
- Part 1: 4 Best Desktop YouTube Gaming Intro Makers
- Part 2: 8 Best Online Intro Makers for YouTube Gaming
- Part 3: 3 Easiest Ways to Make a Gaming Intro
- Bonus: Best Intro Templates for YouTube Gamer
Wondershare Filmstock Gaming Video Editing Skils ](https://filmstock.wondershare.com/creative-theme-game?source%5Fchannel=seo%5Farticle&spm=rs.filmora%5Fweb )
Part 1: Best YouTube Intro Makers for Gaming [Desktop Software Solutions for Windows/Mac/Linux]
Before I recommend the YouTube Gaming Intro Makers, I want to share how we make a stunning YouTube intro, so that you can see in creating a video intro, which elements should be included. Check the video tutorial below to get some tips and tricks for making YouTube Intro.
Those who wish to have more control over their video editing needs are advised to pick desktop software solutions like Filmora and After Effects, and Blender, etc. They can serve the editing needs of beginners as well as professionals. So, in the first part, I’ll show you some of the best gaming intro makers for YouTube video, some of them are free to use, others may need to subscribe.
1. Wondershare Filmora: Freemium
Wondershare Filmora is a great tool that you can use to create a film-look YouTube video, including gaming video intros. What’s more, it offers you lots of pre-made intros with text and title animation, elements, overlays, effects, and transitions. Besides the inbuilt presets and templates for making gaming intro makers, you can find more video effects for gaming intro making in the Filmstock effects store . The 8 Bit Gamer and blockbuster effects are also perfect choices for making gaming intros. After finishing the editing, you can directly upload the video to YouTube from the program.
Download Mac Version ](https://tools.techidaily.com/wondershare/filmora/download/ )
You may also like: Best 3D Intro Makers for YouTube Videos
2. After Effects: ($19.99/month)
Editing YouTube gaming intro task becomes easier when you have Adobe Effects on your desktop computer. Most of the professionals love to access this platform due to its wide range of effects and presentation templates.
Now, if you are a member of Filmstock, you can download some Free After Effects Templates and use it in After Effects to make a stunning gaming intro without paying extra money.
3. Blender: (Free)
It is a well known open source and free of cost gaming intro maker that can process 3D pipelines with ease. It can easily handle processes like motion tracking, composition, rendering, simulation, animation, rigging and modeling etc. It may appear difficult for beginners to make a gaming intro with this free intro maker but professionals can definitely create wonders with this software tool.
4. Cinema 4D: $3510.5
This is a complete and complex software for 3D video animation, it’s developed by MAXON Computer GmbH in Germany, and it gives you almost all the power and control over 3D design and creation. It is very expensive ($3510.5) and complex, so if you just want a simple and quick intro, we don’t recommend this to you to make a simple gaming intro.
Part 2: Best YouTube Intro Makers for Gaming - Online solution
If you are a beginner, then you should go ahead with the online free gaming intro maker tools below. They have a wide range of pre-made templates and you can operate them with ease even without messing up with deep any technical details.
1. Panzoid(Free):
It is a well known online video editing software tool that also possesses abilities of background editor and can also generate quick clips to fulfill instant needs. As it is available for free and works online so beginners can easily switch to this editor anytime from anywhere using their handheld devices. This free to use software tool allows users to complete editing tasks with advanced 3D animations , but the only downside of this tool is its too many annoying ads.
You can find many tutorials about how to use Panzoid on YouTube if you have any questions.
2. Renderfx ($24.99 only):
The high definition effect is the most beautiful part in my opinion. You would definitely love to have a professional class video editing solution for your YouTube gaming needs. Renderfx allows gamers to generate eye-catching videos for YouTube channel uploads; they can prepare presentations, outros, and intros over here.
3. Renderforest ($29.99/Export):
There are lots of interesting things to talk about Renderforest. It contains a wide range of video templates such as neon power logo, electromagnetic logo, neon lightroom, fly-in-fire logo, and many more. You can create various videos for free by utilizing all its advanced features, but in case if you want to expert your created video out without the watermark, then you have to pay $29.99 per export.
4. ivipid($1.99 to $34.99)
If you are more focused on customization needs and want to create something unique for your next YouTube gaming video, then Lvipid.com is here to serve all your needs. There are unlimited stunning themes, including awesome animation cards and video intro personalization options. Note that you have to use credits to start producing a new video on this platform.
5. Moovly Studio: ($5 per Month)
Here is an advanced multimedia solution that is hosted over the cloud platform and assists users in developing promotional videos and animations with a few simple to follow steps. You can enjoy these services with payment of $5/month only.
6. Introchamp: ($5 per template)
As the name indicates, this online tool is master in the creation of video intros, so you need not apply additional efforts to get desired results. Simply pay amount $4.98 to $11.95 and collect all fantastic graphics, text options, and music to complete your task.
7. Intromaker: ($5 to $20 only)
Its stunning designer wizard can assist you in logo designing; just upload your desired image with .jpg or .png extension and merge it into your video background to have impressive results. Its simple editing interface makes editing tasks much easier for beginners. One of the disadvantages is that you can’t preview the result before you finish the order.
8. Flixpress: ($49.44/month)
It provides a wide range of services like handling business promos, slideshows, ads, and YouTube Intros. It offers variable pricing plans so that beginners can start with free ones, and professionals can choose low-cost plans with ease. One can avail access to a full library with a payment of $49.44/month.
Part 3: 3 Easiest Ways to Make a Gaming Intro
If you’re new to YouTube video creation, here we introduce 3 easiest ways that can help you make fascinating gaming intros.
1. Using video intro makers
No matter you are a beginner or a professional, these intro makers offer you multiples options to make wonderful gaming intros from pre-made templates or from nothing.
2. Hiring freelancers
It is also possible to get professional assistance online from top platforms like Peopleperhour , Upwork , Fiverr and, Valoso etc. Those who are not able to find enough time to edit their game videos can hire a well experienced professional online. They charge an hourly basis or as per the work offered by you. They can complete the customization task on your behalf.
3. Taking use of pre-made intro templates
Some websites/YouTube channels over the Internet also offer attractive pre-made templates that are time-saving solutions and can definitely fulfill the purpose of excellent video intro. You can collect fantastic templates from sites like Editorsdepot, VideoBlocks, and Pushedtionsanity, etc.
Note: The intro part is needed to be very short; probably, a maximum of 5 seconds is sufficient to create the impact; otherwise, your audience will become impatient, and they will run away.
Part 4: Best Intro Templates for YouTube gamer [Free Intro Templates Download Sites]
If you’re using Blender, After Effects, Sony Vegas, Cinema 4D, etc, you’ll be happy to find that there are a lot of free intro templates on the Internet. Just download them, and replace the text by your channel name, no further editing skills asked. You can pick some of the best collections from here.
The newly released stock media library Filmstock effects store is a good website to download free intros and customize it based on your personalized needs.
Download Mac Version ](https://tools.techidaily.com/wondershare/filmora/download/ )
Click the image below to visit this effects store directly. If you are looking for some free items which are totally free to download and use, you can check the Free video effects, footage, music and photos .
Filmstock Stock Media Library ](https://tools.techidaily.com/wondershare/filmora/download/ )
1. Editors Depot
Editors depot has thousands of stock videos and templates with free intros available. You can download them then edit in Blender, Cinema 4D, After Effects, or Sony Vegas.
2. VideoBlocks
Videoblocks has after effect templates you can simply download and bring into Photoshop. All you need to do with these templates is insert your name and import the music, the background images and graphics are all generated.
3. Pushedtionsanity
PushedToInsanity is a site designed to provide the users with the latest and best FREE templates for Cinema 4D, After Effects, and Sony Vegas. You will find lots of Intro Templates, Outro Templates, Banner Templates, and almost everything you need for your YouTube videos. You can check their YouTube Channel to watch all the intro templates
After reading so many YouTube gaming intro makers, you may have exhausted. So we have made a simple comparison table about each intro maker, and below is the list of best online and desktop gaming intro makers that can complete the intro making the task as per your choice, pick any of these as per your needs.
You can click the platform name in the form to check the detailed intro about it directly.
| Type | Platform | Price |
|---|---|---|
| Online | Panzoid.com | Free |
| Renderfx | $24.99 to remove the watermark | |
| Renderforest | $29.99/export | |
| Ivipid.com | 1.99$ to $34.99 | |
| Moovly Studio | $5/month | |
| Introchamp | $5 per templates | |
| Intromaker | $5 to $20 | |
| Flixpress | $129.99 monthly for full libray and liftime storage | |
| Desktop | Wondershare Filmora | $59.99 lifetime |
| After Effects | $19.99/monthly | |
| Blender | Free | |
| Cinema 4D | $3510.5 |
Wondershare Filmora is an amazing intro maker for YouTube gamers, besides the various inbuilt titles, animations, filters, transitions and music library, Filmora also has some stunning editing tools to empower your creativity.
Richard Bennett
Richard Bennett is a writer and a lover of all things video.
Follow @Richard Bennett
Also read:
- Channel Branding Hacks 10 Must-Use Online Tools for 2024
- In 2024, Enrich Your Viewing Habit with Essential Movie Channels
- The Final Verdict on the Best Video Editors Online
- [New] Architects of Online Marvel Adventures
- Perfecting Unboxing Videos Essential Strategies Revealed
- Strategic Use of YouTube Cards & Markup
- Cinematic Evolution The Best YouTube Guides for New Filmmakers
- YouTube Update Easy Access to Your Shorts
- Rise in the Rankings Essential SEO for Video Creators
- Conveniently Remove Downloaded YouTube Media for Lightweight Devices
- [New] Crafting Compelling Videos YouTube's Best Thumbnail Practices
- Framing the Perfect Waterway Narrative
- [New] Elevate Your Video Watchlist - Activate AV1 on YouTube
- Elevate Your Videography with Top SEO Gadgets for 2024
- The Blueprint for Designing Eye-Catching Thumbnails for Your YouTube Channel
- Unlock iPhone/iPad Potential Video Upload Tips for YouTube Enthusiasts
- [New] Best Practices Choosing YouTube's Most Popular Video Formats
- Subscribe to Increase Eco-Friendly CTA Impact
- In 2024, Achieve Wider Exposure by Transferring Twitch Broadcasts to YouTube
- Keywords that Catapult Hashtag Hacks in Gameplay Videos
- Elevating Profits via Celebrity Skincare Channels for 2024
- Universal Title Framework for Tech Platforms
- Ultimate Guide Prime Video Stabilizers
- In 2024, Boosting Viewership A Guide to Captivating Haul Content
- [Updated] Champion Top Titles Best Free Video Caption Grabs
- Efficiency in Action Rapid Removal of YouTube Discussions
- [New] Channel Labeling 101 How to Make Yourself Hard to Ignore
- Classic Film Aesthetics Masterclass in Video Production
- In 2024, Elevate Your Content with Professional End Screen Templates
- [Updated] Achieving Financial Freedom Joshi’s YouTube Tactics
- Crafting Engaging YouTube Thumbnails A Step-by-Step Guide
- 2024 Approved Leading Chat Apps to Replace Zoom on Desktop/Mobile Devices
- New Secrets for TikTok Live Studio Success
- New 2024 Approved Install Splice Video Editor on Your Mac
- 5 Best Route Generator Apps You Should Try On Apple iPhone 12 Pro Max | Dr.fone
- Bypassing Google Account With vnROM Bypass For Infinix Zero 5G 2023 Turbo
- How to recover lost data from Vivo X100?
- In 2024, Here are Different Ways to Find Pokemon Go Trainer Codes to Add to Your Account On Apple iPhone 14 Pro | Dr.fone
- Reliable User Guide to Fix Itel P55+ Running Slow and Freezing | Dr.fone
- Unlocking Made Easy The Best 10 Apps for Unlocking Your Oppo A2 Device
- The Best Tripod for iPhone and Android Smartphone
- New The Futures Frontiers Unveiling the Best 5 Audio Video Fusion Technologies
- New Mastering Sound Visualization Merging Waveforms for Audio Sight & Animated Display Using Premiere Pro for 2024
- Updated In This Article, You Will Learn About the Top 5 Editors for Windows, Top 5 Editors for iPhone/Android, and Top 5 Editors for Animated GIF Editing for 2024
- [Updated] From Broadcasting Basics to Facebook Live with Wirecast for 2024
- All About Factory Reset, What Is It and What It Does to Your Samsung Galaxy S23? | Dr.fone
- In 2024, How to Bypass FRP on Motorola Edge 40 Pro?
- Title: In 2024, Bringing YouTube to Life on Google Slides
- Author: Kevin
- Created at : 2024-06-10 00:24:55
- Updated at : 2024-06-11 00:24:55
- Link: https://youtube-videos.techidaily.com/in-2024-bringing-youtube-to-life-on-google-slides/
- License: This work is licensed under CC BY-NC-SA 4.0.
