
:max_bytes(150000):strip_icc()/20tipsforsavingmoneyinyour20s-1f7fd5749e914e31b38747c400f07564.jpg)
"In 2024, Best Screener Tech Perfect for Creating Viral YouTube Moments"
Best Screener Tech: Perfect for Creating Viral YouTube Moments
Best Screen Recorder for YouTube

Richard Bennett
Mar 27, 2024• Proven solutions
Taking viewers ‘in app’ is an effective way to show them how you work or play. A screen recording is a footage recorded not from your camera, but directly from the interface of your computer or mobile device. A screen recording might be footage from a game, a software tutorial, or a demonstration of your creative process in a program.
We have picked up the best 10 paid screen recorders for YouTube on Windows and Mac, but if you are looking for a complete solution to record videos on Windows, Mac, Android or iOS phone to make tutorial videos, how-to videos, or demonstration videos, or products/software review videos, or gameplay videos on YouTube, here is the all the information you need. This article will introduce you to the best screen recorders on computers, Android devices, and iPhones for YouTube.
- Part 1: Best Screen Recording Software for Recording Windows/Mac Screen for YouTube
- Part 2: Best Screen Capturing Apps for Recording Your Android Screen (No Root)
- Part 3: Best Screen Recording Apps for Recording on iOS Devices for YouTube Videos
Part 1: Best Software for Recording Your Computer Screen for YouTube Videos
1.Filmora Video Editor [Windows & Mac, Freemium]


In addition to being a powerful editing tool, Filmora can also be used to record your computer screen. In Filmora, just select Media and then Record. In the Record menu, click Record PC Screen. The recording window will pop up and you will be able to decide whether you want to record your full screen, a customized selection of it, or a specific target window. After you have finished recording your clip will automatically appear in the Media menu in your Filmora project so you can edit it right away. You can download Filmora from Filmora.wondershare.com if you do not have it yet.
If you just want to make a how-to video with some captured screens, Filmora will be a good choice. Check the video below about how to record Screen with Filmora.
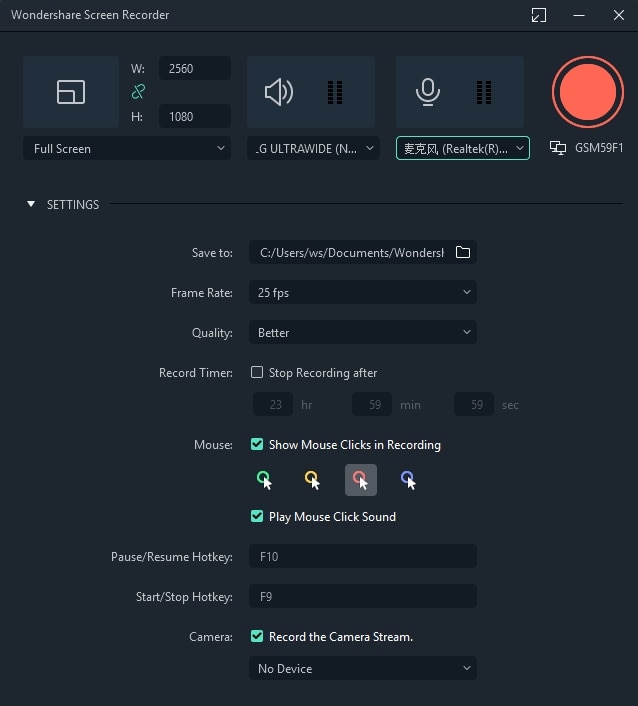
2.Wondershare DemoCreator
DemoCreator is a specially designed screen recording software from Wondershare for both gameplay recording, tutorial making, screen capturing, and webcam recording as well. You can use it to record the full screen of your Windows or Mac computer or a particular part on the screen. The best part is that you can both record and edit the video in DemoCreator and upload it to YouTube directly. This screen recorder for YouTube is a perfect solution for those who want to capture 120 frames per second and 4K videos.
3.VLC Media Player [Windows & Mac & Linux, Free]
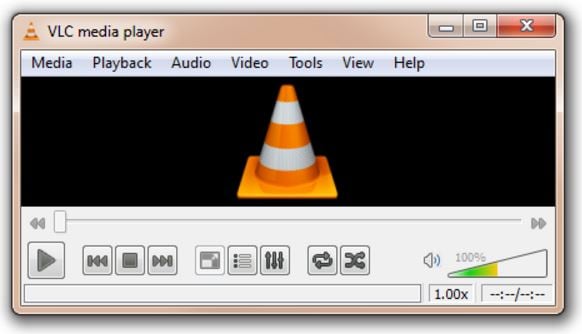
VLC Media Player is a free media player that has a great screen recording feature. You can download it from Video LAN.org. In order to take a screen recording using VLC you first need to click on View and Advanced Controls. A lot of the more advanced features, like screen recording, are initially hidden so as not to confuse users, but selecting Advanced Controls will make them visible. Then you can go to Media and Open Capture Device. In the window that opens choose Desktop next to Capture Mode and click Play. VLC will start displaying your desktop in the player window. Now you just have to click Record.
Learn more details about how to record YouTube videos with VLC
4.QuickTime [Mac, Free]

QuickTime is the default media player for Mac users. To access QuickTime’s screen recording feature select File and New Screen Recording. In the window that pops up click on the arrow next to the Record button and choose a microphone. Then you can press Record. Your recording will not start right away. First, a window will pop up explaining that you can stop your recording by pressing ‘command-control-escape’. Although QuickTime is available for PCs the PC version does not have a screen recording feature.
Learn more details about how to record YouTube video and audio with QuickTime Player on Mac
Part 2: Recording Your Android Screen for YouTube Videos (No Root)
We have already described 4 ways of recording screen videos on Android , while in this part, we will introduce some useful screen recording apps for recording YouTube videos on Android phones.
1. AZ Screen Recorder
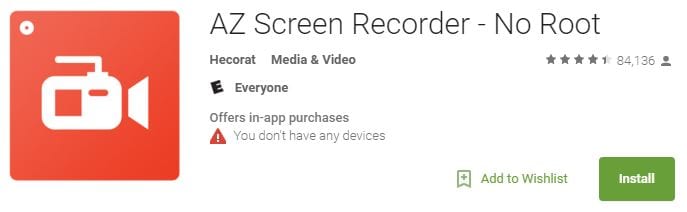
AZ Screen Recorder is free screen recording app for Android 5.0 Lollipop. Using AZ Screen Recorder you can simultaneously record from your phone’s camera and screen. This is useful if you want to shoot a video of yourself explaining an app to add into your final video. Although the basic version of AZ Screen Recorder is free there are in-app purchases.
2.Unlimited Screen Recorder
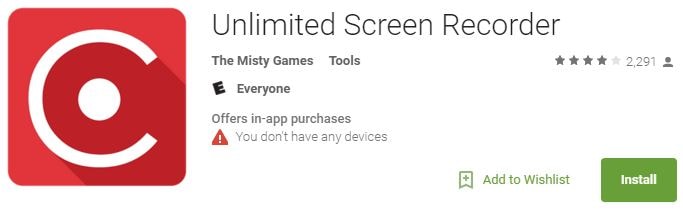
Unlimited Screen Recorder is also for 5.0 Lollipop and is free with in-app purchases. Like the name ‘Unlimited’ suggests you can use this app to record for as long as you want. There is no time limit. You can also record audio through Unlimited Screen Recorder so it is convenient to make a voiceover for your video.
There are very few options available for recording Android devices older than Lollipop without rooting your device.
Click here to check more screen recording apps to capture videos on Android
Part 3: Recording Your iOS Device Screen for YouTube Videos
With the release of iOS 11, recording on iPhone and iPad is much easier with the built-in screen recording tool . If your iOS is above 11 (including 11) version, you can record the screen with its in-app application, check this video to know the details:
Apart from recording with the built-in recording tool, you can also use some best iOS screen recording apps to record YouTube videos, or use some mirror software to record iPhone/iPad on Windows and Mac and create a YouTube video.
1.QuickTime
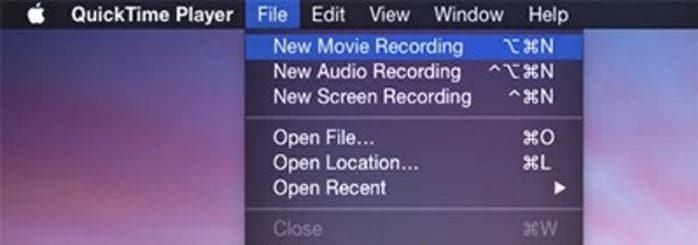
QuickTime can be used to record the screen of your iPhone or iPad in addition to the screen of your Mac. First you need to connect your device to your computer with a USB port. Instead of selecting ‘New Screen Recording’ in QuickTime, the way you would when recording your computer screen, select ‘New Movie Recording’. In the recording window click on the arrow next to the ‘Record’ button and choose your iOS device where it asks you to choose a camera. This method only works with the Mac version of QuickTime.
2.Reflector
Reflector is mirroring software available for Mac or PC. Mirroring software creates a clone of your device’s interface on your computer screen. Once your device is being displayed on the screen of your computer you can capture it by recording your computer screen. You can download Reflector from Airsquirrels.com.
In order to use Reflector to mirror your device, you will also need to use AirPlay on your iPhone or iPad, and your device and your computer will need to be connected to the same wifi network. In AirPlay, make sure mirroring is on and select your computer as a receiver. Your computer will not show up as an option if you do not have Reflector running.
Conclusion
Above are the screen and video recording software programs that we picked up for you to make a YouTube tutorial, how-to or software review video on most popular platforms including Windows and Mac computer and Android and iOS smartphones. Besides recording, you may also need thebest video editing software for editing YouTube videos . Watch the video tutorial to check how to edit your YouTube videos and get to know some terms in video editing. Remember to download Filmora and have a try today.
Richard Bennett
Richard Bennett is a writer and a lover of all things video.
Follow @Richard Bennett
Richard Bennett
Mar 27, 2024• Proven solutions
Taking viewers ‘in app’ is an effective way to show them how you work or play. A screen recording is a footage recorded not from your camera, but directly from the interface of your computer or mobile device. A screen recording might be footage from a game, a software tutorial, or a demonstration of your creative process in a program.
We have picked up the best 10 paid screen recorders for YouTube on Windows and Mac, but if you are looking for a complete solution to record videos on Windows, Mac, Android or iOS phone to make tutorial videos, how-to videos, or demonstration videos, or products/software review videos, or gameplay videos on YouTube, here is the all the information you need. This article will introduce you to the best screen recorders on computers, Android devices, and iPhones for YouTube.
- Part 1: Best Screen Recording Software for Recording Windows/Mac Screen for YouTube
- Part 2: Best Screen Capturing Apps for Recording Your Android Screen (No Root)
- Part 3: Best Screen Recording Apps for Recording on iOS Devices for YouTube Videos
Part 1: Best Software for Recording Your Computer Screen for YouTube Videos
1.Filmora Video Editor [Windows & Mac, Freemium]
In addition to being a powerful editing tool, Filmora can also be used to record your computer screen. In Filmora, just select Media and then Record. In the Record menu, click Record PC Screen. The recording window will pop up and you will be able to decide whether you want to record your full screen, a customized selection of it, or a specific target window. After you have finished recording your clip will automatically appear in the Media menu in your Filmora project so you can edit it right away. You can download Filmora from Filmora.wondershare.com if you do not have it yet.
If you just want to make a how-to video with some captured screens, Filmora will be a good choice. Check the video below about how to record Screen with Filmora.
2.Wondershare DemoCreator
DemoCreator is a specially designed screen recording software from Wondershare for both gameplay recording, tutorial making, screen capturing, and webcam recording as well. You can use it to record the full screen of your Windows or Mac computer or a particular part on the screen. The best part is that you can both record and edit the video in DemoCreator and upload it to YouTube directly. This screen recorder for YouTube is a perfect solution for those who want to capture 120 frames per second and 4K videos.
3.VLC Media Player [Windows & Mac & Linux, Free]
VLC Media Player is a free media player that has a great screen recording feature. You can download it from Video LAN.org. In order to take a screen recording using VLC you first need to click on View and Advanced Controls. A lot of the more advanced features, like screen recording, are initially hidden so as not to confuse users, but selecting Advanced Controls will make them visible. Then you can go to Media and Open Capture Device. In the window that opens choose Desktop next to Capture Mode and click Play. VLC will start displaying your desktop in the player window. Now you just have to click Record.
Learn more details about how to record YouTube videos with VLC
4.QuickTime [Mac, Free]
QuickTime is the default media player for Mac users. To access QuickTime’s screen recording feature select File and New Screen Recording. In the window that pops up click on the arrow next to the Record button and choose a microphone. Then you can press Record. Your recording will not start right away. First, a window will pop up explaining that you can stop your recording by pressing ‘command-control-escape’. Although QuickTime is available for PCs the PC version does not have a screen recording feature.
Learn more details about how to record YouTube video and audio with QuickTime Player on Mac
Part 2: Recording Your Android Screen for YouTube Videos (No Root)
We have already described 4 ways of recording screen videos on Android , while in this part, we will introduce some useful screen recording apps for recording YouTube videos on Android phones.
1. AZ Screen Recorder
AZ Screen Recorder is free screen recording app for Android 5.0 Lollipop. Using AZ Screen Recorder you can simultaneously record from your phone’s camera and screen. This is useful if you want to shoot a video of yourself explaining an app to add into your final video. Although the basic version of AZ Screen Recorder is free there are in-app purchases.
2.Unlimited Screen Recorder
Unlimited Screen Recorder is also for 5.0 Lollipop and is free with in-app purchases. Like the name ‘Unlimited’ suggests you can use this app to record for as long as you want. There is no time limit. You can also record audio through Unlimited Screen Recorder so it is convenient to make a voiceover for your video.
There are very few options available for recording Android devices older than Lollipop without rooting your device.
Click here to check more screen recording apps to capture videos on Android
Part 3: Recording Your iOS Device Screen for YouTube Videos
With the release of iOS 11, recording on iPhone and iPad is much easier with the built-in screen recording tool . If your iOS is above 11 (including 11) version, you can record the screen with its in-app application, check this video to know the details:
Apart from recording with the built-in recording tool, you can also use some best iOS screen recording apps to record YouTube videos, or use some mirror software to record iPhone/iPad on Windows and Mac and create a YouTube video.
1.QuickTime
QuickTime can be used to record the screen of your iPhone or iPad in addition to the screen of your Mac. First you need to connect your device to your computer with a USB port. Instead of selecting ‘New Screen Recording’ in QuickTime, the way you would when recording your computer screen, select ‘New Movie Recording’. In the recording window click on the arrow next to the ‘Record’ button and choose your iOS device where it asks you to choose a camera. This method only works with the Mac version of QuickTime.
2.Reflector
Reflector is mirroring software available for Mac or PC. Mirroring software creates a clone of your device’s interface on your computer screen. Once your device is being displayed on the screen of your computer you can capture it by recording your computer screen. You can download Reflector from Airsquirrels.com.
In order to use Reflector to mirror your device, you will also need to use AirPlay on your iPhone or iPad, and your device and your computer will need to be connected to the same wifi network. In AirPlay, make sure mirroring is on and select your computer as a receiver. Your computer will not show up as an option if you do not have Reflector running.
Conclusion
Above are the screen and video recording software programs that we picked up for you to make a YouTube tutorial, how-to or software review video on most popular platforms including Windows and Mac computer and Android and iOS smartphones. Besides recording, you may also need thebest video editing software for editing YouTube videos . Watch the video tutorial to check how to edit your YouTube videos and get to know some terms in video editing. Remember to download Filmora and have a try today.
Richard Bennett
Richard Bennett is a writer and a lover of all things video.
Follow @Richard Bennett
Spectacular Ensemble: Photos + Music, Videos
People capture loads of photos of the places they visit and the events they attend for social media and future memories. If you check the online trend, users are shifting from static photos to short videos for a better visual experience. That is why you can consider creating videos out of the photos you have captured and adding suitable music in the background to make your memories visually pleasing.
All you need is a video maker with music and pictures. There is no dearth of video makers, but not all live up to the expectation. There are online video markers as well as video maker software applications available. In this article, we have picked the best video maker with photos and music and illustrated how to make a video with music and photos. We have also listed the popular video makers for your consideration.
Part 1. Best Video maker with music and pictures
We recommend Wondershare Filmora as the best video maker with photos and music. Filmora is considered one of the best video makers and editors in the world. Filmora allows you to import photos of different file formats so that you can make slideshow-like video. There are loads of transitions as well as effects available that you can place in between the photos so that the transition becomes eye-pleasing.
Similarly, you can import any audio or music file. Besides, there are stock music files available that you can apply to your slideshow video. You can even add colourful titles and graphical elements to enhance the video content. Here are the steps on how to make a video with your photos and music.
For Win 7 or later (64-bit)
For macOS 10.12 or later
Step 1: Install Filmora and Start Your Project
Download and install Wondershare Filmora as per your operating system. Filmora is available for Windows and Mac. Launch Filmora and click on New Project. Drag and drop your photos on Project Media folder.
Step 2: Import Photos and Arrange Them in Order
Drag and drop the photos on the timeline as per your sequence you want in your slideshow video. You can change the order of the photos as well as stretch durations of photos in the video from the timeline. You have to arrange the photos side by side without any gap so that there is no black screen in between the transition.

Step 3: Add Transition Effects
After arranging the photos side by side, you have to apply transition effects so that the change from one photo to another is eye-soothing. There are loads of transitions available and you can get them from Transition option located at the top bar.
Go through the different categories of transitions. Drag and drop the transition you want on to the photo after which you want the transition effect to play. Do the same for all photos except the last one. You can apply different transitions effects for different photos as per your preference.

Step 4: Add Background Music
Now it is time to add a background music to the entire video. You can drag and drop any music file from your hard drive to Filmora Project Media. Thereafter, you can drag and drop the audio file on the audio timeline below the photo timeline. You can also add audio effects from the top bar if required.

Step 5: Export Your Video
Once you are done adding photos, transitions, and music, you should play the video on Filmora and make adjustments wherever required. Thereafter, click on Export button and save the video file on your hard drive in your desired file format.

Part 2. Popular video makers with photos and music
Here is the list of the popular premium and free video maker with music and pictures that you can consider for making slideshow videos.
1. Invideo
Invideo is a popular online video maker with music and pictures along with 5000 customizable templates. These templates help users to transform photos into videos with background music in a few minutes. Besides, the platform offers a wide range of stock media files. You can create videos in more than 70 languages, and the editor is user-friendly for users of all ages.
All you need to do is select a template and customize it if required. Thereafter, you need to import the photos, add text effects, and finally add music. There are options for trimming, cropping, and adding stickers, texts and transitions. The free version lets you export 60 videos per month but with a watermark. Here are the top features of Invideo.
- 5000+ customizable templates for all video types.
- 9+ million stocks videos, photos, and audio files.
- Add transitions, stickers, animations, and texts to videos.
- Trim and crop videos and audio files.
- Add voiceover as well as fade-in and fade-out effects.
- Work in collaboration with team members.

2. Icecream slideshow maker
Icecream slideshow maker is a free video maker with music and pictures for Windows users only. The software is compatible with Windows 10, 8, 7 and XP. You can create a high-quality video from your photos with music instantly. There is no need for any prior experience to use the video maker. There are beautiful transitions available that will enhance the video quality and make your presentation stand out. The free version allows up to 10 slides per video and saving the video in Webm file format. You can upgrade to Pro version to get rid of the limitations.
You can change photo and transition duration as per requirements. The software supports various audio file formats that you can import for your video. You can also add animations to texts so that they can shine in your video. The software allows sharing the video directly to YouTube. Besides, you can save it on Google Drive and Dropbox. Here are all the features of Icecream slideshow maker that you should be aware of.
- Super intuitive user interface for all users.
- Add colourful text, transitions, and animations.
- Save and resume project work as per time availability.
- Pro version allows saving video in 4K resolution.
- Video output in MP4, AVI, MOV and WEBM formats.
- Suitable for low-end computers.

3. PhotoStage Slideshow
PhotoStage Slideshow by NCH Software is another video maker software for Windows users. The software comes with an easy and automated wizard for users to transform photos with a video instantly. There is also an image editor available to adjust different parameters of your photos before making a video out of them.
Besides, there are various transitions available to apply and you can add captions and narration as per your requirements. In fact, along with photos, you can add video clips to create the ultimate video. Moreover, there are tools available to edit your audio and music file and add different effects. Here are the top features of PhotoStage Slideshow Software.
- Supports Full HD and 4K video resolution.
- Edit and fine-tune photos and add captions.
- Wide range of eye-catching and popular transitions.
- Edit audio and music file and add different effects.
- Save video file in MOV, MP4, GIF, AVI, 3GP and more.
- Directly share on YouTube, Vimeo, Flickr, HTML5.

4. Clideo video maker
Clideo Video Maker is a free online video maker with song. All you need to do is upload photos from your hard drive and choose a preset depending on the online platform where you want to upload the video. Thereafter, add audio and trim it as per video length. Then add smooth transitions and the video will be ready to export on your hard drive or cloud storage.
The online video maker supports different video and audio file format for importing and exporting. You can use the editor on any device starting from Windows and Mac to Android and iPhone. The user interface is very simple to use and it does not store video files for more than a day. Here are all the features of Clideo video maker.
- Upload photos from hard drive, and cloud storage.
- Presets for Instagram, Stories, YouTube, and Facebook videos.
- Add different photos, audio, and video clips to make videos.
- Zoom & crop option along with image duration elongation.
- Suitable for computer and mobile phone users.

5. Movavi Slideshow Maker
Movavi Slideshow Maker is available for both Windows and Mac users. The software comes with a wizard to allow users to create video from photos. However, advanced users can create video from photos manually as well. You get to add photos, audio files and video clips of different file formats. Most importantly, there are various templates available to create professional-quality videos.
There are loads of effects, filters, titles, and stickers available to apply on your video. The free version is limited to seven days usage. The output video will have watermark on it and you can purchase the premium version to avoid all limitations. Here are the top features of Movavi Slideshow Maker.
- Slideshow wizard for fast and easy video creation.
- Manual mode for advanced users to create customized video.
- Supports different types of media file formats.
- Different types of templates for instant video making.
- Wide ranges of transitions, filters, titles, and stickers.

Conclusion
If you are making a video from your photos, you can use an online video maker with photos and music free. If you are someone who wants to make professional-quality videos from photos, a premium video maker is best for you. If you are going to upload your slideshow videos on social media and video streaming platforms, we recommend Wondershare Filmora as the best video maker with music and pictures.
For macOS 10.12 or later
Step 1: Install Filmora and Start Your Project
Download and install Wondershare Filmora as per your operating system. Filmora is available for Windows and Mac. Launch Filmora and click on New Project. Drag and drop your photos on Project Media folder.
Step 2: Import Photos and Arrange Them in Order
Drag and drop the photos on the timeline as per your sequence you want in your slideshow video. You can change the order of the photos as well as stretch durations of photos in the video from the timeline. You have to arrange the photos side by side without any gap so that there is no black screen in between the transition.
Step 3: Add Transition Effects
After arranging the photos side by side, you have to apply transition effects so that the change from one photo to another is eye-soothing. There are loads of transitions available and you can get them from Transition option located at the top bar.
Go through the different categories of transitions. Drag and drop the transition you want on to the photo after which you want the transition effect to play. Do the same for all photos except the last one. You can apply different transitions effects for different photos as per your preference.
Step 4: Add Background Music
Now it is time to add a background music to the entire video. You can drag and drop any music file from your hard drive to Filmora Project Media. Thereafter, you can drag and drop the audio file on the audio timeline below the photo timeline. You can also add audio effects from the top bar if required.
Step 5: Export Your Video
Once you are done adding photos, transitions, and music, you should play the video on Filmora and make adjustments wherever required. Thereafter, click on Export button and save the video file on your hard drive in your desired file format.
Part 2. Popular video makers with photos and music
Here is the list of the popular premium and free video maker with music and pictures that you can consider for making slideshow videos.
1. Invideo
Invideo is a popular online video maker with music and pictures along with 5000 customizable templates. These templates help users to transform photos into videos with background music in a few minutes. Besides, the platform offers a wide range of stock media files. You can create videos in more than 70 languages, and the editor is user-friendly for users of all ages.
All you need to do is select a template and customize it if required. Thereafter, you need to import the photos, add text effects, and finally add music. There are options for trimming, cropping, and adding stickers, texts and transitions. The free version lets you export 60 videos per month but with a watermark. Here are the top features of Invideo.
- 5000+ customizable templates for all video types.
- 9+ million stocks videos, photos, and audio files.
- Add transitions, stickers, animations, and texts to videos.
- Trim and crop videos and audio files.
- Add voiceover as well as fade-in and fade-out effects.
- Work in collaboration with team members.
2. Icecream slideshow maker
Icecream slideshow maker is a free video maker with music and pictures for Windows users only. The software is compatible with Windows 10, 8, 7 and XP. You can create a high-quality video from your photos with music instantly. There is no need for any prior experience to use the video maker. There are beautiful transitions available that will enhance the video quality and make your presentation stand out. The free version allows up to 10 slides per video and saving the video in Webm file format. You can upgrade to Pro version to get rid of the limitations.
You can change photo and transition duration as per requirements. The software supports various audio file formats that you can import for your video. You can also add animations to texts so that they can shine in your video. The software allows sharing the video directly to YouTube. Besides, you can save it on Google Drive and Dropbox. Here are all the features of Icecream slideshow maker that you should be aware of.
- Super intuitive user interface for all users.
- Add colourful text, transitions, and animations.
- Save and resume project work as per time availability.
- Pro version allows saving video in 4K resolution.
- Video output in MP4, AVI, MOV and WEBM formats.
- Suitable for low-end computers.
3. PhotoStage Slideshow
PhotoStage Slideshow by NCH Software is another video maker software for Windows users. The software comes with an easy and automated wizard for users to transform photos with a video instantly. There is also an image editor available to adjust different parameters of your photos before making a video out of them.
Besides, there are various transitions available to apply and you can add captions and narration as per your requirements. In fact, along with photos, you can add video clips to create the ultimate video. Moreover, there are tools available to edit your audio and music file and add different effects. Here are the top features of PhotoStage Slideshow Software.
- Supports Full HD and 4K video resolution.
- Edit and fine-tune photos and add captions.
- Wide range of eye-catching and popular transitions.
- Edit audio and music file and add different effects.
- Save video file in MOV, MP4, GIF, AVI, 3GP and more.
- Directly share on YouTube, Vimeo, Flickr, HTML5.
4. Clideo video maker
Clideo Video Maker is a free online video maker with song. All you need to do is upload photos from your hard drive and choose a preset depending on the online platform where you want to upload the video. Thereafter, add audio and trim it as per video length. Then add smooth transitions and the video will be ready to export on your hard drive or cloud storage.
The online video maker supports different video and audio file format for importing and exporting. You can use the editor on any device starting from Windows and Mac to Android and iPhone. The user interface is very simple to use and it does not store video files for more than a day. Here are all the features of Clideo video maker.
- Upload photos from hard drive, and cloud storage.
- Presets for Instagram, Stories, YouTube, and Facebook videos.
- Add different photos, audio, and video clips to make videos.
- Zoom & crop option along with image duration elongation.
- Suitable for computer and mobile phone users.
5. Movavi Slideshow Maker
Movavi Slideshow Maker is available for both Windows and Mac users. The software comes with a wizard to allow users to create video from photos. However, advanced users can create video from photos manually as well. You get to add photos, audio files and video clips of different file formats. Most importantly, there are various templates available to create professional-quality videos.
There are loads of effects, filters, titles, and stickers available to apply on your video. The free version is limited to seven days usage. The output video will have watermark on it and you can purchase the premium version to avoid all limitations. Here are the top features of Movavi Slideshow Maker.
- Slideshow wizard for fast and easy video creation.
- Manual mode for advanced users to create customized video.
- Supports different types of media file formats.
- Different types of templates for instant video making.
- Wide ranges of transitions, filters, titles, and stickers.
Conclusion
If you are making a video from your photos, you can use an online video maker with photos and music free. If you are someone who wants to make professional-quality videos from photos, a premium video maker is best for you. If you are going to upload your slideshow videos on social media and video streaming platforms, we recommend Wondershare Filmora as the best video maker with music and pictures.
Also read:
- [Updated] Eliminating Backlogged Videos From Your YouTube History
- Exploring the Best Free Video Editing Tools of This Year
- Optimal Video Formats to Skyrocket Your YouTube Popularity
- [New] Awesome Techniques for Streaming and Uploading on iOS Devices
- 2024 Approved Crafting Captivating Thumbnails A Comprehensive Guide for YouTube Creators
- Infuse Video Magic Crafting Captivating Background Images for Thumbnails
- Harnessing Powerful Tools for Effective YouTubers' SEO
- Investing Wisdom in Webcams Finest Stocks Channels
- [New] Downloading Videos Directly to iPhone/iPad - YouTube's Quick Guide
- [New] Alternatives That Shine Top 27 Non-YouTube Videostreaming Sites
- Essential Guide to Top 12 Free and Paid Gaming Introduction Creators
- Boosting Revenue with the Perfect YouTube Trailer Strategy for 2024
- [Updated] Enhance Viewer Engagement The Top 6 Methods for Higher YouTube Audience Retention
- Best Camera Apps to Shoot and Record Videos on iPhone and Andriod Phones
- [New] Behind the Scenes Creating Successful YouTube Shorts Videos
- Charting Financial Horizons The Threefold Technique for Analyzing YouTube Earning Data
- Calculating YouTube Profits Instantly
- [Updated] Boost Engagement with Tailored Templates for Video Info
- In 2024, Bright Beginnings on YouTube Launching and Revenue Strategies
- 2024 Approved Elevate Your FreeFire Gameplay on YouTube Channels
- [Updated] Best Livestream Capturing Solutions for Content Makers
- Ultimate Crew for Photographic Rhythm Films
- 2024 Approved 10 Most Popular Beauty Gurus on YouTube
- Diving Into the World of Haul Video Content
- [Updated] Dissecting YouTubes' User Commentary
- Secrets of Hosting No-Cost Seminars on the World’s Largest Video Platform
- 2024 Approved Captivating Audiences with Thrilling Unboxing Vids
- The Viewer Count Chronicles Mastering the Math of Monetizing Moments in YouTube Space
- In 2024, 10 Best YouTube Conversion Tools for WebM Format
- Pro Tools, Pro Results Elevating Video Quality in YouTube Editing
- [New] Curb Automated YouTube Content Feeds
- 10 Best Non-YouTube Video Platforms IPhone/Android Edition for 2024
- Bridging Gaps Transforming Trend Data Into Video Concepts
- A Comprehensive Review Camera Lenses for YouTube for 2024
- Crafting Comfortable Cinematography Amidst the Chill
- Best Practices Choosing YouTube's Most Popular Video Formats
- In 2024, Boost Your Channel's Income Understanding Critical View Thresholds
- Ultimate Guide to YouTube App on iPhones and Androids
- 2024 Approved Cut to Perfection Editing Video Duration on YouTube
- In 2024, Decoding Chroma Techniques From Raw Footage to Final Cut
- Accelerate YT Growth Strategies for 1K+ Subscribers for 2024
- 2024 Approved Channel Enhancement Through Unnatural Popularity Gains
- 2024 Approved Choosing the Right Platform A Look at Vimeo, YouTube & DailyMotion
- Tuning Into Trends Effective Music Uploads
- Everything You Need to Know about Lock Screen Settings on your Honor Magic 6 Lite
- Bridging Content and Commerce A Youtuber's Guide to Sponsorship
- Audio Mastery Top Strategies for Win10 Users for 2024
- [Updated] In 2024, Retro Remake Applying Modern Filters on Previous Media Posts
- How To Enable USB Debugging on a Locked Tecno Pova 5 Pro Phone
- New In 2024, Professional Results Without the Professionals DIY Movie Making for Beginners
- In 2024, 10 Excellent Web-Based Screen Capture Solutions
- Integrating Luts Into Film Colorwork
- Full Guide to Unlock iPhone 12 Pro Max with iTunes
- [New] 2024 Approved Infinite Loop Twitter's Live Video Saga in '23
- [New] In 2024, Webcam Techniques for Live Recording PowerPoint
- Modern Mobile Maximizing VR/360 Video on Android (Update 2023)
- 3 Solutions to Hard Reset Vivo V27 Pro Phone Using PC | Dr.fone
- Elevate the Experience with These Essential Flight Gears
- In 2024, 4 Most-Known Ways to Find Someone on Tinder For Asus ROG Phone 8 Pro by Name | Dr.fone
- Title: "In 2024, Best Screener Tech Perfect for Creating Viral YouTube Moments"
- Author: Kevin
- Created at : 2024-05-25 15:26:07
- Updated at : 2024-05-26 15:26:07
- Link: https://youtube-videos.techidaily.com/in-2024-best-screener-tech-perfect-for-creating-viral-youtube-moments/
- License: This work is licensed under CC BY-NC-SA 4.0.
