
:max_bytes(150000):strip_icc()/PS5-Slim-Wide-fe2f63e3b1cf443a81fed71f109aacd0.jpg)
"In 2024, Best of Breed Top-Rated Youtuber's Streaming Arsenal"
Best of Breed: Top-Rated Youtuber’s Streaming Arsenal
Best YouTube Live Streaming Software and Hardware You Should Know

Richard Bennett
Mar 27, 2024• Proven solutions
- Part1.Best Software for Live Streaming Video to YouTube
- Part2.Best Software for Live Streaming Game to YouTube
- Part3.Best Software for Live Streaming Mobile to YouTube
- Part4.Hardware for Live Streaming to YouTube
Best Video Editor for You


Best Software for Live Streaming Video to YouTube
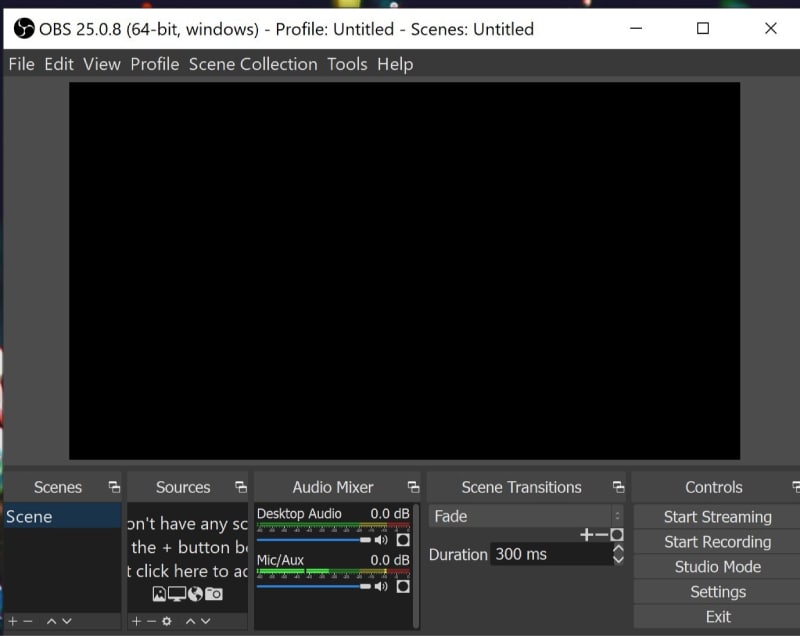
1.OBS:
Price: It is available for free.
OBS or Open Source Broadcaster is a popular recording and live streaming software tool that can be easily operated by all beginners. The best is that you can avail this software tool as an open source so it is possible to customize things as per need.
Key Features:
- It works perfectly on Linux, Mac and Windows.
- Advanced video editing tool with customized transitions.
- Filters, audio mixers, noise suppressor and automatic gain booster added for development of classic videos.
- Users can easily access light and dark themes as per their need.
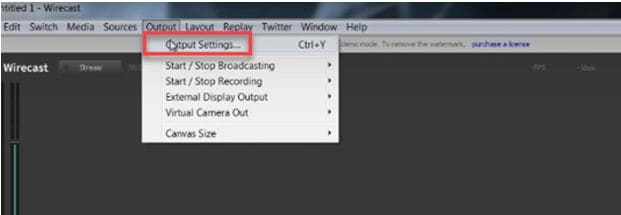
2. Wirecast Play:
Price:
- Wirecast Play 6: Free/ $9.99
- Wirecast Play Studio 6: $279
- Wirecast Play Pro 6: $549.
Wirecast play allows users to enjoy professional kind of stuff with impressive live recording facilities. Users can easily encode all live streams over multiple platforms or servers.
- The professional version of this software tool allows users to add web stream, Ip cameras and input sources.
- It possesses so many professional level editing features such as advanced audio controls, virtual sets, reply and live scoreboards.
- With its interactive user interface, Wirecast is rated as one of the most useful multicamera type live streaming package.
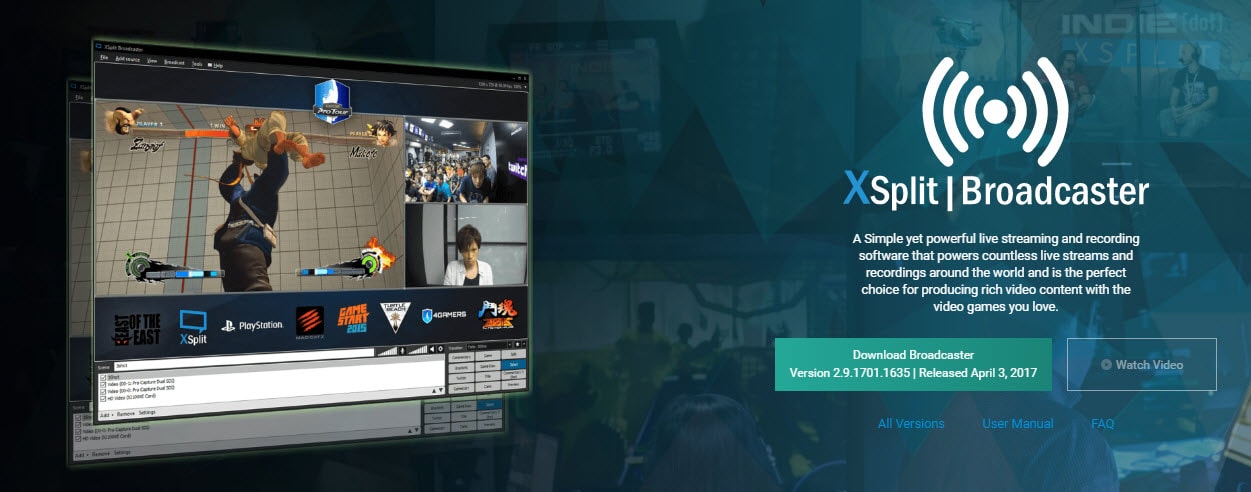
3. XSplit Broadcaster:
Price: Free and Paid
Here is a simple yet highly powerful live streaming software tool that can produce rich video content with its impressive user interface. It possesses all basic video development tools along with audio support feature. You will be glad to know that Xsplit offers Full HD recording ability; other then this you can access social features, in game annotations, in game production control as well as unique live production features.
Key Features:
- XSplit supports almost all capture cards.
- It possesses so many custom integrations and plugins.
- Easy video editing supported with professional production tools.
- You will be able to access notifications and chat option for organizing uploads in interactive manner.
Best Software for Live Streaming Game to YouTube
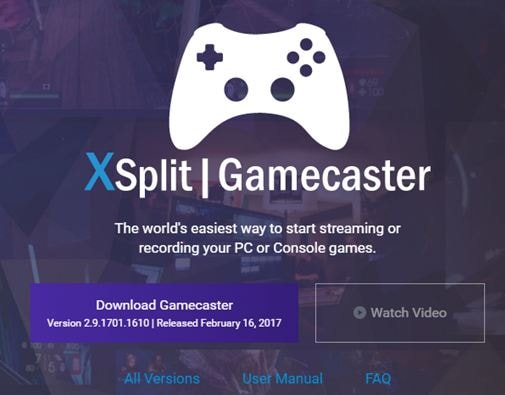
1. XSplit Gamecaster:
Price: Free and Paid
If you love gaming then Xsplit can assist you to share your memorable gaming moments on social media sites so that viewers can come to know about your creativity. Xsplit Gamecaster works perfectly with console games as well as on personal computers.
Key Features:
- It extends its support to all latest capture card designs.
- Users can easily switch to webcam mode and background can be easily removed.
- It offers loads of professional quality editing features.
- There are so many customizable integrations and plugins.
- Chat and notification feature supported.
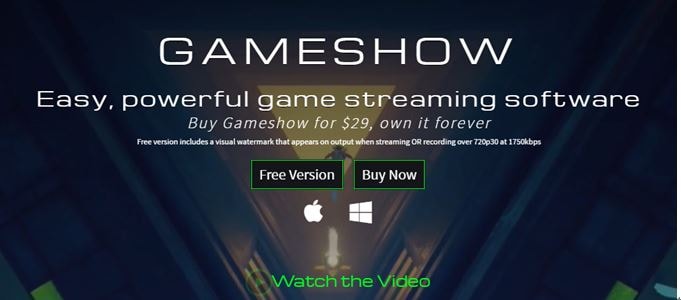
2. Gameshow (Mac/Win):
Price: $29
It is possible to start live streaming within few seconds using your gameshow oftware tool. Gameshow will help you to pick right template, adjust widgets and start streaming content within few seconds. It is possible to stream content directly to all popular social media platforms like Hitbox, YouTube and Twitch.
Key Features:
- It offers multiple layer combinations for development of interactive videos.
- Users will have complete control over scene development.
- It is possible to create playlists using transitions and customized timing effects.
- It works with low CPU usage hence will not affect your device performance.
Best Software for Live Streaming Mobile to YouTube
1. Airserver:
Price: $7.99 to $11.99 only for educational needs, $14.99- Consumer License and $19.99 for Business License.
AirServer is one of the most advanced and interactive screen mirroring type software receiver tools for Xbox, PC and Mac etc. Using this tool, users can easily receive content from chromcast device, Apple TV, Miracast Streams, Google Cast and AirPlay etc.
Key Features:
- It is designed with zero client footprint feature that means everything is just ready for your needs and you will not even need any third party support.
- This software tool enables collaboration between various applications that are working on different platforms.
- It is compatible with Windows, Chrombook and Android platform.
- Comes with retina quality mirroring that can effectively improve picture quality.

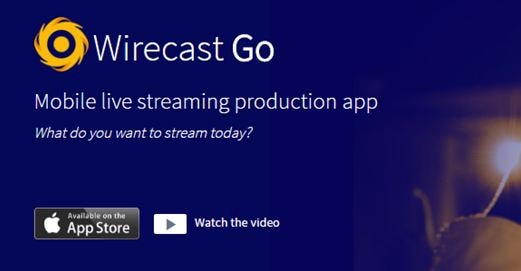
2. Wirecast Go (iOS device only):
Price: Free and upgrades demand payment of $5.99 only.
It is possible to stream rich video content from iPhone directly to Youtube using Wirecast platform. Users will be able to stream their interactive videos with effective editing and customization tools like text, replays and graphics etc. This software tool is compatible with iPod Touch, iPad and iPhone.
Key Features:
- One click type YouTube streaming option.
- Unlimited streaming available even for free version users.
- One can easily add graphics, logos and images for stream content.
- It replays all highlights for live broadcasts.
Hardware for Live Streaming to YouTube
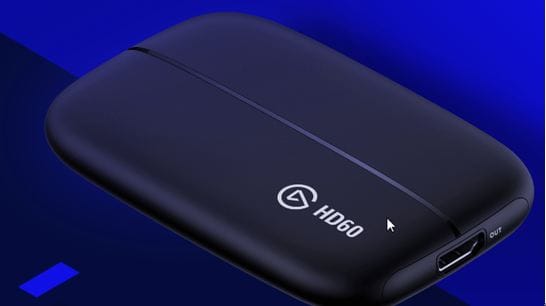
1. Elgato Game Capture HD 60:
Price: $179.95 only
Elgato Game Capture HD 60 is well known for its wide range of compatibility, efficiency and set of powerful features that assists in top quality content development. You can develop videos with 1080p resolution at 60fps frame rate using Elgato tool.
Key Features:
- Rich content quality with Full HD video support.
- It can easily record your overlays, webcam, audio and gameplay with additional facility to separate them as per need so that users can access anything upon selection.
- Easy editing functions that assist in direct upload.
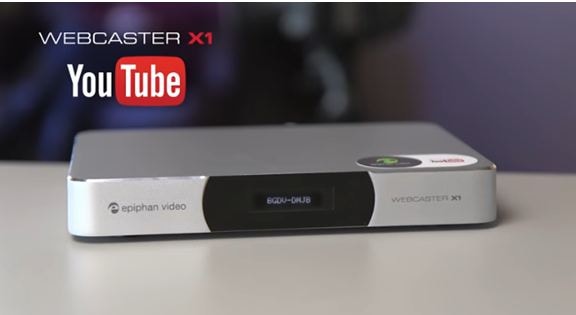
2. Webcaster X1 for YouTube:
Price: $329.95 only.
Webcaster allows users to enjoy interactive video uploading experience while offering easy connectivity to DSLR and dedicated Video camera units so that videos can be directly sent to YouTube.
Key Features:
- It offers easy setup options and starts automatically when you pair it up with a device using pairing code.
- This software tool can accept high quality audio content via HDMI inputs.
- It is possible to use advanced configuration options like keyboard, mouse and monitor connectivity for precise live streaming.
- One can easily make selections between Wi-Fi and Ethernet connections for content uploading.
Richard Bennett
Richard Bennett is a writer and a lover of all things video.
Follow @Richard Bennett
Richard Bennett
Mar 27, 2024• Proven solutions
- Part1.Best Software for Live Streaming Video to YouTube
- Part2.Best Software for Live Streaming Game to YouTube
- Part3.Best Software for Live Streaming Mobile to YouTube
- Part4.Hardware for Live Streaming to YouTube
Best Video Editor for You
Best Software for Live Streaming Video to YouTube
1.OBS:
Price: It is available for free.
OBS or Open Source Broadcaster is a popular recording and live streaming software tool that can be easily operated by all beginners. The best is that you can avail this software tool as an open source so it is possible to customize things as per need.
Key Features:
- It works perfectly on Linux, Mac and Windows.
- Advanced video editing tool with customized transitions.
- Filters, audio mixers, noise suppressor and automatic gain booster added for development of classic videos.
- Users can easily access light and dark themes as per their need.
2. Wirecast Play:
Price:
- Wirecast Play 6: Free/ $9.99
- Wirecast Play Studio 6: $279
- Wirecast Play Pro 6: $549.
Wirecast play allows users to enjoy professional kind of stuff with impressive live recording facilities. Users can easily encode all live streams over multiple platforms or servers.
- The professional version of this software tool allows users to add web stream, Ip cameras and input sources.
- It possesses so many professional level editing features such as advanced audio controls, virtual sets, reply and live scoreboards.
- With its interactive user interface, Wirecast is rated as one of the most useful multicamera type live streaming package.
3. XSplit Broadcaster:
Price: Free and Paid
Here is a simple yet highly powerful live streaming software tool that can produce rich video content with its impressive user interface. It possesses all basic video development tools along with audio support feature. You will be glad to know that Xsplit offers Full HD recording ability; other then this you can access social features, in game annotations, in game production control as well as unique live production features.
Key Features:
- XSplit supports almost all capture cards.
- It possesses so many custom integrations and plugins.
- Easy video editing supported with professional production tools.
- You will be able to access notifications and chat option for organizing uploads in interactive manner.
Best Software for Live Streaming Game to YouTube
1. XSplit Gamecaster:
Price: Free and Paid
If you love gaming then Xsplit can assist you to share your memorable gaming moments on social media sites so that viewers can come to know about your creativity. Xsplit Gamecaster works perfectly with console games as well as on personal computers.
Key Features:
- It extends its support to all latest capture card designs.
- Users can easily switch to webcam mode and background can be easily removed.
- It offers loads of professional quality editing features.
- There are so many customizable integrations and plugins.
- Chat and notification feature supported.
2. Gameshow (Mac/Win):
Price: $29
It is possible to start live streaming within few seconds using your gameshow oftware tool. Gameshow will help you to pick right template, adjust widgets and start streaming content within few seconds. It is possible to stream content directly to all popular social media platforms like Hitbox, YouTube and Twitch.
Key Features:
- It offers multiple layer combinations for development of interactive videos.
- Users will have complete control over scene development.
- It is possible to create playlists using transitions and customized timing effects.
- It works with low CPU usage hence will not affect your device performance.
Best Software for Live Streaming Mobile to YouTube
1. Airserver:
Price: $7.99 to $11.99 only for educational needs, $14.99- Consumer License and $19.99 for Business License.
AirServer is one of the most advanced and interactive screen mirroring type software receiver tools for Xbox, PC and Mac etc. Using this tool, users can easily receive content from chromcast device, Apple TV, Miracast Streams, Google Cast and AirPlay etc.
Key Features:
- It is designed with zero client footprint feature that means everything is just ready for your needs and you will not even need any third party support.
- This software tool enables collaboration between various applications that are working on different platforms.
- It is compatible with Windows, Chrombook and Android platform.
- Comes with retina quality mirroring that can effectively improve picture quality.
2. Wirecast Go (iOS device only):
Price: Free and upgrades demand payment of $5.99 only.
It is possible to stream rich video content from iPhone directly to Youtube using Wirecast platform. Users will be able to stream their interactive videos with effective editing and customization tools like text, replays and graphics etc. This software tool is compatible with iPod Touch, iPad and iPhone.
Key Features:
- One click type YouTube streaming option.
- Unlimited streaming available even for free version users.
- One can easily add graphics, logos and images for stream content.
- It replays all highlights for live broadcasts.
Hardware for Live Streaming to YouTube
1. Elgato Game Capture HD 60:
Price: $179.95 only
Elgato Game Capture HD 60 is well known for its wide range of compatibility, efficiency and set of powerful features that assists in top quality content development. You can develop videos with 1080p resolution at 60fps frame rate using Elgato tool.
Key Features:
- Rich content quality with Full HD video support.
- It can easily record your overlays, webcam, audio and gameplay with additional facility to separate them as per need so that users can access anything upon selection.
- Easy editing functions that assist in direct upload.
2. Webcaster X1 for YouTube:
Price: $329.95 only.
Webcaster allows users to enjoy interactive video uploading experience while offering easy connectivity to DSLR and dedicated Video camera units so that videos can be directly sent to YouTube.
Key Features:
- It offers easy setup options and starts automatically when you pair it up with a device using pairing code.
- This software tool can accept high quality audio content via HDMI inputs.
- It is possible to use advanced configuration options like keyboard, mouse and monitor connectivity for precise live streaming.
- One can easily make selections between Wi-Fi and Ethernet connections for content uploading.
Richard Bennett
Richard Bennett is a writer and a lover of all things video.
Follow @Richard Bennett
Quick Guide: Enhancing YouTube Clips Using Windows Movie Maker
How to Edit YouTube videos in Windows Movie Maker
Richard Bennett
Mar 27, 2024• Proven solutions
We all know YouTube is an important platform for sharing and watching videos. Are you a YouTuber looking for how to edit YouTube video with the best YouTube movie maker? You have come the right place if you wonder how to edit a video for YouTube on Windows. While, if you have free Windows Movie Maker already installed on your computer, you can edit YouTube videos in Windows Movie Maker and then upload to YouTube directly. In this article, I will show you all the information you need to know about how to edit a video for YouTube in Windows Movie Maker with step by step.
You may also like : The Ultimate Guide to YouTube Video Editing Tools
In case that you do not have free Windows Movie Maker in your computer, you may need to download it from other website since Microsoft has removed the downloading link after January 2017. Please pay attention when downloading the Movie Maker application from website and never download it from untrusted website.
A better way to edit YouTube Videos - Wondershare Filmora supports many formats including MP4, MOV, MKV, and FLV, which means that you will not need to convert the files before and after editing. Like Windows Movie Maker, Wondershare Filmora is easy to use but comes with many more features that allow for professional-grade videos. One of these features is the animated text. There are also built-in presets that you can use to quickly edit your videos. There is also the option to directly upload a video to YouTube from Filmora, so no time is wasted waiting for a video to process.
Download Mac Version ](https://tools.techidaily.com/wondershare/filmora/download/ )
It is hard to list all the information of how to use Filmora to edit YouTube videos here, but we have composed an article about how to edit videos, you can check How to Edit Video in Filmora: Beginners’ Guide .
Windows Movie Maker YouTube: How to Edit YouTube Videos?
Before editing the video in Windows Movie Maker , you have to make sure that the video format is supported by free Windows Movie Maker. As you may know that Window Movie Maker only accept the following file formats at importing: .WMV/.ASF, .MPG (MPEG-1), .AVI (DV-AVI), .WMA, .WAV, and .MP3. Importing formats such as MP4/3GP, FLV and MOV, are also supported you are running Windows 7 or later and you have installed the necessary codec as well.
If your videos are not supported at importing in Windows Movie Maker, you may need to converter it first or choose a video editor like Filmora video editor which supports the almost all popular formats.
Step 1: Import Video Files Into Windows Movie Maker

To import video or photo into Windows Movie Maker, you can click on the button Add Videos or Photos located at the top of the program. A file window will open, and you can select the videos from any area of your computer. Once you have the files selected, click OK to import the files to the storyboard in the right hand panel.
You can also choose to record a webcam on your windows 10 or windows 7 computer and use it as the material.

Step 2: Trim/Cut/Split/Combine videos in Windows Movie Maker
Preview the video clips in the preview box. You can always use the Previous Frame or Next Frame to preview video frame by frame. When editing a video for YouTube, you may need to trim to remove unwanted parts from the video , combine several clips into a new one or split the video into several smaller parts .
To remove any parts of the video that you do not want in the final version of the video, locate the start frame that you want to remove in the storyboard, and then click the Split button to get the starting point of the split segment, and then locate the end frame that you want to remove and click Split again. Right-click the split video clip you want to remove and select Remove from the context menu. This can be done as many times as you want.

Step 3: Apply Transitions and Visual Effects to YouTube Video
Once you have all the clips that you want in your video, you can then add transitions to the video. At the top of Windows Movie Maker, there is a button that says Animations. This will open a menu that has different options. You need to select the clip, and add the transition that you want. The program does the rest of the work. You can see how it looks by clicking play.

Applying visual effects, overlays and filters work in the same way, but you click on Visual Effects, which is located at the top of the window. You can apply effects to any clip as along as the clip is selected first.
Step 4: Edit/Mute Audio in Video or Add New Audio Sound
If you are planning on adding music to your video, you should think about muting the audio in video or decrease the audio volume in Video. Double click the video clip to enter the Edit panel, and then then click on Video Volume button. You can then mute the audio by drag the volume slider to the left end. Of course, you can adjust the video audio volume per your need. This will affect the all the sounds on that video clip. If you want to mute all the clips, you need to select all the clips, or you will end up with one clip with no sound, and the rest of the clips having sound.

Once the sound has been adjusted on the clips, you can add new audio sound to the video. You can record narrations for your YouTube video in Windows Movie Maker by clicking Record narration button in Home tab and add music to video by clicking Add music button and select the music to import it. You can add music from your computer or find new music sound from AudioMicro, Vimeo or Free Music Archive online.

After importing the new audio file for your YouTube video, you can now adjust the music volume. In the Music Tools tab, there is an Option tab, you can control the volume and other options about the music.

Step 5: Add Title and Text to Video for YouTube
Windows Movie Maker allows you to add different types of text freely. You will see 3 buttons that allow different types of text to video: stationary title, captions and rolling credits. Click on Title, you can add text before the video begins; select Caption, you will write text to the video frames; and click Credits will add end credits to the end of the video.

After selecting the type of text you want, you can enter your text and edit the text effects. You can change the text duration and apply text visual effects, and change the text outline size and more.

Check the detailed information of How to Add Text in Windows Movie Maker .
Step 6: Save and Publish
Once all the edits are done, you can save the video by clicking on File then clicking on Publish Movie. You will need to select where you want to save the file and the file type. Since we are editing videos for YouTube, choose YouTube to upload the edited video to YouTube. You can also save the video in computer with different formats, resolution or burn to DVD. Windows Movie Maker also allows you to save the Video for Email or for mobile devices.

Conclusion
That’s it. That’s how you can edit your YouTube video with Windows Movie Maker. It is a great YouTube video editor to make video with various features. However, you may consider other YouTube movie maker as it won’t updated. Why not try Filmora. It is one of the best movie editor for YouTube. Download it now to have a try!
Download Mac Version ](https://tools.techidaily.com/wondershare/filmora/download/ )
Richard Bennett
Richard Bennett is a writer and a lover of all things video.
Follow @Richard Bennett
Richard Bennett
Mar 27, 2024• Proven solutions
We all know YouTube is an important platform for sharing and watching videos. Are you a YouTuber looking for how to edit YouTube video with the best YouTube movie maker? You have come the right place if you wonder how to edit a video for YouTube on Windows. While, if you have free Windows Movie Maker already installed on your computer, you can edit YouTube videos in Windows Movie Maker and then upload to YouTube directly. In this article, I will show you all the information you need to know about how to edit a video for YouTube in Windows Movie Maker with step by step.
You may also like : The Ultimate Guide to YouTube Video Editing Tools
In case that you do not have free Windows Movie Maker in your computer, you may need to download it from other website since Microsoft has removed the downloading link after January 2017. Please pay attention when downloading the Movie Maker application from website and never download it from untrusted website.
A better way to edit YouTube Videos - Wondershare Filmora supports many formats including MP4, MOV, MKV, and FLV, which means that you will not need to convert the files before and after editing. Like Windows Movie Maker, Wondershare Filmora is easy to use but comes with many more features that allow for professional-grade videos. One of these features is the animated text. There are also built-in presets that you can use to quickly edit your videos. There is also the option to directly upload a video to YouTube from Filmora, so no time is wasted waiting for a video to process.
Download Mac Version ](https://tools.techidaily.com/wondershare/filmora/download/ )
It is hard to list all the information of how to use Filmora to edit YouTube videos here, but we have composed an article about how to edit videos, you can check How to Edit Video in Filmora: Beginners’ Guide .
Windows Movie Maker YouTube: How to Edit YouTube Videos?
Before editing the video in Windows Movie Maker , you have to make sure that the video format is supported by free Windows Movie Maker. As you may know that Window Movie Maker only accept the following file formats at importing: .WMV/.ASF, .MPG (MPEG-1), .AVI (DV-AVI), .WMA, .WAV, and .MP3. Importing formats such as MP4/3GP, FLV and MOV, are also supported you are running Windows 7 or later and you have installed the necessary codec as well.
If your videos are not supported at importing in Windows Movie Maker, you may need to converter it first or choose a video editor like Filmora video editor which supports the almost all popular formats.
Step 1: Import Video Files Into Windows Movie Maker
To import video or photo into Windows Movie Maker, you can click on the button Add Videos or Photos located at the top of the program. A file window will open, and you can select the videos from any area of your computer. Once you have the files selected, click OK to import the files to the storyboard in the right hand panel.
You can also choose to record a webcam on your windows 10 or windows 7 computer and use it as the material.
Step 2: Trim/Cut/Split/Combine videos in Windows Movie Maker
Preview the video clips in the preview box. You can always use the Previous Frame or Next Frame to preview video frame by frame. When editing a video for YouTube, you may need to trim to remove unwanted parts from the video , combine several clips into a new one or split the video into several smaller parts .
To remove any parts of the video that you do not want in the final version of the video, locate the start frame that you want to remove in the storyboard, and then click the Split button to get the starting point of the split segment, and then locate the end frame that you want to remove and click Split again. Right-click the split video clip you want to remove and select Remove from the context menu. This can be done as many times as you want.
Step 3: Apply Transitions and Visual Effects to YouTube Video
Once you have all the clips that you want in your video, you can then add transitions to the video. At the top of Windows Movie Maker, there is a button that says Animations. This will open a menu that has different options. You need to select the clip, and add the transition that you want. The program does the rest of the work. You can see how it looks by clicking play.
Applying visual effects, overlays and filters work in the same way, but you click on Visual Effects, which is located at the top of the window. You can apply effects to any clip as along as the clip is selected first.
Step 4: Edit/Mute Audio in Video or Add New Audio Sound
If you are planning on adding music to your video, you should think about muting the audio in video or decrease the audio volume in Video. Double click the video clip to enter the Edit panel, and then then click on Video Volume button. You can then mute the audio by drag the volume slider to the left end. Of course, you can adjust the video audio volume per your need. This will affect the all the sounds on that video clip. If you want to mute all the clips, you need to select all the clips, or you will end up with one clip with no sound, and the rest of the clips having sound.
Once the sound has been adjusted on the clips, you can add new audio sound to the video. You can record narrations for your YouTube video in Windows Movie Maker by clicking Record narration button in Home tab and add music to video by clicking Add music button and select the music to import it. You can add music from your computer or find new music sound from AudioMicro, Vimeo or Free Music Archive online.
After importing the new audio file for your YouTube video, you can now adjust the music volume. In the Music Tools tab, there is an Option tab, you can control the volume and other options about the music.
Step 5: Add Title and Text to Video for YouTube
Windows Movie Maker allows you to add different types of text freely. You will see 3 buttons that allow different types of text to video: stationary title, captions and rolling credits. Click on Title, you can add text before the video begins; select Caption, you will write text to the video frames; and click Credits will add end credits to the end of the video.
After selecting the type of text you want, you can enter your text and edit the text effects. You can change the text duration and apply text visual effects, and change the text outline size and more.
Check the detailed information of How to Add Text in Windows Movie Maker .
Step 6: Save and Publish
Once all the edits are done, you can save the video by clicking on File then clicking on Publish Movie. You will need to select where you want to save the file and the file type. Since we are editing videos for YouTube, choose YouTube to upload the edited video to YouTube. You can also save the video in computer with different formats, resolution or burn to DVD. Windows Movie Maker also allows you to save the Video for Email or for mobile devices.
Conclusion
That’s it. That’s how you can edit your YouTube video with Windows Movie Maker. It is a great YouTube video editor to make video with various features. However, you may consider other YouTube movie maker as it won’t updated. Why not try Filmora. It is one of the best movie editor for YouTube. Download it now to have a try!
Download Mac Version ](https://tools.techidaily.com/wondershare/filmora/download/ )
Richard Bennett
Richard Bennett is a writer and a lover of all things video.
Follow @Richard Bennett
Also read:
- [New] Edible Imagery Stepwise Food Film Making
- [Updated] Aesthetic Ambitions Launching a YouTube Channel for Makeup Maven
- Gain Traction with Effective Video Descriptions and Tagging
- [Updated] Enhancing YouTube Viewing with Faster or Slower Video Pace
- 2024 Approved Boosting Bank Balance Effective Tactics for Mobile Video Money-Making
- 2024 Approved Cashing In on Content The Carminati Effect (AJay)
- Affordable Gear for Aspiring Content Creators for 2024
- [New] Boost Your Visual Storytelling Key Strategies for Solo Videos
- Premium 7 DSLR Picks For Ultimate Visual Storytelling Online
- In 2024, Enhance Your Online Skills A Guide to YouTube Editing via Sony Vegas
- In 2024, Cross-Platform Titling Guidelines for Mobile & Social Apps
- [New] Dissecting YouTube’s Features and Mechanisms After Uploading Content
- In 2024, Essential Non-Youtube Watching Options for Smartphones
- Free Video Credits Expertise - Top 6 Maker Guide
- In 2024, Analyzing TSeries’ Income via Subscriber Engagement on YouTube
- The Ultimate Newbie's Roadmap Building a Channel, Making Cash
- In 2024, Elite Online Collection of Video Downloader Tools
- 2024 Approved Effortless Free Extraction of YouTube Desktops
- YouTube Star-Level Stabilization Tools Listed
- A Compreenas Guide to Choosing Ideal Lenses for Filmmaking
- In 2024, 10 Record Screen and Upload to YouTube Tools [PC, Mac, Online]
- 2024 Approved Elevate Video Branding Incorporating Watermarks Into YouTube Media
- Essential Strategies for Effective Content Management in Creator Studio
- [Updated] Channel Expansion Sharing Your Show Across 30 Platforms
- Crafting the Perfect YouTube Channel Url A Quick Guide for 2024
- [New] Effortless Free Extraction of YouTube Desktops
- [Updated] Conquer YouTube Creator Studio A Comprehensive Guide
- The Comprehensive Overview of YouTube Shorts
- Unlocking Monetization Success A 3-Step System to Determine Your YouTube Earnings
- Expert Advice on Leveraging YouTube's Video Editor
- Exploring Income Average Creator Revenue From Adverts on YouTube?
- Digital Dreamland Gamers' Income Evolution
- In 2024, Accelerate Engagement - Implementing the Top 12 Video Growth Strategies
- Unlock YouTube Broadcast Google Meet Tutorial Steps
- Navigating YouTube Promo Landscape An Insider's Guide
- 2024 Approved Differentiate Yourself with These Critical YT Shorts Hacks
- Thriving on Both Sides Work and YouTubing Tips
- Acquire High-Quality Sounds for Media Creators for 2024
- YouTube Slow How to Slow Down YouTube Videos [3 Ways]
- YouTube's Time Loop Video Recovery Explained
- How to Make Fortnite Thumbnail in 30 Seconds
- Discover the Best Top 10 No-Cost Cinema Treasures Online for 2024
- [New] 15 Best YouTube Movies Channels for You to Kill Time
- [Updated] Essential Microphones Tailored to Channel Genres
- Transform Ads with Green Screen & Subs
- Enhance Viewing Experience Best YouTube Converters to AVI for 2024
- 2024 Approved Enhancing Your Content 10 Exceptional Reacting Techniques
- Erasing the Spotlight Hide Visuals in Shared Media
- [Updated] Elevate Your Content with Effective Video SEO
- Updated 2024 Approved From Capture to Share Mastering GoPro Quik Video Editing on MacBook
- In 2024, 9 Best Phone Monitoring Apps for Apple iPhone 11 Pro | Dr.fone
- Full Guide to Catch 100 IV Pokémon Using a Map On Samsung Galaxy S23 FE | Dr.fone
- [New] OBS Temporal Control Initiating Countdown Features Seamlessly
- [New] In 2024, Explore Interaction Tips for Uploading Videos From Twitter (Snapchat)
- [New] Audience Focus The Ultimate Guide to Creating Powerful TikTok Captions for 2024
- In 2024, How to Change/Fake Your Honor Magic 5 Lite Location on Viber | Dr.fone
- [Updated] Unlocking the Power of Capturing FaceTime Calls
- [New] In 2024, Transition Magic Quick Fade Tactics
- In 2024, Apple ID Locked or Disabled On iPhone 12 Pro? 7 Mehtods You Cant-Miss
- [New] How to Record WhatsApp Call for 2024
- In 2024, 8 Ultimate Windows 10 Video Grabber Apps You Must Try
- In 2024, How to Factory Reset iPad or iPhone 13 without iCloud Password or Apple ID?
- In 2024, Forgotten The Voicemail Password Of Realme C51? Try These Fixes
- Updated Mastering the Art of Music Video Creation Expert Advice for 2024
- In 2024, Melody Meets Momentum Harmonizing Sound with Imagery
- [Updated] Stop and Start Strategies FB Livestream Recovery Methods
- [New] How to Measure the Performance of IGTV Videos for 2024
- New Unlock Perfect Videos TikTok Aspect Ratio Guide for Creators
- Top 12 Prominent Realme C67 4G Fingerprint Not Working Solutions
- Bricked Your OnePlus 11 5G? Heres A Full Solution | Dr.fone
- New In 2024, 10 Best Free Chroma Key Apps for Android and iOS Devices 2023 Edition
- [New] MIUI Screen Recorder Review for 2024
- [Updated] 2024 Approved The Biggest Tweet Waves of 2023 Decoded
- [Updated] PartedPicture Breakdown
- How to Analyze an Editorial Cartoon
- How to to Mimic Professional Filming Gears
- In 2024, How Can I Use a Fake GPS Without Mock Location On Samsung Galaxy Z Flip 5? | Dr.fone
- 10 Best Fake GPS Location Spoofers for Lenovo ThinkPhone | Dr.fone
- [Updated] In 2024, Chromes' Favorite Video Clippers From Facebook
- The Art of Elevating Your PC with Windows 11 Update
- In 2024, How To Remove or Bypass Knox Enrollment Service On Realme GT 3
- In 2024, How To Open Your iPhone 12 Pro Max Without a Home Button
- In 2024, Easily Unlock Your OnePlus Nord CE 3 5G Device SIM
- [Updated] Ultimate Compilation of Leading 9 Mobile Meeting Services (iOS, Android)
- [Updated] Revolutionary Techniques to Change Video Borders in TikTok
- Repair Video Tool - Repair all your damaged video files of Samsung Galaxy S24
- 2024 Approved Go Full Screen with Ease Masterful Mac Scaling Methods for Insta Posts
- [Updated] Avoid Last-Minute FB Stress with These Free Tools
- In 2024, How To Enable USB Debugging on a Locked Xiaomi Redmi Note 12 4G Phone
- Google Play Services Wont Update? 12 Fixes are Here on Poco C50 | Dr.fone
- [Updated] How to Fix OBS Not Recording Audio
- Title: "In 2024, Best of Breed Top-Rated Youtuber's Streaming Arsenal"
- Author: Kevin
- Created at : 2024-05-25 15:25:59
- Updated at : 2024-05-26 15:25:59
- Link: https://youtube-videos.techidaily.com/in-2024-best-of-breed-top-rated-youtubers-streaming-arsenal/
- License: This work is licensed under CC BY-NC-SA 4.0.
