
:max_bytes(150000):strip_icc()/500-internal-server-error-explained-2622938-1485165a9b6942f09f2f5257682c0b6e.png)
In 2024, Automated Subscription Link Creation for Youtube
Automated Subscription Link Creation for Youtube
Create High-Quality Video - Wondershare Filmora
An easy and powerful YouTube video editor
Numerous video and audio effects to choose from
Detailed tutorials provided by the official channel
Building a YouTube channel isn’t a walk-in-the-park. As a content creator, you go toiling several processes to ensure its success. More so, you are probably building a brand and want people to know about your product or services. What about one easy way to remember the URL and share it with your potential subscribers? Besides sending such links to people, you’ll be reminding them to subscribe with just a click. And that’s YouTube auto-subscribe link. It is a more effective way than asking or directing to check your YouTube channel. They’ll probably not find it easy, maneuvering around numbers of other channels that bear names close to your channel. A visitor will quickly give up. You can save them the crap and engage more effectively.

In this article
01 How to subscribe to a YouTube channel?
02 How to create an auto-subscribe link for your YouTube channel?
03 Other tricks that work besides YouTube auto-subscribe.
How to subscribe to a YouTube channel?
A YouTube auto-subscribe link will be beneficial in many ways. Here are the steps to subscribe to a YouTube channel. You can subscribe from your phone or computer.
Using a phone
- First, open the YouTube app. Look for it on your phone’s home screen or search through apps.
- Then sign in to your “Google” account for you to be able to subscribe to YouTube channels.
- Next, locate the channel that you want to subscribe to. You can either subscribe from the channel home page or watch the channel video.
- Tap on the “Subscribe” button. The text on the “Subscribe” button will immediately change to “Subscribed” once you hit the subscribe tab.
- Finally, hit the “Subscriptions” tab to manage your channel subscriptions. You’ll also manage to see other latest updates from your subscription.
- You can now easily manage your notifications. You now start to receive notifications of other new channels by default. It is possible to modify this by choosing “All,” “None,” or “Personalized” to determine how to get notifications.

Using a computer
- First, visit the YouTube web page https://www.youtube.com in a web browser. The YouTube website will then be open.
- Then sign in to your YT account. Remember, you must also be signed in to a Google account to subscribe to YouTube channels.
- Browse for a channel and find what’s trending in the left-side panel of the screen.
- Hit the “Subscribe” button to subscribe to a channel. Once you are subscribed, the Subscribe text button will turn grey and change to “Subscribed.”
- View subscriptions by clicking the “three horizontal lines” found at the top-left corner of YouTube. You can also adjust your notification preferences to receive more or fewer updates from a channel.

How an auto-subscribe link will help boost your YouTube channel?
1. Links will auto-prompt visitors to subscribe to your YouTube channel.
2. You can use the link anywhere and reach very many visitors.
3. It works automatically to boost your subscriber count.
How to create an auto-subscribe link for your YouTube channel?
Here are the steps to create YouTube auto subscribers’ links on your computer and mobile device.

How to create a YouTube subscribe link on your computer
- Step 1. First, go to your YouTube Channel URL.
- Step 2. Press on your “Profile,” then click on the “Settings” option in the drop-down menu.
- Step 3. Next, click on the “Profile” picture and copy the URL link.
- Step 4. Add your “YouTube” channel URL with an “Auto Subscribe Tag.” “YouTube channel URL + ?sub_confirmation=1 Then remove the Plus Sign in between to get a YouTube subscribe link.
How to create a YouTube subscribe link on your mobile
- Step 1. Launch the YouTube app on your mobile phone, then click on the “Profile” icon.
- Step 2. Then go to the “Menu” tab and click on the “Your Channel” option.
- Step 3. Select the “Share” option from the drop-down menu.
- Step 4. Next, click on the “Copy link” of your YouTube Channel.
- Step 5. Finally, add your “YouTube” channel URL with the Auto Subscribe Tag.
How to locate your YouTube Channel URL
Unfortunately, many people don’t know their YouTube Channel URL. Check out how to locate your URL.
- Click on your “Profile” icon in the top-right corner of the YouTube page.
- Choose the “Settings” option from the drop-down menu.
- Next, hit the “Advanced” tab below your name.
- Boom! You get your link.
- Finally, combine your channel URL with the “Auto Subscribe” Tag.
● The formula: YouTube channel URL + “?sub_confirmation=1.” Remember to remove the parenthesis to get your auto-subscribe link.
Other tricks that work besides YouTube auto-subscribe
As a content creator, you need to do more to add YouTube auto subscribers to your channel.
Use closed captions to improve accessibility
Including subtitles or closed captions can drive a larger audience to access your content. Some YouTube users have challenges, for example, the deaf or those with hearing problems. Creating a video and not considering this may limit such users from getting to your channel as they may not get all the needed information. Follow these steps to create subtitles or closed captions.
- Sign in to YouTube Studio.
- Then select the “Subtitles” option from the left menu.
- Click on the video that you wish to edit.
- Next, click on the “Add Language” button and select your language.
- Go to the “Subtitles” section and select the “Add” button.
- Finally, enter your captions as the video plays. It will enable viewers who find it challenging to understand your video in detail and probably hit the subscribe button.

Translate your video descriptions
YouTube is accessed worldwide and not necessarily by those who speak your language. You can increase the chances of subscribers by translating your video titles and descriptions to make them understandable to people from across the world. It will make your videos more discoverable and show that you care about those from other regions. Check out how to add translations to YouTube videos.
- First, sign in to YouTube Studio.
- Then go to the left menu and select the “Subtitles” option.
- Choose the video in which you want to add the translations.
- It would be best if you choose a language for your video. Click the “Confirm” button.
- Then select the “Add language” option and choose the language you wish to translate your video into
- Go to “Titles & descriptions” and select the “Add” tab.
- Lastly, enter the translated description and hit the “Publish” button.
Use end screens for extra content promotion
An end screen call-to-action is essential in every video that you post on YouTube. They appear in the last 10 seconds and are useful in directing viewers to your chosen destination. Use them to direct a viewer to visit another channel, subscribe to your channel, or play another video. Here’s how to do it:
- Firstly, sign in to YouTube Studio.
- Then go to the “Videos” page and select a video to use.
- Select the “Editor” tab from the left menu.
- Next, choose the “Add an end screen” option to direct viewers appropriately.
Add a comment to your feed
This functionality is essential if many commenters repeatedly ask the same question. Besides, it will help you to boost engagement with a question.
Here are the simple steps on how to pin a comment to the top of your feed.
- Go to your “Community” tab.
- Then choose the comment that you wish to pin.
- Click on the “More” tab > “Pin” option.

Bonus: Will YouTube auto-subscribe me to a new channel?
It is not necessarily true that YouTube auto-subscribe will subscribe to a new channel. However, some reasons may contribute to that. You may have realized that YouTube just subscribed you to random channels without asking you. Here are the possible reasons for that.
• Spinoff Channel
A content creator may decide to come up with a Spinoff channel. In this case, they may automatically subscribe you to their new channel. In most cases, such content creators want to promote their new channel.
• Check your extensions
One of your browsers may be playing tricks on your YouTube account. Extensions may change your browser’s settings and make the “Unsubscribe” option unavailable. Try disabling all of your browser extensions, then check back if YouTube still subscribes you to channels unknown to you. If so, solve the issue by uninstalling the specific extensions. These could be ad blockers or free VPN extensions.
• Someone else can hit the button
Do you share your computer with other fellows? The chances are that someone hit the “Subscribe” button without your consent. Just unsubscribe and keep watching next time.
Conclusion
● The internet arena is very competitive. It would be best if you did everything right to drive as many YouTube auto-subscribers as possible to your channel. And creating a YouTube auto-subscribe link is the first step to making things easier for your potential subscribers. We have covered how to create a YouTube subscribe link and shown other tricks to help you keep your viewers locked.
Building a YouTube channel isn’t a walk-in-the-park. As a content creator, you go toiling several processes to ensure its success. More so, you are probably building a brand and want people to know about your product or services. What about one easy way to remember the URL and share it with your potential subscribers? Besides sending such links to people, you’ll be reminding them to subscribe with just a click. And that’s YouTube auto-subscribe link. It is a more effective way than asking or directing to check your YouTube channel. They’ll probably not find it easy, maneuvering around numbers of other channels that bear names close to your channel. A visitor will quickly give up. You can save them the crap and engage more effectively.
In this article
01 How to subscribe to a YouTube channel?
02 How to create an auto-subscribe link for your YouTube channel?
03 Other tricks that work besides YouTube auto-subscribe.
How to subscribe to a YouTube channel?
A YouTube auto-subscribe link will be beneficial in many ways. Here are the steps to subscribe to a YouTube channel. You can subscribe from your phone or computer.
Using a phone
- First, open the YouTube app. Look for it on your phone’s home screen or search through apps.
- Then sign in to your “Google” account for you to be able to subscribe to YouTube channels.
- Next, locate the channel that you want to subscribe to. You can either subscribe from the channel home page or watch the channel video.
- Tap on the “Subscribe” button. The text on the “Subscribe” button will immediately change to “Subscribed” once you hit the subscribe tab.
- Finally, hit the “Subscriptions” tab to manage your channel subscriptions. You’ll also manage to see other latest updates from your subscription.
- You can now easily manage your notifications. You now start to receive notifications of other new channels by default. It is possible to modify this by choosing “All,” “None,” or “Personalized” to determine how to get notifications.
Using a computer
- First, visit the YouTube web page https://www.youtube.com in a web browser. The YouTube website will then be open.
- Then sign in to your YT account. Remember, you must also be signed in to a Google account to subscribe to YouTube channels.
- Browse for a channel and find what’s trending in the left-side panel of the screen.
- Hit the “Subscribe” button to subscribe to a channel. Once you are subscribed, the Subscribe text button will turn grey and change to “Subscribed.”
- View subscriptions by clicking the “three horizontal lines” found at the top-left corner of YouTube. You can also adjust your notification preferences to receive more or fewer updates from a channel.
How an auto-subscribe link will help boost your YouTube channel?
1. Links will auto-prompt visitors to subscribe to your YouTube channel.
2. You can use the link anywhere and reach very many visitors.
3. It works automatically to boost your subscriber count.
How to create an auto-subscribe link for your YouTube channel?
Here are the steps to create YouTube auto subscribers’ links on your computer and mobile device.
How to create a YouTube subscribe link on your computer
- Step 1. First, go to your YouTube Channel URL.
- Step 2. Press on your “Profile,” then click on the “Settings” option in the drop-down menu.
- Step 3. Next, click on the “Profile” picture and copy the URL link.
- Step 4. Add your “YouTube” channel URL with an “Auto Subscribe Tag.” “YouTube channel URL + ?sub_confirmation=1 Then remove the Plus Sign in between to get a YouTube subscribe link.
How to create a YouTube subscribe link on your mobile
- Step 1. Launch the YouTube app on your mobile phone, then click on the “Profile” icon.
- Step 2. Then go to the “Menu” tab and click on the “Your Channel” option.
- Step 3. Select the “Share” option from the drop-down menu.
- Step 4. Next, click on the “Copy link” of your YouTube Channel.
- Step 5. Finally, add your “YouTube” channel URL with the Auto Subscribe Tag.
How to locate your YouTube Channel URL
Unfortunately, many people don’t know their YouTube Channel URL. Check out how to locate your URL.
- Click on your “Profile” icon in the top-right corner of the YouTube page.
- Choose the “Settings” option from the drop-down menu.
- Next, hit the “Advanced” tab below your name.
- Boom! You get your link.
- Finally, combine your channel URL with the “Auto Subscribe” Tag.
● The formula: YouTube channel URL + “?sub_confirmation=1.” Remember to remove the parenthesis to get your auto-subscribe link.
Other tricks that work besides YouTube auto-subscribe
As a content creator, you need to do more to add YouTube auto subscribers to your channel.
Use closed captions to improve accessibility
Including subtitles or closed captions can drive a larger audience to access your content. Some YouTube users have challenges, for example, the deaf or those with hearing problems. Creating a video and not considering this may limit such users from getting to your channel as they may not get all the needed information. Follow these steps to create subtitles or closed captions.
- Sign in to YouTube Studio.
- Then select the “Subtitles” option from the left menu.
- Click on the video that you wish to edit.
- Next, click on the “Add Language” button and select your language.
- Go to the “Subtitles” section and select the “Add” button.
- Finally, enter your captions as the video plays. It will enable viewers who find it challenging to understand your video in detail and probably hit the subscribe button.
Translate your video descriptions
YouTube is accessed worldwide and not necessarily by those who speak your language. You can increase the chances of subscribers by translating your video titles and descriptions to make them understandable to people from across the world. It will make your videos more discoverable and show that you care about those from other regions. Check out how to add translations to YouTube videos.
- First, sign in to YouTube Studio.
- Then go to the left menu and select the “Subtitles” option.
- Choose the video in which you want to add the translations.
- It would be best if you choose a language for your video. Click the “Confirm” button.
- Then select the “Add language” option and choose the language you wish to translate your video into
- Go to “Titles & descriptions” and select the “Add” tab.
- Lastly, enter the translated description and hit the “Publish” button.
Use end screens for extra content promotion
An end screen call-to-action is essential in every video that you post on YouTube. They appear in the last 10 seconds and are useful in directing viewers to your chosen destination. Use them to direct a viewer to visit another channel, subscribe to your channel, or play another video. Here’s how to do it:
- Firstly, sign in to YouTube Studio.
- Then go to the “Videos” page and select a video to use.
- Select the “Editor” tab from the left menu.
- Next, choose the “Add an end screen” option to direct viewers appropriately.
Add a comment to your feed
This functionality is essential if many commenters repeatedly ask the same question. Besides, it will help you to boost engagement with a question.
Here are the simple steps on how to pin a comment to the top of your feed.
- Go to your “Community” tab.
- Then choose the comment that you wish to pin.
- Click on the “More” tab > “Pin” option.
Bonus: Will YouTube auto-subscribe me to a new channel?
It is not necessarily true that YouTube auto-subscribe will subscribe to a new channel. However, some reasons may contribute to that. You may have realized that YouTube just subscribed you to random channels without asking you. Here are the possible reasons for that.
• Spinoff Channel
A content creator may decide to come up with a Spinoff channel. In this case, they may automatically subscribe you to their new channel. In most cases, such content creators want to promote their new channel.
• Check your extensions
One of your browsers may be playing tricks on your YouTube account. Extensions may change your browser’s settings and make the “Unsubscribe” option unavailable. Try disabling all of your browser extensions, then check back if YouTube still subscribes you to channels unknown to you. If so, solve the issue by uninstalling the specific extensions. These could be ad blockers or free VPN extensions.
• Someone else can hit the button
Do you share your computer with other fellows? The chances are that someone hit the “Subscribe” button without your consent. Just unsubscribe and keep watching next time.
Conclusion
● The internet arena is very competitive. It would be best if you did everything right to drive as many YouTube auto-subscribers as possible to your channel. And creating a YouTube auto-subscribe link is the first step to making things easier for your potential subscribers. We have covered how to create a YouTube subscribe link and shown other tricks to help you keep your viewers locked.
Decoding Video Potential: DSLR vs Mirrorless Innovation
Mirrorless vs. DSLR Cameras: Which is Better for Videos?

Richard Bennett
Oct 26, 2023• Proven solutions
If you’re looking to shoot your videos with interchangeable lenses, your camera set up will either have to have a mirrorless camera body or a DSLR camera body. In this post, I’ll be comparing the two camera body types for recording video.
- Part 1: What is a DSLR Camera?
- Part 2: What is a Mirrorless Camera?
- Part 3: Mirrorless vs. DSLR - a Complete Comparison
- Part 4: Mirrorless vs. DSLR - Which One is Better for Video?
What is a DSLR Camera?
DSLR cameras are digital single-lens reflex cameras. Like 35mm film cameras of the past, DSLR cameras are built with an angled mirror inside its camera body. This mirror allows you to look into your camera’s optical viewfinder and see exactly what your camera sees.
The mirror inside a DSLR camera flips up out of the way when you open the shutter to allow light to reach the camera’s image sensor.
Check out our list of the 7 Best DSLR Cameras For Vlogging .
What is a Mirrorless Camera?
Mirrorless cameras are interchangeable lens cameras without a mirror inside the camera body. With nothing to reflect your image, you won’t find any optical viewfinder to look through to see exactly what your camera sees.
Light passes through the lens of a mirrorless camera and lands directly onto the camera’s sensor.
Check out our list of the 8 Best Mirrorless Cameras For Vlogging .
Mirrorless vs. DSLR - a Complete Comparison
Size and Weight
DSLR cameras are larger and heavier than mirrorless cameras because there are more parts that go into their camera bodies. DSLR cameras require enough space inside for an angled mirror to flip up out of the way.
If your video shooting style is more on-the-go, like that of a daily vlogger or travel vlogger, the smaller size and lighter weight of a mirrorless camera may be more suitable for you.
Previewing Images
When you’re using a DSLR camera, your optical viewfinder will show you exactly what your camera sees as opposed to a digital preview of what your image sensor picks up. No matter how bright or dark your scene actually is, through the optical viewfinder, you’ll be able to clearly see what your camera sees with the power of your eye.
Mirrorless cameras, on the other hand, display on your camera’s screen or electronic viewfinder a digital preview of what your camera is looking at. You will notice a lag, especially in low light, between actions that are taking place in front of the camera and the same actions being displayed in your live preview.
Lenses and Accessories
Having been around much longer, there are plenty more options for lenses and accessories when it comes to shooting with DSLR cameras. You can choose from all kinds of different quality levels and price ranges.
Video Resolution
4K video recording is more readily available in mirrorless cameras than DSLR cameras. At a much more affordable budget, you can get your hands on a 4K mirrorless camera. If you want to shoot 4K video on a DSLR camera, though, you will have to pay for some of the most expensive DSLR cameras on the market.
Image Stabilization
Up until quite recently, you needed to get the right lens with built-in optical image stabilization if you wanted to shoot stabilized photos and videos with an interchangeable lens camera. Image stabilization had not been readily available in the bodies of these cameras.
In recent years, however, mirrorless cameras have been much more active in their development of camera bodies equipped with shifting image sensors. Your shots can be even more stabilized when the optical image stabilization of your lens is combined with your camera’s in-body sensor-shift image stabilization.
Battery Life
When it comes to shooting video, DSLR cameras and mirrorless cameras consume about the same amount of power. It’s still safe to say, though, that DSLR cameras, for the most part, have better battery life than mirrorless cameras because their bigger batteries are packed with more power.
Mirrorless vs. DSLR - Which One is Better for Video?
In my opinion, when it comes to filming a video, mirrorless cameras are the way to go. In such a short time, mirrorless cameras have made huge leaps in their capabilities. It won’t be long before the ultimate vlogging camera comes out on the mirrorless market.
In the end, if you need to edit videos futhermore, try Filmora video editor . It’s a video editor which has significantly improved overall performance, making the product faster, and more powerful, and taking the user editing experience to a new level.
It is perfect for helping beginners, and intermediate users create stylish videos by providing an intuitive user interface and built-in effects.
![]()
Richard Bennett
Richard Bennett is a writer and a lover of all things video.
Follow @Richard Bennett
Richard Bennett
Oct 26, 2023• Proven solutions
If you’re looking to shoot your videos with interchangeable lenses, your camera set up will either have to have a mirrorless camera body or a DSLR camera body. In this post, I’ll be comparing the two camera body types for recording video.
- Part 1: What is a DSLR Camera?
- Part 2: What is a Mirrorless Camera?
- Part 3: Mirrorless vs. DSLR - a Complete Comparison
- Part 4: Mirrorless vs. DSLR - Which One is Better for Video?
What is a DSLR Camera?
DSLR cameras are digital single-lens reflex cameras. Like 35mm film cameras of the past, DSLR cameras are built with an angled mirror inside its camera body. This mirror allows you to look into your camera’s optical viewfinder and see exactly what your camera sees.
The mirror inside a DSLR camera flips up out of the way when you open the shutter to allow light to reach the camera’s image sensor.
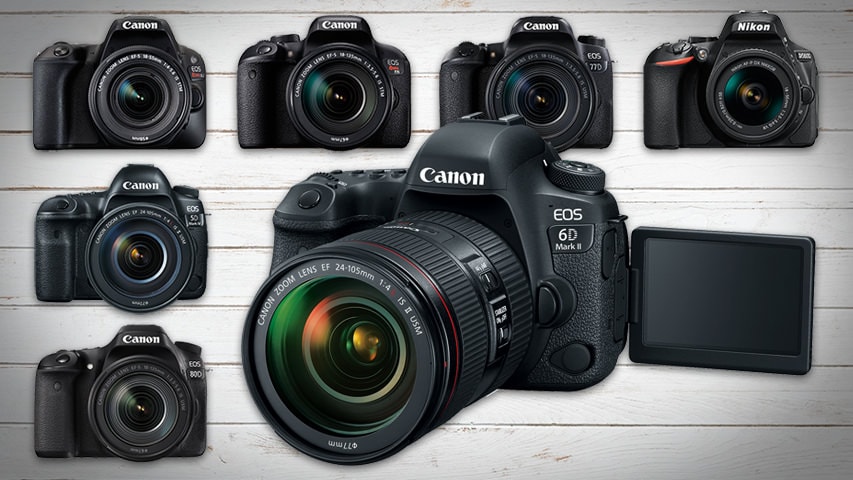
Check out our list of the 7 Best DSLR Cameras For Vlogging .
What is a Mirrorless Camera?
Mirrorless cameras are interchangeable lens cameras without a mirror inside the camera body. With nothing to reflect your image, you won’t find any optical viewfinder to look through to see exactly what your camera sees.
Light passes through the lens of a mirrorless camera and lands directly onto the camera’s sensor.
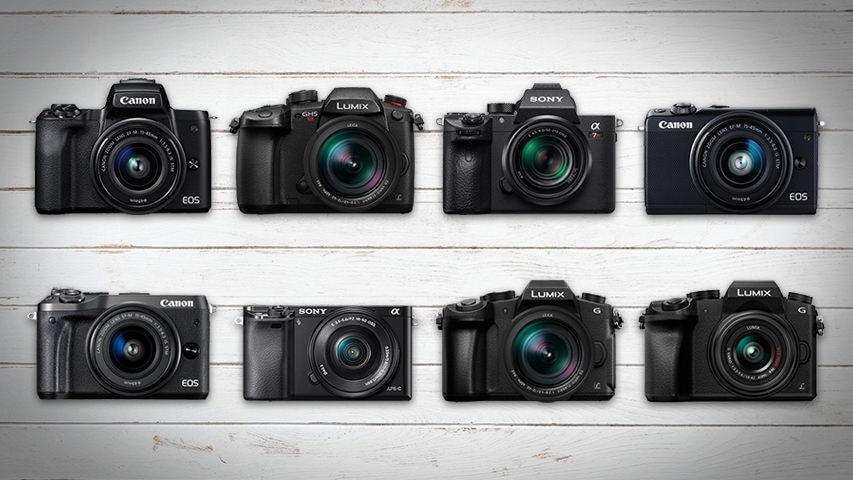
Check out our list of the 8 Best Mirrorless Cameras For Vlogging .
Mirrorless vs. DSLR - a Complete Comparison
Size and Weight
DSLR cameras are larger and heavier than mirrorless cameras because there are more parts that go into their camera bodies. DSLR cameras require enough space inside for an angled mirror to flip up out of the way.
If your video shooting style is more on-the-go, like that of a daily vlogger or travel vlogger, the smaller size and lighter weight of a mirrorless camera may be more suitable for you.
Previewing Images
When you’re using a DSLR camera, your optical viewfinder will show you exactly what your camera sees as opposed to a digital preview of what your image sensor picks up. No matter how bright or dark your scene actually is, through the optical viewfinder, you’ll be able to clearly see what your camera sees with the power of your eye.
Mirrorless cameras, on the other hand, display on your camera’s screen or electronic viewfinder a digital preview of what your camera is looking at. You will notice a lag, especially in low light, between actions that are taking place in front of the camera and the same actions being displayed in your live preview.
Lenses and Accessories
Having been around much longer, there are plenty more options for lenses and accessories when it comes to shooting with DSLR cameras. You can choose from all kinds of different quality levels and price ranges.
Video Resolution
4K video recording is more readily available in mirrorless cameras than DSLR cameras. At a much more affordable budget, you can get your hands on a 4K mirrorless camera. If you want to shoot 4K video on a DSLR camera, though, you will have to pay for some of the most expensive DSLR cameras on the market.
Image Stabilization
Up until quite recently, you needed to get the right lens with built-in optical image stabilization if you wanted to shoot stabilized photos and videos with an interchangeable lens camera. Image stabilization had not been readily available in the bodies of these cameras.
In recent years, however, mirrorless cameras have been much more active in their development of camera bodies equipped with shifting image sensors. Your shots can be even more stabilized when the optical image stabilization of your lens is combined with your camera’s in-body sensor-shift image stabilization.
Battery Life
When it comes to shooting video, DSLR cameras and mirrorless cameras consume about the same amount of power. It’s still safe to say, though, that DSLR cameras, for the most part, have better battery life than mirrorless cameras because their bigger batteries are packed with more power.
Mirrorless vs. DSLR - Which One is Better for Video?
In my opinion, when it comes to filming a video, mirrorless cameras are the way to go. In such a short time, mirrorless cameras have made huge leaps in their capabilities. It won’t be long before the ultimate vlogging camera comes out on the mirrorless market.
In the end, if you need to edit videos futhermore, try Filmora video editor . It’s a video editor which has significantly improved overall performance, making the product faster, and more powerful, and taking the user editing experience to a new level.
It is perfect for helping beginners, and intermediate users create stylish videos by providing an intuitive user interface and built-in effects.
![]()
Richard Bennett
Richard Bennett is a writer and a lover of all things video.
Follow @Richard Bennett
Also read:
- [Updated] Best 7 Multimedia Cameras For Quality Live Streams & Video Blogs
- Subscribe Green Screen - Make It Easy to Add YouTube Video CTA
- In 2024, Best Cameras for Quality YouTube Content
- In 2024, Avid Illusionists Top Editing Hocus Pocus
- Beginning Creator's Guide Top 8 Free YouTube Tutorials for 2024
- In 2024, Deciphering the Best YouTube Video Trackers for Success
- [Updated] Building Your Digital Identity Start a YouTube Channel Today
- Demystifying the Process of Writing YouTube Video Content for 2024
- Amplify Impact Strategies for Growing YouTube Fans for 2024
- [New] Bridging YouTube and iMovie with Seamless Audio Transfer
- 7 Easy Steps for a Subscriber Surge on YouTube for 2024
- Integrate Spotify and YouTube Top 5 Playlist-to-Channel Converters Available
- 2024 Approved Broadcast Repeat Looping YouTube Video Magic for Your Setup
- Key Video Makers in the ASMR Space
- Crafting Success in YouTube's Creator Hub for 2024
- 2024 Approved Cutting Techniques for Sports Entertainment Films
- Top 10 Audio Disruptors Android/iOS Edition
- Viral Harmony Essential Soundtracks For Popular Video Shorts
- Trim the Excessive Green Revamping YouTubes on a Mac
- In 2024, Elevate Your Views Degrees of Rotation on YouTube - A 2023 Guide
- [New] Ensuring Data Privacy While Transforming YouTube Video Audio to MP3
- An Owner's Guide to Playlist Permutations in YT
- Elevate Your Sound Experience Subscribe to 20 YouTube Sounds for 2024
- [New] Beyond YouTube Elite Video Sharing Hubs Revealed
- In 2024, Content Creators’ Earnings Timeline on YouTube
- Eliminating Backlogged Videos From Your YouTube History
- 2024 Approved Essential Strategies for Successful Mukbang Production
- [Updated] Dodging Doubts A Guide to Vlogging's Most Common Anxieties
- 2024 Approved Enthralling Epics Essential Channel-Building Tactics
- In 2024, Essential Science YouTube Networks Expand Your Mind
- Adobe Premiere Power Enhancing Your YouTube Presence for 2024
- In 2024, Edit with Ease The Top 10 YouTube Video Trimmers Guide
- In 2024, Compare & Contrast Leading Online & Desktop GIF Tools
- [Updated] Curtail Unexpected YouTube Recommendations
- A Comprehensive Look at Editing and Uploading Virtual Reality Videos to YouTube
- [New] Enhancing YouTube Thumbnails Neon Borders - Top 3 Methods
- [New] Conquer YouTube's Realms A Step-by-Step Video Uploading Guidebook
- Unleash Your Potential Skyrocketing Numbers of YouTubers' Subscribers
- Skyrocket Traffic The Ultimate List of Video Growth Techniques
- A Tale of Two Approaches Polite vs Aggressive Asking
- Efficient Storytelling in Product Revelations
- [New] Essential ASMR Apps Android & iOS Edition
- [Updated] Enhancing Viewership Maintaining YouTube's Creative Commons
- 2024 Approved 10 Most Popular Beauty Gurus on YouTube
- Innovate On-Screen Imagery with YouTube’s Green Screens Edge
- Fake the Location to Get Around the MLB Blackouts on Tecno Spark 10 Pro | Dr.fone
- [Updated] In 2024, Innovating Content Creation Vimeo Edition
- Simple ways to get lost files back from Infinix Hot 30i
- [New] In 2024, Pixel Perfection Radeon Redux Review
- Modern Techniques for Shrinking Digital File Dimensions for 2024
- How to share/fake gps on Uber for Oppo A2 | Dr.fone
- [Updated] 2024 Approved Streamline Video Capture MacBook Webcam Tips
- [Updated] 2024 Approved Elevate Your Social Presence The Art of Uploading Many Images and Videos to Instagram
- [New] Immediate Harmony Views on Xigua Video
- Unlock Crystal-Clear Facebook Video on Android
- Updated In 2024, How to Use Autotune in Audacity with Plugins for Free?
- New Free Video Dubbing Software for PC Top Picks for 2024
- Best Fixes For Samsung Galaxy A25 5G Hard Reset | Dr.fone
- Top 15 Apps To Hack WiFi Password On Xiaomi Redmi 13C 5G
- In 2024, A Quick Guide to Poco C50 FRP Bypass Instantly
- Will MOV files play on Galaxy S21 FE 5G (2023) ?
- Android Safe Mode - How to Turn off Safe Mode on Honor X8b? | Dr.fone
- Stop Time in Its Tracks How to Freeze Frames in Your Favorite Video Editor for 2024
- How To Unbrick a Dead Samsung Galaxy A23 5G | Dr.fone
- [Updated] In 2024, Accessing the Elite Step-by-Step Guide to Getting DiscoNitro
- How To Restore a Bricked Nubia Red Magic 9 Pro Back to Operation | Dr.fone
- Title: In 2024, Automated Subscription Link Creation for Youtube
- Author: Kevin
- Created at : 2024-05-25 15:24:54
- Updated at : 2024-05-26 15:24:54
- Link: https://youtube-videos.techidaily.com/in-2024-automated-subscription-link-creation-for-youtube/
- License: This work is licensed under CC BY-NC-SA 4.0.
