
:max_bytes(150000):strip_icc()/4060ti-39bff0d880304752bcded280abd0cf89.jpg)
"How to Illuminate A Guide to Great Vlog Images"
How to Illuminate: A Guide to Great Vlog Images
Lighting Tips for Vlogging: How to Light

Richard Bennett
Mar 27, 2024• Proven solutions
One of the best things you can do for your video quality is to ensure you have great lighting. Viewers find poor lighting distracting and it’s hard for them to see how great your content is if they are busy thinking about why your video is so dark. By creating a great lighting set up you can ensure that the people watching your videos are only thinking about how much they’re enjoying them.
Going outside and using natural light is the cheapest way to get a lot of light for your videos. If your vlog is not suited to the great outdoors then you need to get more strategic. You can turn on all the lights in your living room and still end up with a dark, grainy, video.
Video Lighting Basics: Three Point Lighting

The most common technique of lighting a scene is called three-point lighting. It involves three different sources of light in the shot and is used by portrait photographers, which is also a great method for lighting your vlog.
The brightest source of light is also known as the key light which need to be high quality. A window will work, but if you do not have access to one where you are filming then consider an LED panel light or a softbox light like the ones used in portrait photography.
This first light will create a dramatic shadow across half of your face. You want to reduce this shadow, but not get rid of it completely.
Rather than setting up another light source on the opposite side of the camera, put up a reflector to bounce some light back onto your face. This reflector is called your ‘Fill Light’.
The fill light is less bright than the primary source of light and it is placed on the side opposite to the key light. Its purpose is to reduce shadows produced by the key light and the reflector will need to be mounted on a stand.
The final step to creating three point lighting is to set up another light behind you. This is your ‘Backlight’, and it will help you stand out from your background. Backlight or Hair light is always placed behind and above the subject to create separation between the subject in the shot and the background. This basic lighting technique can be applied in almost every scene you shoot, which is why it is important to keep an open mind and to continue experimenting with possible light setups.
Watch Video! Top Lighting Tips for Vlogging
Lightning Tips for Aspiring YouTube Videographers
Becoming the master of light will take some time and practice, so it is crucial to remain curious and anxious to learn new tricks throughout that process if you want to continually become better. These tips will help you make the first steps on that journey.
1. Focus Your Key Light
Try to focus your Key Light so that it lights only you and not your background. Do this by mounting anything that can cast a shadow onto your Key Light to control the area where the light hits. If you are using a window for your Key Light then you can use a curtain. If you use a softbox light then your light will already be somewhat focused.
2. Use Natural Lighting
The light provided by the Sun is still the best light source, you can have in your video. The trouble is that natural light changes quickly, which makes it highly unpredictable. The best way to deal with this challenge is to come prepared to the set and to get the shot you want as quickly as you can.
3. Try DIY Lightning
Literally, anything from candles to LED light bulbs can serve as a source of light in a shot. You just need to pay attention to the light temperature, because warmer light sources may highlight reds and yellows that can make your footage look less realistic.
4. Use Lightning Kits
This is by far the best option if you want to be in complete control of the light on your set. You can adjust the intensity of the lights, use filters, diffusers and all sorts of other accessories to create the light that flatters the subjects of your videos. The only downside is that you’ll have to spend a considerable amount of money if you want to have a professional lighting kit.
5. Set up reflectors
Sets of reflectors are often under $50, so they are fairly affordable. However, some vloggers choose to forgo purchasing reflectors and make their own out of tinfoil.

If your strong main light is too hard on your eyes then you can use a translucent ‘reflector’ to soften it. Set your translucent reflector, or other screen, up in front of your main light to diffuse it.
If you are hosting a beauty vlog then you might consider a slightly different set up. Instead of having your main light off to one side set it up directly in front of you so your entire face is lit evenly. It is still a good idea to use fill lights in this set up to give you some dimension, and a backlight is even more essential for helping you stand out from the background. The even light hitting your face will also make you look flat if you do not use a backlight.

If you are using all of the lighting options available to you and your video still looks too dark then you can try brightening it by opening up the aperture of your camera lens/setting a lower f-stop. Letting more light into your camera can help your footage look brighter, although you also run the risk of making things look overexposed/ washed out if you are not careful.
If you are stuck shooting in low light conditions it is best to use a lens with a wider aperture/lower f-stop. This will make the best of the light you do have.
Richard Bennett
Richard Bennett is a writer and a lover of all things video.
Follow @Richard Bennett
Richard Bennett
Mar 27, 2024• Proven solutions
One of the best things you can do for your video quality is to ensure you have great lighting. Viewers find poor lighting distracting and it’s hard for them to see how great your content is if they are busy thinking about why your video is so dark. By creating a great lighting set up you can ensure that the people watching your videos are only thinking about how much they’re enjoying them.
Going outside and using natural light is the cheapest way to get a lot of light for your videos. If your vlog is not suited to the great outdoors then you need to get more strategic. You can turn on all the lights in your living room and still end up with a dark, grainy, video.
Video Lighting Basics: Three Point Lighting
The most common technique of lighting a scene is called three-point lighting. It involves three different sources of light in the shot and is used by portrait photographers, which is also a great method for lighting your vlog.
The brightest source of light is also known as the key light which need to be high quality. A window will work, but if you do not have access to one where you are filming then consider an LED panel light or a softbox light like the ones used in portrait photography.
This first light will create a dramatic shadow across half of your face. You want to reduce this shadow, but not get rid of it completely.
Rather than setting up another light source on the opposite side of the camera, put up a reflector to bounce some light back onto your face. This reflector is called your ‘Fill Light’.
The fill light is less bright than the primary source of light and it is placed on the side opposite to the key light. Its purpose is to reduce shadows produced by the key light and the reflector will need to be mounted on a stand.
The final step to creating three point lighting is to set up another light behind you. This is your ‘Backlight’, and it will help you stand out from your background. Backlight or Hair light is always placed behind and above the subject to create separation between the subject in the shot and the background. This basic lighting technique can be applied in almost every scene you shoot, which is why it is important to keep an open mind and to continue experimenting with possible light setups.
Watch Video! Top Lighting Tips for Vlogging
Lightning Tips for Aspiring YouTube Videographers
Becoming the master of light will take some time and practice, so it is crucial to remain curious and anxious to learn new tricks throughout that process if you want to continually become better. These tips will help you make the first steps on that journey.
1. Focus Your Key Light
Try to focus your Key Light so that it lights only you and not your background. Do this by mounting anything that can cast a shadow onto your Key Light to control the area where the light hits. If you are using a window for your Key Light then you can use a curtain. If you use a softbox light then your light will already be somewhat focused.
2. Use Natural Lighting
The light provided by the Sun is still the best light source, you can have in your video. The trouble is that natural light changes quickly, which makes it highly unpredictable. The best way to deal with this challenge is to come prepared to the set and to get the shot you want as quickly as you can.
3. Try DIY Lightning
Literally, anything from candles to LED light bulbs can serve as a source of light in a shot. You just need to pay attention to the light temperature, because warmer light sources may highlight reds and yellows that can make your footage look less realistic.
4. Use Lightning Kits
This is by far the best option if you want to be in complete control of the light on your set. You can adjust the intensity of the lights, use filters, diffusers and all sorts of other accessories to create the light that flatters the subjects of your videos. The only downside is that you’ll have to spend a considerable amount of money if you want to have a professional lighting kit.
5. Set up reflectors
Sets of reflectors are often under $50, so they are fairly affordable. However, some vloggers choose to forgo purchasing reflectors and make their own out of tinfoil.
If your strong main light is too hard on your eyes then you can use a translucent ‘reflector’ to soften it. Set your translucent reflector, or other screen, up in front of your main light to diffuse it.
If you are hosting a beauty vlog then you might consider a slightly different set up. Instead of having your main light off to one side set it up directly in front of you so your entire face is lit evenly. It is still a good idea to use fill lights in this set up to give you some dimension, and a backlight is even more essential for helping you stand out from the background. The even light hitting your face will also make you look flat if you do not use a backlight.
If you are using all of the lighting options available to you and your video still looks too dark then you can try brightening it by opening up the aperture of your camera lens/setting a lower f-stop. Letting more light into your camera can help your footage look brighter, although you also run the risk of making things look overexposed/ washed out if you are not careful.
If you are stuck shooting in low light conditions it is best to use a lens with a wider aperture/lower f-stop. This will make the best of the light you do have.
Richard Bennett
Richard Bennett is a writer and a lover of all things video.
Follow @Richard Bennett
Navigating Sub4sub Like a Pro? Begin Here for Expert Tips
Create High-Quality Video - Wondershare Filmora
An easy and powerful YouTube video editor
Numerous video and audio effects to choose from
Detailed tutorials provided by the official channel
YouTube streaming service is a beehive of activities. Promoters strive for a higher number of subscribers to boost their content. Several ways are available for you to increase the number of subscribers and visitors to your site. YouTube sub for sub is one common practice for this noble cause. In this practice, a person subscribes, in anticipation of the recipient subscribing back as well.
However, the practice may not give your channel that genuine growth. The subscribers may not even watch your videos or care much about leaving comments or other engagements. All in all, the aim is to hit a certain number of subscribers so that you can get into the recommended territory and probably start earning. But are there other options to increase YouTube subscriptions apart from Sub4Sub? Be genuine and use real avenues to rise to the top. This article corresponds adequately on the matter by giving you alternative ways to gain real subscribers who will stick around to grow your channel.
In this article
03 Tips & tricks to use sub for sub
04 Additional thoughts - Should we rely on subforsub to get more subscribers?
What is sub for sub?
Subforsub means a subscription for a subscription. In this practice, there are subscribers and subscriptions. Those who subscribe to you on YouTube are the subscribers while those whom you subscribe to, are the subscriptions. Both video makers’ subscribers are, therefore, increased equally and doesn’t give each other a competitive advantage against the other member. Sub for sub was founded in Germany, 4 years ago. It is easy to use and free platform that takes only about 5 minutes to contact a subscriber and complete the initiative. To get started, a user signs up and creates a new account on the home page. You can then reach out to other members for a subscription.
How does sub for sub work?
With YouTube sub for sub, you market your YouTube channel to get more subscribers. Simply sub to one another’s channel and they sub back.
You can do this on different channels such as YouTube live videos, among other channels. But again, these subscribers are not so much concerned about getting the real subs. What matters is that you get 1,000 subscribers to enable you to monetize on YouTube. However, YouTube also has its measures in place, and manipulating the matrix is one of which they don’t advocate for. But in most cases, subforsub participants operate fake YouTube accounts and you can find one person corresponding up to 5 accounts to gain subscriptions. This isn’t good for your rating as you don’t get real subscribers but you only boost the number of subscribers. And since they don’t watch your videos, neither will they share them with other viewers.
Tips & tricks to use sub for sub
Subforsub isn’t genuine and all you get is bot subscribers who don’t engage. However, you can use available tricks to gain popularity.
- Using fake accounts

A user should only run one genuine YouTube account. However, the trick that most subscribers use to gain more subs is by creating other additional fake accounts to gain more subs in return. But again, it is not a guarantee as some subscribers may not sub back to all the accounts.
- Subscribers don’t watch the videos
Perhaps there is no time for subscribers to watch the potential sub videos before subscribing. Your mission is to gain as many subs as possible even if your watch time doesn’t go up. This doesn’t bring any positivity to your channel rather an increased number of subscribers.
- Reach out to friends
You can also boost your sub for sub by reaching out to friends to inform them of your channel and ask for subscriptions in return for theirs as well. This, however, could be a slow process as not all your friends will be attracted to what you do.
- Don’t do subforsub for followers
A subforsub may not give you followers parse. So, don’t get into it for genuine followers. Those who sub to your channel won’t follow you in most cases. Rather, they might unsubscribe after a short duration of time.
- Use channel branding
This trick will glue viewers to your channel. These can include banner art to welcome everyone who clicks into your channel.
Additional thoughts - Should we rely on subforsub to get more subscribers?
You should not rely on subforsub as it doesn’t give the real figures but manipulates the outcome. Nonetheless, you need real subscribers to climb the YouTube ladder. That’s the best way to push the YouTube algorithm. There are genuine aspects of gaining subscribers to grow your channel.
Get to social media platforms

These include Facebook, Instagram, WhatsApp, and other sites. Introduce your YouTube channel to your followers and remind them to subscribe. Likewise, demonstrate why your channel is worth subscribing to.
Upload content consistently
Ensure your upload schedule is consistent and you’ll see viewers having a reason to subscribe to your channel. Once you introduce your channel with the first video, post a second and third video to build more momentum on your potential subscribers.
Incorporate YouTube stories
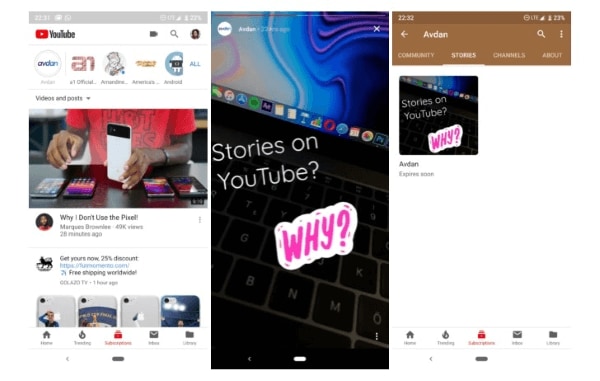
Stories can be a good starting point for those who have not subscribed to your content yet despite watching. Short video stories will attract viewers’ attention and want to get more from your channel.
Use Calls to Action

Ask your audience to subscribe after watching your videos. A great idea is to use animation or graphics to attract the viewers’ attention instantly. Other free options like green screen are also available for use.
Make it easy for viewers to understand your channel
You can make it easy by giving your viewers a guided tour. By this, they’ll know where to find important sections like comments. You can also create a channel banner that tells your audience what you do. They’ll soon familiarize themselves with your channel and be friends in no time.
Build a relationship with your audience
It is good to connect with your audience in various aspects. Expressing yourself probably in front of a camera has a deeper impact. You can also use illustrations to bring out your points for a quick understanding. Engaging them in the process is the best way to make them feel like they belong and eventually turn into subscribers.
Focus on the video that’s working for you
You should know which video is working and which is not. Judge and put more emphasis on the video that’s working for you. Check out which videos turn viewers into subscribers as that’s your main aim. More so, be creative and innovative.
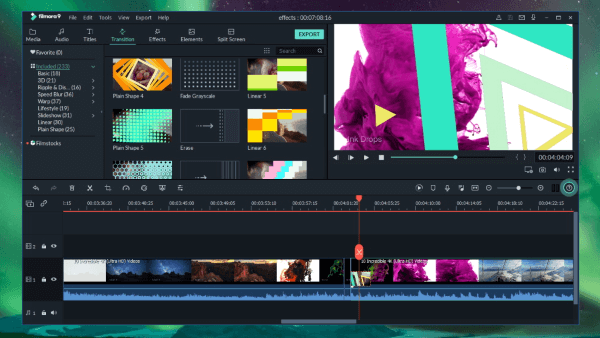
A video editor is worth a try – Filmora
Since creativity is paramount, engaging a video editor tool will make you achieve your goal in a few clicks. Filmora Video Editor will transform your videos into magical content. It comes with powerful editing tools to make your video stand tall from the rest. You will also manage to import and export your videos in various formats for easy access on different platforms and devices. Whether you wish to create a tutorial for learning or promotional purposes, Filmora will give you exceptional results. The steps are as easy as 1-2-3 and the process is effective. Check out its key features to help you produce quality videos.
For Win 7 or later (64-bit)
For macOS 10.12 or later
Key Features of Filmora Video Editor
- 4K editing support: Quality and sharp videos are attractive to viewers. Filmora lets you edit and export your videos at high resolutions of up to 4K.
- Noise removal: Make your videos noise-free by removing unwanted background sounds. Viewers won’t be destructed and can concentrate more on the important aspects of the video.
- Speed control: There are important sections of your video that you may wish to emphasize more. You can slow down the speed in such sections for your viewers to understand them in detail. Nonetheless, you can speed up certain parts that don’t require too much emphasis.
- Reverse: What about being creative using this feature. Simply flip your clips and play them backward with this feature.
- Preview frame by frame: Focus on precise editing by using this feature. It lets you move to any section of the frame at a time to ascertain that the final product will be the best.
- Audio separation: Do it in a few clicks. Detach audio from video and put any other background music depending on the theme of that moment.
Conclusion
● You may gain subscribers from the YouTube sub for sub but you will be violating YouTube’s terms of service. Additionally, the YouTube algorithm will eventually notice that your subscribers are not watching your videos. It will presume that you are buying subscribers, which is illegal in the long run. Be smart and engage the Filmora video editor. It works in simple steps to create wanting videos that will upsell your brand. Editing isn’t a worry either as it presents you with numerous stunning effects to transform your video to a compelling piece of art.
YouTube streaming service is a beehive of activities. Promoters strive for a higher number of subscribers to boost their content. Several ways are available for you to increase the number of subscribers and visitors to your site. YouTube sub for sub is one common practice for this noble cause. In this practice, a person subscribes, in anticipation of the recipient subscribing back as well.
However, the practice may not give your channel that genuine growth. The subscribers may not even watch your videos or care much about leaving comments or other engagements. All in all, the aim is to hit a certain number of subscribers so that you can get into the recommended territory and probably start earning. But are there other options to increase YouTube subscriptions apart from Sub4Sub? Be genuine and use real avenues to rise to the top. This article corresponds adequately on the matter by giving you alternative ways to gain real subscribers who will stick around to grow your channel.
In this article
03 Tips & tricks to use sub for sub
04 Additional thoughts - Should we rely on subforsub to get more subscribers?
What is sub for sub?
Subforsub means a subscription for a subscription. In this practice, there are subscribers and subscriptions. Those who subscribe to you on YouTube are the subscribers while those whom you subscribe to, are the subscriptions. Both video makers’ subscribers are, therefore, increased equally and doesn’t give each other a competitive advantage against the other member. Sub for sub was founded in Germany, 4 years ago. It is easy to use and free platform that takes only about 5 minutes to contact a subscriber and complete the initiative. To get started, a user signs up and creates a new account on the home page. You can then reach out to other members for a subscription.
How does sub for sub work?
With YouTube sub for sub, you market your YouTube channel to get more subscribers. Simply sub to one another’s channel and they sub back.
You can do this on different channels such as YouTube live videos, among other channels. But again, these subscribers are not so much concerned about getting the real subs. What matters is that you get 1,000 subscribers to enable you to monetize on YouTube. However, YouTube also has its measures in place, and manipulating the matrix is one of which they don’t advocate for. But in most cases, subforsub participants operate fake YouTube accounts and you can find one person corresponding up to 5 accounts to gain subscriptions. This isn’t good for your rating as you don’t get real subscribers but you only boost the number of subscribers. And since they don’t watch your videos, neither will they share them with other viewers.
Tips & tricks to use sub for sub
Subforsub isn’t genuine and all you get is bot subscribers who don’t engage. However, you can use available tricks to gain popularity.
- Using fake accounts
A user should only run one genuine YouTube account. However, the trick that most subscribers use to gain more subs is by creating other additional fake accounts to gain more subs in return. But again, it is not a guarantee as some subscribers may not sub back to all the accounts.
- Subscribers don’t watch the videos
Perhaps there is no time for subscribers to watch the potential sub videos before subscribing. Your mission is to gain as many subs as possible even if your watch time doesn’t go up. This doesn’t bring any positivity to your channel rather an increased number of subscribers.
- Reach out to friends
You can also boost your sub for sub by reaching out to friends to inform them of your channel and ask for subscriptions in return for theirs as well. This, however, could be a slow process as not all your friends will be attracted to what you do.
- Don’t do subforsub for followers
A subforsub may not give you followers parse. So, don’t get into it for genuine followers. Those who sub to your channel won’t follow you in most cases. Rather, they might unsubscribe after a short duration of time.
- Use channel branding
This trick will glue viewers to your channel. These can include banner art to welcome everyone who clicks into your channel.
Additional thoughts - Should we rely on subforsub to get more subscribers?
You should not rely on subforsub as it doesn’t give the real figures but manipulates the outcome. Nonetheless, you need real subscribers to climb the YouTube ladder. That’s the best way to push the YouTube algorithm. There are genuine aspects of gaining subscribers to grow your channel.
Get to social media platforms
These include Facebook, Instagram, WhatsApp, and other sites. Introduce your YouTube channel to your followers and remind them to subscribe. Likewise, demonstrate why your channel is worth subscribing to.
Upload content consistently
Ensure your upload schedule is consistent and you’ll see viewers having a reason to subscribe to your channel. Once you introduce your channel with the first video, post a second and third video to build more momentum on your potential subscribers.
Incorporate YouTube stories
Stories can be a good starting point for those who have not subscribed to your content yet despite watching. Short video stories will attract viewers’ attention and want to get more from your channel.
Use Calls to Action
Ask your audience to subscribe after watching your videos. A great idea is to use animation or graphics to attract the viewers’ attention instantly. Other free options like green screen are also available for use.
Make it easy for viewers to understand your channel
You can make it easy by giving your viewers a guided tour. By this, they’ll know where to find important sections like comments. You can also create a channel banner that tells your audience what you do. They’ll soon familiarize themselves with your channel and be friends in no time.
Build a relationship with your audience
It is good to connect with your audience in various aspects. Expressing yourself probably in front of a camera has a deeper impact. You can also use illustrations to bring out your points for a quick understanding. Engaging them in the process is the best way to make them feel like they belong and eventually turn into subscribers.
Focus on the video that’s working for you
You should know which video is working and which is not. Judge and put more emphasis on the video that’s working for you. Check out which videos turn viewers into subscribers as that’s your main aim. More so, be creative and innovative.
A video editor is worth a try – Filmora
Since creativity is paramount, engaging a video editor tool will make you achieve your goal in a few clicks. Filmora Video Editor will transform your videos into magical content. It comes with powerful editing tools to make your video stand tall from the rest. You will also manage to import and export your videos in various formats for easy access on different platforms and devices. Whether you wish to create a tutorial for learning or promotional purposes, Filmora will give you exceptional results. The steps are as easy as 1-2-3 and the process is effective. Check out its key features to help you produce quality videos.
For Win 7 or later (64-bit)
For macOS 10.12 or later
Key Features of Filmora Video Editor
- 4K editing support: Quality and sharp videos are attractive to viewers. Filmora lets you edit and export your videos at high resolutions of up to 4K.
- Noise removal: Make your videos noise-free by removing unwanted background sounds. Viewers won’t be destructed and can concentrate more on the important aspects of the video.
- Speed control: There are important sections of your video that you may wish to emphasize more. You can slow down the speed in such sections for your viewers to understand them in detail. Nonetheless, you can speed up certain parts that don’t require too much emphasis.
- Reverse: What about being creative using this feature. Simply flip your clips and play them backward with this feature.
- Preview frame by frame: Focus on precise editing by using this feature. It lets you move to any section of the frame at a time to ascertain that the final product will be the best.
- Audio separation: Do it in a few clicks. Detach audio from video and put any other background music depending on the theme of that moment.
Conclusion
● You may gain subscribers from the YouTube sub for sub but you will be violating YouTube’s terms of service. Additionally, the YouTube algorithm will eventually notice that your subscribers are not watching your videos. It will presume that you are buying subscribers, which is illegal in the long run. Be smart and engage the Filmora video editor. It works in simple steps to create wanting videos that will upsell your brand. Editing isn’t a worry either as it presents you with numerous stunning effects to transform your video to a compelling piece of art.
Also read:
- Navigating Your Path as a First-Time YouTuber Sidestep These 8 Common Mistakes
- A Compreayer's Guide to Polishing YouTube Content via iMovie Editing Techniques for 2024
- Drive More Watch Time, Not Churn Discover the Top 6 Techniques on YouTube for 2024
- [New] Cutting-Edge Video Communities Eclipsing Youtube
- In 2024, Boosting Income via YouTube Ads & Analytics Across Platforms
- Three Easy Ways to Harvest Youtube's Default Iconography
- Creative Music Videos A List of 15 YouTube Projects
- [Updated] 10 Record Screen and Upload to YouTube Tools [PC, Mac, Online]
- Elevate Your Content Visibility - Discover 6 Thumbnail Designers' Best Tools for 2024
- 2024 Approved Designing Efficient Auto-Subscribe Web Addresses
- Downloading Standardized Youtube Images with Ease & Precision
- Short Form Media Exploration
- Easy Access to No-Cost Music for Video Makers for 2024
- [New] Editor's Workshop Enhancing Your Youtube Video Visibility
- [Updated] Channel Character A Comprehensive Guide to Templates
- [New] 5-Second Stories Explained Well
- [New] A Taste of Film Home Cook's Visual Journey
- In 2024, Achieving Profitability on YouTube Average View Count for Success
- 2024 Approved Complete Investigation Virtual Stars' Journey Explored
- [Updated] Become a Shorts Connoisseur Must-Know Facts
- 2024 Approved Building a Brand Through YouTube A Strategic Guide
- Unseen Audiences Transform Your Zero-View Videos with These Tips
- Comprehensive Codes of Conduct for the Yt Community
- Miniature Melodic Maps Actors in Audio Landscape
- Cutting Edge Top 8 Free Online Video Tools for 2024
- Elevating Video View Count Top Hashtag Trends Guide
- 2024 Approved Easy Way to Edit YouTube Videos in iMovie
- Dual-Stream Technique for Massive Viewer Growth for 2024
- In 2024, Crafting the Perfect Aesthetic with Controlled Lighting
- 2024 Approved Elite Online Collection of Video Downloader Tools
- Enhance Your Media with Top Free Android Editing Tools for 2024
- Phenomenal Edits The Digital Illusionist's Art
- 10+ Top FREE YouTube Image Extractors for 2024
- [Updated] 10 Expert Suggestions to Make Your YT Shorts Stand Out
- Navigating the Online Marketplace for Profitable YT Content
- Curated Cinematic Journeys The Best YT Film Selections
- Unveiling 10 Inspirational Workout Plans for Video Creators
- In 2024, Conduct Cost-Effective Seminars Using YouTube
- Easy Steps for Stellar YouTube Thumbnails
- Audio Visual Synopsis Creator for 2024
- Best 9 Free YouTube Logo Makers for 2024
- Compreeved Guide to Creating Stellar YouTube Outros
- [Updated] Avoid YouTube? Here Are Top 10 Indie Video Apps for Phones
- Elevating Video Branding The Art and Science of Youtube Image Designs
- [New] Aesthetic Enigma The Ultimate Backdrop Collection for Video Thumbnails
- Striking Visuals for Success A Deep Dive Into YouTube Live Imagery
- From Free to Paid The Transition to YouTube's Elite Service
- [Updated] Boosting Revenue with YouTube Short Videos – A Complete Plan
- In 2024, Choosing the Right Platform A Look at Vimeo, YouTube & DailyMotion
- [Updated] Controlling Comment Visibility on YouTube Videos
- [Updated] In 2024, Instagram’s Video Length Limit - A Compre Written for You
- [Updated] Essential Browser Tools Enhanced Vimeo Accessibility
- Updated Pure Visuals Techniques for Removing Video Soundtracks (Latest Edition) for 2024
- [Updated] In 2024, Social Savvy Strategies for Maxed-Out Page Popularity
- Top 30 Affordable & Robust Cloud Services with Up to 1TB Space
- How To Change Your Apple ID on iPhone 15 With or Without Password
- [New] 2024 Approved Instagram to Music Directing Videos to MP3 Outputs
- In 2024, Reddit Experts Briefly Meet at Snapchat
- In 2024, The Top 10 Apple iPhone 11 Pro Max Emualtors for Windows, Mac and Android | Dr.fone
- [New] In 2024, FB Video Downloads & Direct MP3 Conversion
- How to Fix Unfortunately, Contacts Has Stopped Error on Infinix Note 30 Pro | Dr.fone
- New Understanding Audacitys Noise Suppression Techniques Step-by-Step Guide for 2024
- OnePlus Open Camera Not Working Unexpected Error? Fix It Now | Dr.fone
- The Ultimate Guide to iMovie Alternatives for Windows 10 Users
- VR Shopping Experience Optimization
- 2024 Approved A Beginner's Guide to Creating Impactful Slug Lines
- [Updated] Ultimate Compilation of Leading 9 Mobile Meeting Services (iOS, Android) for 2024
- [New] In 2024, Top Eco-Friendly Film Tech
- Bypass iCloud Activation Lock with IMEI Code From iPhone 11 Pro
- In 2024, OnePlus Ace 2 ADB Format Tool for PC vs. Other Unlocking Tools Which One is the Best?
- In 2024, Getting the Pokemon Go GPS Signal Not Found 11 Error in Infinix Note 30i | Dr.fone
- [Updated] 2024 Approved Journey Back in Time with These Top 5 GBA Console Emulators for PCs
- [Updated] Expert Tips for Twitter Video Interactions
- [Updated] Elevating Your Instagram Experience Through Smart Archiving
- [Updated] 2024 Approved Mastering Multi-Image Instagram Stories A Step-by-Step Tutorial
- [New] 2024 Approved Pursuit of Riches Terraria’s Quintessential Map Rankings
- In 2024, 5 Must-Know Fixes to Avoid Darkness on Game Capture by OBS
- The Secrets Behind the Most Influential TikTok Marketing Movements for 2024
- [Updated] Transform Your Stream Embrace OBS for YouTube & Twitch for 2024
- In 2024, How to Change your Motorola Moto G84 5G Location on Twitter | Dr.fone
- [Updated] Essential FB Video Plays Top 10 Choices
- [New] Unlocking Mac Recording Capabilities for 2024
- [Updated] 2024 Approved FaceTime Call Screen Recording The Beginner's Guide
- In 2024, Ultimate Guide from Samsung Galaxy S23 Tactical Edition FRP Bypass
- How to get the dragon scale and evolution-enabled pokemon On Meizu 21 Pro? | Dr.fone
- 4 Feasible Ways to Fake Location on Facebook For your Samsung Galaxy S24+ | Dr.fone
- OBS Mastery 5 Edits That Will Elevate Your Work for 2024
- Investigating Instagram's Videography Cap for 2024
- Complete Guide to Hard Reset Your Asus ROG Phone 7 Ultimate | Dr.fone
- Updated In 2024, Blur, Dont Reveal The Best Video Editing Tools for Anonymity
- New 2024 Approved Are You Ready to Learn About Something Free yet Amazing? We Are Talking About All Format Video Players for PC that You Should Know , Lets Begin
- [New] Syncing Songs with Your Facebook Chronicles for 2024
- [Updated] In 2024, Journey Through Japan Best Video Games Akin to Ghost of Tsushima
- [New] In-Game Capture Kings for 2024
- In 2024, Complete Transformation Handbook Using MorphVOX Tech
- In 2024, How to Change/Add Location Filters on Snapchat For your Honor X8b | Dr.fone
- Title: "How to Illuminate A Guide to Great Vlog Images"
- Author: Kevin
- Created at : 2024-05-25 15:19:47
- Updated at : 2024-05-26 15:19:47
- Link: https://youtube-videos.techidaily.com/how-to-illuminate-a-guide-to-great-vlog-images/
- License: This work is licensed under CC BY-NC-SA 4.0.
