
:max_bytes(150000):strip_icc()/GettyImages-157187140-37e3901e6d024481b1ea394bff30cd84.jpg)
How to Convert YouTube Videos to GIFs
Seamless Conversion of Video Content to Dynamic GIF Formats
How to Convert YouTube Videos to GIFs

Shanoon Cox
Mar 27, 2024• Proven solutions
A GIF adds an extra element to any conversation and makes the reader feel connected to the post. Using GIF can turn useful if done rightly. It narrates a story in a single animated image for social media conversation. In this article, we will brief you about how to convert YouTube to gif, various GIF converters, their uses, and the pros and cons of each converter.
Let’s get started!
How to Convert a YouTube Video into GIFs?
1. YouTube to GIF Directly
Here is a quick way to convert the YouTube video to GIFs without typing a YouTube to GIF website.
Gif.com is a free and easy-to-use video editor available with multiple effects. This converter was created keeping in mind how people spend hours and money on paid platforms.
Follow the below steps to convert a YouTube video into gifs.
- In the YouTube video page, add gif before youtube.com. For example, I want to convert the YouTube video https://www.youtube.com/watch?v=40fuGLmwHwk to GIFs, here is how it looks like after adding gif at the beginning: https://www.gifyoutube.com/watch?v=40fuGLmwHwk . Press the enter button on your keyboard and you will enter the gifs.com directly.

- In gifs.com, you can play and pause the YouTube video and drag the bar to select a desired moment for gif. Press the “Create Gif” button on the top right side to convert the specific part of the YouTube video to gif.
- You will then be directed to the result page to see your GIF created using the YouTube video, and you can change the GIF title and the tag.
- Lastly, you need to copy the link and share it!
Pros of converting YouTube to GIFs with Gifs.com:
- The interface is easy to use and it provides lots of tools to adjust.
- Simple functionality.
Cons:
- The watermark on your created GIF can be removed only after purchasing the premium version.
- GIFs can be downloaded only by registered users.
2. FreeGifMaker.me
FreeGifMaker is one simple online tool that allows the creation of animated Gifs for free. A minimum of two pictures has to be uploaded out of ten. It takes few seconds and is super easy to make a GIF from a YouTube video. You can use FreeGifMaker.me in some easy steps.
- Open the website http://freegifmaker.me/youtube-to-gif/ on your desktop.
- Go to YouTube and copy the video URL you want to create a GIF of and paste it on the website mentioned above.
- Then click “Load YouTube Video” below the URL and wait for a few seconds while the tool checks the video source.
- Once the YouTube video is loaded, enter the gif duration, start time, and click on the “Make a GIF button.” It will redirect you to the result page.
- Pros:
- Conversion size is unlimited**.**
- There is no usage of ads.
- Easy to make Gifs.
- Cons:
- The upload speed is slow.
- The converter gives limited options for editing.
3. Wondershare Online UniConverter
Online UniConverter converts video into a high-quality animated GIF and allows editing. It is a simple converter with unique features.
If you want to convert your YouTube video into a GIF, follow the steps.
- You need to upload your video through the “Choose Files” option. You can also copy the link from YouTube.
- Wait for some time once you upload the file; you can then set your start time, end time, frame rate according to your needs.
- Lastly, click on “Create GIF” and download your GIF. You can also save it through the dropdown option available besides “Download.”
- Pros:
- Easy to handle.
- A wide range of customization tools is available.
- Zero ads.
- Cons:
- Upload speed is slow.
- Conversion size is limited.
4. GifRun
It is a video maker that started in 2013, and GifRun converts videos from YouTube, Facebook, and other sources to high-quality GIFs. You can create Gifs free of cost from GifRun.
Here is how you can use Gifrun.
- Open the website and paste the URL you want to convert into Gif. Later, press “Get Video” option below the URL box.
- In this step, you can adjust the duration, start time, add text, and also pause and preview the video. Once you’re done altering the video, click “Create GIF.”
- Lastly, click on the “Download” button beside the add text button, or share the link directly.
- Pros:
- Fast conversion and download.
- There is no upload limit.
- The video preview feature is available.
- Cons:
- UI is ad-infested.
- Supports YouTube videos only.
5. Makeagif
This GIF converter creates high-quality GIFs in no time. You need to paste the URL in Makeagif and nothing much. It can make GIFs from Instagram, Facebook, Twitter, and other platforms easily.
The only issue is that it supports one type of conversion with a maximum limit of 25MB.
Here is how you can make your favorite GIF in few steps.
- Open makeagif.com and paste the YouTube URL in the box available.
- Once you paste the URL, the website will automatically take you to the edit page to edit GIF length, start time, speed, and add caption and stickers. The next step is to select the category to which the video belongs available on the left side of the screen.
- After editing, click on “Continue to publishing” then “Create GIF” at the lower right corner of the screen. Voila! Your GIF is ready to use.
- Pros:
- The UI is user-friendly.
- Ads are minimal
- Various GIF conversions are supported.
- Cons:
- The conversion size is small.
- Batch conversions are not available.
6. ImgFlip
It is a creative GIF website supporting various videos from other websites such as Vimeo and YouTube. ImgFlip has innovative customization tools for cropping, reshaping, adding text and, a lot more, but you just need to be aware of the ads.
Want to know how to create GIF? Go through these simple steps.
- You can make GIFs both from Video and Images. To make GIF from a video, paste the YouTube URL in the box at the top, upload the tape from your device’s file.
- After pasting the URL, you will be given lots of customization options. Choose the effect of your choice for your GIF.
- Lastly, click on “Generate GIF” available on the right side of the screen. You can now share the GIF via your device or download it.
- Pros:
- Plenty of customization options.
- Fast conversion.
- Easy to upload and use.
- Cons:
- Ads pop up frequently.
- Offline conversion is unavailable.
7. GIPHY
It is a free GIF converter that helps you download free YouTube GIFs. You can also make GIFs from your photos, videos available on your device along with video URLs and images. The only problem is, to use Giphy you first have to log in to the app.
Follow the below steps to create a GIF from YouTube videos with Giphy:
- Open Giphy on your device and click on “Create” on the top right-side of your screen.
- Paste the URL in the space given below. A pop-up will tell you to log in. Log in to the website to continue.
- The video you choose should be less than 15 seconds and under 100MB. You will be given editing options from which you can select the start time and duration of your GIF along with Captions and Tags.
- In the end, press the “Create GIF” button to make the GIF. When it’s done, you will be redirected to the GIF page. You can then share your GIF on any social media site.
- Pros:
- Ads are absent
- Uploading is fast
- Wide range of free GIFs available
- Cons:
- Not perfect for green hands
8. Imgur
It is one of the best apps that offers tons of images, memes, and GIFs. You can make GIFs of less than 60 seconds with high quality, which you can share anywhere.
Here are three easy steps to make GIFs
- Visit the page “imgur.com/vidgif” and paste your YouTube URL there.
- Set a start time by clicking or dragging on the timeline. The total runtime is also adjustable, with 60 seconds as the maximum time for GIFs.
- Lastly, press on “Create GIF” to see the magic. The GIF is converted from the YouTube video.
- Pros:
- The users can share the post of their choice
- Users can save posts.
- Great collection of short GIFs and videos.
- Cons:
- During loading, the screen flashes.
9 VEED.IO
Veed is a simple YouTube video converter that makes your work super easy. It converts YouTube videos into GIFs with various editing options like crop, trim, text ads, and many more.
Check out how to use VEED in 3 steps.
- Start by pasting the URL of your YouTube video into VEED, Your video will be ready to convert into GIF.
- Now you are all set to edit your video. You have the option to crop and trim the video. You can also include different font styles, colors, and sizes of your choice.
- Lastly, download the GIF you made in VEED.
- Pros:
- Downloading the software is not mandatory.
- UI is simple and easy to navigate.
- The subtitle option is present.
- Cons:
- It takes a lot of time to upload video.
- Many basic tools.
10. Kapwing
Kapwing is a helpful video converter that can easily turn any video into GIFs with a click. It can also convert different files such as 3GP, GIF, WEBM.
To create beautiful GIFs with this video editor, follow these easy steps.
- Open Kapwing video editor and upload your video from YouTube.
- Choose the “Export dropdown” option and choose the format you wish to convert.
You can also preview the GIF and customize it as per your choice.
- In the final step, export the video by clicking the “Export Video” button. Save and download the newly created GIF and share it anywhere with your friends.
- Pros:
- Great editing tools.
- Easy to use.
- Cons:
- Available only on the website.
- Too many tools for the same purpose.
Final Thoughts
With the increased use of GIFs on social media, you can now easily convert your favorite YouTube videos into GIFs on your own. All you have to do is simply choose the tools mentioned above and share it with your friends.
Shanoon Cox
Shanoon Cox is a writer and a lover of all things video.
Follow @Shanoon Cox
Shanoon Cox
Mar 27, 2024• Proven solutions
A GIF adds an extra element to any conversation and makes the reader feel connected to the post. Using GIF can turn useful if done rightly. It narrates a story in a single animated image for social media conversation. In this article, we will brief you about how to convert YouTube to gif, various GIF converters, their uses, and the pros and cons of each converter.
Let’s get started!
How to Convert a YouTube Video into GIFs?
1. YouTube to GIF Directly
Here is a quick way to convert the YouTube video to GIFs without typing a YouTube to GIF website.
Gif.com is a free and easy-to-use video editor available with multiple effects. This converter was created keeping in mind how people spend hours and money on paid platforms.
Follow the below steps to convert a YouTube video into gifs.
- In the YouTube video page, add gif before youtube.com. For example, I want to convert the YouTube video https://www.youtube.com/watch?v=40fuGLmwHwk to GIFs, here is how it looks like after adding gif at the beginning: https://www.gifyoutube.com/watch?v=40fuGLmwHwk . Press the enter button on your keyboard and you will enter the gifs.com directly.
- In gifs.com, you can play and pause the YouTube video and drag the bar to select a desired moment for gif. Press the “Create Gif” button on the top right side to convert the specific part of the YouTube video to gif.
- You will then be directed to the result page to see your GIF created using the YouTube video, and you can change the GIF title and the tag.
- Lastly, you need to copy the link and share it!
Pros of converting YouTube to GIFs with Gifs.com:
- The interface is easy to use and it provides lots of tools to adjust.
- Simple functionality.
Cons:
- The watermark on your created GIF can be removed only after purchasing the premium version.
- GIFs can be downloaded only by registered users.
2. FreeGifMaker.me
FreeGifMaker is one simple online tool that allows the creation of animated Gifs for free. A minimum of two pictures has to be uploaded out of ten. It takes few seconds and is super easy to make a GIF from a YouTube video. You can use FreeGifMaker.me in some easy steps.
- Open the website http://freegifmaker.me/youtube-to-gif/ on your desktop.
- Go to YouTube and copy the video URL you want to create a GIF of and paste it on the website mentioned above.
- Then click “Load YouTube Video” below the URL and wait for a few seconds while the tool checks the video source.
- Once the YouTube video is loaded, enter the gif duration, start time, and click on the “Make a GIF button.” It will redirect you to the result page.
- Pros:
- Conversion size is unlimited**.**
- There is no usage of ads.
- Easy to make Gifs.
- Cons:
- The upload speed is slow.
- The converter gives limited options for editing.
3. Wondershare Online UniConverter
Online UniConverter converts video into a high-quality animated GIF and allows editing. It is a simple converter with unique features.
If you want to convert your YouTube video into a GIF, follow the steps.
- You need to upload your video through the “Choose Files” option. You can also copy the link from YouTube.
- Wait for some time once you upload the file; you can then set your start time, end time, frame rate according to your needs.
- Lastly, click on “Create GIF” and download your GIF. You can also save it through the dropdown option available besides “Download.”
- Pros:
- Easy to handle.
- A wide range of customization tools is available.
- Zero ads.
- Cons:
- Upload speed is slow.
- Conversion size is limited.
4. GifRun
It is a video maker that started in 2013, and GifRun converts videos from YouTube, Facebook, and other sources to high-quality GIFs. You can create Gifs free of cost from GifRun.
Here is how you can use Gifrun.
- Open the website and paste the URL you want to convert into Gif. Later, press “Get Video” option below the URL box.
- In this step, you can adjust the duration, start time, add text, and also pause and preview the video. Once you’re done altering the video, click “Create GIF.”
- Lastly, click on the “Download” button beside the add text button, or share the link directly.
- Pros:
- Fast conversion and download.
- There is no upload limit.
- The video preview feature is available.
- Cons:
- UI is ad-infested.
- Supports YouTube videos only.
5. Makeagif
This GIF converter creates high-quality GIFs in no time. You need to paste the URL in Makeagif and nothing much. It can make GIFs from Instagram, Facebook, Twitter, and other platforms easily.
The only issue is that it supports one type of conversion with a maximum limit of 25MB.
Here is how you can make your favorite GIF in few steps.
- Open makeagif.com and paste the YouTube URL in the box available.
- Once you paste the URL, the website will automatically take you to the edit page to edit GIF length, start time, speed, and add caption and stickers. The next step is to select the category to which the video belongs available on the left side of the screen.
- After editing, click on “Continue to publishing” then “Create GIF” at the lower right corner of the screen. Voila! Your GIF is ready to use.
- Pros:
- The UI is user-friendly.
- Ads are minimal
- Various GIF conversions are supported.
- Cons:
- The conversion size is small.
- Batch conversions are not available.
6. ImgFlip
It is a creative GIF website supporting various videos from other websites such as Vimeo and YouTube. ImgFlip has innovative customization tools for cropping, reshaping, adding text and, a lot more, but you just need to be aware of the ads.
Want to know how to create GIF? Go through these simple steps.
- You can make GIFs both from Video and Images. To make GIF from a video, paste the YouTube URL in the box at the top, upload the tape from your device’s file.
- After pasting the URL, you will be given lots of customization options. Choose the effect of your choice for your GIF.
- Lastly, click on “Generate GIF” available on the right side of the screen. You can now share the GIF via your device or download it.
- Pros:
- Plenty of customization options.
- Fast conversion.
- Easy to upload and use.
- Cons:
- Ads pop up frequently.
- Offline conversion is unavailable.
7. GIPHY
It is a free GIF converter that helps you download free YouTube GIFs. You can also make GIFs from your photos, videos available on your device along with video URLs and images. The only problem is, to use Giphy you first have to log in to the app.
Follow the below steps to create a GIF from YouTube videos with Giphy:
- Open Giphy on your device and click on “Create” on the top right-side of your screen.
- Paste the URL in the space given below. A pop-up will tell you to log in. Log in to the website to continue.
- The video you choose should be less than 15 seconds and under 100MB. You will be given editing options from which you can select the start time and duration of your GIF along with Captions and Tags.
- In the end, press the “Create GIF” button to make the GIF. When it’s done, you will be redirected to the GIF page. You can then share your GIF on any social media site.
- Pros:
- Ads are absent
- Uploading is fast
- Wide range of free GIFs available
- Cons:
- Not perfect for green hands
8. Imgur
It is one of the best apps that offers tons of images, memes, and GIFs. You can make GIFs of less than 60 seconds with high quality, which you can share anywhere.
Here are three easy steps to make GIFs
- Visit the page “imgur.com/vidgif” and paste your YouTube URL there.
- Set a start time by clicking or dragging on the timeline. The total runtime is also adjustable, with 60 seconds as the maximum time for GIFs.
- Lastly, press on “Create GIF” to see the magic. The GIF is converted from the YouTube video.
- Pros:
- The users can share the post of their choice
- Users can save posts.
- Great collection of short GIFs and videos.
- Cons:
- During loading, the screen flashes.
9 VEED.IO
Veed is a simple YouTube video converter that makes your work super easy. It converts YouTube videos into GIFs with various editing options like crop, trim, text ads, and many more.
Check out how to use VEED in 3 steps.
- Start by pasting the URL of your YouTube video into VEED, Your video will be ready to convert into GIF.
- Now you are all set to edit your video. You have the option to crop and trim the video. You can also include different font styles, colors, and sizes of your choice.
- Lastly, download the GIF you made in VEED.
- Pros:
- Downloading the software is not mandatory.
- UI is simple and easy to navigate.
- The subtitle option is present.
- Cons:
- It takes a lot of time to upload video.
- Many basic tools.
10. Kapwing
Kapwing is a helpful video converter that can easily turn any video into GIFs with a click. It can also convert different files such as 3GP, GIF, WEBM.
To create beautiful GIFs with this video editor, follow these easy steps.
- Open Kapwing video editor and upload your video from YouTube.
- Choose the “Export dropdown” option and choose the format you wish to convert.
You can also preview the GIF and customize it as per your choice.
- In the final step, export the video by clicking the “Export Video” button. Save and download the newly created GIF and share it anywhere with your friends.
- Pros:
- Great editing tools.
- Easy to use.
- Cons:
- Available only on the website.
- Too many tools for the same purpose.
Final Thoughts
With the increased use of GIFs on social media, you can now easily convert your favorite YouTube videos into GIFs on your own. All you have to do is simply choose the tools mentioned above and share it with your friends.
Shanoon Cox
Shanoon Cox is a writer and a lover of all things video.
Follow @Shanoon Cox
Savvy Sponsorship Strategies for Small-Scale Sites
How to Get YouTube Sponsorship for Small Channels (Easy)

Richard Bennett
Mar 27, 2024• Proven solutions
Are you looking for YouTube sponsorship? Getting YouTube sponsorship for small channels might seem to be a very difficult goal. Whenever the word sponsors strikes your mind, you think of the big and expensive commercials.
However, if you lower your expectation from the big commercial companies, there are several other companies in the market that can help you with the YouTube sponsorship.
In this article, you will learn how to get YouTube sponsorship and make money out of it.
- Part1: Before You Start Applying For Sponsorship
- Part2: How To Get A Sponsor For Youtube Channel
- Part3: Types of Sponsorship
Part 1: Before You Start Applying For Sponsorship
1. Read YouTube Rules
As you are a small channel, you must be very cautious about the YouTube rules. Never put up any abusive content on your channel that degrades the value of YouTube. Ensure that your channel’s content fits the directions and guidelines of YouTube.
The supporters of YouTube sponsorship for small channels would never wish to get associated with channels that might be erased due to the strategy infringement of YouTube. So, be careful before uploading your content.
2. Quality Content Is Important
The content you offer through your channel must offer valuable content. Not just that, you must have a library of valuable content so that the potential sponsors can browse through several materials in your channel. Uploading once in a blue moon or just a few contents in the beginning and expecting YouTube sponsorships to pour in is not the way out to acquire supporters.

3. Leave Your Business Email
Always add a business email ID to your channel, which shows that you would love to receive business inquiries. This is the ID where you will receive notifications for friend requests, video comments, and even the battering messages once you have a large fan following.

4. Try to Make Your Video Eye-catching
A high-quality video will also attract sponsors. Don’t just put your footage together and upload it to YouTube, add some transitions, elements, and effects to make it more entertaining and attractive. Yet not everyone is able to edit videos perfectly, that’s why we would like to recommend Filmora for you.
Filmora is a video editing software for people of different levels. For beginners, the Instant Mode, Template Mode saves you from the trouble of finding the proper transitions or elements. For experienced, the Green Screen, Split Screen, Speed Ramping, and more allow you to add more effects to your video.
Check the below videos to find out the features of Filmora and download it to get started with video editing.


Part 2: How To Get A Sponsor For Youtube Channel
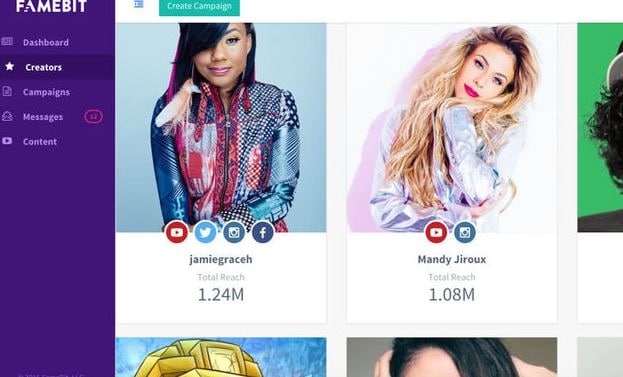
1. Use YouTube Sponsorship Platform – Famebit
If you are searching for YouTube sponsorship for small channels, Famebit is a trusted platform that can be considered. It is an interface for the advertisers and the video creators who require sponsorship for their content.
Utilizing Famebit can be beneficial in acquiring more than the average amount of cash as it is added by Google. If you have 5000 endorsers for your channel, you can very well utilize Famebit to obtain YouTube sponsorship for small channels.
You can explore various items like contraptions, innovations, designs, and more when you get to their commercial center by making a free record. Famebit charges 10% of the sponsored amount and the installment is made by check or PayPal.
2. Reach Out Directly
Reaching out to the people directly is one of the tried and tested ways to acquire YouTube sponsorship for small channels. Research and try to find 50 to 100 companies that would be interested in your channel.
It will not be much difficult to search for that one person within this list whom you can connect with directly. Once you have the company’s list and detailed contact information of those companies, send a mail inviting them to check your channel and show your interest to partner with them.
It is essential to make yourself stand out in the colossal crowd. Ensure your channel is unique and somewhat different from the rest because the contacted companies keep receiving partnering submissions from several other content creators too.
One important thing is not to send out the same old letter to all 50 companies and keep hoping to receive a positive response from at least one. Try to focus on your channel’s USP and highlight the same in your letter to the companies while trying to contact the companies for YouTube Sponsorship.

3. Remember To Attend Exhibition
The trade shows and exhibitions are a great way to search for YouTube sponsorship for small channels. The exhibitions that focus on new media give a huge platform for you to find a sponsor when you participate in it.
Such events offer tricks and tips, helps you to talk to other content creators, and also lets you connect with the brand managers who can offer your channel with YouTube sponsorship.

Part 3: Types of Sponsorship
1. Product Sponsorships
When you are searching for sponsorship for a particular product, ensure that it is relevant to your channel. Never approach the sponsors without ensuring the same as you might put off your viewers and your sponsors will not achieve their expected results. You might lose both your sponsors and audiences in such a case.
When you try to get YouTube sponsorship for small channels, it is quite difficult as the promotion of the product becomes limited to whatever small following they have. Product reviews and tutorials are the best ways to obtain product sponsorships.
2. Paid Sponsorship
Among all sponsorships, paid sponsorship is the most challenging one. Usually, when you review the products of the affiliate links in your videos, you earn revenues, but, in the paid sponsorship you earn by advertising product and company links on your channel.
When you add the company’s products to your videos, you earn money. It appears at the beginning and at the end of your videos after it is played on your YouTube channel.
3. Affiliate Sponsorship
It is the easiest of all sponsorships but also the least revenue-generating one too. Affiliate sponsorship works by sharing affiliate codes and links. It is used by your audiences to obtain discounts or offer you a reward.
There are two types in which affiliate sponsorship works. One is the discounting option where the code is shared and the viewers use these codes to get discounts anywhere between 5-15% in shopping products from that same site. Another option is to use the affiliate code to integrate it into an URL that offers profits to a content creator in form of traffic.
Conclusion
Not just the popular channels, the newbies can also earn YouTube sponsorship when they know the way outs. Follow the above tricks to get the youtube sponsorship for small channels without much effort. If your content is unique and your process to reach the sponsors is right, you can definitely make money through this medium. If you want to edit a YouTube video, Filmora can help you with its powerful features.
Richard Bennett
Richard Bennett is a writer and a lover of all things video.
Follow @Richard Bennett
Richard Bennett
Mar 27, 2024• Proven solutions
Are you looking for YouTube sponsorship? Getting YouTube sponsorship for small channels might seem to be a very difficult goal. Whenever the word sponsors strikes your mind, you think of the big and expensive commercials.
However, if you lower your expectation from the big commercial companies, there are several other companies in the market that can help you with the YouTube sponsorship.
In this article, you will learn how to get YouTube sponsorship and make money out of it.
- Part1: Before You Start Applying For Sponsorship
- Part2: How To Get A Sponsor For Youtube Channel
- Part3: Types of Sponsorship
Part 1: Before You Start Applying For Sponsorship
1. Read YouTube Rules
As you are a small channel, you must be very cautious about the YouTube rules. Never put up any abusive content on your channel that degrades the value of YouTube. Ensure that your channel’s content fits the directions and guidelines of YouTube.
The supporters of YouTube sponsorship for small channels would never wish to get associated with channels that might be erased due to the strategy infringement of YouTube. So, be careful before uploading your content.
2. Quality Content Is Important
The content you offer through your channel must offer valuable content. Not just that, you must have a library of valuable content so that the potential sponsors can browse through several materials in your channel. Uploading once in a blue moon or just a few contents in the beginning and expecting YouTube sponsorships to pour in is not the way out to acquire supporters.
3. Leave Your Business Email
Always add a business email ID to your channel, which shows that you would love to receive business inquiries. This is the ID where you will receive notifications for friend requests, video comments, and even the battering messages once you have a large fan following.
4. Try to Make Your Video Eye-catching
A high-quality video will also attract sponsors. Don’t just put your footage together and upload it to YouTube, add some transitions, elements, and effects to make it more entertaining and attractive. Yet not everyone is able to edit videos perfectly, that’s why we would like to recommend Filmora for you.
Filmora is a video editing software for people of different levels. For beginners, the Instant Mode, Template Mode saves you from the trouble of finding the proper transitions or elements. For experienced, the Green Screen, Split Screen, Speed Ramping, and more allow you to add more effects to your video.
Check the below videos to find out the features of Filmora and download it to get started with video editing.
Part 2: How To Get A Sponsor For Youtube Channel
1. Use YouTube Sponsorship Platform – Famebit
If you are searching for YouTube sponsorship for small channels, Famebit is a trusted platform that can be considered. It is an interface for the advertisers and the video creators who require sponsorship for their content.
Utilizing Famebit can be beneficial in acquiring more than the average amount of cash as it is added by Google. If you have 5000 endorsers for your channel, you can very well utilize Famebit to obtain YouTube sponsorship for small channels.
You can explore various items like contraptions, innovations, designs, and more when you get to their commercial center by making a free record. Famebit charges 10% of the sponsored amount and the installment is made by check or PayPal.
2. Reach Out Directly
Reaching out to the people directly is one of the tried and tested ways to acquire YouTube sponsorship for small channels. Research and try to find 50 to 100 companies that would be interested in your channel.
It will not be much difficult to search for that one person within this list whom you can connect with directly. Once you have the company’s list and detailed contact information of those companies, send a mail inviting them to check your channel and show your interest to partner with them.
It is essential to make yourself stand out in the colossal crowd. Ensure your channel is unique and somewhat different from the rest because the contacted companies keep receiving partnering submissions from several other content creators too.
One important thing is not to send out the same old letter to all 50 companies and keep hoping to receive a positive response from at least one. Try to focus on your channel’s USP and highlight the same in your letter to the companies while trying to contact the companies for YouTube Sponsorship.
3. Remember To Attend Exhibition
The trade shows and exhibitions are a great way to search for YouTube sponsorship for small channels. The exhibitions that focus on new media give a huge platform for you to find a sponsor when you participate in it.
Such events offer tricks and tips, helps you to talk to other content creators, and also lets you connect with the brand managers who can offer your channel with YouTube sponsorship.
Part 3: Types of Sponsorship
1. Product Sponsorships
When you are searching for sponsorship for a particular product, ensure that it is relevant to your channel. Never approach the sponsors without ensuring the same as you might put off your viewers and your sponsors will not achieve their expected results. You might lose both your sponsors and audiences in such a case.
When you try to get YouTube sponsorship for small channels, it is quite difficult as the promotion of the product becomes limited to whatever small following they have. Product reviews and tutorials are the best ways to obtain product sponsorships.
2. Paid Sponsorship
Among all sponsorships, paid sponsorship is the most challenging one. Usually, when you review the products of the affiliate links in your videos, you earn revenues, but, in the paid sponsorship you earn by advertising product and company links on your channel.
When you add the company’s products to your videos, you earn money. It appears at the beginning and at the end of your videos after it is played on your YouTube channel.
3. Affiliate Sponsorship
It is the easiest of all sponsorships but also the least revenue-generating one too. Affiliate sponsorship works by sharing affiliate codes and links. It is used by your audiences to obtain discounts or offer you a reward.
There are two types in which affiliate sponsorship works. One is the discounting option where the code is shared and the viewers use these codes to get discounts anywhere between 5-15% in shopping products from that same site. Another option is to use the affiliate code to integrate it into an URL that offers profits to a content creator in form of traffic.
Conclusion
Not just the popular channels, the newbies can also earn YouTube sponsorship when they know the way outs. Follow the above tricks to get the youtube sponsorship for small channels without much effort. If your content is unique and your process to reach the sponsors is right, you can definitely make money through this medium. If you want to edit a YouTube video, Filmora can help you with its powerful features.
Richard Bennett
Richard Bennett is a writer and a lover of all things video.
Follow @Richard Bennett
Also read:
- [New] Bite-Sized Content Explanation The Lowdown
- In 2024, Audio Matters Ensuring Excellent Sound in Your YouTube Shots
- Tiny Vid Creators
- 2024 Approved Amplify Online Impact Through Savvy Templates Design
- The Journey From Ad Revenue to Bank Account Balance
- Craft a Memorable First Snap Your Shorts' Thumbnail Blueprint
- The Power of Precision Crafting Effective Video Titles
- 2024 Approved Discover the Best 12 Cameras to Elevate Your Vlogs
- Mastering Money Top Stock-Focused YT
- 7 Ultimate Live Streaming Apps for iPhone and Android Users on YouTube for 2024
- In 2024, Elevating Your Content's Reach Without Breaching Laws
- PlayStation Plaza Your Gateway to a Thousand Channels
- 2024 Approved Crafting Worldly Stories Startup Guide for Future Travel Vloggers
- [New] Elevate Your Mobile Surfing with These Top 7 Blockers
- Unravel iPhone Tricks for Repetitive Videos
- Respecting Copyrights When Converting YouTube to MP4
- Boosting Bank Balance Effective Tactics for Mobile Video Money-Making for 2024
- How to Create a Sports Highlight Video - a Simple Guide
- Does Life360 Notify When You Log Out On Vivo Y28 5G? | Dr.fone
- In 2024, Unlock Vivo V29 Pro Phone Password Without Factory Reset Full Guide Here
- Does find my friends work on Vivo Y36i | Dr.fone
- New In 2024, Create Fake Identities Best Free Face Generation Websites
- In 2024, The Complete Stardew Compendium Focus on Ginger Isle
- In 2024, Top IMEI Unlokers for Your OnePlus Nord CE 3 Lite 5G Phone
- Affordable Desktop Recording Solutions Reviewed
- In 2024, How to Intercept Text Messages on Motorola Moto G73 5G | Dr.fone
- 2024 Approved AMD Graphics Relic
- In 2024, Elevate Your Content From Instagram Vids to Crisp MP4 Files
- Updated In 2024, Cutting-Edge Cinema 10 Famous Films Edited with Final Cut Pro
- How to Downgrade Apple iPhone 13 mini to an Older iOS System Version? | Dr.fone
- [Updated] A Comparative Analysis of Top 10 Budget-Friendly Video Calls
- [Updated] Making New Connections Discord for PC/Mobile for 2024
- How to See Someones Location on Apple iPhone 12 Pro | Dr.fone
- Title: How to Convert YouTube Videos to GIFs
- Author: Kevin
- Created at : 2024-05-25 15:19:15
- Updated at : 2024-05-26 15:19:15
- Link: https://youtube-videos.techidaily.com/how-to-convert-youtube-videos-to-gifs/
- License: This work is licensed under CC BY-NC-SA 4.0.
