

"From Barely There to Top Rated The Youtube Growth Arc"
From Barely There to Top Rated: The Youtube Growth Arc
Case Study: How to Grow on YouTube to Have Millions of Subs

Shanoon Cox
Oct 26, 2023• Proven solutions
You’ve probably heard of stories about individuals who managed to find financial success on YouTube. If your dream is to make money on YouTube it’s important to remember that regular people are doing it.
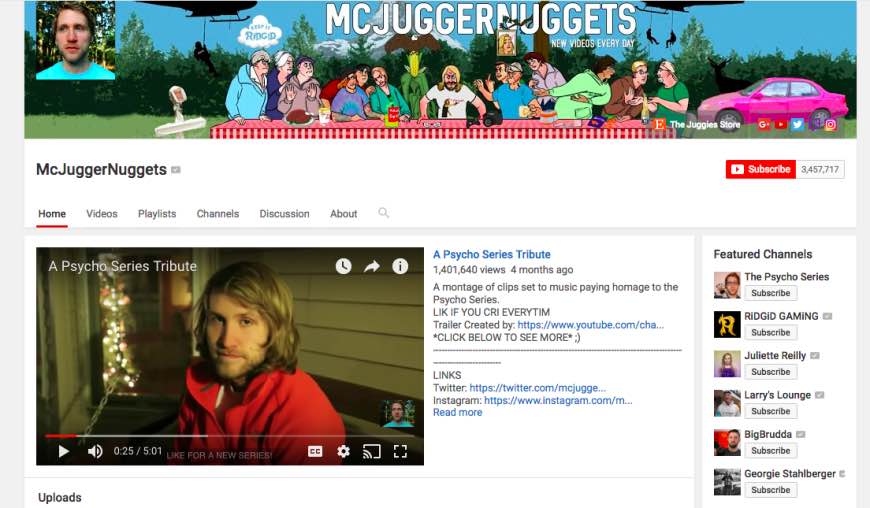
Jesse Ridgway is the owner of the vlog McJuggerNuggets , which has grown to over 3.4 million subscribers. He makes enough money to live off of YouTube alone. Here is a case study of how he made his first $10,000 on YouTube:
Case Study of McJuggerNuggets
Jesse was one of the earliest YouTubers. He started his channel on December 9, 2006. Jesse never guessed that he would make enough money to live off of the videos he was creating. Here are some of the ways that he monetized his channel:
AdSense
Monetization of videos through AdSense is one of the easiest ways that you can start to profit off your videos. Registering for a Google AdSense can earn you between $0.30 and $2.00 per thousand ad impressions (an impression is a click, not a view). How much you make per ad impression depends on a lot of things, including the time of year. There are good months for advertising revenue and bad months. December is usually the hottest month for making money through AdSense because of the holiday shopping season. Some of the other months where you can see huge profits include September for back-to-school, June, and March.
More popular channels get higher paying ads, and it is harder to earn ad revenue in popular vlogging genres (i.e. gaming) than in more obscure niches.
Target the Right Demographic
Some of the largest YouTuber success stories are creators who primarily target younger audiences. Others target men or women specifically. Think about who you want your audience to be and make videos that will appeal to them.
Multichannel Networks
Once you hit a certain level of subscribership and views you will start getting invited to MCMs. In some cases, multichannel network promotions could entitle you to discounts on merchandise and products. Be careful: a multichannel network will always want you to sign a contract, and they will take over your AdSense account.
Social Blade
This site will provide details about your subscription count, which of your videos has the best watch time, and more. It will give you a good impression of what you should be including in your videos and how you can make more money from your channel.
Uploading Your Videos at the Right Time
Uploading videos at the right time will make sure that you are on the front page of recently uploaded videos when people are let out of school or taking a break from work. This will earn you lots of views. Set an upload time for all of your videos each day and stick to that schedule.
Check out Webinars
Looking into webinars and videos of what other popular YouTube experts have done will help you model their success.
Collaborate with Other YouTubers
When you create a collab video you and your partner are each introduced to each other’s subscribers.
Keep Quality Up
Putting time and effort into every upload will ensure that you won’t lose subscribers or viewers because you got a bit lazy.
Do Follow-Up Videos
If you have a particular video that has a lot of views, you may want to consider creating follow-up videos. This can be a great way to generate lots of views.
Complete Regular Research
Regular research into your target market will help you to create the trendiest new content.
Don’t Get Discouraged
Timing and luck are definitely two of the biggest factors in becoming a success on YouTube. If you are willing to keep working and don’t get discouraged you will eventually earn profits.
Edit Your Videos with High-Quality Video Editor


Shanoon Cox
Shanoon Cox is a writer and a lover of all things video.
Follow @Shanoon Cox
Shanoon Cox
Oct 26, 2023• Proven solutions
You’ve probably heard of stories about individuals who managed to find financial success on YouTube. If your dream is to make money on YouTube it’s important to remember that regular people are doing it.
Jesse Ridgway is the owner of the vlog McJuggerNuggets , which has grown to over 3.4 million subscribers. He makes enough money to live off of YouTube alone. Here is a case study of how he made his first $10,000 on YouTube:
Case Study of McJuggerNuggets
Jesse was one of the earliest YouTubers. He started his channel on December 9, 2006. Jesse never guessed that he would make enough money to live off of the videos he was creating. Here are some of the ways that he monetized his channel:
AdSense
Monetization of videos through AdSense is one of the easiest ways that you can start to profit off your videos. Registering for a Google AdSense can earn you between $0.30 and $2.00 per thousand ad impressions (an impression is a click, not a view). How much you make per ad impression depends on a lot of things, including the time of year. There are good months for advertising revenue and bad months. December is usually the hottest month for making money through AdSense because of the holiday shopping season. Some of the other months where you can see huge profits include September for back-to-school, June, and March.
More popular channels get higher paying ads, and it is harder to earn ad revenue in popular vlogging genres (i.e. gaming) than in more obscure niches.
Target the Right Demographic
Some of the largest YouTuber success stories are creators who primarily target younger audiences. Others target men or women specifically. Think about who you want your audience to be and make videos that will appeal to them.
Multichannel Networks
Once you hit a certain level of subscribership and views you will start getting invited to MCMs. In some cases, multichannel network promotions could entitle you to discounts on merchandise and products. Be careful: a multichannel network will always want you to sign a contract, and they will take over your AdSense account.
Social Blade
This site will provide details about your subscription count, which of your videos has the best watch time, and more. It will give you a good impression of what you should be including in your videos and how you can make more money from your channel.
Uploading Your Videos at the Right Time
Uploading videos at the right time will make sure that you are on the front page of recently uploaded videos when people are let out of school or taking a break from work. This will earn you lots of views. Set an upload time for all of your videos each day and stick to that schedule.
Check out Webinars
Looking into webinars and videos of what other popular YouTube experts have done will help you model their success.
Collaborate with Other YouTubers
When you create a collab video you and your partner are each introduced to each other’s subscribers.
Keep Quality Up
Putting time and effort into every upload will ensure that you won’t lose subscribers or viewers because you got a bit lazy.
Do Follow-Up Videos
If you have a particular video that has a lot of views, you may want to consider creating follow-up videos. This can be a great way to generate lots of views.
Complete Regular Research
Regular research into your target market will help you to create the trendiest new content.
Don’t Get Discouraged
Timing and luck are definitely two of the biggest factors in becoming a success on YouTube. If you are willing to keep working and don’t get discouraged you will eventually earn profits.
Edit Your Videos with High-Quality Video Editor
Shanoon Cox
Shanoon Cox is a writer and a lover of all things video.
Follow @Shanoon Cox
Step by Step Process of Adding Subtitles to Your YouTube Content
How to Add Text to YouTube Video Before or After Uploading

Richard Bennett
Mar 27, 2024• Proven solutions
A great way to emphasize something you say in your vlog is to have your words appear next to you as you say them . Adding text to YouTube videos can look really professional. You might put a title at the beginning of your video, use bullet points to help people keep track of your monologue, or to highlight an important point by writing it on your screen. When you use text in your videos there are a few things you need to keep in mind. In this article, I will share with you 2 ways to add text/subtitles/captions to YouTube videos, whether you need to add text to the video during editing and upload it to YouTube later, or you have uploaded the video to YouTube already and want to add some captions and subtitles to complement it.
- Part 1: Add text to video before uploading YouTube
- Part 2: Add Text to YouTube video after uploading
- Part 3: Top 3 YouTube Video Text Tips
How to Add Text to YouTube Video Before Uploading
Before uploading the video to YouTube, it is recommended to add text to the video first. You can add simple texts and captions to videos with the free video editing software. To add more text effects to the video, you can use Filmora, Sony Vegas Movie Studio and Adobe Premiere CC based on your video editing skills and needs. These software programs are great video editors, which can help you input text easily.
1. Use Filmora to Add text to Videos
There are plenty of Text effects built in Filmora, you can apply motions and animation to texts, titles, subtitles, end credits and openers as well. Each title preset will present different effects. You can add multiple text boxes and place the text to any position in need. Besides writing texts to video, you can select the target font, size and color and customize the text effect in detail as well. To add text to a video in Filmora is easy, just follow the steps below:

- Open up Filmora and drag a clip into your timeline. Then, go to Text/Credit.
- Find a style that you like and drag it into your timeline where you want your text to appear. Make sure your text is selected in your timeline and click the Advanced Text Editing icon, which looks like a pen and paper.
- Insert your own words and drag your text to where you want it on the screen. Adjust the size by dragging the blue squares which surround your text.
- To change the color of your text, go into the Customize menu. You will find it near the top left of your screen. While you are in Customize there will be a section called Fill. This is where you select the color of your text. You can even change the fill type to ‘gradient fill’ and have your text transition between two colors.
- All of Filmora’s text options are animated – they fade, move around the screen, or perform some other type of action as they appear and disappear. To change the animation of your text select Animation next to Customize. A selection of different animations will appear. Double click on the one you want to apply to your text.
Download Mac Version ](https://tools.techidaily.com/wondershare/filmora/download/ )
Check the detailed steps of how to add text to video in Filmora.
2. Use Windows Movie Maker
As a simple video editing software, Windows Movie Maker also allows you to add text to videos. It provides 3 different options for you to add Title, Caption and Credits to the YouTube videos. You can follow the steps below to add text to the video in WMM.

- To start, launch the Windows Movie Maker.
- After, select import video to insert the video that you want to add text with.
- Select edit movie then click make credits or titles.
- Then add the text that you want to include.
For the step by step tutorial of adding text to YouTube video, check How to Add Text to Video with Windows Movie Maker . Besides adding text to video, you can use Windows Movie Maker to edit YouTube video further. Learn How to trim, cut, combine, split video and add transitions and upload video to YouTube in Windows Movie Maker?
3. Use Sony Vegas Movie Studio
Adding text to YouTube videos in Sony Vegas is not so complicated if you are new to this software. You can adjust the color, size, font and duration of the text effect and add fade in and fade out effects. Follow the steps below to add texts to video in Vegas:

- Launch Sony Vegas Movie Studio.
- Click the View Menu then select Media Generators.
- Choose the generator that you want to use.
- After, drag the generator you have chosen on the timeline.
- Then, the video event FX dialogue box will appear.
- Enter the text that you want and modify it by changing the font, size and style.
4. Use Adobe Premiere CC
For professionals who are looking for a professional way to adding text to video and also have a sufficient budget, Adobe Premiere CC is always recommended. You can check the video and the steps below to add text to video in Premiere:
- Click open or create a project.
- Click the file menu then choose new and title.
- After, the text window will appear then utilize the text tool to add text.
- You can also edit your text using the commands that are provided in the Title Menu.
- Save the text that you have made by clicking the file menu then choose Save As.
How to Add Text to video in YouTube after uploading
Sometimes, we have uploaded a video to YouTube and then want to add subtitles/cc to the video later. The good news is that YouTube is not only a site for videos but is also the place where you can edit your videos in an instant. As you have read, adding text and captions to the uploaded YouTube videos is just a breeze.
Of course, you can only add and edit texts and captions to the video under your YouTube account. Here are the steps on how you can add text to your videos with YouTube Video Editor after the video is uploaded.
- Go to youtube.com then sign in to your account. After sign in your YouTube account, click your avatar and select Creator Studio to enter the creator studio interface.
- Click the Video Manager tab and in Videos section you will see all your videos uploaded to YouTube. Select the video that you want to add captions to and then select Subtitles/CC after clicking Edit button.
- Add Captions/Subtitles

While YouTube may have already created the subtitles automatically for your video with its speech recognition technology. If it does, you will see something like Published: English (Automatic) to the right of your video. If the automatically generated subtitles is not correct, you can edit it to improve the accuracy. Select the line that needs modification to make the edits.
If there is no auto-subtitles, you can choose from 3 ways to add subtitles and closed captions to the video: Upload a file, Transcribe and auto-sync and create new subtitles or CC.

Upload a file: upload a text transcript or timed subtitles file.
Transcribe and auto-sync: Type or paste in a full transcript of the video and subtitle timings will be set automatically.
Create new subtitles or CC: Create subtitles and closed captions by typing them in as you watch the video.
If you already have a caption file which contains both text and time codes, just click Upload a file and upload the text to the video.
- Once everything is okay, you can change the name of the video and you can do it in the box beside Project.
Cons of Using YouTube Video Editor
When you make use of this editor, you cannot shorten the clips for music. Moreover, since it is an online editor, you need to refresh the page in order to do the changes. Aside from YouTube Video Editor, you can use Adobe Premier Pro, MAGIX Vegas Pro, OpenShot and Avidemux.
From 20th September 2017 users will no longer be able to use the complementary editing suite. Check the best YouTube video editor alternatives from this complete guide to find out more YouTube video editor alternatives if you want to add text to video with more features and customization.
Top 3 Tips for Adding Text to YouTube Videos
1. Leave Room
If you know you are going to add text to your video then make sure you leave room for it in your frame. Consider standing off to one side instead of directly in front of your camera. You do not want to have to choose between not using text, making your text really small, or placing it over your face.
While planning out your frame and leaving room for your text, consider what color you are going to make the words and whether it will stand out and look good against your background.
2. Bigger is Better
People should be able to read your text without putting in any extra effort, such as straining their eyes to make out small words. If it takes effort to read your text then a lot of people will just ignore it. Your text should be big enough that somebody watching your video on their smartphone screen – where everything is shrunk down – can read it easily.
It is easier to make your text larger when you stick to titles, keywords, and short sentences.
3. Do Not Overuse
Text is a great tool for making something stand out. However, if you try to use text to emphasize too much of what you say it will lose its effect. Text does not stand out anymore once viewers get too used to seeing it. Too much text can even get annoying and cause people to click away from your videos.
Try to use text to emphasize only the most important things you say.
Richard Bennett
Richard Bennett is a writer and a lover of all things video.
Follow @Richard Bennett
Richard Bennett
Mar 27, 2024• Proven solutions
A great way to emphasize something you say in your vlog is to have your words appear next to you as you say them . Adding text to YouTube videos can look really professional. You might put a title at the beginning of your video, use bullet points to help people keep track of your monologue, or to highlight an important point by writing it on your screen. When you use text in your videos there are a few things you need to keep in mind. In this article, I will share with you 2 ways to add text/subtitles/captions to YouTube videos, whether you need to add text to the video during editing and upload it to YouTube later, or you have uploaded the video to YouTube already and want to add some captions and subtitles to complement it.
- Part 1: Add text to video before uploading YouTube
- Part 2: Add Text to YouTube video after uploading
- Part 3: Top 3 YouTube Video Text Tips
How to Add Text to YouTube Video Before Uploading
Before uploading the video to YouTube, it is recommended to add text to the video first. You can add simple texts and captions to videos with the free video editing software. To add more text effects to the video, you can use Filmora, Sony Vegas Movie Studio and Adobe Premiere CC based on your video editing skills and needs. These software programs are great video editors, which can help you input text easily.
1. Use Filmora to Add text to Videos
There are plenty of Text effects built in Filmora, you can apply motions and animation to texts, titles, subtitles, end credits and openers as well. Each title preset will present different effects. You can add multiple text boxes and place the text to any position in need. Besides writing texts to video, you can select the target font, size and color and customize the text effect in detail as well. To add text to a video in Filmora is easy, just follow the steps below:
- Open up Filmora and drag a clip into your timeline. Then, go to Text/Credit.
- Find a style that you like and drag it into your timeline where you want your text to appear. Make sure your text is selected in your timeline and click the Advanced Text Editing icon, which looks like a pen and paper.
- Insert your own words and drag your text to where you want it on the screen. Adjust the size by dragging the blue squares which surround your text.
- To change the color of your text, go into the Customize menu. You will find it near the top left of your screen. While you are in Customize there will be a section called Fill. This is where you select the color of your text. You can even change the fill type to ‘gradient fill’ and have your text transition between two colors.
- All of Filmora’s text options are animated – they fade, move around the screen, or perform some other type of action as they appear and disappear. To change the animation of your text select Animation next to Customize. A selection of different animations will appear. Double click on the one you want to apply to your text.
Download Mac Version ](https://tools.techidaily.com/wondershare/filmora/download/ )
Check the detailed steps of how to add text to video in Filmora.
2. Use Windows Movie Maker
As a simple video editing software, Windows Movie Maker also allows you to add text to videos. It provides 3 different options for you to add Title, Caption and Credits to the YouTube videos. You can follow the steps below to add text to the video in WMM.
- To start, launch the Windows Movie Maker.
- After, select import video to insert the video that you want to add text with.
- Select edit movie then click make credits or titles.
- Then add the text that you want to include.
For the step by step tutorial of adding text to YouTube video, check How to Add Text to Video with Windows Movie Maker . Besides adding text to video, you can use Windows Movie Maker to edit YouTube video further. Learn How to trim, cut, combine, split video and add transitions and upload video to YouTube in Windows Movie Maker?
3. Use Sony Vegas Movie Studio
Adding text to YouTube videos in Sony Vegas is not so complicated if you are new to this software. You can adjust the color, size, font and duration of the text effect and add fade in and fade out effects. Follow the steps below to add texts to video in Vegas:
- Launch Sony Vegas Movie Studio.
- Click the View Menu then select Media Generators.
- Choose the generator that you want to use.
- After, drag the generator you have chosen on the timeline.
- Then, the video event FX dialogue box will appear.
- Enter the text that you want and modify it by changing the font, size and style.
4. Use Adobe Premiere CC
For professionals who are looking for a professional way to adding text to video and also have a sufficient budget, Adobe Premiere CC is always recommended. You can check the video and the steps below to add text to video in Premiere:
- Click open or create a project.
- Click the file menu then choose new and title.
- After, the text window will appear then utilize the text tool to add text.
- You can also edit your text using the commands that are provided in the Title Menu.
- Save the text that you have made by clicking the file menu then choose Save As.
How to Add Text to video in YouTube after uploading
Sometimes, we have uploaded a video to YouTube and then want to add subtitles/cc to the video later. The good news is that YouTube is not only a site for videos but is also the place where you can edit your videos in an instant. As you have read, adding text and captions to the uploaded YouTube videos is just a breeze.
Of course, you can only add and edit texts and captions to the video under your YouTube account. Here are the steps on how you can add text to your videos with YouTube Video Editor after the video is uploaded.
- Go to youtube.com then sign in to your account. After sign in your YouTube account, click your avatar and select Creator Studio to enter the creator studio interface.
- Click the Video Manager tab and in Videos section you will see all your videos uploaded to YouTube. Select the video that you want to add captions to and then select Subtitles/CC after clicking Edit button.
- Add Captions/Subtitles
While YouTube may have already created the subtitles automatically for your video with its speech recognition technology. If it does, you will see something like Published: English (Automatic) to the right of your video. If the automatically generated subtitles is not correct, you can edit it to improve the accuracy. Select the line that needs modification to make the edits.
If there is no auto-subtitles, you can choose from 3 ways to add subtitles and closed captions to the video: Upload a file, Transcribe and auto-sync and create new subtitles or CC.
Upload a file: upload a text transcript or timed subtitles file.
Transcribe and auto-sync: Type or paste in a full transcript of the video and subtitle timings will be set automatically.
Create new subtitles or CC: Create subtitles and closed captions by typing them in as you watch the video.
If you already have a caption file which contains both text and time codes, just click Upload a file and upload the text to the video.
- Once everything is okay, you can change the name of the video and you can do it in the box beside Project.
Cons of Using YouTube Video Editor
When you make use of this editor, you cannot shorten the clips for music. Moreover, since it is an online editor, you need to refresh the page in order to do the changes. Aside from YouTube Video Editor, you can use Adobe Premier Pro, MAGIX Vegas Pro, OpenShot and Avidemux.
From 20th September 2017 users will no longer be able to use the complementary editing suite. Check the best YouTube video editor alternatives from this complete guide to find out more YouTube video editor alternatives if you want to add text to video with more features and customization.
Top 3 Tips for Adding Text to YouTube Videos
1. Leave Room
If you know you are going to add text to your video then make sure you leave room for it in your frame. Consider standing off to one side instead of directly in front of your camera. You do not want to have to choose between not using text, making your text really small, or placing it over your face.
While planning out your frame and leaving room for your text, consider what color you are going to make the words and whether it will stand out and look good against your background.
2. Bigger is Better
People should be able to read your text without putting in any extra effort, such as straining their eyes to make out small words. If it takes effort to read your text then a lot of people will just ignore it. Your text should be big enough that somebody watching your video on their smartphone screen – where everything is shrunk down – can read it easily.
It is easier to make your text larger when you stick to titles, keywords, and short sentences.
3. Do Not Overuse
Text is a great tool for making something stand out. However, if you try to use text to emphasize too much of what you say it will lose its effect. Text does not stand out anymore once viewers get too used to seeing it. Too much text can even get annoying and cause people to click away from your videos.
Try to use text to emphasize only the most important things you say.
Richard Bennett
Richard Bennett is a writer and a lover of all things video.
Follow @Richard Bennett
Also read:
- Cultivate Community Interest With Collaborative Lists
- Accelerated Fortnite Visualization Steps
- Best YouTube Video to Text Converters On-Line
- Reach New Heights in YouTube SEO Top Tips and Tricks
- In 2024, Elevating Your Content Strategy YouTube Keywords Explained
- Avoiding Strikes YouTube Edition for 2024
- 2024 Approved Charting Success with YouTube Income Streams
- A Step-by-Step Strategy for Merging Your YouTube & TikTok Presence
- Amplify Videographic Excellence - Choose From These 7 Audios for 2024
- Interactive Multiplayer Experiences Online
- Effortless iMovie Music Enhancement Using YouTube Songs for 2024
- In 2024, Curated List of Top 10 YouTube Video Cutting Apps
- Frame by Frame Building a Filmmaking Foundation on YouTube
- Streaming Made Simple Convert and Broadcast MP3 Songs Online
- [New] Conquer the Viewer Void 10 Tactics for YouTube Video Growth
- [New] Decoding Vtubers The Path From Concept to Career?
- 2024 Approved Beyond the Box 27 Premium Videostreaming Alternatives
- Elevating Your YouTube Projects with Enhancements for 2024
- Cutting-Edge Video Communities Eclipsing Youtube for 2024
- [Updated] Dominating the Digital Space with Trending Content
- Visual Producer Hub
- 2024 Approved Employing Google Trends to Discover Compelling Video Themes
- Secure Methods for Youtube-to-MP4 Conversion
- In 2024, Blueprint Making Inspiring Lifestyle Broadcasts
- Best 12 YouTube Game Openers A Comparative Guide (No Expense)
- Channel Personality Complimentary YouTube Graphics for 2024
- Unveiling the Hidden Treasures YouTube's Top Makeup Talents
- Craft Your Online Identity with Customized YouTube URLs
- In 2024, Anime in the Sunshine The Best YouTubers for Positivity [Top 15]
- In 2024, Bridging Creativity & Engagement - Anime Subscribe Buttons with Filmora
- 10 Best Yoga YouTube Channels to Follow - Keep Fit
- [New] DIY Photography Support Systems
- 6 Proven Techniques to Elevate Your YouTube Engagement and Reduce Churn
- [New] Customizing YouTube Viewing Policies for Your Content
- Best 10 Screen Recorders for YouTube for 2024
- Magical Editor Moves in Digital Worlds
- Enchanting the Screen with Edit Mastery for 2024
- Step-by-Step Techniques for Seamless YouTube Subtitling & Captions
- 2024 Approved 10+ Top FREE YouTube Image Extractors
- [Updated] Essential Insights Into YouTube's Content Policy Framework
- 2024 Approved 10+ Free Apps to Convert YouTube Videos on Demand
- Harness Your Content's Potential with Ideal Post Days
- Daily Dosage of Serenity Top Yoga Channels for Life
- Beyond the Iconic Youtube A Curated List of Top Alternatives
- Irreversible Termination of YouTube’s Brevity Mode
- 2024 Approved Access All Audio Extracted Top Free YouTube to MP3 Converter Guide
- 10 Best YouTube Conversion Tools for WebM Format for 2024
- In 2024, Easy Guide Online Tools to Save Your YouTube Videos
- In 2024, Constructing an Intriguing Trailer Blueprint
- How to Rescue Lost Contacts from Honor 90 GT?
- [New] NoLimitCapture - Professional Win11 Screen Recorders
- New Master Musicians Picks Best 10 Song Arrangers for Windows & Mac Devices
- [Updated] How to Enhance Audibility with Adjusted OBS Settings
- Forgot Apple iPhone XR Backup Password? Heres What to Do
- [New] 2024 Approved Picture Perfect Creating Screenshots in Windows
- How to identify malfunctioning hardware drivers with Windows Device Manager on Windows 7
- [New] Segment Screen Showdown Recorder's Leader Status
- [New] Covert Videography The Premier 8 Downloader List
- How To Fix OEM Unlock Missing on Honor V Purse?
- All About Factory Reset, What Is It and What It Does to Your Samsung Galaxy A54 5G? | Dr.fone
- Gain on IG Unveiling High-Payoff Content Strategies for 2024
- [Updated] Effortless Online Video Access via Vimeo for 2024
- [Updated] In 2024, Convert TikTok to MP4 [No Watermark] Top TikTok Downloaders
- 2024 Approved Comparative Analysis of Offline Screen Capturing
- What is Geo-Blocking and How to Bypass it On Google Pixel 8? | Dr.fone
- Venturing Free Audio Amendments to Visual Projects for 2024
- 2024 Approved Discord Gifs Made Simple A Step-by-Step Reference Guide
- In 2024, 10 Fake GPS Location Apps on Android Of your Nokia C110 | Dr.fone
- Say Goodbye to Bloatware with These 44 Superb Android Video Reducers
- Groundbreaking Gear for Next-Level Virtual Reality
- What is Fake GPS Location Pro and Is It Good On Honor Magic 6 Pro? | Dr.fone
- [New] Beat the Bad Guys Top Kung Fu Action Puzzle Games for 2024
- [Updated] In 2024, Effortless Guide to Going Live on Instagram
- In 2024, Apple iPhone 8 Asking for Passcode after iOS 17/14 Update, What to Do? | Dr.fone
- Updated Unleash Creative Freedom Best Public Domain Video Resources for 2024
- Top 4 SIM Location Trackers To Easily Find Your Lost Realme C51 Device
- [New] In 2024, Crafting Dynamic Web Pages with PHP and HTML
- 6 Proven Ways to Unlock Tecno Spark Go (2023) Phone When You Forget the Password
- [New] Unlock Stalled Facebook Videos on Mobile for 2024
- [Updated] In 2024, Social Media Stardom Guide
- New In 2024, A Comprehensive Guide for Free Video Translator Downloading
- [Updated] 2024 Approved Watchful Eye Discovering Twitter’s HD Features
- Unlock Your Xiaomi Redmi K70 Pros Potential The Top 20 Lock Screen Apps You Need to Try
- New 2024 Approved From Camera to Computer A Step-by-Step Guide to Editing Sony Camcorder Videos
- How to Turn Off Google Location to Stop Tracking You on OnePlus Nord CE 3 5G | Dr.fone
- Personalizing Call Screens The Pre/Post-Meeting Edge
- How to Stop My Spouse from Spying on My Lava Blaze Pro 5G | Dr.fone
- In 2024, How to Transfer Data from OnePlus 11 5G to Any iOS Devices | Dr.fone
- Title: "From Barely There to Top Rated The Youtube Growth Arc"
- Author: Kevin
- Created at : 2024-06-10 00:24:28
- Updated at : 2024-06-11 00:24:28
- Link: https://youtube-videos.techidaily.com/from-barely-there-to-top-rated-the-youtube-growth-arc/
- License: This work is licensed under CC BY-NC-SA 4.0.
