
:max_bytes(150000):strip_icc()/GettyImages-641174594-bdeb3169be1f4334a6a40ad7934fdd97.jpg)
"Exploring Earning Potential Revenue From YouTube Advertisements?"
Exploring Earning Potential: Revenue From YouTube Advertisements?
YouTube is a great way to make money online through sponsorship and selling merchandise and sponsorships. However, a big chunk of the creator generates their revenue from Google ads. The YouTube monetization rates defines how much you can make from the ads. In this article, we talk about YouTube monetization rates and what you need to start making money.
YouTububer Monetization Helper A cross-platform for creating visually appealing and engaging videos that will increase the chances of monetization on YouTube!
Free Download Free Download Learn More

Part 1. How Much Do YouTubers Make Per View?
Are you curious about how much YouTubers make per view? Most people are. The Influencer Marketing Hub estimates that the average YouTuber makes $0.018 per view. These rates vary from $0.10 to $0.30 per ad view depending on the type of video and location.

The YouTube monetization rates vary significantly because of various factors:
- The number of views a video receives
- The number of clicks an ad receives
- Ad blockers
- Ad Quality
- Video length
Part 2. How Much Do YouTubers Make Per 1,000 Views
A YouTube channel is a great way to generate revenye. Quality content attracts a large audience, enabling a way to generate ad revenue. Although it may be difficult to grow a YouTube channel, the revenue generated is worth. The youtube monetization rates determine the amount you can earn for every 1,000 views on your videos.
Allowing advertiser to run their ads on your channel through Google AdSense is an effective way of monetizing YouTube Content. The advertisers pay YouTube to display their products on the platform. YouTube then pays YouTubers for displaying the ads on their videos. Although the YouTube monetization rates may vary, overall revenue generated is usually substantial.
Each view will generate $0.10 to $0.30 or an average of $0.018. The YouTuber will be paid $18 on average for a video with 1,000 ad views. The amount paid depends on the CPM (Cost per Mille), which is the cost of advertising to 1,000 people. Brands will incur between $4 and $24 on YouTube to advertise on YouTube. However, the revenue generated by the Youtuber will be lower because not all the 1,000 views will be ad views.
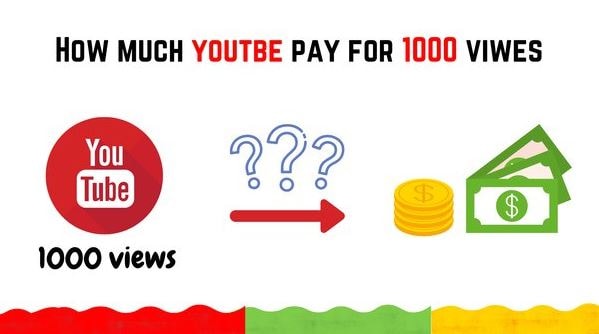
Most YouTubers report to earn around $5 to $7 from 1,000 views of their videos. Here is a breakdown of the earnings from this:
- Top talent on YouTube will likely earn $5 per 1,000
- Garnering 1 million views will earn the YouTuber $5,000
- Garnering 1 million views with 5 videos will earn the YouTuber $25,000
The figures above are just estimates. YouTubers often make more or less this amount.
Part 3. How Many Views Do YouTubers Need to Get Paid?
To get paid from revenues, you need to be eligible for the YouTube Partner Program (YPP). The following is the eligibility criteria.

The specific eligibility criteria include the following:
- Subscribers - At least 1,000
- YouTube Reach – At least 4,000 valid public watch hours in the past 12 months or at least 10M public Shorts views in the last 90 days
- YouTube Shorts Reach -
- Sign and agree to the terms and conditions
- Have an AdSense account
- Get reviewed and approved
Once approved for the YPP, you have the potential to start earning through ads. The revenue-sharing program allows you to earn income for the ads that show on your channel. Specifically, Google will pay you 68% of the revenue from the ads displayed with AdSense. For instance, a video that generates $1,000 from AdSense revenue will pay the YouTuber $680.
Part 4. The Top 6 Highest Paid YouTubers
YouTube creates a clear path for the birth of a new breed of celebrities. They have a huge following, and grow their wealth by sharing content with them. Let’s have a look at the top 6 paid YouTubers right now:
- Beast (Jimmy Donaldson) - $54 Million
- Jake Paul - $45 million
- Markiplier - $38 Million
- Rhett and Link - $30 million
- Unspeakable - $28.5 million
- Nastya - $28 million
1. Mr. Beast (Jimmy Donaldson) - $54 Million

Ranked first among the highest-paid YouTubers, Jimmy has the most popular channel. With more than 150 million subscribers, he creates videos about challenges, pranks, and giveaways. The videos have accumulated billions of views, contributing to his estimated net worth of over $100 million. Another important source of income is the Mr. Beast Burger app and menu that lets fans order MrBeast-banded meals from over 1,600 restaurants across the country.
2. Jake Paul - $45 million

Jake Paul is a renowned American professional boxer. Widely famous on social media, his YouTube is also one of the most highly ranked. He shares different kinds of videos from his boxing games. He also does pranks and reviews about different products.
3. Markiplier - $38 Million

Markiplier makes videos about playing games. The YouTube channel, which started in 2021 is renowned for moving merch. In addition to ad revenue, Markiplier records high sales of T-shirts, hoodies, and other items tied to the Unus Annus series.
4. Rhett and Link - $30 million

This YouTube channel started as the duo hosting a nerdy daily talk show called Good Mythical Morning. It quickly grew into an empire with brand extensions and spinoffs that boosted its views and earnings on YouTube.
5. Unspeakable - $28.5 million
Unspeakable talks about Minecraft in the channel. Nathan Graham posts videos of himself playing this and other games. He also posts other kinds of entertaining content such as filling a room with live alligators. His creativity has allowed him to collaborate with brands in making different ads and promotions.
6. Nastya - $28 million

Nastya immigrated from Russia with her parents. With over 88 million subscribers on her channel, she chronicles her life in prosaic installments. In 2021, she did a Spotter deal and added other brand extensions like merchandise and NFT collection that contributed added income.
Part 5. Edit Your Videos for Monetization with Wondershare Filmora
The amount of money a YouTuber earns depends on several factors. However, the amount can be increased by uploading quality videos. YouTube will quality and engaging content attract more audience, increasing the opportunities for revenue generation. Wondershare Filmora is one such software, that allows you to tell your story in a better way.
Free Download For Win 7 or later(64-bit)
Free Download For macOS 10.14 or later
With the integration of AI, Filmora now offers a wide range of editing features that you can use to automate editing. Instantly generate images, remove image background, and now. These features help create visually appealing and engaging videos that will increase the chances of monetization on YouTube. One of the AI features that stands out is Instant Mode.
Filmora Instant Mode
The Instant Mode helps beginners design slideshow videos with minimal effort. You probably have no video editing experience or a professional content creator with no time to make more videos. With Instant Mode, you can create a video within minutes. Let’s have a look at the steps involved:
Step 1 – Start Instant Mode on Filmora
After opening Filmora on your device, click on Instant Mode. This feature is on the left side of the screen.

Step 2 – Choose a Template
From the Instant Mode window, choose the video template you want to use. Click on it and play to preview the Video. Once satisfied, click om the Download Slideshow button to start editing your video.

Step 3 – Import Media Items
Click on the Import Your Media icon, and add all the media files you want to use for the video. Make sure to import more media files for better use, and press the Auto Create icon to move to the next step.

Step 4 – Implement Text Titles
From the top-left corner of the screen, click the “Titles” category. Then choose from the options available for the required title template.

Step 5 – Replace Needed Media Items
Review all the media items in the timeline, and replace any that you want with another option. The Replace icon allows you to seamlessly achieve this. You can also import new files to replace it with.

Step 6: Add Project to Timeline
Once you are satisfied with your slideshow video, click on the Timeline button. This will take you to Filmora’s editing environment where you can add effects and other elements to enhance the video.

Step 7 – Preview and Export Your Video
Click on the Play icon to preview the edited video. Then export it in MP4 format for quick upload to YouTube.

Other Useful Filmora Video Editing Features
- AI Portrait – Remove the background of your videos with high accuracy and choose over 70 portrait and sticker effects.
- AI Copywriting : Get inspiration for your video through AI-generated scripts, and automatically generate text during video editing.
- AI Image – Generate an image automatically by typing what you want. Choose from 3 resolutions and use the image directly for your video project
- Auto Reframe – Automatically resize your videos within minutes to use on both YouTube and Shorts.
- Auto Beat Sync – Automatically match the footage with music, giving your video a smooth flow with the music you choose.
Conclusion
Running a YouTube Channel is lucrative. Although it may take time to build a following, YouTube is a great platform for generating revenue. Most YouTubers have monetized their channels through the YPP program. The program allows you to earn revenue from the ads that show up in your videos. This means that a successful YouTube needs high-quality videos. We recommend Wondershare Filmora for editing your videos and improving their rate of engagement with the audience. This is a key step in building recurring revenue with YouTube monetization options.
Free Download Free Download Learn More
Part 1. How Much Do YouTubers Make Per View?
Are you curious about how much YouTubers make per view? Most people are. The Influencer Marketing Hub estimates that the average YouTuber makes $0.018 per view. These rates vary from $0.10 to $0.30 per ad view depending on the type of video and location.
The YouTube monetization rates vary significantly because of various factors:
- The number of views a video receives
- The number of clicks an ad receives
- Ad blockers
- Ad Quality
- Video length
Part 2. How Much Do YouTubers Make Per 1,000 Views
A YouTube channel is a great way to generate revenye. Quality content attracts a large audience, enabling a way to generate ad revenue. Although it may be difficult to grow a YouTube channel, the revenue generated is worth. The youtube monetization rates determine the amount you can earn for every 1,000 views on your videos.
Allowing advertiser to run their ads on your channel through Google AdSense is an effective way of monetizing YouTube Content. The advertisers pay YouTube to display their products on the platform. YouTube then pays YouTubers for displaying the ads on their videos. Although the YouTube monetization rates may vary, overall revenue generated is usually substantial.
Each view will generate $0.10 to $0.30 or an average of $0.018. The YouTuber will be paid $18 on average for a video with 1,000 ad views. The amount paid depends on the CPM (Cost per Mille), which is the cost of advertising to 1,000 people. Brands will incur between $4 and $24 on YouTube to advertise on YouTube. However, the revenue generated by the Youtuber will be lower because not all the 1,000 views will be ad views.
Most YouTubers report to earn around $5 to $7 from 1,000 views of their videos. Here is a breakdown of the earnings from this:
- Top talent on YouTube will likely earn $5 per 1,000
- Garnering 1 million views will earn the YouTuber $5,000
- Garnering 1 million views with 5 videos will earn the YouTuber $25,000
The figures above are just estimates. YouTubers often make more or less this amount.
Part 3. How Many Views Do YouTubers Need to Get Paid?
To get paid from revenues, you need to be eligible for the YouTube Partner Program (YPP). The following is the eligibility criteria.
The specific eligibility criteria include the following:
- Subscribers - At least 1,000
- YouTube Reach – At least 4,000 valid public watch hours in the past 12 months or at least 10M public Shorts views in the last 90 days
- YouTube Shorts Reach -
- Sign and agree to the terms and conditions
- Have an AdSense account
- Get reviewed and approved
Once approved for the YPP, you have the potential to start earning through ads. The revenue-sharing program allows you to earn income for the ads that show on your channel. Specifically, Google will pay you 68% of the revenue from the ads displayed with AdSense. For instance, a video that generates $1,000 from AdSense revenue will pay the YouTuber $680.
Part 4. The Top 6 Highest Paid YouTubers
YouTube creates a clear path for the birth of a new breed of celebrities. They have a huge following, and grow their wealth by sharing content with them. Let’s have a look at the top 6 paid YouTubers right now:
- Beast (Jimmy Donaldson) - $54 Million
- Jake Paul - $45 million
- Markiplier - $38 Million
- Rhett and Link - $30 million
- Unspeakable - $28.5 million
- Nastya - $28 million
1. Mr. Beast (Jimmy Donaldson) - $54 Million
Ranked first among the highest-paid YouTubers, Jimmy has the most popular channel. With more than 150 million subscribers, he creates videos about challenges, pranks, and giveaways. The videos have accumulated billions of views, contributing to his estimated net worth of over $100 million. Another important source of income is the Mr. Beast Burger app and menu that lets fans order MrBeast-banded meals from over 1,600 restaurants across the country.
2. Jake Paul - $45 million
Jake Paul is a renowned American professional boxer. Widely famous on social media, his YouTube is also one of the most highly ranked. He shares different kinds of videos from his boxing games. He also does pranks and reviews about different products.
3. Markiplier - $38 Million
Markiplier makes videos about playing games. The YouTube channel, which started in 2021 is renowned for moving merch. In addition to ad revenue, Markiplier records high sales of T-shirts, hoodies, and other items tied to the Unus Annus series.
4. Rhett and Link - $30 million
This YouTube channel started as the duo hosting a nerdy daily talk show called Good Mythical Morning. It quickly grew into an empire with brand extensions and spinoffs that boosted its views and earnings on YouTube.
5. Unspeakable - $28.5 million
Unspeakable talks about Minecraft in the channel. Nathan Graham posts videos of himself playing this and other games. He also posts other kinds of entertaining content such as filling a room with live alligators. His creativity has allowed him to collaborate with brands in making different ads and promotions.
6. Nastya - $28 million
Nastya immigrated from Russia with her parents. With over 88 million subscribers on her channel, she chronicles her life in prosaic installments. In 2021, she did a Spotter deal and added other brand extensions like merchandise and NFT collection that contributed added income.
Part 5. Edit Your Videos for Monetization with Wondershare Filmora
The amount of money a YouTuber earns depends on several factors. However, the amount can be increased by uploading quality videos. YouTube will quality and engaging content attract more audience, increasing the opportunities for revenue generation. Wondershare Filmora is one such software, that allows you to tell your story in a better way.
Free Download For Win 7 or later(64-bit)
Free Download For macOS 10.14 or later
With the integration of AI, Filmora now offers a wide range of editing features that you can use to automate editing. Instantly generate images, remove image background, and now. These features help create visually appealing and engaging videos that will increase the chances of monetization on YouTube. One of the AI features that stands out is Instant Mode.
Filmora Instant Mode
The Instant Mode helps beginners design slideshow videos with minimal effort. You probably have no video editing experience or a professional content creator with no time to make more videos. With Instant Mode, you can create a video within minutes. Let’s have a look at the steps involved:
Step 1 – Start Instant Mode on Filmora
After opening Filmora on your device, click on Instant Mode. This feature is on the left side of the screen.
Step 2 – Choose a Template
From the Instant Mode window, choose the video template you want to use. Click on it and play to preview the Video. Once satisfied, click om the Download Slideshow button to start editing your video.
Step 3 – Import Media Items
Click on the Import Your Media icon, and add all the media files you want to use for the video. Make sure to import more media files for better use, and press the Auto Create icon to move to the next step.
Step 4 – Implement Text Titles
From the top-left corner of the screen, click the “Titles” category. Then choose from the options available for the required title template.
Step 5 – Replace Needed Media Items
Review all the media items in the timeline, and replace any that you want with another option. The Replace icon allows you to seamlessly achieve this. You can also import new files to replace it with.
Step 6: Add Project to Timeline
Once you are satisfied with your slideshow video, click on the Timeline button. This will take you to Filmora’s editing environment where you can add effects and other elements to enhance the video.
Step 7 – Preview and Export Your Video
Click on the Play icon to preview the edited video. Then export it in MP4 format for quick upload to YouTube.
Other Useful Filmora Video Editing Features
- AI Portrait – Remove the background of your videos with high accuracy and choose over 70 portrait and sticker effects.
- AI Copywriting : Get inspiration for your video through AI-generated scripts, and automatically generate text during video editing.
- AI Image – Generate an image automatically by typing what you want. Choose from 3 resolutions and use the image directly for your video project
- Auto Reframe – Automatically resize your videos within minutes to use on both YouTube and Shorts.
- Auto Beat Sync – Automatically match the footage with music, giving your video a smooth flow with the music you choose.
Conclusion
Running a YouTube Channel is lucrative. Although it may take time to build a following, YouTube is a great platform for generating revenue. Most YouTubers have monetized their channels through the YPP program. The program allows you to earn revenue from the ads that show up in your videos. This means that a successful YouTube needs high-quality videos. We recommend Wondershare Filmora for editing your videos and improving their rate of engagement with the audience. This is a key step in building recurring revenue with YouTube monetization options.
Editing Pro Tips for Aspiring Sports Video Makers
How to Create a Sports Highlight Video

Richard Bennett
Mar 27, 2024• Proven solutions
“I want to make a sports highlight video, but I don’t know how to edit it or what kind of tools I need to use. Can someone tell me how to work on a sports video?”
As I read this query posted on a popular online forum, I realized that so many people out there find it hard to create a sports video. Well, unlike a standard video, working on a sports highlight video can be tough. This is because it needs a lot of editing and we need to handpick the right moments from hours of footage. Though, if you use the right tools, then you can easily work on highlight videos like a pro. In this guide, I will let you know how to create sports videos in a step by step manner.
- Part 1: Why is a sports highlight video and why important?
- Part 2: Highlight Video vs. Skills Video
- Part 3: Use Excellent Video Editor to Make a Sports Highlight Video
- Part 4: How to Create a Sports Highlight Video?
- Part 5: Expert Tips for Creating Highlight Videos
Why is a sports highlight video and why important?
As the name suggests, a highlight video basically includes all the vital events of a game in a short duration of time. You can include the details of some players at the start or focus on a particular player as well. Besides that, a sports highlight video would have fast-forward, slow motion, and frozen clips to skip or focus on certain details.
A lot of times, people don’t have the time to watch the entire game, which can span for a couple of hours. Therefore, they can watch a sports highlight video that would include all the major events of the game and will let them enjoy their thrill in a few moments.

Besides that, if you are applying for a college/academy or just want to showcase your skills, then you can consider making a sports video of an impressive game of yours. You can simply showcase a player and try to highlight their skills in the video.
Highlight Videos vs. Skills Videos: the Major Differences
While making a sports video, you might encounter two different types of content – a highlight video and a skills video. As I have mentioned above, a sports highlight video would include the shots of an actual game. You can either focus on the event of a single game or include clips from multiple games that were played in a genuine setup. If you want, you can highlight a particular player while making the video as well.
On the other hand, a skills video is mostly made to demonstrate the skills of a player and is not focused on the game. In fact, most of the skills videos are made outside of a real game setting. For instance, if you have mastered a skill or would like to demonstrate your game-related actions, then you can make a skills video. Some of these videos are also tutorial game-plays to teach others about a particular skill that they can master.
Use Excellent Video Editor to Make a Sports Highlight Video
If you want to come up with engaging and visually appealing highlight videos, then consider using a versatile video editor like Filmora. Equipped with several video editing tools, it will let you create a sports highlight video in no time. Since the tool has so many features, you can save your time in editing and come up with a new sports video in minutes.


- Filmora is extremely easy to use and runs on all the leading Windows and macOS versions without any issue.
- Using its inbuilt tools, you can clip out the most important events from a sports video or include them in your highlights.
- There are also features to change the motion and pace of the video (like fast forward or slow motion).
- You can also focus on any athlete and freeze a frame on a particular skill or action.
- Besides that, you can also add voiceovers in your sports highlight video, add media layers, use its inbuilt transitions, and fine-tune the overall aesthetics of your videos.
- There are also tons of filters and presets in Filmora that you can use to save your time in editing. You can work on videos of almost every format with seamless 4K support.
Why we picked it
- Options to import/export files in different formats
- Tons of features in one place (extremely easy to use)
- Split-screen support to include multiple events in a highlight video
How to Create a Sports Highlight Video with Filmora?
With the help of Filmora , anyone can create a sports video without even prior editing/designing experience. Firstly, you can install Filmora on your Windows or Mac by visiting its website and have the footage you wish to edit. Now, you can just follow these steps to work on your next sports highlight video.
Filmstock Stock Media Library ](https://filmstock.wondershare.com/creative-theme-sports?spm=rs.filmora%5Fweb&source%5Fchannel=seo%5Farticle )
Step 1: Add a video to Filmora
To start with, just launch Filmora on your computer and add the video that you wish to work on. You can just drag and drop the video to its interface or go to its Menu > File > Import Media to browse and load the file.

Step 2: Edit the Sports Video
In order to create a sports highlight video, the first thing that people do is trim any unwanted part. Once the video is loaded, you can view it on the timeline of the interface. Now, go to the timeline and get the trim tool to manually select the part of the video you wish to trim. After selecting the desired fragment, you can trim the clip or just delete it by clicking on their respective icons.

In the same way, you can also split your video and make other changes in it. You can also include multiple videos together and include them in your timeline as well.
If you are including multiple videos, then make sure they have the same dimensions and aspect ratio. For this, you can select the video, right-click on the timeline, and click on the crop icon. Now, select the same aspect ratio for the entire video to keep it uniform.

Most of the game highlights that we see have different speeds for various sections. That is, some actions would be fast-forwarded while some would be in slow motion. To apply this, simply select the section in the timeline, right-click, and go to the Speed and Duration settings. This will open a dedicated interface from where you can change the speed of the sports video.
Apart from manually setting the speed, you can also take the assistance of the custom speed options that are available in the timeline tools.

Step 3: Make Advanced Edits in your Sports Video
With the user-friendly interface of Filmora, you can do some basic edits and make a sports highlight video in minutes. Though, if you want to focus on some parts and make more changes, then you can use its advanced options as well.
For instance, in a highlight video, we often wish to freeze certain frames. To do this, just select a frame and use the “Freeze Frame” option from the timeline tools. You can even set the duration to freeze the selected frame.
If you have included clips from different videos, then you can apply all kinds of transitions from Filmora. In the end, you can go to its edit options and choose to close gaps as well.
To give your video a uniform and aesthetically pleasing appeal, you can also add different overlays and effects on it from Filmora’s library.
Lastly, make sure that you added sound or voiceover to your video. You can add a sound from its library or import any other music file to it. Since highlight videos mostly have voiceovers, you add the same by visiting the Record > Record Voiceover option.

Step 4: Export your video in the desired format
That’s it! Once your sports highlight video is ready, you can export it in different formats. Just go to the Export option and select the location to save the video and a preferred resolution. You can save your video in formats like MP4, WMV, AVI, FLV, MKV, and so on.
Expert Tips for Creating Highlight Videos
As you can see, making a sports highlight video with a tool like Filmora is extremely easy. Although to be a pro and make better videos, you can consider the following tips:
Keep it short
Make sure that you only include the highlights of the game in your video to keep it interesting. Your aim is to have a short and crisp video without any unwanted footage.
Use freeze frames and slow motion
Some games can be pretty fast-paced and the viewers might miss out on a few key details. To showcase them, you can freeze certain frames or apply slow motion.
Include other details
A sports highlight video can also be informative. You can include details about the players or the team at the start. Also, it is recommended to have sound or a voiceover in the background to narrate the events.
Pick the best clips
When you watch a game, make a note of the best moments that you know your viewers would enjoy. You can also focus on different skills that you found impressive and include them in your sports video.
I’m sure that after reading this guide, you would be able to come up with an impressive sports highlight video as well. Since you might need to make a lot of edits on a sports video, I would recommend using a diverse tool like Filmora. With the tons of editing options that it provides, you can easily create all sorts of highlight videos while saving your time and resources.
Richard Bennett
Richard Bennett is a writer and a lover of all things video.
Follow @Richard Bennett
Richard Bennett
Mar 27, 2024• Proven solutions
“I want to make a sports highlight video, but I don’t know how to edit it or what kind of tools I need to use. Can someone tell me how to work on a sports video?”
As I read this query posted on a popular online forum, I realized that so many people out there find it hard to create a sports video. Well, unlike a standard video, working on a sports highlight video can be tough. This is because it needs a lot of editing and we need to handpick the right moments from hours of footage. Though, if you use the right tools, then you can easily work on highlight videos like a pro. In this guide, I will let you know how to create sports videos in a step by step manner.
- Part 1: Why is a sports highlight video and why important?
- Part 2: Highlight Video vs. Skills Video
- Part 3: Use Excellent Video Editor to Make a Sports Highlight Video
- Part 4: How to Create a Sports Highlight Video?
- Part 5: Expert Tips for Creating Highlight Videos
Why is a sports highlight video and why important?
As the name suggests, a highlight video basically includes all the vital events of a game in a short duration of time. You can include the details of some players at the start or focus on a particular player as well. Besides that, a sports highlight video would have fast-forward, slow motion, and frozen clips to skip or focus on certain details.
A lot of times, people don’t have the time to watch the entire game, which can span for a couple of hours. Therefore, they can watch a sports highlight video that would include all the major events of the game and will let them enjoy their thrill in a few moments.
Besides that, if you are applying for a college/academy or just want to showcase your skills, then you can consider making a sports video of an impressive game of yours. You can simply showcase a player and try to highlight their skills in the video.
Highlight Videos vs. Skills Videos: the Major Differences
While making a sports video, you might encounter two different types of content – a highlight video and a skills video. As I have mentioned above, a sports highlight video would include the shots of an actual game. You can either focus on the event of a single game or include clips from multiple games that were played in a genuine setup. If you want, you can highlight a particular player while making the video as well.
On the other hand, a skills video is mostly made to demonstrate the skills of a player and is not focused on the game. In fact, most of the skills videos are made outside of a real game setting. For instance, if you have mastered a skill or would like to demonstrate your game-related actions, then you can make a skills video. Some of these videos are also tutorial game-plays to teach others about a particular skill that they can master.
Use Excellent Video Editor to Make a Sports Highlight Video
If you want to come up with engaging and visually appealing highlight videos, then consider using a versatile video editor like Filmora. Equipped with several video editing tools, it will let you create a sports highlight video in no time. Since the tool has so many features, you can save your time in editing and come up with a new sports video in minutes.
- Filmora is extremely easy to use and runs on all the leading Windows and macOS versions without any issue.
- Using its inbuilt tools, you can clip out the most important events from a sports video or include them in your highlights.
- There are also features to change the motion and pace of the video (like fast forward or slow motion).
- You can also focus on any athlete and freeze a frame on a particular skill or action.
- Besides that, you can also add voiceovers in your sports highlight video, add media layers, use its inbuilt transitions, and fine-tune the overall aesthetics of your videos.
- There are also tons of filters and presets in Filmora that you can use to save your time in editing. You can work on videos of almost every format with seamless 4K support.
Why we picked it
- Options to import/export files in different formats
- Tons of features in one place (extremely easy to use)
- Split-screen support to include multiple events in a highlight video
How to Create a Sports Highlight Video with Filmora?
With the help of Filmora , anyone can create a sports video without even prior editing/designing experience. Firstly, you can install Filmora on your Windows or Mac by visiting its website and have the footage you wish to edit. Now, you can just follow these steps to work on your next sports highlight video.
Filmstock Stock Media Library ](https://filmstock.wondershare.com/creative-theme-sports?spm=rs.filmora%5Fweb&source%5Fchannel=seo%5Farticle )
Step 1: Add a video to Filmora
To start with, just launch Filmora on your computer and add the video that you wish to work on. You can just drag and drop the video to its interface or go to its Menu > File > Import Media to browse and load the file.
Step 2: Edit the Sports Video
In order to create a sports highlight video, the first thing that people do is trim any unwanted part. Once the video is loaded, you can view it on the timeline of the interface. Now, go to the timeline and get the trim tool to manually select the part of the video you wish to trim. After selecting the desired fragment, you can trim the clip or just delete it by clicking on their respective icons.
In the same way, you can also split your video and make other changes in it. You can also include multiple videos together and include them in your timeline as well.
If you are including multiple videos, then make sure they have the same dimensions and aspect ratio. For this, you can select the video, right-click on the timeline, and click on the crop icon. Now, select the same aspect ratio for the entire video to keep it uniform.
Most of the game highlights that we see have different speeds for various sections. That is, some actions would be fast-forwarded while some would be in slow motion. To apply this, simply select the section in the timeline, right-click, and go to the Speed and Duration settings. This will open a dedicated interface from where you can change the speed of the sports video.
Apart from manually setting the speed, you can also take the assistance of the custom speed options that are available in the timeline tools.
Step 3: Make Advanced Edits in your Sports Video
With the user-friendly interface of Filmora, you can do some basic edits and make a sports highlight video in minutes. Though, if you want to focus on some parts and make more changes, then you can use its advanced options as well.
For instance, in a highlight video, we often wish to freeze certain frames. To do this, just select a frame and use the “Freeze Frame” option from the timeline tools. You can even set the duration to freeze the selected frame.
If you have included clips from different videos, then you can apply all kinds of transitions from Filmora. In the end, you can go to its edit options and choose to close gaps as well.
To give your video a uniform and aesthetically pleasing appeal, you can also add different overlays and effects on it from Filmora’s library.
Lastly, make sure that you added sound or voiceover to your video. You can add a sound from its library or import any other music file to it. Since highlight videos mostly have voiceovers, you add the same by visiting the Record > Record Voiceover option.
Step 4: Export your video in the desired format
That’s it! Once your sports highlight video is ready, you can export it in different formats. Just go to the Export option and select the location to save the video and a preferred resolution. You can save your video in formats like MP4, WMV, AVI, FLV, MKV, and so on.
Expert Tips for Creating Highlight Videos
As you can see, making a sports highlight video with a tool like Filmora is extremely easy. Although to be a pro and make better videos, you can consider the following tips:
Keep it short
Make sure that you only include the highlights of the game in your video to keep it interesting. Your aim is to have a short and crisp video without any unwanted footage.
Use freeze frames and slow motion
Some games can be pretty fast-paced and the viewers might miss out on a few key details. To showcase them, you can freeze certain frames or apply slow motion.
Include other details
A sports highlight video can also be informative. You can include details about the players or the team at the start. Also, it is recommended to have sound or a voiceover in the background to narrate the events.
Pick the best clips
When you watch a game, make a note of the best moments that you know your viewers would enjoy. You can also focus on different skills that you found impressive and include them in your sports video.
I’m sure that after reading this guide, you would be able to come up with an impressive sports highlight video as well. Since you might need to make a lot of edits on a sports video, I would recommend using a diverse tool like Filmora. With the tons of editing options that it provides, you can easily create all sorts of highlight videos while saving your time and resources.
Richard Bennett
Richard Bennett is a writer and a lover of all things video.
Follow @Richard Bennett
Also read:
- Ace Your Edits YouTube Studio's Time-Saving Secrets Revealed for 2024
- Surge Viral Traction via YouTube Short Content
- Mastering FreeFire The 30 Best Tag Strategies to Increase Views
- Mastering Video Production Essential Lessons for Beginners
- Eradicated Muted Video Entries (Shorts) for 2024
- [New] Craft Your Vision Best Cameras for Video Creators
- Sensational Sequences YouTube’s Greatest Magic Showcase!
- Top 10 Must-Watch Global Journey Vids on YouTube
- Effortless Guide to Adding Banners on Gaming Channels
- Top Video Watch Counts YouTube's Historical List
- Evaluating Best YouTube Extractors Available on Android
- [Updated] A Roadmap for Monetization Success on YouTube via AdSense
- In 2024, 24-Hour Scoreboard Top Ten Viewership Heavyweights on YT
- 2024 Approved Create Professional Movies on YouTube Quickly
- In 2024, Bridging the Audience Gap Successful Multi-Streaming Approaches on Youtube & Twitch
- A Comprehensive Guide to Creating Viral YouTube Shorts Videos for 2024
- [New] A-List Makeup Tutorials Who to Watch ?
- Unlock Creative Potentials YouTube Trailers with Filmora
- In 2024, Easy YouTube Introduction Design Tips and Tricks
- Elevate Your Fitness Routine - Top 10 Yoga Streams Unveiled
- [Updated] Crafting Visual Wonders Home-Made Effects Demystified
- Eliminate Cacophony Perfecting Sound Quality for YouTube for 2024
- 2024 Approved Captivating Call-to-Action Designing a Dynamic Subscribe Buttons with Filmora
- Leveraging Google Meet for YouTube Streaming A Step-by-Step Process
- Plotting the Pathway for Engaging YouTube Content
- [Updated] Elevate Your YouTube Presence with Expert iDevice Screen Techniques
- 2024 Approved Enhancing Video Discoverability with Ideal Thumbnail Widths and Height
- [New] Elevating Engagement Optimal Size & Ratio on YouTube
- Child Prodigy Ryan Kaji Dominates YouTube Revenue Race for 2024
- 2024 Approved Crafting the Perfect Strategy Exclusive YouTube to Gmail Connection
- 2024 Approved Creating Costless Webinars on YouTube A Handbook
- Crafting a Unique Online Presence YouTube Edition
- Compre-Web Resources for Effortless YouTube Template Access
- YouTube Revenue Demystified
- In 2024, Dive Into a Stream of 9 Full-Length Festive Flicks - No Charge
- [New] Culinary Comrades YouTube's Best Food Blogs
- [New] Engaging Tactics for Increased Subscriber Count
- Achieving Peak Video Clarity with YouTube's Tools
- In 2024, Culinary Crescendo High-Impact Food Network Monikers
- [New] Crafting Effective Teacher Videos on YouTube – Top 10 Strategies
- Watch Without Limits 15+ Free Apps to Save Your Favorite Content
- Taking Flight on YouTube Strategies to Skyrocket Your Video Rankings
- In 2024, Elevate Engagement Top Hashtags for Gameplay Vids
- [New] Demystifying the Powerhouse Behind YouTube Creator Hub
- [Updated] Developing A Streamlined YouTube Subscribe Link
- Nightly Narratives Analyzing Video-Based Storytelling
- [New] In 2024, Innovative Adventures Unveiled The Ultimate Top-10 Game Showcase
- [New] In 2024, Enhance Your Videos - Top 10 Free TikTok Edits Available on Mac
- How To Do Lenovo ThinkPhone Screen Sharing | Dr.fone
- Forgotten The Voicemail Password Of Nubia Z50 Ultra? Try These Fixes
- 2024 Approved 10 No-Fuss Methods to Record Audio on Your Chromebook
- 2024 Approved Expert Guide to Displaying Audio Waves and Adding Motion Graphics in Premiere Pro
- How to Safely Obtain VLC Player at No Charge on MacOS
- 2024 Approved Unlock the Potential of Your Feed with Mass Photo & Video Posting
- Unleash Your Creative Potential The Best Pro Audio Editing Tools for 2024
- In 2024, How to Transfer Data from Honor 90 Pro to Other Android Devices? | Dr.fone
- The Ultimate List of Sound Editing Instruments for Modern Musicians
- Hard Reset Nokia G310 in 3 Efficient Ways | Dr.fone
- In 2024, Top 11 Free Apps to Check IMEI on iPhone 6 Plus
- [New] In 2024, Affectionate Emulation Nintendo's Top Android Games
- In 2024, Top 10 AirPlay Apps in Xiaomi Redmi Note 12 Pro+ 5G for Streaming | Dr.fone
- How to Quickly Fix Bluetooth Not Working on Itel P55 | Dr.fone
- [New] In 2024, Low-End PC Visual Logging Software
- Top 10 AI-Talking Avatars Revolutionizing Communication
- [New] Top 10 Video Calls Software Compared Side by Side
- New Captivating Sounds Without Breaking Your Piggy Bank The Top Six No-Cost Video Conversion Approaches for 2024
- How to Stop Google Chrome from Tracking Your Location On Honor X50 GT? | Dr.fone
- Top Free Video Repeater Tools for 2024
- [New] Diving Into Nitro What Makes It Special in Discord? + How to Access It for 2024
- In 2024, Two Ways to Track My Boyfriends HTC U23 Pro without Him Knowing | Dr.fone
- [New] Efficient & Reliable A Comparison of the Best PC Sniping Software
- Title: "Exploring Earning Potential Revenue From YouTube Advertisements?"
- Author: Kevin
- Created at : 2024-05-25 15:13:46
- Updated at : 2024-05-26 15:13:46
- Link: https://youtube-videos.techidaily.com/exploring-earning-potential-revenue-from-youtube-advertisements/
- License: This work is licensed under CC BY-NC-SA 4.0.
